Clarity’s Blog Tutorial: How to Add a Duet Frame to a Parchment Poppet
Hello hello! Grace here.
I hope this finds you well, safe and happy!
Happy Easter!
Many of you have been taking part in Clarity’s Easter Egg Hunt! I know this because I was on the chat system on Good Friday, and MANY of you were online, just searching away!
I purposefully did not request the answers from the team… so that I wouldn’t be tempted to help the few tricky ones of you trying to pry answers from me online hahaha! Worth a shot though, eh?
You can find the info on the Egg Hunt HERE. It’s good fun! And there are prizes (worth £150!!) to be won 🙂 The deadline is Monday, April 5th!
But for now, we have an Easter Sunday treat! The brilliant Josie Davidson is back in our virtual bubble, to share her epic techniques and tricks with us. BLESSED!
I’ll hand you over to the pro herself…

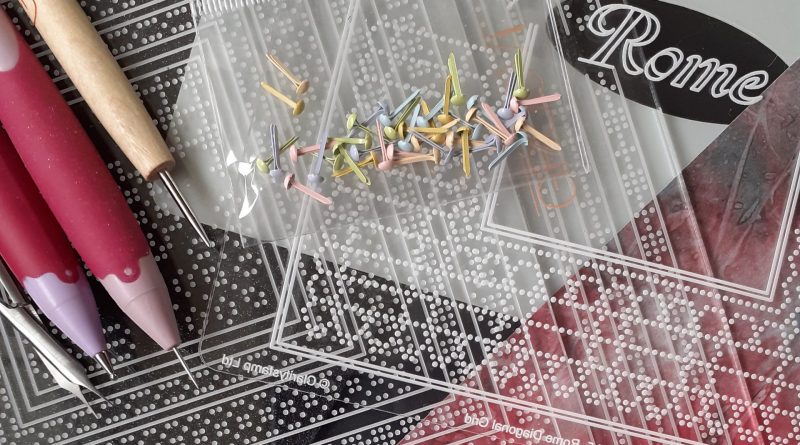
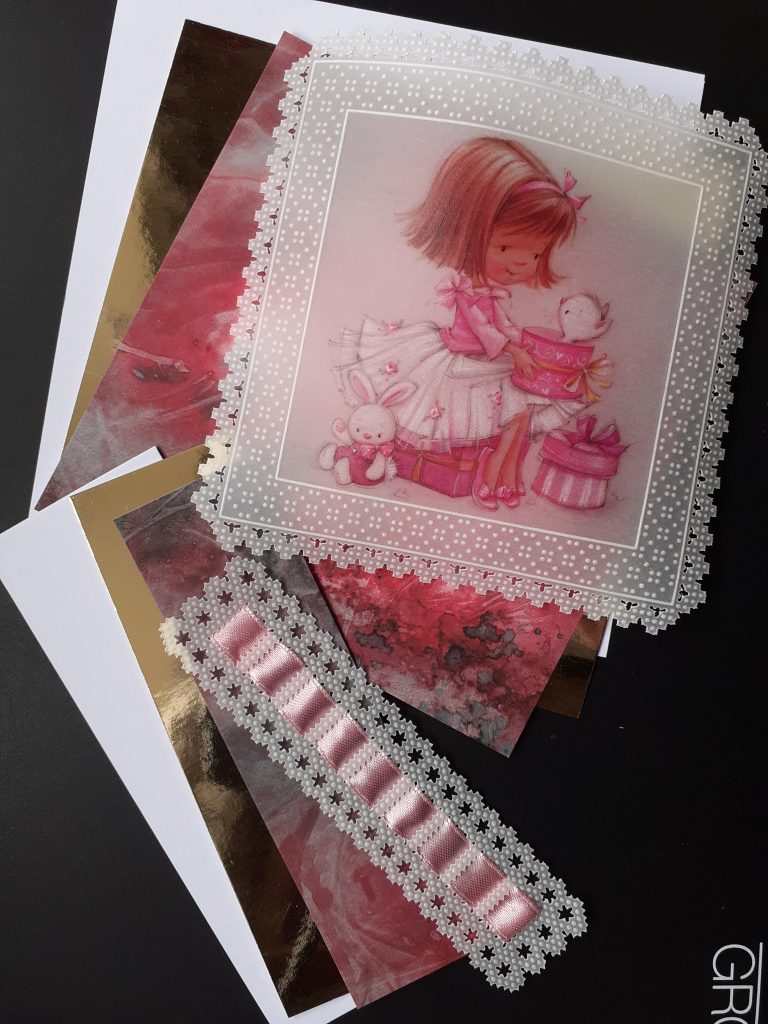
Ingredients
Grid Plate Mate (GRO-CO-41706-08)
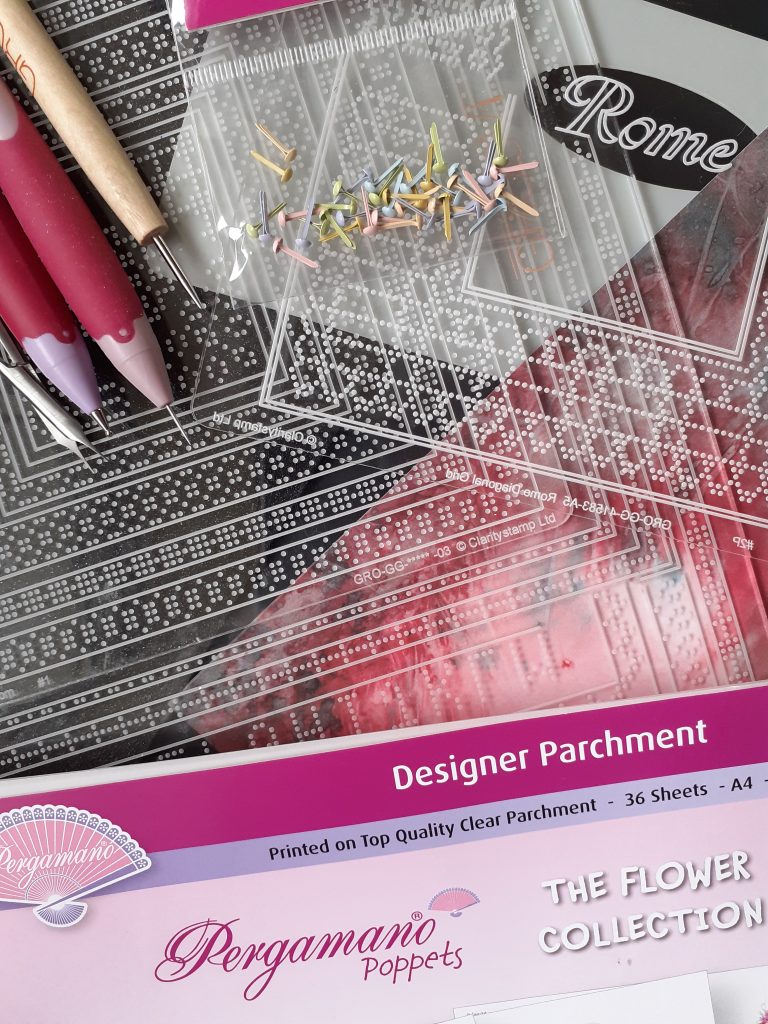
Italian Cities – Rome (GRO-GG-41583-03)
Straight Grid (GRO-GG-40202-12)
Parchment Poppets Flower Collection (PER-PA-70392-A4)
Super Foam (GRO-AC-40603-A4)
Pergamano Scissors or Snips
Groovi 1 and 2 Embossing Tool (GRO-AC-40026-XX)
Pergamano Bold 1 Needle Perforating Tool (PER-TO-70028-XX)
Pergamano Ball Tools: 1.5mm, 3mm, 4.5mm & 6mm
Groovi Tabs (GRO-AC-40437-XX)
Clarity 10mm Ribbon (ACC-MS-31107-XX)
Double-sided Red Liner Tape (ACC-AD-30375-XX)
4 Pink Clarity Brads (PER-AC-70270-XX)
A5 Translucent Parchment (GRO-AC-40020-XX)
Shenandoah Designer Card (ACC-CA-30555-57)
2 5×5 White Card Blanks (ACC-CA-30617-55)
Foam Tape
Gold Mirror Card
Method
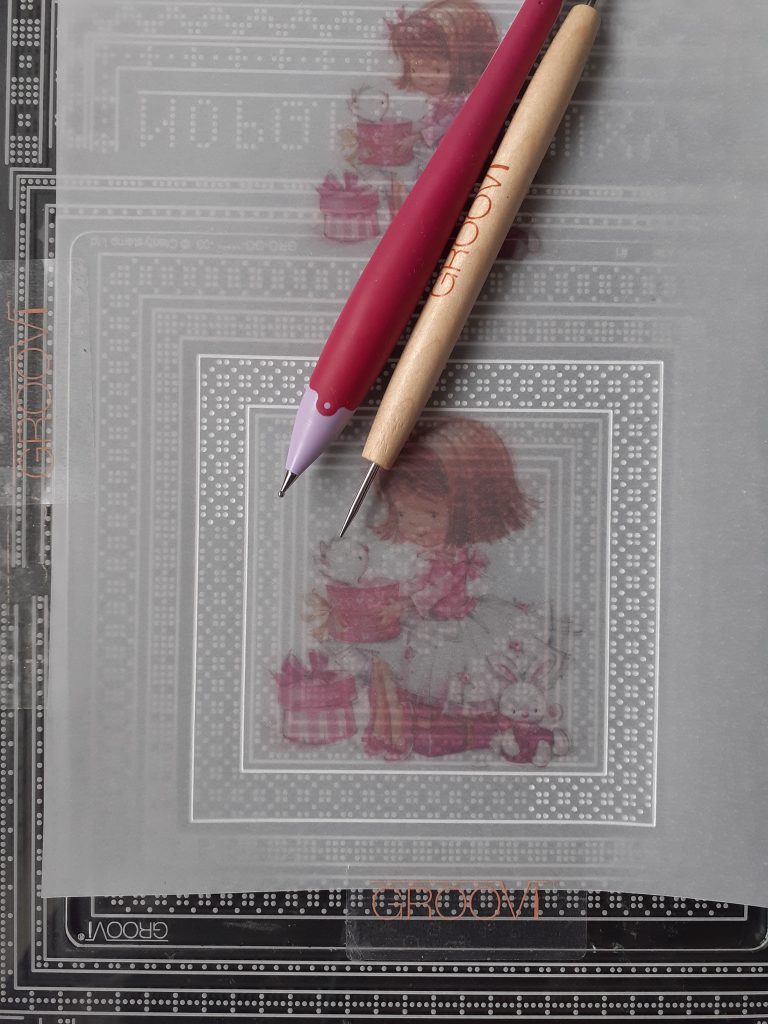
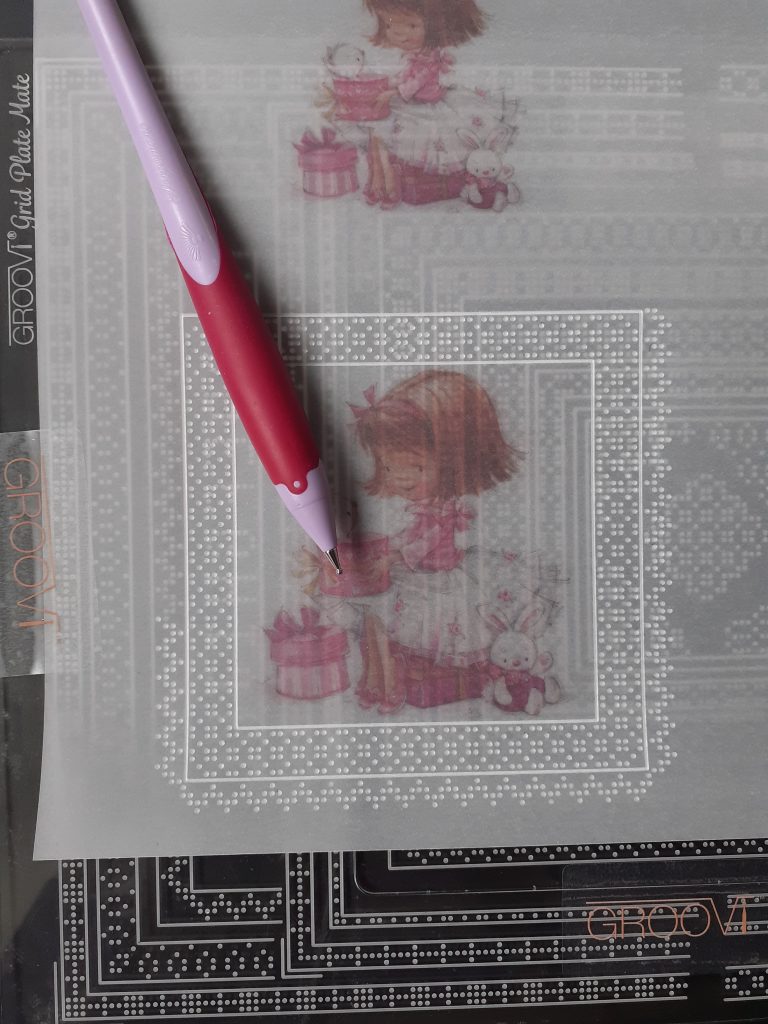
Step 1. Using the poppets parchment, centre your picture inside the 3rd pattern from the outer edge of the inner plate and emboss the outlines and dots using the Groovi No 2 tool. I put the shiny/brighter side of the picture face down onto the plate.
Step 2. Using the pattern above (the A, B, C section of the plate mate) align the outer line of your embossing to the edge of the pattern of dots, making sure you have the point of the dots at either end of your line. Don’t use a corner to do this as it will not fit around the square, you need to work each side separately. Work all four sides in this way.
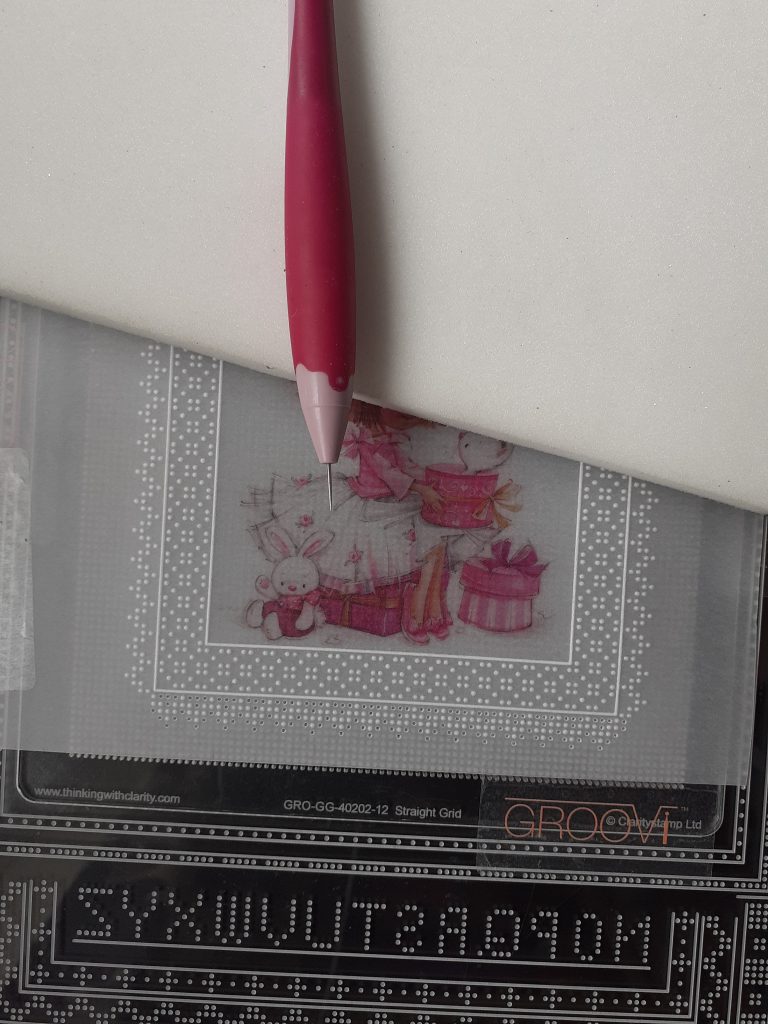
Step 3. Using the straight basic grid plate on the super foam, turn your work over and realign the embossed dots of your outer design with the dots on the plate. Perforate between them and around the outside of them, using the bold single needle tool. Again, you will need to work each side separately.
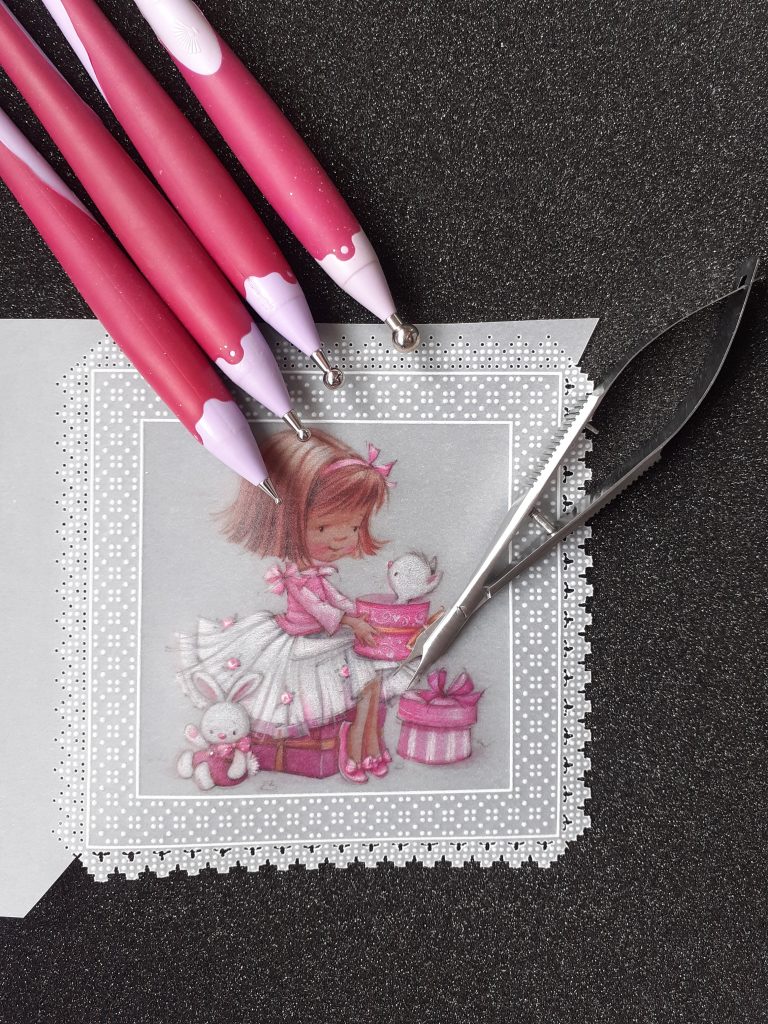
Step 4. Emboss your poppet picture with the Pergamano ball tools and cut out the outer edge design with scissors or snips. This can now be put to one side while you work on the ribbon threaded piece.
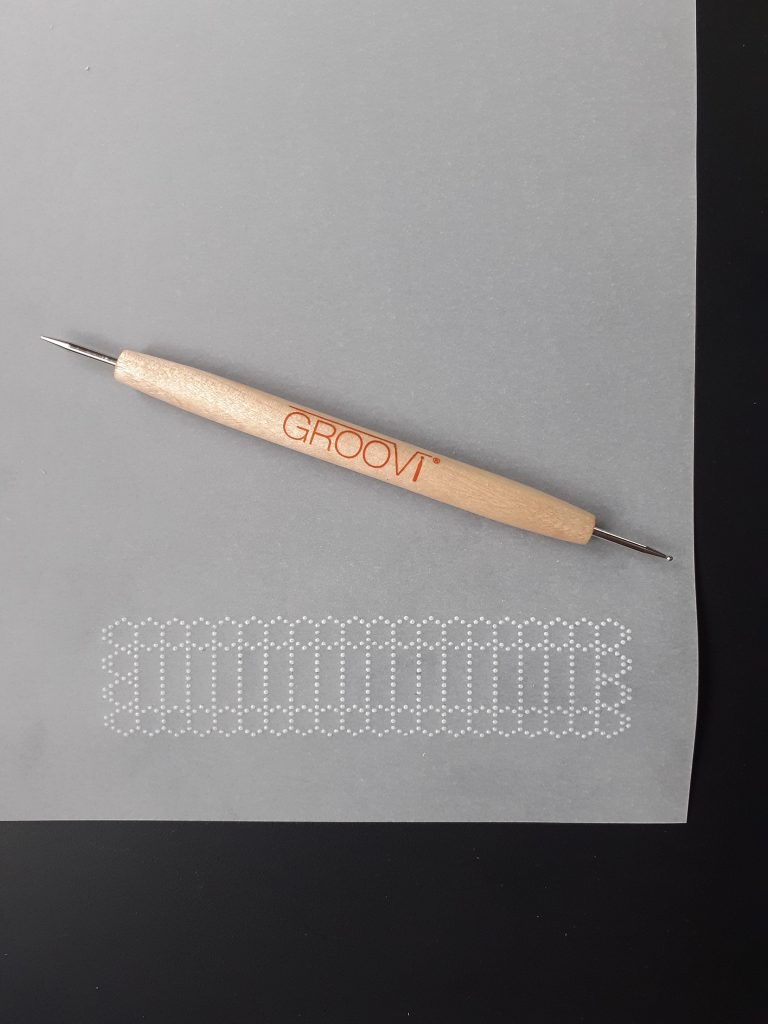
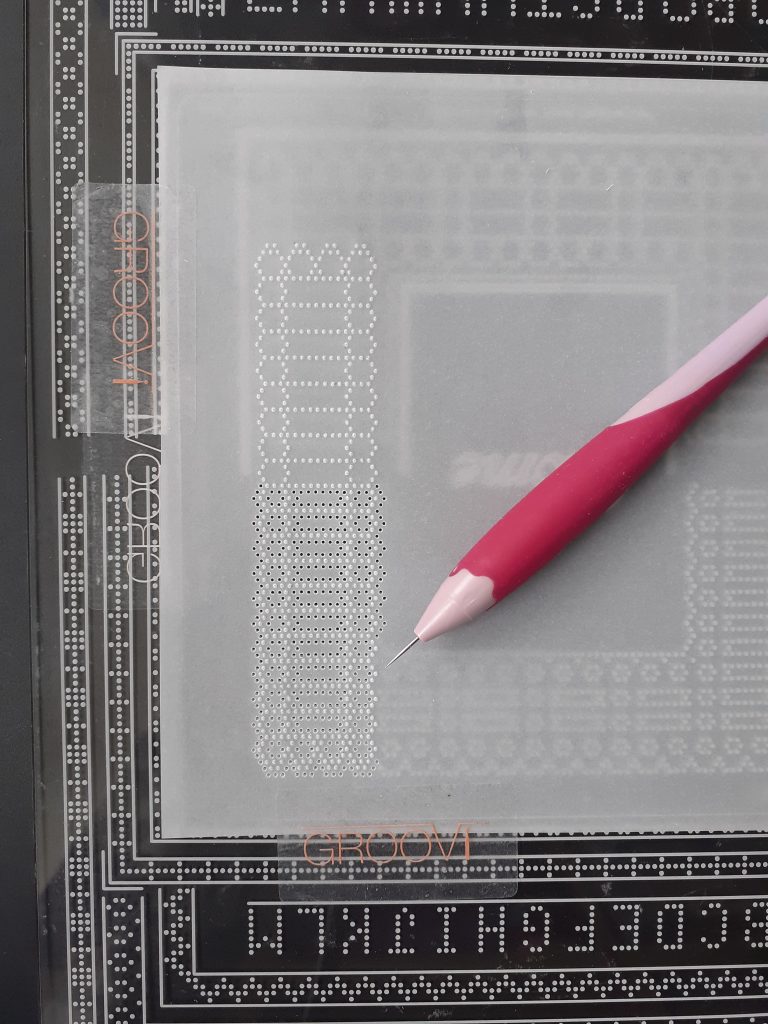
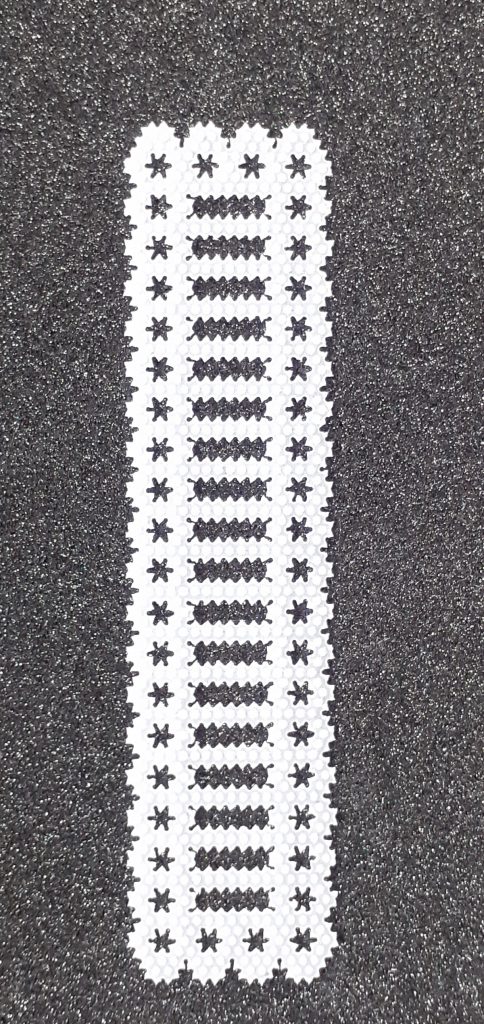
Step 5. Using the plain parchment, emboss the dots from one of the sides of the Rome plate. You need the four hexagon shapes at each end and a total of 20 hexagons along the sides. You will need to move the parchment along to achieve the required length and also turn it around to emboss the four hexagons at the other end.

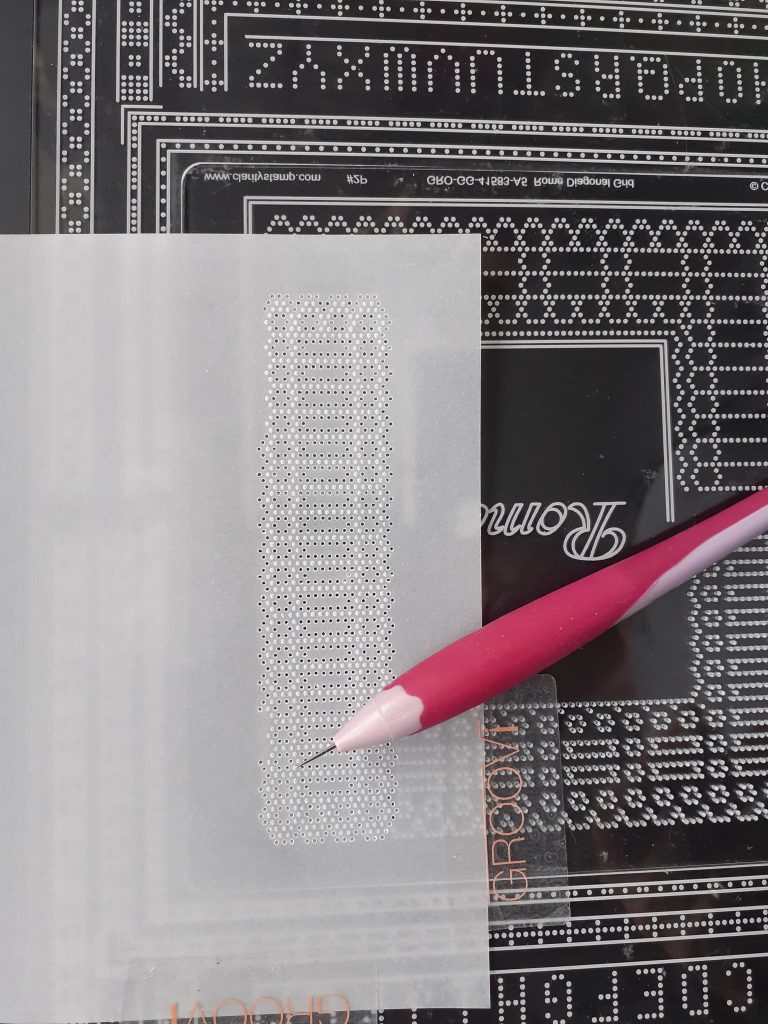
Step 6. This is what your finished embossed piece should look like.
Step 7. Turn your parchment over and align the embossed dots inside the holes on the other side of the plate. Perforate using the 1 needle bold tool.
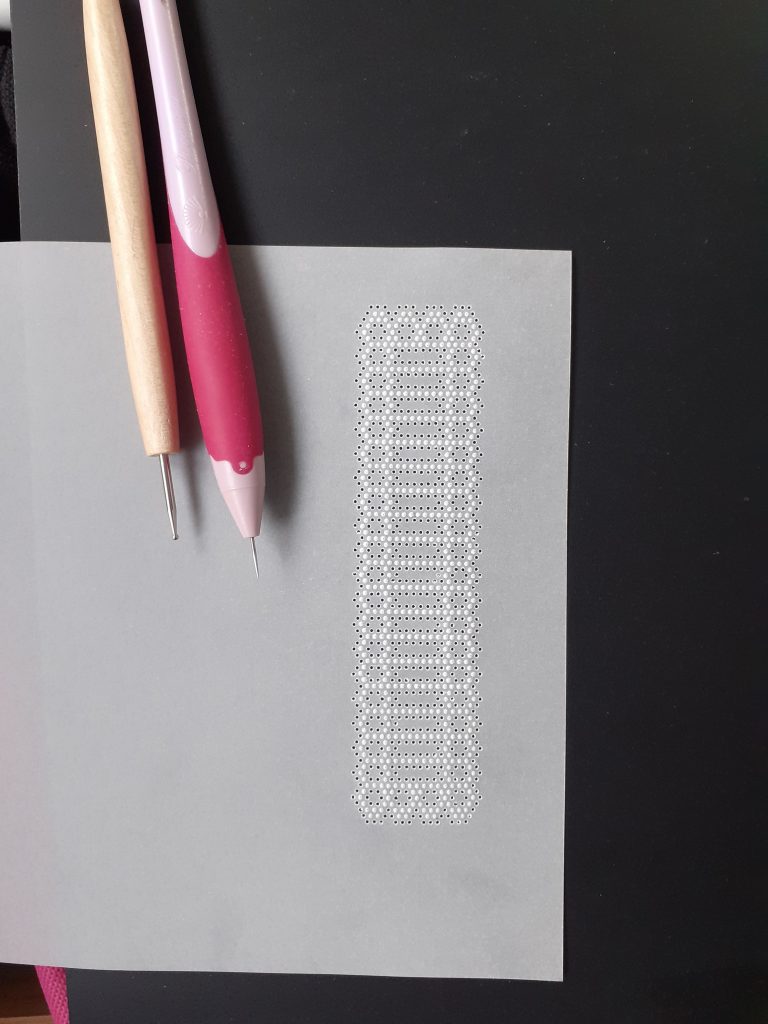
Step 8. You will need to move the parchment along to complete all of the perforations. You will find that the perforations you have made will slot back into the holes on the grid, which helps with the realignment.
Step 9. This is what your finished embossed and perforated piece will look like.
Step 10. Cut out the perforations in your piece of work.
TOP TIP: Cut the wider gaps at each end of the slots first, as this will give you a neater picot.
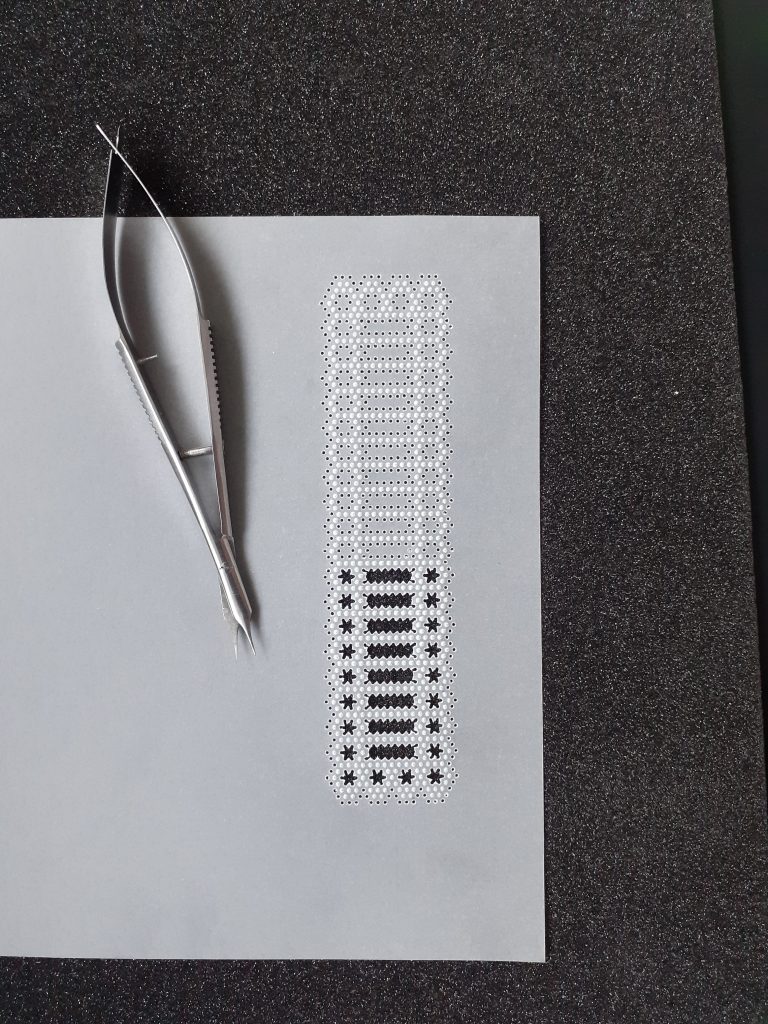
Step 11. Cut around the outer edge of your piece.
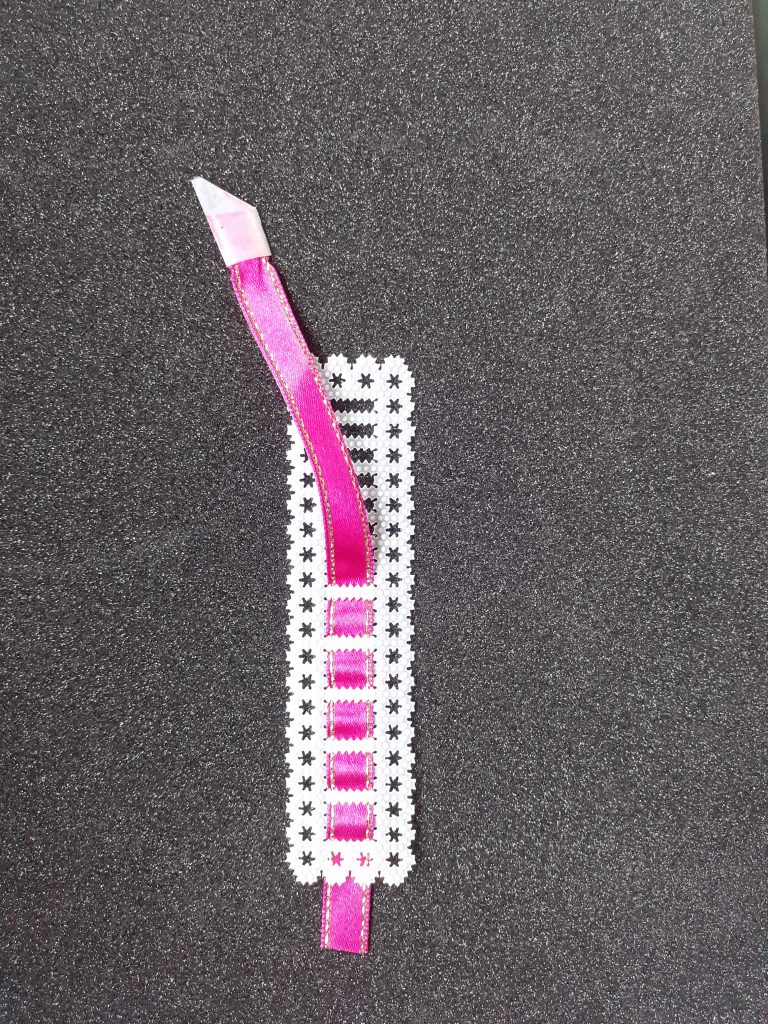
Step 12. You now need to thread the ribbon through the slots. Cut a piece of ribbon to slightly longer than your finished piece. Wrap a Groovi tab around one end, cutting one side of it to form a point… this will help to thread the ribbon through the slots. Begin threading from the back to the front and then down through the next slot. Thread each slot separately to avoid breaking the bars between the slots.
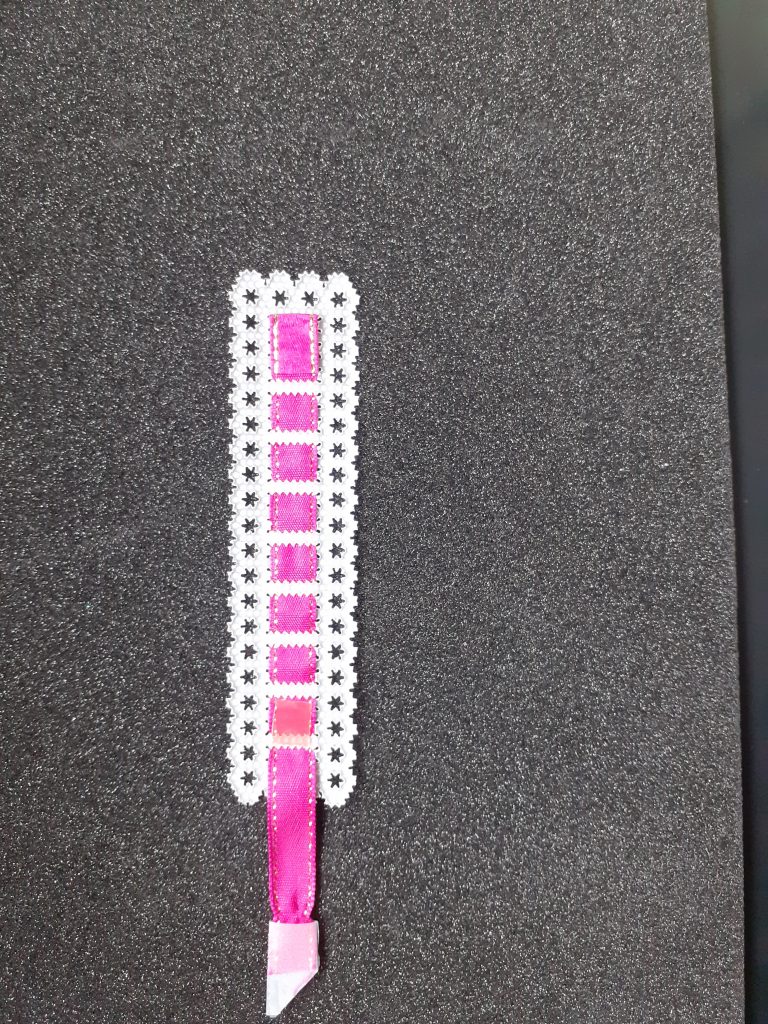
Step 13. When you have threaded the ribbon through all of the slots, turn your work over and place a piece of red liner tape at either end of the ribbon where it goes through the first and last slot. Remove the backing liner and fold the ends of the ribbon over onto the tape. This gives a neat finish and holds the end of your ribbon in place. Snip off any excess ribbon.
Step 14. Cut one of the card blanks in half, as this is the piece your poppet will be mounted on to. Cut a piece off the other half of the card blank which measures 42mm. This is to make the stopper for your easel card. Cut the mirror card and designer card to fit both pieces of your card blanks.
Step 15. Take the other card blank and score along one half to form the easel. Attach two pieces of red liner tape onto the front section of the scored card (ie. the one which will stand up).
Step 16. Attach the poppet to the designer card using brads. Matt this onto the mirror card and the piece of card blank. The bottom half of this is now attached to the red liner tape on the scored half of the base card. Attach the ribbon threaded piece to the smaller piece of designer card using red liner tape along the back of the ribbon. This will hold it securely in place and the tape is hidden by the ribbon. Matt this onto the mirror card and the piece of backing card. Attach this to the base of the card blank which hasn’t been scored using the foam tape (as this gives it enough height to act as a stopper). Make a bow from the ribbon and attach it to one corner of the poppet using red liner tape
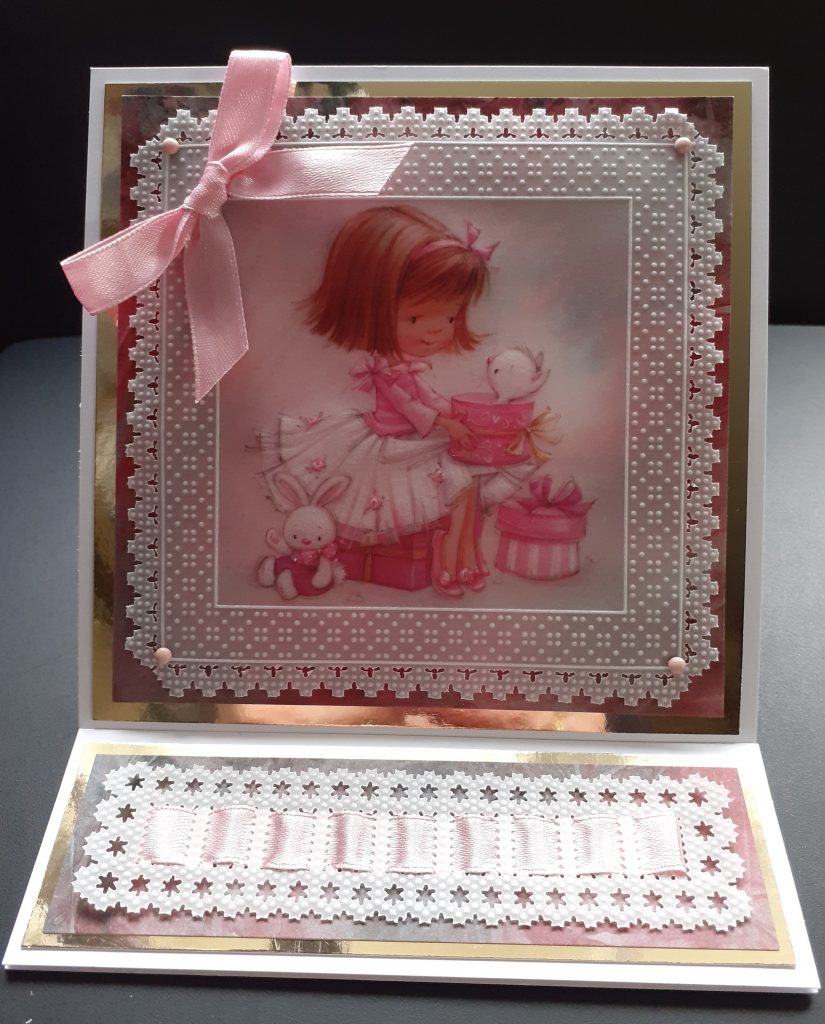
Voila!!
An absolutely stunning card! And it’s Eastery… look at the bunny rabbit! 😉
Thank you, Josie! A beautiful piece of art, as always.
As usual, we have put everything in one place over on the Clarity website HERE
Don’t forget to check in on Mum today, on this lovely Easter Sunday! She’ll be on The Craft Store (Hochanda’s new brilliant name!) from 2-4pm! You can get a little sneak peak here 🙂
Lotsa love, Grace & Josie xo
Clarity – The Home of Art, Craft and Well-Being.
Hi Grace, thanks Josie for another great project which I will look at later. The sun is shining & the sky is blue & not a sign of a cloud but still a little chilly but we can’t have everything !!
Wieder eine wunderschöne Karte und eine exzellente Erklärung. Noch ein frohes Osterfest. Grüsse aus Deutschland. Charlotte
Love Josies design. Hope I can find time to give it a go. Have the plates but not the poppets but I’m sure I could find something to go in the middle. Have found all the eggs and entry sent in. Happy Easter to all.
I am definatley going to have a go at this, because I can not get the lining up of the edges right well once in 10 tries, so I am hoping I will see where I am going wrong if I keep having a go at this , I have all the plates and stuff so here is keeping my fingers crossed . It’s truly lovely I have all your grid plates that have been on Claritystamp and at the moment am following Paul’s Groovi Tuesday. Thank you so much for all the lovely design’s you do all of you. I am hoping to go to the retreat Parchment retreat in October. All the best from Dawn McCall keep well and safe.
Must try this lovely project. Have all the plates and adore the poppets. Thanks Josie for the inspiration.
Beautiful sunny day today but a bit nippy outside.
Your mum did a great job tnis afternoon.
Take care, be safe.
Thank you for your lovely blog Grace
Will have a go at this I do enjoy Josie’s masterpiece s in grid work
Enjoy rest of your weekend
Thanks, Josie and Grace, for an interesting project and blog. You have to smile at people trying it on. Happy Easter, Everyone.
Hi Grace, Happy Easter Day.
Thank you, Josie, for once again giving us a fantastic tutorial, this finished piece is stunning, you are awesome with your projects.
Love from Patricia xx
Thank you Grace and thank you Josie for a brilliant step by step. I wish my picot cut stars looked like yours! Even after loads of practise, mine are always on the wonk, but I shall persevere. I do love all your plates. I hope you all had a happy Easter. Love Annette x
Thank you both for another stunning, really well explained project. Love it xxx
Beautiful project Josie xx. I found all the eggs in the end Grace ! Xx
me justaría adquirir los martiriales
You can find all of our products on: http://www.claritycrafts.com