Clarity’s Blog Tutorial: How to Create a Frame Using Basic Grids
Hello hello! Grace here.
I hope this finds you enjoying your Sunday?
The lovely Glynis Whitehead is back in the virtual building. I love it when she visits 🙂 A good friend, one of the loveliest women I know AND a super talent.

Glynis is going to share with us another fabulous snipping project (LUCKY US!). Her last lovely snipping project can be found here.
I’ll hand you over…
Ingredients
Deluxe Groovi Starter Kit (GRO-SK-41709-XX)
Art Deco Border Plate Mate (GRO-MA-40348-13)
Nested Squares (GRO-PA-40037-03)
Pair of Straight Basic Border Grids (GRO-GG-41018-14)
Straight Pattern 1 Border Grid (GRO-GG-40350-14)
Straight Basic Border Grid (GRO-GG-40384-14)
Parchment Poppets Flower Collection (Poppy) (PER-PA-70392-A4)
Groovi No1 Tool (GRO-AC-40026-XX)
Pergamano Embossing Tool (6mm) (PER-TO-70016-XX)
Pergamano Single-needle Tool Bold (PER-TO-70028-XX)
Super Foam (GRO-AC-40603-A4)
Picot Foam (GRO-AC-40625-XX)
Pergamano Exclusive Pointed Scissors (PER-TO-70040-XX)
Pergamano Ringlock Scissors (PER-TO-70041-XX)
Pergamano Perga Cutter Curved (PER-TO-70042-XX)
Pergamano Brad Collection (PER-AC-70287-XX)
Method
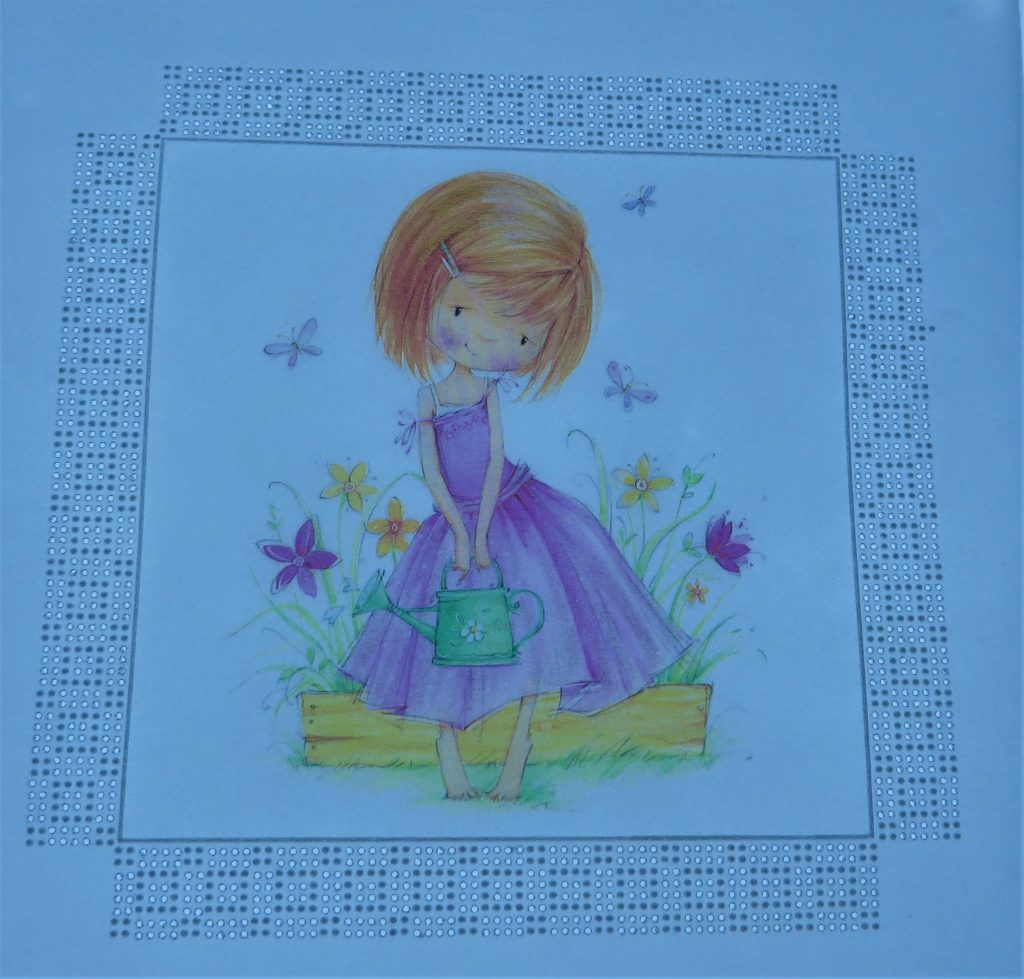
Step 1. Take the largest print of Poppy from the Parchment Poppets collection and put a frame around her, using the nested squares – 4th square in from the outside of the plate. Using the number 1 tool.
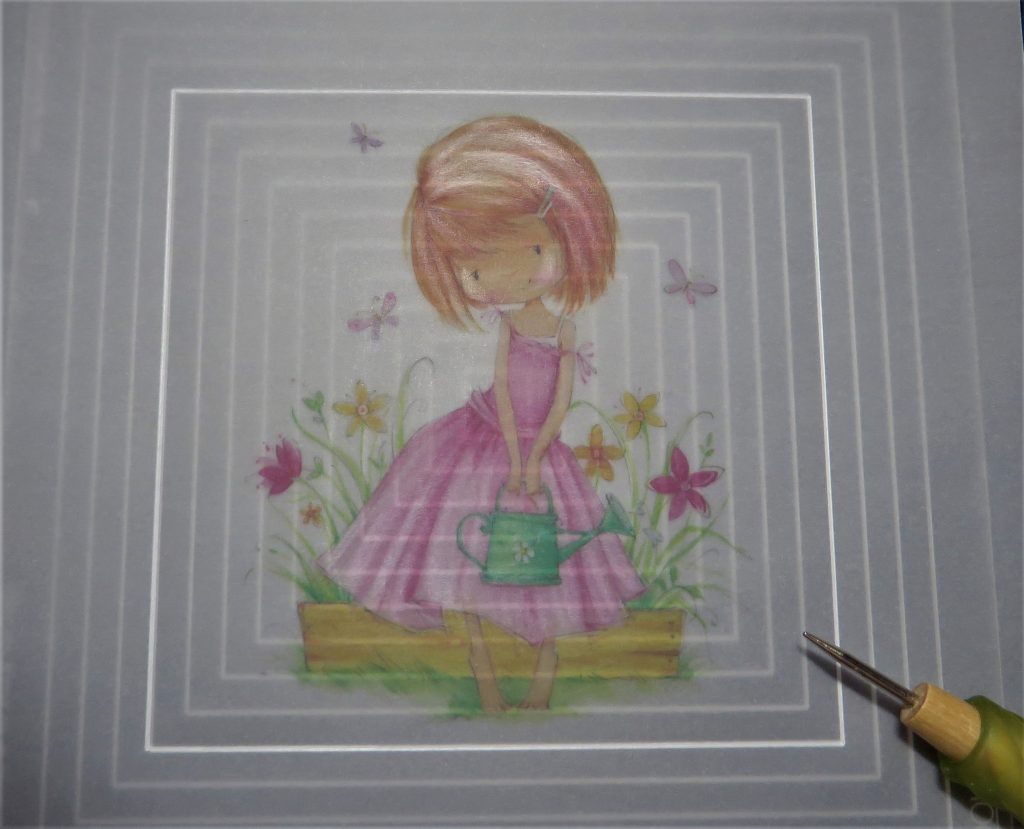
Step 2. Working on the back, lightly emboss the hair and folds of the dress to give some highlights.
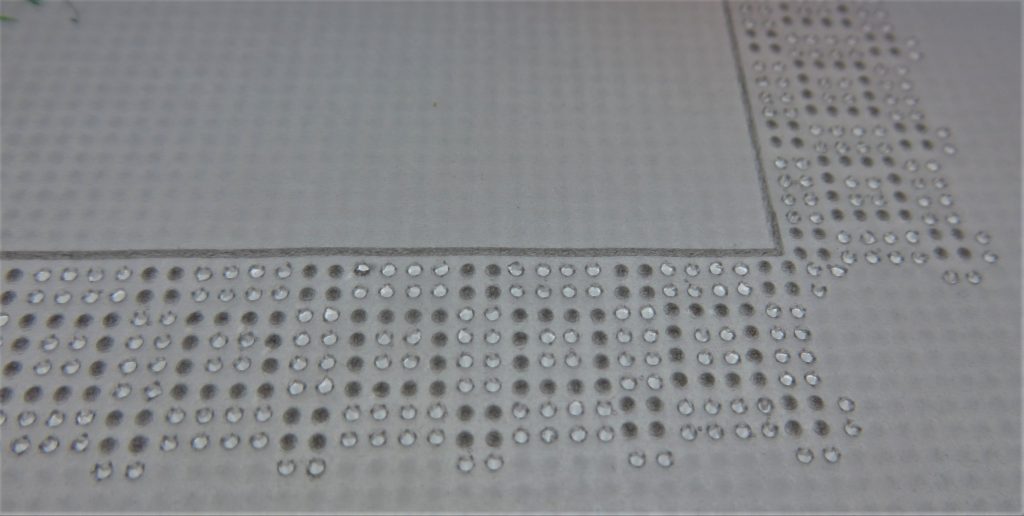
Step 3. Now from the front. Put super foam underneath Straight Border Grid 1 and line up the edges of the embossed square – one at a time. The pattern of the border must be equal at each corner – do not worry if the repeats of the pattern will not go all the way around the corners. By turning the work each time, you will leave the corners free and empty.
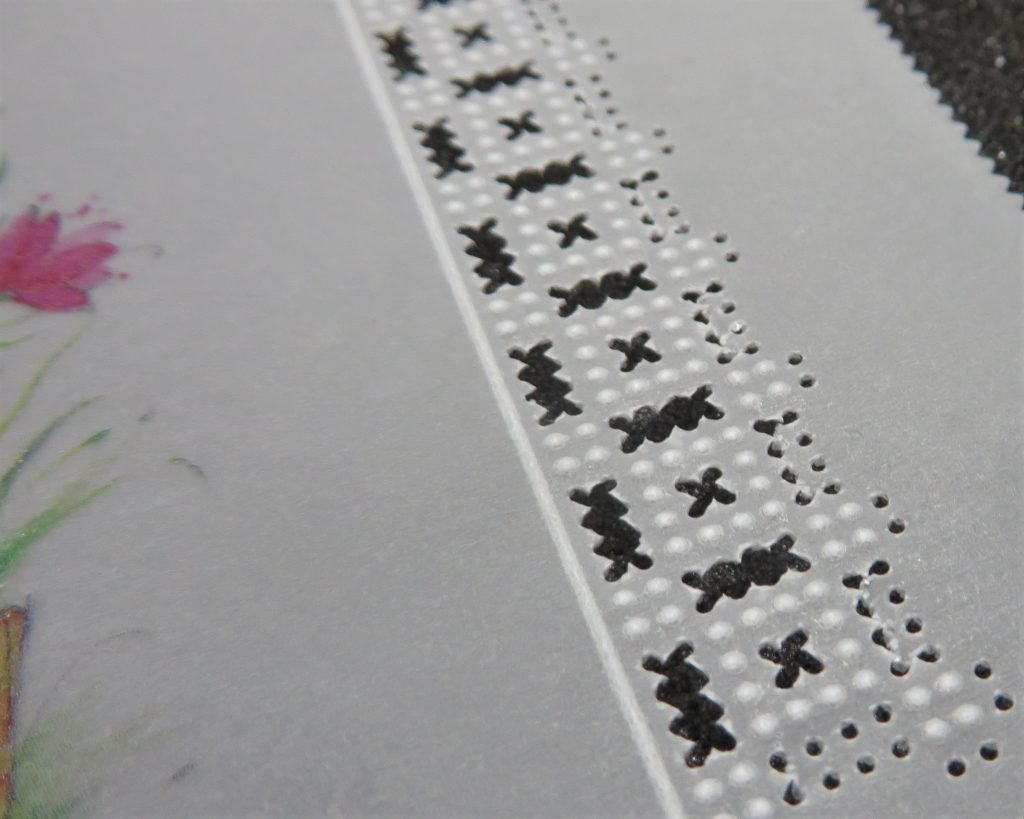
Step 4. Use your bold single-needle tool to perforate all the holes of the pattern, but be careful to stop when you get to the corners. Finish one side before turning the work to line up the next side.

Step 5. Once all the perforations are done, swap out the patterned grid for the plain one (the basic piercing grid straight works in tandem with the patterned grids and so it is good to get both).

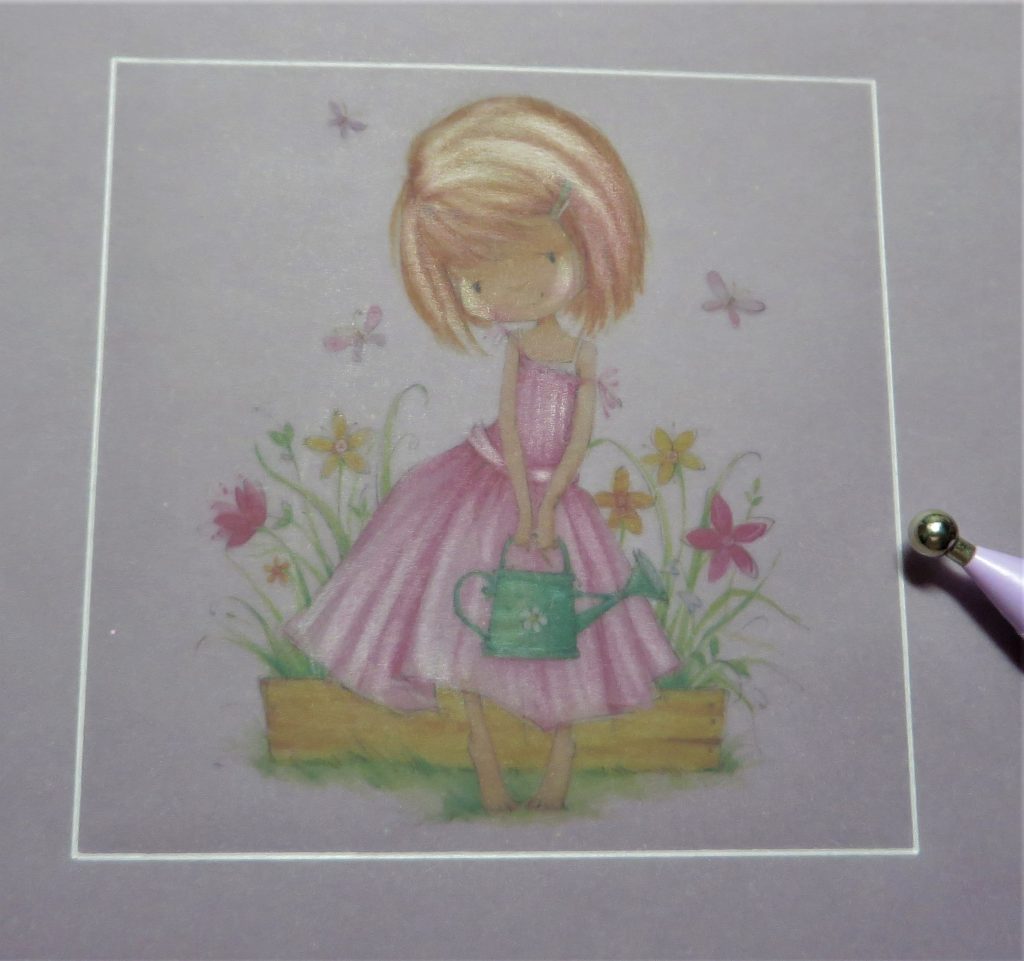
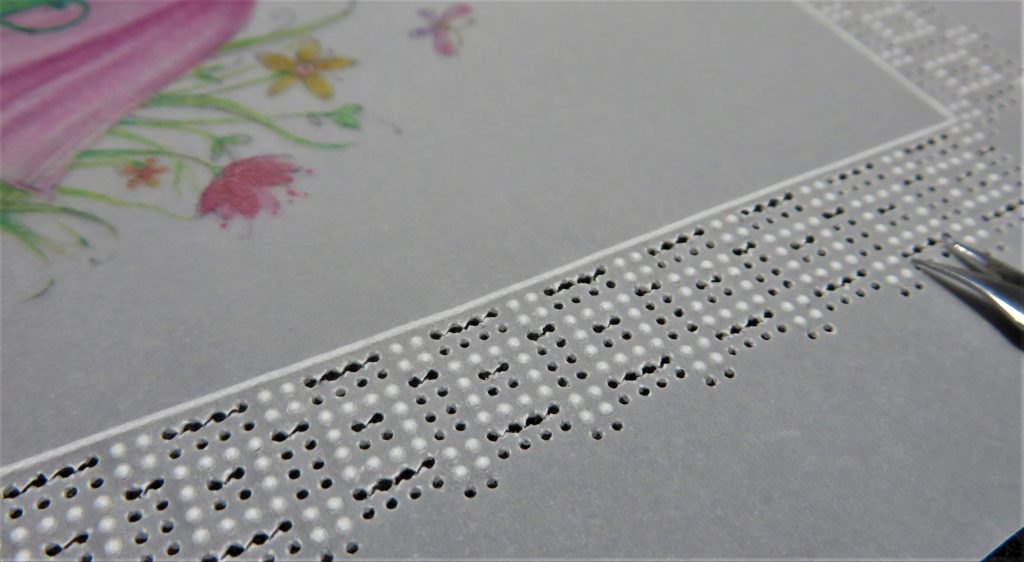
Step 6. Working on the back, line up the work so that the dots fit nicely between all the holes of the grid pattern you have just created. Again, turn the work so that you do one side at a time. When you have completed all around the piece, turn the work over so the front is upper most.
Step 7. This is what it should look like at this stage.
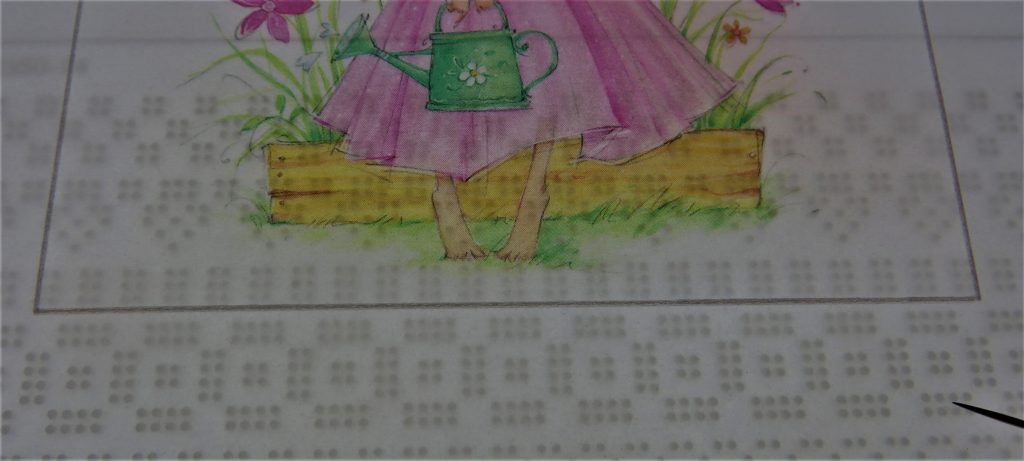
Step 8. Now you need to perforate holes where all the sets of four dots are around the edge and also the corners.
Snipping
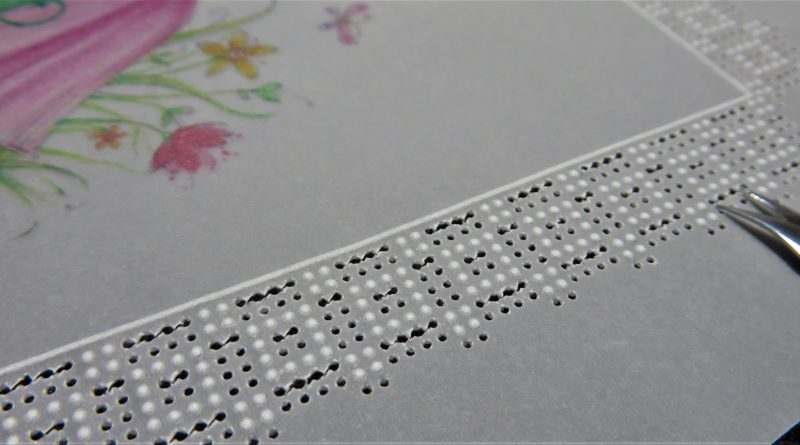
Step 9. You can save time by snipping all the slots and crosses one way – along a side. Just snip one side at a time and leave the outer edge until all the inner snipping is done. Keep your hand in a naturally comfortable position for you and turn the work each time you need to change direction. Do not twist your hand as the picot points will not look even.
Step 10. Once you have snipped out all the crosses and slots, go around the outside edge – NOTE – the holes on a diagonal have a larger ‘stride’ than the straight ones. Snip all of these first. This will help to keep the integrity of the paper until you are ready to detach it completely from the paper. Be careful when you remove the piece, as if you have missed a snip anywhere, you could tear your work.
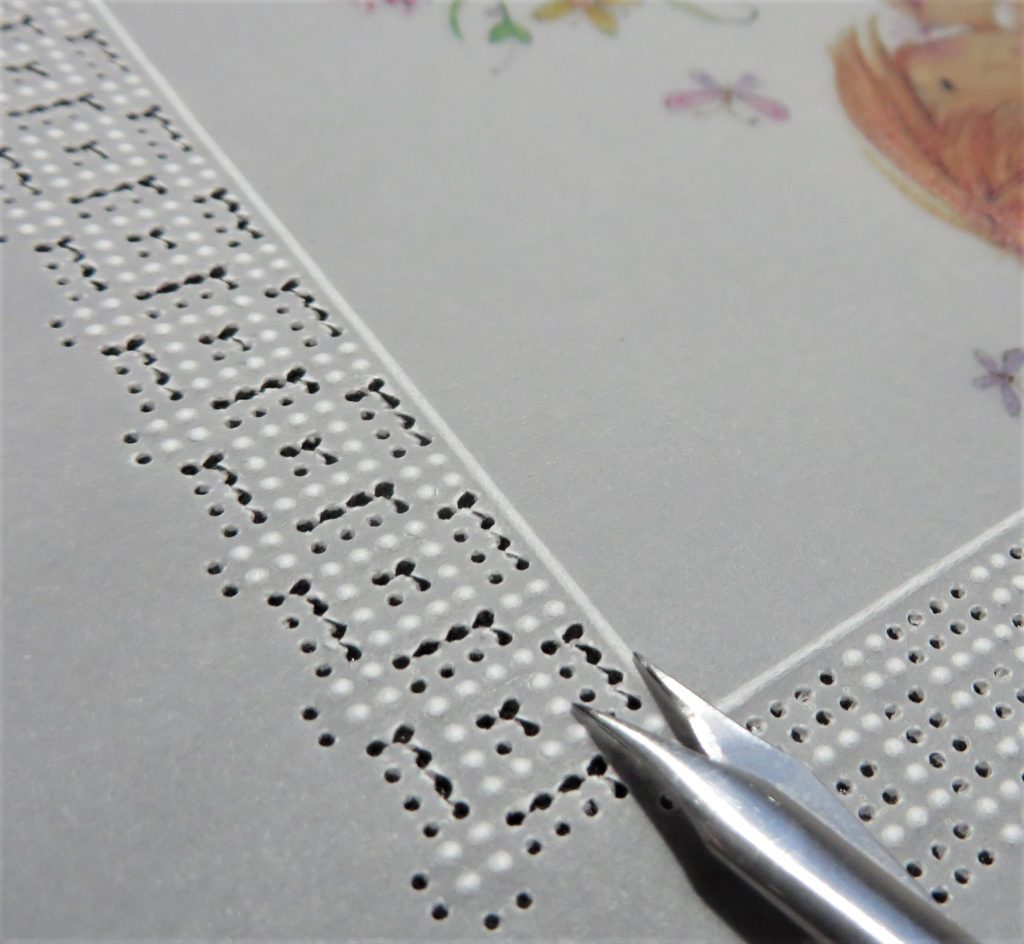
Step 11. This is what it should look like at this stage.
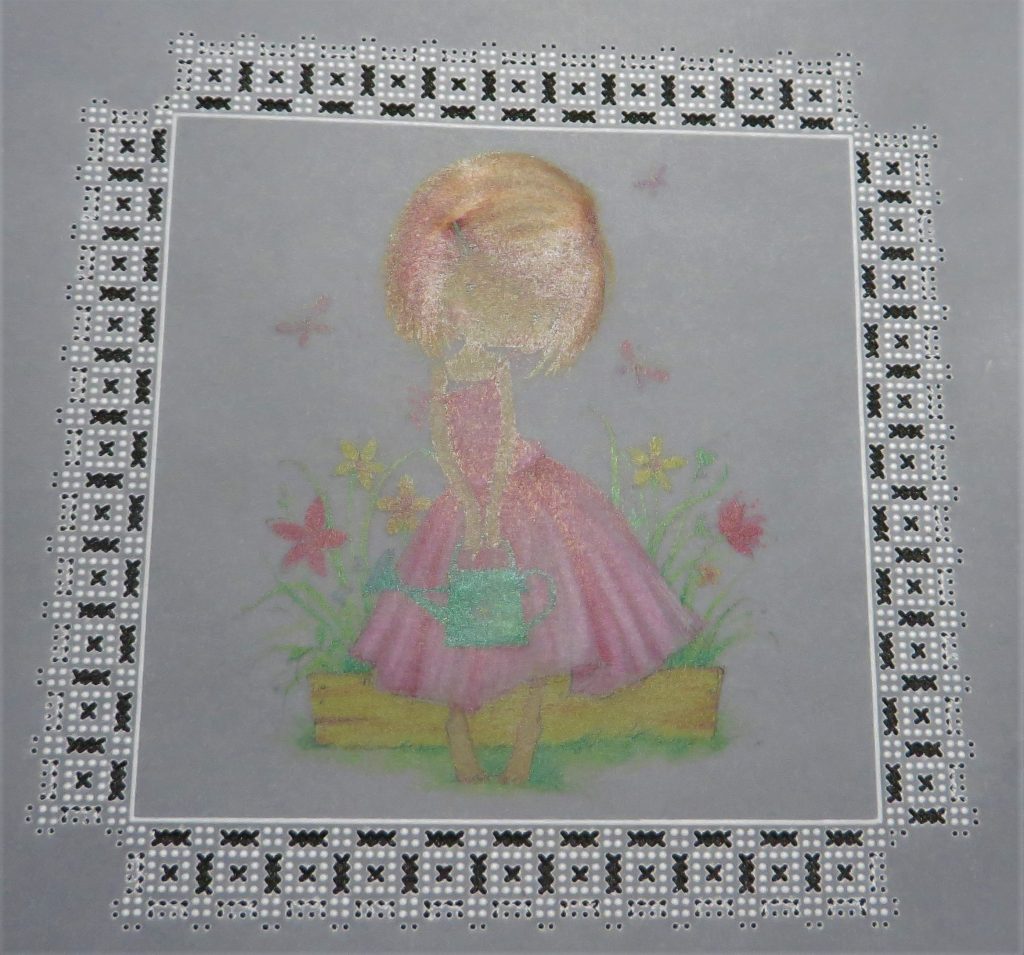
Step 12. Cut a piece of thin card or copy paper to a 13 x 13 cm square. Slide this under the Poppet image before matting and layering your work onto a card blank.
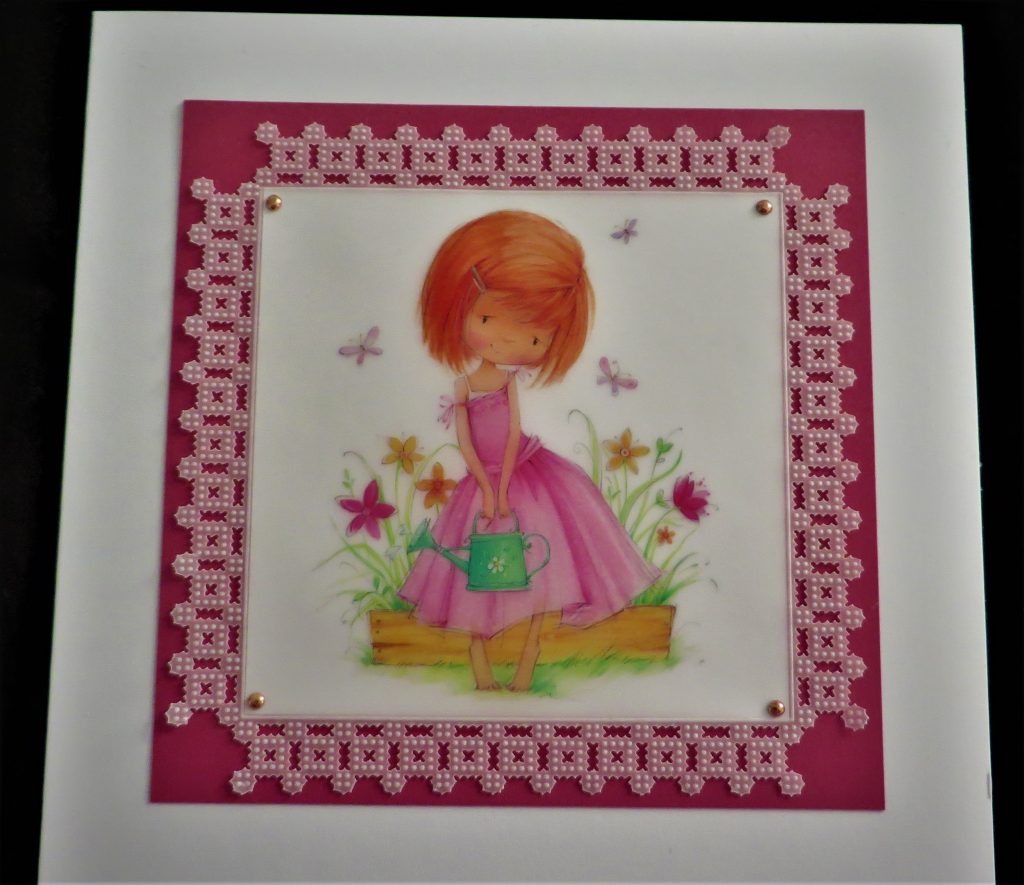
Ta-da!! What a BEAUTIFUL piece of artwork. Thank you, Glynis! I love watching Glynis break down perforating and snipping for us, she makes it look so easy! Will you give it a go? It is very addictive once you get the hang of it!
If you do, feel free to send it to me! Grace@claritystamp.com – I’d love to see it!
As usual, we have put everything you will need in one place – Click HERE
If you have the new Plate Mate for Grids, you could adapt your piece using the design on the plate! Click HERE
For now though, take it easy and enjoy the rest of your weekend!
Lotsa love, Grace xo
Clarity – The Home of Art, Craft and Well-being.
thank you for the good explanation of the details
Beautiful work. Thank you Glynis and Grace. Valuable inspiration
That’s gorgeous. Definitely on my to do list. Thank you Glynis and thank you Grace x
Love this piece – will try it later. Thanks Glyis – inspiring work.
First day of Spring tomorrow, morning mist has cleared and the sun is shining now. Happy day!!!!!
Stay safe 🍒
Absolutely gorgeous, thank you Glynis.
Hi Grace this is gorgeous. I won’t be trying this just yet as I have only just started doing Groovi. I am learning lots from Paul. Have a good week. Take care. Hugs Jackie
Loved working along following your instructions. Will snip tonight and hopefully put it on a card tomorrow, if I can wait that long. Thank you so much for the tutorial.
Hi Grace, Thank you so much Glynis for this beautiful creation and the tutorial, it is awesome !!
Love from Patricia xx
Beautiful piercing and cutting to aspire to xxxx thank you
What a beautiful piece. I will definitely being trying this one Love the poppets so much too.
Thank you Glynis and Grace for bring us such fabulous tutorials. xx