
Clarity Matters Blog Tutorial: Diagonal Circle Grid – Peace
Hello hello! Grace here.
I hope this finds you well, safe and enjoying your Sunday morning.
We are joined today by the brilliant Josie Davidson. She has kindly put together a gridwork tutorial for us. I’ll hand you over to our tutor!

Diagonal Circle Grid – Flower Of Peace Card
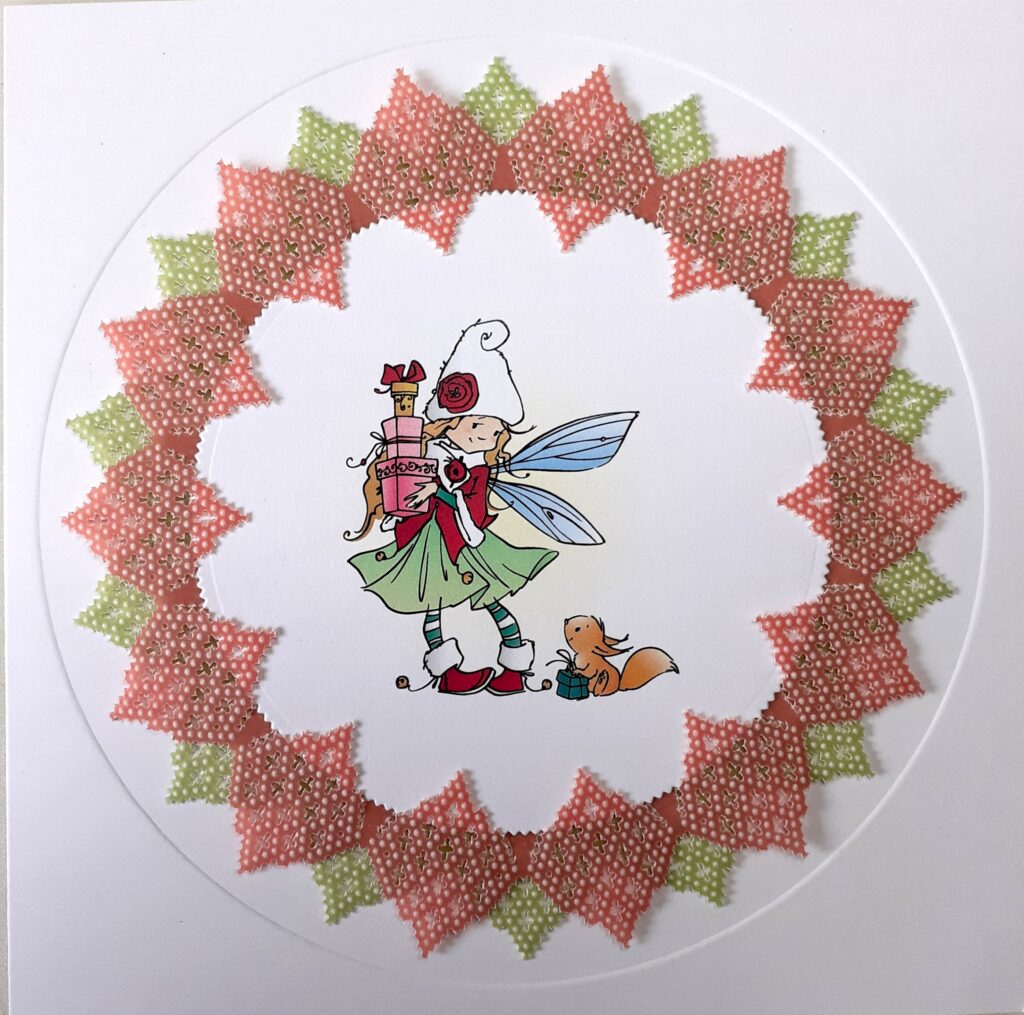
I was so excited when I got the new diagonal grid circles plates. Although we have the straight grid circles I think these are even prettier. It was so lovely to be able to share my new designs with everyone who came to Ditton for the Open Days. The Peace design reminds me of a flower and so layering one on top of the other makes it look like petals. You could use the same colour for both layers but I like to use different colours for contrast – here I’ve used the Orange Squash and Lime Twist parchment.
The circle grids work differently to any of the other grids because you work on one side of the plate… as long as you can read the word GROOVI in the top right hand corner you are good to go! Your plate comes with the instructions on how to use it so keep this handy whenever you are working with the plates. We also perforate the circle grids first as this is a much easier way to line up the work to finish off the circle.
Flower Of Peace Card
Ingredients
Josie’s Peace Diagonal Circular Lace Duet (GRO-GG-42311-12)
Groovi Plate Mate for A5 Sq Grids (GRO-CO-41706-08)
A4 Black Super Foam (GRO-AC-41957-A4)
Groovi Embossing Tool 0.8mm – 1.3mm (GRO-AC-40026-XX)
Festive Pixies – Pocket Poppets Card Toppers (ACC-CA-31641-XX)
1-Needle Bold Perforating Tool (PER-TO-70028-XX)
Perga Cutters (PER-TO-70042-XX)
Pergamano Scissors (PER-TO-70040-XX)
Clarity Embedders – Oval and Round (ACC-EM-31324-XX)
Roll-A-Tape Glue Runner (ACC-MS-31065-XX)
6×6 Card Blanks and Envelopes (ACC-CA-31671-66)
Lime Twist & Orange Squash Parchment x10 (GRO-AC-40776-A4)
Groovi Tabs (GRO-AC-40437-XX)
Nested Circle Picot Die Set (ACC-DI-30680-66)
Tumble Dryer Sheet
Method
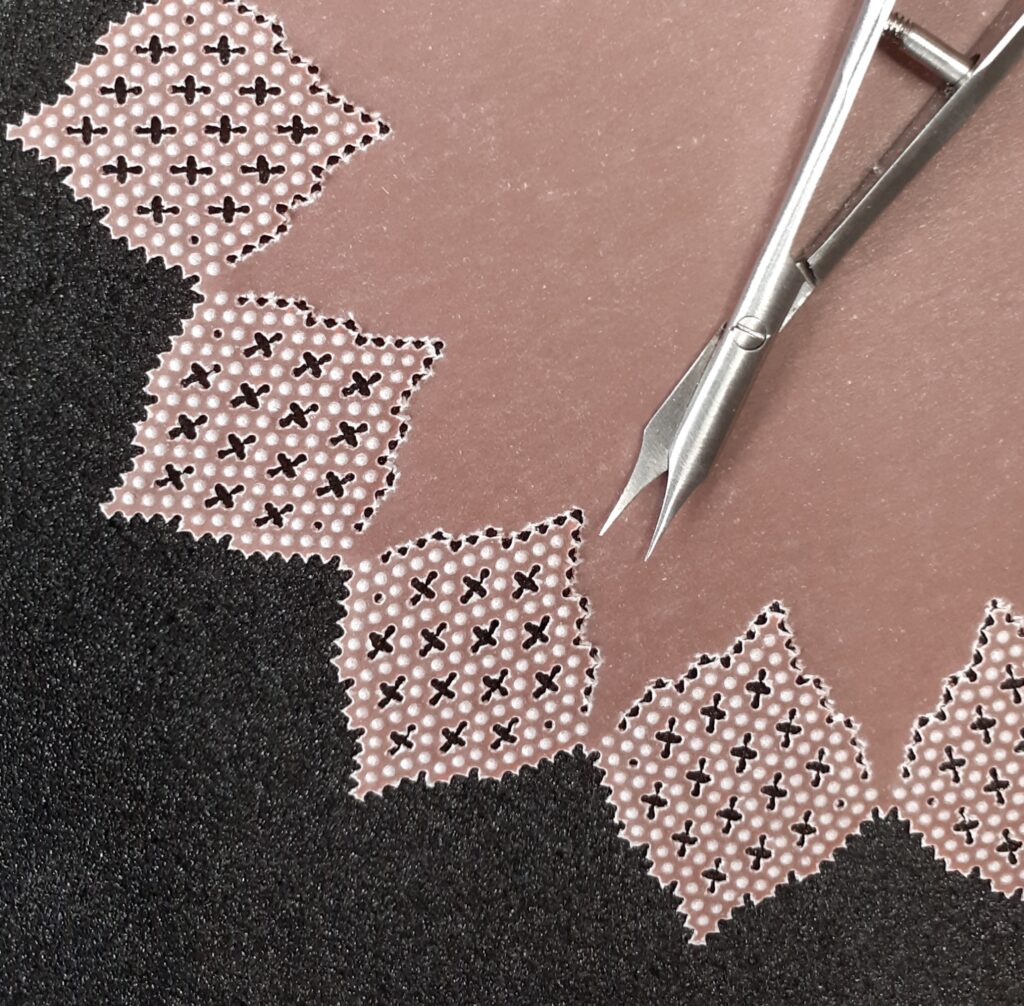
Step 1. To make it easier to work with, I cut my A4 Orange Squash parchment in half. Put your plate mate onto a thick foam mat, place your Peace plate into the plate mate and secure with a couple of Groovi tabs to prevent it moving around. Wipe the back (shiny side) of your parchment with a tumble dryer sheet and place it over the grid design with the shiny side facing the plate. This will make it easier when you come to work the embossed dots, as it’s very difficult to use the tumble dryer sheet on the parchment once you have perforated. Using your one needle bold tool, perforate all of the holes in the outer circle.
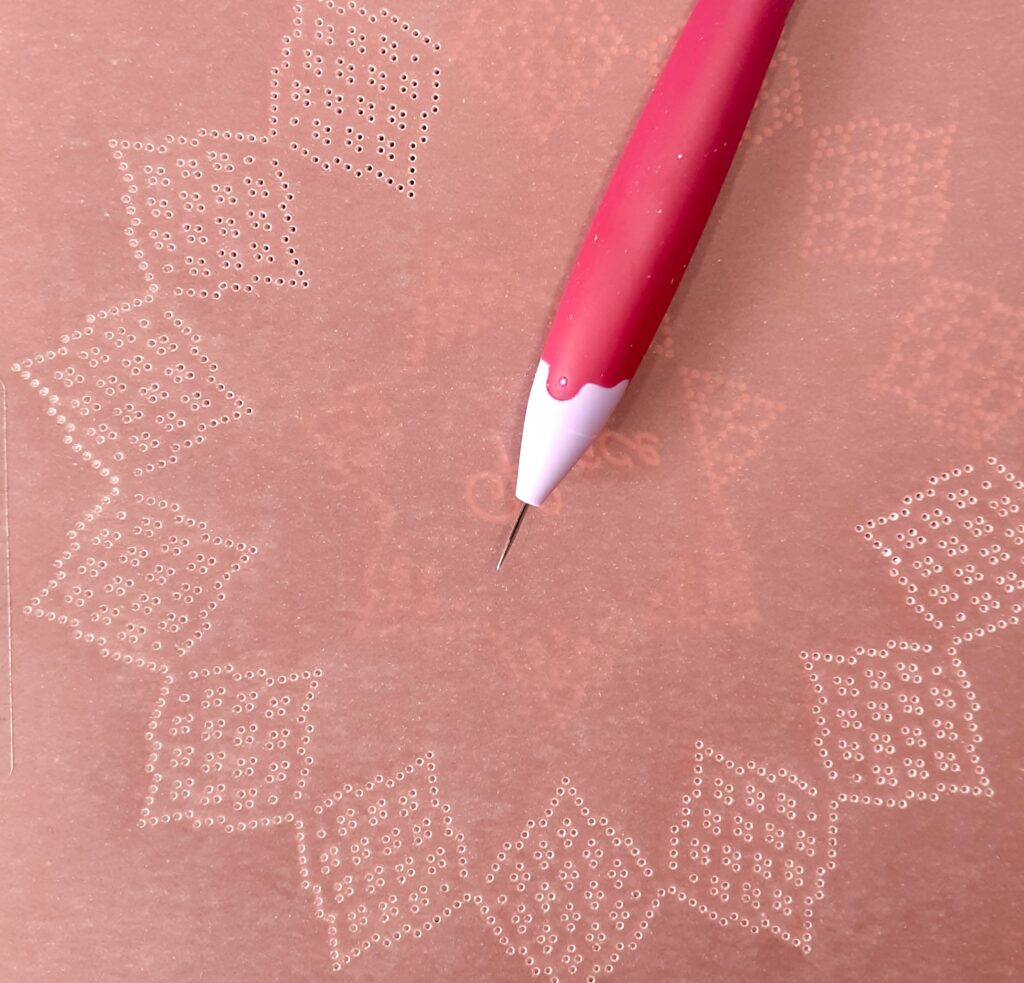
Step 2. You will see that you have four ‘petals’ missing. Remove your parchment and rotate it until the empty space is over the centre section of the drilled holes. Secure your work in place by locking the perforations you have made into the holes in the plate.
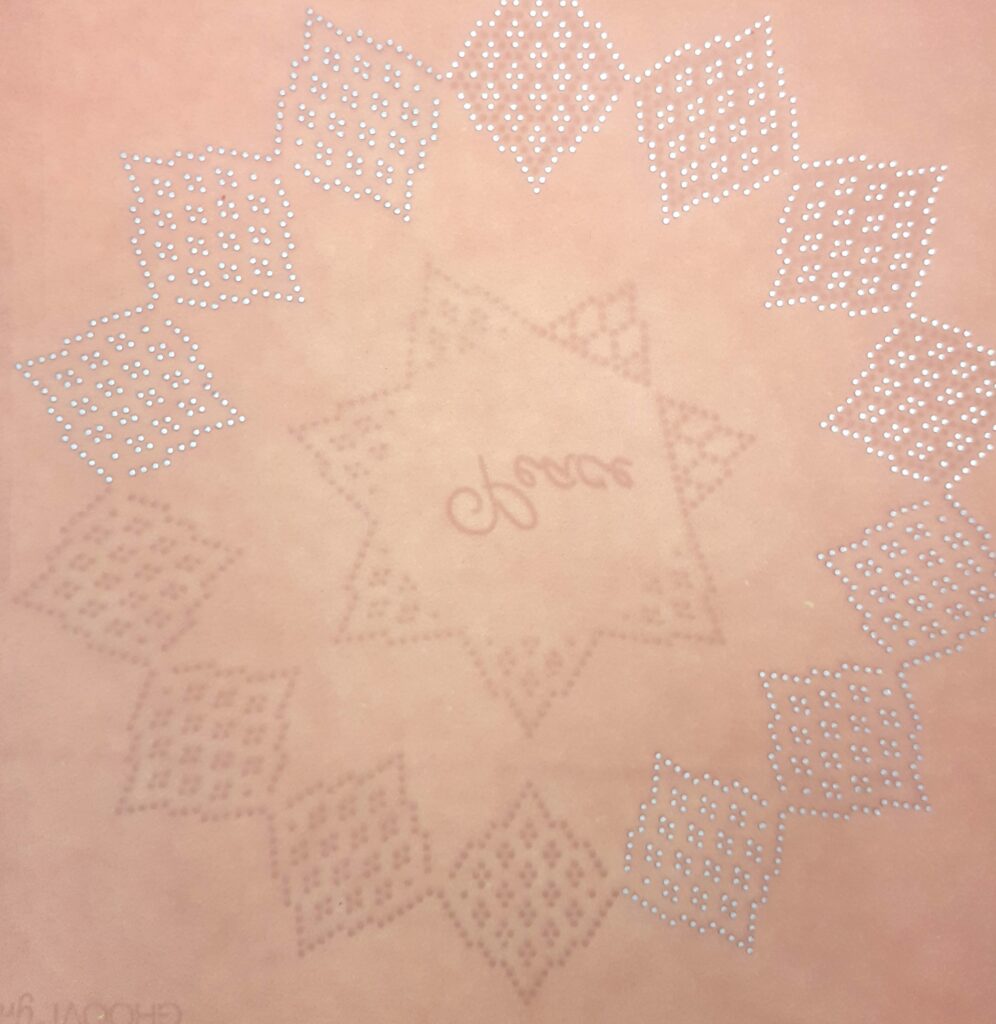
Step 3. Perforate the four missing petals to complete the circle.
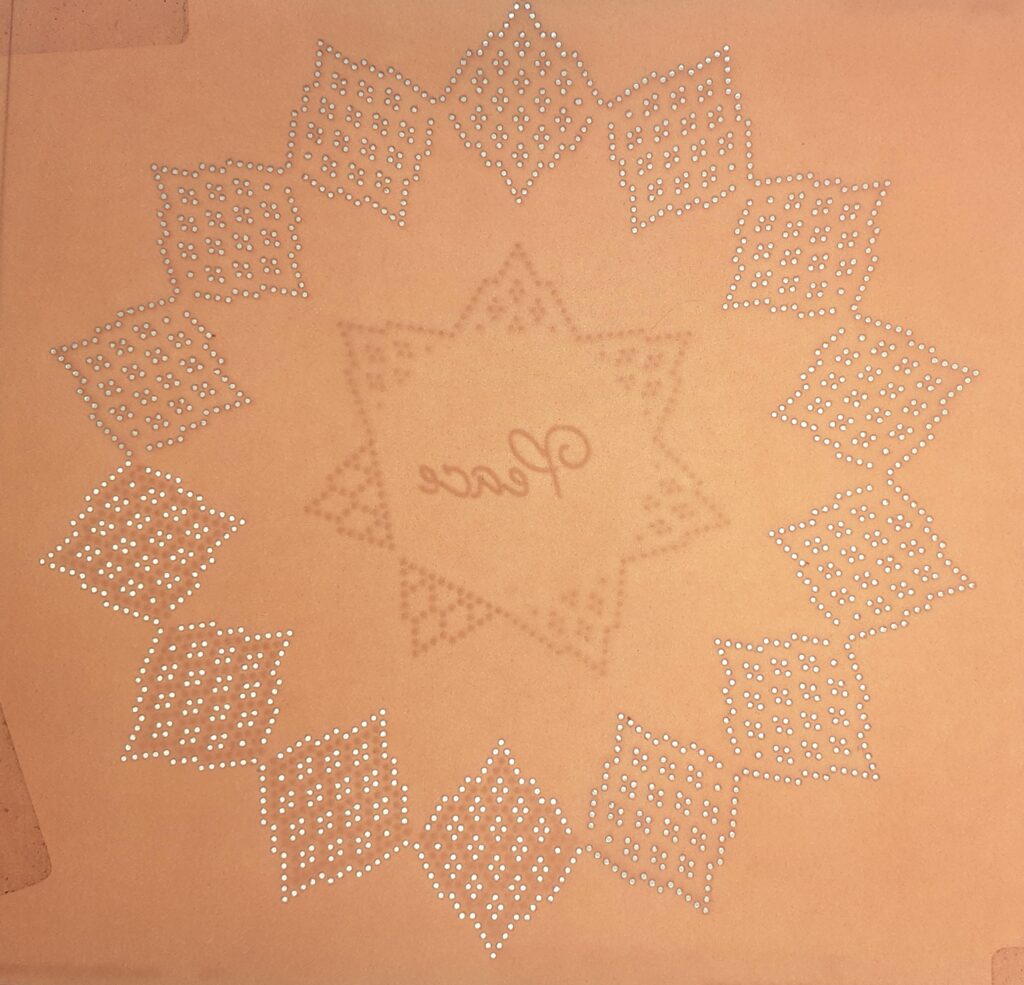
Step 4. Turn your parchment over and place the perforations over and around the embossing dots section of the plate (there are four petals in total). Emboss the dots with your Number 2 Groovi tool. Repeat this process by rotating your parchment and embossing the remaining petals.
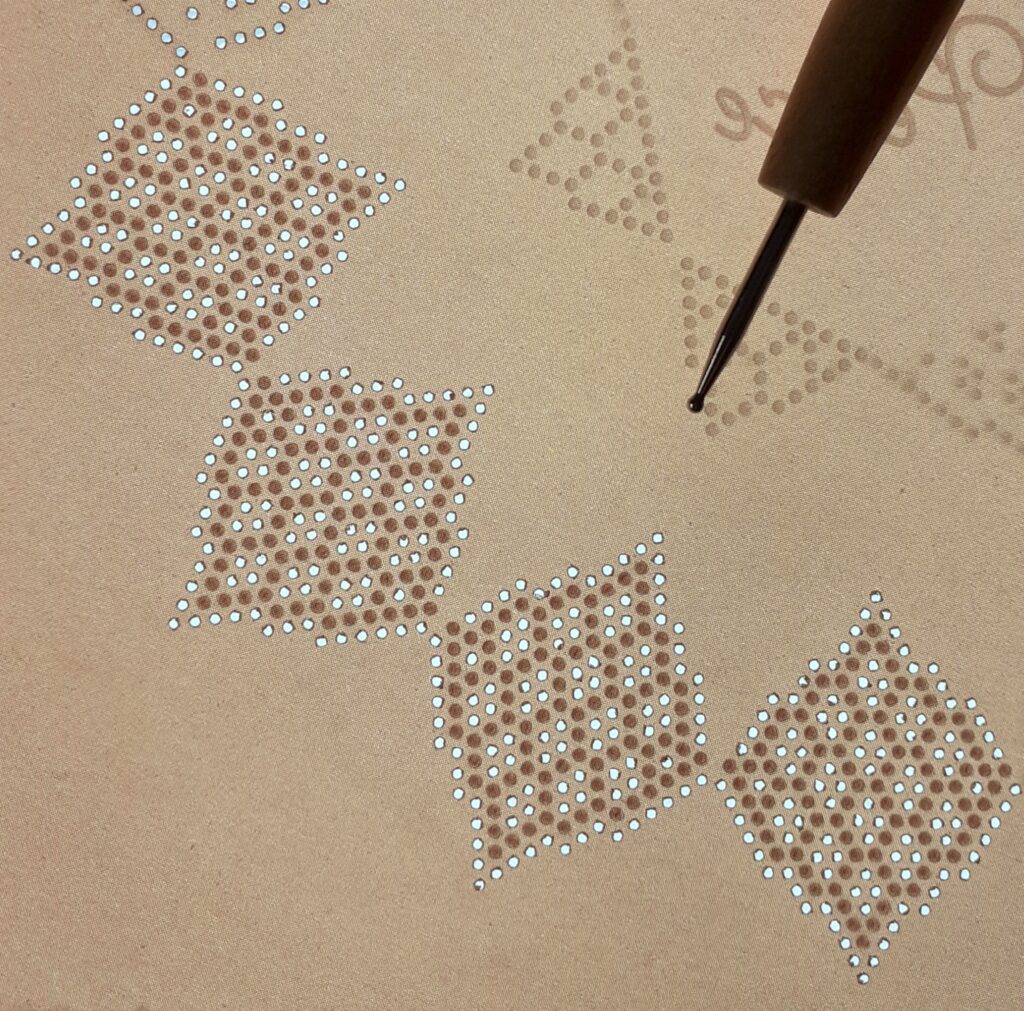
Step 5. You are now ready to picot cut your circle. This is the order that I like to work my picot cutting of the grid plates. Cutting the outside edge last will give your work more stability as you work. Picot cut the crosses in each of the petals, cut the inner photo corner perforations and finally cut out around the outer edge.
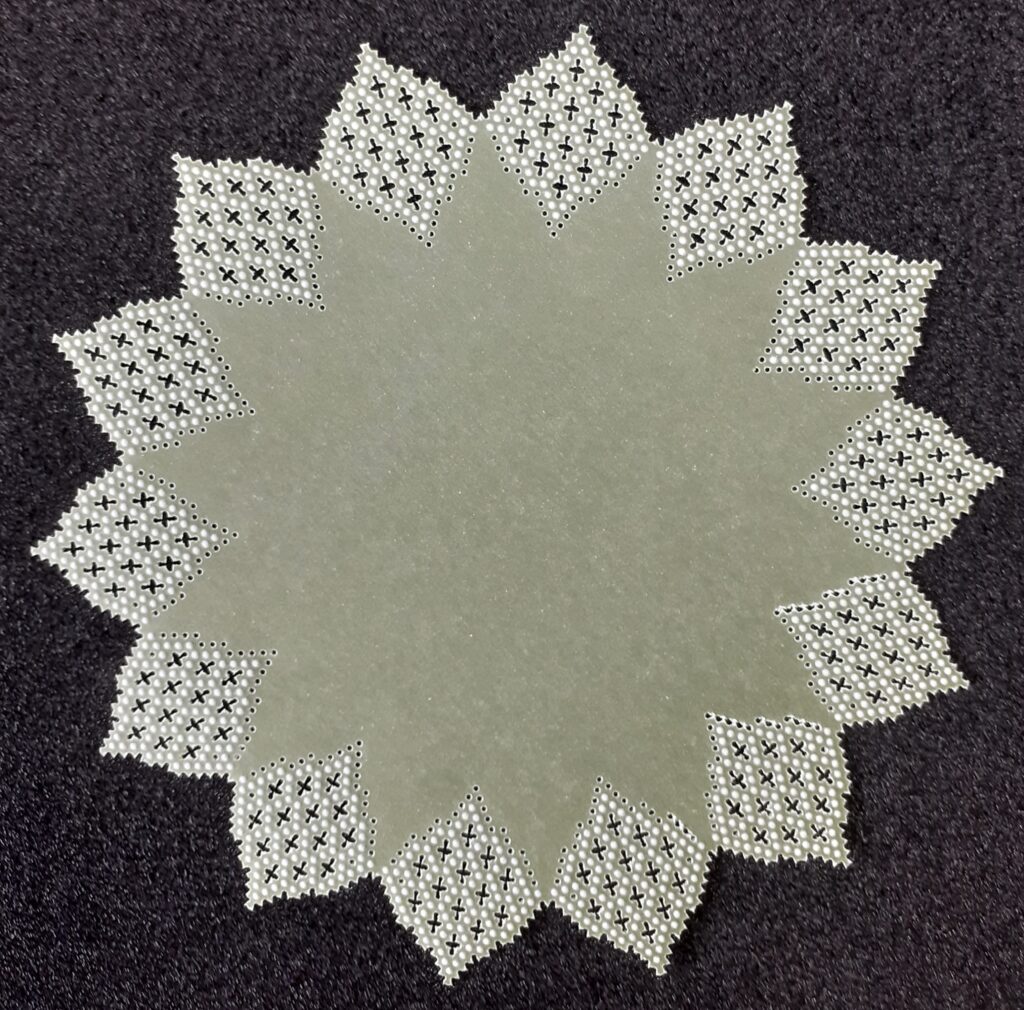
Step 6. You now need to repeat the above process using the Lime Twist parchment but you don’t need to cut the inner set of perforations.
Step 7. Cut your Poppet card topper using the 6th picot die from the outer edge.
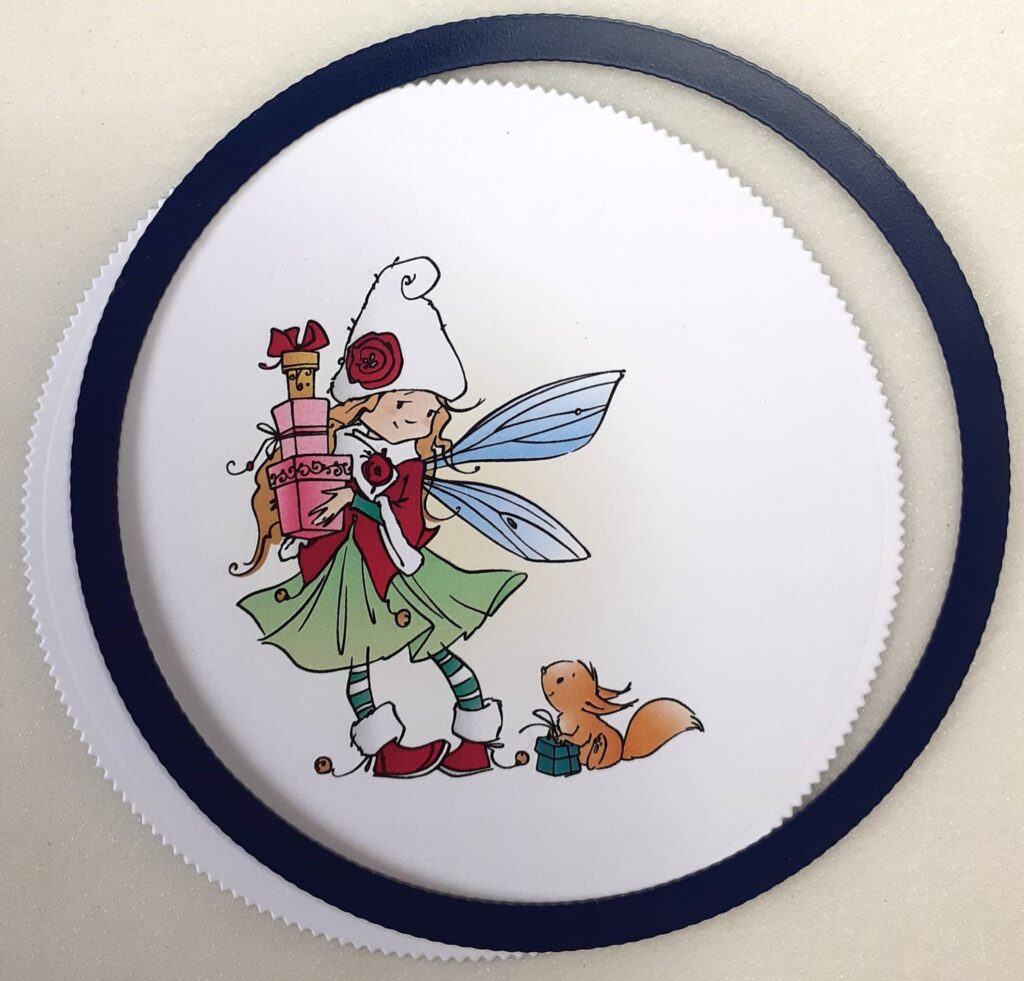
Step 8. Place the Poppet inside the Orange Squash circle. Place the topper under the petals of one half of your work and gently push it as far as it will go. This means that you can now carefully flip the remainder of the petals over the other side of the topper. Once all of the petals are over the poppet you can move the topper around so that it is in the centre of your work.
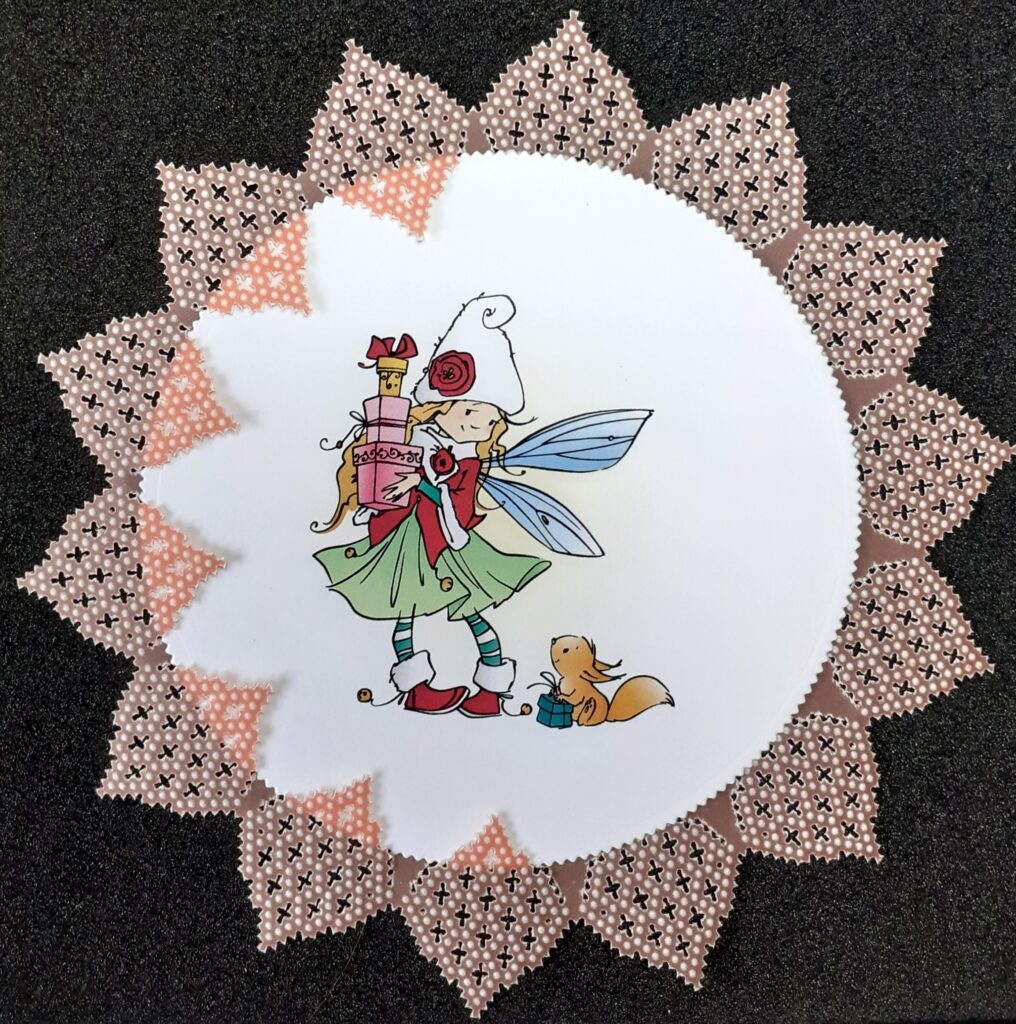
Step 9. Use the largest circle embedder on the front of your card blank. When attaching your work only put your tape behind the centre area, not behind the lace sections. Attach the orange circle onto the green circle, offsetting the petals. Attach your parchment layers to the centre of the embedded circle. Your project is now complete!
Ooooh! That is special. And very helpful! Although, at first glance, the finished result looks like it may be quite difficult, Josie has made it achievable by breaking it down into steps. Quite fabulous!
We hope to see your versions of this card and the techniques shared on Groovi Worldwide and Pergamano Worldwide.
Thank you so much, Josie, for sharing this detailed and helpful bloggy tutorial with us. Yet another amazing step-by-step project that we are sure will encourage and inspire those at home!
Everything that Josie has used in this particular project is available in a shopping list, HERE.
Now, looking at the week ahead…
Monday 22nd July:
In the SHAC with Barbara – 10am Live on Facebook & YouTube
Tuesday 23rd July:
Groovi Tuesday with Paul – 10am Live on Facebook & YouTube
Thursday 25th July:
Get Groovi with Clarity with Paul on Create & Craft – 1pm & 5pm
Friday 26th July:
Crafting with Clarity with Barbara on Create & Craft – 9am & 1pm
See you there!
Travel gently, friends.
Lotsa love, Grace & Josie xoxo
Clarity – The Home of Art, Craft, and Well-Being.
It’s very pretty and the instructions on how you make it are easy to follow; thank you.
Another lovely project from Josie. I was lucky to see these at the Open Days when Josie was demonstrating them & needless to say they fell in my basket. I have done one layer & it worked perfectly without any dramas of getting it to match up like I sometimes do with the squares. The designs are so pretty I must do some more frames ready to add a topper when I require a card.
Thank you Grace & Josie for this weeks project & hope everyone has a good week – there is plenty going on at Clarity Towers to keep us occupied. I must go & finish my teapot before tomorrow morning as just watched & chatted on Thursday evening as I was a bit late joining in x
Great step by step and plates, Josie. These are definitely on my wish list.
Thank you Josie and Grace for sharing.
These plates are so pretty, can’t wait to have a go, I’ve just been using one of the first sets with the perfume bottle design and enjoyed doing it. Look forward to having a go when I get these.
Can’t say I’m having a peaceful Sunday morning – clearing out the kitchen ready for them to start on putting a new one in tomorrow, going to be a bit dusty with floor and wall tiles coming off tomorrow ! Sandwiches and take away all week I think !
Thanks for a lovely design yet again. Have a good weekend. X
Brilliant demonstration, thank you
Great step by step, thank you Josie and Grace. I ordered the new set last week, so hopefully will try this when it arrives. xx
Pingback: Saturday Share!