Clarity’s Matters Blog Tutorial: How To Make A 3D Parchment House
Hello hello! Grace here.
I hope this finds you enjoying your Sunday!
We’re joined this weekend by the lovely Glynis Whitehead. She’s prepared a step-by-step project for us using the Tudor House Tem-Plate!
I’ll hand you right over to our fabulous tutor to show us the ropes…

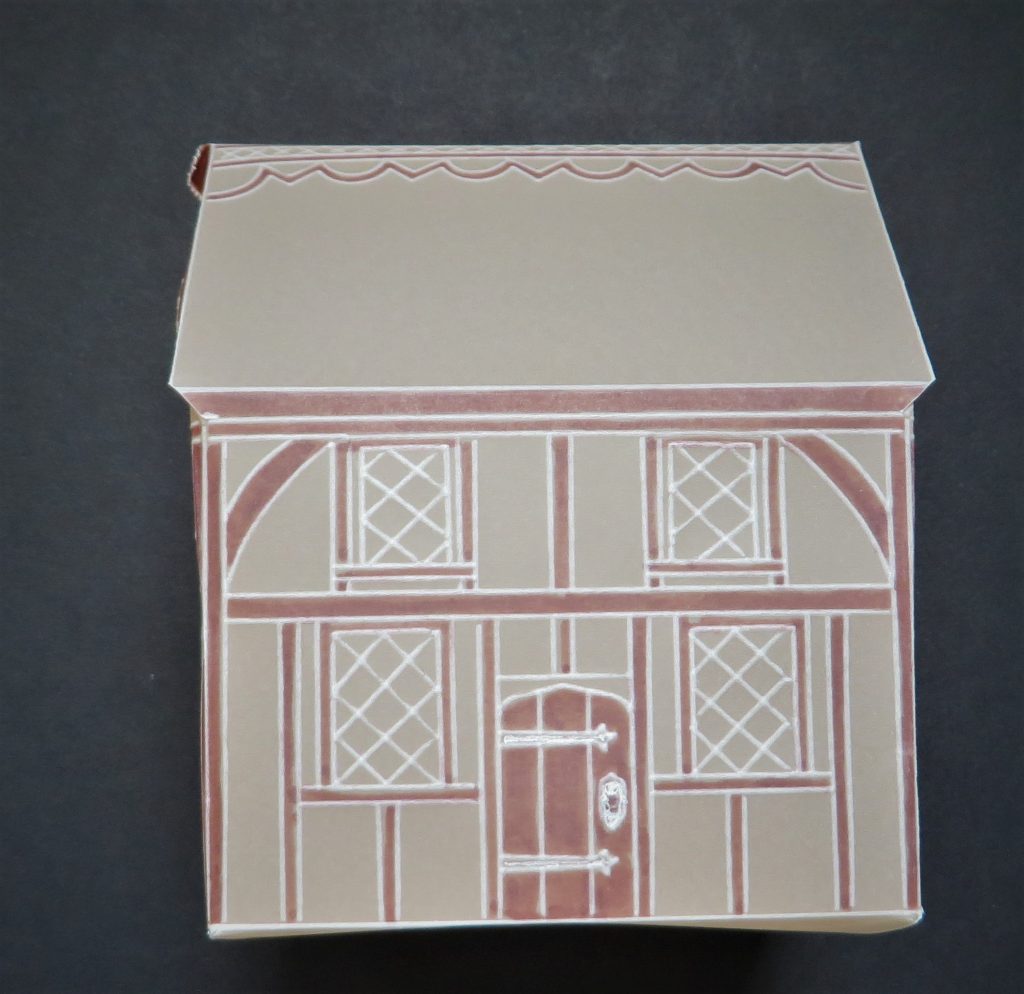
Tudor House Tem-plate
This is a project that will make a lovely Christmas decoration or gift box (or perhaps you know someone who is moving into a new home). It will also hold mini chocolate eggs at Easter. There are so many uses! What else can you think of?
Ingredients
Tudor House A4 Groovi Tem-Plate (GRO-TE-40425-16)
Groovi Plate Mate for A4 Sq Grids (GRO-MA-41768-21)
Perga Colour Exclusive Pens (PER-CO-70060-XX)
Pergamano Perforating Tool (Fine) (PER-TO-70037-XX)
A4 Parchment (GRO-AC-40024-XX)
Groovi Tabs (GRO-AC-40437-XX)
Red Liner Tape (ACC-AD-30375-XX)
Scissors (PER-TO-70040-XX or PER-TO-70041-XX)
*Gingerbread Cottage Groovi Border Plate (GRO-HO-40427-09)
*Swiss Cottage Groovi Border Plate (GRO-HO-40426-09)
*Bundle of Tudor House & Border Plates (GRO-CH-41042-XX)
Method
Step 1. Attach the extensions into your Plate Mate, secure them with Groovi Tabs and put your Tudor House tem-plate in place. Line up your A4 parchment so that all the outside lines of the house will fit in.
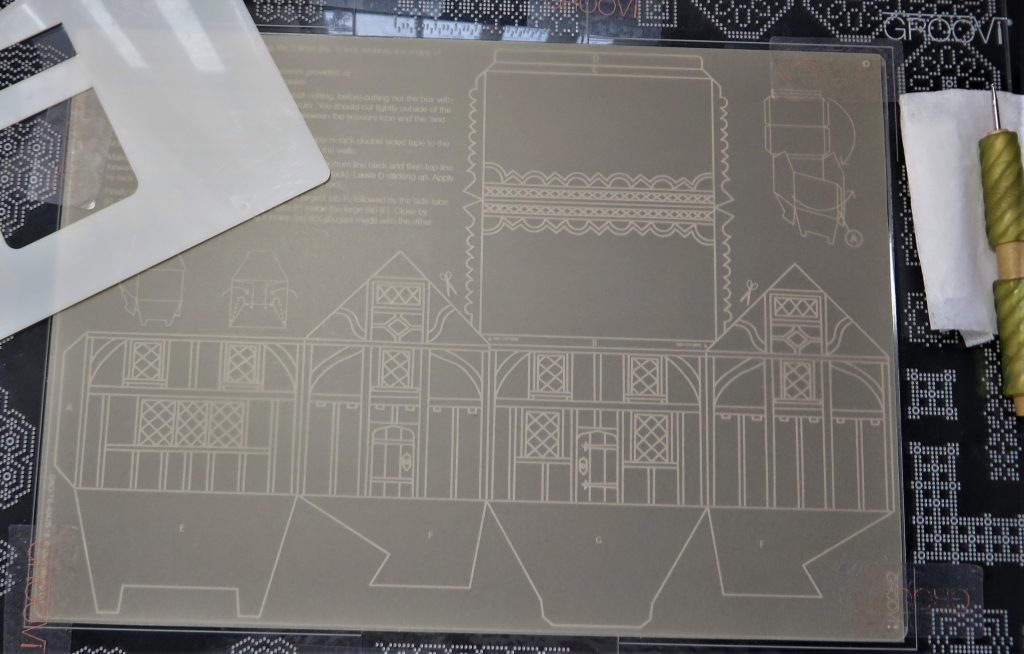
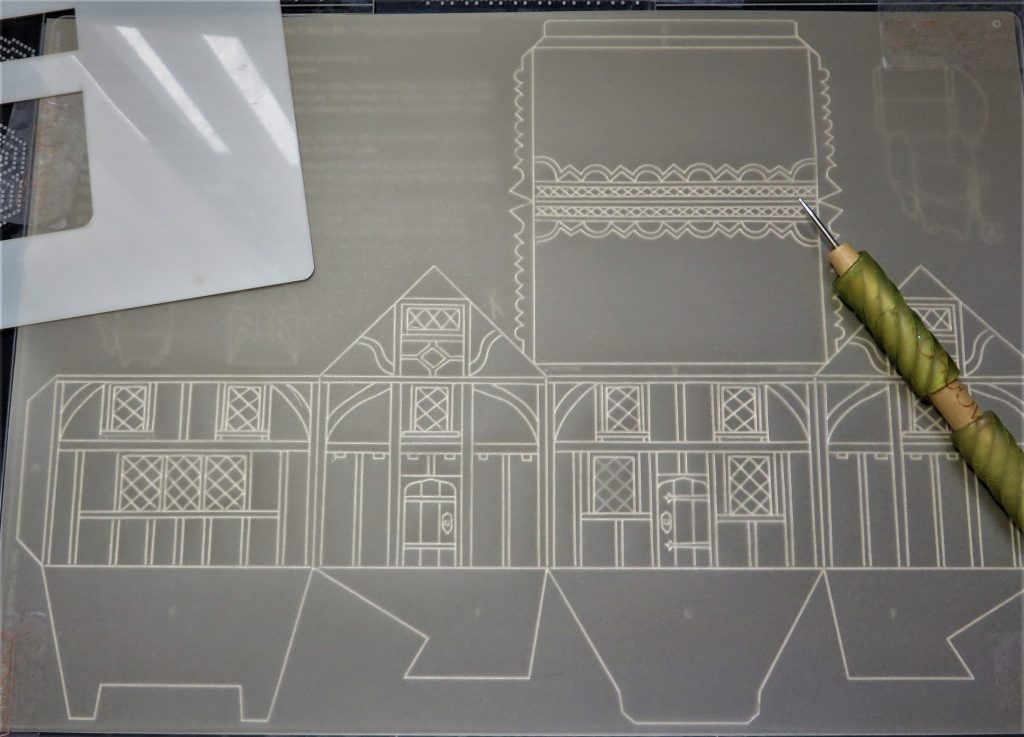
Step 2. Trace out the whole design using the number 1 tool from the Groovi Starter Kit.
*Did you know that there are also two Border plates that correspond with this Tem-Plate? The Swiss Cottage and the Gingerbread Cottage. I have listed them above in the ingredients list, as well as the bundle of all 3 plates.*
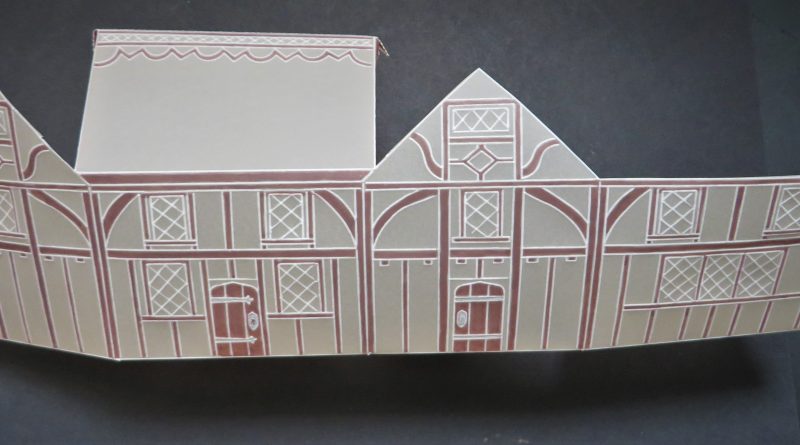
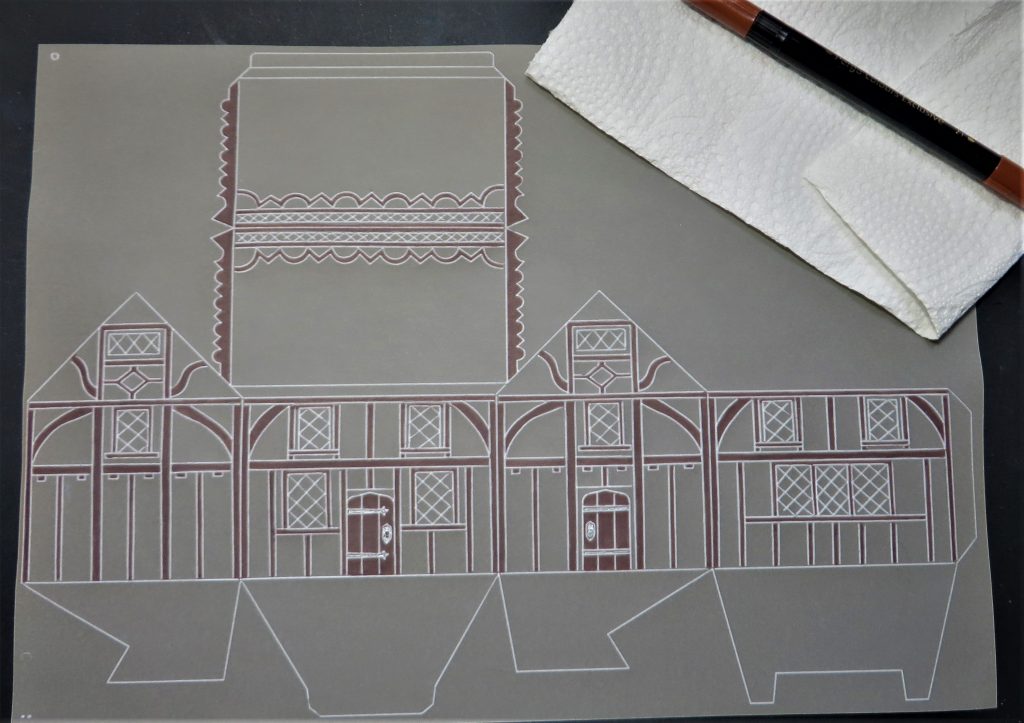
Step 3. Take the parchment off the plate – keep the plate nearby because there are lots of instructions on there to help you. It’s time now to colour the work. I have used a brown (number 21) from the Perga Colour Exclusive set. Working on the back, colour in all the beams, eaves and doors of the house. I have also used a silver gel pen to colour in the latches and hinges on the doors (I did this on the front).
TOP TIP: Keep a paper towel in your hand to cover the bits you have just applied pen to, otherwise it will smudge onto the rest of the work.
Step 4. Give the piece a rest, so that the colour has time to dry properly. Once dry, go around the eaves of the house, perforating with a two-needle tool. I believe it is easier than fussy cutting it out and it also looks pretty. Snip the perforations.
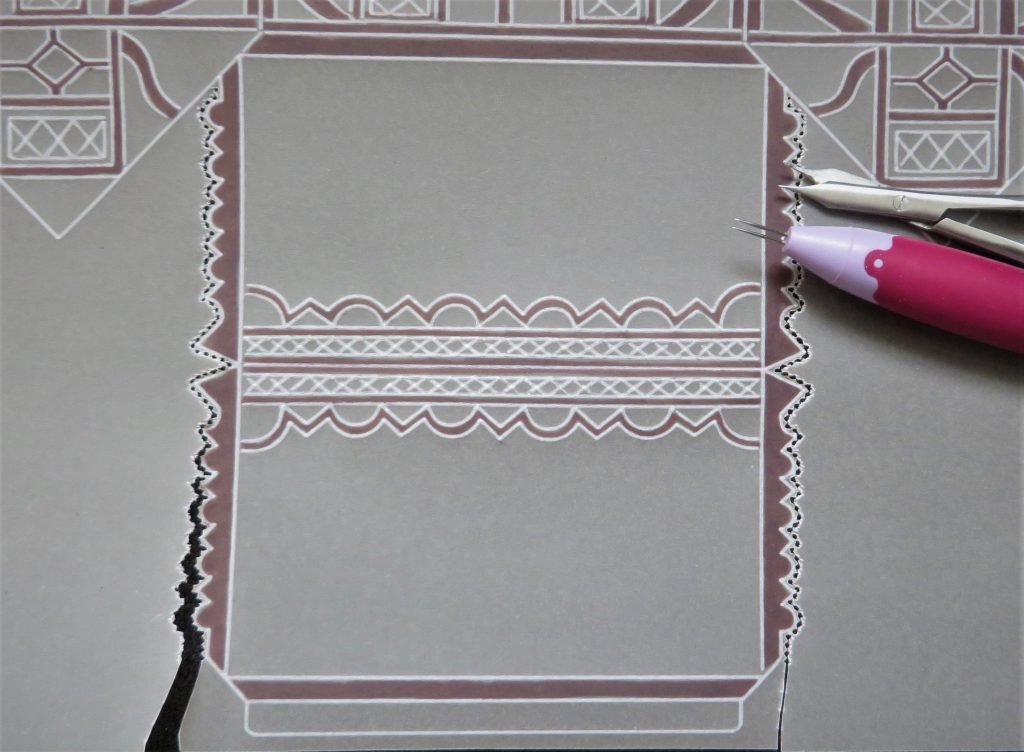
Step 5. Cut out the rest of the house using scissors. Take note of the instruction on the plate… to cut down the sides of the eaves to where it says “end cut here”.
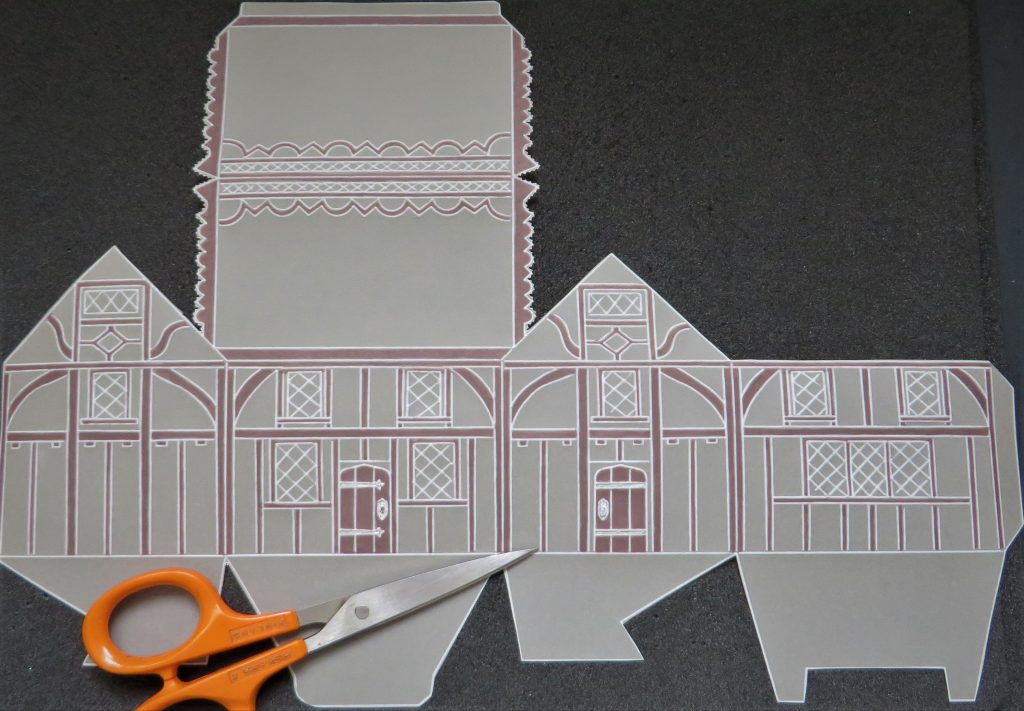
Step 6. Check the plate and follow the instructions as to where to fold along the embossed lines. Use a ruler (laid along the line) and gently, gently bend up the parchment against it until you have a 45-degree bend. If you try to bend the parchment too quickly and too sharply, the parchment can split along the embossing.
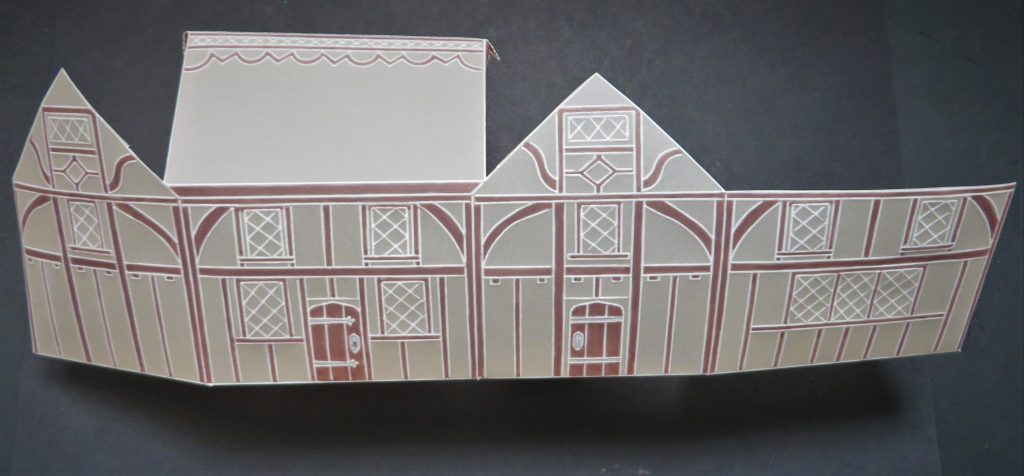
Step 7. Add some extra strong or red liner tape to the side flap and join the walls of the house. Fold the roof and fix it into place. I used a tiny bit of red liner tape on the flap to hold it there. If it is to be a gift box, leave the bottom of the house untaped so that anything inside can be accessed.
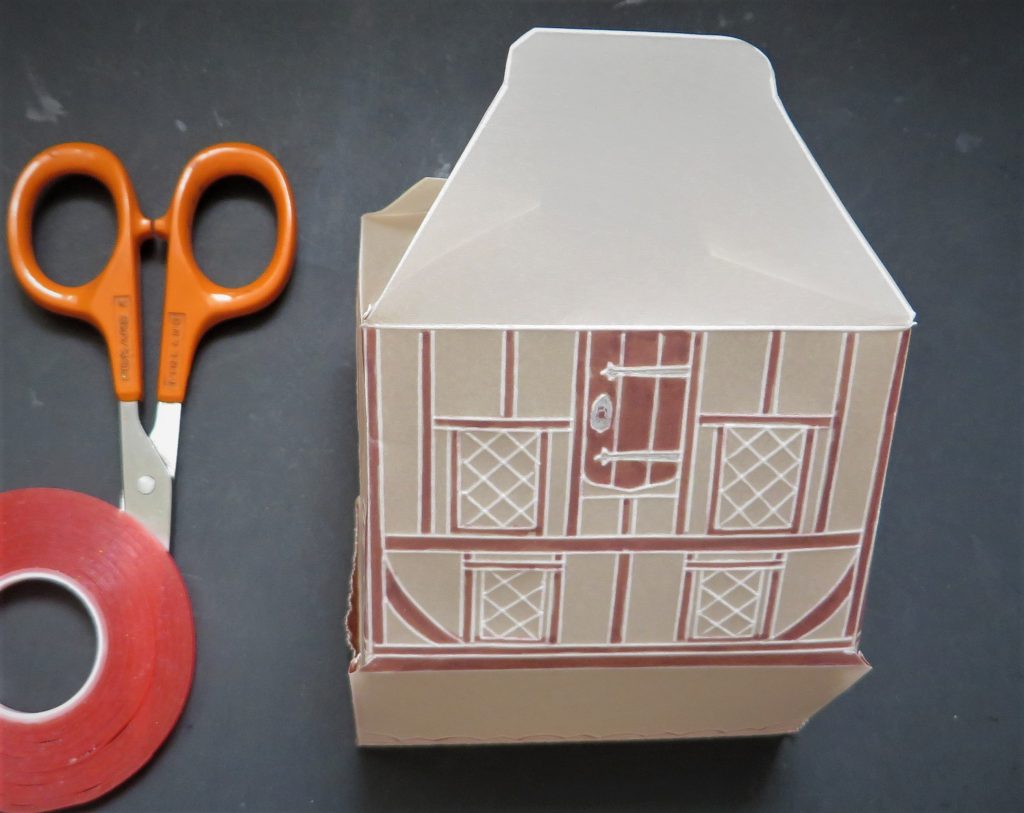
Step 8. Fold up the flaps at the bottom of the house – following the instructions on the plate. And you’ve made a 3D Tudor House!!
That’s so cool! Thank you, Glynis, for sharing your brilliant tips and tricks with us. There are so many different variations we try with this house. You could change the style entirely and make it more modern by not adding the beams. Those extra border plates allow you to create a Gingerbread House and a Swiss Cottage! Very different styles (check out the artwork HERE for inspiration). And then when you get to colouring… well, the options are endless! You could make a whole town! Or perhaps just a small cul-de-sac 😉
We’d love to see your version of the houses! I think they’d make lovely Christmas tree ornaments. Or 3D advent calendars with chocolates or sweets inside. A 3D cul-de-sac advent calendar! Wouldn’t that be epic?
If you follow this step-by-step, don’t forget to email me your finished artwork – Grace@claritystamp.com
Everything that Glynis has used can be found HERE on the Clarity website.
Looking at the week ahead, no SHAC Shack or Groovi Tuesday this week due to the Parchment Retreat. However, the super talented Tina Cox will be dazzling you with her super tips and techniques on Create & Craft on Saturday at 12pm & 5pm, so I hope you can join her
Right, we’re off! Enjoy the rest of your weekend, friends. Travel gently.
Lotsa love, Grace & Glynis xoxo
Clarity – The Home of Art, Craft, and Well-Being.
Hi Grace, this is one plate I haven’t got but it does look pretty & as you say so many variations. I completed the last 2 weeks projects from Jane & Glynis & posted them on Facebook. I will pass on this one & finish some of my Christmas cards using Linda’s & Tina’s lovely Christmas plates as we are already halfway through October. My hairdresser said that it was only 10 weeks to Christmas when I went on Thursday!!
Safe travel for those going to the Retreats this week & hope you all have a fabulous time. I look forward to seeing the projects in due course.
Good morning, this is one plate I don’t have but it’s a lovely project. Just read Sue’s comment above – 10 weeks until Christmas – eek ! I’m going to finish of the first two of Linda’s projects before starting the third! Still plenty of my birthdays with at least 7 I can think of in December ! Have a good weekend! X
Something else for me to try, I don’t have the Swiss Cottage, but I have the Gingerbread House and the Tudor House. Did start a Gingerbread house, and that’s as far as I got, so must try to finish it! xx