Clarity’s Blog Tutorial: How To Create An Easel Card with Tina’s Parchlets
Hello hello! Grace here.
I hope this finds you safe and well this Sunday morning!
We are joined this weekend by the fabulous Glynis Whitehead. She’s an absolute creative machine, our Glynis, and makes these step-by-step projects faster than I can put them together! We love her. And we have another brilliant project to share with you.
I’ll waste no more time and hand you over to the pro!

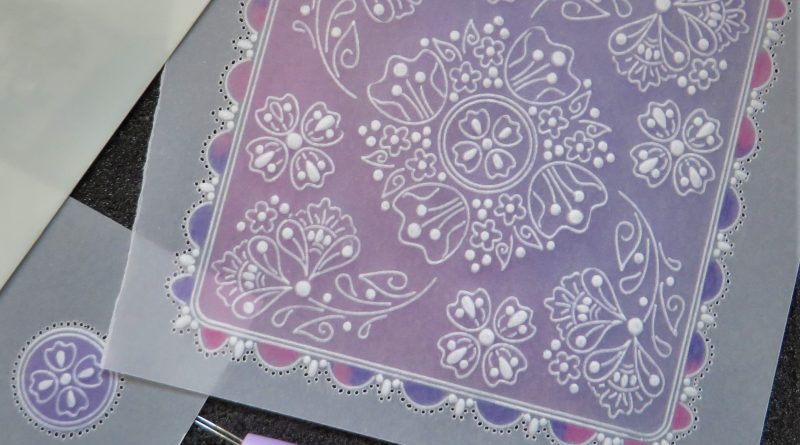
Diamond Easel card with Tina’s Parchlets.
This card is a simple one to make and will suit all of Tina’s parchlets. The card can also be altered in size so that you can use any of our Groovi plates, making a square design. It folds flat for postage too.
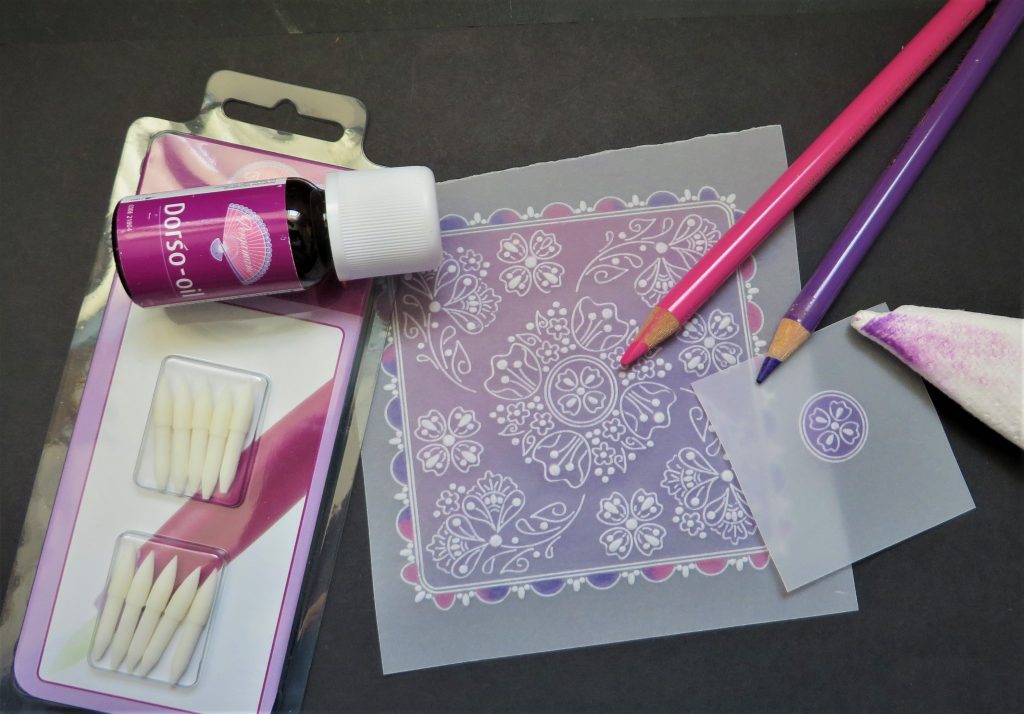
Ingredients:-
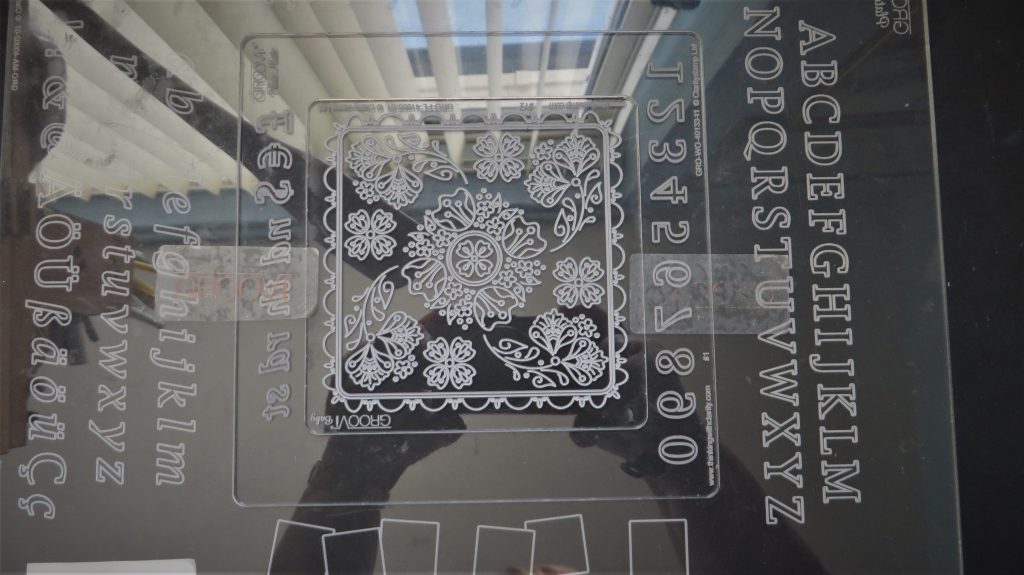
Tina’s A6sq Groovi Parchlet – GRO-FL-41805-01
Groovi Deluxe Starter Kit – GRO-SK-41709-XX or
Alphabet A5sq Groovi Plate Mate – GRO-MA 40002-07
Numbers, Ovals & Tags A6sq Groovi Plate Insert – GRO-WO-40133-11
*Also found in the Deluxe Starter Kit
Groovi Embossing Tool 1 & 2 – GRO-AC-40026-XX
Groovi Embossing Tool 3 & 4 –GRO-AC-40027-XX
*Also found in Deluxe Starter Kit.
Clear Parchment – GRO-AC-40020-XX
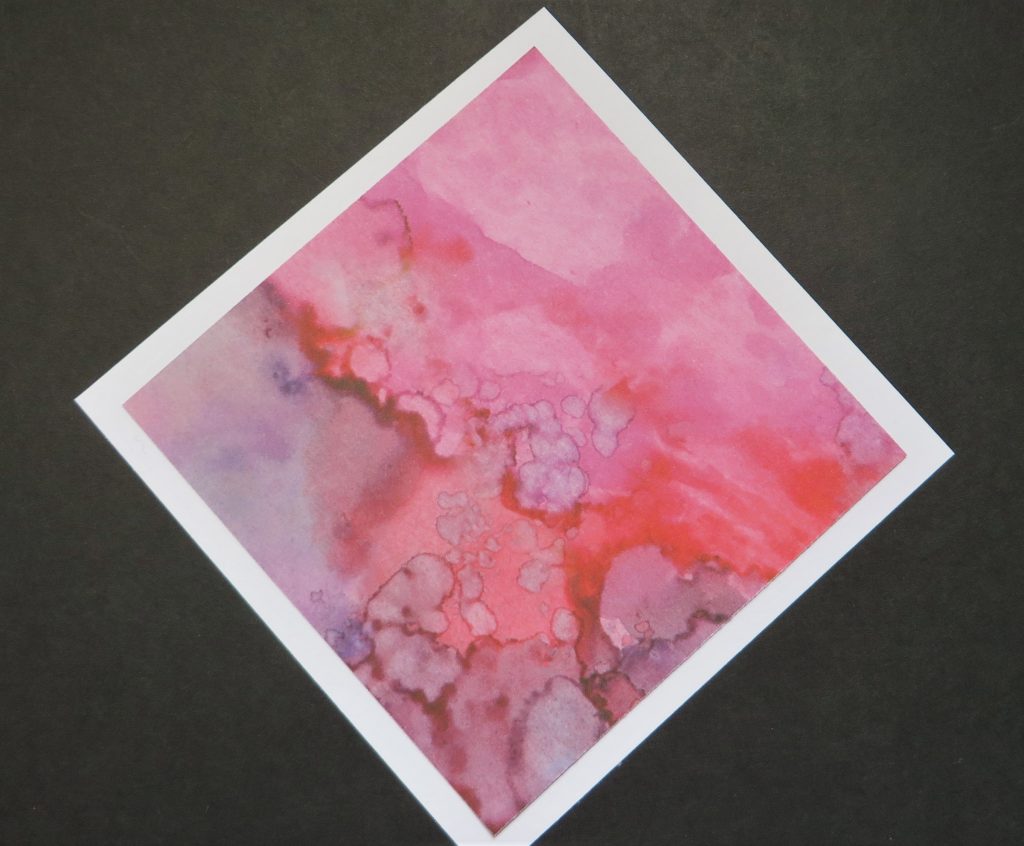
Rainbow River Designer Paper 8 x 8 – ACC-CA-30539-88
White card stock or 5 x 5 Card blanks – ACC-CA-30617-55
Faber Castell Polychromos – ACC-PE-30797-XX or
Perga-liners (B) – PER-CO-70063-XX
Dorso Oil – PER-CO-70066-XX
Pergamano Blending Nibs – PER-AC-70299-XX
Pergamano Perforating Tool – 2 needle- PER-TO-70037-XX
Perga-brads in gold – PER-AC-70274-XX
Perga-glue – PER-AC-70133-XX
Foam Pads/tape.
Cut 3 pieces of card to 4.25 x 4.25 inches. 2 mats from the designer paper to 4 x 4 inches. Then for the ‘stopper’ you will need an inch square of designer paper and 1.25 inch square of card

To set up your plates, put the inset into the larger plate mate and the parchlet will fit inside that very nicely. Fix them in place with Groovi tabs to prevent any movement. Then you can go ahead and attach your parchment.
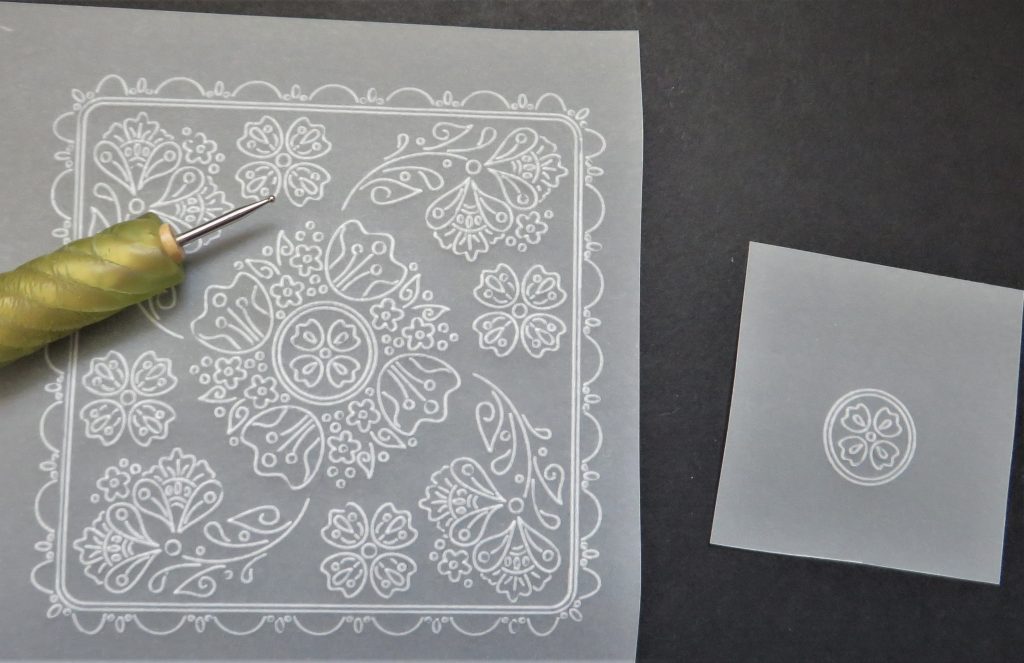
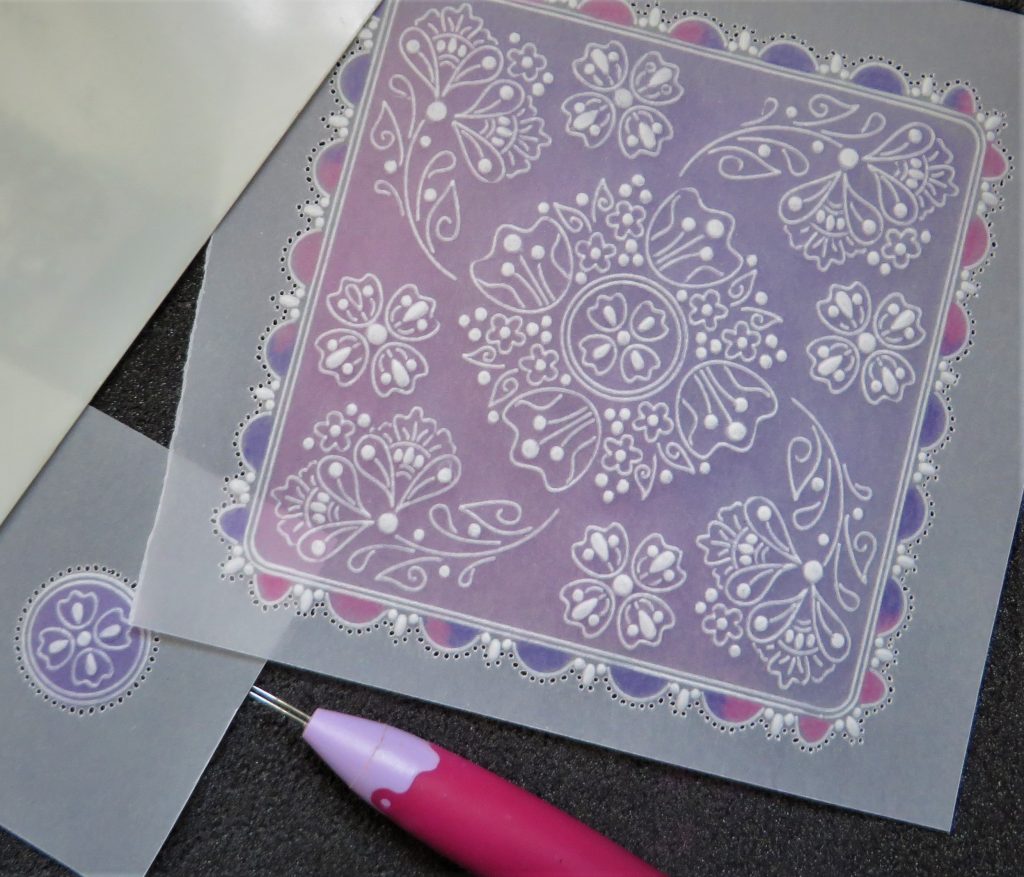
Trace out the whole design using the number 1 tool *where you are embossing dots, use the number 2 tool. Use a little off-cut of parchment to trace out the little circle from the centre of the plate
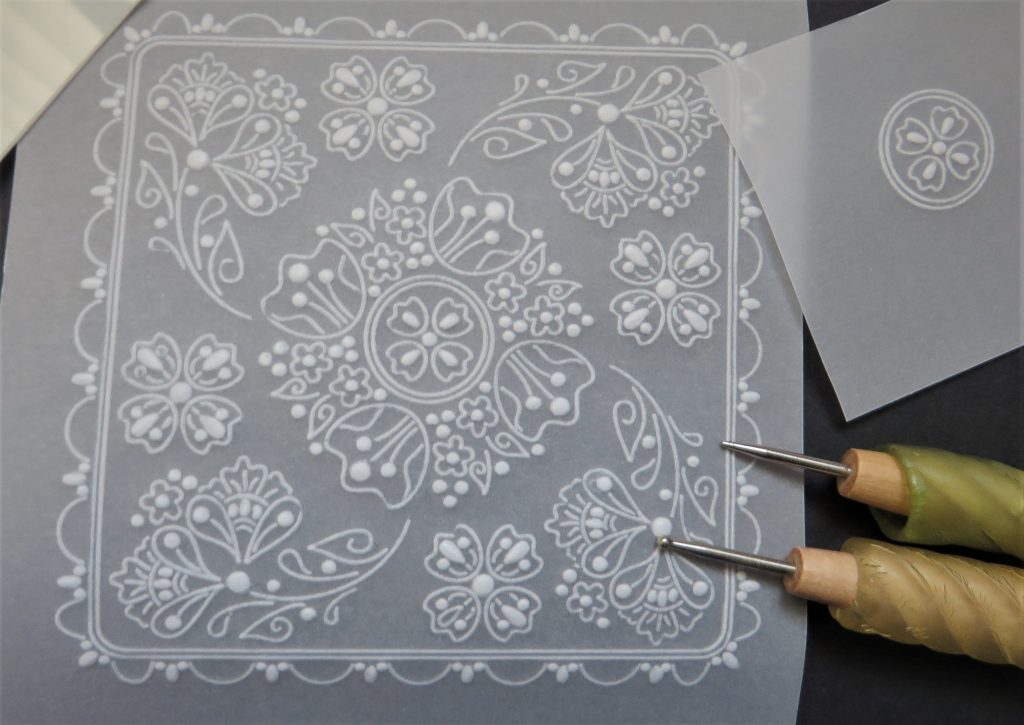
Use the number 2 and 3 tools from the starter kit to emboss the dots and petal shapes within the design and around the edges. The larger dots will need the no.3 tool. By the time you get back to the beginning, these dots and petals will be ready for the 2nd embossing as they are just small areas
Now to add some colour. I have chosen a pink and a purple pencil from my selection of Faber Castell Polychromos Pencils. There are also some gorgeous colours in the Pergaliners (B) selection. Use the side of the point to put some pink down in one corner and purple on the other, meeting in the centre of the square. Blend all of this out with nibs and Dorso oil. You can also use a folded tissue to help smooth out the colour evenly. Merge the two colours in the centre using the purple nib. Add colour to the scallops around the outside. I used a mix of purple and pink. Do the little circle also
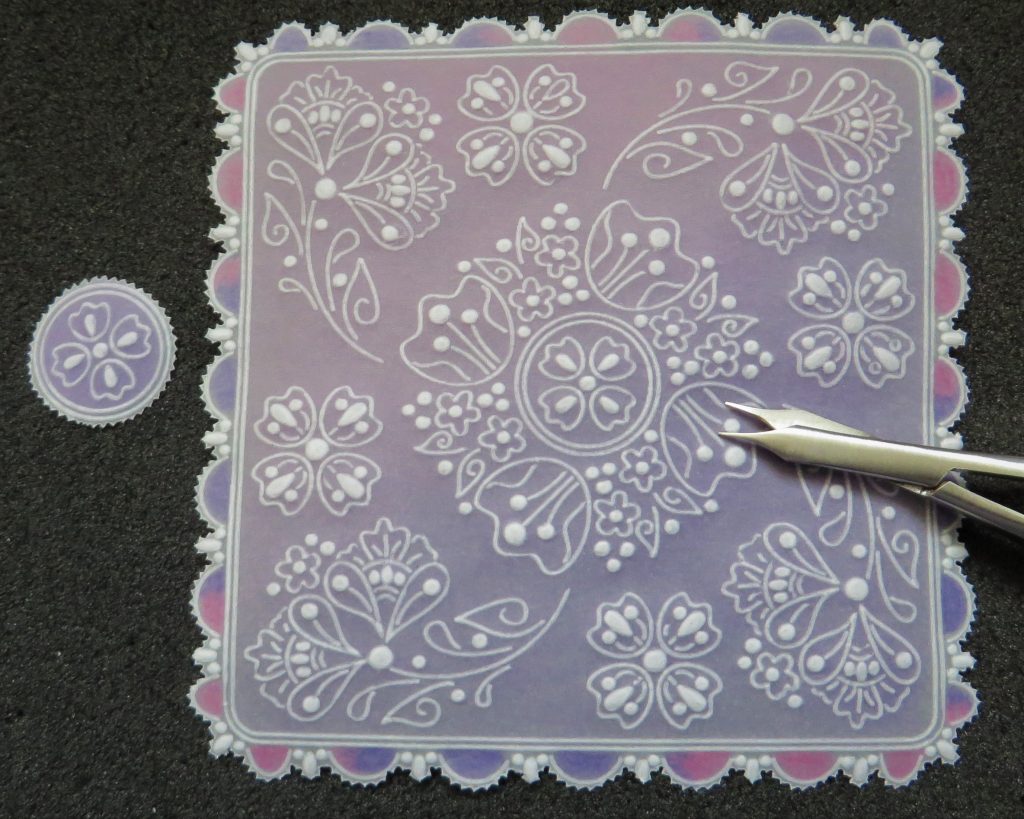
Go around the outside of the scallops with the two-needle tool, moving the work around so that your hand is always in a comfy position. The little circle also
Snip out the work, making sure your hand is in a comfortable position, turning the work as you go
Attach the parchment to the designer paper mats with gold brads and apply the ‘stopper’ to the piece of card. Put this onto some foam pads/tape, ready for sticking to the card base
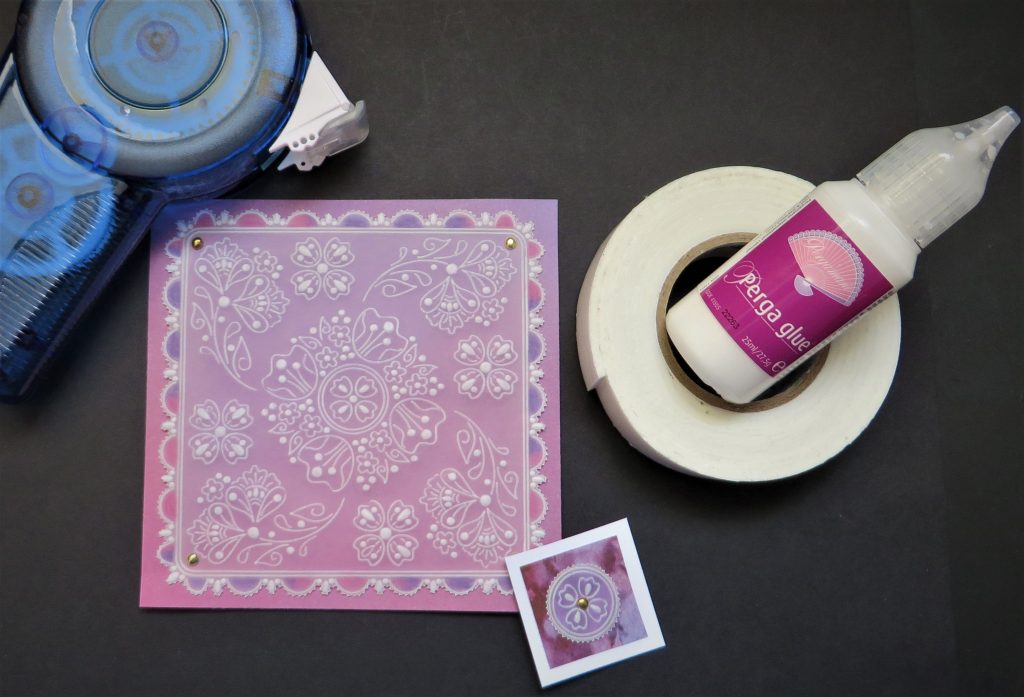
ASSEMBLY :- Take one of the square pieces of cards and either use a ruler and embossing tool or a score board to score a line from corner to corner and then from a corner, mark 1.25 inches either side with a pencil and score across, matching the dots with the ruler – then rub out the dots
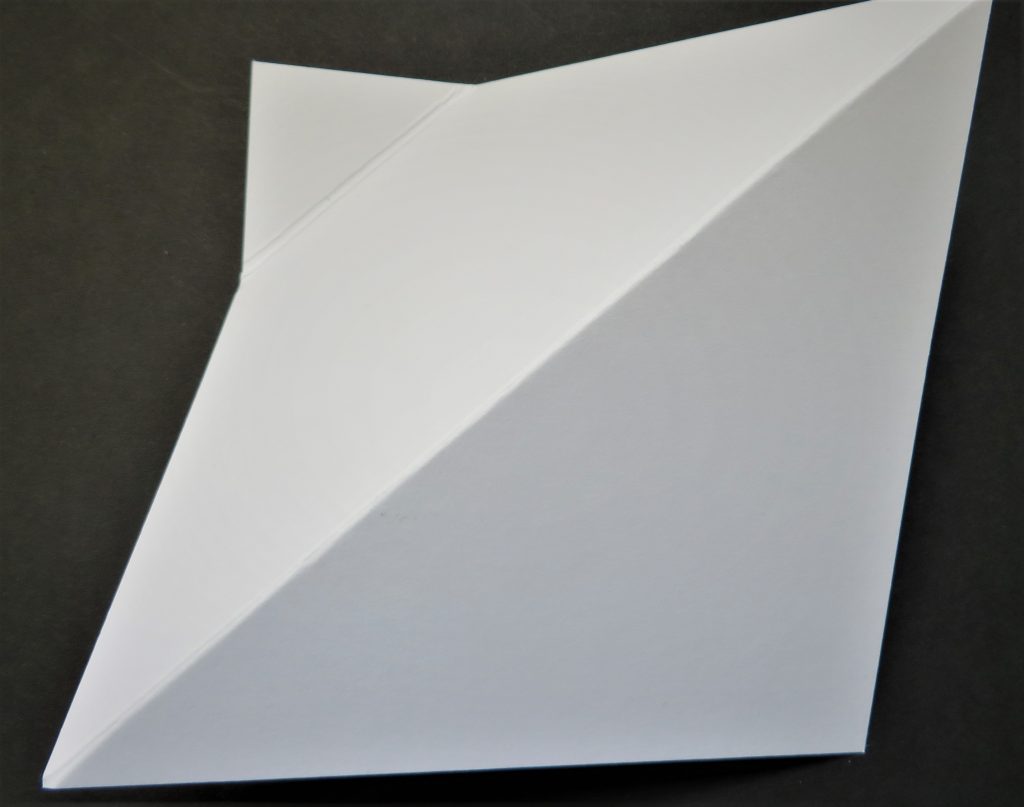
Take the piece that will be your base and stick the second designer paper mat in place
Add some glue to the corner of the folded piece – wet glue is good for this as it gives you some wiggle time to get the edges of the card lined up. Whilst allowing the Perga-glue to dry on that corner, stick your parchment piece to the remaining square of card using double sided tape
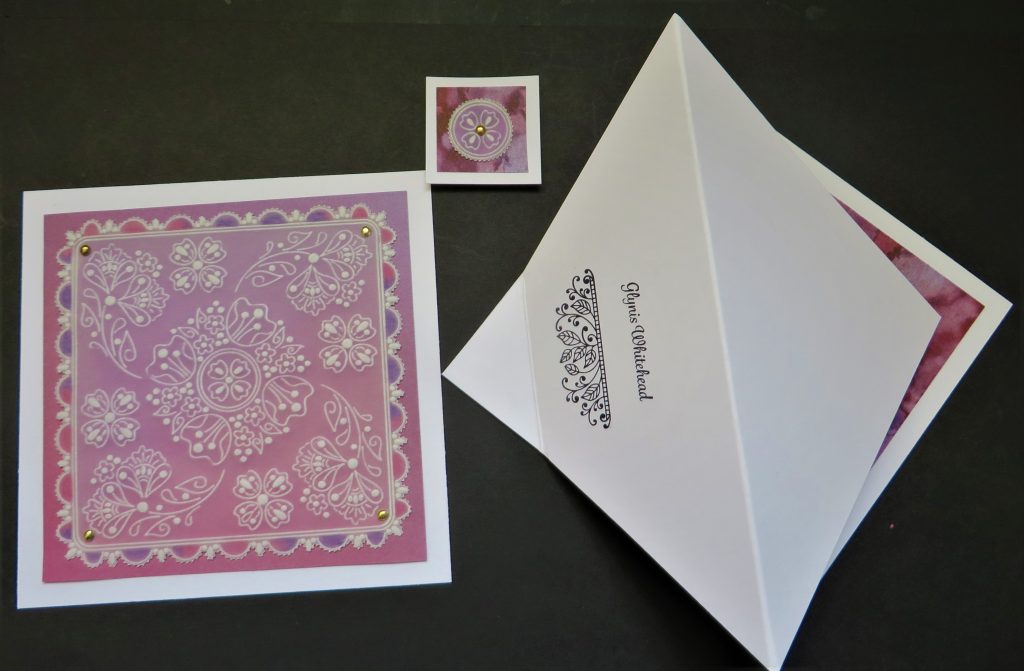
Stick the parchment piece to the easel, making sure to just stick the bottom half, keeping the double sided tape or glue to below the fold line. Then sit the easel into the right position and put the ‘stopper’ in place
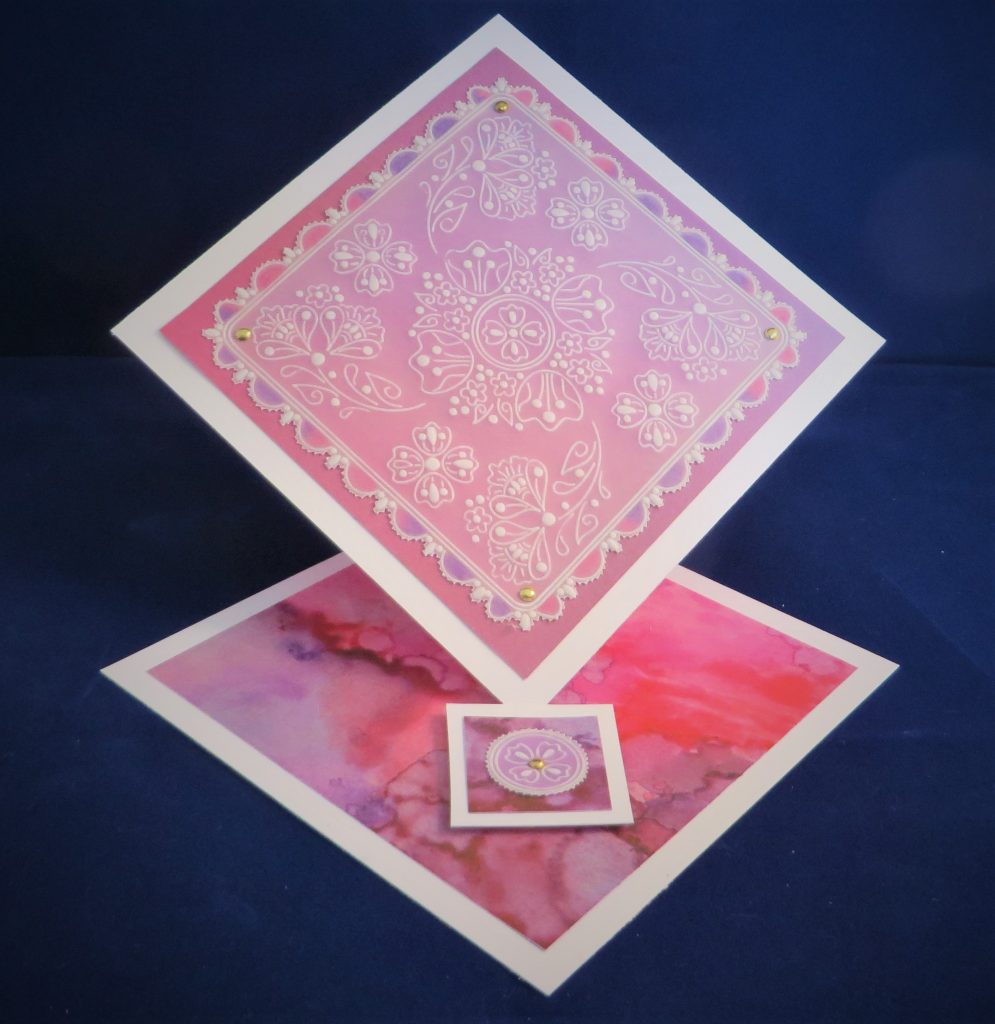
I just love it 🙂 What a pretty card, Glynis! Thank you for sharing your skills with us. As usual, if you would like to give this a go yourself, please send your artwork to me! We love to see it. Grace@claritystamp.com
Everything that Glynis has used can be found in one place over on the Clarity website HERE
If you like the look at what Glynis has created but you are not yet ready to try out your picot cutting, then you may want to check out this weeks Half Price Highlight Product of the Week

Paul did a little Facebook Live earlier in the week which explains exactly what they do
What’s happening at Clarity Towers this week:
Tuesday, May 31st: Groovi Tuesday with Paul – Live at 10am on Facebook & YouTube
Sunday, June 5th: Crafting with Clarity with Barbara from 3pm to 5pm on the new Create and Craft
Right, off to spend some time with Mum and Dave before they head back to the UK on Monday!
Enjoy whatever you’re up to & travel gently.
Lotsa love, Grace & Glynis xoxo
Clarity – The Home of Art, Craft and Well-Being.
Beautiful card Glynis, great demo. thank you. Tina’s parchlets are some of my favourite plates for cards. Enjoy the rest of your time Grace, with Barbara & Dave, xx
Thank-you Glynis. Pretty card. I do like Tina’s little plates. X
Love the way this easel card has been put together, really pretty. Thank you Glynis xx
What a great project, thank you Glynis for sharing the step by step with us.
Grace, have a great day with your Mom & Dave. I bet you have had a busy week catching up with them. Not long though until you will be flying over to the UK for the Open Days.
I am looking forward to them & catching up with everyone who I have ”met” over the last 2 years in the SHAC Shack. Just one problem my new varifocals have had to go back to be tweaked prescription wise so have 2 pairs of temporary £ shop glasses – 1 to read with & 1 for middle distance/computerwork. I am fine looking at things in the distance but still I have 12 days to get used to them !!
Take care & safe journeys for you all x