Happy Days Clarity Days! A Step-By-Step Project by Josie Davidson – Day 2, Blog 2
Grace here…
Today we’re back in our crafty hall! Woop woop! And everyone is creating away. A particularly gifted woman has graced us with her talents today!
Meet Josie Davidson…

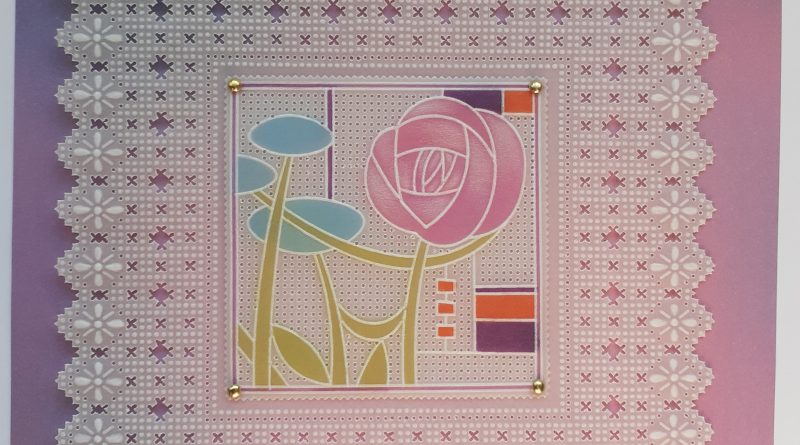
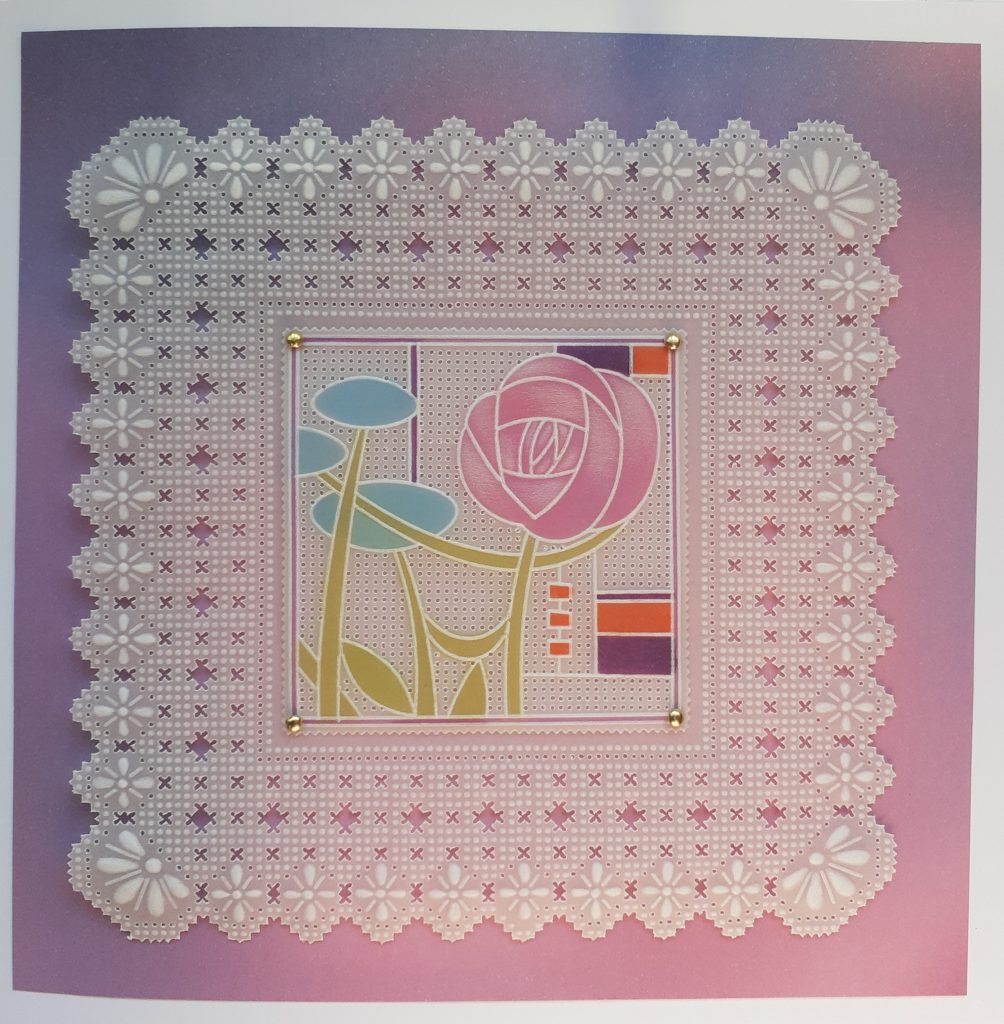
Today, Josie has put together a fab step-by-step for us, using the Diana Lace Border Grid. Enjoy!
INGREDIENTS
- Cut out a square using the fourth die from the centre of the die set and emboss the corresponding lines from the matching Groovi plate
- Emboss the design from the Art Nouveau plate in the centre
- Perforate every hole in the background of the design using the straight grid plate
- Lightly emboss areas of the design with large ball tool
- Colour on the back using Pergacolours exclusive

TO MAKE THE LACE BORDER
- Place your lace border grid into your platemate with the side which says ‘Emboss this side up’ facing you. Use Groovi tabs to secure the plate into your platemate – this will prevent it from moving while you are working.
- Place your parchment over the plate and secure with Groovi tabs on as many sides as is possible – you will see from the picture that I have aligned the bottom and sides of my parchment with the edge of the Diana plate, by doing this you know that your parchment is straight.
- Rub the parchment with a tumble dryer sheet and begin to emboss the outer and inner lines of dots, add some of the dots between these lines plus the teardrop shapes using your number 2 Groovi tool or Pergamano 1.5mm tool, these will act as registration marks when you come to line it up

4. To make sure that you have the correct size of border to fit your centre design, place it into the centre and then you can work the inner line of dots around it
5. Once you have embossed one corner, turn your work and line the dots you have made up with the ones on the plate – you will find they slot into place. Once you are happy that they are in the correct place secure your parchment and work the next corner. Carry on around the design until you have a full square.

6. You can now complete the rest of the design. The lines between the teardrop shapes are embossed with the No 1 Groovi or Pergamano tools

7. When all of the embossing is finished, remove your work from the plate and flip the platemate with the Diana plate still attached inside it completely over, you should now be able to read ‘perforate this side up’.
8. Align the holes on the plate inside your embossing and tape the parchment securely to your plate. You can perforate using the 1, 2 or 4 needle tools, whichever your find easier. When you have worked one corner turn the work around and you will find the holes you’ve made will slot back into the holes on the grid so making it easier to get them in the correct place

9. Once all of your perforating is finished you can start on embossing the teardrop shapes. Work on your embossing mat and start with the largest ball tool you can fit into the shape, gently emboss the area. The larger teardrops in the corners will take at least 4 lots of gentle embossing to get them white, you will get the smaller ones white with less embossing but take your time and don’t press hard otherwise you are likely to crack the parchment.

10. When all of the embossing is complete you can work on the picot cutting. You will find a guide on the back of the leaflet which came with your plate showing how each area is cut. If you are unsure on how to cut then perforate the shapes onto scrap parchment and practice before starting on your masterpiece
11. When all of the inner design has been worked you can picot cut around the edge. Picot cut the wider/diagonal gaps first and finish off with the smaller gaps – this will give you a much neater finish
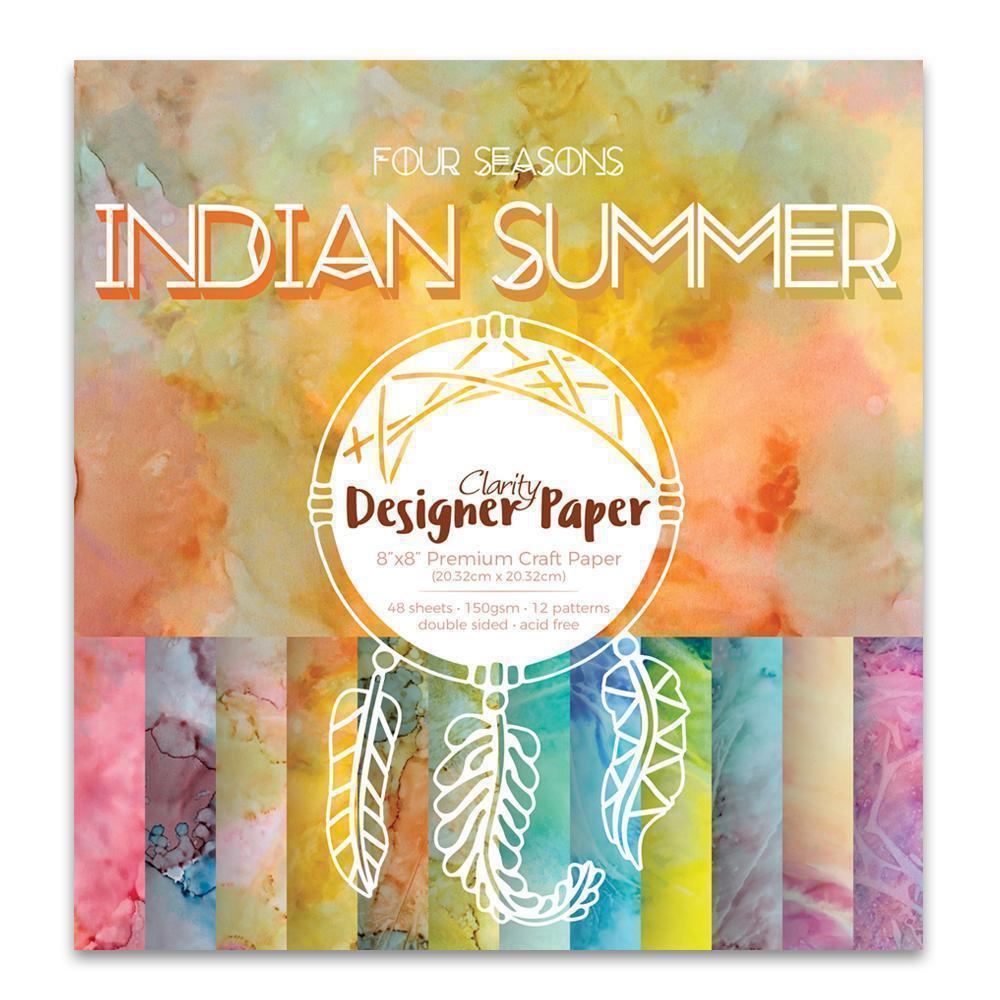
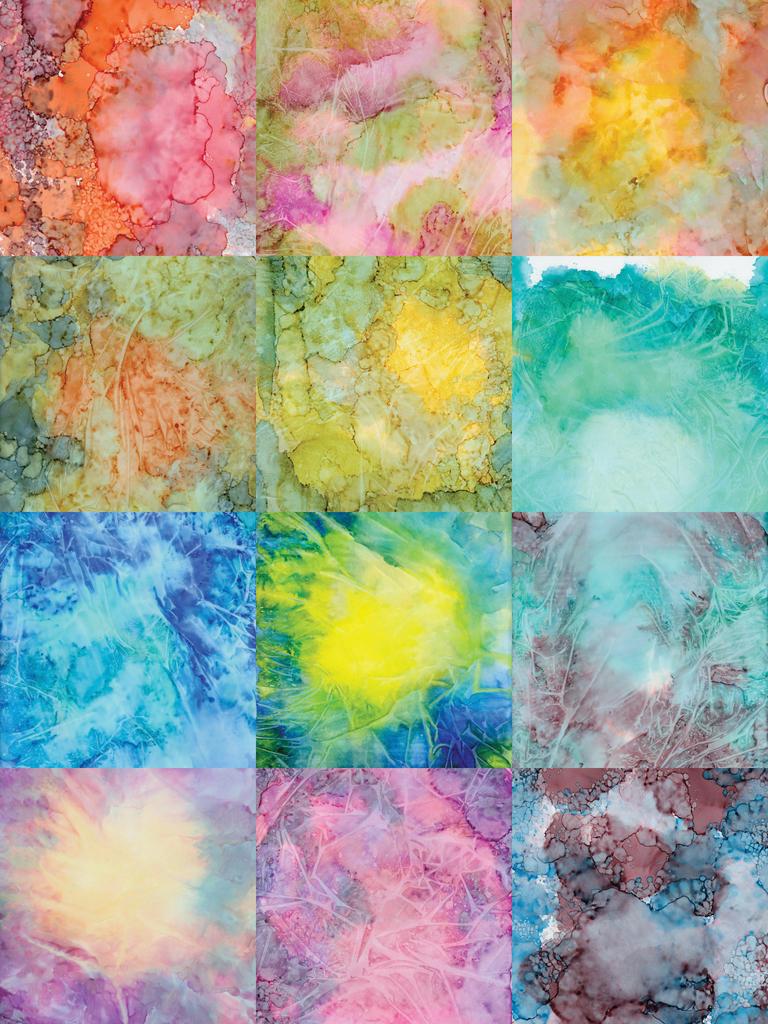
12. Cut a piece of Indian Summer designer paper to fit behind your lace border and secure the centre panel into your lace border with Pergamano brads going through the two layers of parchment and the paper. Attach to your card blank with double sided tape

Wow! Thank you Josie! Such a beautiful card. Josie teaches Groovi classes with Chris Walker and they do a retreat in Scarborough twice a year. They have a facebook page called Scarborough Groovi Retreats, so if you’re within traveling distance of Scarborough you should absolutely check them out!
Prize time! Please leave a descriptive word for Josie’s card in the comments section below, to be in for the chance to win a free pack of Indian Summer Designer Paper
You’ll be put into a raffle, and I’ll pick 5 names! 🙂
In the meantime, don’t forget that all of the items Josie has used, as well as our entire range, is on a 25% off sale until Monday!
I hope you’re enjoying the virtual open days! We certainly are.
Clarity Matters. It really does.
Lotsa Love, Grace xoxo
Clarity – The Home of Art, Craft and Well-being.
Fantastic
Beautiful and Rosie x
Stunning
Graceful
Clever 😉
Di- vine
Classy 😍
Delicate
Inspiring
Nouveau!
Beautiful delicate colourful.
Enchanting
Bonnie
Fabulous!
Minimalist
Awesome!
Stunning
Extraordinary.
Perfect.
Perfection!
Gorgeous
Fandabidozi !!
Artful
PergaMagic!
Stupendous!
Striking
Elegant!
Rosielicious
Beautiful
Elegant
Absolutely Blooming Marvellous
Nouveaulicous
Sensational x
Stunning!
Intricate
Graceful
Stunning!
Rosielicious
Stupendous
Elegant
Delicate detail
Delicate. Stunning artwork from Josie.
Do-able! (by novices and experienced crafters alike, I mean)
Intricate
Elegant
Fresh
inspirational
Flowersome
Timeless
Dainty.
M x
AMAZING !!!
Beautiful.
Stunning!!!
Inspirational
Exquisite!
Mac-rosie!
Lacy
Amazing
Macintosh Magic !
Inspiring
meticulous
Gorgeous x
Simple Elegance (oops 2 words)
Inspired Macintosh, had to be two words x
Inspiring. X
Stunning ! Loads more ! X
Awesome!!!
Beautiful x