Clarity Blog Tutorial: 5 Needle Tool (Part 1)
Hello hello! Grace here.
I hope this finds you safe & enjoying your weekend.
We enjoyed Lesson 4 this week of The Pergamano Summer School! Linda showed us the basics of the 5 Needle Tool. If you missed the class, then you can either catch up HERE or watch below:
Have you been enjoying Summer School? We have! So much to learn.
I’ll hand you over to Glynis…

5-Needle tool (Part 1)
Ingredients
Pergamano Handbook for Multi-Needle Tools Volume 1 by Linda Williams (PER-BO-70291-XX)
Linda’s Bumble Bees Groovi Plate A5 square (GRO-AN-40816-03)
Nested Arch Tags Groovi Plate A5 (GRO-PA-41465-04)
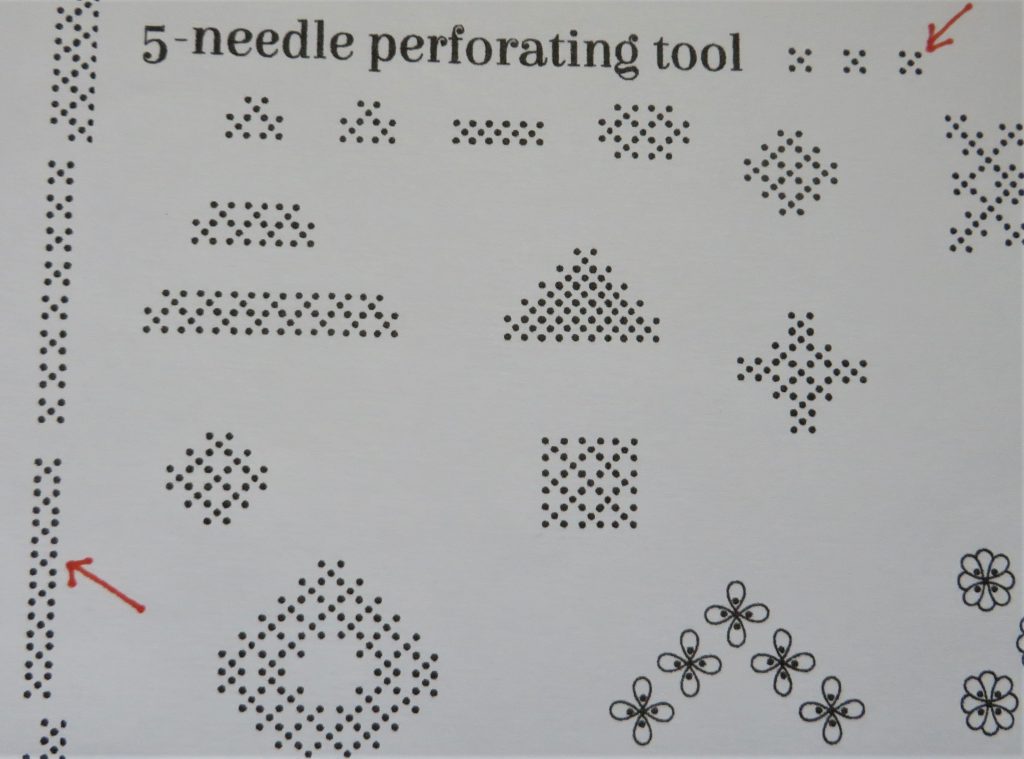
5-Needle Perforating tool (PER-TO-70019-XX)
1.5mm Embossing Ball tool (PER-TO-70004-XX)
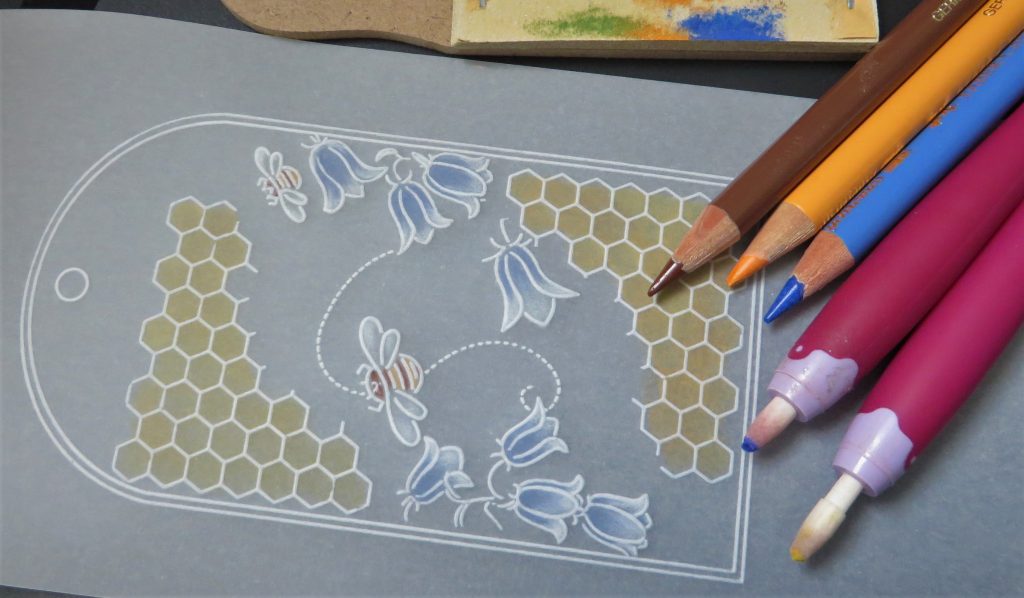
Faber-Castell Polychromos Pencils (ACC-PE-30797-XX)
or Perga-Liner Pencil B (PER-CO-70063-XX)
Blending nibs (PER-AC-70299-XX)
Tools from the starter kit
A4 Translucent Perforating mat (GRO-AC-40307-A4)
A4 Translucent White Super Foam (GRO-AC-40603-A4)
Pergamano Sticky Ink (PER-AC-70134-XX)
Pergamano Mapping Pen (PER-TO-70039-XX)
Perga-glitters (PER-AC-70252-XX)
Perga Glitter Bundle available (PER-70305-XX)
Method
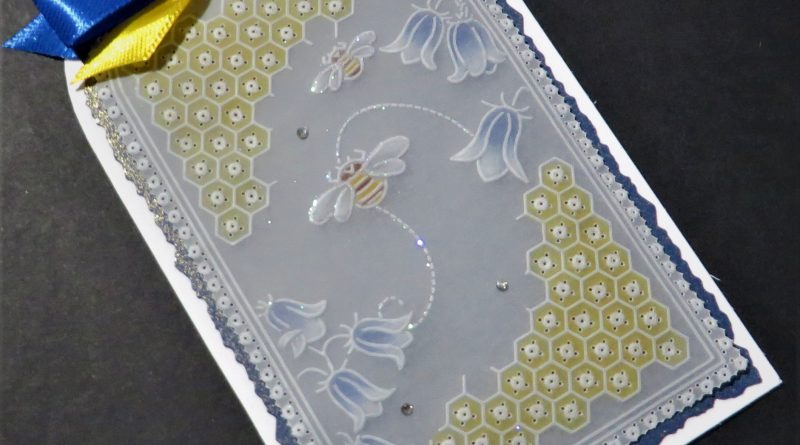
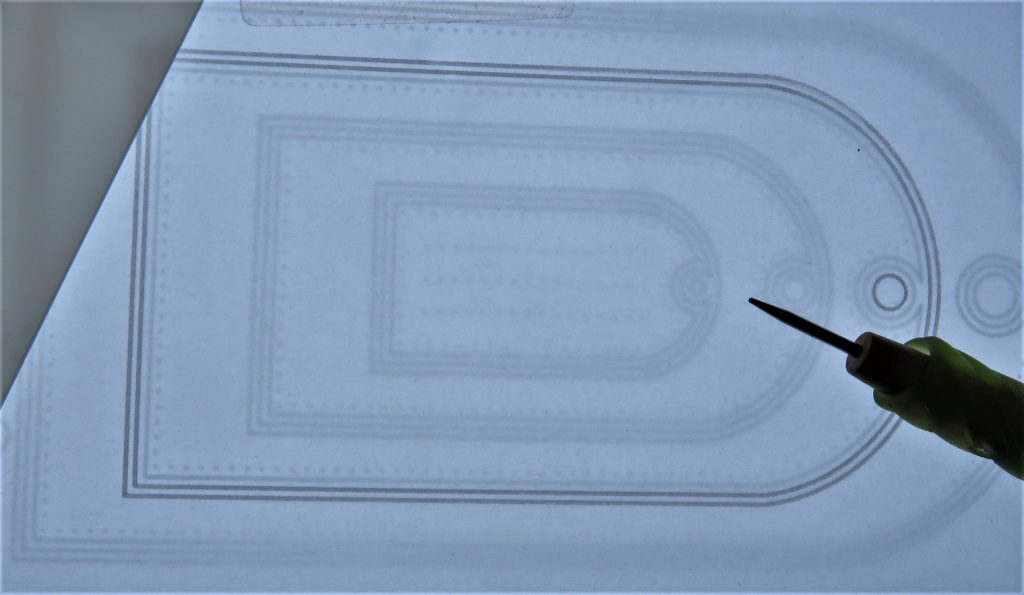
Step 1. Trace out the 2nd largest tag from the Nested Arch tag plate.
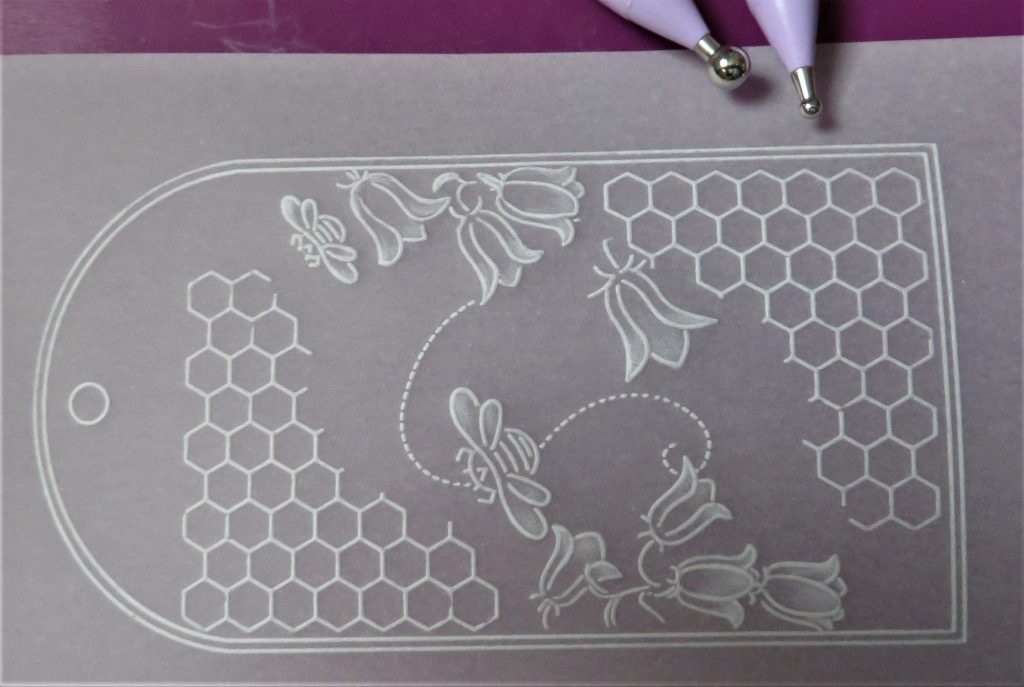
Step 2. Line up the tag onto Linda’s Bumble Bees plate so that you have the honeycomb at the bottom left of the tag, then turn the tag around so that you have some at the top right-hand side. Fill in with some flowers down the sides and add a couple of bumble bees and a trail.

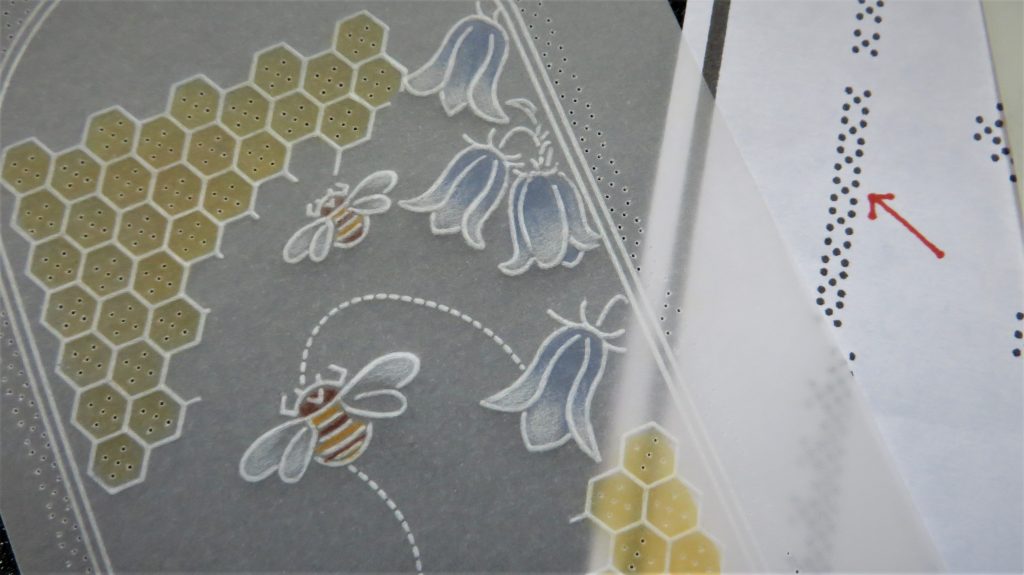
Step 3. The 5-needle designs we are going to use come from Linda’s Handbook, pages 22-25. I have marked which designs will be used here with a red arrow.
Step 4. Emboss petals of the flowers and bees’ wings – just enough to add some highlights. Use the 3mm embossing ball tool or the number 4 tool from the starter kit. Also the 6mm ball tool in larger areas.
Step 5. It is important that we add our colour at this stage rather than after we have perforated, as it would make blending very difficult if we leave it until afterwards. The flowers have been coloured in blue – not over the embossing, then dry blend it with a blending nib. The honeycomb has been blended with oil on the nib.
Step 6. Use the 5-needle tool; line it up carefully into the honeycomb shapes and with the shallow translucent foam under parchment. Remember to use the dots on the handle of the tool to help you keep it straight. Then go around the edge, following the pattern on page 25. You can do all of this free hand, but if you need to put the pattern underneath the parchment and perforate through, matching the needles to the dots.
Step 7. With the 1.5mm embossing ball tool, emboss around the dots in the centre of all the 5-needle tool perforations. Don’t worry that you might flatten the holes down as you emboss. They will be opened up again when you come to re-perforate on the deeper pricking mat.
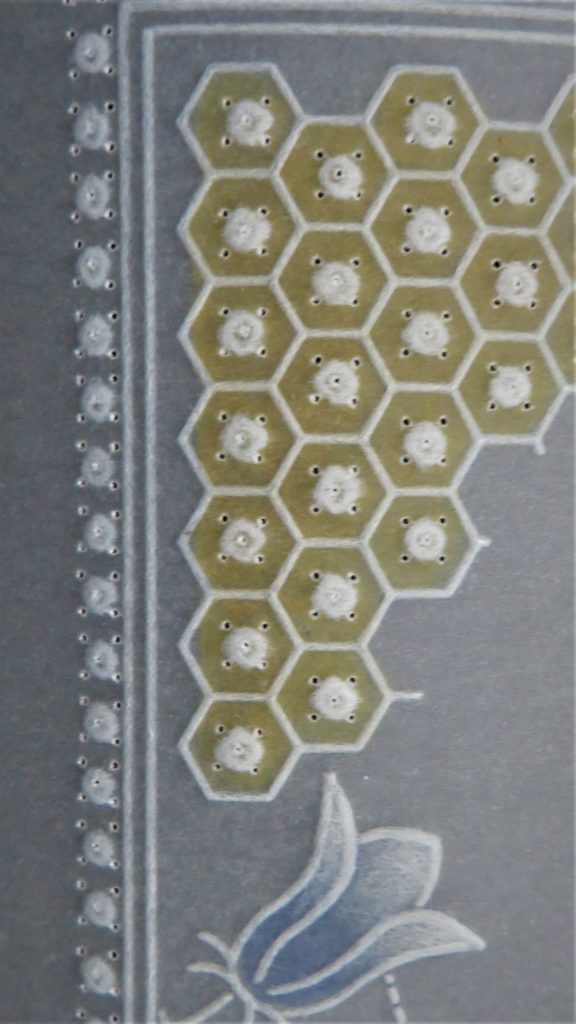
Step 8. Now re-perforate with the 5-needle tool, making the holes nice and round. Just make the needles go half-way in so that you don’t split the parchment in between the holes. Then snip the work out. *Do the ones between the widest gaps first and then go around and snip the rest.
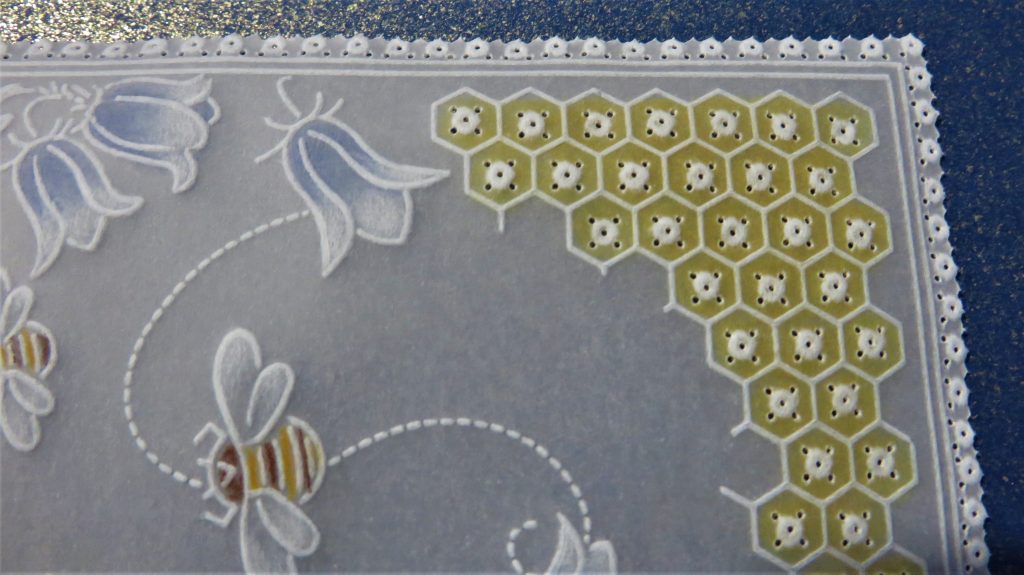
Step 9. Mat and layer the tag onto a piece of backing card and carefully cut around the tag shape. I have used deckle edge scissors to do this. Then backed it with a toning card. Decorate the piece with glitter, gems and a ribbon.

That is a beautiful tag, Glynis. Thank you! I love bees, as so many of us do… How nice would it be to send or receive that as a gift tag? Lovely. As usual, we have put everything that Glynis has used in one place over on the Clarity website HERE
Don’t forget that The Pergamano Summer School is on a break, but don’t worry, Paul will be back with Groovi Tuesday and going back to basics with Linda’s 123 Butterfly Plate
Available HERE
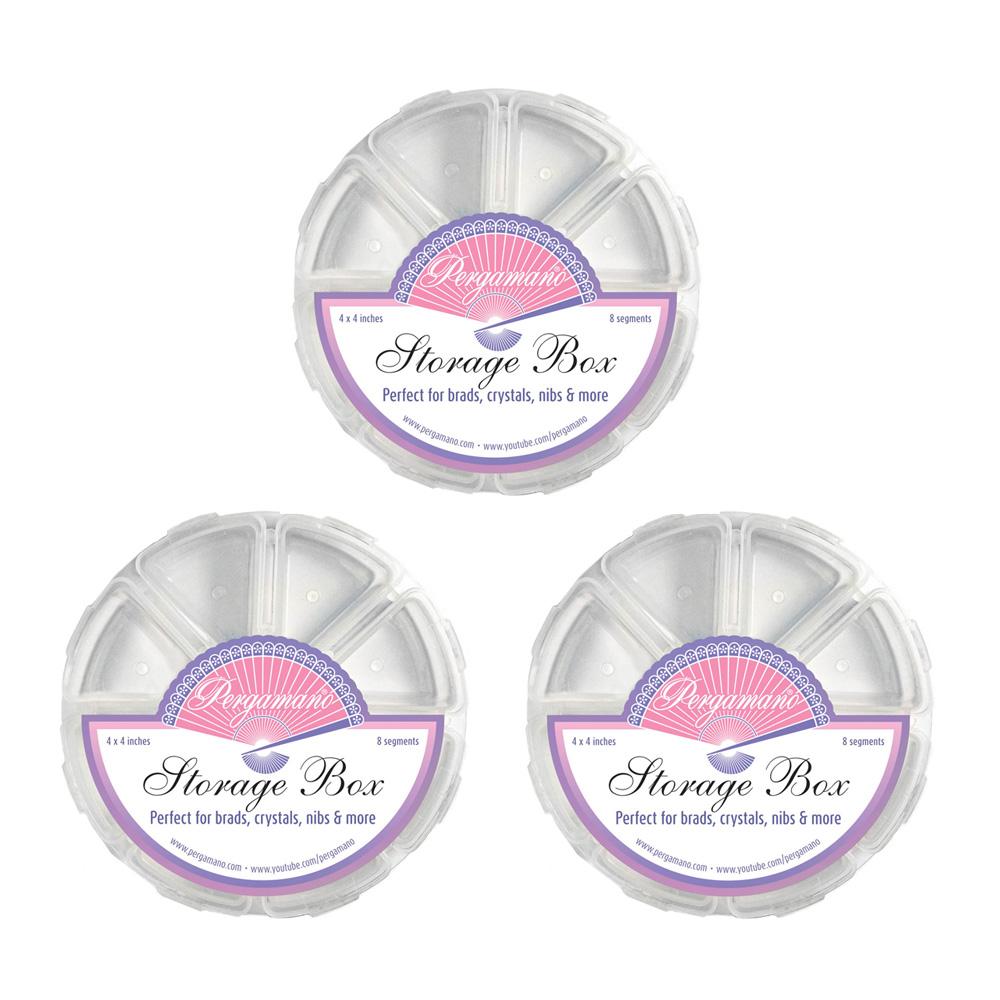
and don’t forget to check out the latest collection from Tina Cox HERE together with our fabby Pergamano Storage containers
Lotsa love, Grace & Glynis xo
Clarity – The Home of Art, Craft and Well-Being.
Dear Grace. Hope you are well, I expect your visit home seems a long time ago now. Hope your grandad is improving.
I try to watch the summer school, but so often a phone call, or FaceTime, interrupts it. So glad it is on YouTube.
I will get some more tools soon, but can’t see very well due to having a bad fall 18months ago, having tests now that the hospital is opening up more, then perhaps some good glasses.
Glynis is one of the best, love her work.
Keep safe. Xxxx
Thanks Glynis and Grace. Beautiful tag x
Hi Grace, Hi Glynis, Woweeeee !! this tutorial is amazing !! I absolutely adore this patterned tag, the embossing, colouring and 5 needle perforating is so effective, culminating in a stunning and exquisite tag, thank you.
Take care all.
Lots of love from Patricia xx
Love the effect you can get with the five needle tool so will have a go at this tag card but it might not be this week . Thank you Glynis for preparing another project for us & Grace for sharing it with us.
Hi Grace – Hi Glynis – you’ve done it again Glynis – what a superb,beautiful project – thank you for taking the time to share this – will be giving this a go very soon.
Take care & have a good week
Seta Xx