Clarity’s Matters Blog Tutorial: How To Add Colour to Coloured Parchment
Hello hello! Grace here.
I hope this finds you well and enjoying your Sunday!
We are joined today by the fabulous Jane Telford. She has been kind enough to put together a gorgeous step-by-step tutorial using some of those new Christmas plates by Linda Williams. They continue to be very popular, so we know that this tutorial will be useful for many in the lead up to the holidays! I’ll hand you over to our teacher 🙂

Hi! I love these Christmas Treasures plates by Linda Williams. I can see just how useful they will be and not just for Christmas.
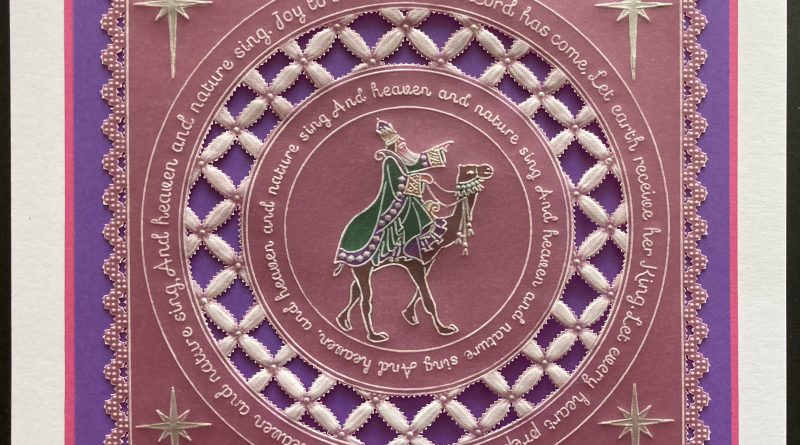
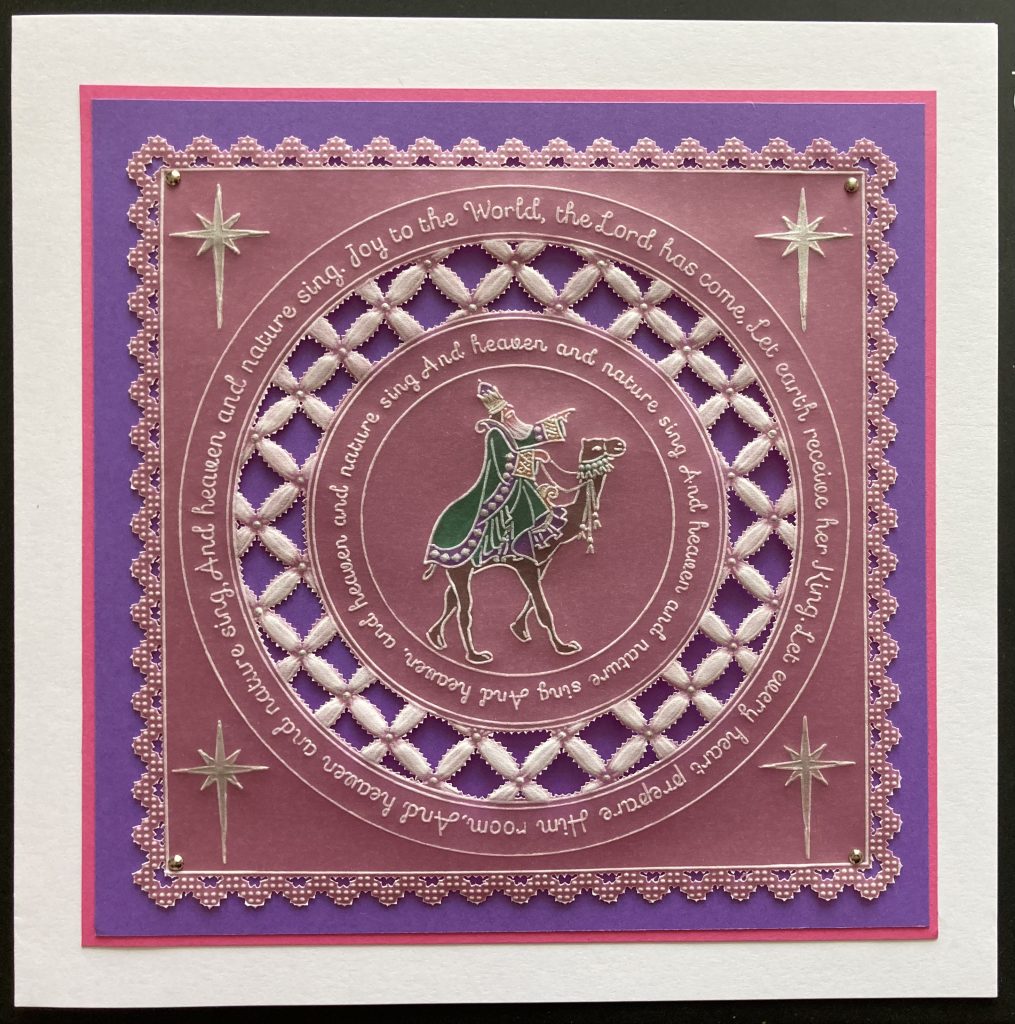
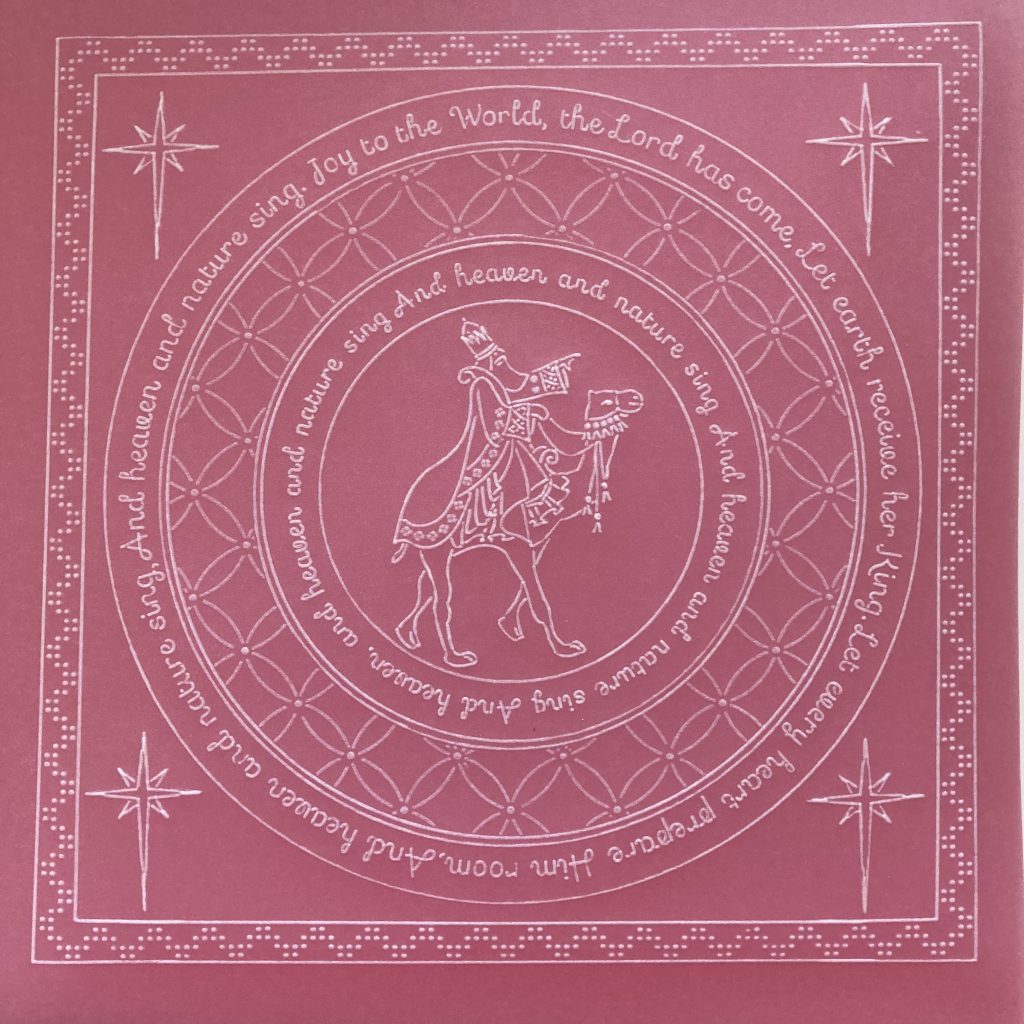
This is a project using the second set of plates. This is where we are headed…
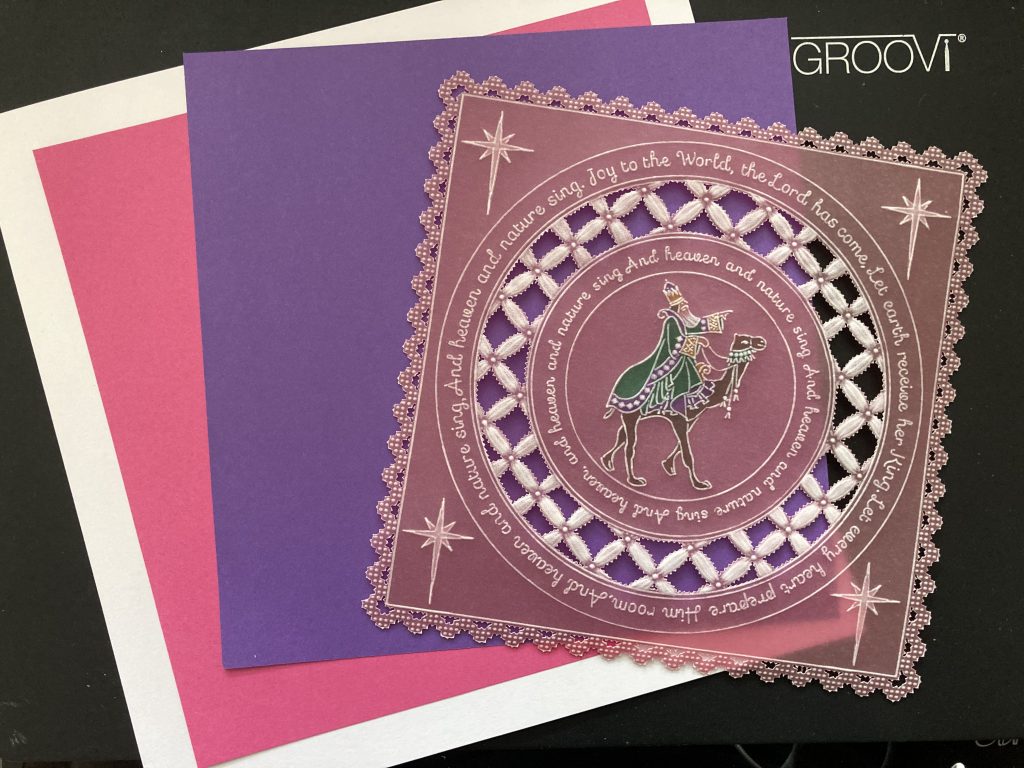
Ingredients
Linda Williams’ Joy To The World Nested Wraps – Christmas Treasures A5 Sq Groovi Plate (GRO-CH-41877-03)
Linda Williams’ We Three Kings – Christmas Treasures A5 Sq Groovi Plate (GRO-CH-42050-03)
Groovi Plate Mate For A5 Sq Grids (GRO-CO-41706-08)
Straight Basic Bold A4 Groovi Piercing Grid (GRO-GG-40528-17)
Black Dual-Purpose Groovi Mat A4 (GRO-AC-40194-A4)
Pink A4 Two Tone Parchment Paper X10 (GRO-AC-41406-A4)
Lightwave (ACC-LP-30352-A4)
Groovi® embossing tool 0.8mm – 1.3mm (GRO-AC-40026-XX)
Groovi® embossing tool 2.0mm – 2.8mm (GRO-AC-40027-XX)
1-Needle Bold Perforating Tool (PER-TO-70028-XX)
2-Needle Perforating Tool (PER-TO-70037-XX)
White Eraser Pencil (ACC-PE-30670-XX)
Perga Colours Exclusive (PER-CO-70060-XX)
Faber-Castell Polychromos Artists’ Pencil – White (101) (ACC-PE-31073-XX)
4 silver brads (PER-AC-70275-XX)
piece of purple card
piece of pink card
Ringlock Scissors (PER-TO-70041-XX)
8×8 card blank (ACC-CA-30620-88)
Pebeo Acrylic Paint 59ml – Pearl Silver (ACC-PA-31304-XX)
Method
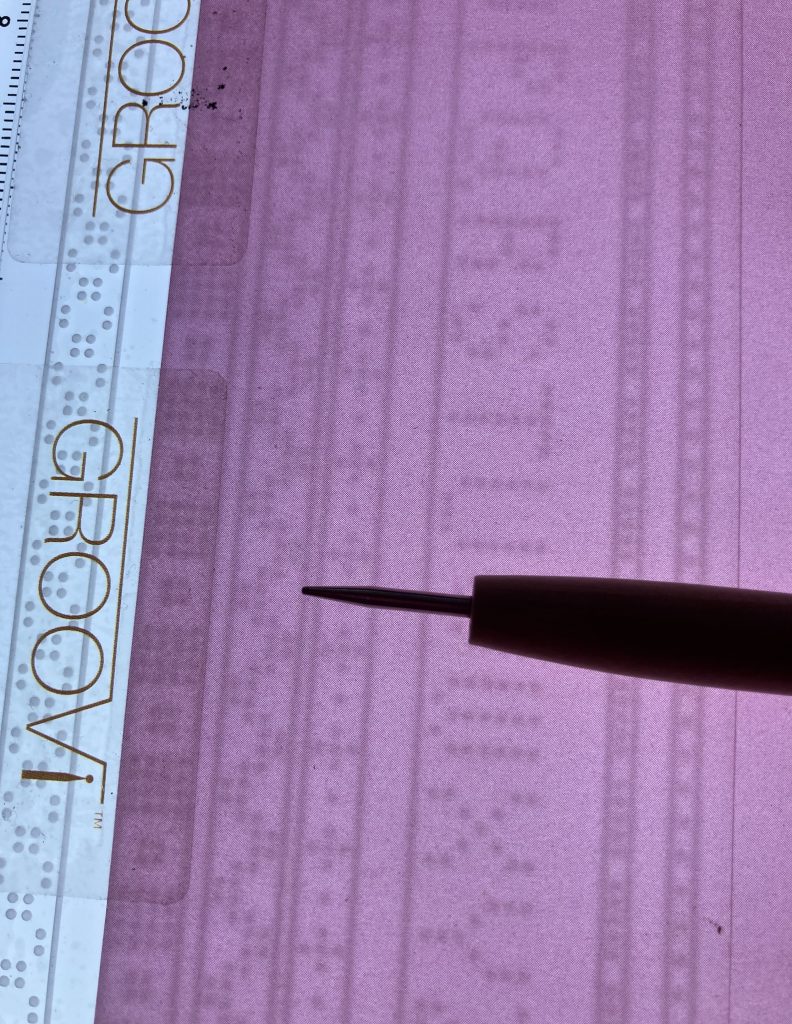
Step 1. Using pink parchment of the deepest shade, create a frame using the plate mate for grids and the pattern shown in the picture. I added the outer line as this helps line it up. This will get cut off eventually. However, if you prefer not to snip you can then trim your parchment to this line later.
Step 2. Position the square frame that you have created over the joy to the world plate, so it fits evenly.
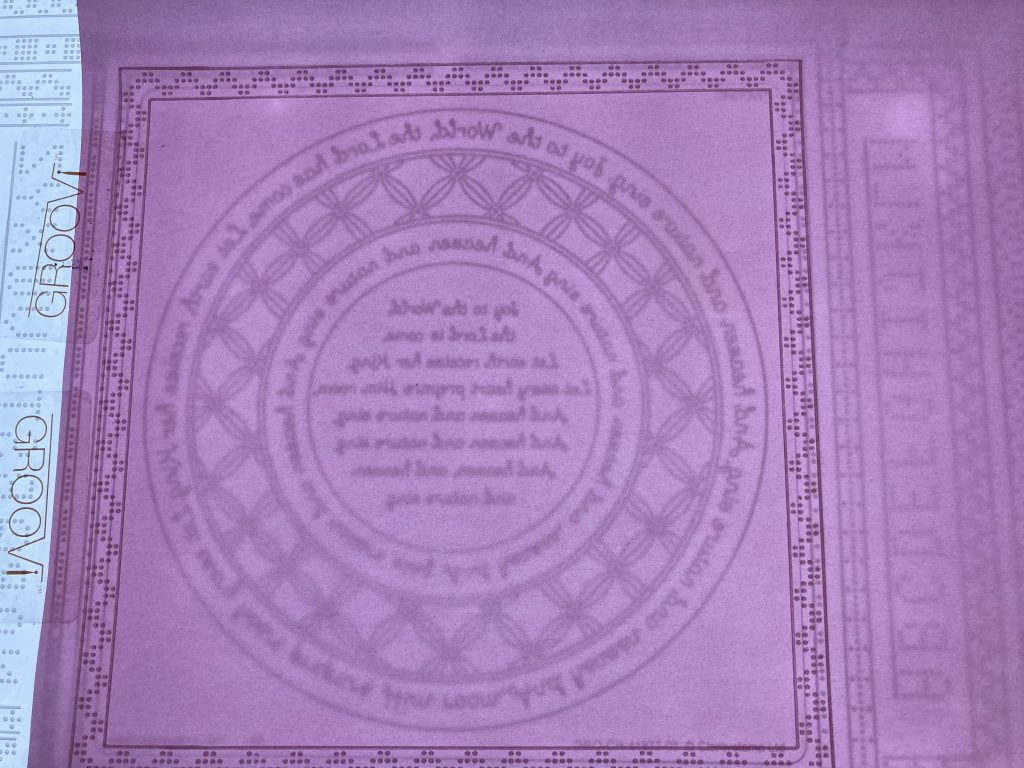
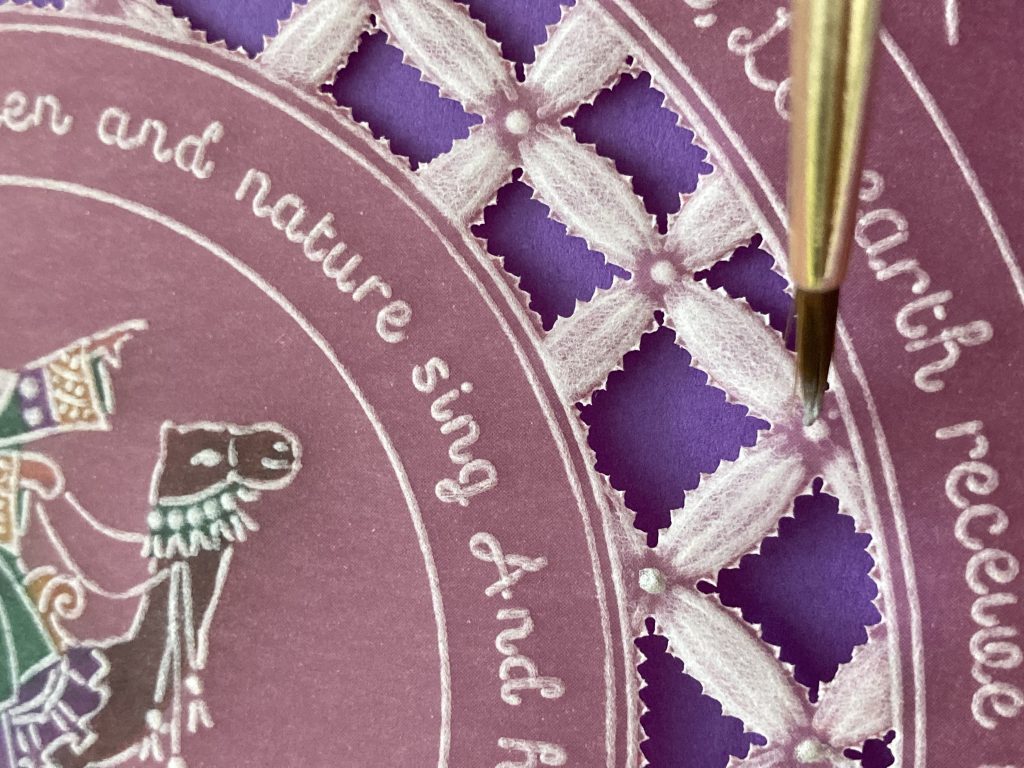
Step 3. Using the number 2 tool, emboss the parts that you want to do white work in.
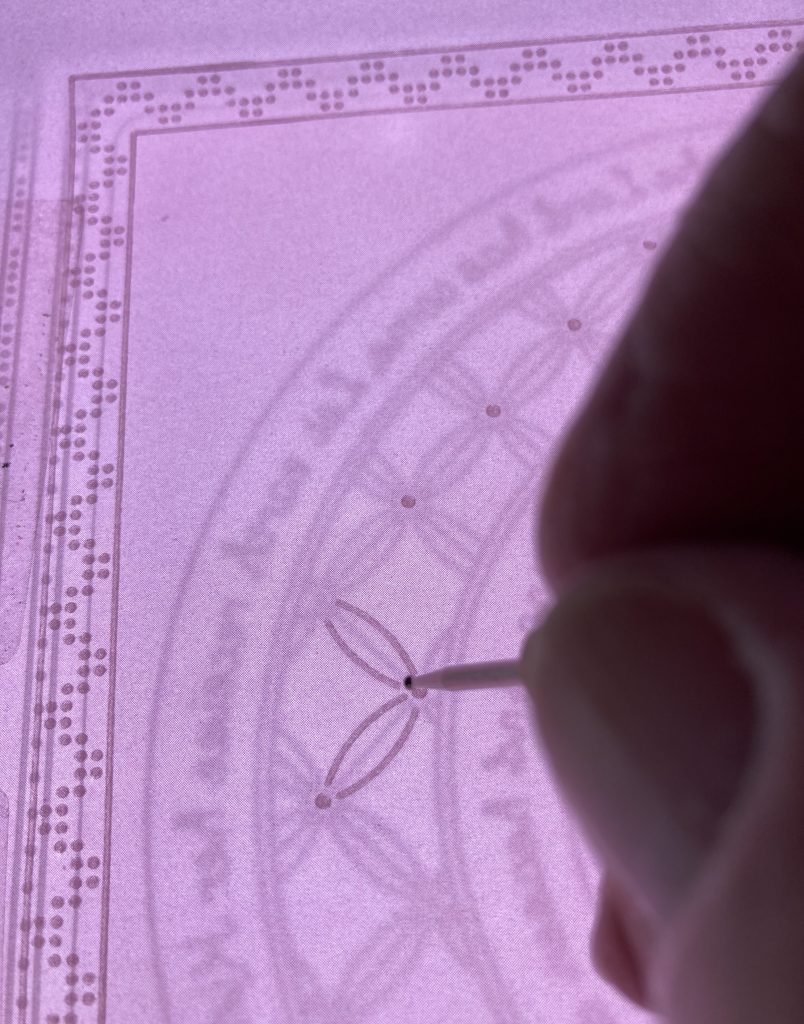
Step 4. Emboss the rest of the design using the number 1 tool. Don’t emboss the verse in the centre.
Step 5. Swap the plate for the 3 kings’ plate and emboss the king that fits in the centre circle.
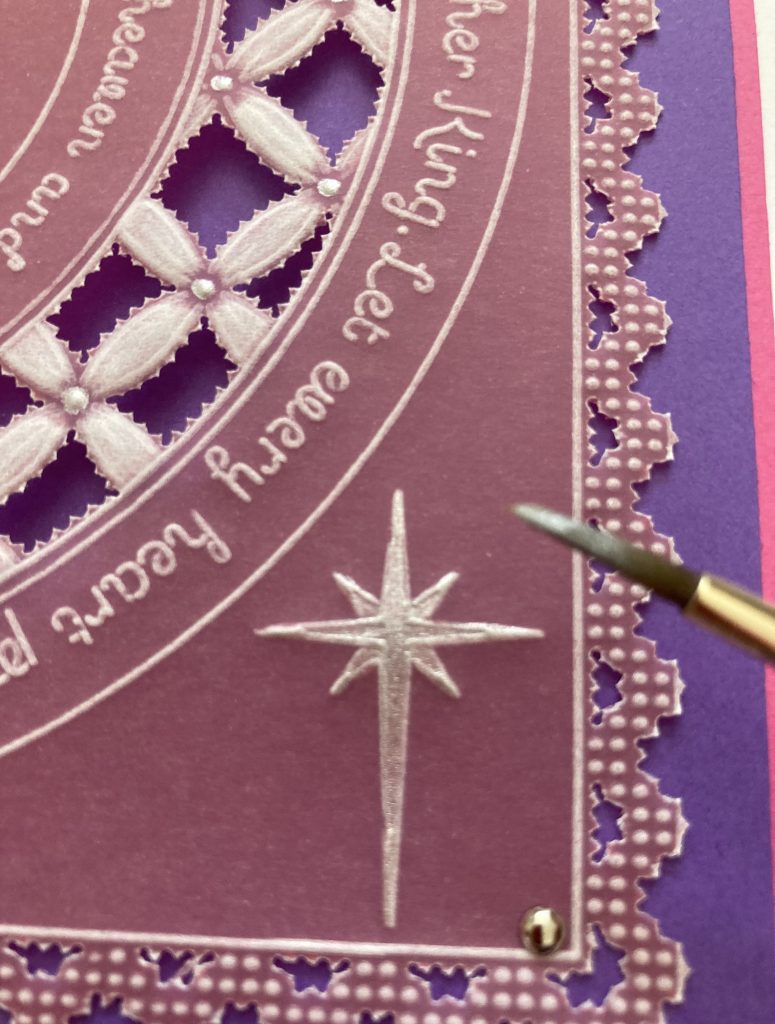
Step 6. Move the parchment so that you can add a star in each corner.
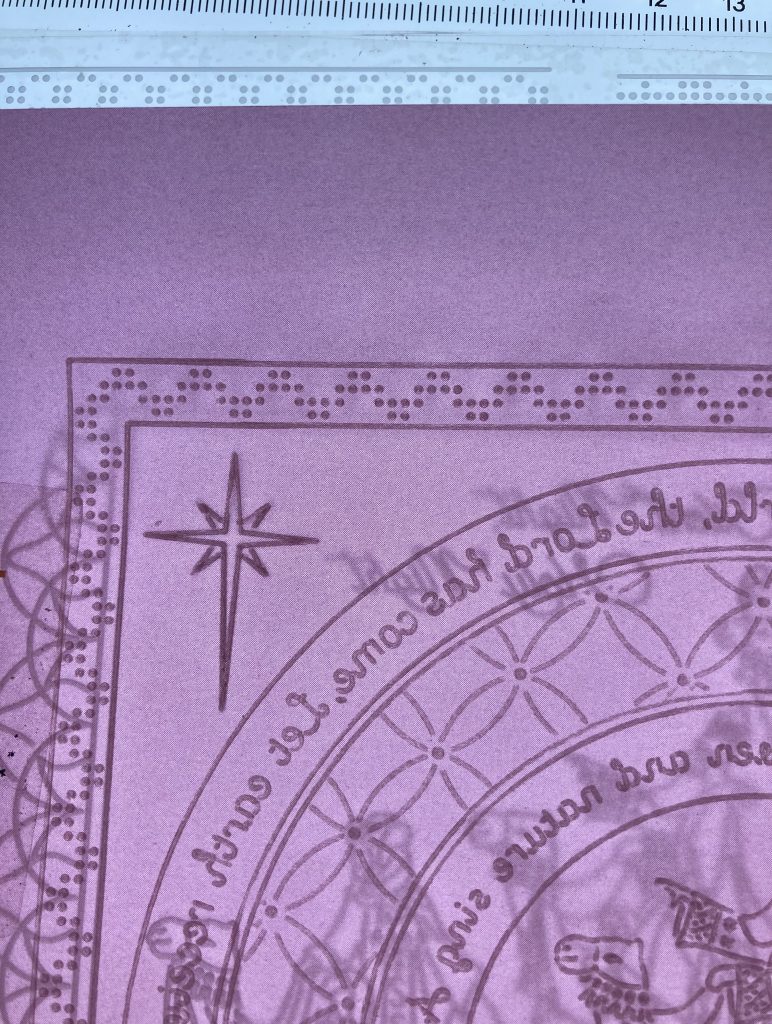
Step 7. Your design should now look like this.
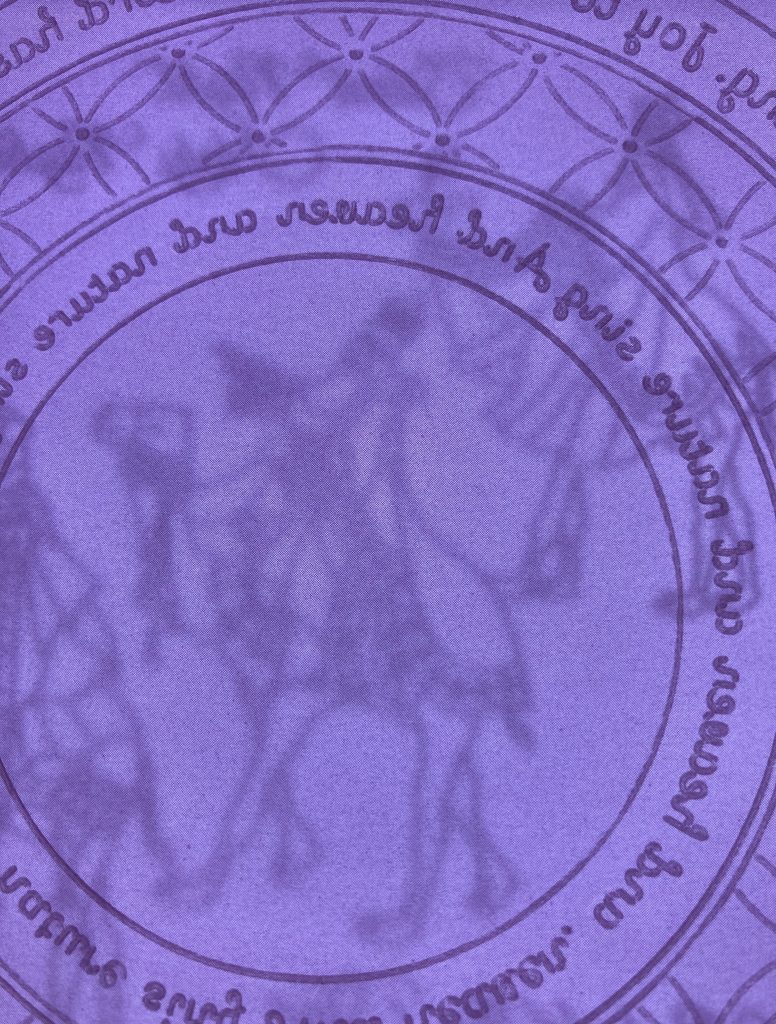
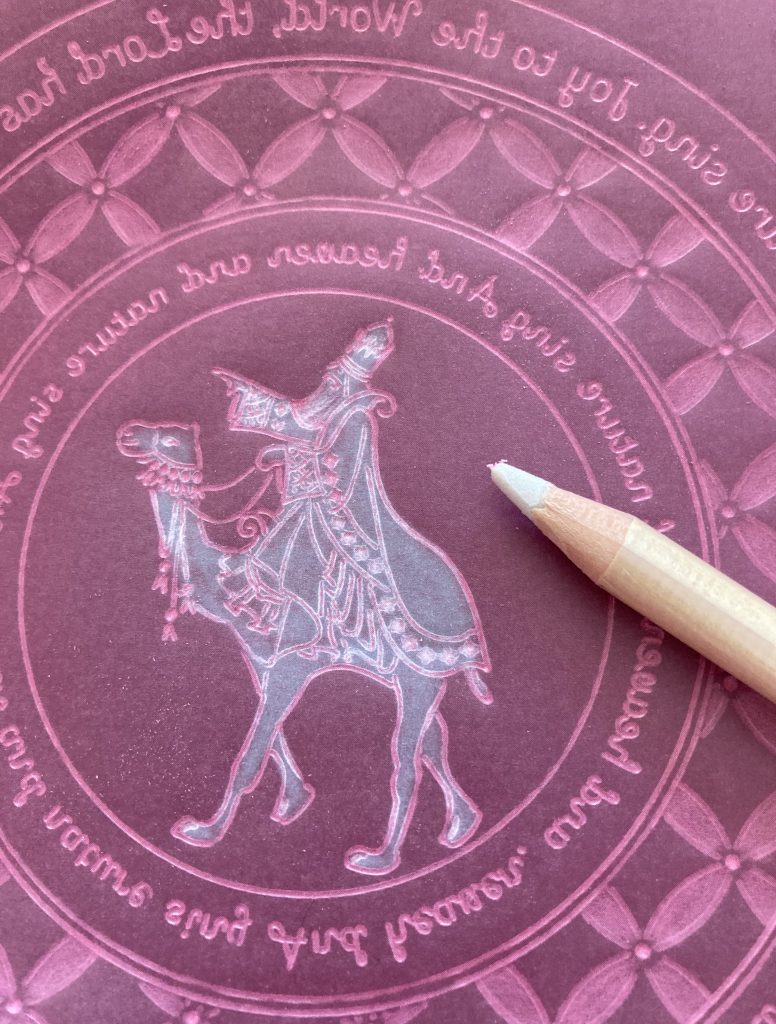
Step 8. Add whitework to the parts of the design that you want. Use a white eraser pencil and remove the colour from the wise man and camel.
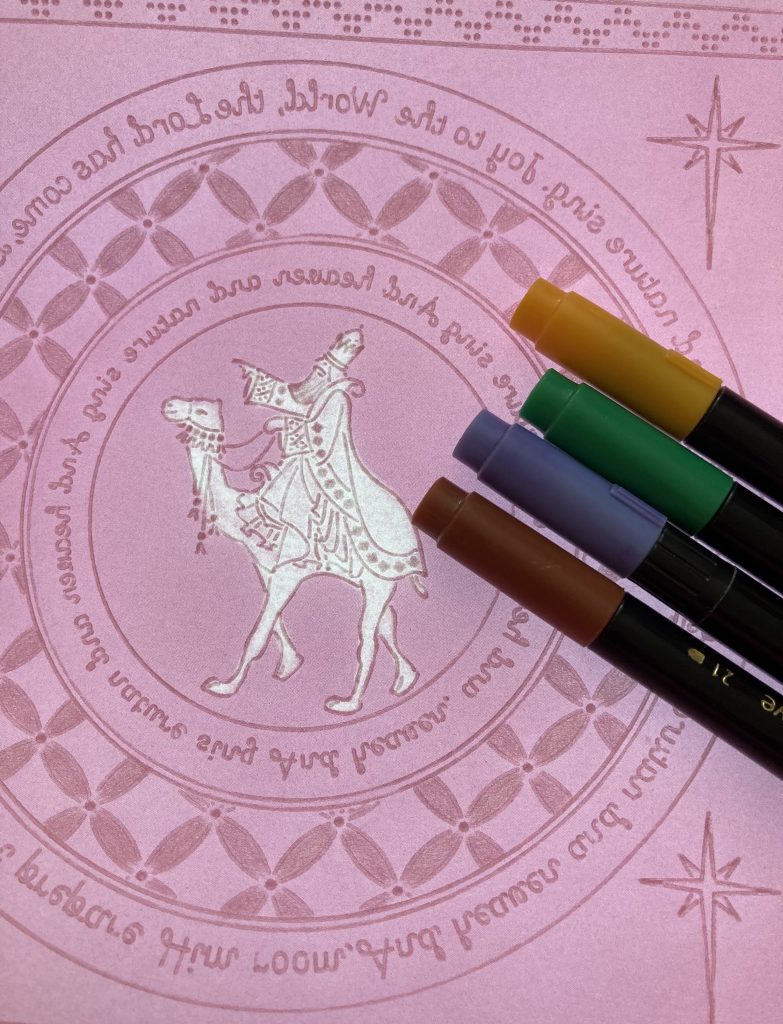
Step 9. Use Perga colours to add colour. I used numbers 2, 4, 9, 21 & 30.
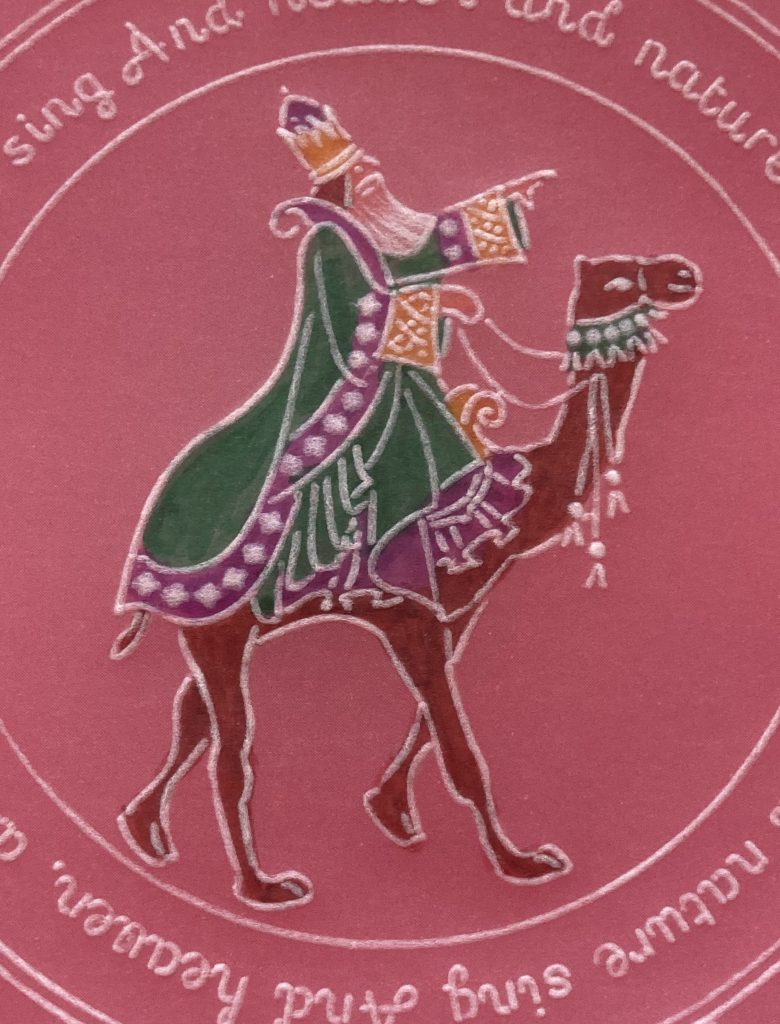
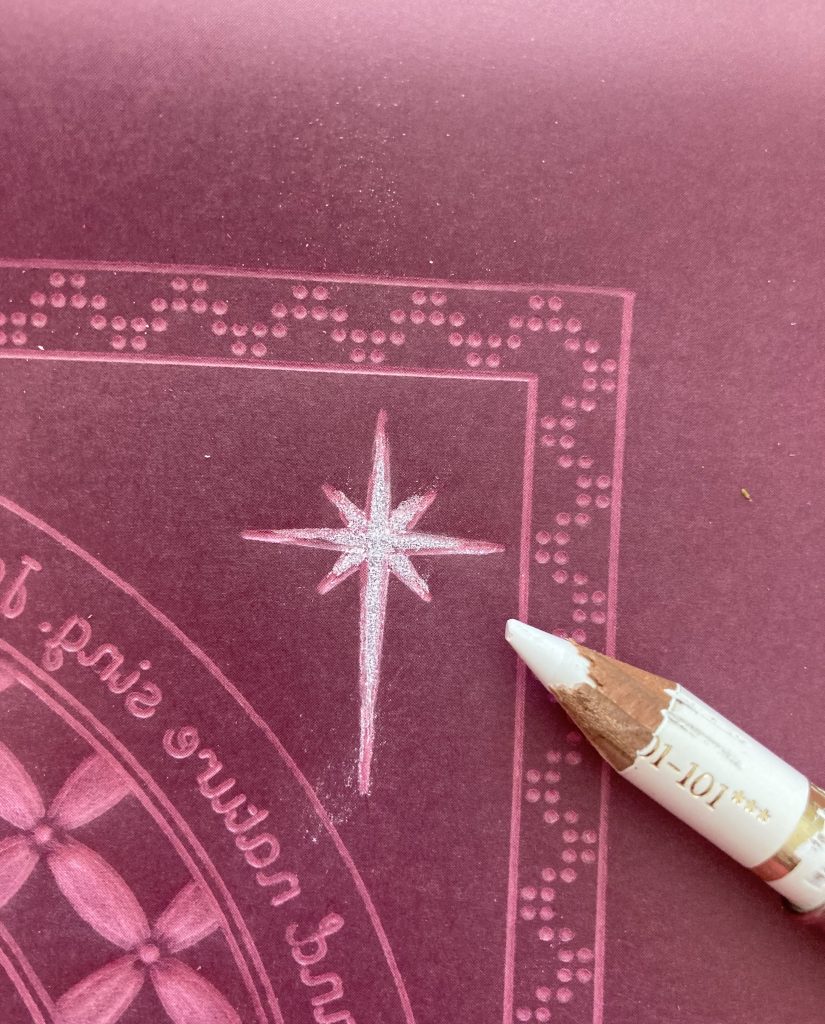
Step 10. Use the eraser pencil to remove the colour from the star and then colour with a white pencil.
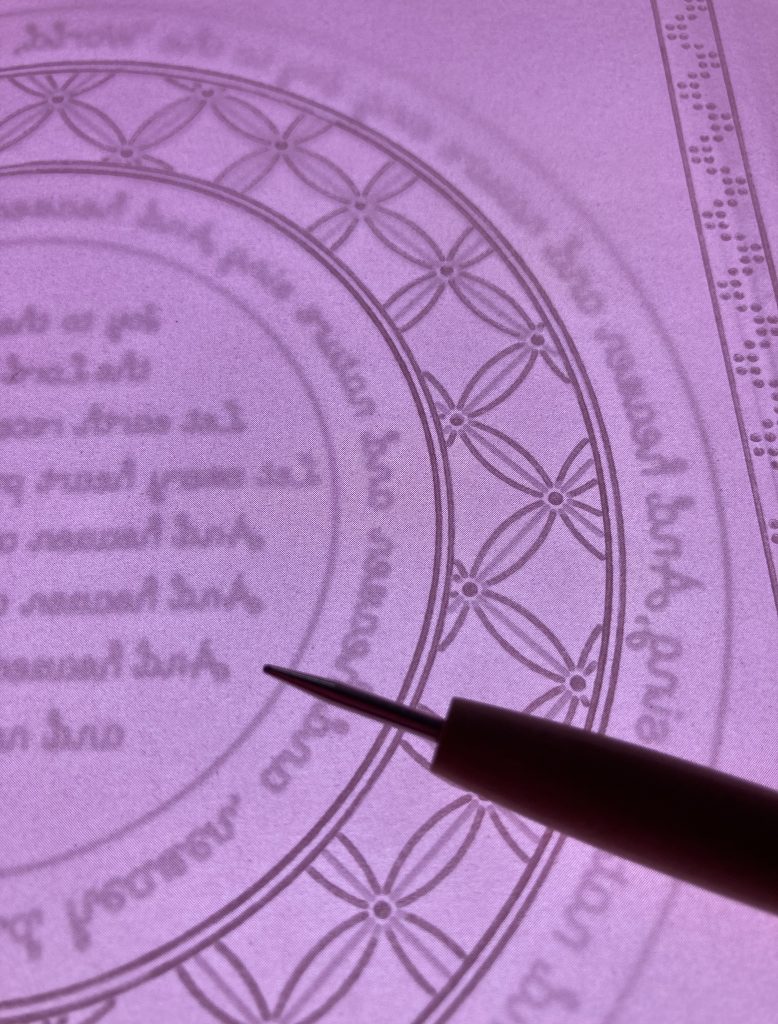
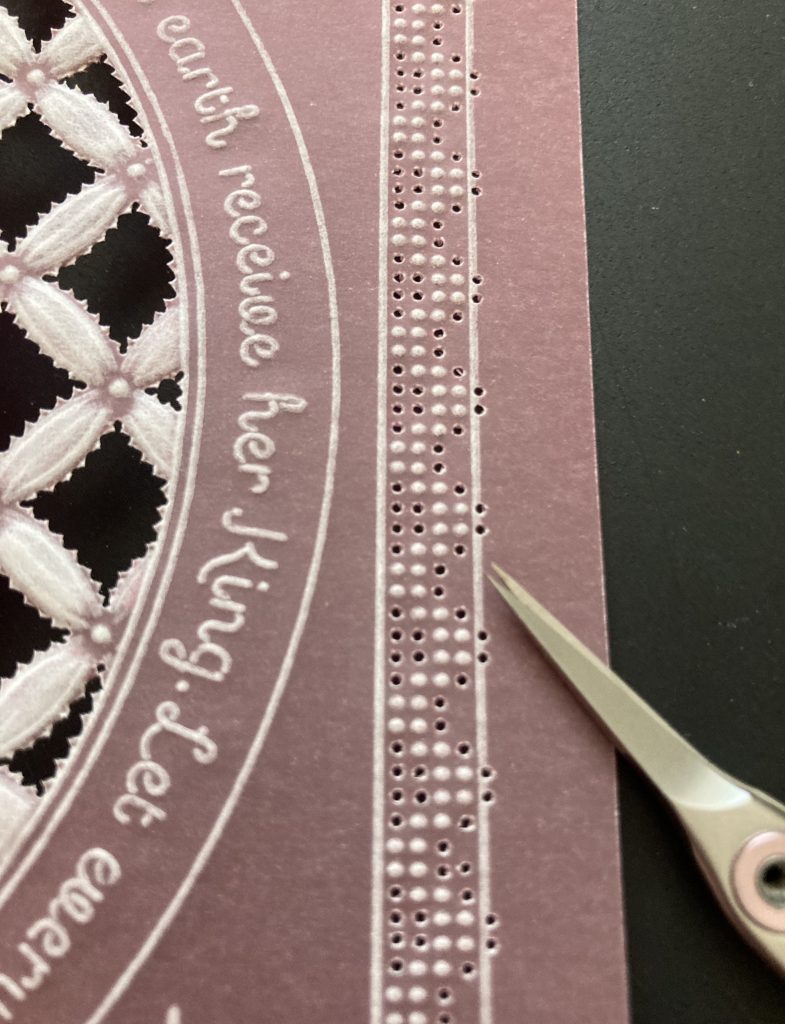
Step 11. Working on the front of the parchment, perforate around the areas you did white work.
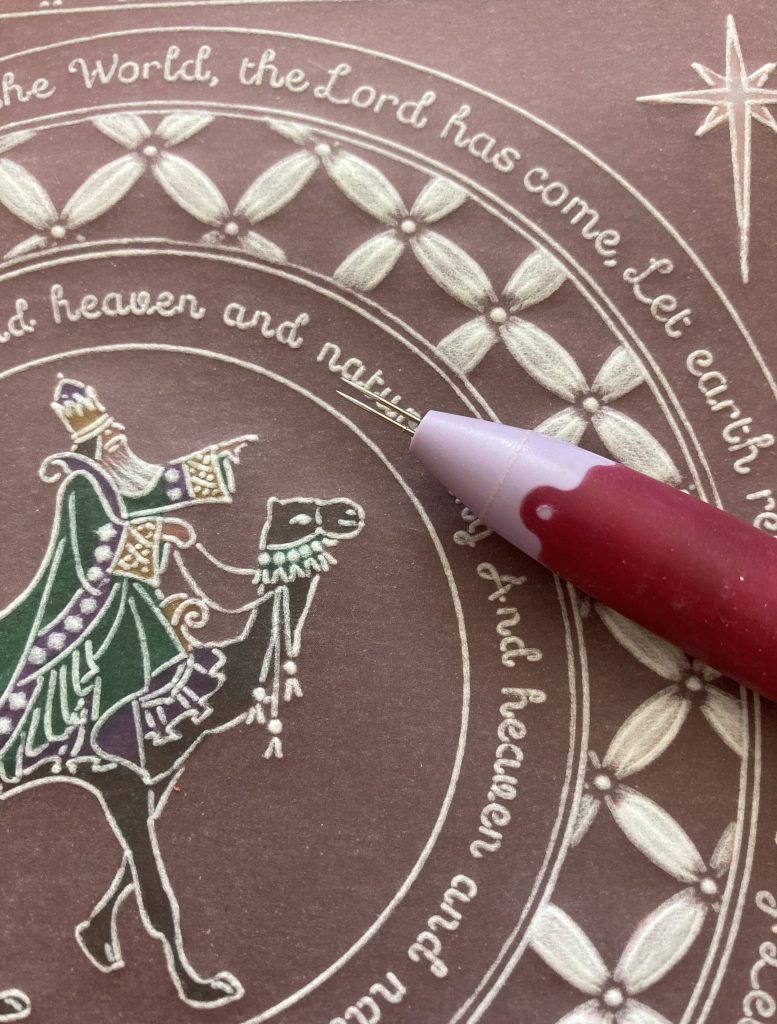
Step 12. Line up the border on the basic grid and perforate within the design and around the outer edge.
TOP TIP: Use pins to help line it up and hold it in place.

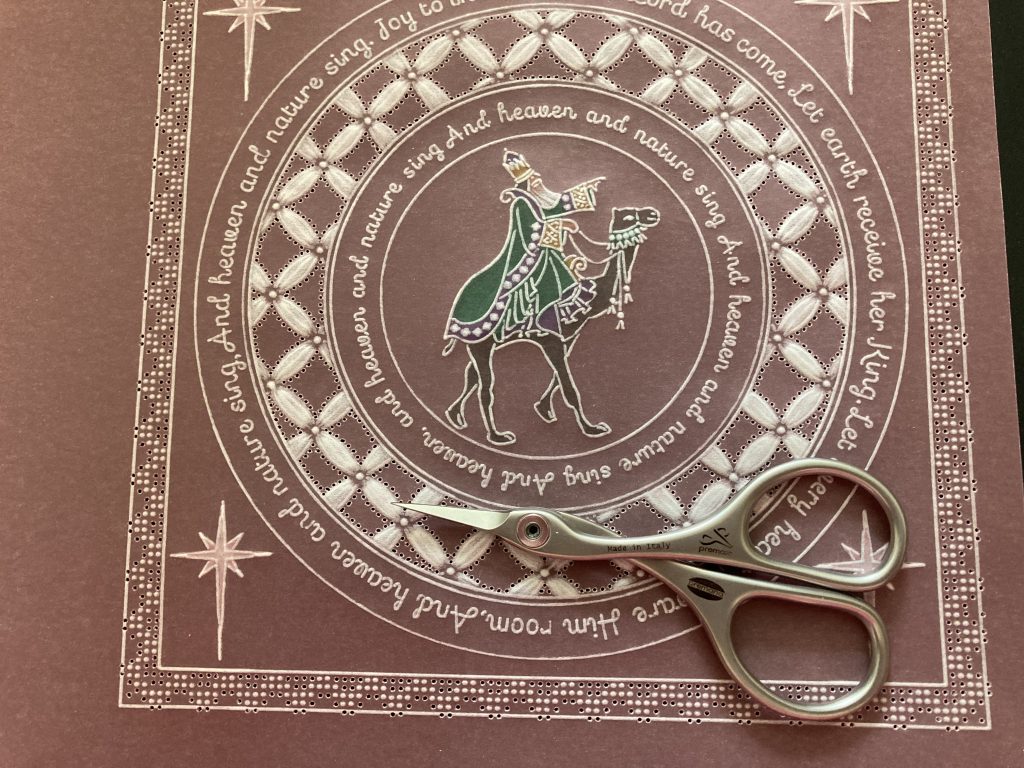
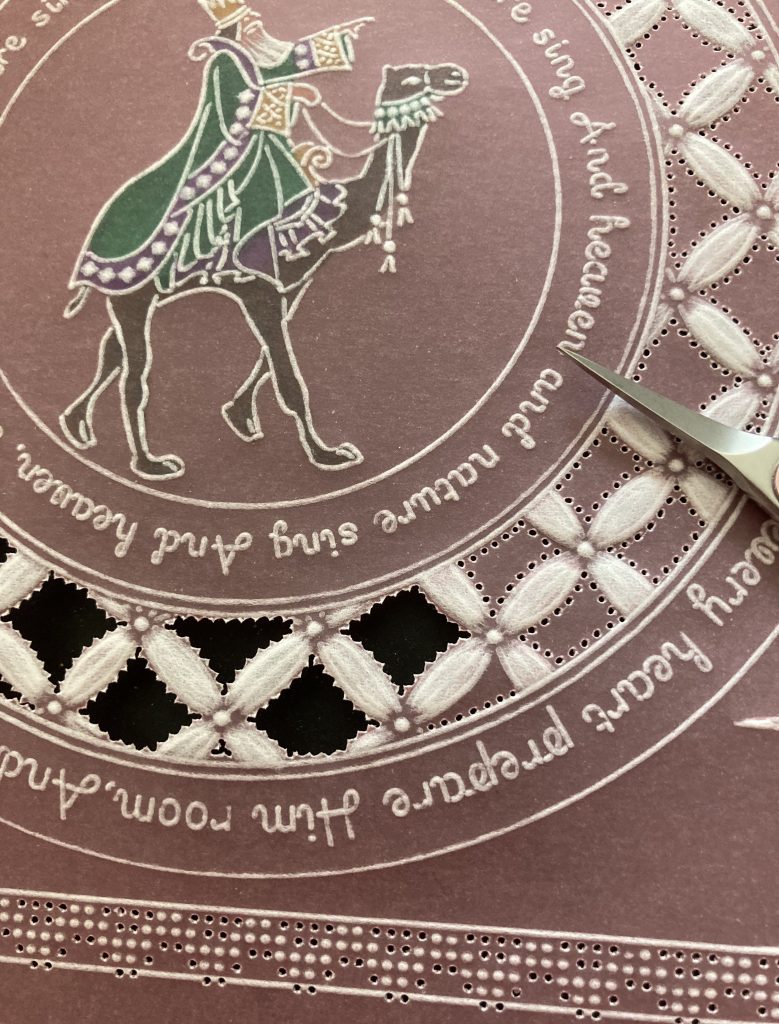
Step 13. Now snip away the waste parchment from the design. Do the central parts first, then the small areas in the border design before you snip around the outer edge.
Step 14. Cut a piece of purple card to measure 17cm x17cm and a piece of pink card to 17½ x 17½ cm. Attach the parchment to the purple card using brads and then stick it onto the pink card. Adhere all this to the 8×8 card blank.
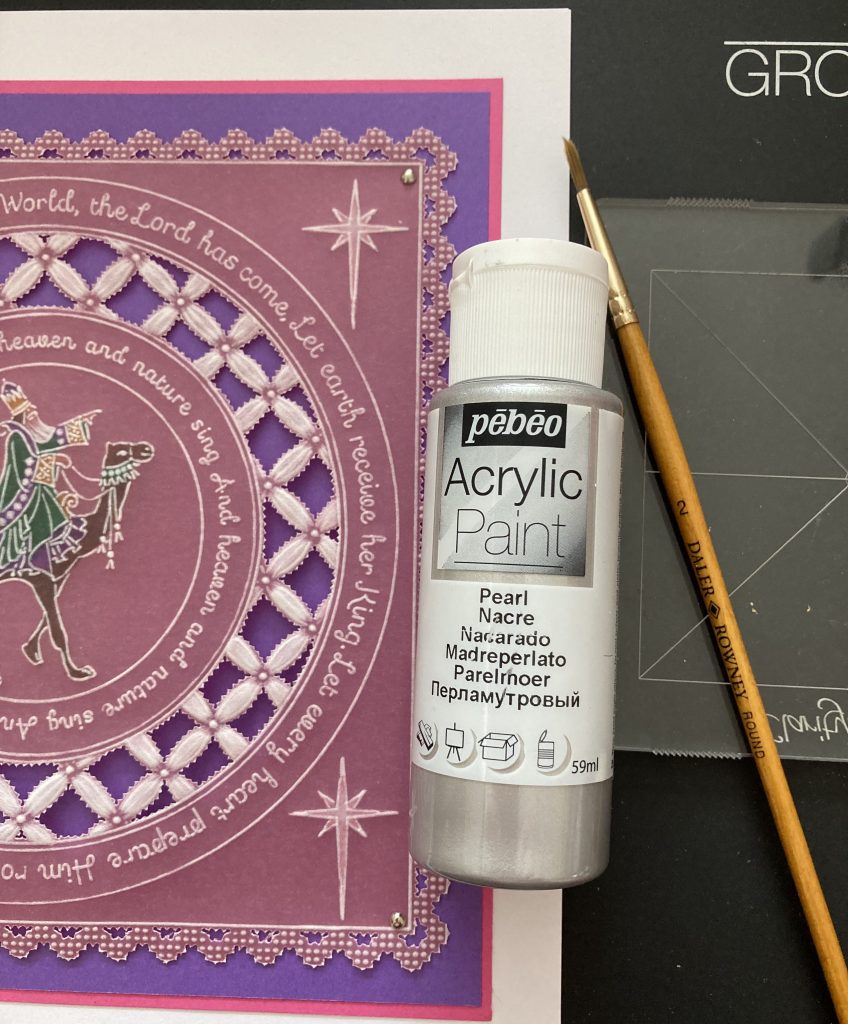
Step 15. Working on the front, use silver pearl paint and a small brush to add silver to the dots on the design, the stars and parts of the wise man and camel. Leave it to dry.
You have now completed your project…
Cor!! That is gorgeous. And surprisingly achievable when broken down into simple steps like that. Thank you, Jane, for your guidance and teaching!
Everything that Jane has used can be found on the Clarity website HERE
What’s happening at Clarity Towers this week:
Monday 10th October – SHAC Shack – 10am Live on Facebook and YouTube
Tuesday 11th October – Groovi Tuesday with Paul – 10am Live on Facebook and YouTube
Thursday 13th October – SHAC Shack – 10am Live on Facebook and YouTube
Thursday 13th October – The Pergamano Show on Create & Craft with Tina – 11am & 3pm
Travel gently, friends.
Lotsa love, Grace & Jane xoxo
Clarity – The Home of Art, Craft, and Well-Being.
Wow !!! Thank you.
Beautiful card! Would never have thought of the pink for the background colour- but it works so well! Thank you , Jane.
Great project. Will definitely do this one and try different colour vellum too.
Thank you Jane.
Stunning card and great tutorial. Thank you for sharing.
Beautiful project, thank you, I do love the camels – especially their legs ! Best design ever! X
That is a beautiful card! I haven’t received my plates yet, but when I do, I’ll definately be coming back to this tutorial, you have made it so much easier to understand by doing it step by step, I can’t wait to give it a go! Thank your for all of you hard work!
Hi Grace & Jane. Another great project with a step by step guide to make it doable for everyone to have a go at. You could always use glitter if you haven’t got the Pebeo paint. Not sure what has happened this week as Sunday seems to have come round very quickly so must have a session of catch up with the Sunday projects & SHAC doodle which needs to be done for tomorrow.
Have a good week everyone x
Loved this tutorial Jane! Thanks for sharing your skills. x
Hi Grace & Jane
Such a lovely tutorial – thank you so much
Love Seta Xx