Clarity’s Blog Tutorial: How To Use The Bordeaux Plate
Hello hello! Grace here.
I hope this finds you safe & happy on this glorious Sunday morning. Why is it glorious? Because we are here today. And that, my friends, is glorious.
Happy Mother’s Day! If you missed it this morning, we put out a lovely little Mothering Sunday blog. Check it out HERE.
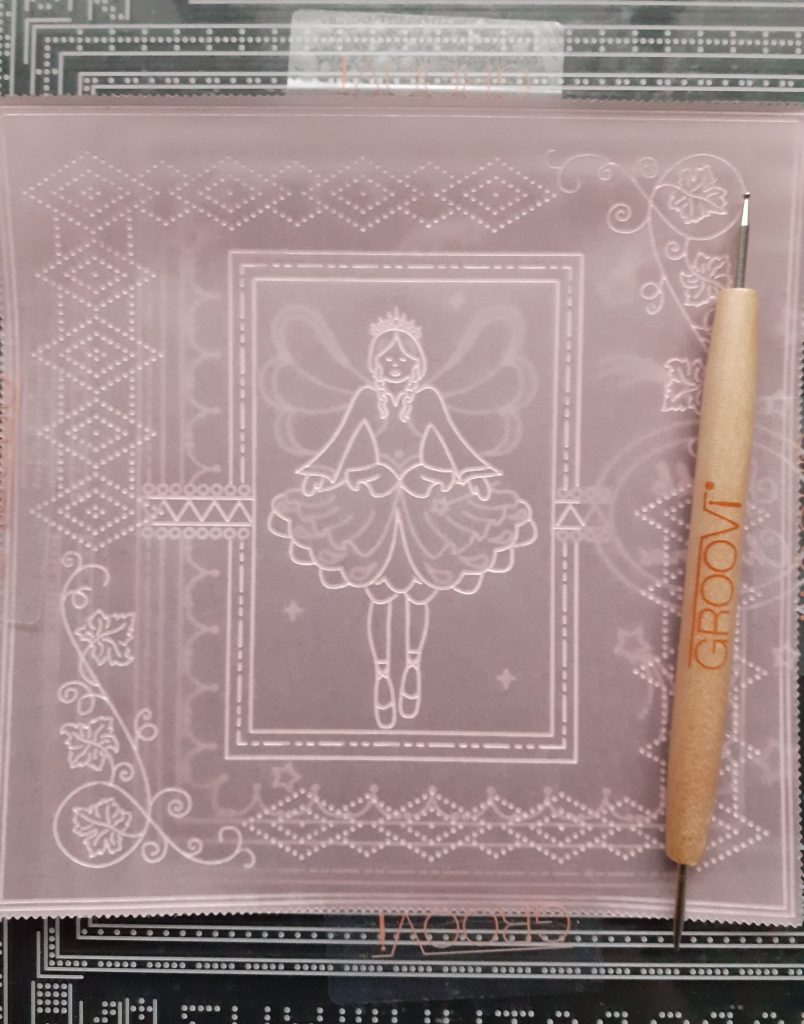
The brilliant Josie Davidson has joined us today, to share her tips & techniques with us. This step-by-step project shows how to use just the corners of the French Cities Duet Plate (Bordeaux). Very useful! Let’s jump right in. Hey Josie!

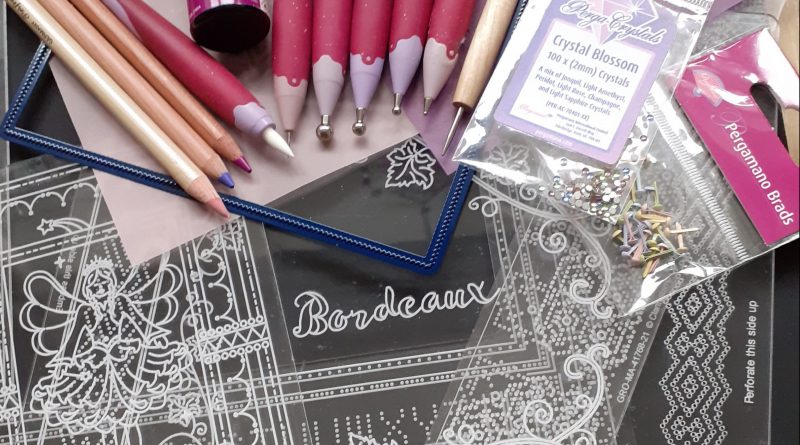
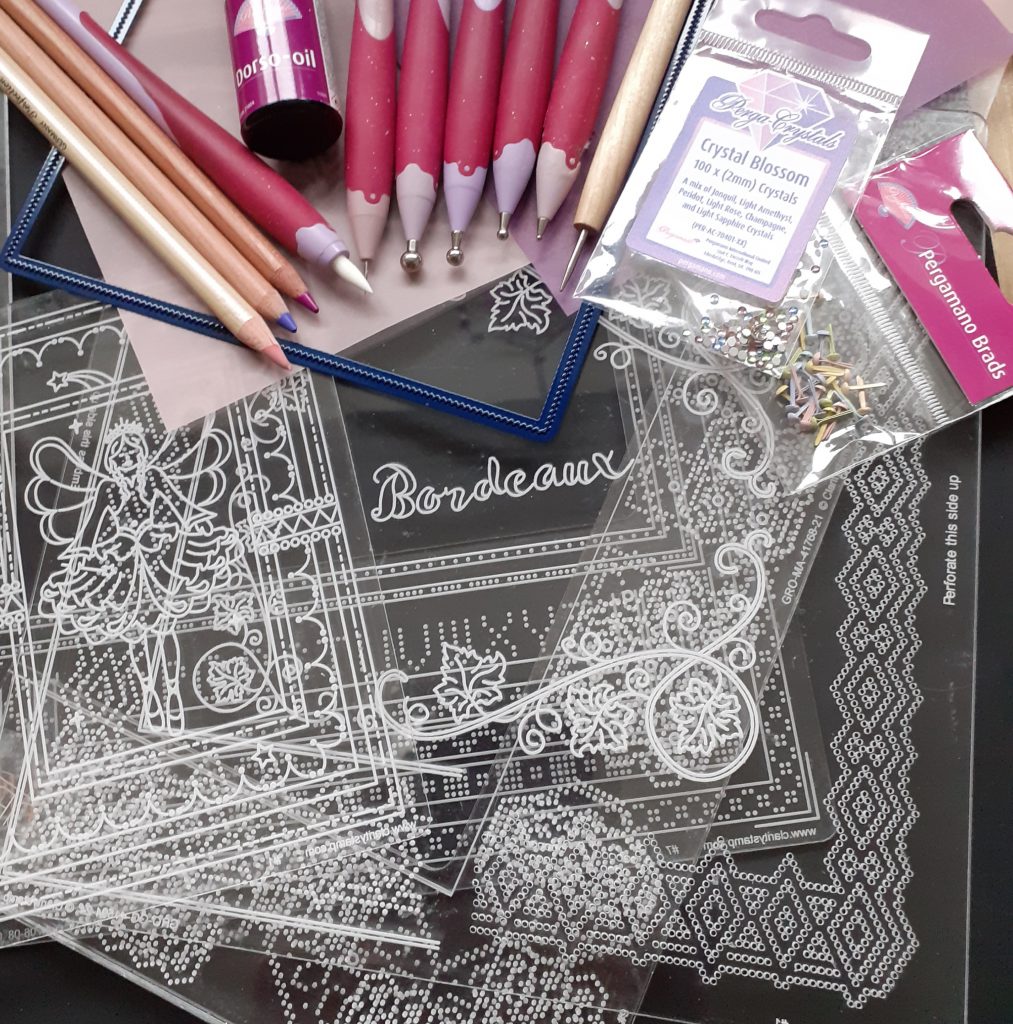
Ingredients
French Cities Duet Plate – Bordeaux (GRO-GG-41594-24)
Linda’s Easy Layout Plate – Angel (GRO-LW-42029-03)
A4 Plate Mate for Grids (GRO-MA-41768-21)
A5 Square Plate Mate:
I used the Grid Plate Mate but the original A5 Sq Plate Mate can be used
Square Picot Dies (ACC-DI-30666-66)
Square Picot Plate (GRO-PA-41035-15)
A4 Baby Pink Parchment (GRO-AC-40403-A4)
A4 Purple Parchment (GRO-AC-41405-A4)
Scissors or Perga Cutters
Groovi Tool 1&2 (GRO-AC-40026-XX)
6mm Embossing Tool (PER-TO-70016-XX)
4.5mm Embossing Tool (PER-TO-70015-XX)
3mm Embossing Tool (PER-TO-70005-XX)
Pergamano Bold Single Needle Tool (PER-TO-70028-XX)
Pastel Mix Pergamano Brads (PER-AC-70270-XX)
Perga-Crystals – Crystal Blossom (PER-CR-70401-XX)
Perga Liners #5 & #14 (PER-CO-70063-XX)
Dorso Oil (PER-CO-70066-XX)
Blending Pen (PER-AC-70300-XX)
Ink Eraser (ACC-PE-30670-XX)
Sticky Ink & Mapping Pen
Perga Glitter
Perga Glue
7×7 White Card Blank (ACC-CA-30619-77)
Clarity Tape Runner (ACC-MS-31065-XX)
Method
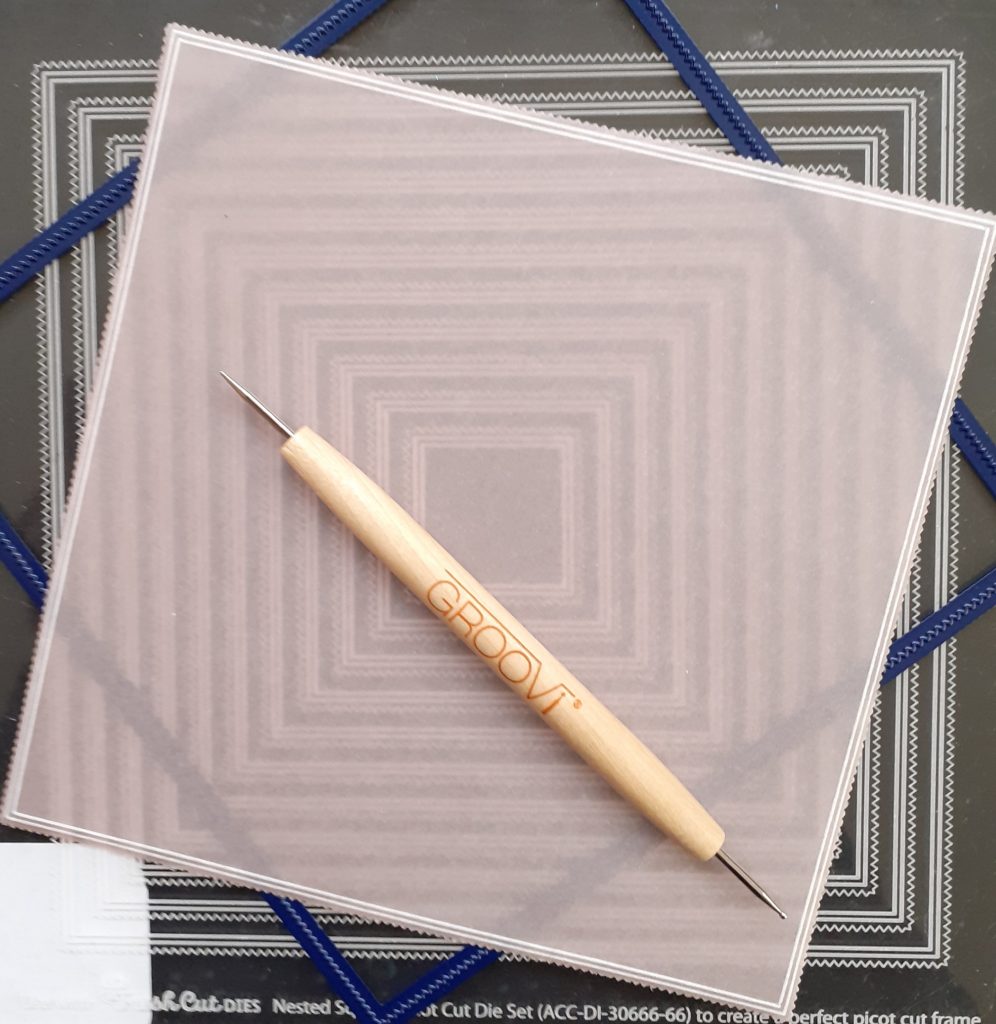
Step 1. Using the pink parchment, cut out the second picot die from the outer edge. Emboss the corresponding lines from the picot plate using the #1 Groovi tool.
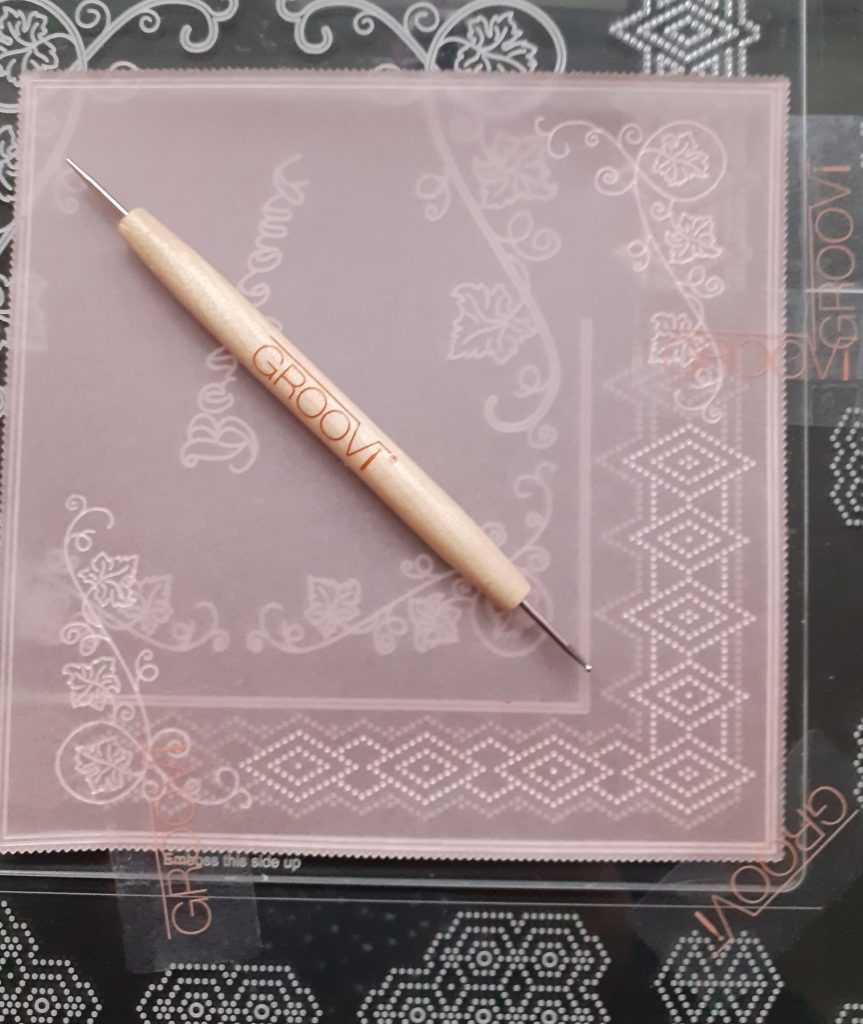
Step 2. Place the embossed lines on your parchment into the matching lines on the Bordeaux plate and emboss the smallest leaf corner. Turn your parchment around and do exactly the same thing in the diagonally opposite corner.
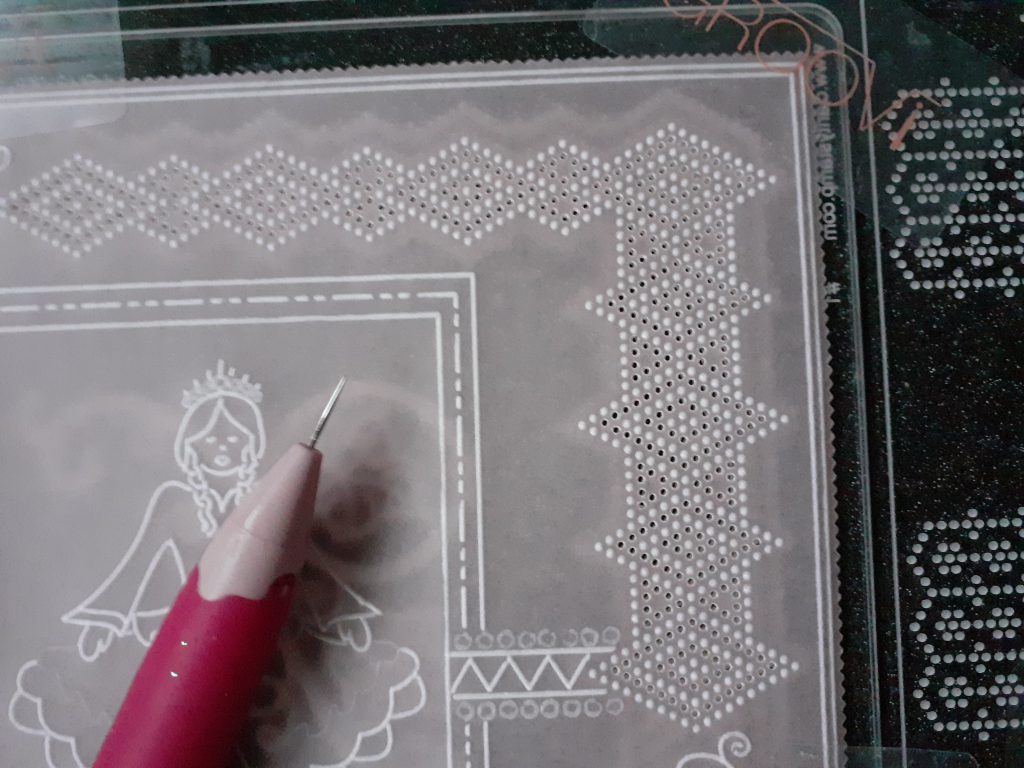
Step 3. Using your Groovi Tab, attach your parchment to an embossing corner of the Bordeaux plate (the plate has ‘emboss this side up’ etched into it). Emboss the dots up to where the leaf corners finish and then repeat for the diagonally opposite corner. Emboss the inner diamond pattern only.
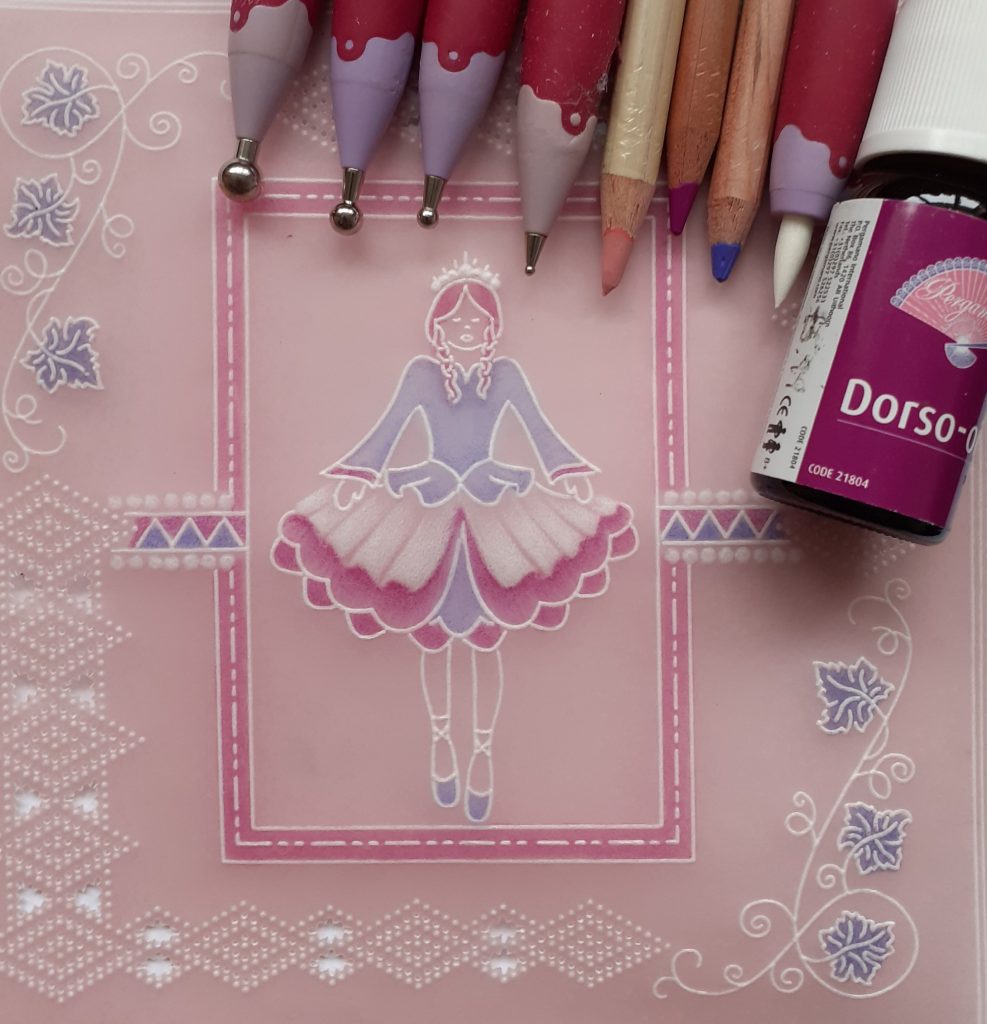
Step 4. Position the angel on the easy layout plate in the centre of your parchment. If you look at the picture below, you will see that the ribbon band (on either side of the rectangle) goes to the point of a diamond on both sides. Emboss the small circles and the middle layer of her dress with the #2 Groovi tool. Emboss the rest of the design with the #1 Groovi tool but do not emboss the bolero or the wings as we are turning her into a ballerina for this project.
Step 5. The ribbon does not reach one of the diamonds so you will need to turn your work around and realign it with the ribbon on the other side of the plate to complete it.
Step 6. Turn your work over and perforate the holes inside the diamond patterns using your bold single needle tool.
Step 7. Using your eraser pencil, erase areas of the ballerina’s dress, leaves, outer frame, and the ribbon.
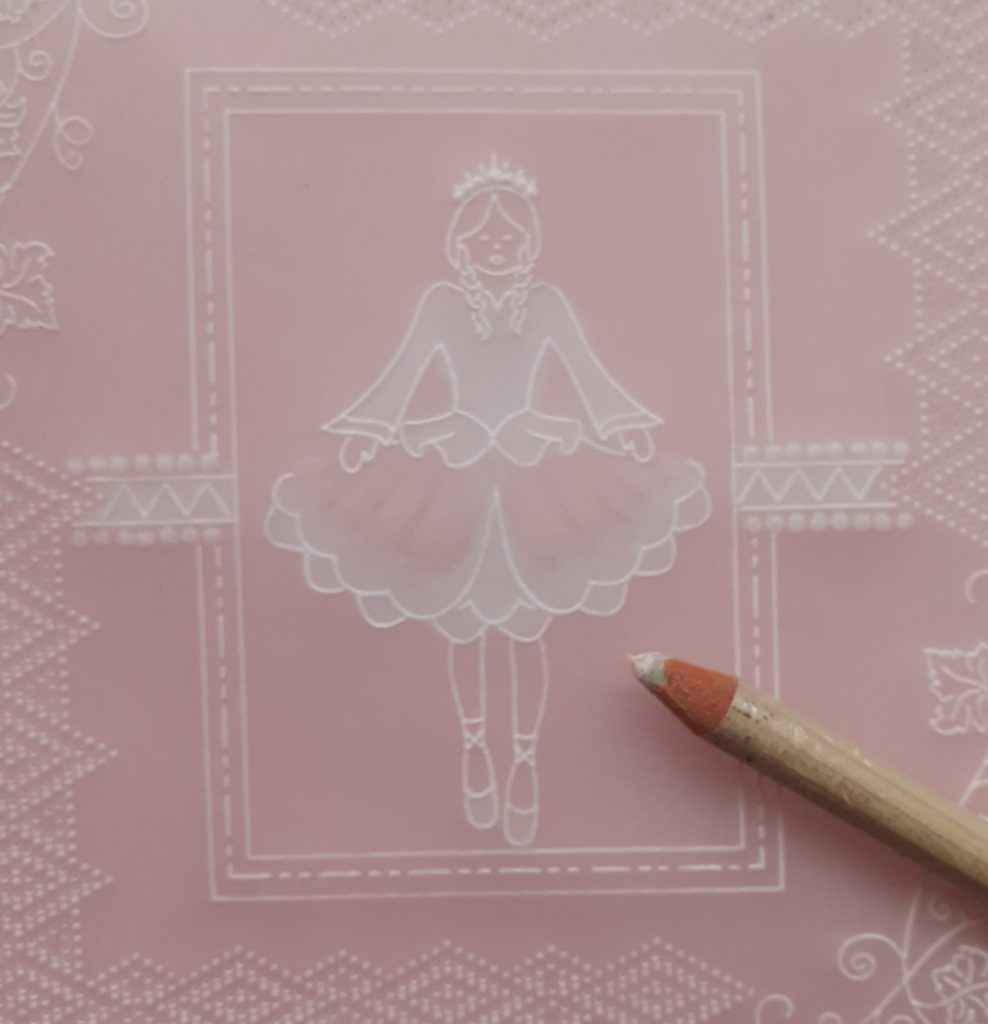
Step 8. Colour the ballerina, leaves, rectangle, and ribbon on the back with Pergaliners. Blend using your Dorso oil and blending pen. Emboss the top layer frills of her dress that haven’t been coloured – start with your largest ball tool and work down in size. There are 9 layers of embossing on my finished piece. Emboss the circles on her tiara and the circles at either side of the ribbon band.
Step 9. Cut out the diamonds in the grid corners following the cutting guide that came with your plate.
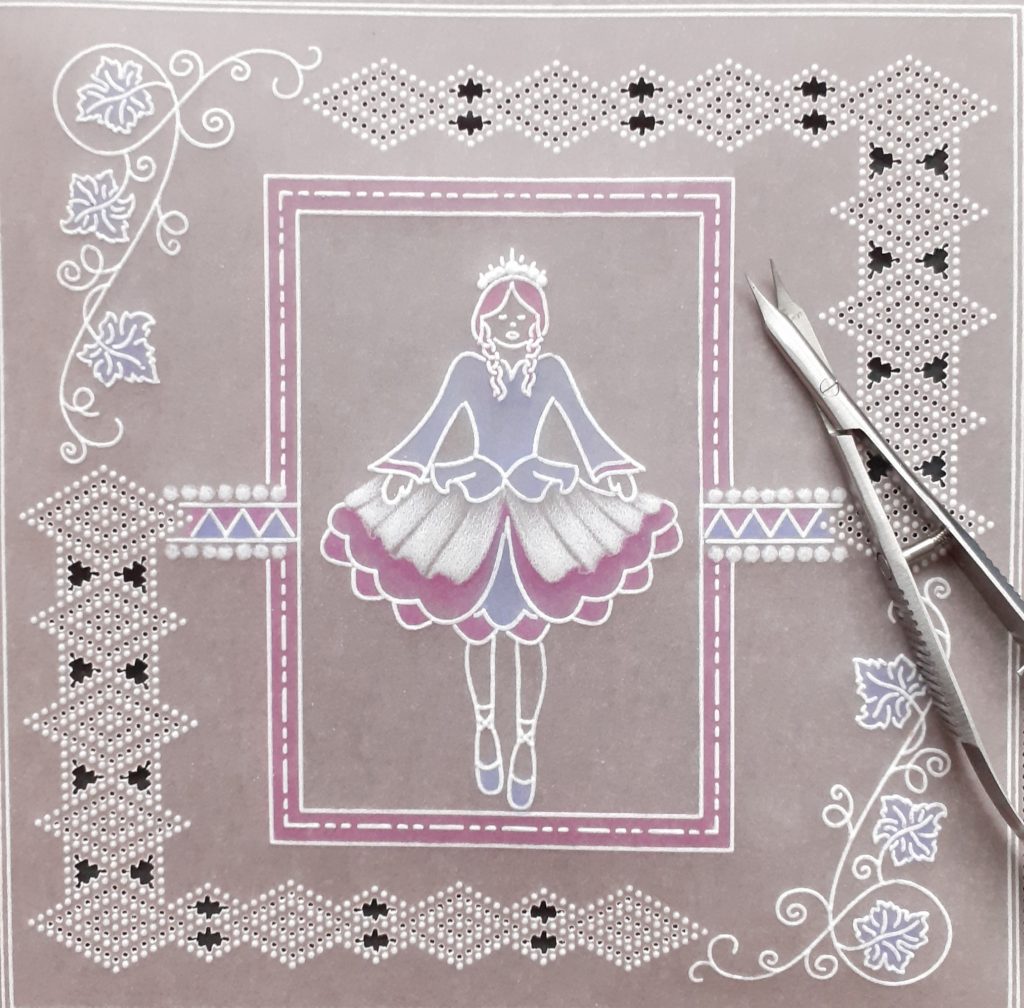
Step 10. Use the mapping pen and sticky ink to add glitter to the ballerina and leafy fronds of the corners. Cut the purple parchment to a 6.5inch square and matt your piece of work onto it using brads. Use the tape runner to attach your finished artwork onto the card blank. Use small dots of Perga glue to attach crystals around her waist. And Voila! You’re all done.
WOW, Josie! That is fabulous. I don’t have the sort of brain that sees all of the options within a plate. It’s an Angel plate, so I see an angel. It’s a grid plate, so I see a grid. I’m always blown away by the creative ideas you come up with. The way Josie has made this frame has me all giddy about the possibilities. Just look at the original plate!
Thank you, Josie, for sharing your skills and creative brain power with us!
Everything that Josie has used is available over on the Clarity website HERE
Did you catch Paul on Create and Craft on Friday launching the brand new Seasonal Wreaths that some of you doodled along with Mum in the SHAC Shack?
If you missed the shows, you can watch them on Catch Up
Friday 3pm HERE
Friday 7pm HERE
Looking at the week ahead
Monday 28th – 10am – Barbara in the SHAC Shack – Live on Facebook & YouTube
Tuesday 29th – 10am – Paul – Groovi Tuesday – Live on Facebook & YouTube
Thursday 31st – 10am – Barbara in the SHAC Shack – Live on Facebook & YouTube
Don’t forget! If you have a go at any of these Sunday step-by-step projects, send your work to me! On March 31st I’ll close the draw and pick a winner to win a £30 Clarity gift voucher. grace@claritystamp.com
This early March blog is where the challenge originated. Get involved 🙂
Right, I’m off! Happy Sunday. And happy Mother’s Day friends!
Lotsa love, Grace & Josie xoxo
Clarity – The Home of Art, Craft and Well-Being.
Wow Josie this is fabulous. Very clever use of the plates. I sometimes forget that the plates don’t just offer a grid design and these ones in particular have so much more to them. And then to combine that with the Angel….. pure genius at work!
Thanks for sharing with us.
And thank you to grace for putting this all together. Xxx
Gorgeous project – thank you x
Absolutely gorgeous Josie 💖
Its amazing what you can do with combinations of different grids. You are very creative. Your work is tops. Thank you for giving us these wonderful ideas.