Clarity’s Blog Tutorial: How to Snip Fine Lines
Hello hello! Grace here.
I hope you’re having a lovely day, whatever it entails.
The wonderful Glynis Whitehead is back in our bloggy bubble. Lucky us! I’ll waste no more precious time and hand you over to the teacher!

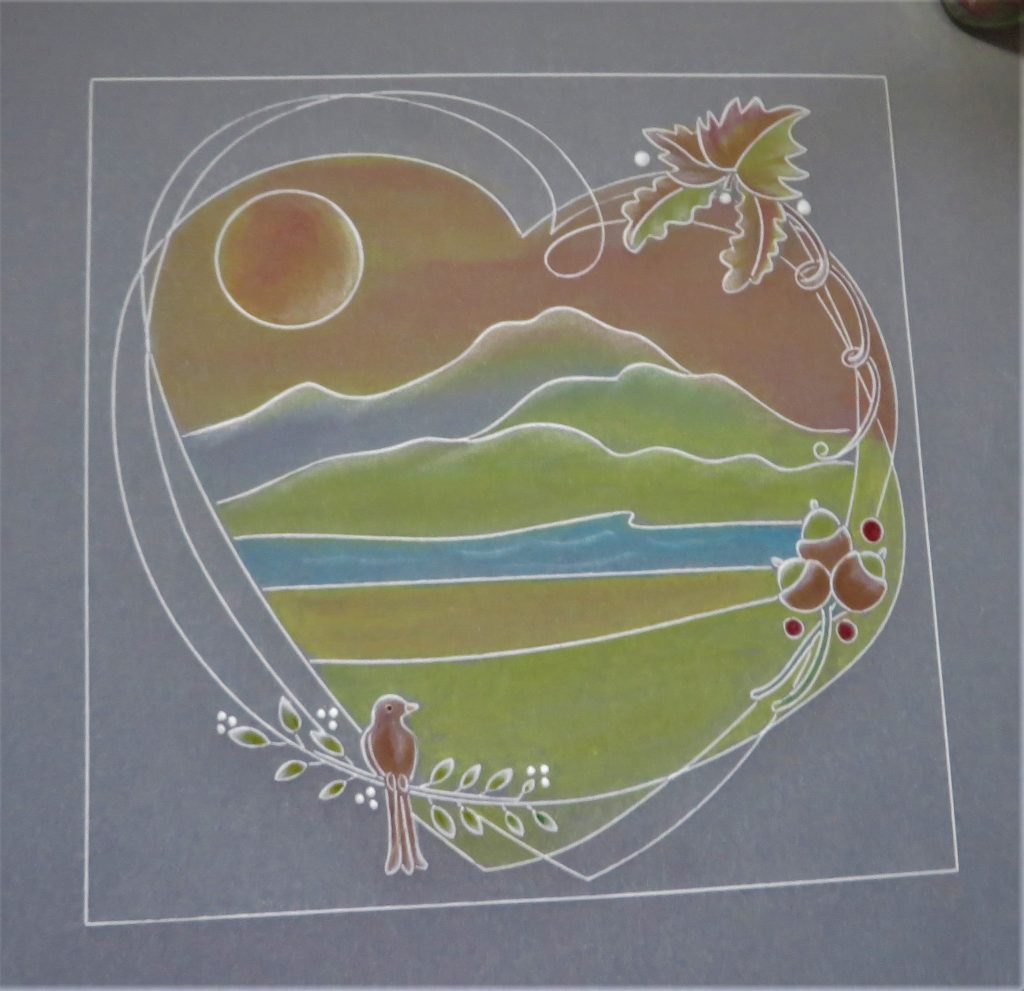
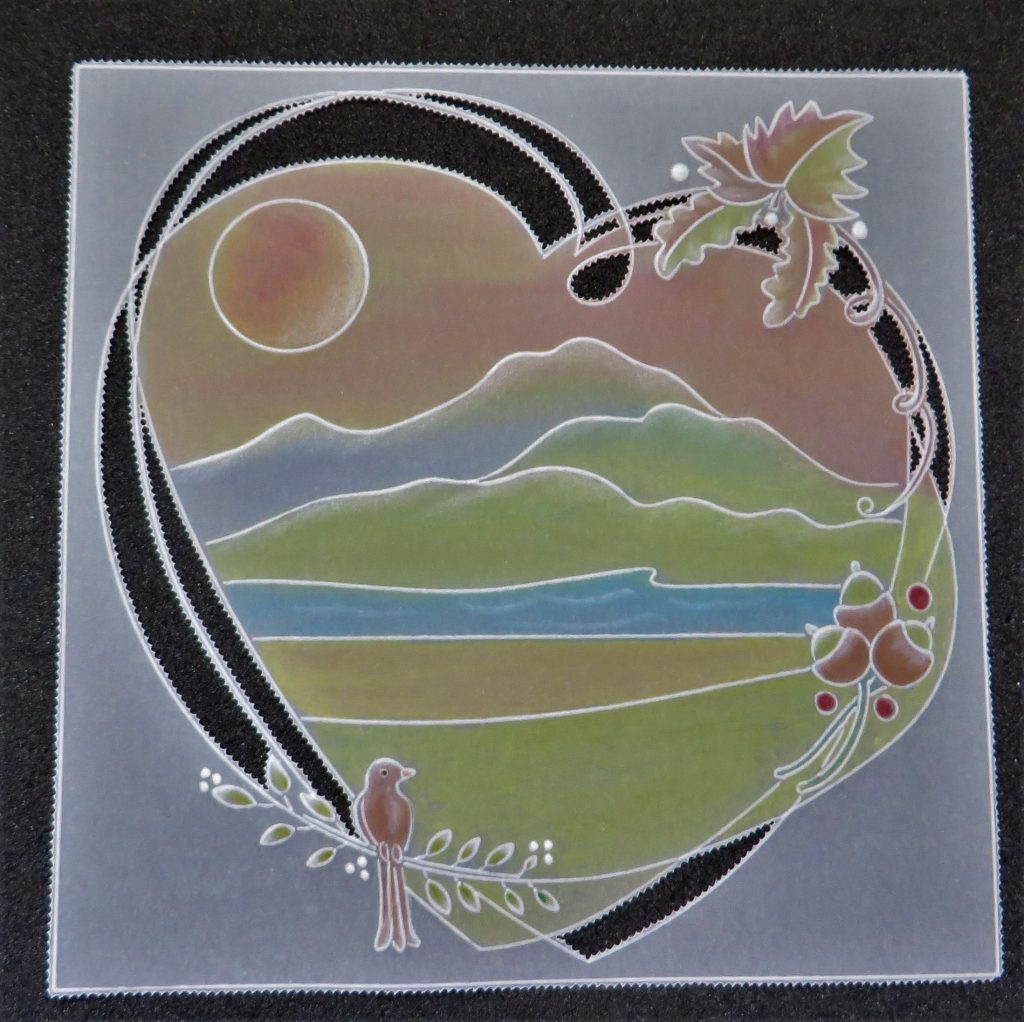
With this tutorial, I wanted to show you how to make the Entwined Autumn Heart Wreath look a little different and how to do some delicate snipping along embossed lines. I thought this might make an ideal card for a man too.
Ingredients
Nested Squares Extension (GRO-WO-40538-15)
Entwined Autumn Heart Wreath (GRO-FL-41435-03)
Mountains & Hills A5 plate (also in the Starter Kit) (GRO-LA-40007-03)
Mix Mat (PER-AC-70304-XX)
PergaLiner Pencils (PER-CO-70063-XX)
Dorso Oil (PER-CO-70066-XX)
2 Needle Perforating Fine (PER-TO-70037-XX)
1 Needle – fine (PER-TO-70035-XX)
1mm Pergamano Embossing ball tool (PER-TO-70011-XX)
1.5mm Ball tool (PER-TO-70004-XX)
3mm Ball Tool (PER-TO-70005-XX)
Pergamano Shader Tool – 1.2mm (PER-TO-70003-XX)
Pergamano Hockey Stick Embossing Tool (Discontinued)
Amazonia Designer Paper (ACC-CA-31034-88)
Instructions
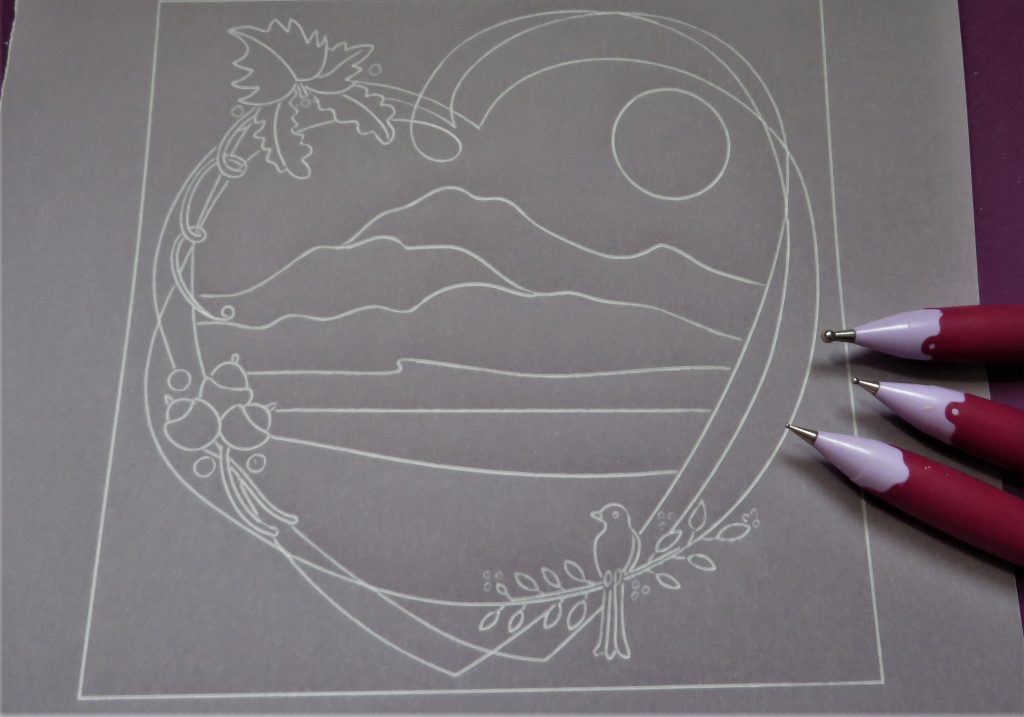
Step 1. Use the Nested Squares extension plate and a piece of plain parchment. Trace the 6th line in from the edge.
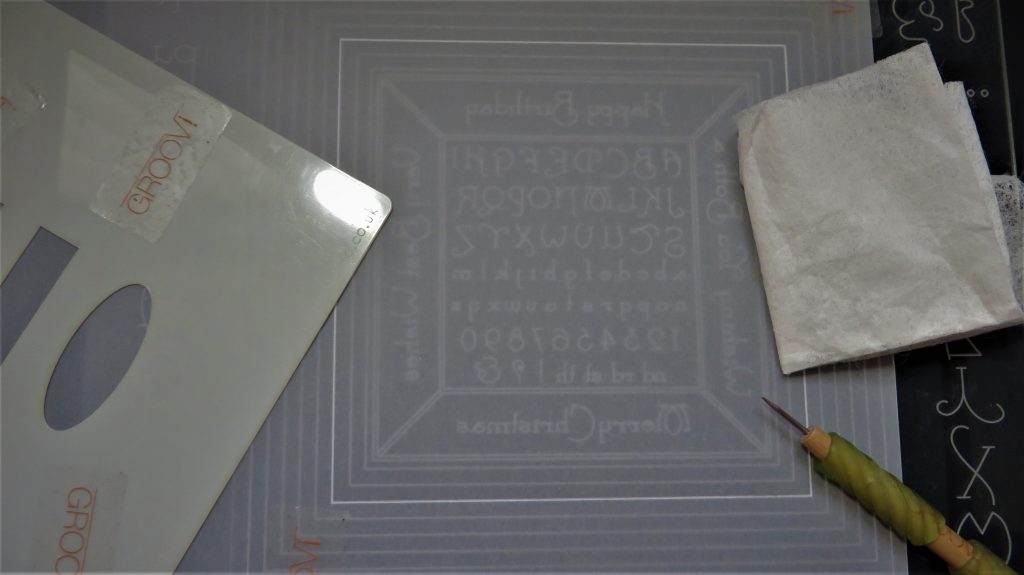
Step 2. Line up the parchment and centralise the Entwined Heart Wreath within the border and trace this out.
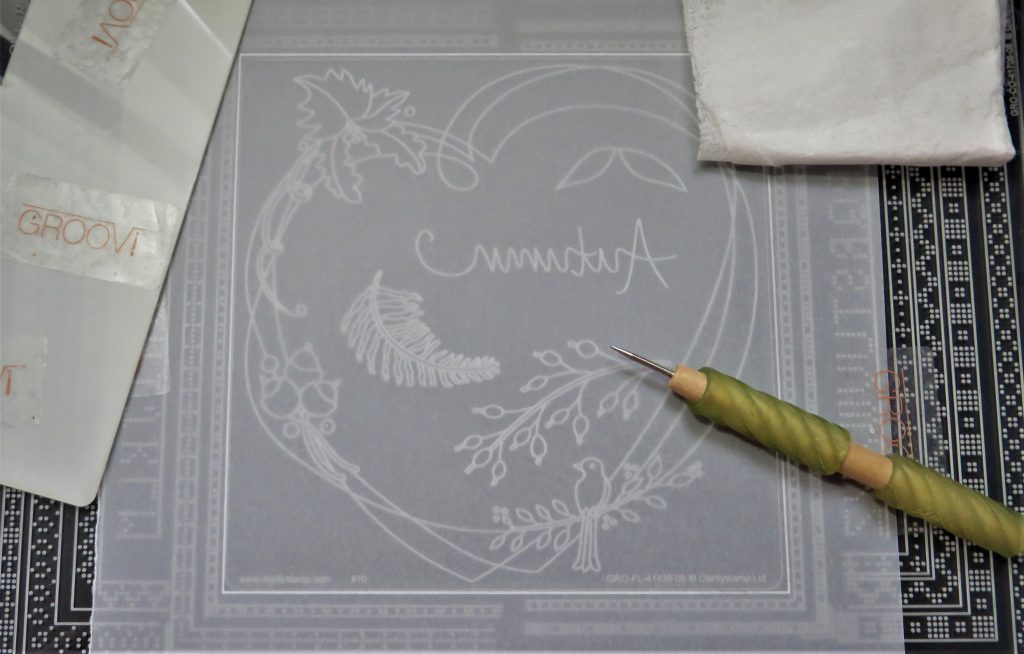
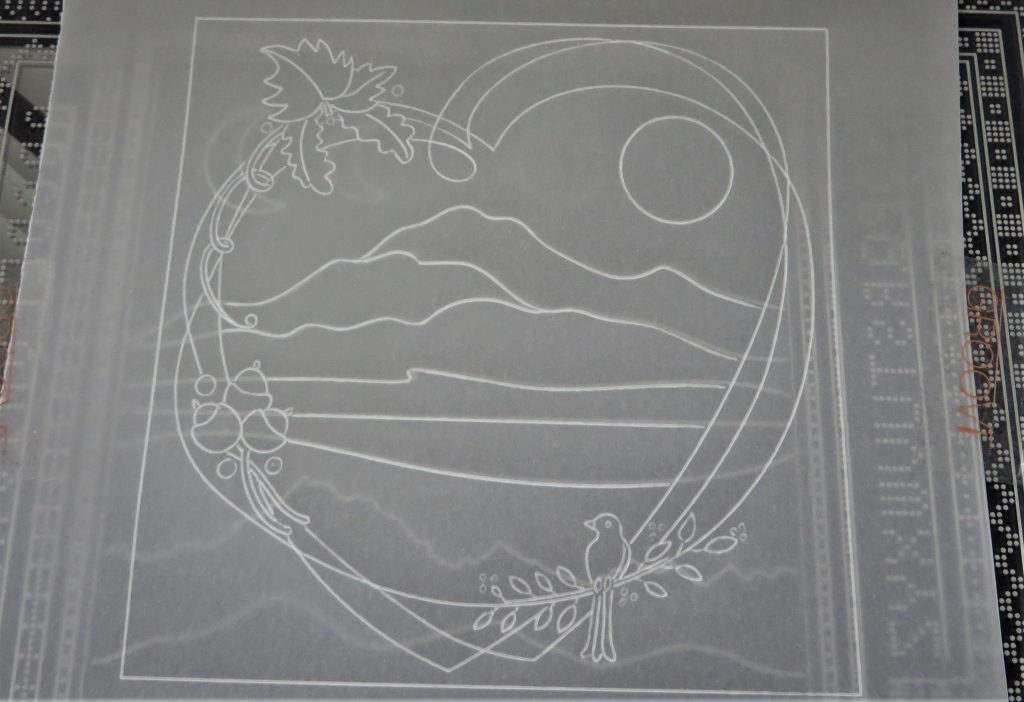
Step 3. Swap the wreath plate out now and use the mountains and hills to make a landscape within the wreath, remembering not to go over any lines that make up the heart shape.

Step 4. Barbara gave us a lot of white work opportunities when she illustrated the wreath, so decide which of the elements you would like to be white. I left the bigger berries so that they could be coloured red. For the smaller dots, use 1mm ball, 1.5mm for medium sized dots and 3mm for the larger.
Step 5. For the landscape and leaves, I wanted to use some tools you might not be so familiar with. Not to worry if you do not have these, you can still use the range of embossing tools at your disposal, but I have had questions as to what these are for, so I thought I would address it here.
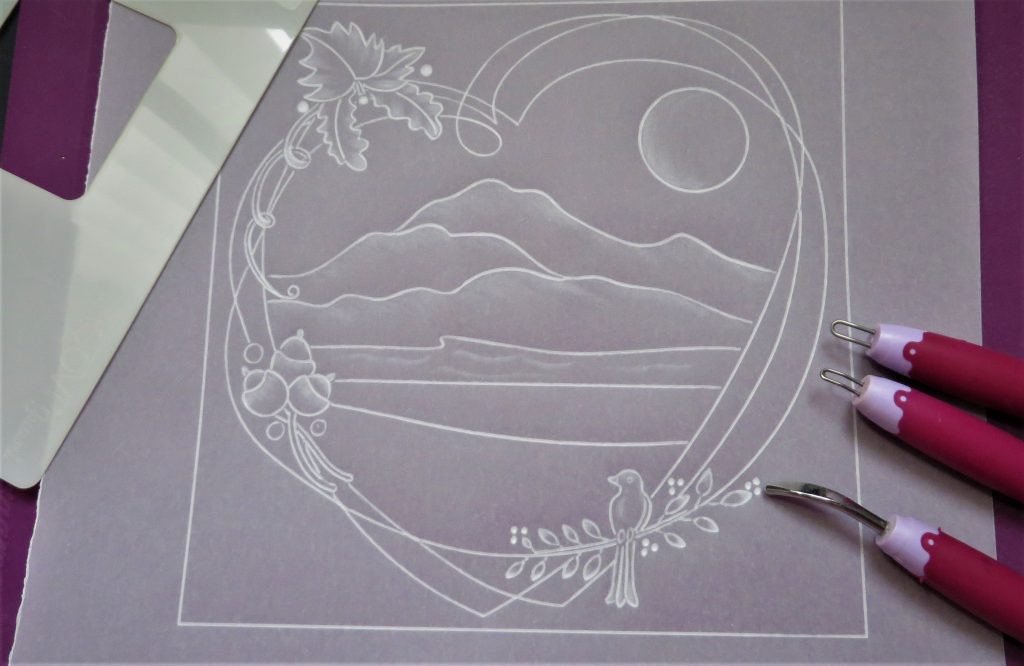
Step 6. First the Hockey Stick (this tool has been discontinued, but you can create this effect with other similar tools) – I wanted to show you the way we hold it in relation to the paper. This tool creates a very soft effect and allows us to create light and dark in a picture. It is fabulous for creating snow drifts in winter cards too. I will try to do a blog to show you this soon.
I used the Hockey Stick to create the light on the top of the hills – I also used the side of it to create some ripples in the water.
Step 7. Next, the Shaders. There are two sizes and it’s best to start off with the largest. Very gently from the edges of the leaves, feathers of the bird and at the top of the acorn cup, emboss from the line art – stroking gently away from it and lifting the tool off the parchment. So light feathery strokes. The angle of tool is shown here.
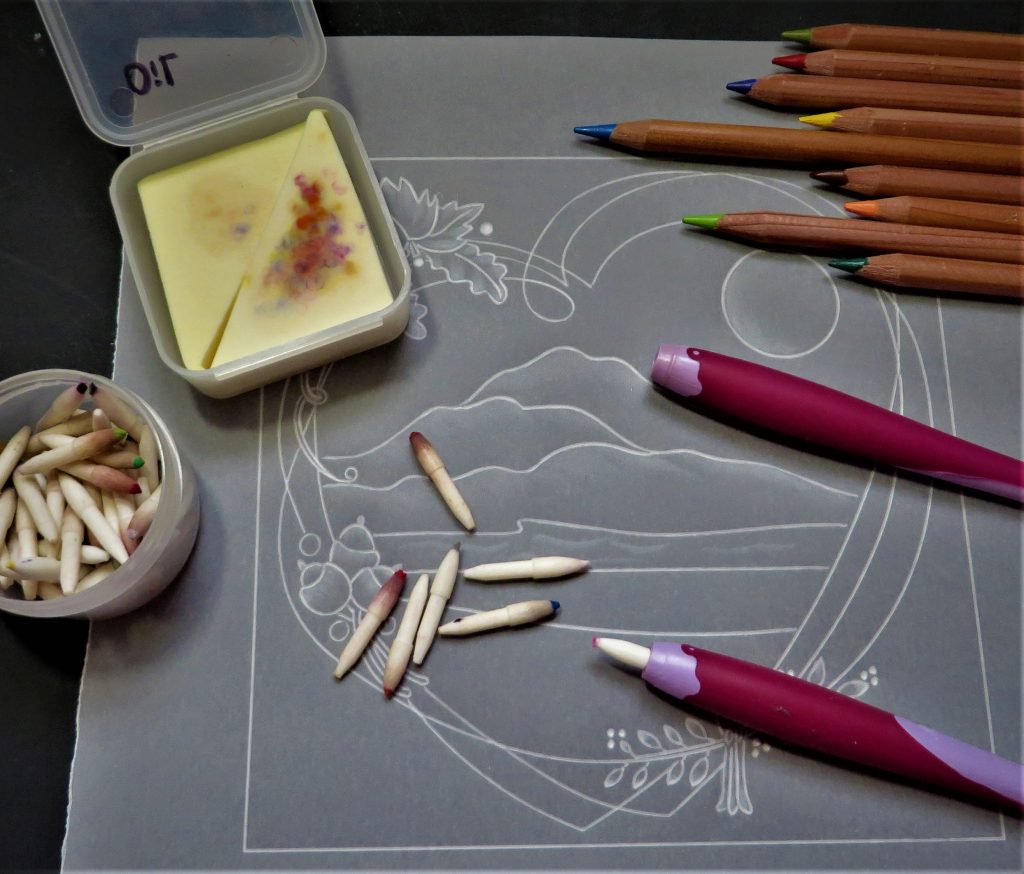
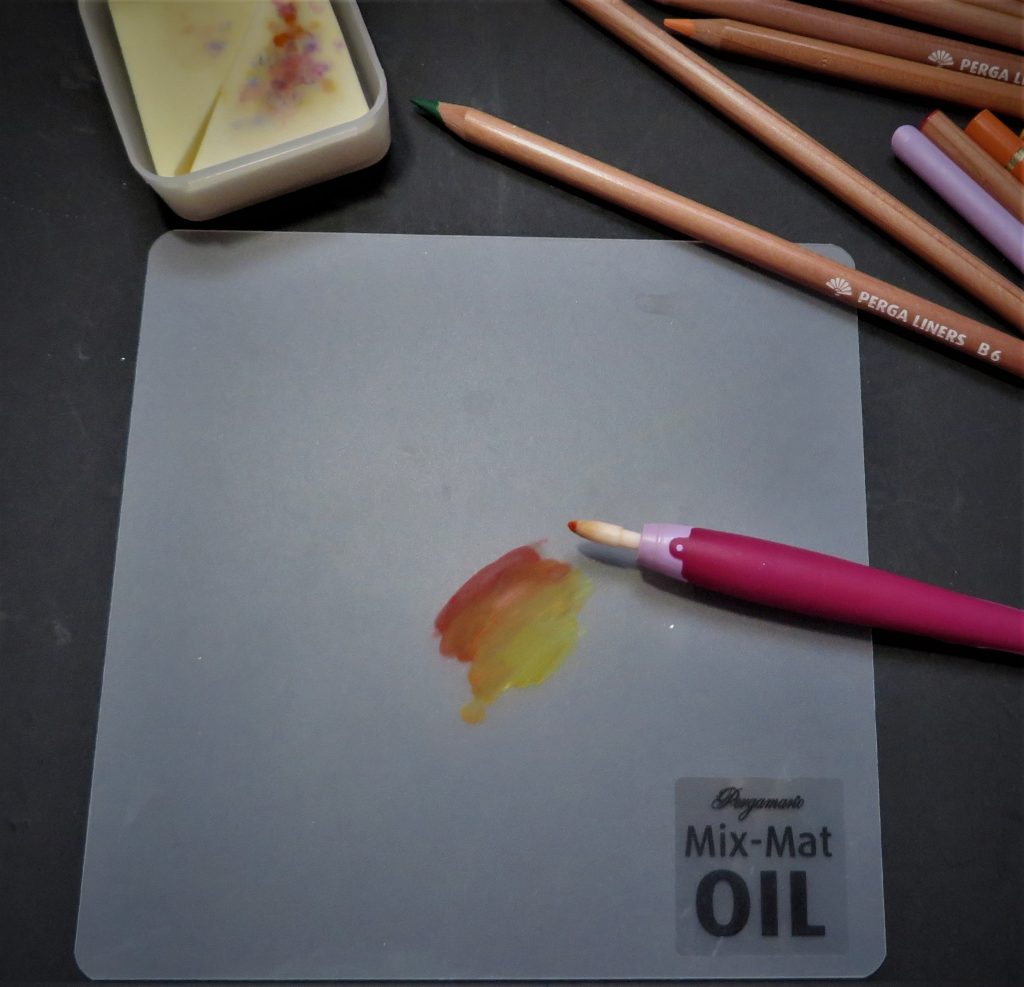
Step 8. Colour on the back of the parchment, using Pergaliner pencils, dorso oil and blending nibs. Here is where the Mix Mat comes in very handy. If you have not got all the colours you want, you can scribble onto the mat and mix the colours with some Dorso oil and a blending nib. If the colours dry out a bit, just touch the nib to your sponge with the oil on it and pick up some colour. The colours I used are from the B section (blending) and the number are – 3, 4, 5, 6, 7, 8, 10, 11, 15.
Step 9. Be careful how much oil to apply to the nib (I keep one for each colour and they last ages) as if you use too much, you will remove the colour and too little will not allow the pigment in the pencil to move. The hills furthest away will be lighter than the ones in front – allow a little of the setting sun to glow on the top of furthest hill – add a little purple to denote heather. As you come further forward, make the hills brighter.
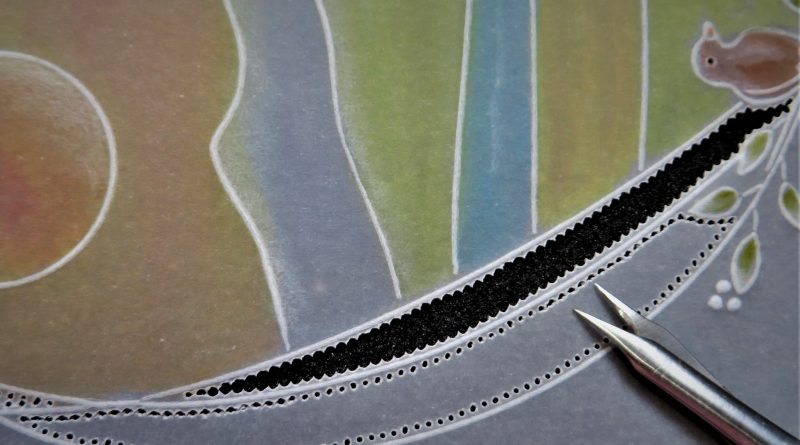
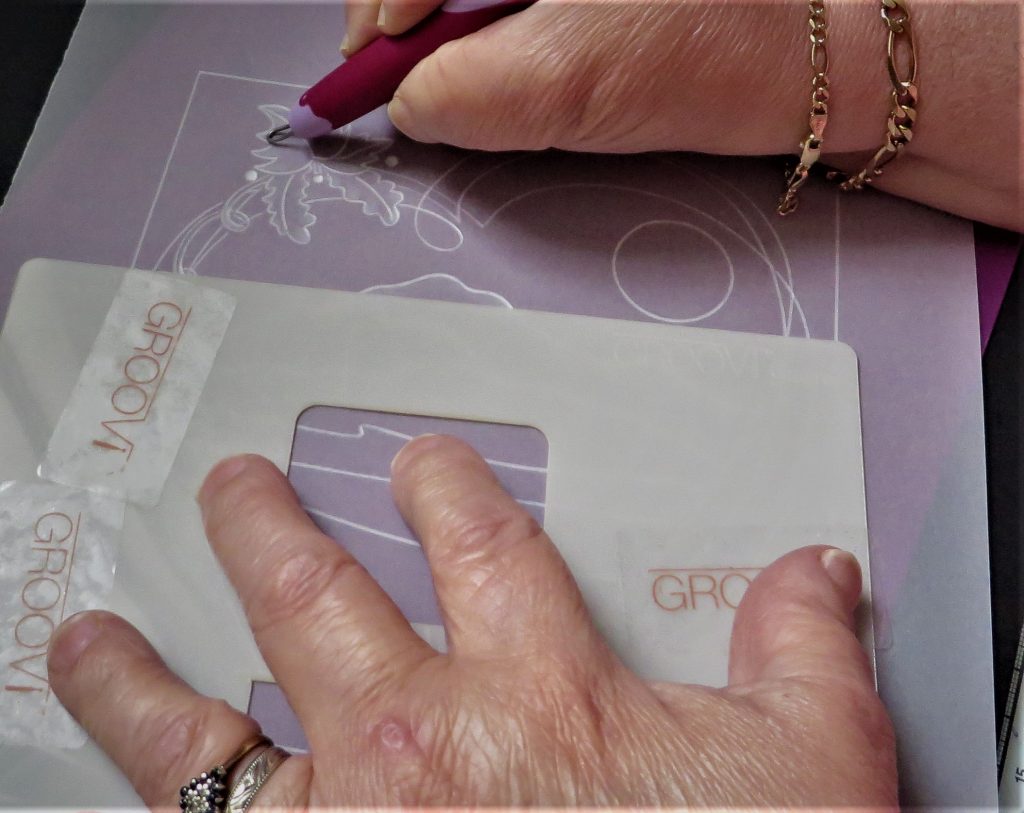
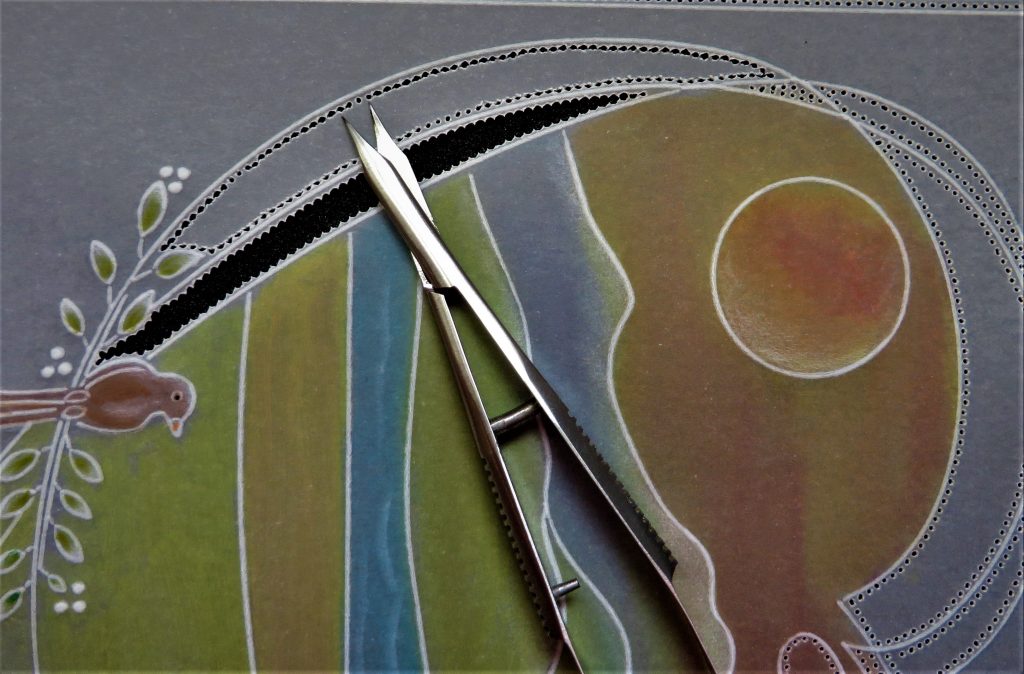
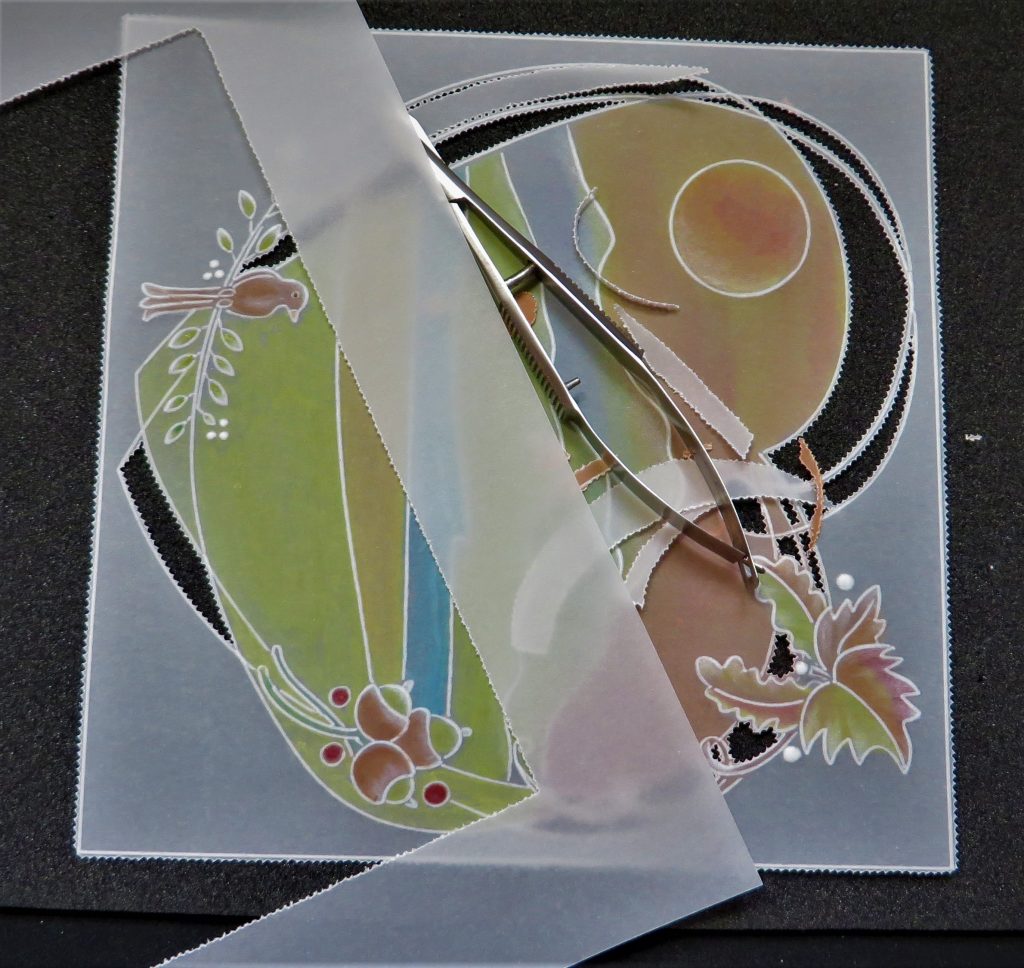
Step 10. Now for perforating the entwined wreath – this is for you to decide how much or how little you want to do of this. Use the two-needle tool for most of it, but there will be places where it gets a bit too tight for the two-needle tool to fit, so here you can use the 1 needle to make that extra hole. Also, go around the outside of the piece with the two-needle tool.

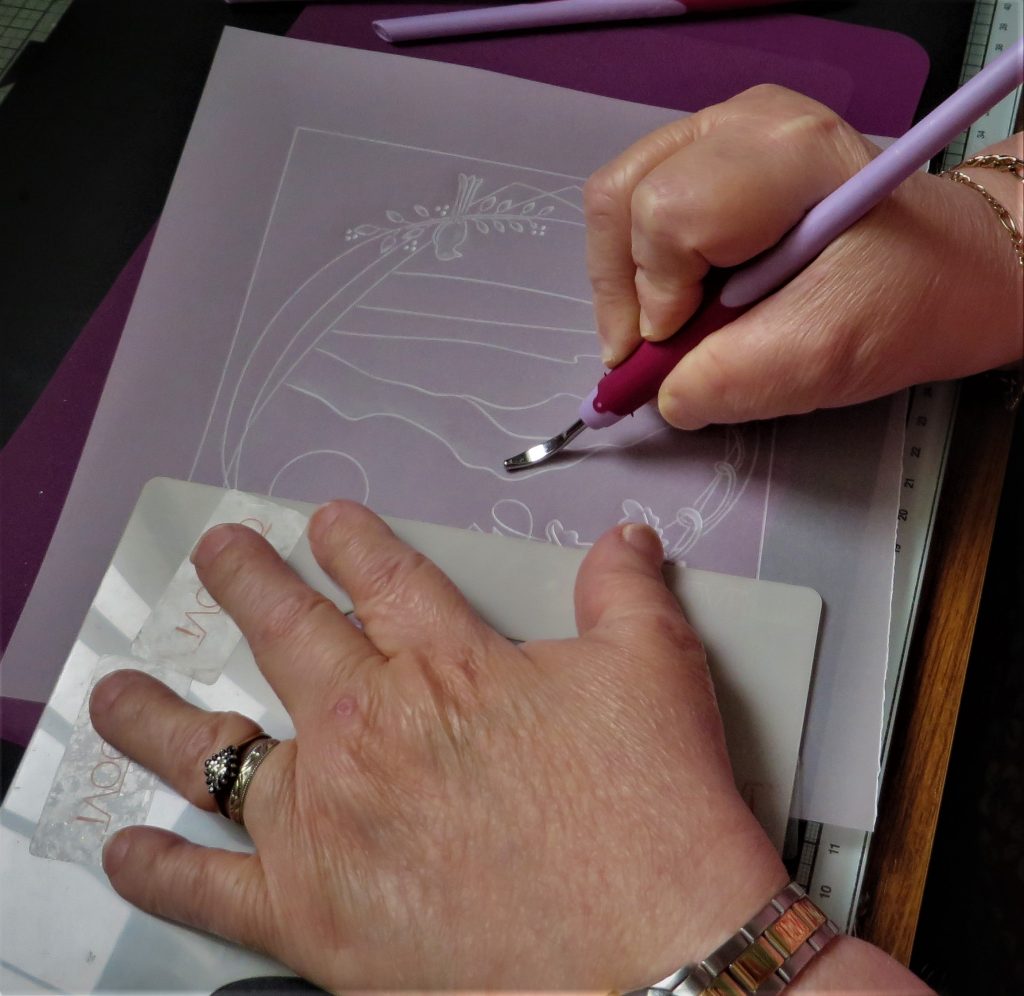
Step 11. When you start snipping the heart wreath out, make sure you lay your artwork down onto a mat. I have two A4 picot foam mats, one I have relegated for this purpose and the other is newer, for when I shallow perforate. Laying the work down rather than holding it in your hand when snipping will help prevent any narrow, delicate pieces from snapping. As you can see from the picture, I have started snipping at either end of the delicate section. Continue to make a few snips at each end until there are just a few picots left to snip, and leave them in place for a while.

Step 12. I have turned my work and have done the same on the other side – note that the snips/scissor tips are pointing towards where I want the picots to be and the body of the snips/scissor lays over the piece you will discard. Again, leave a few picots intact.
Step 13. Continue in this way until all the sections are snipped. Turn the mat rather than picking up the work to turn it, this way it will be supported throughout this process. Leave all the remaining picot un-snipped whilst you snip around the outside edge of the piece.
Step 14. I have cut a mount to 6 ¼ inches square and have used a piece of Amazonia Designer Paper to frame it. Tip: This piece of Amazonia had a piece that was die cut out of the middle for another piece of artwork. I saved the outside edge that was left and cut that down to size. Once mounted, you would never know there was a piece missing at all! I cut this piece down to 6 ¾ inches square. Even the slivers of off-cut can be used as ribbons to thread through Josie’s Lace Ribbon Borders – so never waste any of this gorgeous paper.
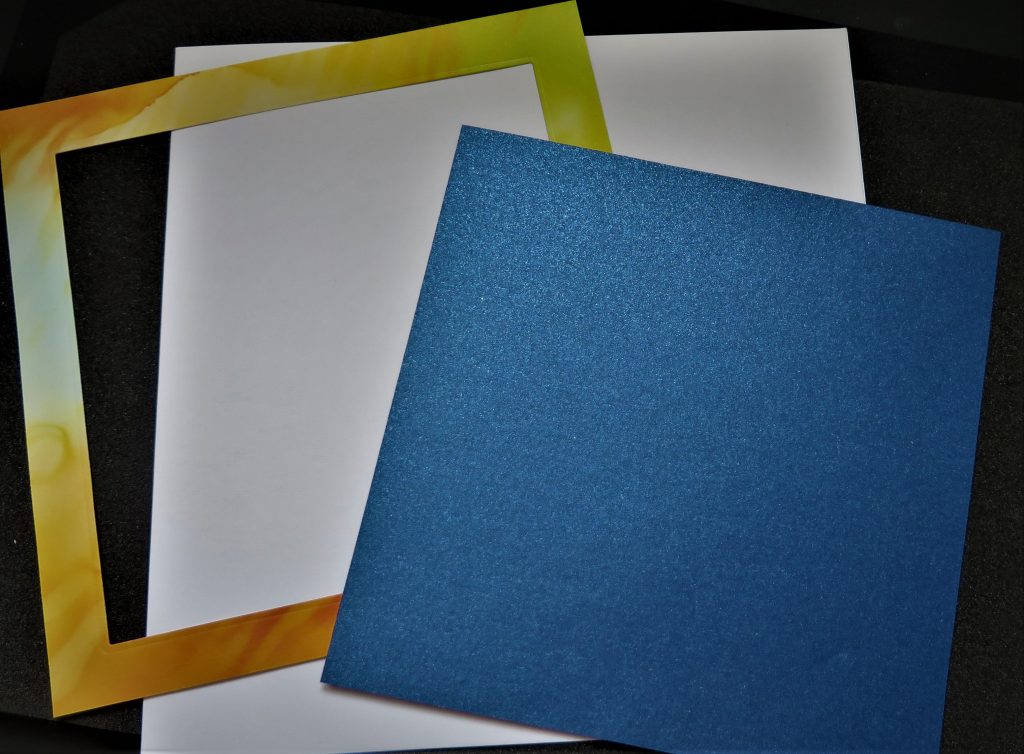
Step 15. Attach the artwork with brads and layer it up onto an 8 x 8 inch card blank. I have added some sparkle pen to the water and the sun to give it that extra shine.

Wow! That is a stunning and very delicate looking card. Thank you Glynis for your helpful tips and techniques.
To make it nice and easy, we have put everything in one place over on the Clarity website HERE
Don’t forget, if you’d like to give this a try (or any other of our Blog Tutorials) and send your version to me, you can do so at Grace@claritystamp.com
All I ask is that when you email it to me, please include the following information:
– Your full name
– Your email address
– The specific blog tutorial title that you used as inspiration
For now though, enjoy the rest of your day and travel gently 🙂
Lotsa love, Grace & Glynis xo
Clarity – The Home of Art, Craft and Well-Being.
Thank you Grace and Glynis for a lovely card design will have a go at this
Enjoy your Sunday xx
What a great tutorial from Glynis–thank you so much.
Hope you will all have a great Sunday!
Lots of love, Trijntje Huppel
Hello Grace and Glynis.
I love this design of yours, Glynis. Simple designs appeal to me, especially for a man. I like your tip of placing your work down to snip. I used to hold it in my hand but purchased a small ‘lazy Susan’ which I use regularly for all aspects of parchment work. I trained myself to put my work on this to snip and my snipping improved a lot, also, having my work on a turntable means I can turn my work without having to pick it up.
Love
Roz.xxx
Great design. Interesting to see both hockey stick and shaders used as well as colouring, perforating and snipping. Thank you Glynis.
Hi Grace & Glynis, what a lovely design. I’ve done this sort of snipping with these plates and it’s great to have tips. I’ve always put a greeting in mine so will have a go at the background next time -it looks great ! X
Thank you Ladies for this lovely project. I love how you can go back and revisit if you are unable to start the project straight away, which will be the case with me as I currently have a problem with my eyes and am unable to do close work.
Thanks Glynis and Grace for a lovely card and especially the instructions on using the hockey stick embossing tool – I’ve had one in my tools for ages but couldn’t remember /work out how to use it – might get a shader too now.
Hi Grace, Hi Glynis, thank you for this in-depth tutorial to create this beautiful parchment ‘work of art’. It is stunning.
Love from Patricia xx
Love this, thank you x