
Clarity’s Blog Tutorial: How To Combine Stencils & Groovi
Hello hello! Grace here.
I hope this finds you happy and ready to get crafty! Happy Sunday 🙂
The wonderful Hazel Edwards has put together a fantastic step-by-step tutorial for us. It’s really quite special!
I’ll waste no more time and hand you right over to Hazel…
STENCIL MEETS GROOVI
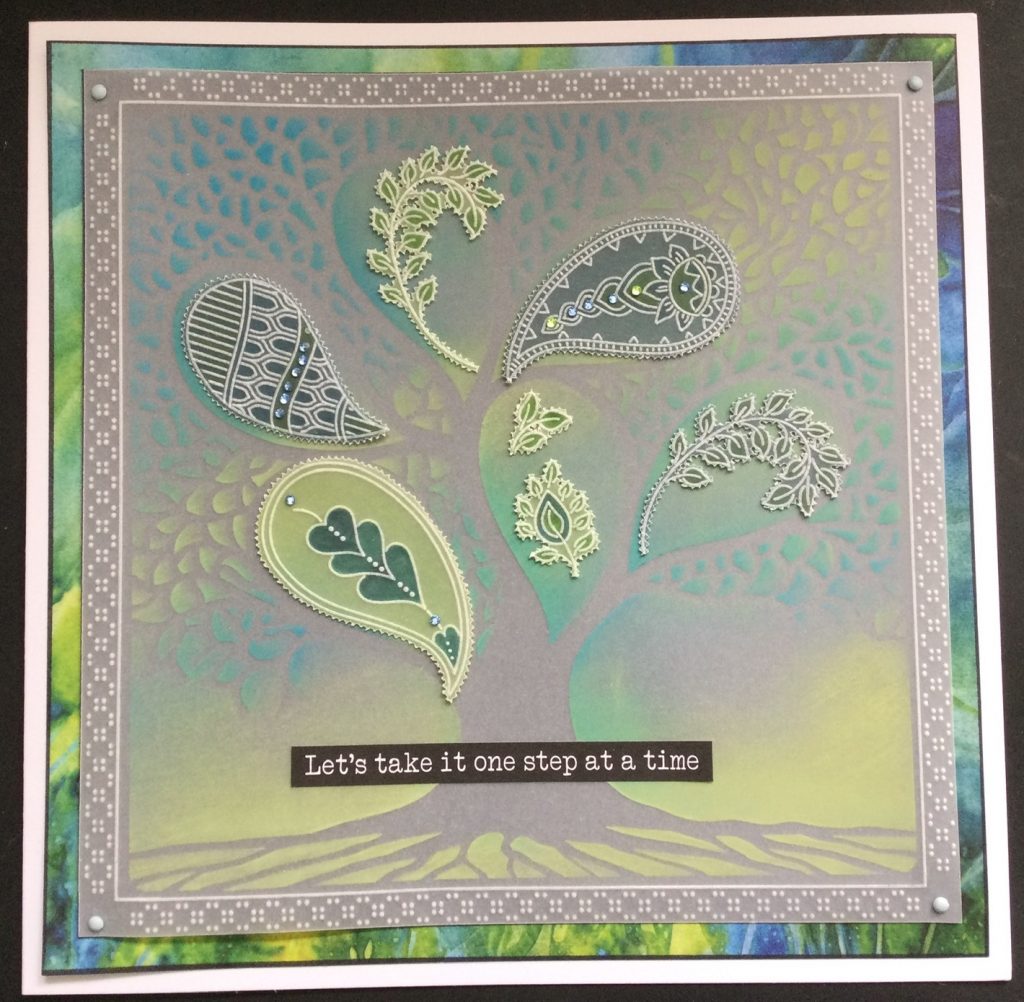
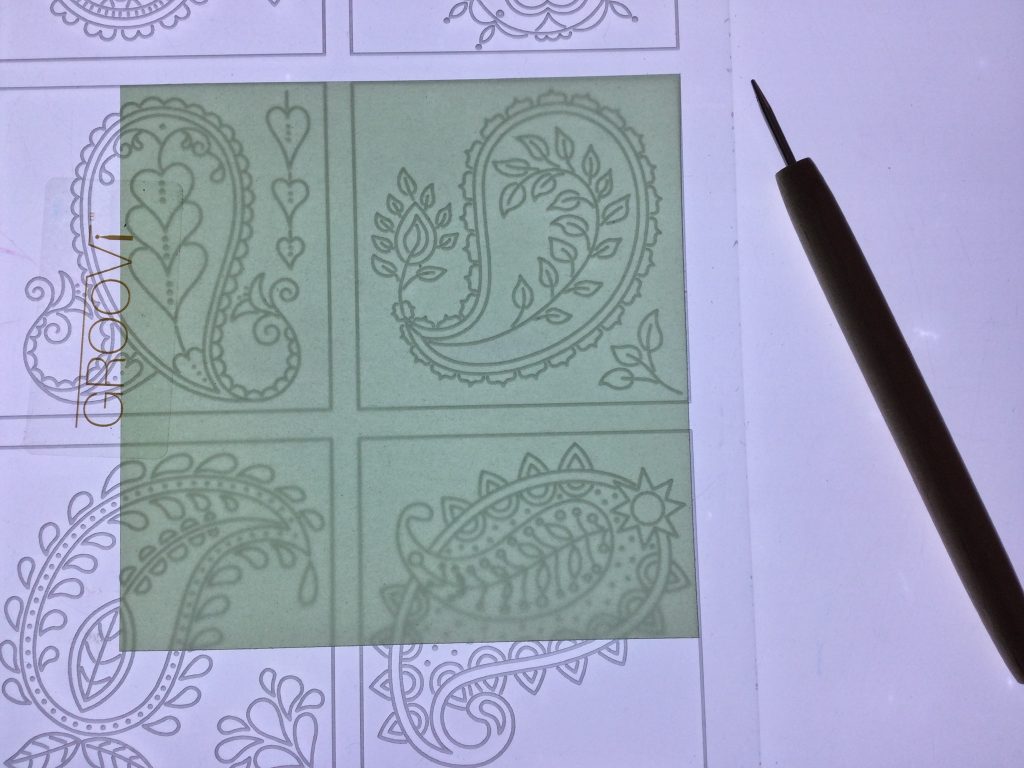
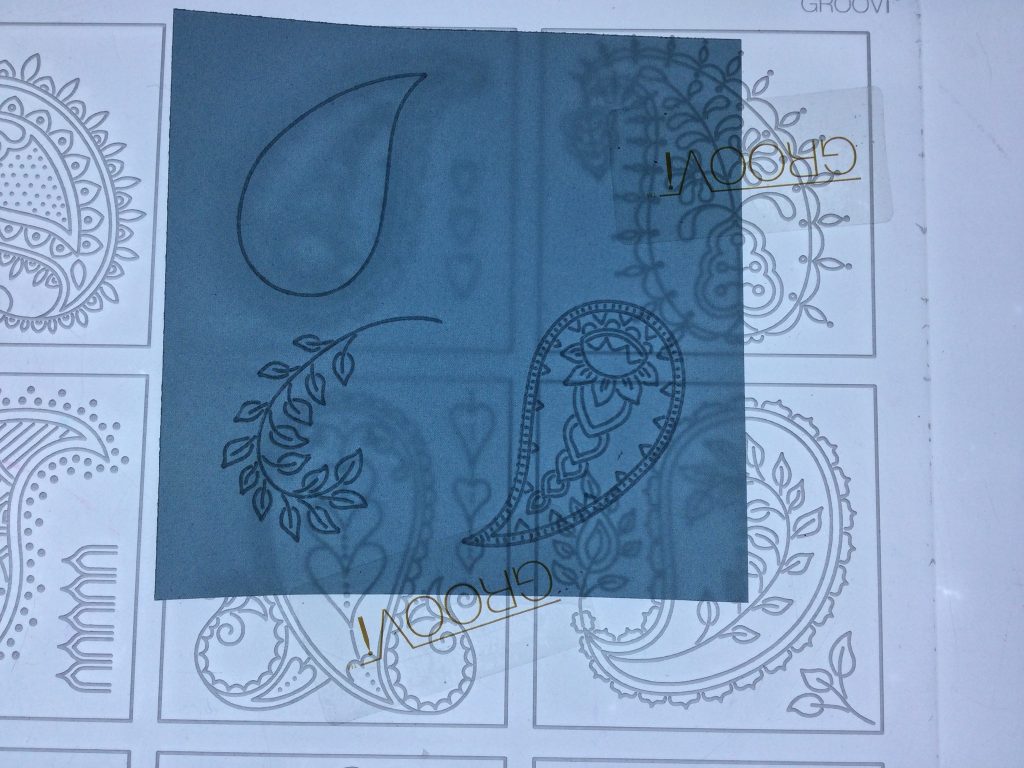
I love mixing Groovi with other papercraft techniques and as soon as I saw Barbara’s Groovi A42 Paisley & Leaves Sampler plate, an idea was born! Here is a lovely little project utilising both the Family Tree stencil and what has become one of my favourite A42 Groovi plates – I think you will agree they work perfectly together.
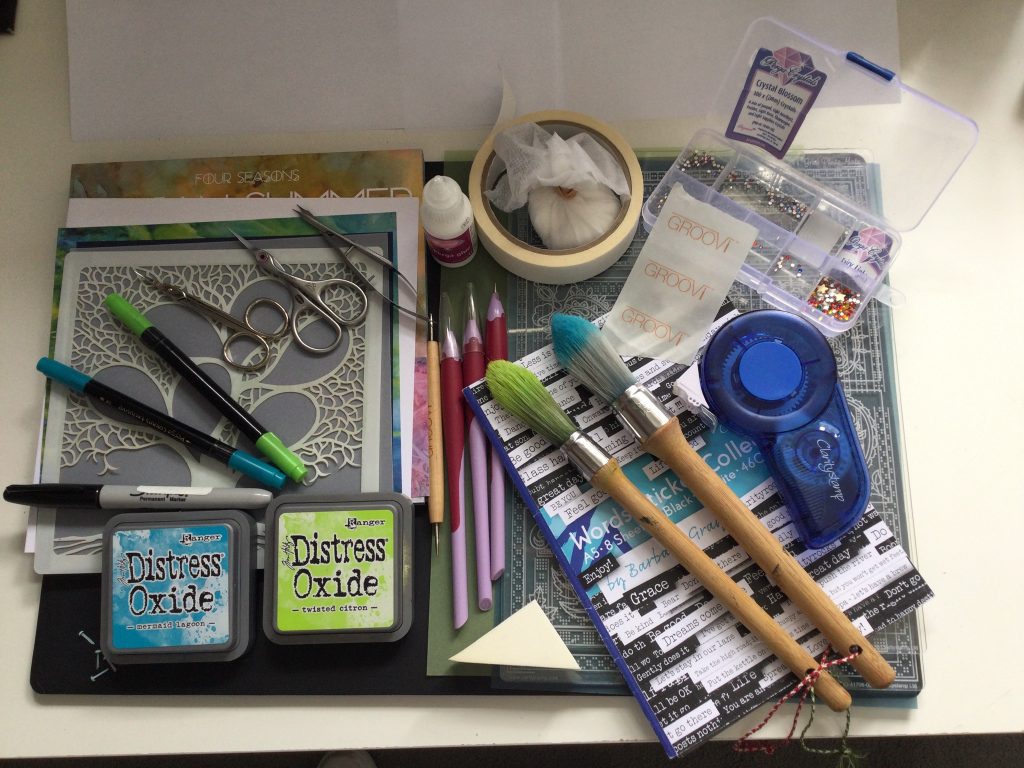
Ingredients
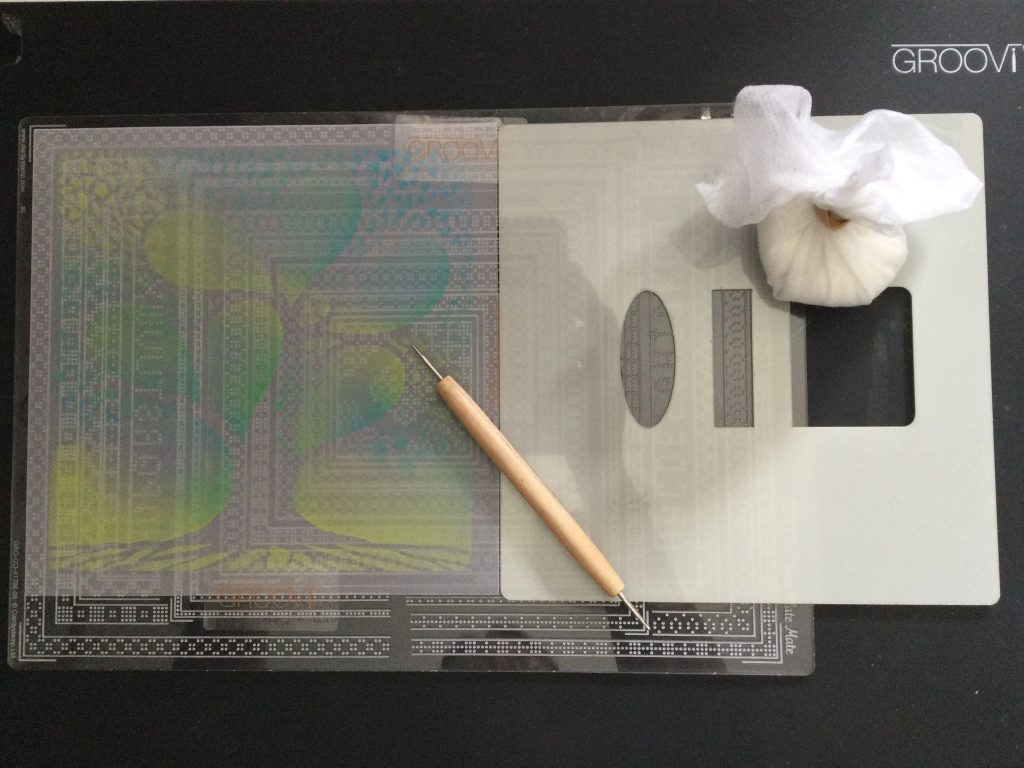
Groovi Plate Mate for A5 Square Grids (GRO-CO-41706-08)
Barbara’s Paisley & Leaves Sampler (GRO-TR-41761-15)
Family Tree 7” x 7” Stencil (STE-TR-00037-77)
8” x 8” white card blank (ACC-CA-30620-88)
Indian Summer Designer Paper (ACC-CA-30524-88)
Plain Parchment (A4) (GRO-AC-40024-XX)
Mixed Pack x 26 sheets Two Tone Parchment (GRO-AC-40779-A4)
Coloured Card
Groovi Embossing Tool (0.8mm – 1.3mm) (GRO-AC-40026-XX)
Pergamano 2 needle bold tool (PER-TO-70279-XX)
Pergamano Exclusive Scissors (PER-TO-70040-XX)
or Pergamano Perga Cutters (PER-TO-70042-XX)
or Pergamano Ringlock Scissors (PER-TO-70041-XX)
12” x 12” Black & White Super foam (GRO-AC-41759-XX)
Perga Colour Exclusives (PCE’s) (PER-CO-70060-XX)
Perga Crystals (Crystal Blossom) (PER-AC-70401-XX)
Perga Glue (PER-AC-70133-XX)
Brads (Pastel) (PER-AC-70270-XX)
Clarity Stencil Brushes (ACC-BR-30006-XX)
Distress Oxide Ink – Twisted Citron (INK-DO-50434-XX)
Distress Oxide Ink – Mermaid Lagoon (INK-DO-50416-XX)
Spot On Sponges (ACC-MG-30537-XX)
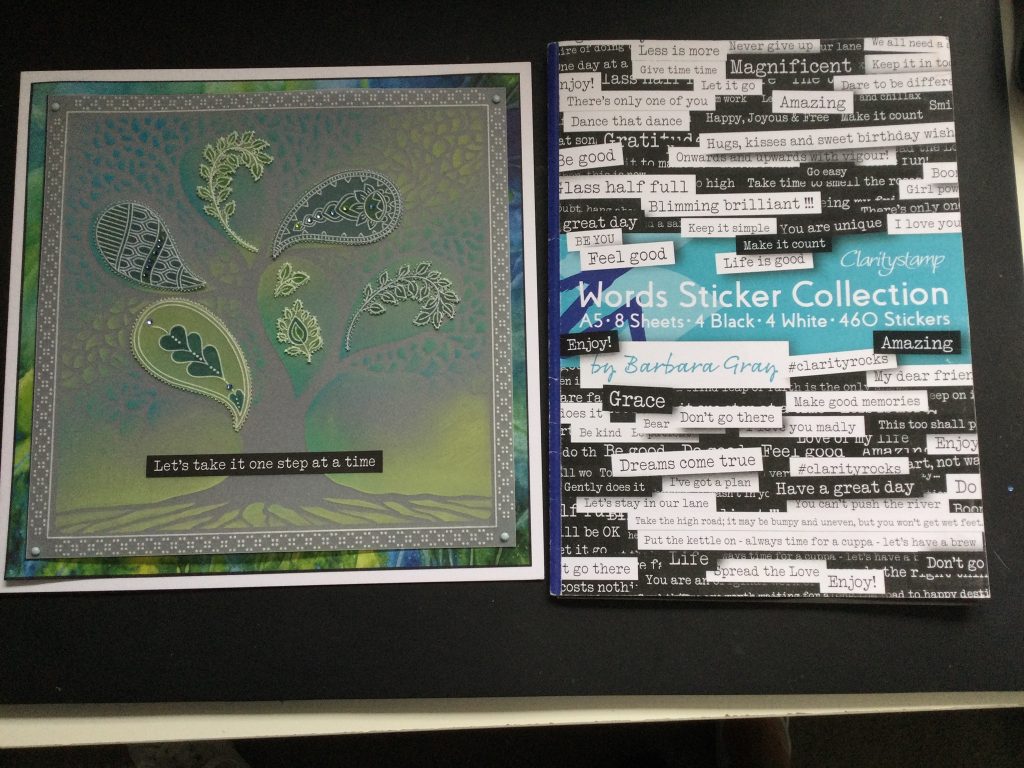
Barbara’s Word Sticker Collection (ACC-SC-30849-A5)
Roll A Tape Super Strong Runner (ACC-MS-31065-XX)
Masking Tape (ACC-AD-30109-XX)
Black Sharpie Pen
Pokey Tool (for making holes for the brads)
Instructions
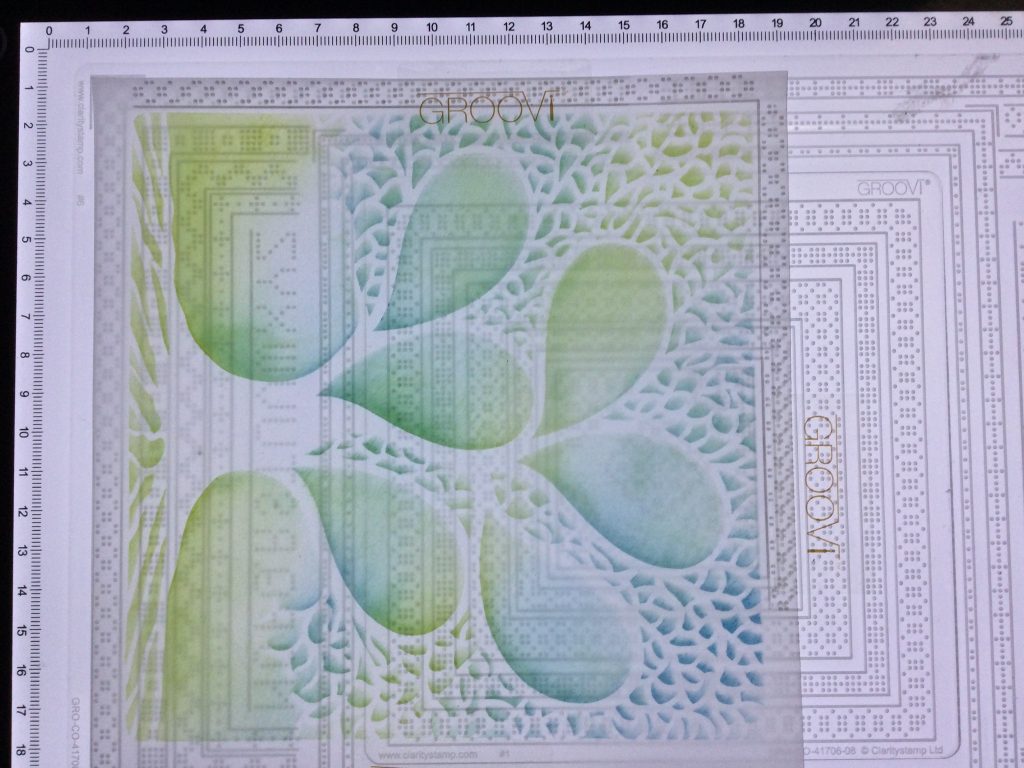
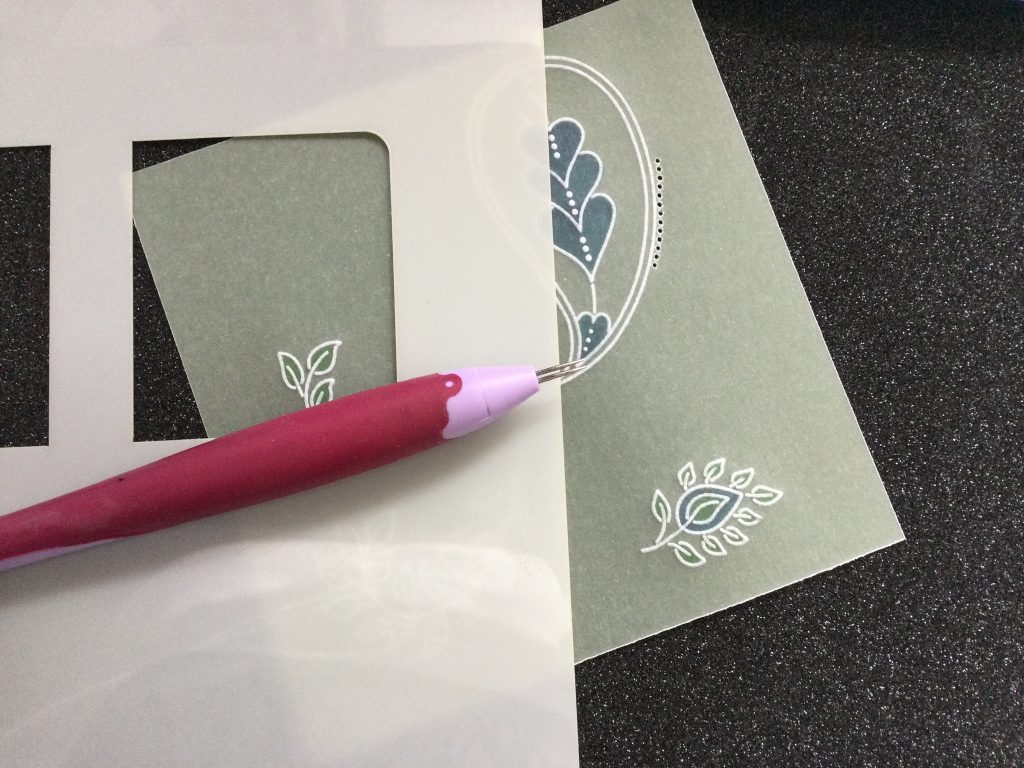
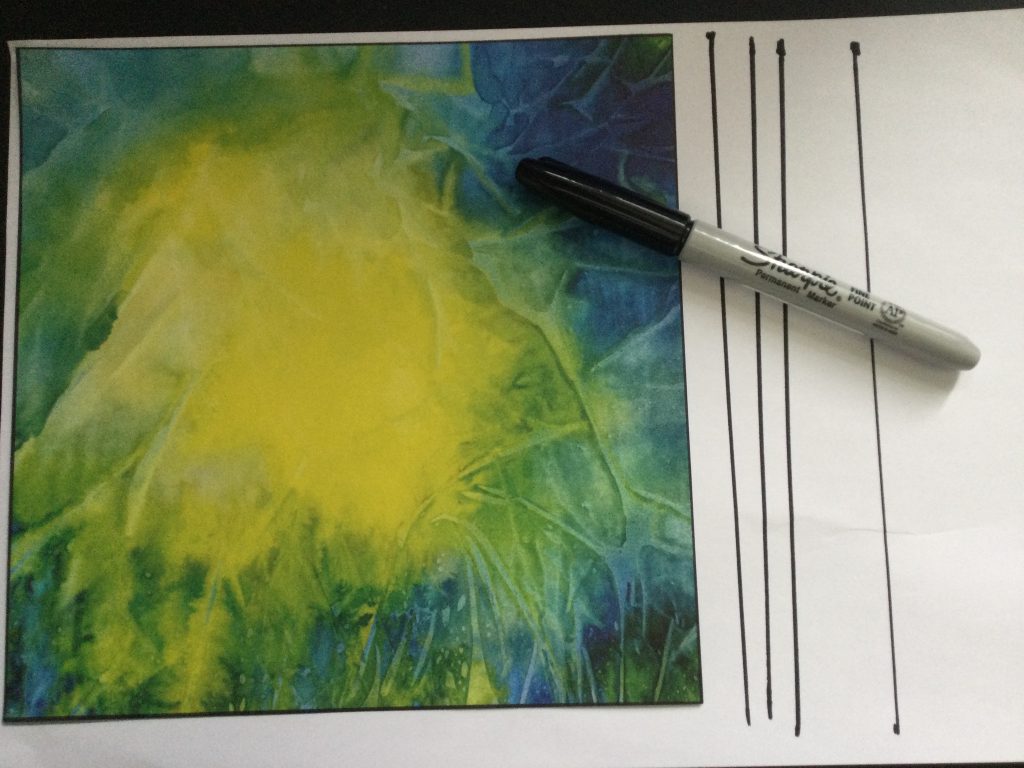
Step 1. Place the stencil over a piece of parchment measuring 7” x 7” and secure with masking tape.
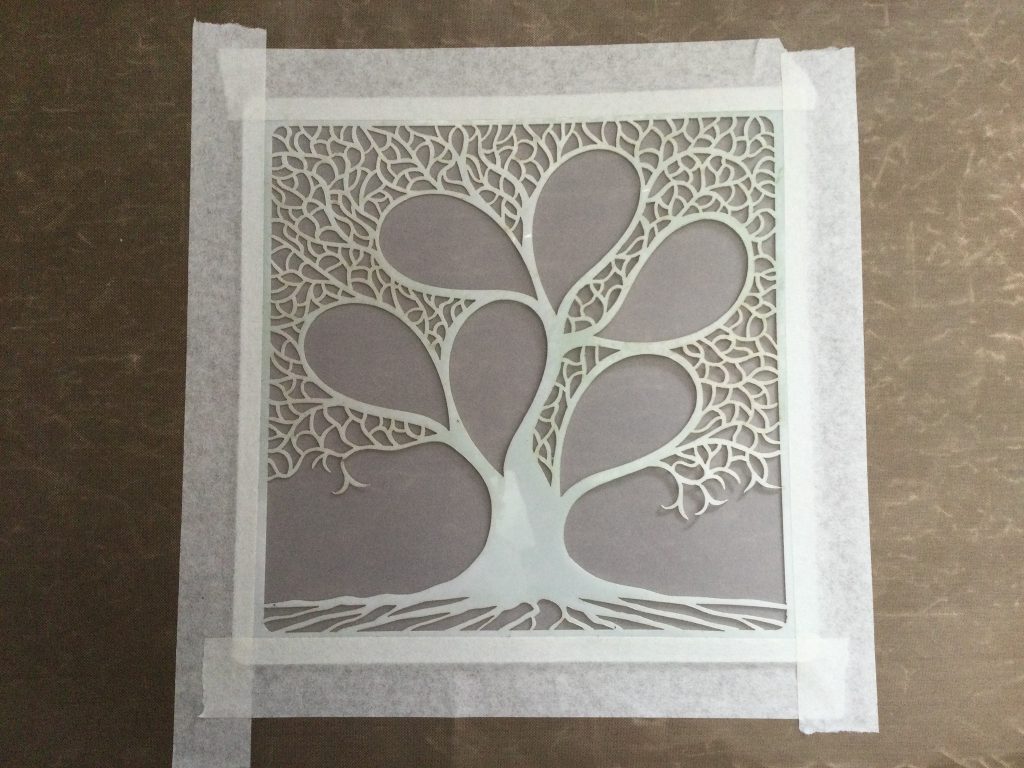
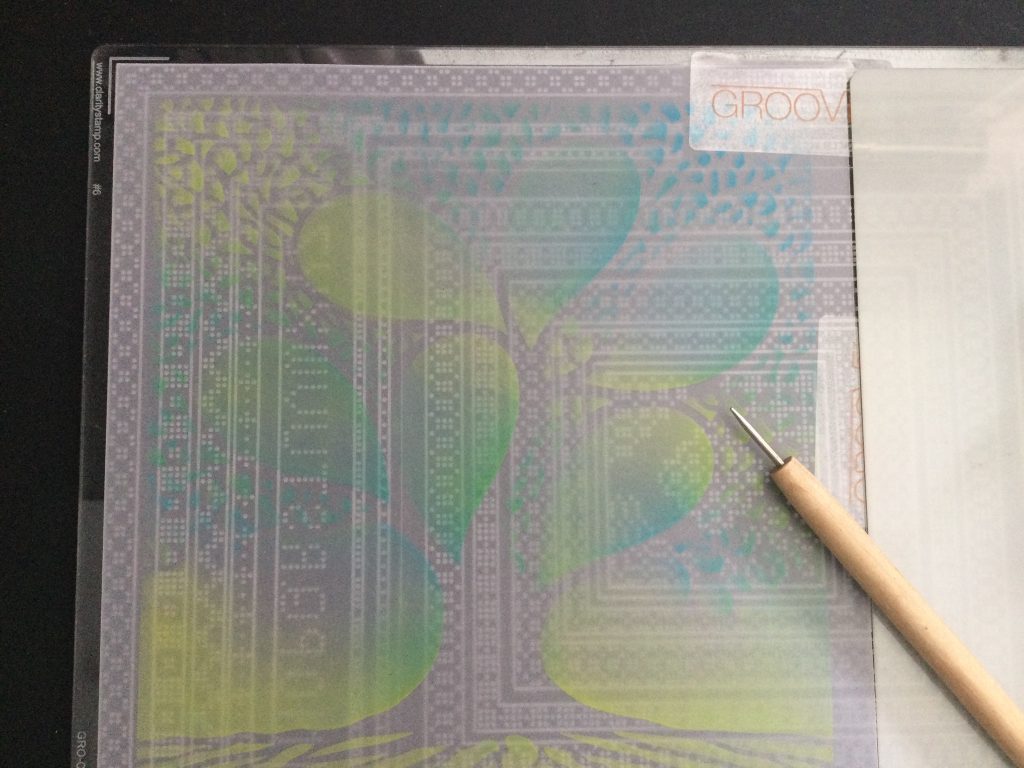
Step 2. Using the Clarity brushes and alternating between the two ink pads, sweep colour across the stencil in a random fashion. I spent a little time here applying several layers to create a nice depth of colour and used a spot on sponge to drag the colour off the stencil.
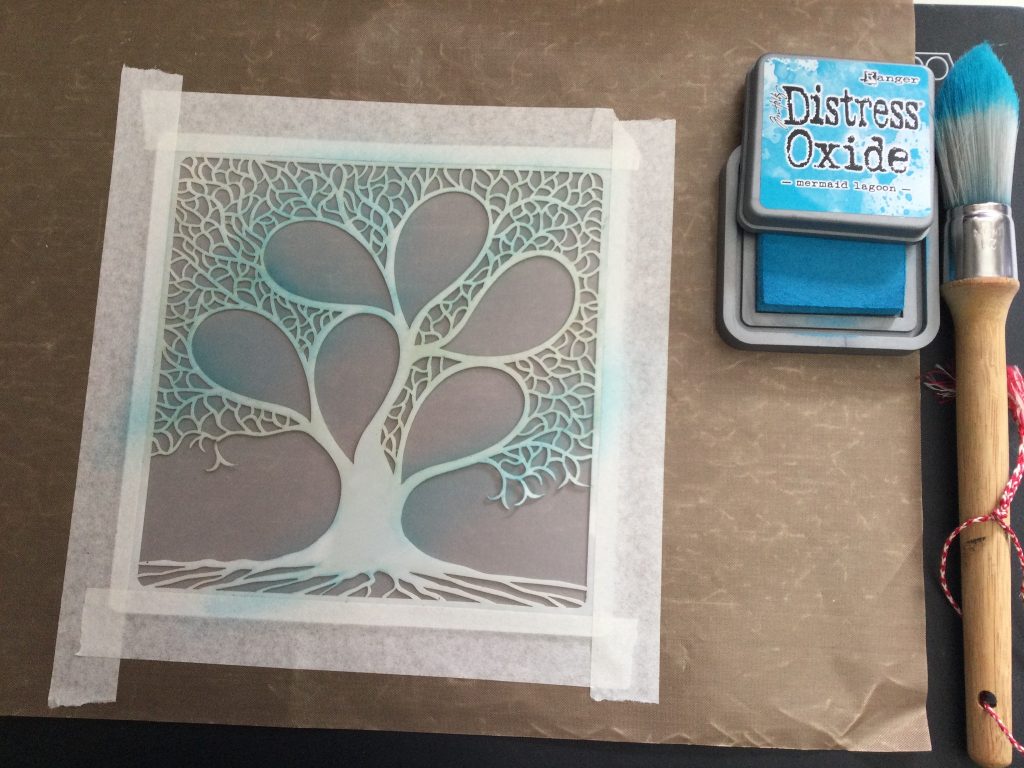
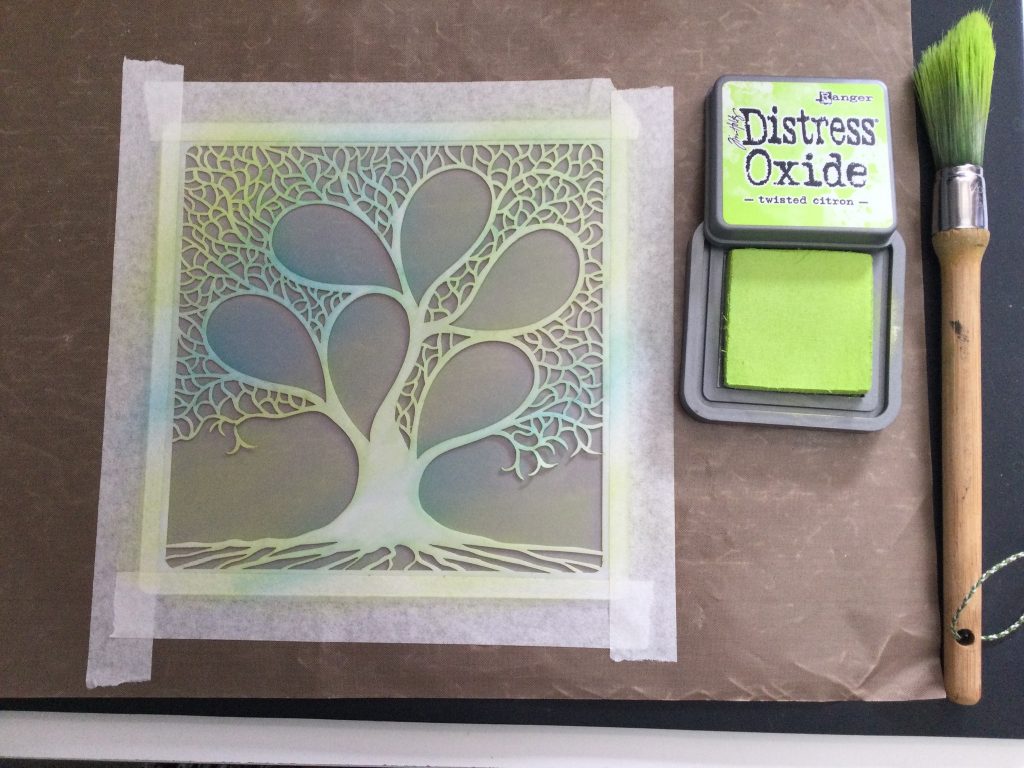
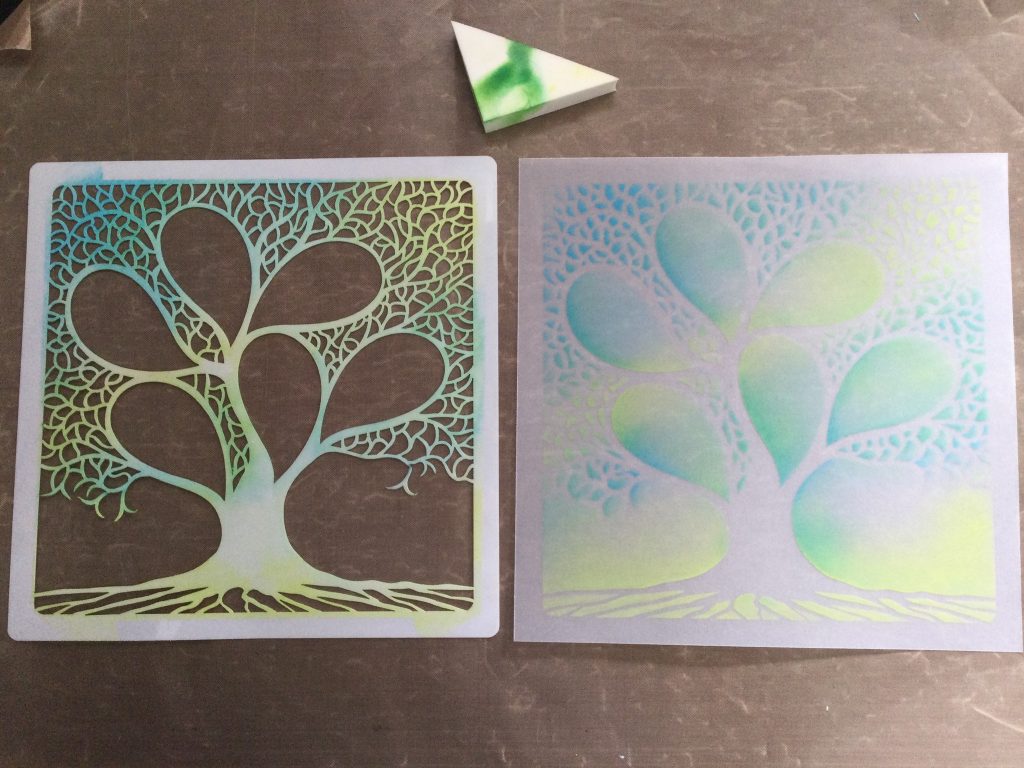
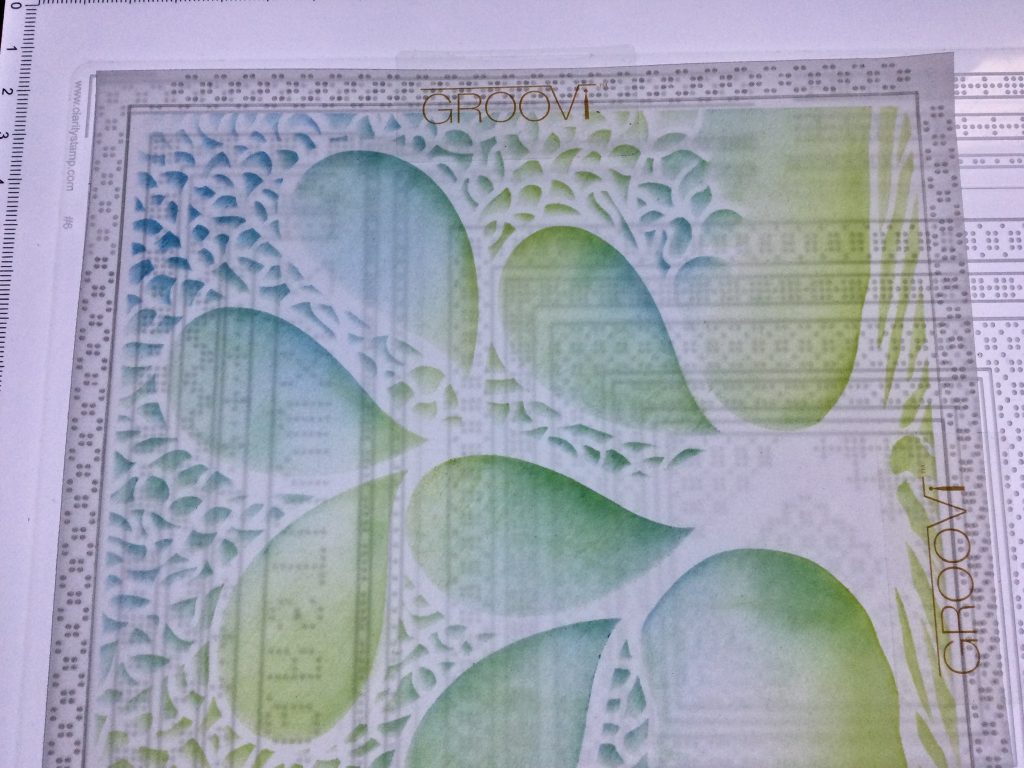
Step 3. Carefully remove the masking tape from the stencil and turn the parchment over (this is now the back of your work).
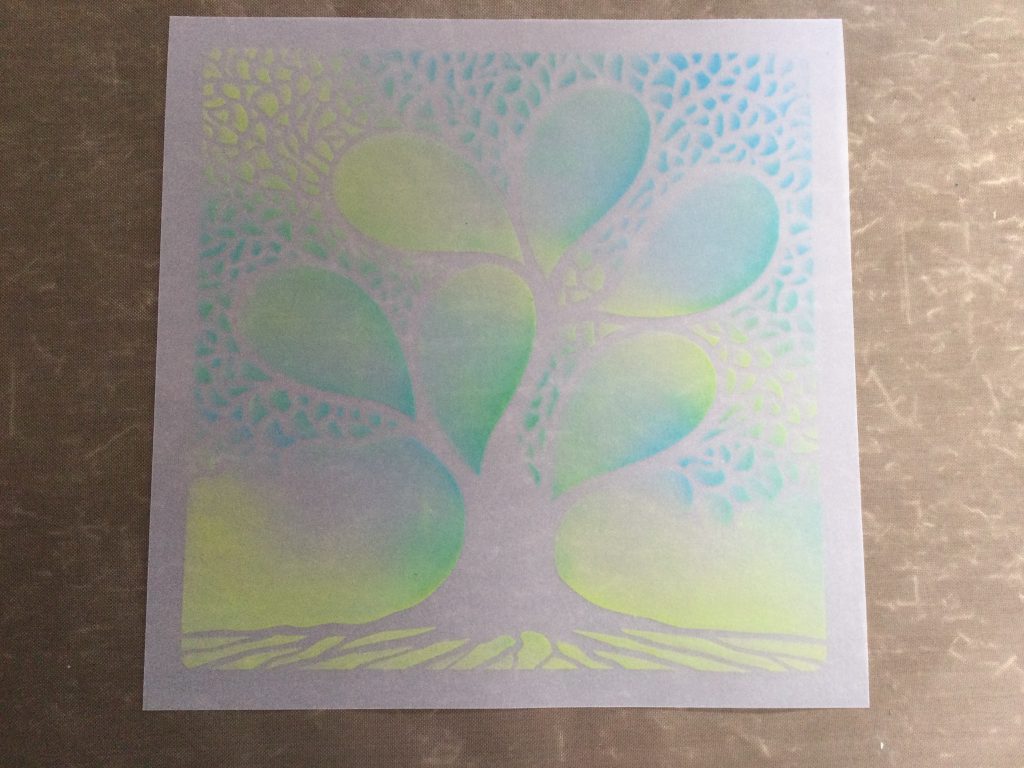
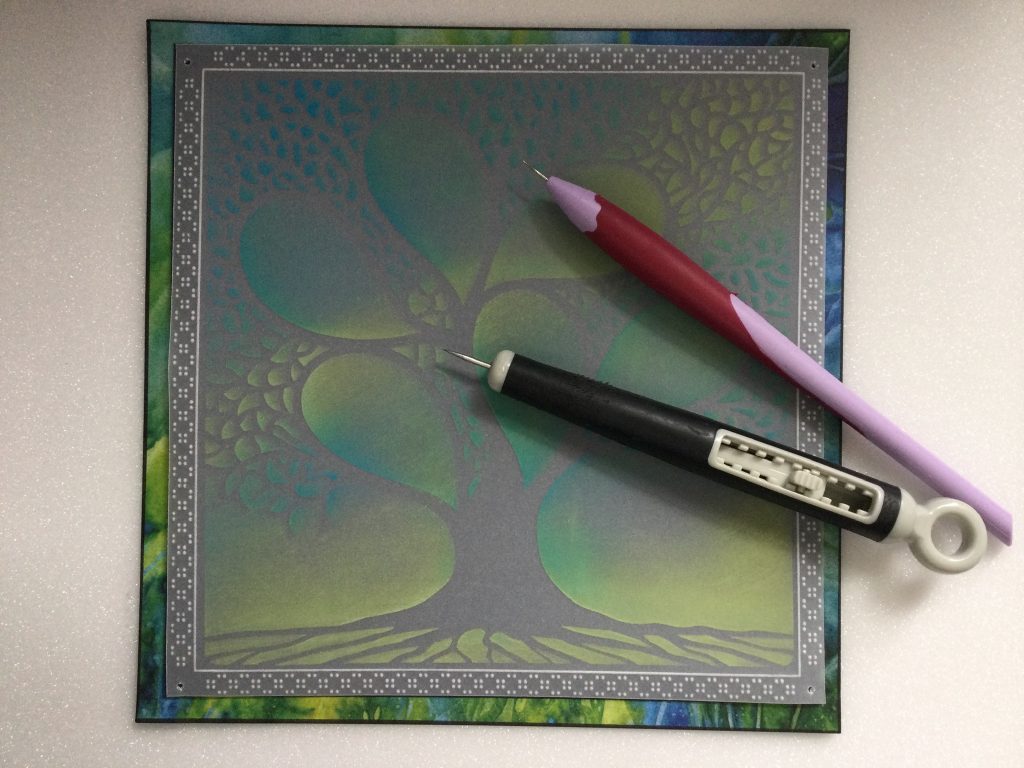
Step 4. Place the parchment onto the Groovi Plate Mate for A5 Square Grids lining up with the border.
Step 5. Using the No. 1 embossing tool, emboss the horizontal line in full, then the vertical line, but stop short of the bottom.
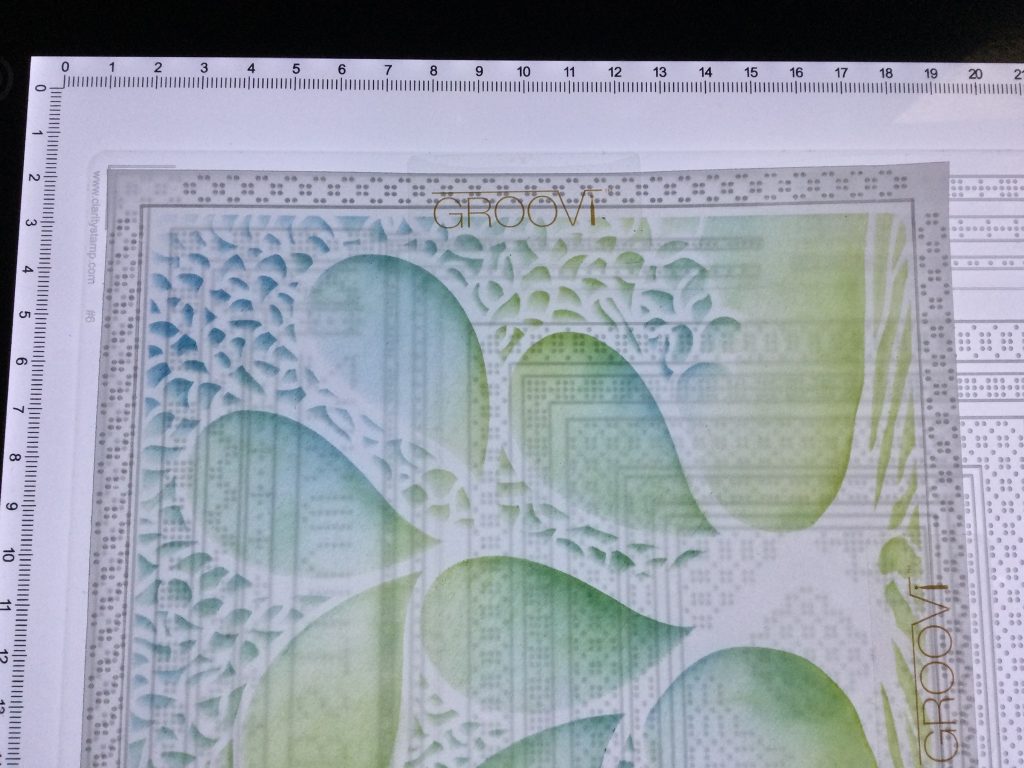
Step 6. Emboss the pattern using the No.2 embossing tool but leave the corners and start the embossing at the beginning of the lines.
Step 7. Turn the parchment 90o to the right and repeat on this side and remaining sides using the lines on the grid to keep your work straight.
Step 8. On the final side, you will need to realign the embossed dots to ensure the pattern remains true.
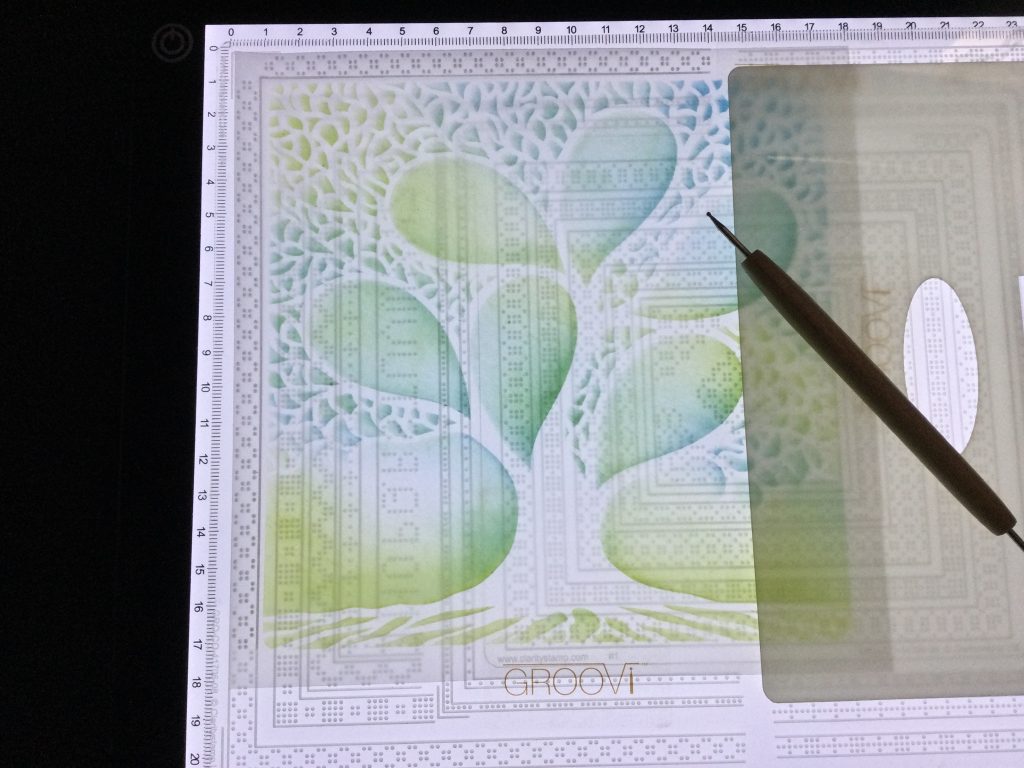
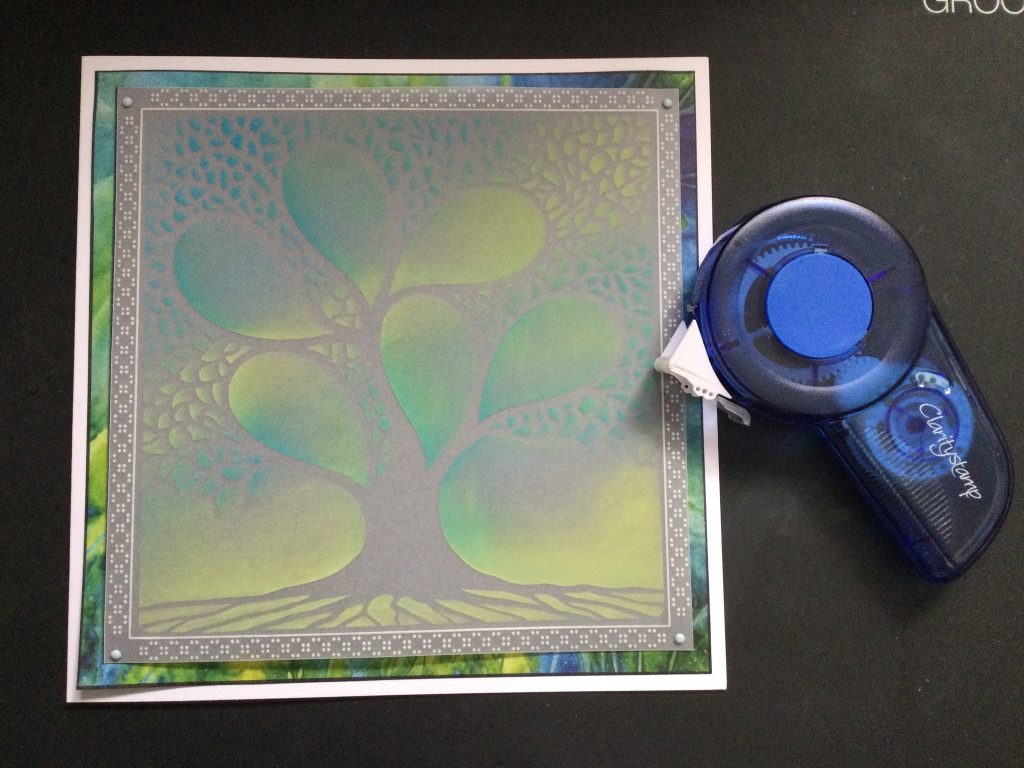
Step 9. This is how it looks on the right side of the parchment; the space in each corner will house a brad perfectly!
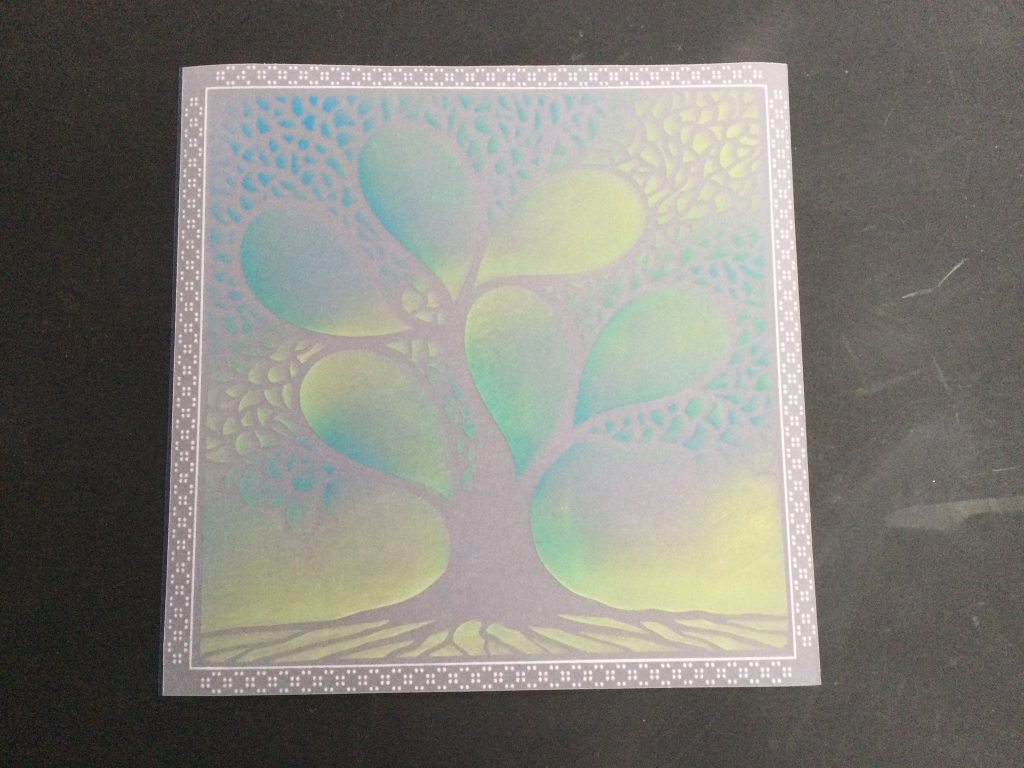
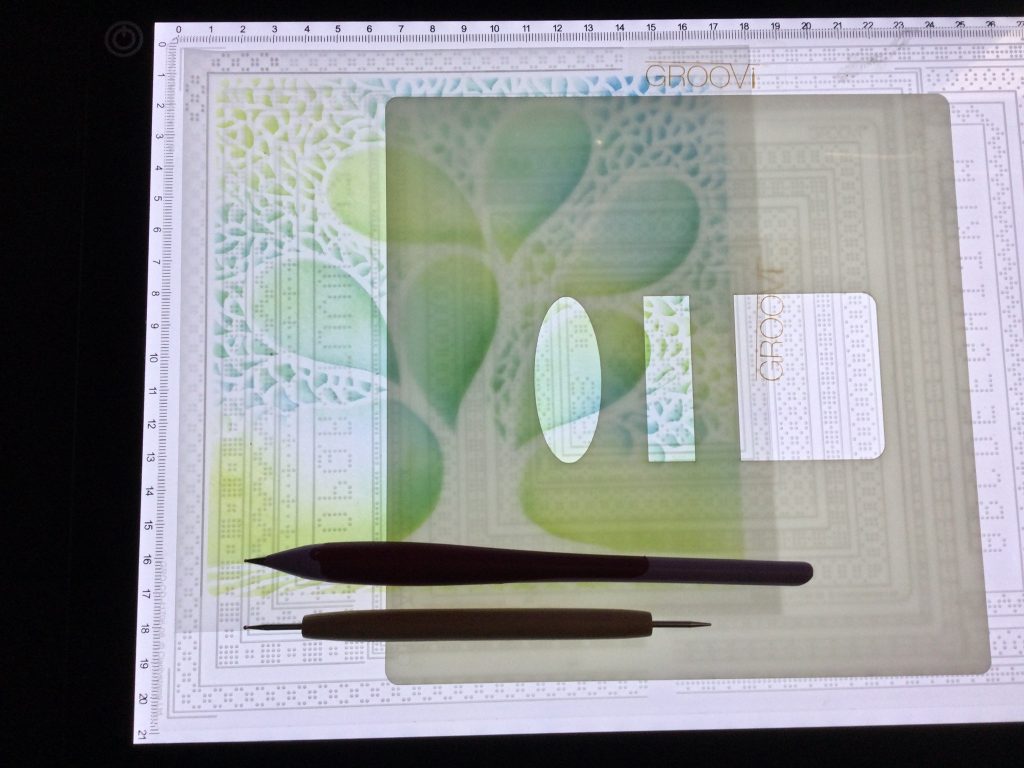
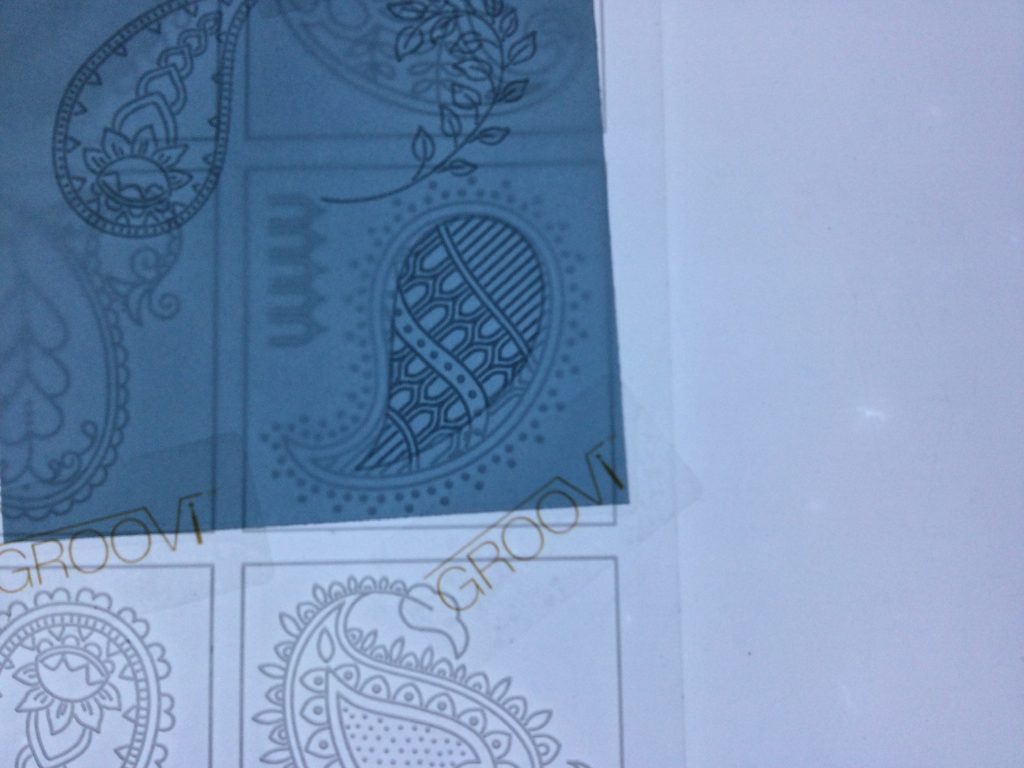
Step 10. Take a small piece of the coloured parchment – I used Apple Green – and on the shiny side, emboss the leaves, the small element in that square together with the sprig.
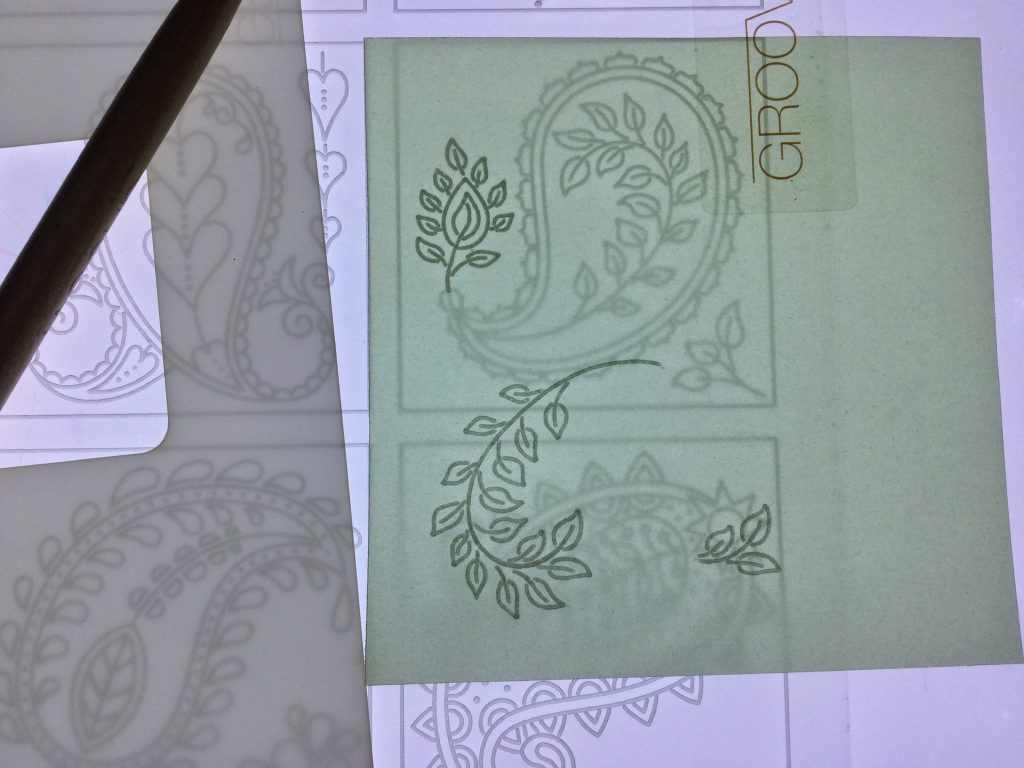
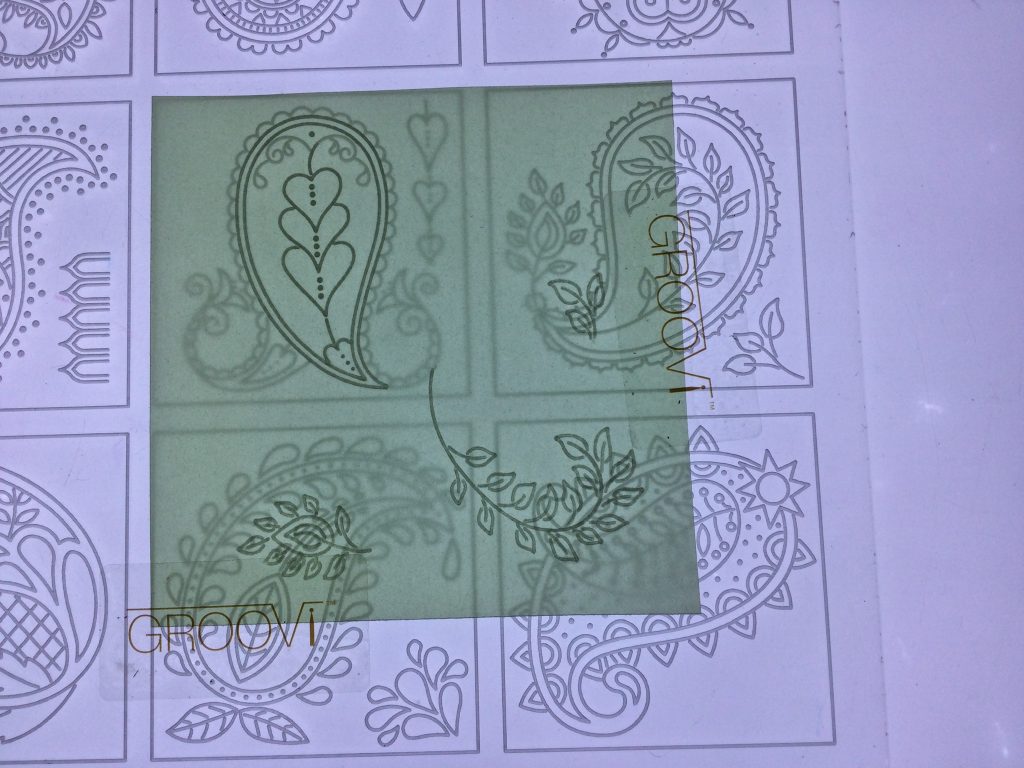
Step 11. Take a small piece of the coloured parchment – I used Petrol Blue – and on the shiny side, emboss the pattern from the square above the middle pattern, the leaves and the inside of the paisley pattern to the left of the centre square.
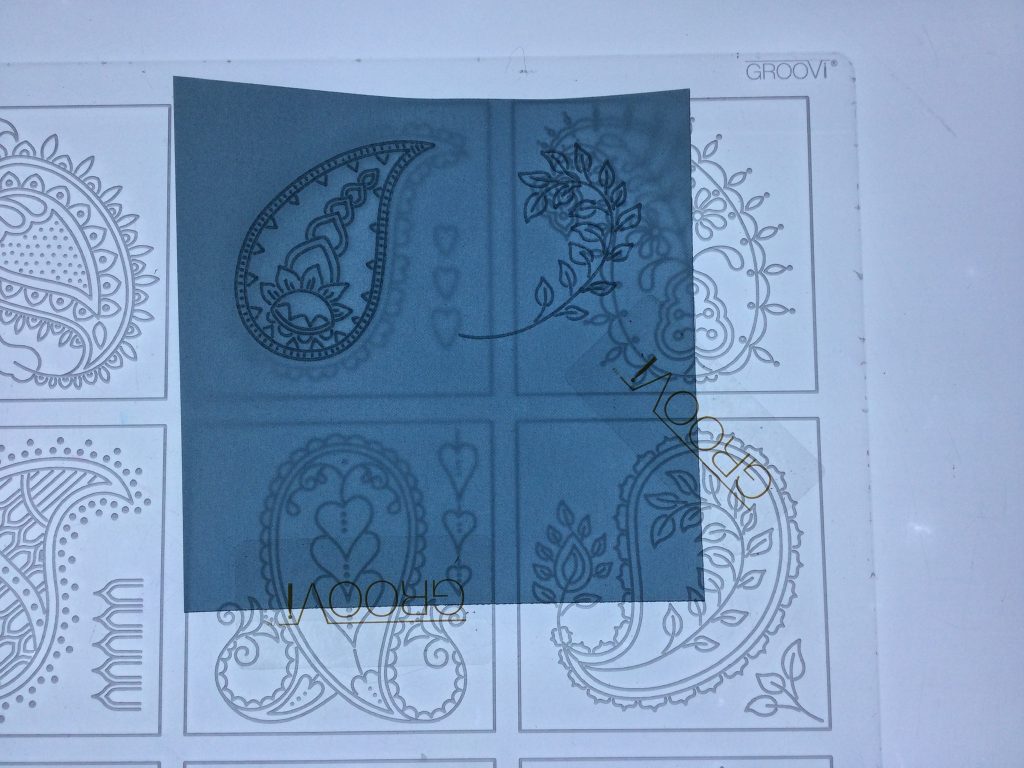
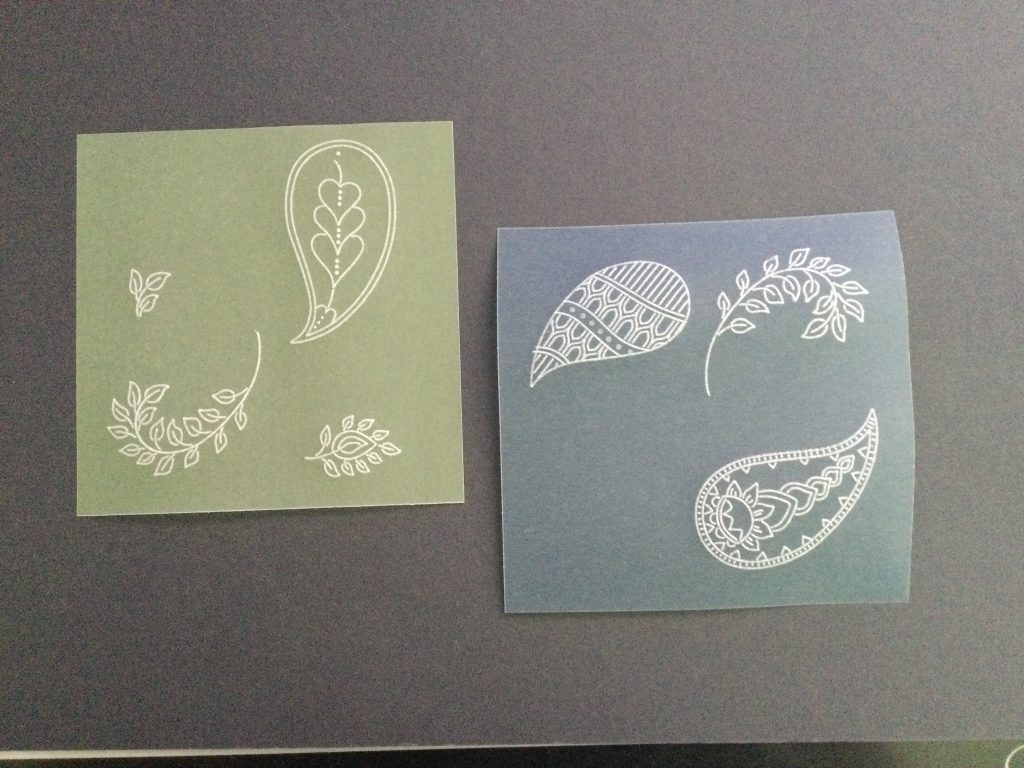
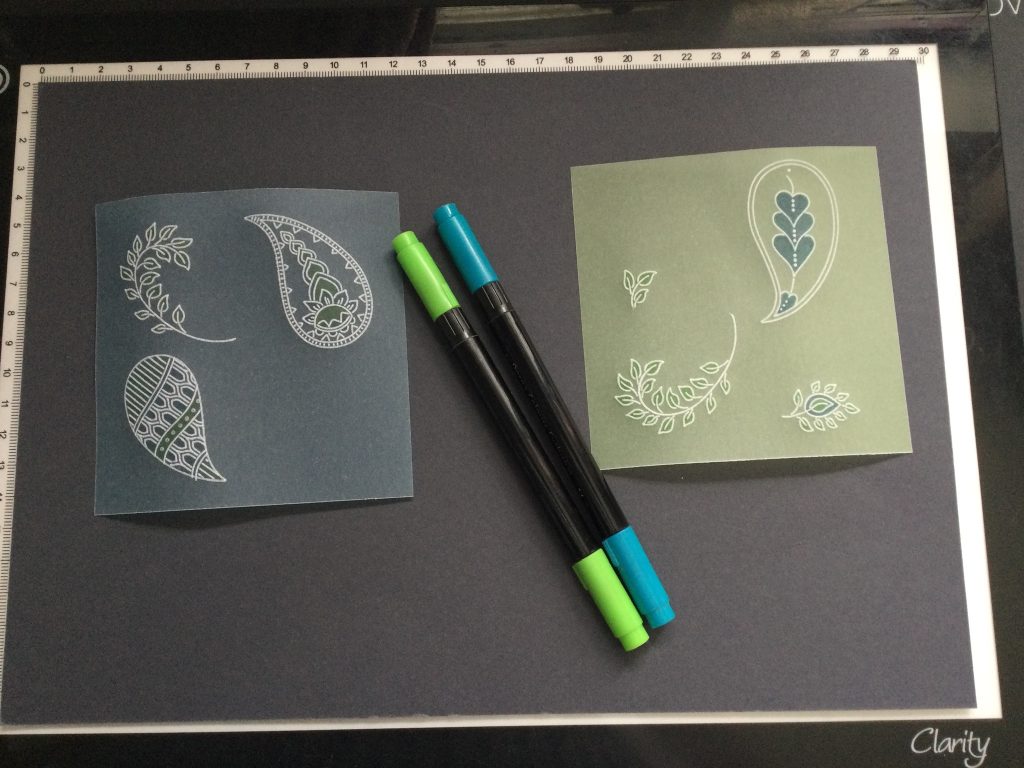
Step 12. Using perga colours 14 & 16, and working on the back of the parchment, colour in the detail.
Step 13. Place your parchment right side up on the black super foam and using the 2 needle bold perforating tool, carefully pierce around each of these elements.
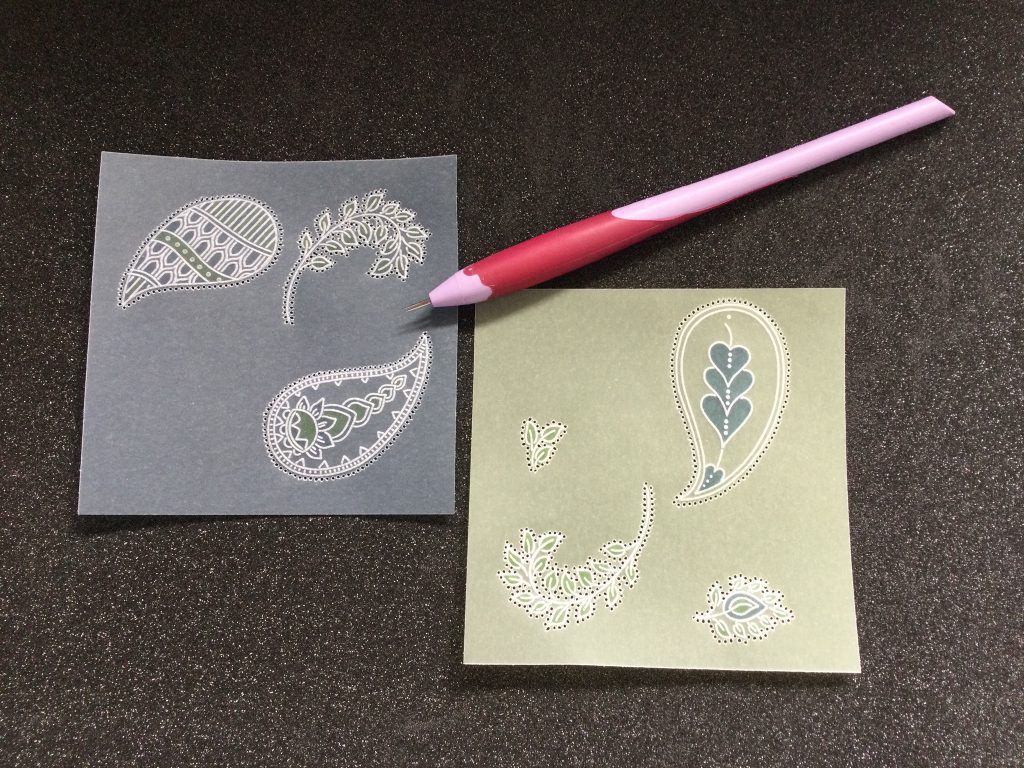
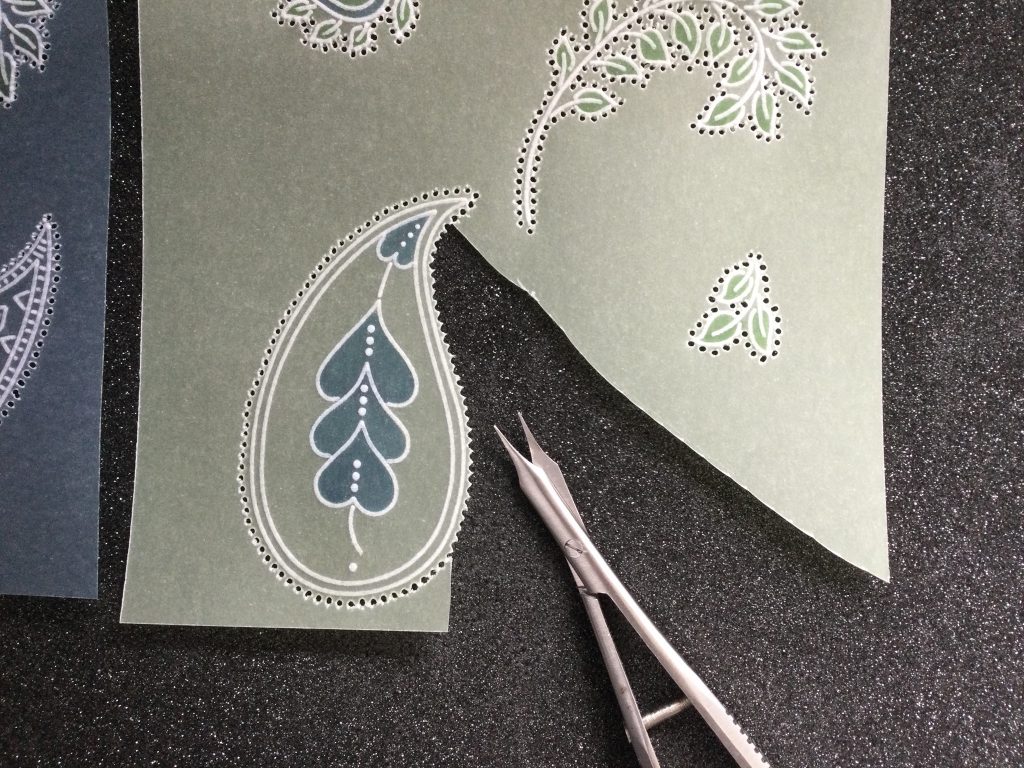
Step 14. Select your scissors and picot cut each of the elements – I always have a 5 minute warm up before picot cutting my work, so at this point, perforate a line of holes and a few four hole patterns to get you ready for the main event!
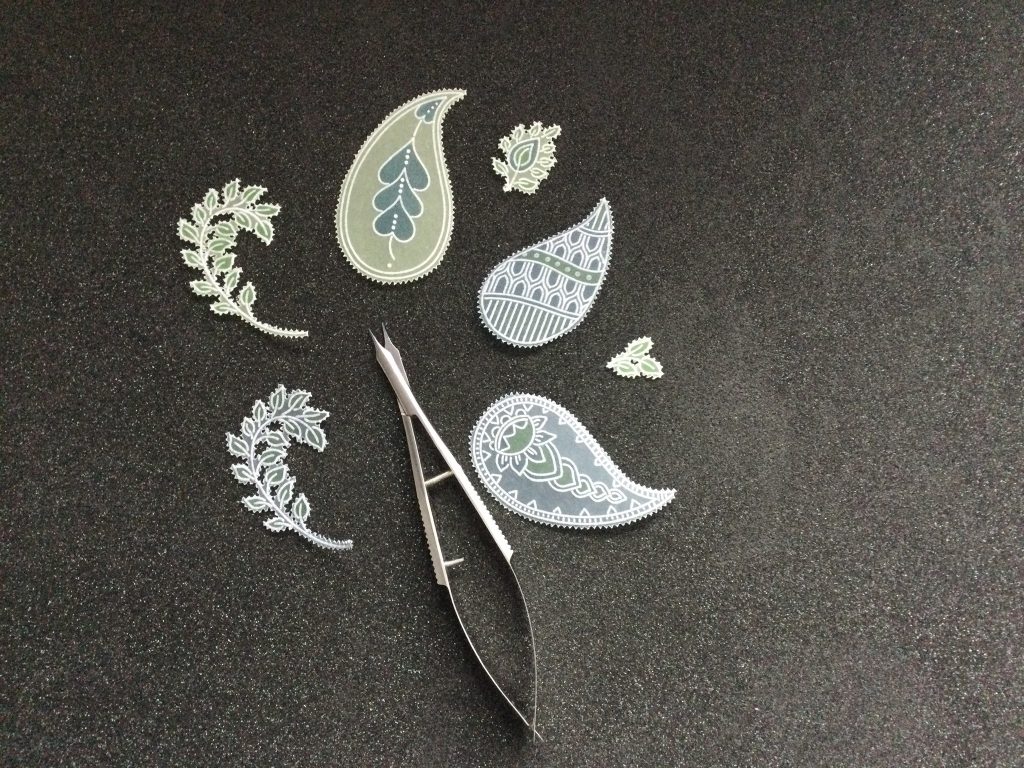
Step 15. Cut your designer paper to measure 7½” x 7½” and using a black sharpie pen, drag the edge of the pen on all four sides to create a black border.
Step 16. Place the designer paper, a piece of coloured card (I used navy blue) measuring 7” x 7” and your parchment on the white super foam and pierce a hole in each of the four corner areas.
Step 17. Add a brad in each corner and then fix the whole piece to the card blank using the tape runner.
Step 18. Using small dabs of perga glue fix the elements onto the open areas of the tree. Add a few perga crystals (I used light blue and light green) to the paisley shapes.
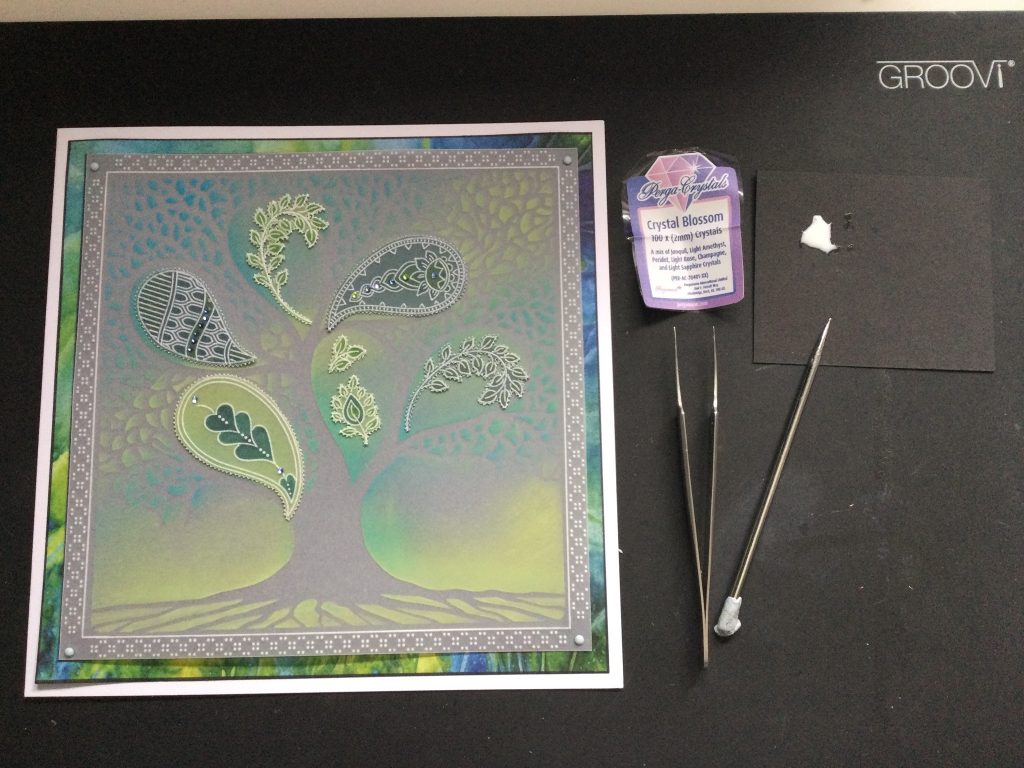
Step 19. Finally, select a word sticker from Barbara’s collection and add to the front of the card.
And there it is – a simple yet effective card using stencils, inks and of course, Barbara’s lovely Groovi plate. I hope you enjoyed this tutorial and I look forward to seeing your makes on Groovi Worldwide and Clarity Worldwide.

Blimey!! We certainly did take it ‘one step at a time’. And what a stunning result! It just goes to show that if you slow down, take your time and follow the steps… THIS is quite achievable, even if it might look daunting at first glance. Thank you Hazel for sharing such a beautiful tutorial with us.
As usual, we have put everything that Hazel has used in one place over on the Clarity website HERE
I really hope to see this card replicated by some of you online. Please feel free to have a go and email it to me (grace@claritystamp.com). There may be some sneaky giveaways if you do!
OK, OK, one last thing before we go. We’re just so excited, and why shouldn’t we be? It’s our birthday after all. You probably knew that, we’ve not exactly kept quiet about it. But you might not know ALL the details. We’ve had a few TV shows in celebration so far, marking the occasion with brilliant new innovative products. You can visit our website for regular in-depth updates on the birthday shows HERE.
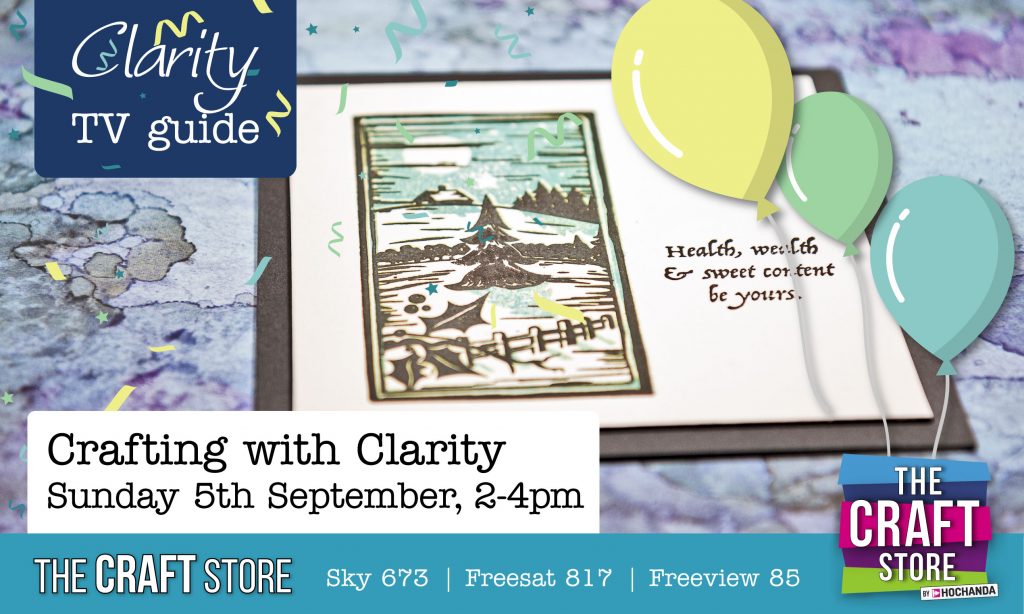
You can also check out the graphics below for details on today’s shows. We’ve got Barbara’s 2-4pm Sunday show coming up in just a few hours, and we’ve got a stunning set of winter-themed Linocut stamps for you. Designed by Barb herself, we really do faun over these exquisite designs. And you will too when you see what Barb has in store for the shows!
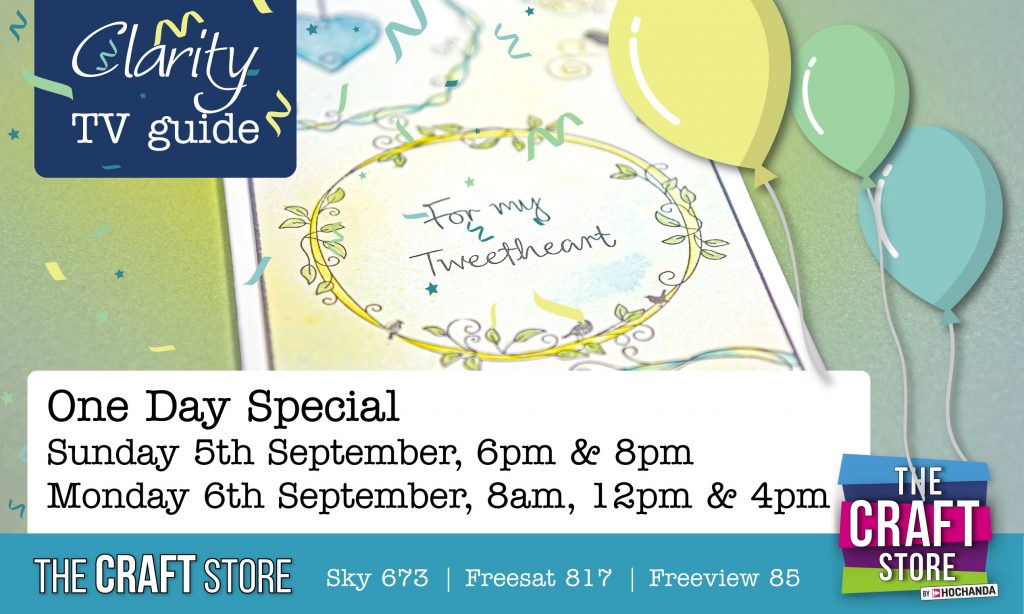
Then we’re ending the celebrations in style with another blockbuster One Day Special featuring a range of Personalised stamps. That’s right, a personalisation service for bespoke stamps, featuring your own name or phrase is the offering and we’re thrilled to offer this service so you can add that extra special, extra personal touch to your stamps and creations.
If you’ve not enjoyed the birthday party yet, why not? You’re all invited and it’s not over yet!
For now, travel gently into the week ahead. I’m almost back in ol’ Blighty 🙂
Lotsa love, Grace xo
Clarity – The Home of Art, Craft and Well-Being.
Lovely step by step and fantastic shows and products this weekend. Just waiting for the Lino cuts to go on sale! Have a good weekend. Hx
A lovely project, not sure whether I have the stencil as I don’t recognise it so may have to wait for that to come but I can get on with the smaller elements. Have the ironing ready to do between 2 & 4 for the reveal of the lino cuts & then we have the ODS of personalised stamps. I had one last time but it seems to have gone AWOL but I like the delicate look of the new ones so might treat myself to another. Then all we need is time to use all our lovely goodies but the fact that they enhance the dies & stamps we already have is a bonus. Hope you have a good flight over the pond – the weather is good at the beginning of the week, not so sure about the end. May be see you on Friday for the PJ party x
That’s a fabulous project Hazel! Thank you for sharing it with us. I think it shows that we can use stencils alongside Groovi extremely well. X
Looks great Hazel. Have just included the stencil with my order so will get on with some of the rest until it arrives. Its been a brilliant weekend !! All those lovely goodies!!
Take care and thank you for all you do.
xx
Hi Grace, Hi Hazel, Wow !! when stencil met groovi a stunning creation emerged, I would never have thought to do this, but this technique is stunning and the colours you used are gorgeous, thank you.
Lots of love from Patricia xx
Thank you everyone, for your kind comments. I love mixing things up a bit so watch this space, there is more to come!! Xx