Clarity’s Blog Tutorial: How To Make A Christmas Tree Aperture
Hello hello! Grace here.
I hope this finds you well and enjoying your Sunday.
We’re joined this weekend by the fabulously talented Glynis Whithead. She has prepared a step-by-step project for you, to share her tricks and techniques. Lucky us!
I’ll pass you over to the pro!

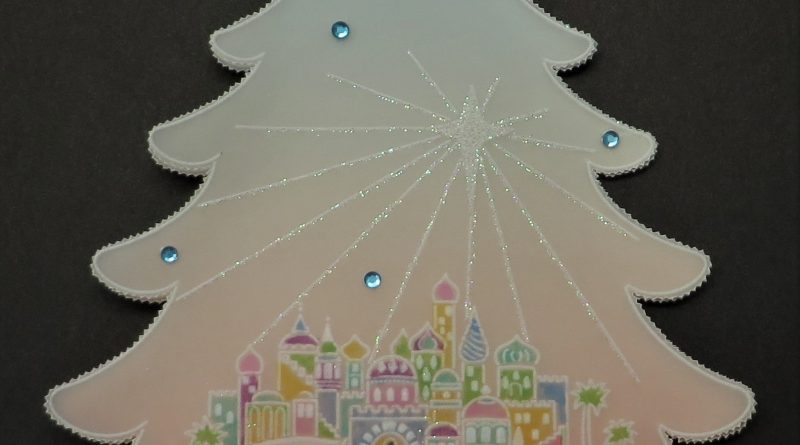
Oh Little Town of Bethlehem Christmas Tree Blog
Ingredients
Oh Little Town of Bethlehem from Linda’s Christmas Plate Collection Set 2 (GRO-CH-41984-03)
Linda’s Layered Christmas Tree A5 Plate (GRO-CH-41671-04)
Rainbow Duo Parchment and Paper – Paradise Island A4 (GRO-AC-42023-XX)
Plain parchment (GRO-AC-40024-XX)
Christmas Tree Card Blanks and Envelopes x 10 (ACC-CA-31074-XX)
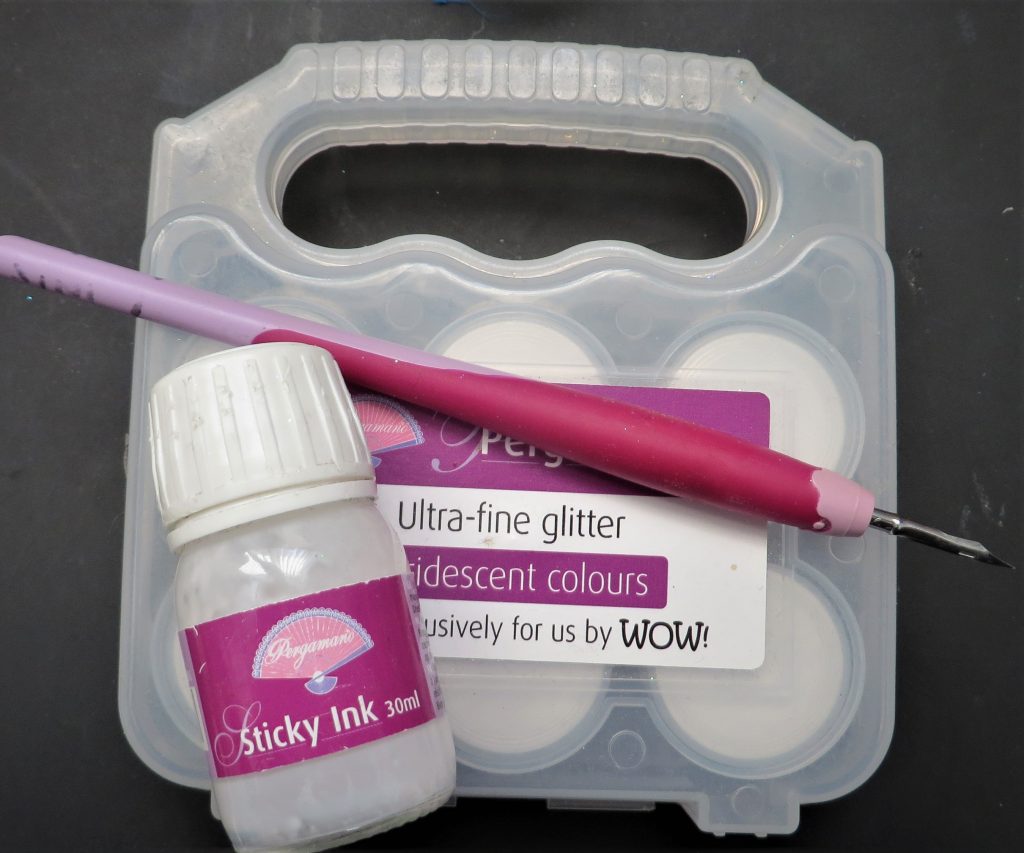
Perga Glue (PER-AC-70133-XX)
Sticky Ink (PER-AC-70134-XX)
Perga Glitter (PER-AC-70252-XX)
Perga Colour Exclusives (PER-CO-70060-XX)
Gems
Method
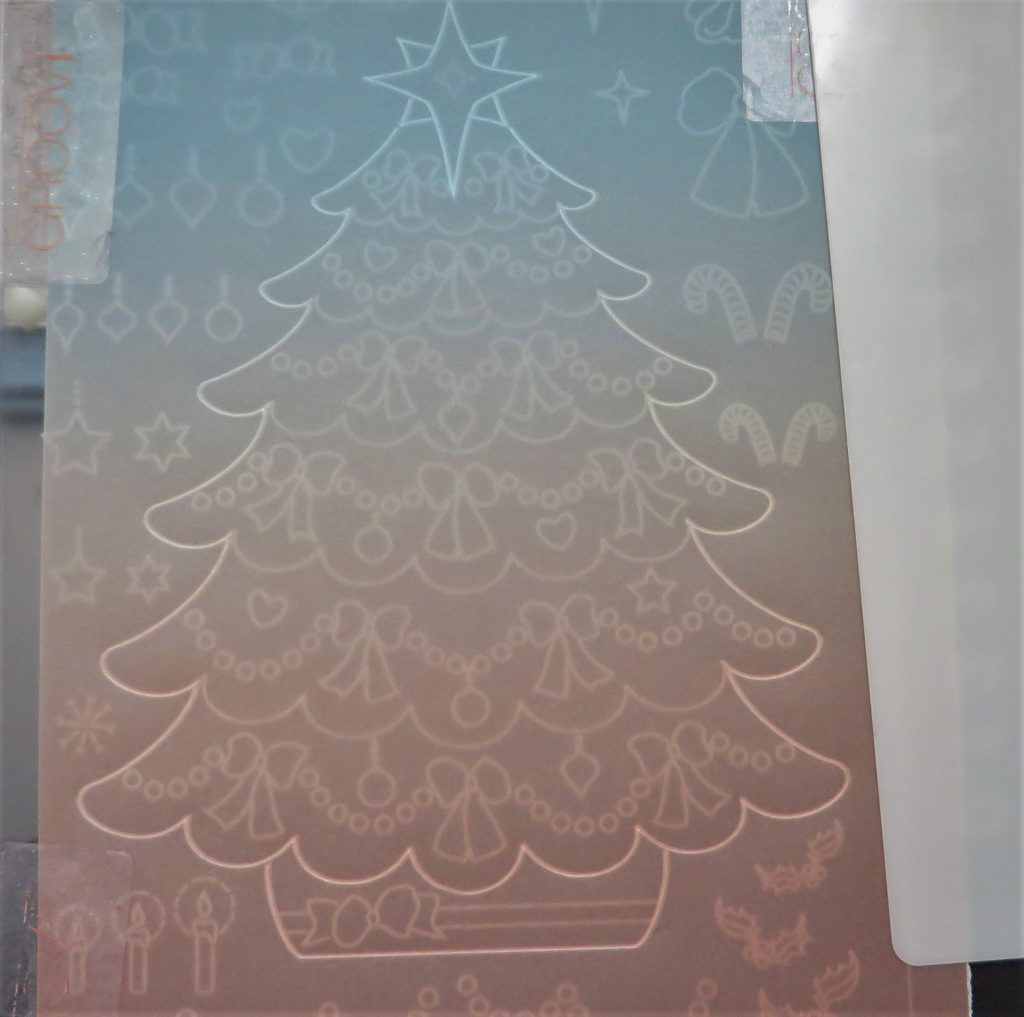
Step 1. Take a piece of A5 plain parchment and emboss the outline of the Christmas tree, leaving out all the layers. Trace an extra star for layering up at the end.
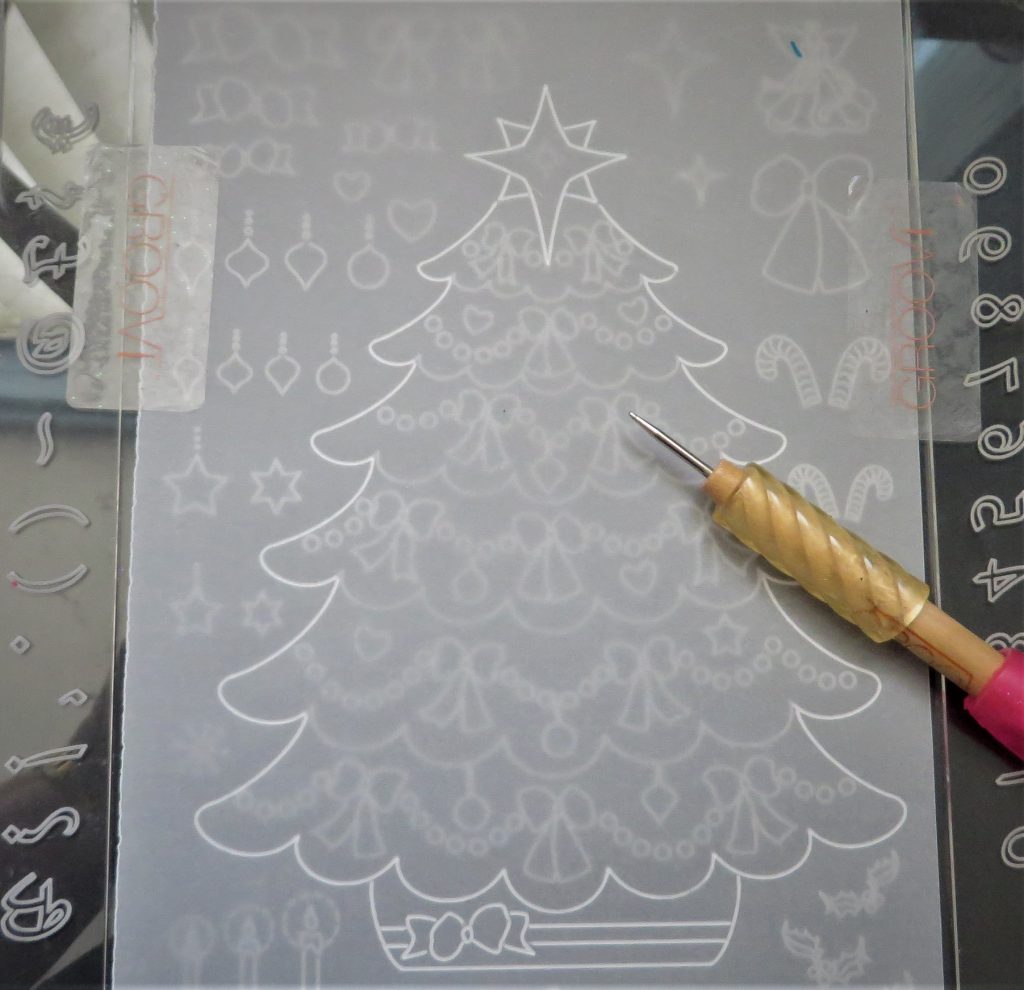
Step 2. Using the ‘Oh Little Town of Bethlehem’ A5 square plate, frame the picture into the Christmas Tree outline.
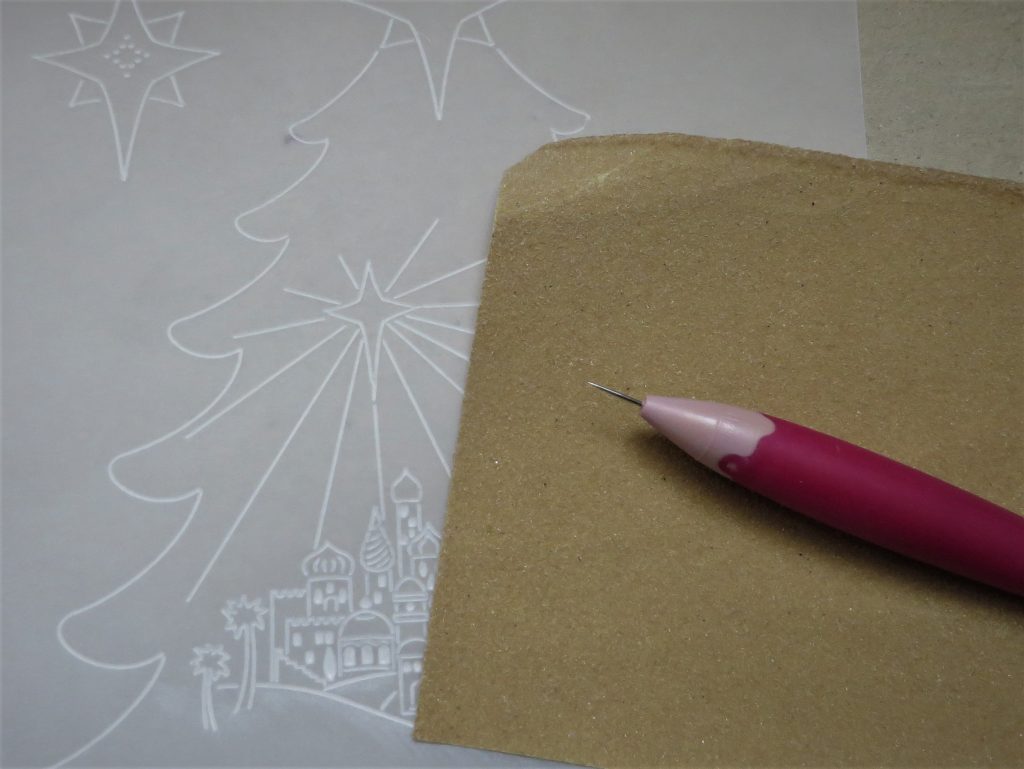
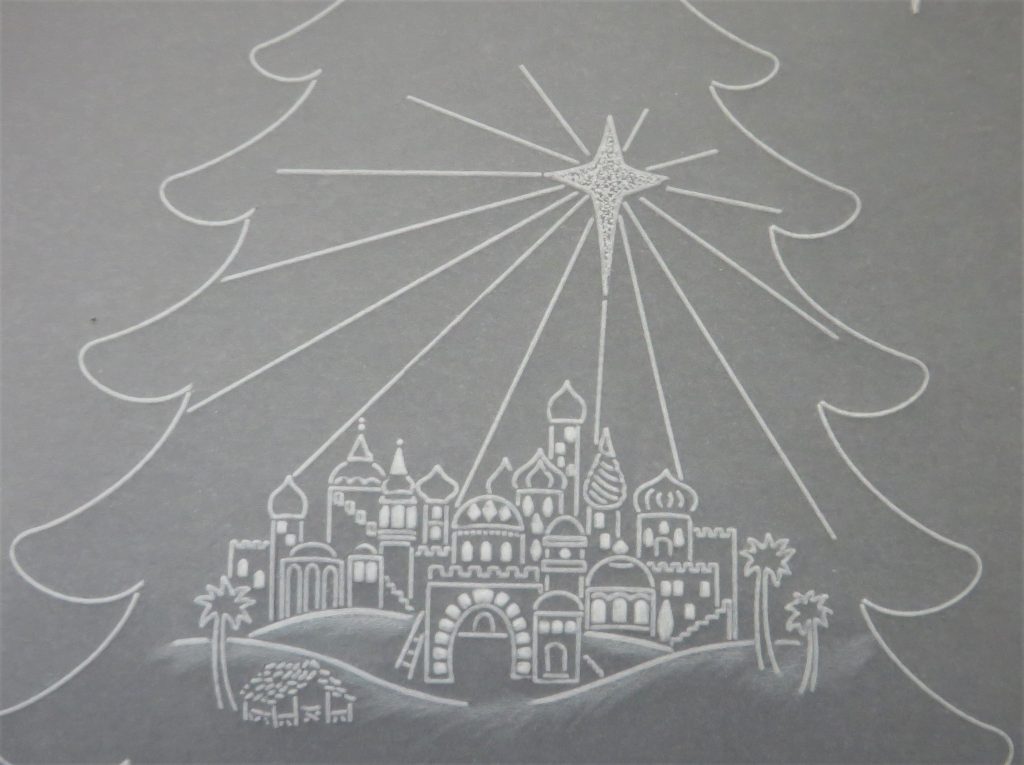
Step 3. Emboss all of the tiny windows of the buildings and some highlights on the hills. For the windows, use a 1.5 mm ball tool or the number 2 tool from the starter kit. Use a 6mm ball tool to add some highlights to the hills.
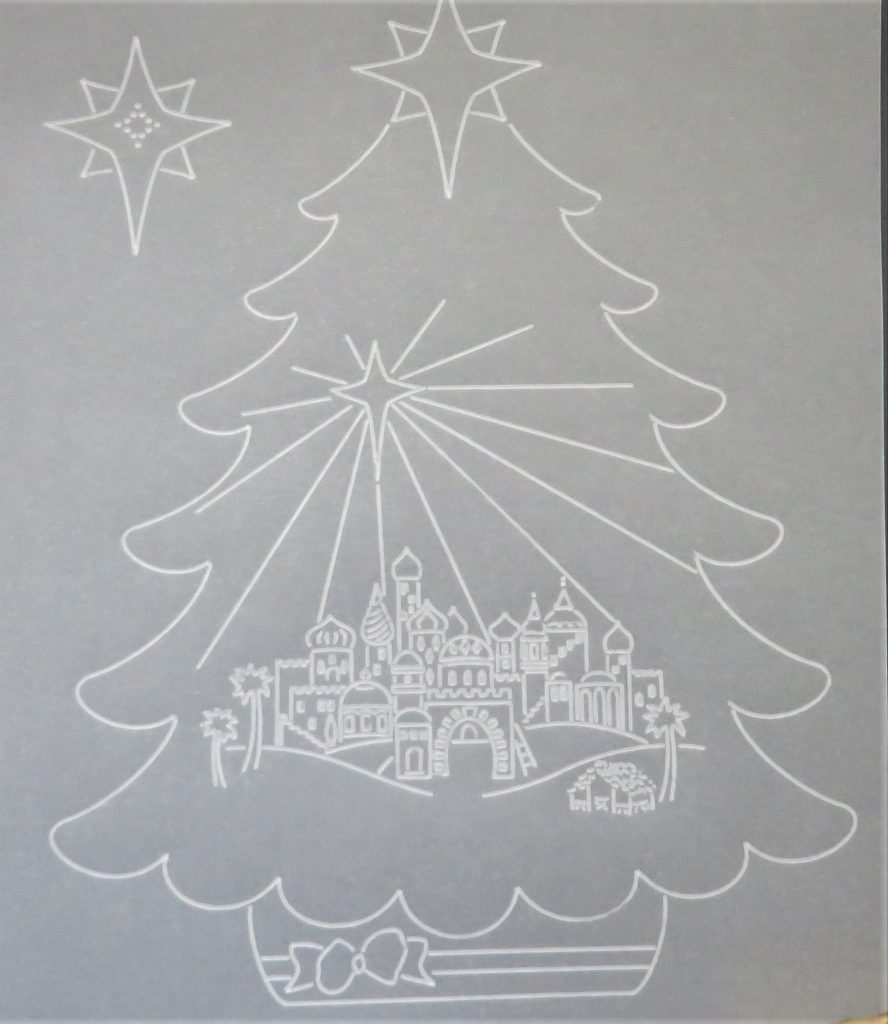
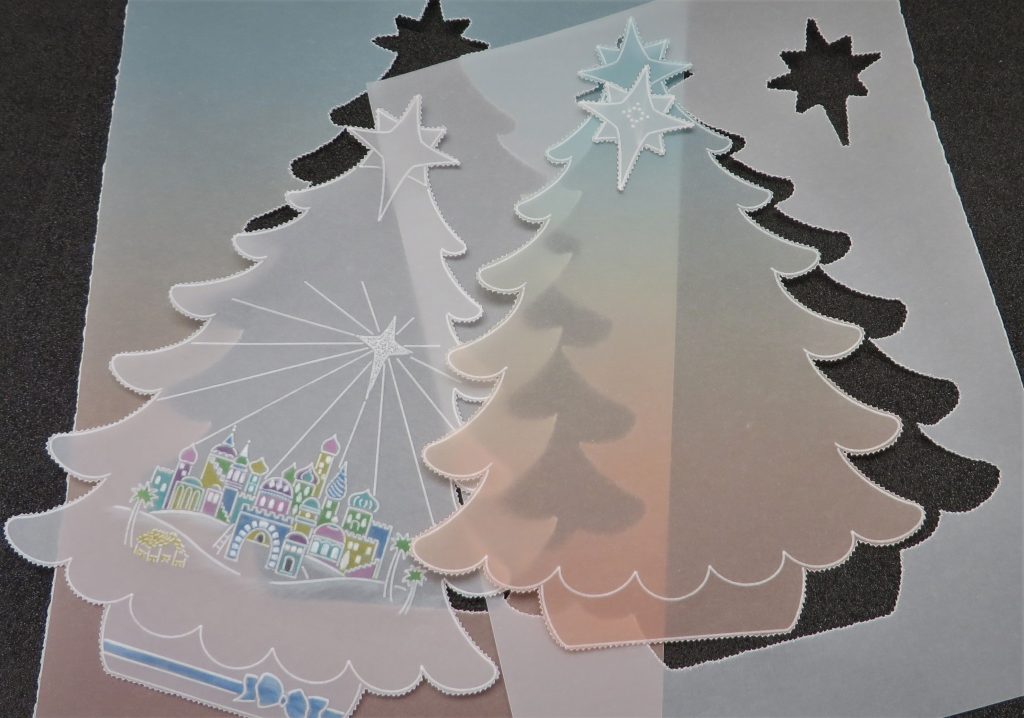
Step 4. Cut an A5 piece of Rainbow parchment. Trace the outline of the tree again, leaving out all of the inner layers, the ribbon and the bow on the bowl.
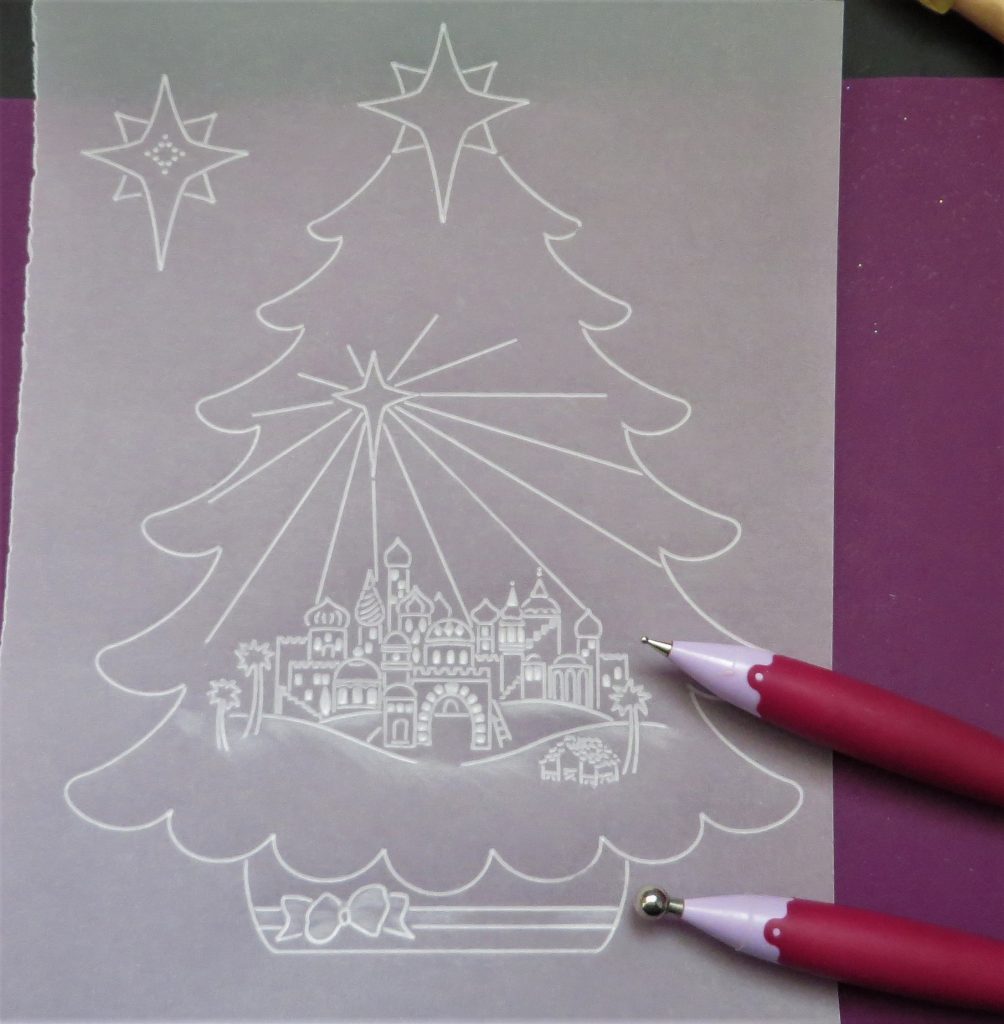
Step 5. Stippling: The star above the buildings has been stippled – this is done by using some stout board (like mount board or the board from the back of a paper pad). Place a piece of fine-grade sandpaper onto the board, and lay the parchment on top – working on the back. Take a bold 1 needle perforating tool and lightly tap the back of the parchment, covering the star in tiny white dots.
Step 6. This is how the piece should look so far.
Step 7. Colouring on the back, use some lovely bright colours on the buildings of the village, the ribbon and bow. Also colour the large, separate star.
Step 8. Go around both tree outlines and the star with a two-needle tool. Picot cut all of the pieces out.
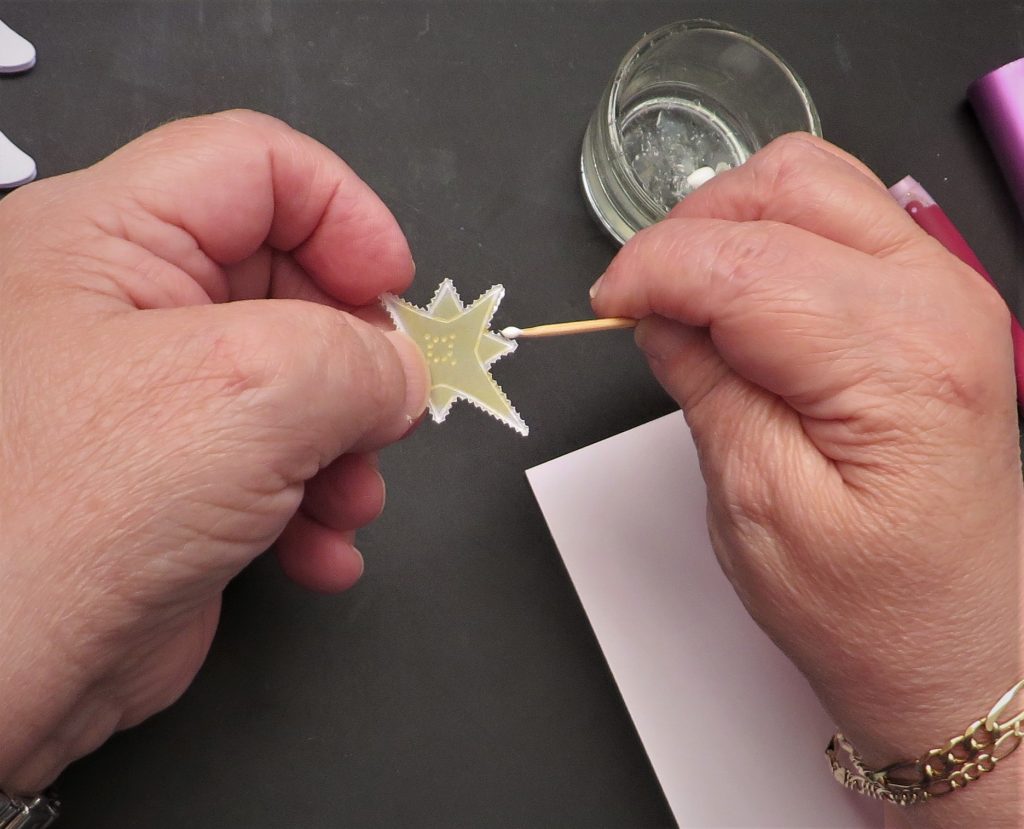
Step 9. Stick the star onto a piece of white card (I save my scraps for this kind of thing). To do this, decant a spot of Perga Glue onto a surface, and pick up a spot of it with a cocktail or pickle stick. Put tiny dots of the glue onto the picot edges of the star and then you can go ahead and stick it to the scrap of card and the glue will not show.
Step 10. Stick all of the layers together onto the card blank. Put the glue onto the star where it will not show once the 3D star has been stuck on. The coloured parchment goes on first with the picture on top.
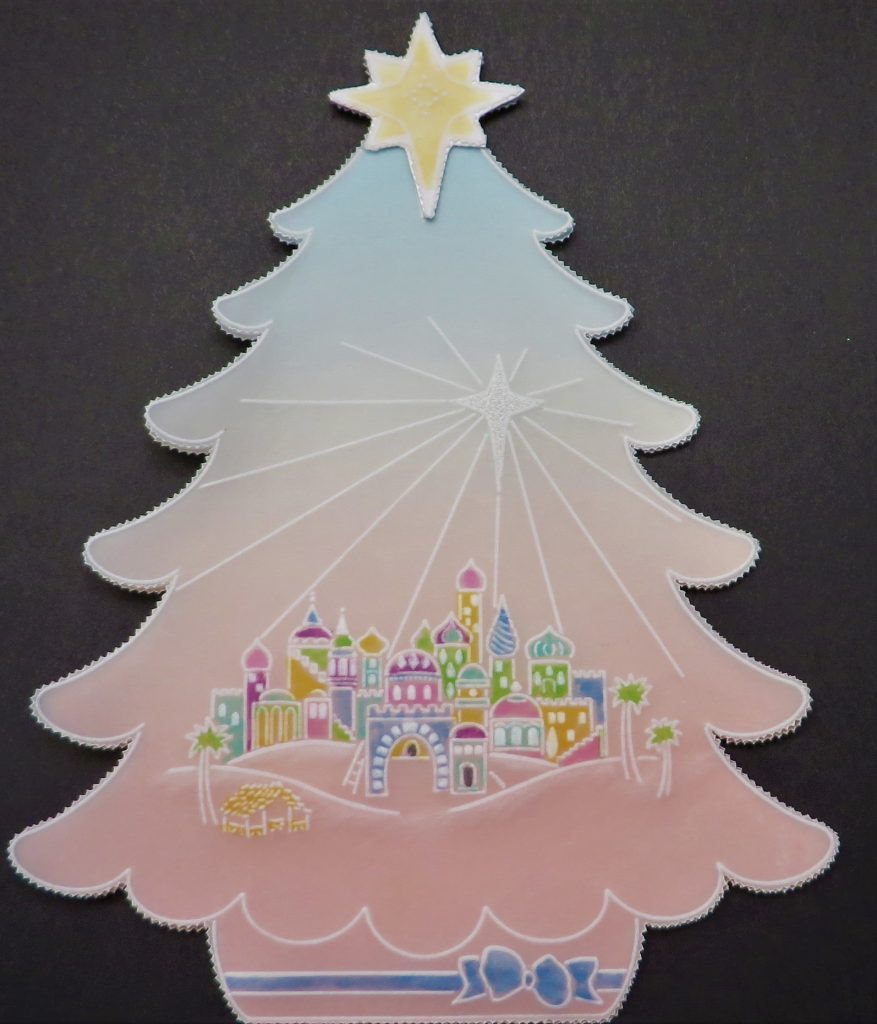
Step 11. Now add some sticky ink and glitter along the lines of the starlight and the tops of the hills.
Step 12. Use dots of Perga glue to stick on some gems to represent stars in the sky. You can also add them into the large star and the centre of the bow. And you’re finished!
That is so beautiful, Glynis! Beautiful colours and design. Thank you for sharing your tips and tricks with us. And for breaking down the project steps so simply for us to follow along at home.
If you fancy giving this project a go yourself, please email me your artwork! We love to see it. Grace@claritystamp.com
So much fantastic artwork is shared on our Facebook Groups; Clarity Worldwide, Groovi Worldwide & Pergamano Worldwide.
Did you manage to craftalong with Mum and Linda on Friday evening using the latest release from Linda – Christmas Treasures 2? If you missed it, then don’t worry, you can watch below or click HERE to watch on our YouTube page
Looking at the week ahead:
Tuesday 20th September – Groovi Tuesday with Paul – 10am Live on Facebook and YouTube
Thursday 22nd September – SHAC Shack with Barbara – 10am Live on Facebook and YouTube
Thursday 22nd September – The Pergamano Show on Create and Craft with Tina Cox at 11am & 3pm
Travel gently, friends.
Lotsa love, Grace & Glynis xoxo
Clarity – The Home of Art, Craft, and Well-Being.
Good morning Grace & Glynis, another lovely project for us all to try this week. For some reason I don’t think I have the tree plate but after Janes challenge a couple of weeks a go I must start thinking outside the box so to speak & start adapting what I have got.
Friday night was great with lots of hints, tips & laughter. The fact that it was all recorded is a bonus so I can go back & check bits that I missed because I was either commenting, laughing or getting another glass of wine!! I forgot food I was so engrossed.
Enjoy the rest of your stay here & have a safe journey home when you go xx
Good morning to the 2 Gs, what a beautiful project. I joined in on Friday but had to leave before the end so have to catch up, might be able to do that later. Mum coming for lunch today. I desperately need to get a card for a 2 year old done and, despite doing 3 lately, I’ve got a mental block for this one for some reason ! Have a good day xx
Must check to see if I have the tree plate. All the Christmas sets 1&2 plates could be used for a different look. Thanks both for this idea.
Enjoy the rest of your stay with the family.
Hugs 🍒
Beautiful inspiration. Thank you.
Thank you for the inspiration Glynis, beautiful project. I’m looking forward to returning home to spend the day making Christmas cards tomorrow with my new plates. (Whilst watching the Queen’s funeral)
Lovely card, great step by step. xx
Could you please inform me about the type of pencils you use because I have a beautiful set of water pencils ,could I use these ? I was watching on Friday on u tube (not on face book ) most inspirational and thank you to all .
Hi Marilyn! Glynis has sent me the following advice for you: Scribble some onto a mix mat (or piece of rough plastic until you can get one) then pick the pigment up with a damp brush. Parchment hates water, but a damp brush will do the trick. I hope this helps!
Thank you Glynis – what a beautiful card – will be having a go at this project Xx