Clarity’s Blog Tutorial: How To Emboss A Ribbon
Hello hello! Grace here.
Happy Sunday! I hope that you’re enjoying it, wherever in the world you are.
We’re back again in bloggy land! And we’re blessed with a step-by-step tutorial from the fantastic Maggie Byford. I’ll hand you right over!

How To Emboss Ribbons & Use Multi-Needle Tools (Semi Circle & Wave) To Make a Delicate Lacy-Edged Frame
Sometimes it’s nice to know how a ribbon has been embossed, so here is my version using two delightful trailing ribbons on Linda’s Summer Flowers and Lace (Violet) plate. I’ve also used multi-needle tools (Semi Circle and Wave) which when used together can create a delicate lacy-edged outer frame for your card.
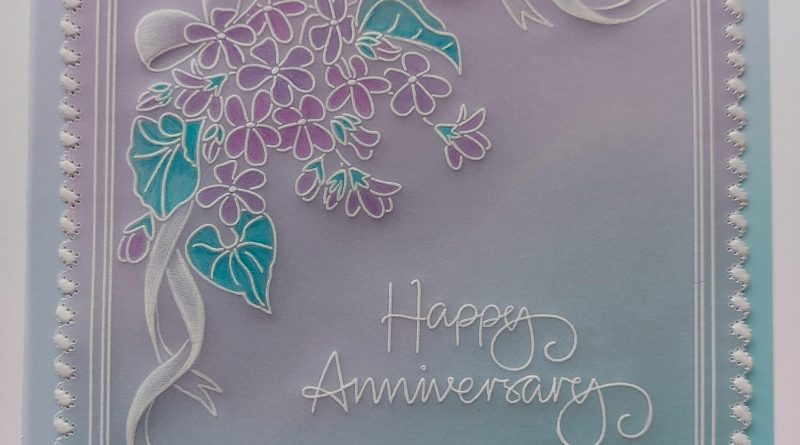
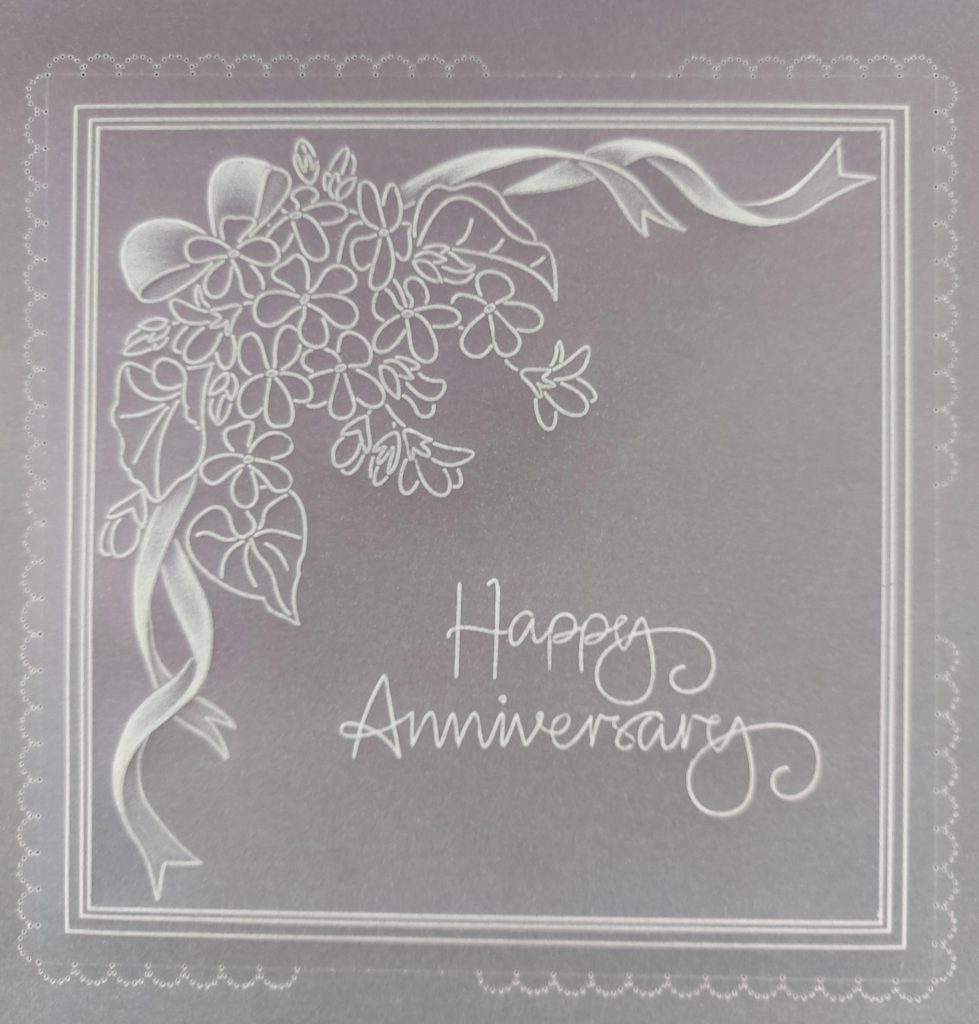
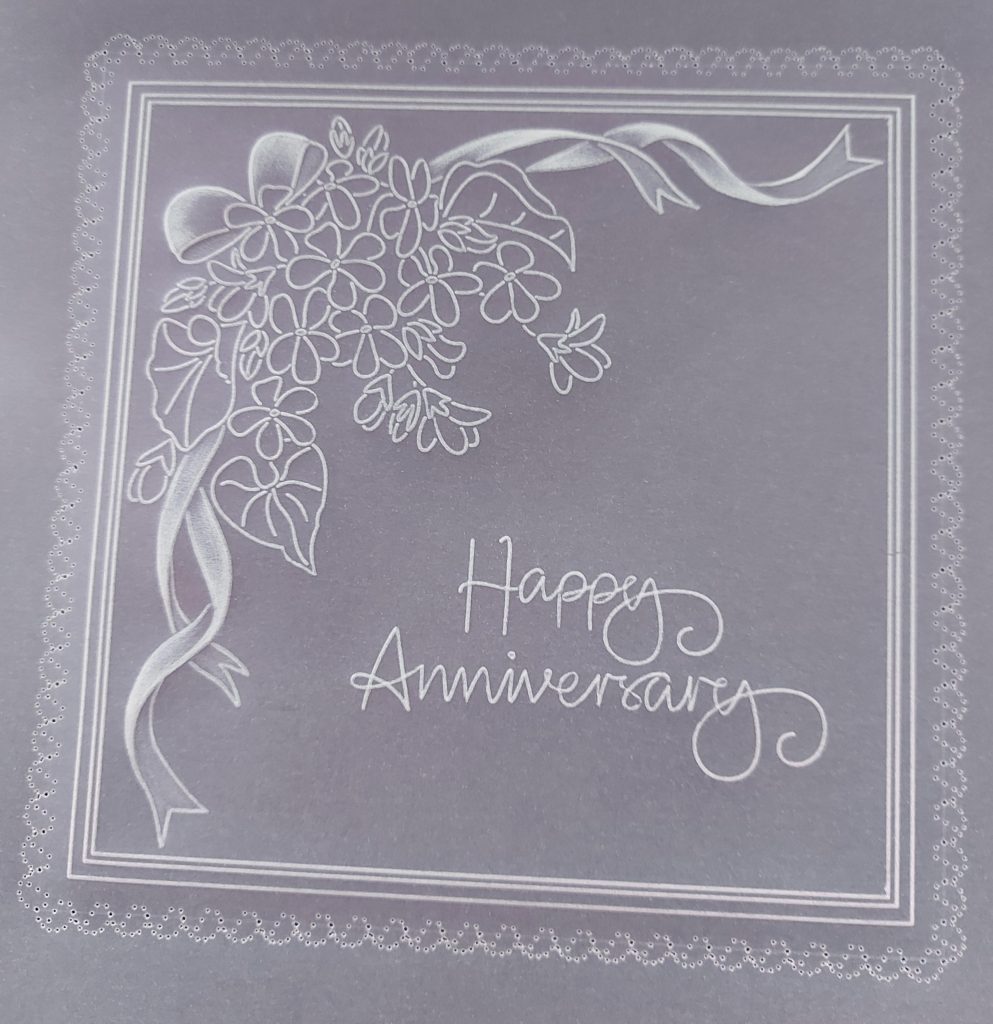
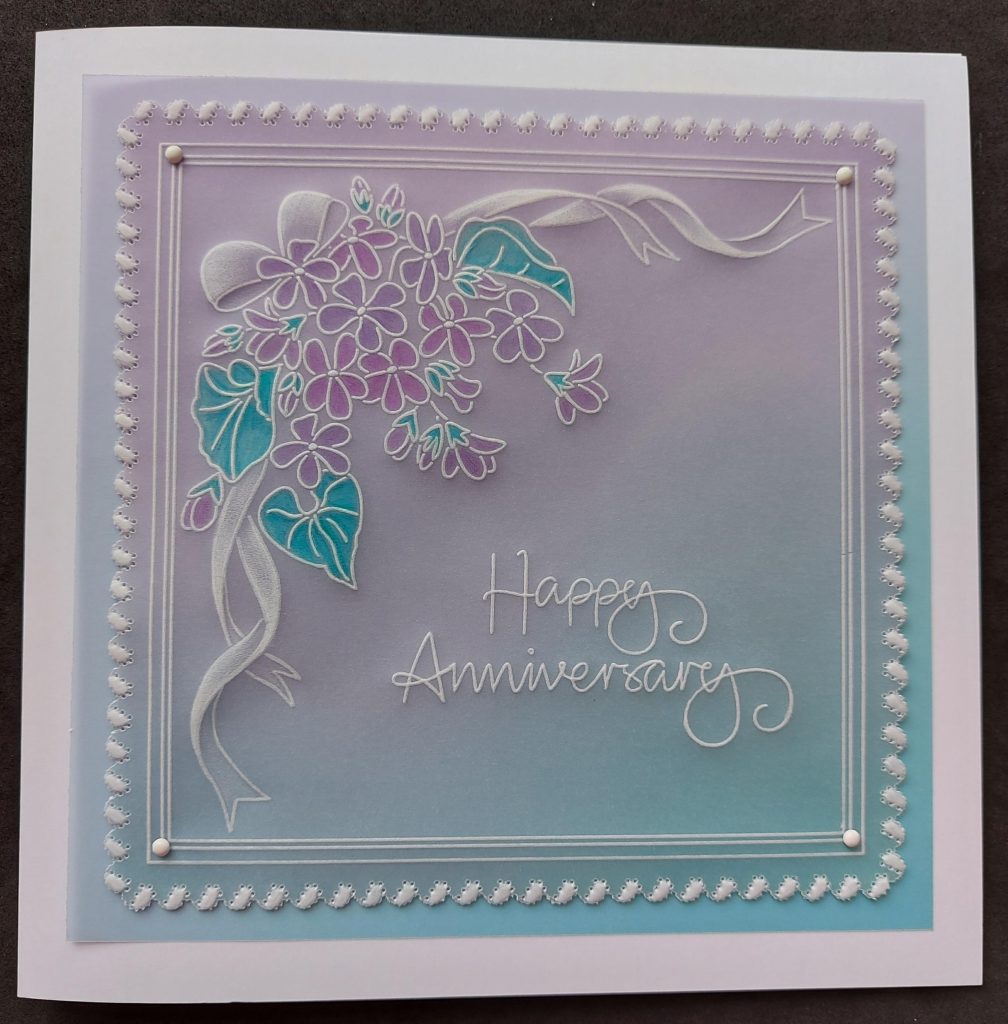
Here is what my card looks like, and what we’re working towards!

INGREDIENTS
Linda’s Summer Flowers & Lace Plate (Violet) (GRO-FL-41230-03)
Entwined Sentiments Plate (GRO-WO-41437-03)
Nested Squares Extension and Alphabet Frame A4 Square Plate (GRO-WO-40538-15)
Alphabet A5 Square Plate Mate (GRO-MA-40002-07)
Rainbow Duo Parchment & Paper Lavender Fields A4 (GRO-AC-42021-XX)
Groovi Sticker Tabs x 16 (GRO-AC-40437-XX)
A5 Black Super Foam (GRO-AC-41765-XX)
A4 Picot Foam (GRO-AC-40625-XX)
Pergamano Excellent – Embossing Mat (31411) (PER-AC-70075-XX)
Groovi Guard (GRO-AC-40345-XX)
Ringlock Scissors (11315) (PER-TO-70041-XX)
Groovi Embossing Tool 1 and 2 (GRO-AC-40026-XX)
Groovi Embossing Tool 3 and 4 (GRO-AC-40027-XX)
Pergamano 4.5mm Ball Tool (10098) (PER-TO-70015-XX)
Pergamano Semi Circle (10209) Perforating Tool (PER-TO-70017-XX)
Pergamano Wave (10227) Perforating Tool (PER-TO-70344-XX)
Pergamano White Brads (PER-AC-70269-XX)
Spare pieces of plain parchment paper for practice pieces
Ruler and sharp White pencil
Dry tumble dryer sheet
METHOD
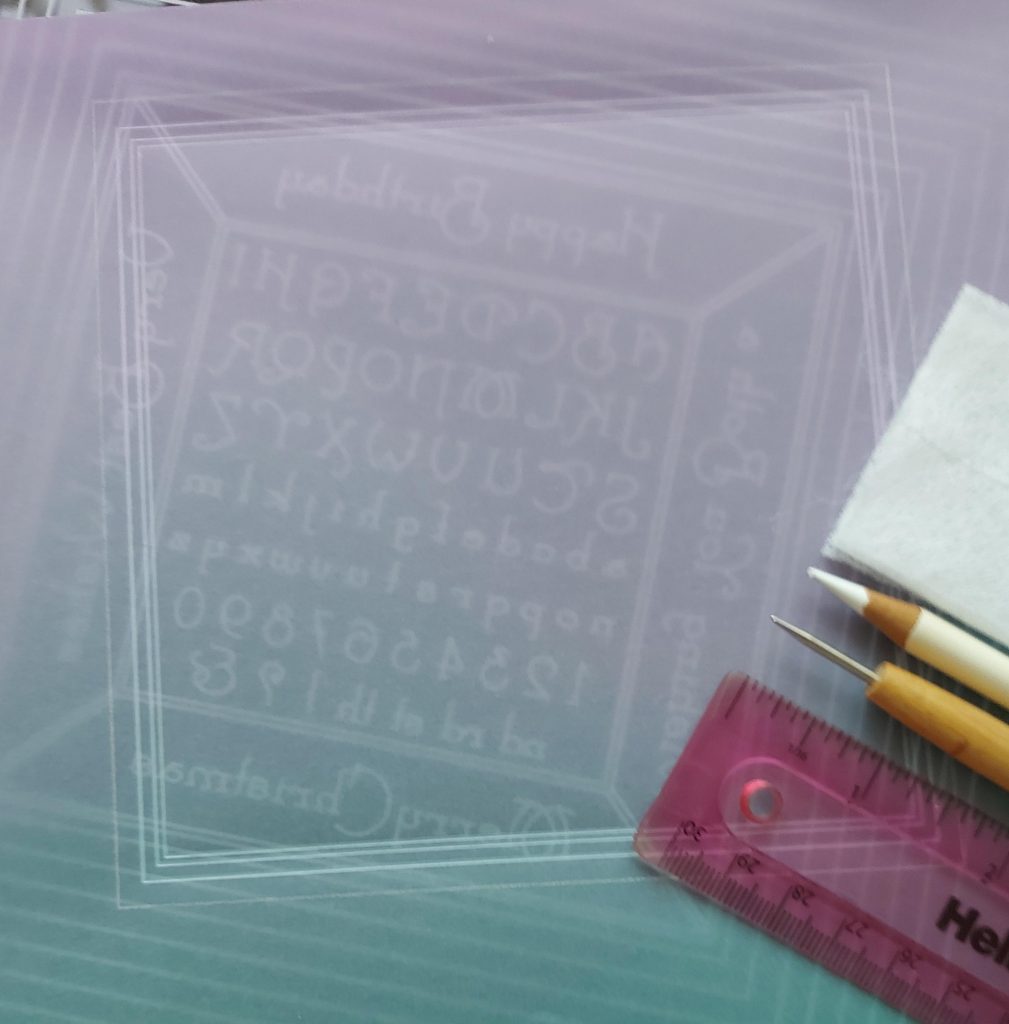
Step 1. Attach Lavender Fields parchment (shiny side facing upwards) to the Nested Squares Extension plate. Wipe a dry tumble dryer sheet across the surface to make embossing easier, and use Groovi 1 to emboss the 8th, 9th and 10th squares counting down from the top of the plate. Use a sharp White pencil and a ruler to draw around the 7th square counting down from the top. This is how it should look.
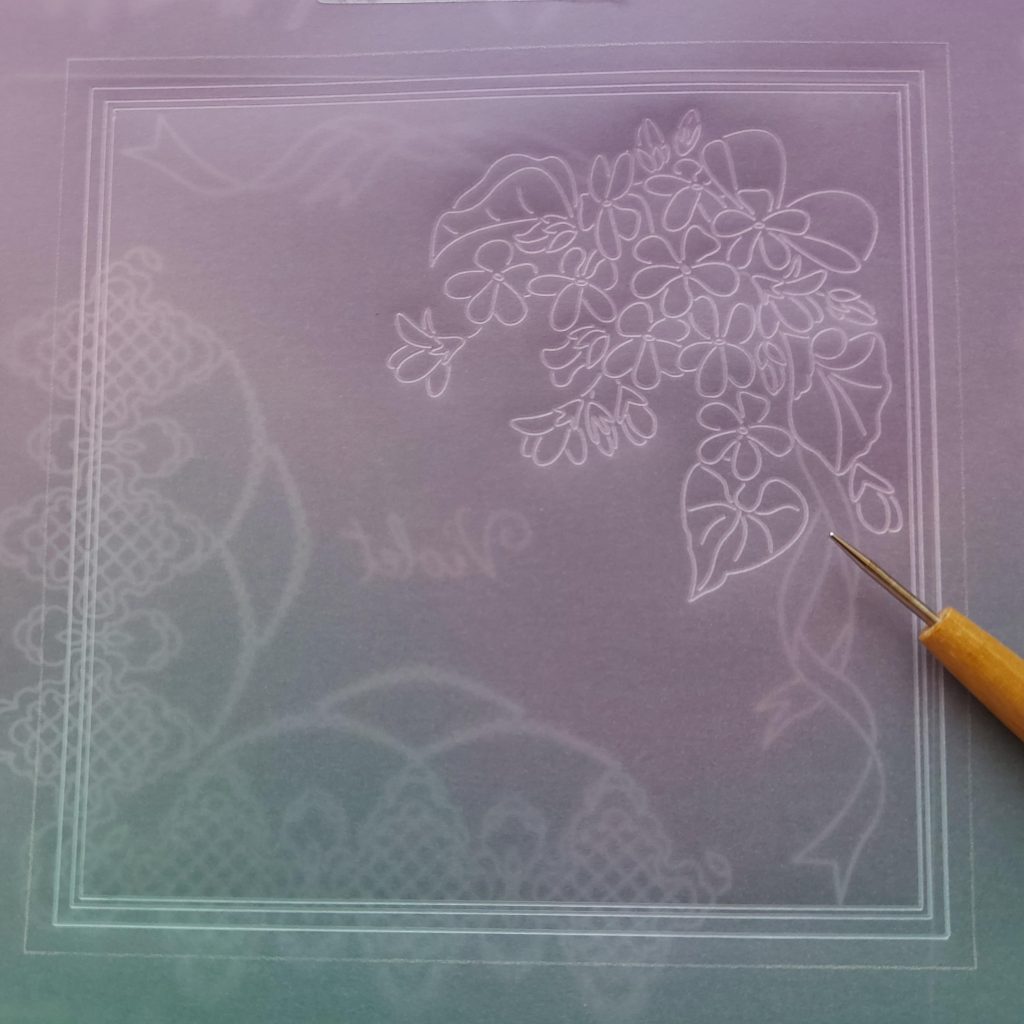
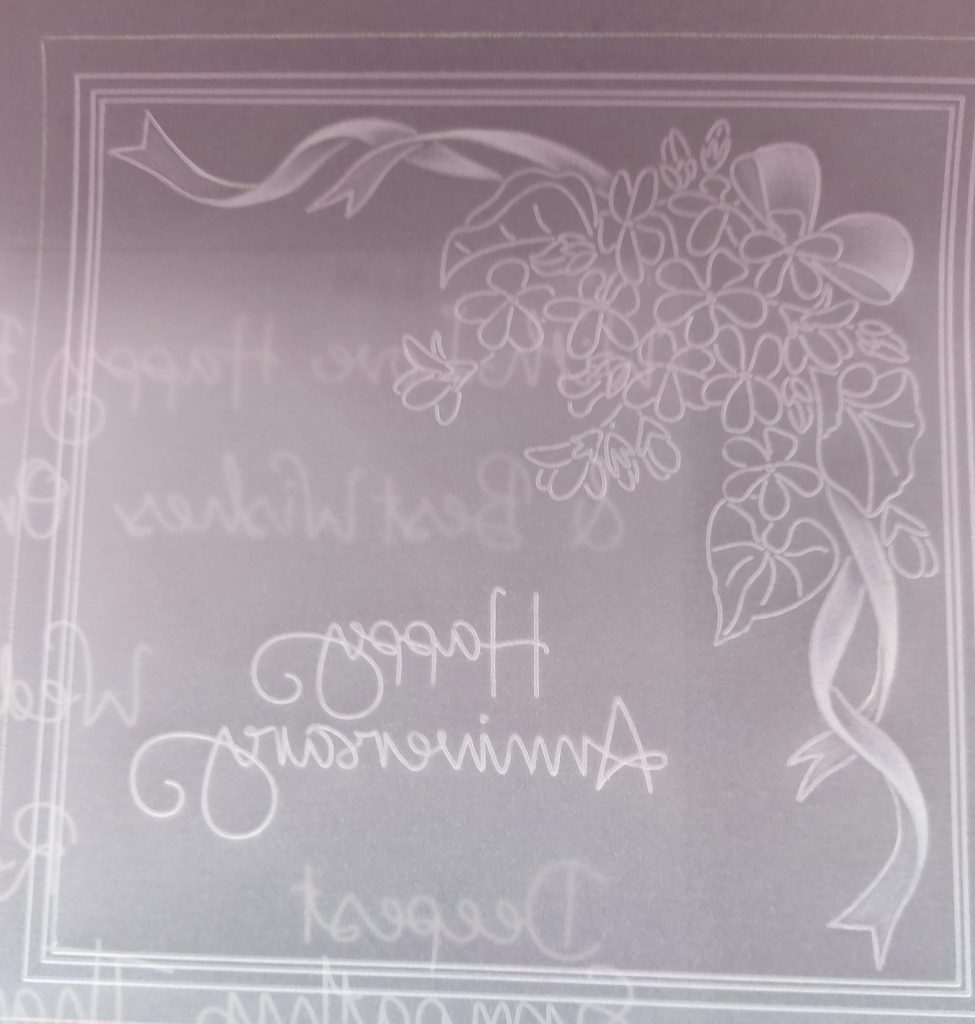
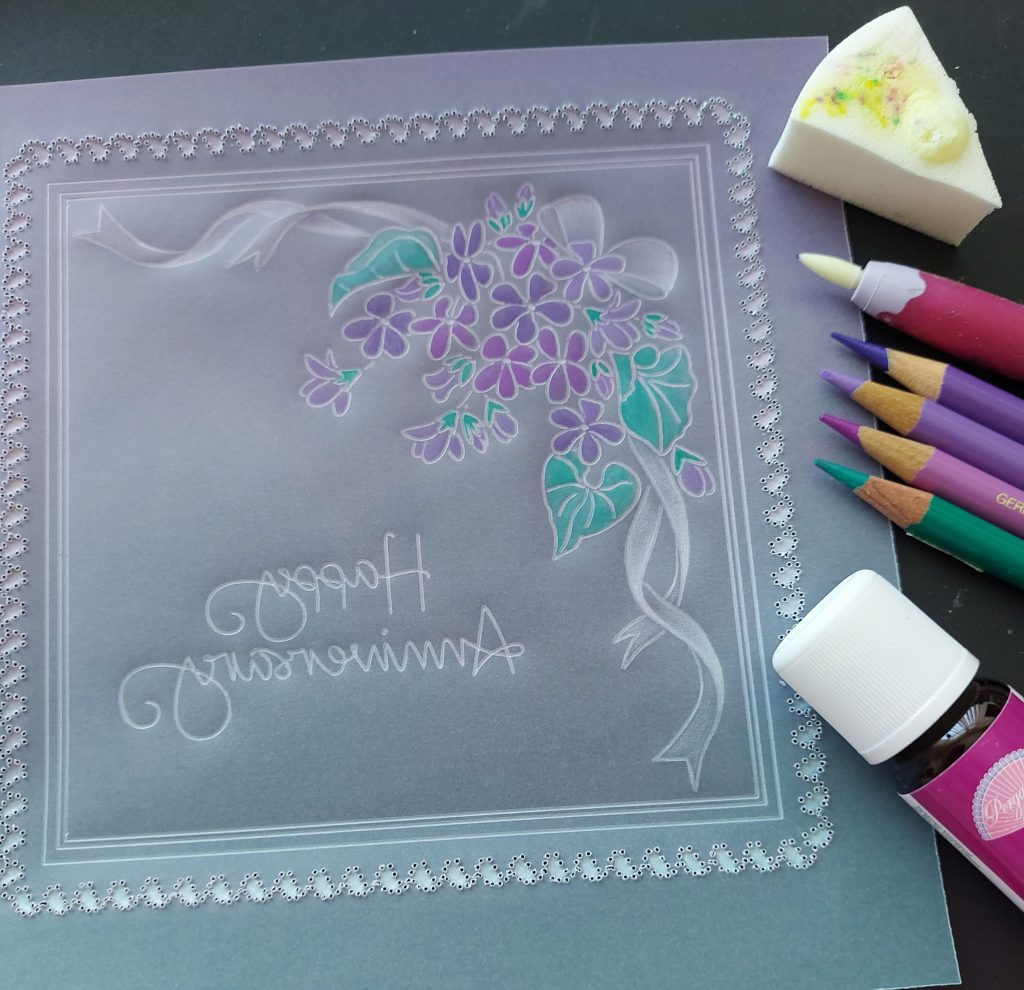
Step 2. Insert the Summer Flowers and Lace plate into the A5 Plate Mate with the floral design at the top right. Align your parchment facing down over the plate so that the whole floral design and trailing ribbons fit nicely into the top right corner, ensuring that none of the design overlaps any of the embossed border lines. Use Groovi 1 to emboss only those outlines shown on the picture, namely the Bow, Leaves, Flowers and Buds, but NOT the trailing ribbon yet. This is how it should look at this stage.
Step 3. Take a look at my Step by Step 1 (below) for the Top and Side trailing ribbons and either apply the steps directly to your work, or onto a spare piece of plain parchment as a practice piece.
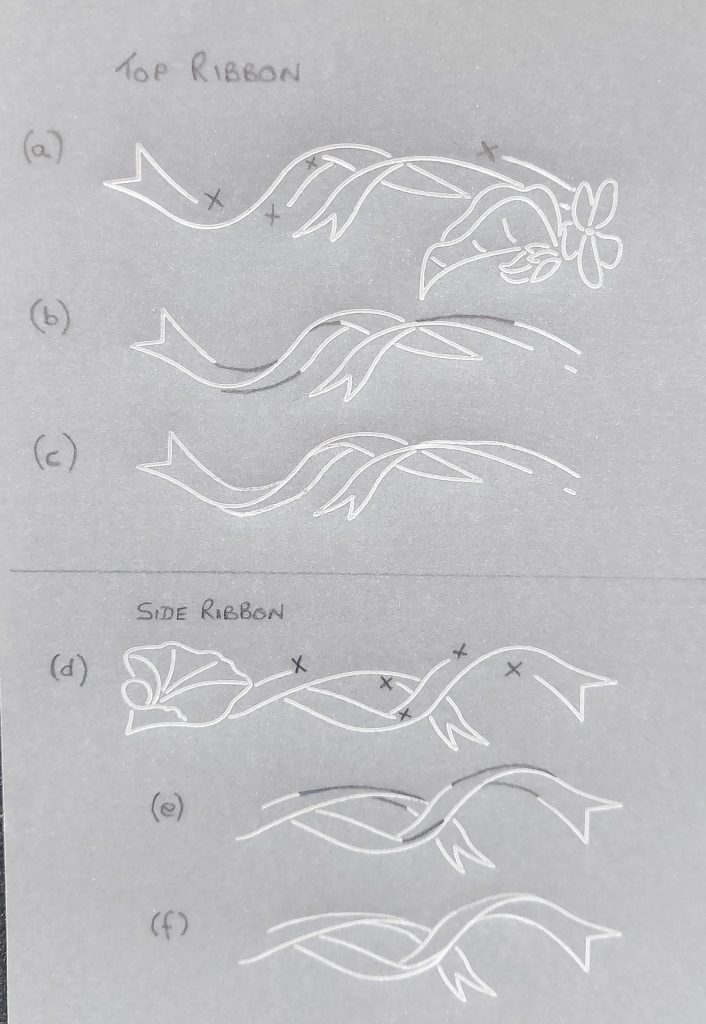
On the back emboss the outlines of the ribbon exactly as you see them on (a) and (d), leaving gaps where shown by an “x”. Use a sharp White pencil to draw a slightly curved line in-between the gaps as in (b) and (e) – I used a grey pencil so you could see my lines better. Carefully emboss over the pencil lines twice so they blend in with the adjoining lines as in (c) and (f).
Step 4. To shadow-emboss the ribbons (see Top Tip below) you’ll see from my Step by Step 2 (below) that I’ve included arrows showing the direction of your embossing. You’ll also see the letter F which means you should emboss on the front of the parchment in that particular area.
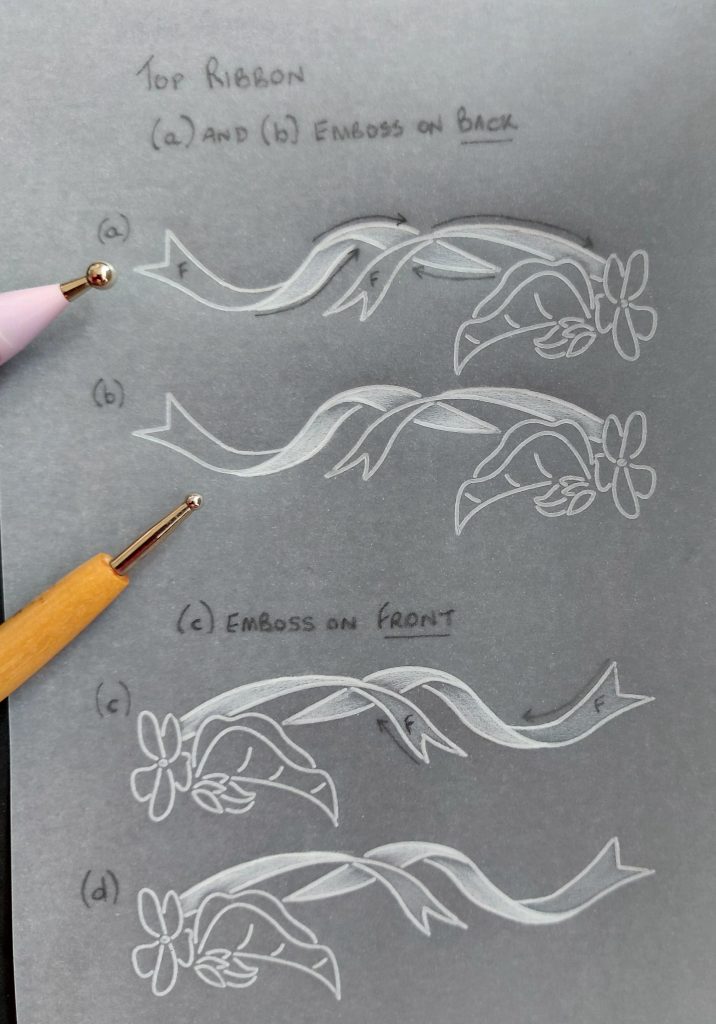
On the back of your parchment use Pergamano 4.5 embossing tool to emboss the Top Ribbon in the direction of the arrows as shown in (a). Change down to Groovi 4 tool to emboss a second time to whiten as in (b). Turn your parchment to the front and use 4.5 again to emboss in the areas marked with an F as shown in (c), again following the direction of the arrow. There’s no need to emboss a second time as this embossing is meant to be lighter and less white to appear concave with it being the inside of the ribbon. Your finished ribbon should look like (d) which is shown from the front.
TOP TIP: To shadow-emboss begin with the largest embossing tool that fits the area (in this case 4.5). Start from the base as shown by the arrow, using light pressure and varied long and short strokes with a flicking movement at the end (like striking a match), and emboss slightly more than ¾ of the length of the area. Each stroke should be very close together, even overlapping, and the unembossed area at the end is what forms the shadow, giving depth and dimension.
To whiten the embossed area, change down to the next smaller size of embossing tool (in this case 4) and go over the area once again from the base but still keeping the strokes varied as before. If it’s still not as white as you would like then in this case I suggest you leave the parchment to rest for a short while and emboss over it once again with No 4.
Note: the larger sizes of the 4.5 and 4 embossing tools allows you to do soft, feather-like embossing on the ribbons without forming thick white lines.
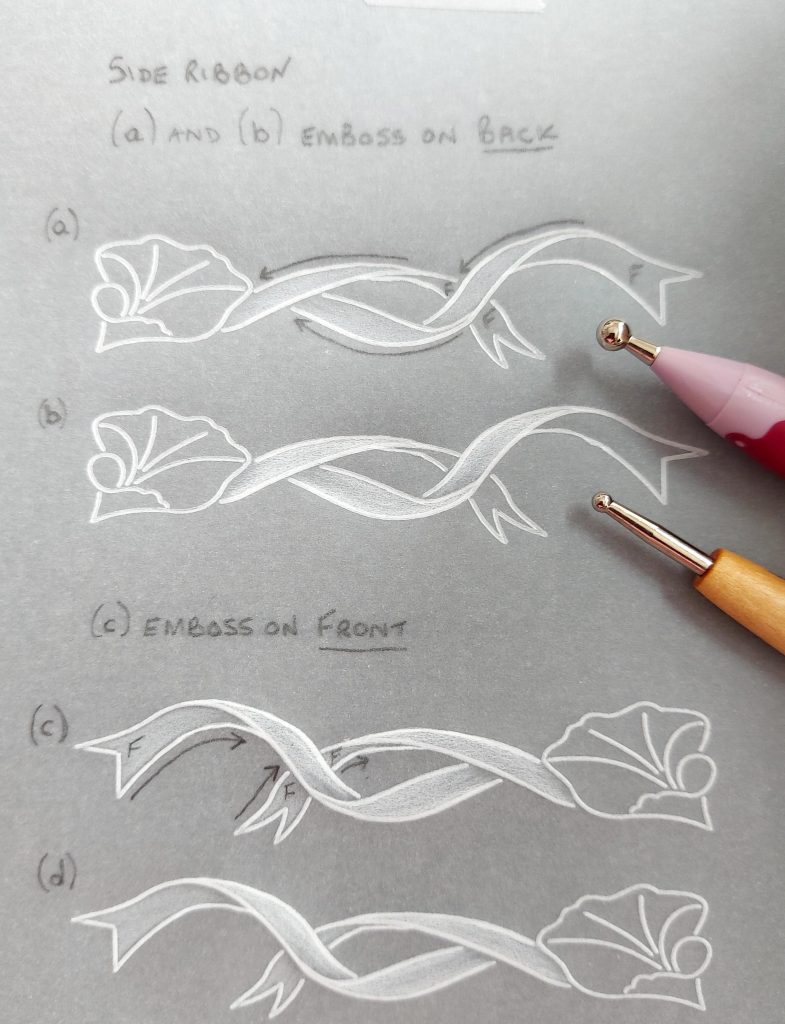
Step 5. To emboss the Side Ribbon follow the same steps as for Step 4 above.
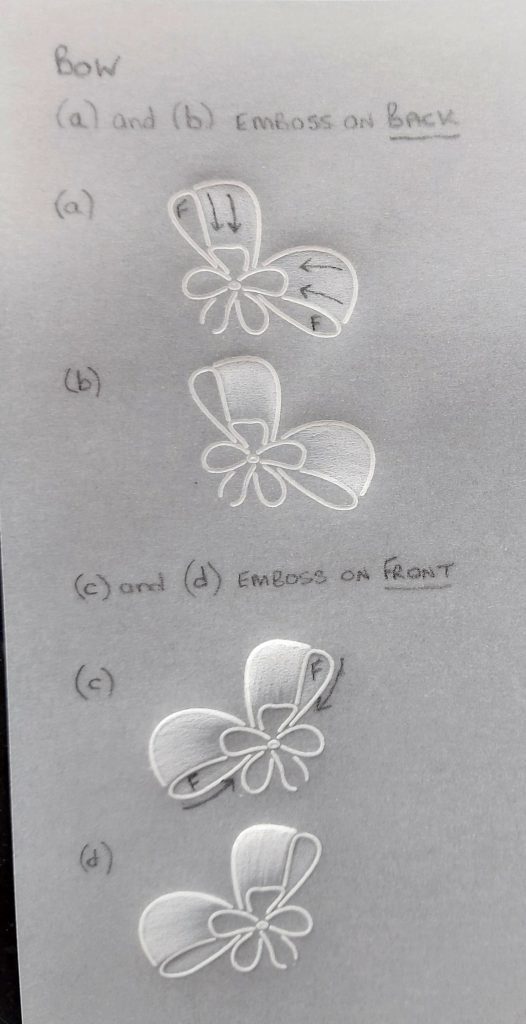
Step 6. To emboss the Bow use 4.5 on the back and emboss in the direction of the arrows as in (a), then emboss a second time with 4 to whiten as in (b). Turn your parchment to the front and use 4.5 to emboss in the areas marked with an F as shown in (c). When finished it should look like (d) which is shown from the front.
Step 7. Using the Entwined Sentiments plate, align and attach your parchment facing down over your choice of greeting and emboss the words. I used Happy Anniversary simply because of the flowers, ribbon and lace theme.
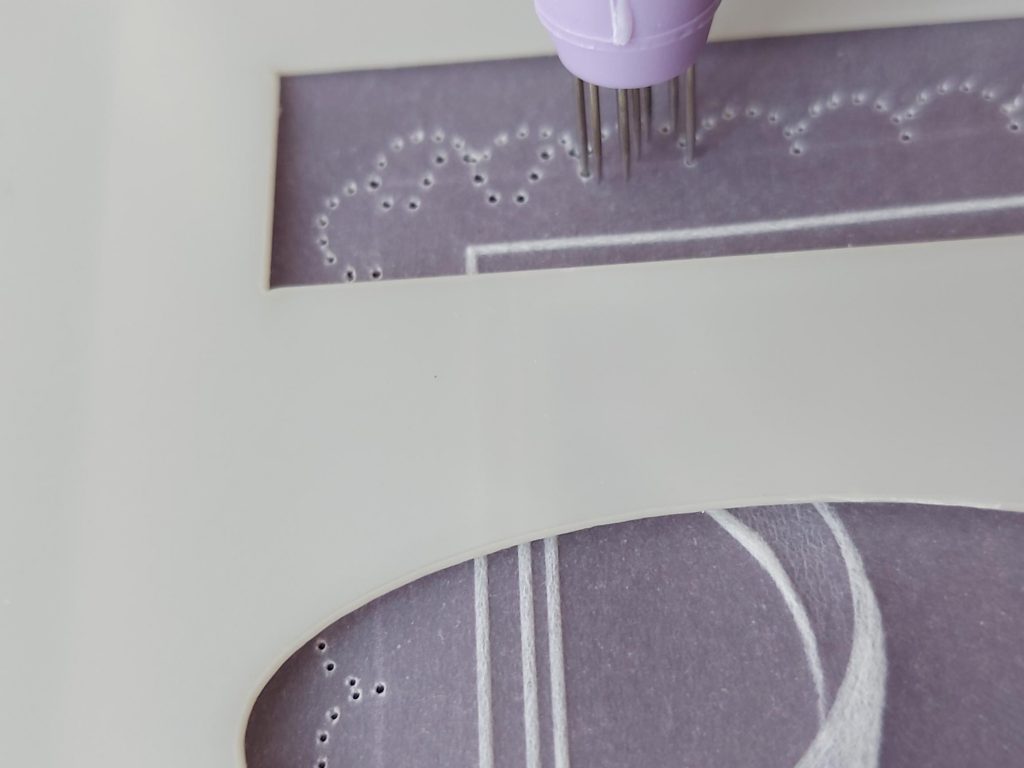
Step 8. For the Lacy Edged Frame start with your Semi Circle tool. Place your parchment facing up on your thin picot foam mat. Hold the Semi Circle tool upright and carefully perforate through the White pencil lines around the outer border. This is called shallow-perforating and I used a Groovi Guard to keep my parchment flat whilst perforating. Here is a corner close-up of how it should look.
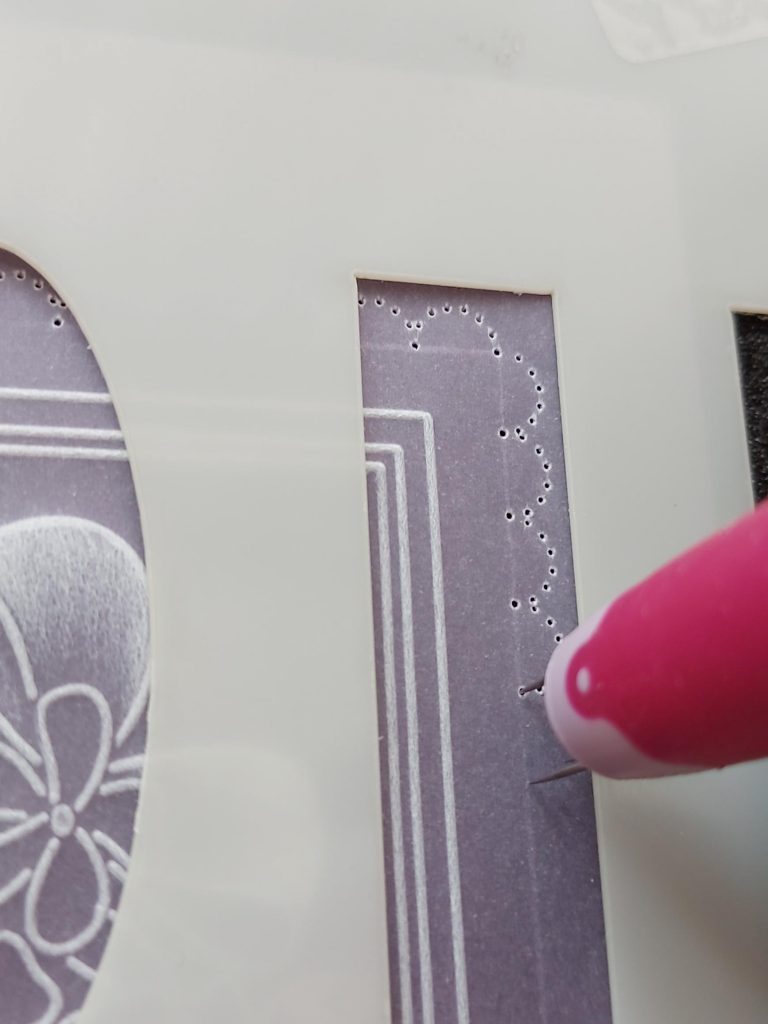
Note: before you begin perforating, check out my Top Tip below as it should help you ensure the perforations fit the length of the line from start to finish – as sometimes they don’t.
TOP TIP: I used a thin foam mat for the shallow-perforating. If you use a thick foam mat with multi perforating tools that have 4 needles or more then do take extra care as you run the risk of creasing the parchment paper whilst perforating which could spoil your work.
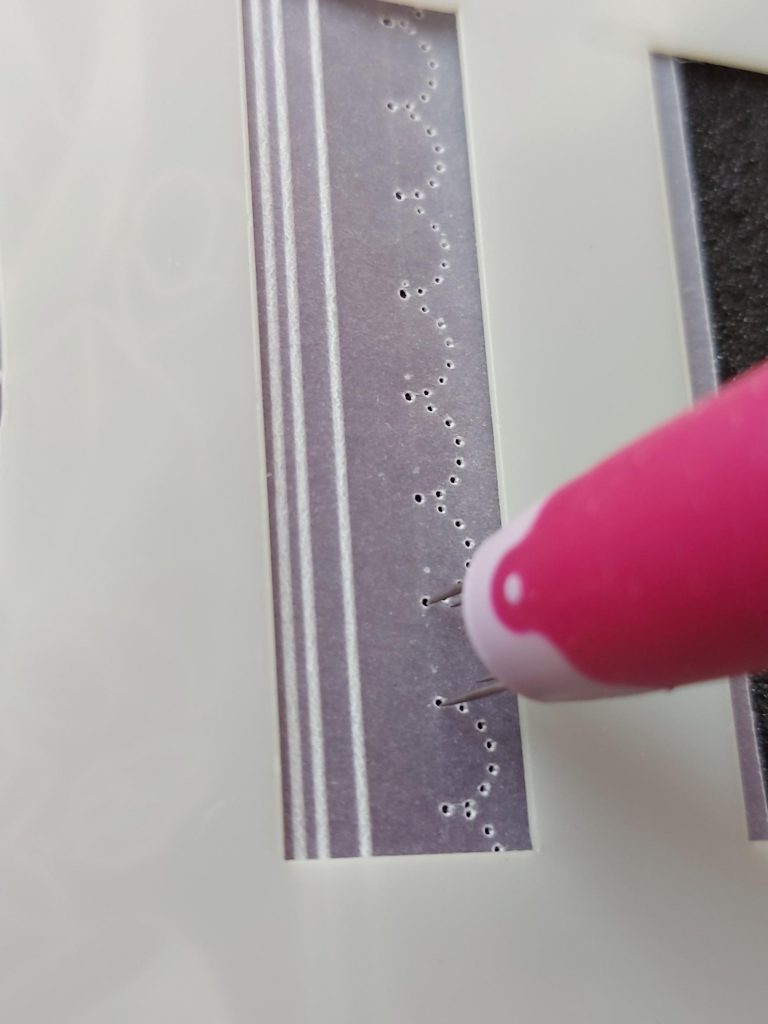
To make sure all your semi-circles fit each line from start to finish (on this particular card) try perforating, say, 11 semi-circles from one end of a line and then perforating 9 from the other end of the same line which will leave you with a gap near the middle of about 1 inch.
This shows how it looks with the gaps in place once perforating has been done on all 4 sides.
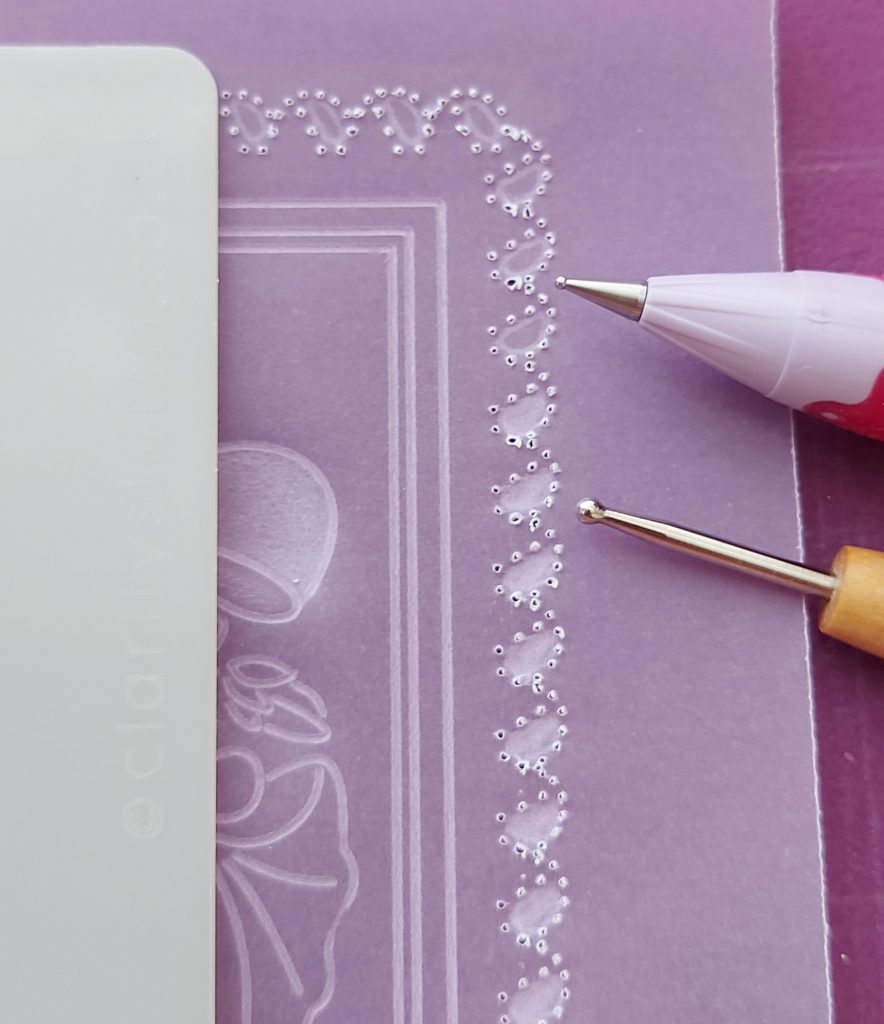
The gaps allow you to adjust the remaining 4 (or 5) perforations to fit, so it’s just a matter of seeing whether you need to slightly stretch or shorten any of them. To find this out you need to make gentle “notches” (not holes) along the white line within the gap with one of the long end needles of the Semi Circle tool. Here is a close up of how it should look.
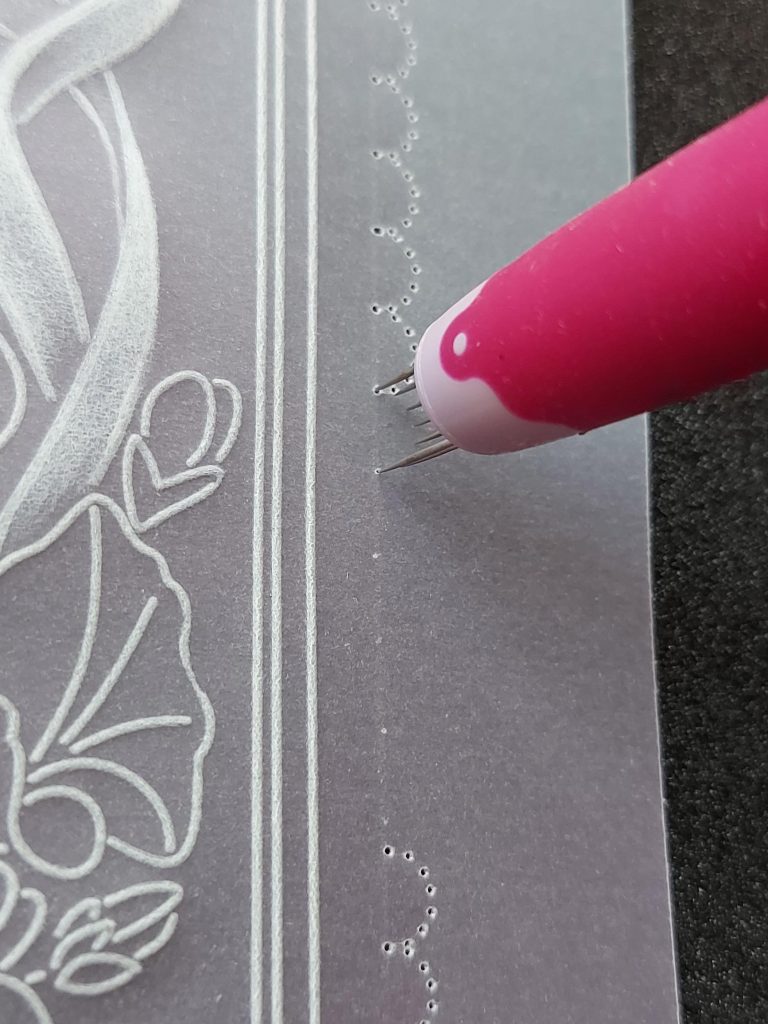
If the last “notch” is just short of ending up in a waiting hole you need to carefully lengthen the next few semi circles you’re going to make so that the last one you do fits nicely as you’ll see on the picture.
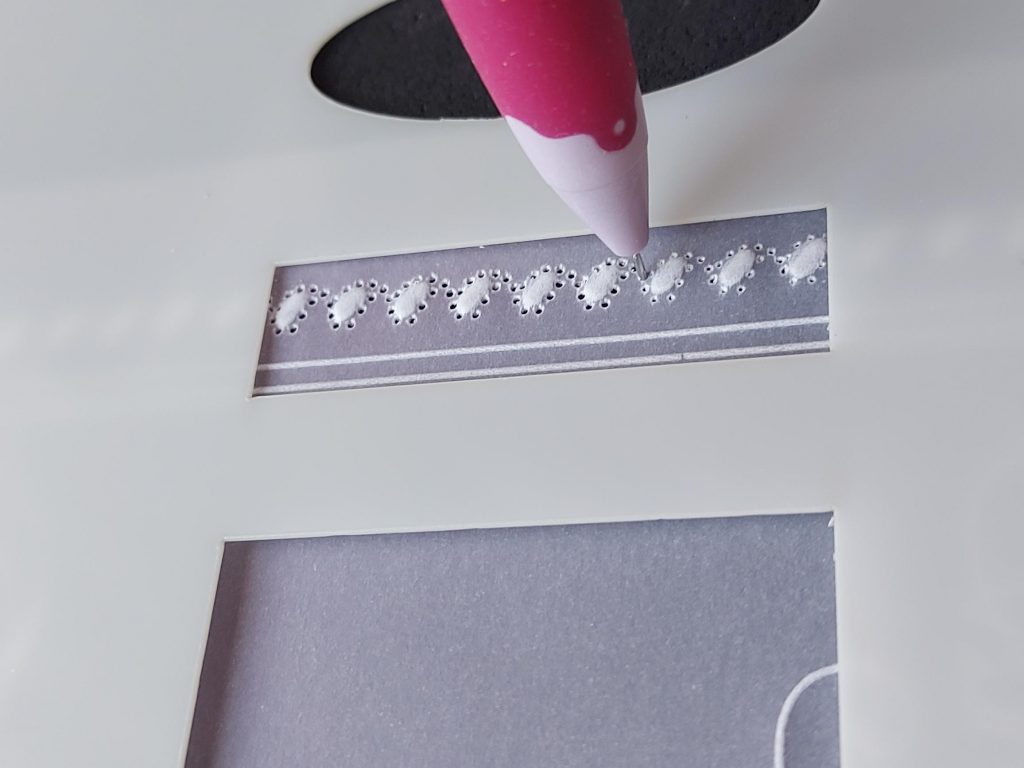
Step 9. Still working on the front use your Wave tool to perforate within each perforated semi circle shape by inserting the long end needles into each of the end holes of these perforations. Here is a close-up.
When you’ve finished all the perforating it should look like this.
Turn to the back and firstly use Groovi 2 to emboss an outline within the wave and semi-circle perforations, then fully emboss within these outlines with Groovi 3 – and don’t worry if you squash any of the perforations as they are going to be re-perforated.
Place your parchment facing up on your thick Super Foam mat and use your 1-Needle Bold to very carefully re-perforate the semi-circle and wave perforations to give you nice big, round holes for when you come to the snipping stage.
TOP TIP: When re-perforating with the 1-Needle Bold I suggest you don’t push it all the way down through the parchment in case you tear it. Instead only go down as far as the thickest part of the needle and bring it back up.
Step 10. For the colouring, use your Polychromos oil-based (blendable) pencils to add colour to the back of your flowers and leaves, then blend with Dorso oil and a blending nib. I used 134 Magenta, 136 Purple Violet, 138 Violet, 161 Phthalo Green and 276 Chrome Oxide Green Fiery. If you don’t have these pencils you could use Perga Liner B pencils in colours of your own choice.
Step 11. Use your parchment scissors or snips to cut between the Semi Circle and Wave perforations as shown in my example.
Step 12. Attach your parchment onto matching Lavender Fields Paper which has been cut to size, attach with a white brad at each corner, then mount onto the front of folded white card (7×7”).
Here is the finished card.
That is such a helpful tutorial, Maggie! Thank you so much for sharing your tips and tricks with us. I hope those at home will give this a go! As always, you can send me your artwork at Grace@claritystamp.com
Here’s a little recommendation…
If you have enjoyed combining the Semi-Circle and Wave multi-needle tools for this project then I highly recommend Linda’s Handbook for Multi-Needle Tools – Volume Two. It’s an illustrated reference book packed with useful and invaluable information covering How to Use Multi Needle Tools, Tool Guides and Patterns, Perfecting your Cutting, Projects and FAQs, and much more. Don’t worry if you don’t have Volume 1, as you’ll see that Linda has considered this in Volume 2.
Everything that Maggie has used in this blog tutorial can be found over on the Clarity website HERE. All is one helpful place 🙂
And to close out the weekend, please allow me to share what’s coming up at Clarity Towers this week! Another creative week ahead…
Monday, July 18th:
SHAC Shack with Barb – Live at 10am on Facebook & YouTube
Tuesday, July 19th:
Groovi Tuesday with Paul – Live at 10am on Facebook & YouTube
Thursday, July 21st:
SHAC Shack with Barb – Live at 10am on Facebook & YouTube
Saturday, July 23rd:
Get Groovi with Tina Cox – 5pm on Create and Craft
Lotsa love, Grace & Maggie xoxo
Clarity – The Home of Art, Craft, and Well-Being.
Lovely card, particularly love the border and might just have to try that one out! Thanks Maggie xx
Thank you for this. The tips are particularly useful to know xxx
Such a detailed and informative tutorial Maggie with lots to learn. Thanks for all your time and effort to put it together for us. I love all the tutorials and often refer back to them. Thank you Maggie and thank you Grace. Pam xx
Wow what a gorgeous,a great tutorial. Thank you
Thank you for a great easy to follow tutorial which I can refer back to when I need to.
Thank you Maggie for a very useful tutorial. My eyes ain’t what they used to be so I have difficulty with multi needle tools but I will definitely give this a go.
Thank you Grace for the diary details which will help my planning for this coming scorching weekend.
Stay cool, stay safe.
🍒
Another great project, thank you Maggie for such full step by step instructions. For some reason I don’t appear to have this plate – knew I should have checked out the sale more closely but was not feeling 100% at the time. The outer border looks pretty though so will give that ago as I need to make more use my multi needle tools.
Stay cool everyone over the next few days, at least we have an excuse to do some craft whilst sitting in the shade & not doing anything too strenuous. Housework can wait until it is cooler !!