Clarity’s Blog Tutorial: How To Incorporate Linda’s Flowers & Lace Plate With It’s A Wrap
Hi everyone, Paul here covering for Grace whilst she is on holiday.
I hope you are all well and not eating too many Easter Eggs!
This week we are joined by the super talented Glynis Whitehead for another fantastic step-by-step project using Linda’s It’s A Wrap A4 Groovi Plate together with Linda’s Roses & Lace Groovi Plate which is perfect for the Clarity “Say it with Flowers” event (more info below!). Without further ado, I will hand you over to the lovely Glynis…..

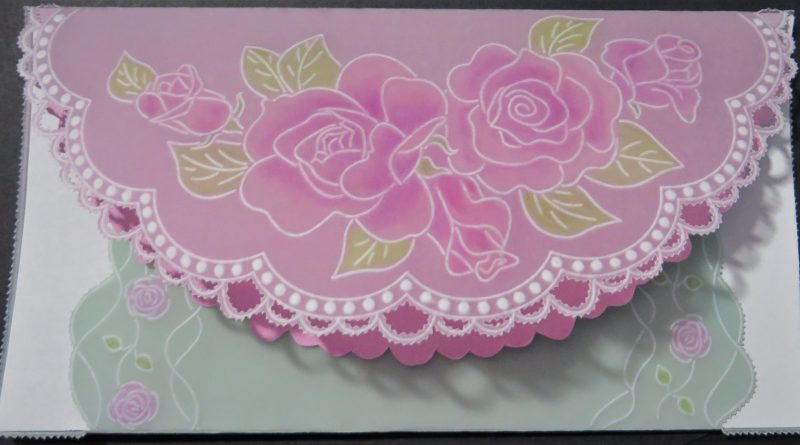
I wanted to put some roses into one of Linda’s ‘It’s A Wrap’ designs and rather than make it as a gatefold, I wanted to make it as a tri-fold. So I thought I would share with you how I did it!
Ingredients
It’s A Wrap Part 1 – Semi Circle Flourish Gatefold A4 Groovi Plate (GRO-LW-41518-16)
Linda’s Roses and Lace A5 Square Groovi Plate (GRO-FL-40922-03)
A4 Plate Mate for A4 Square Grids (GRO-MA-41768-21)
Rainbow Duo Parchment and Paper – Rose Garden (GRO-AC-42025-XX)
Groovi Tabs (GRO-AC-40437-XX)
Faber-Castell Pencil Eraser (Double Ended) (ACC-PE-30611-XX)
Faber-Castell Polychromos Pencils – Box of 60 (ACC-PE-30797-XX)
Pergamano Blending Nibs (PER-AC-70299-XX)
Pergamano Dorso Oil (PER-CO-70060-XX)
or the new Pergamano Colouring Essentials Kit (PER-AC-70431-XX)
Pergamano Perforating Tool – 2 needle (fine) (PER-TO-70037-XX)
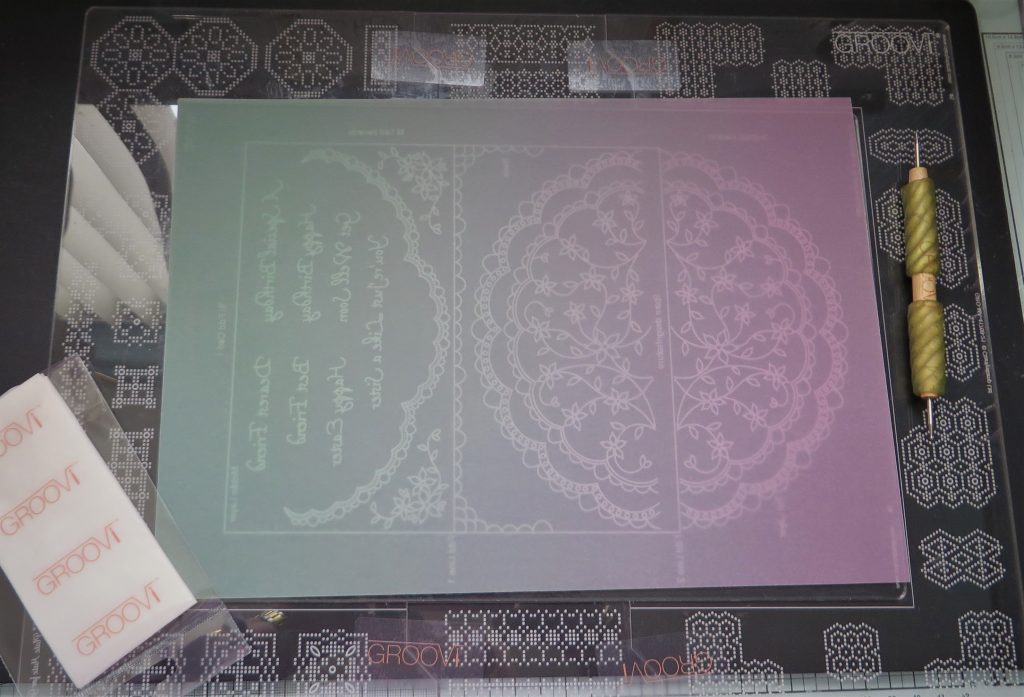
Step 1 – I have found the new A4 Plate Mate absolutely invaluable for using A4 plates. The one I am using has the extenders fixed in place with Groovi tabs. This gives you plenty of area to attach your parchment. If I do not need the embossed dots, I tend to use the smooth side of the plate to work on. Once you have set up, attach your parchment to the plate using more Groovi tabs. *Make sure you have the glossy side of the parchment facing upwards. Then you will get lovely crisp white lines.
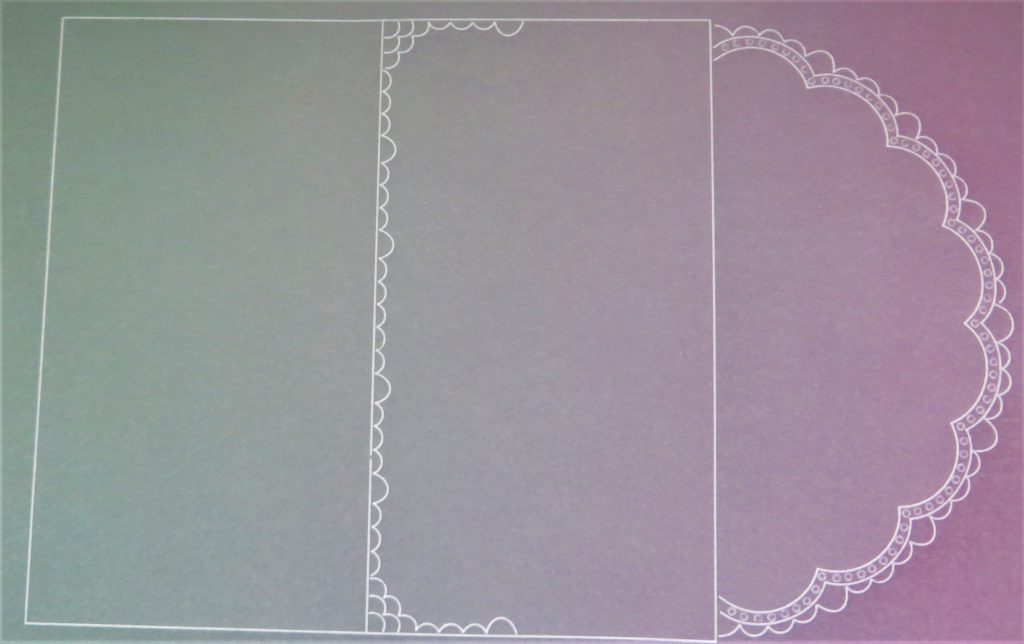
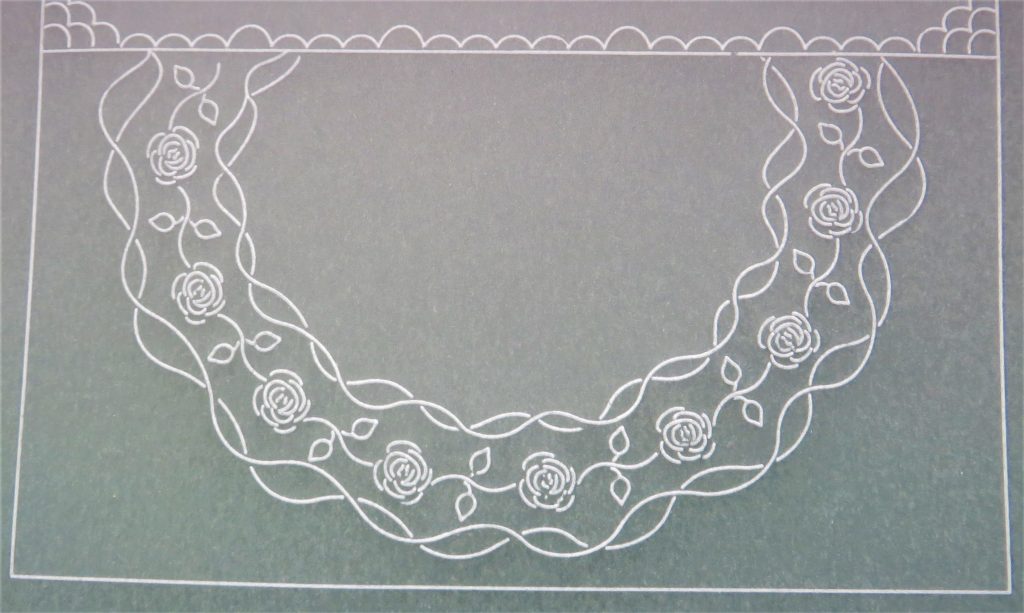
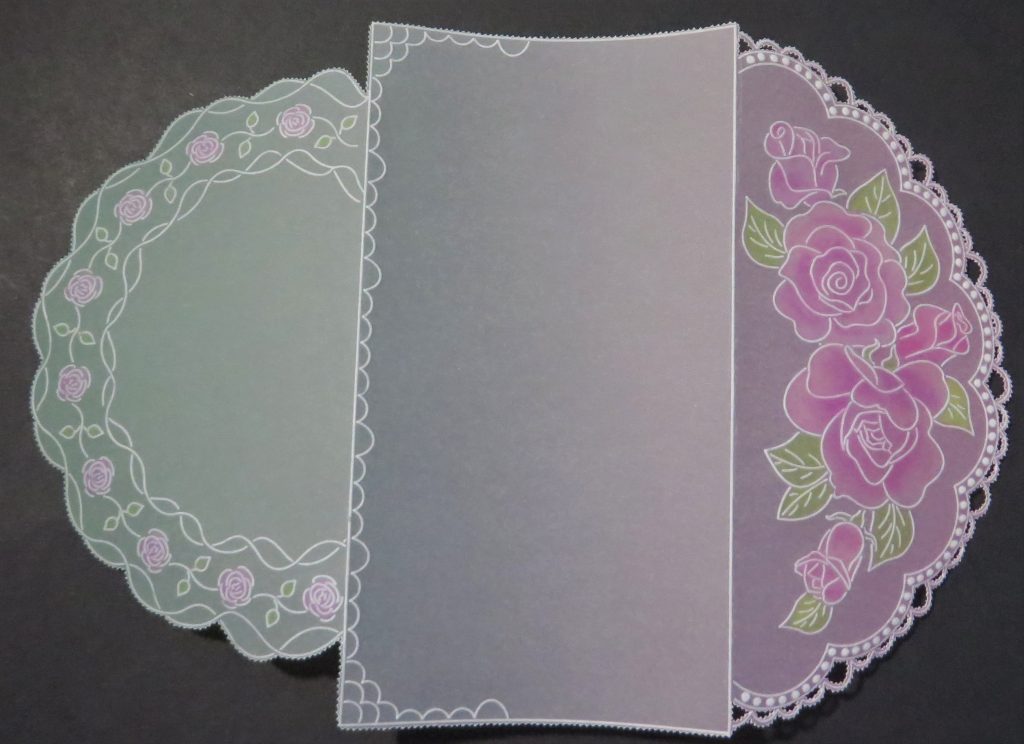
Step 2 – Using the number 1 tool from the starter kit, emboss the outside lines and the scalloped edge only. Leave the inside of the scalloped piece empty, ready for the roses. * use the number 2 tool to emboss all the dots within the border. You can add the scalloped pattern from the centre piece should you wish.
Step 3 – Take away the large Plate Mate and bring in a Plate Mate for the A5 square Groovi plate, I am using the Plate Mate for Grids, but the Starter Kit Plate Mate is good too. Line up the lace part of Linda’s Roses and Lace plate to fit WITHIN the lines of the bottom flap of what will be your tri-fold card.
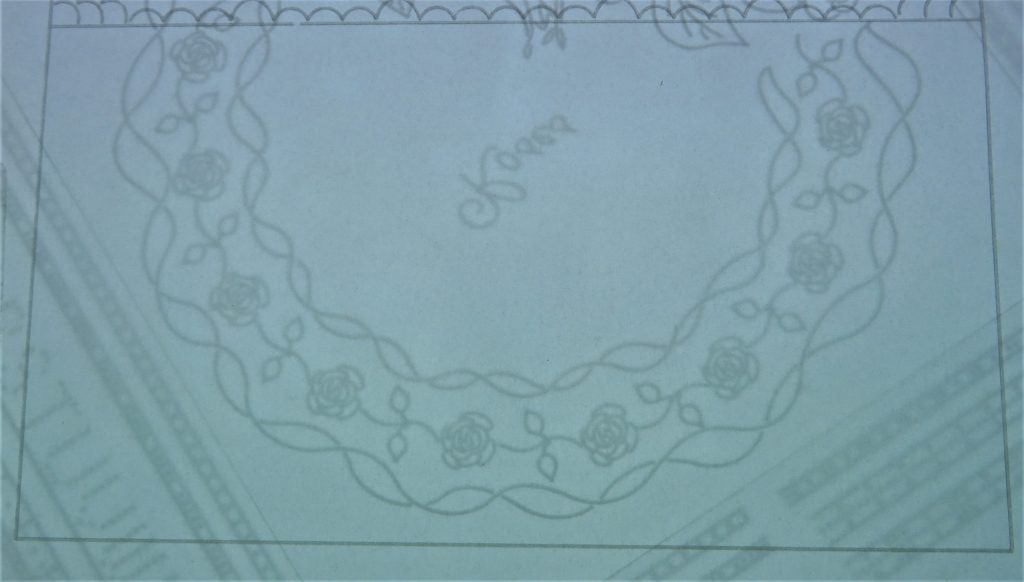
Step 4 – Emboss the wavy lines and the roses within them, using the number 1 tool from the starter kit.
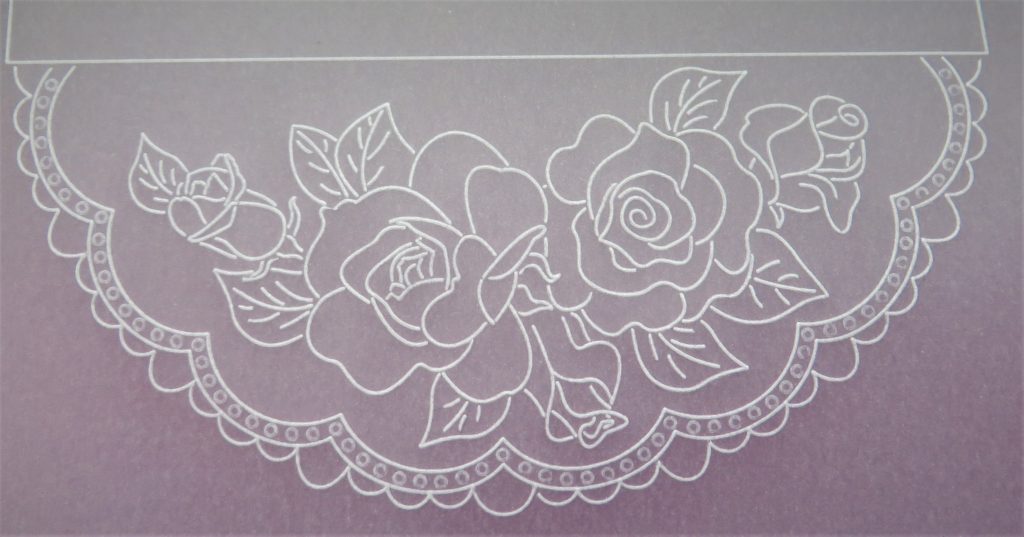
Step 5 – Turn the whole piece around and realign the parchment so that the spray of roses are in the front ‘flap’ of the card, within the scallops. I have used the number 1 Groovi tool for this.
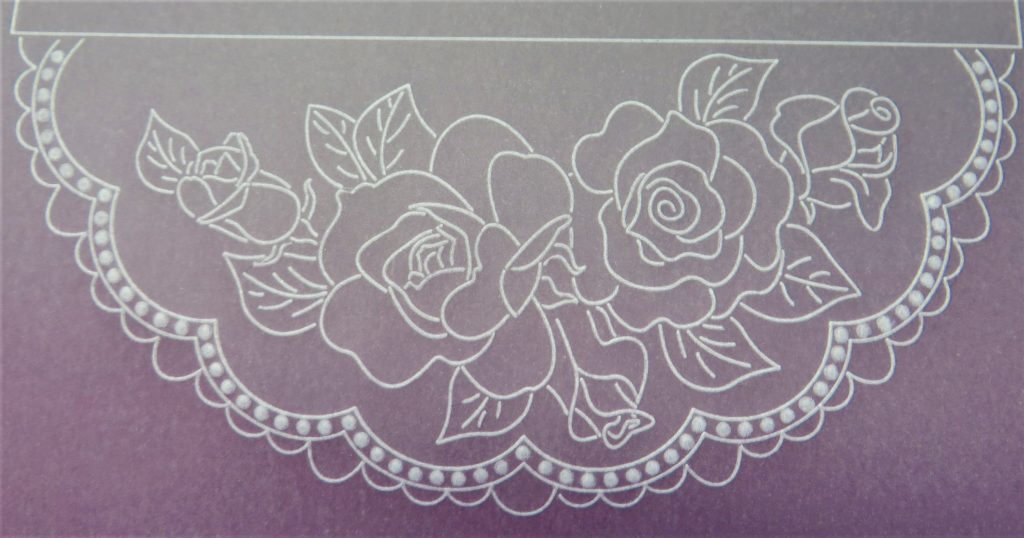
Step 6 – Emboss all the dots within the scallop border. To do this, start with a 3mm ball tool (number 4 tool of the starter kit) Don’t try to whiten it too quickly as the parchment will need a rest before moving down to a smaller ball tool. When embossing dots, do not just go in a round and round motion – it’s instinctive to do this, but it creates little black dots in the centres that you cannot get rid of. So, go up and down, then right to left first and then you can finish off with a round and round action. Barbara often says “North, South, East, West, then round the houses”!
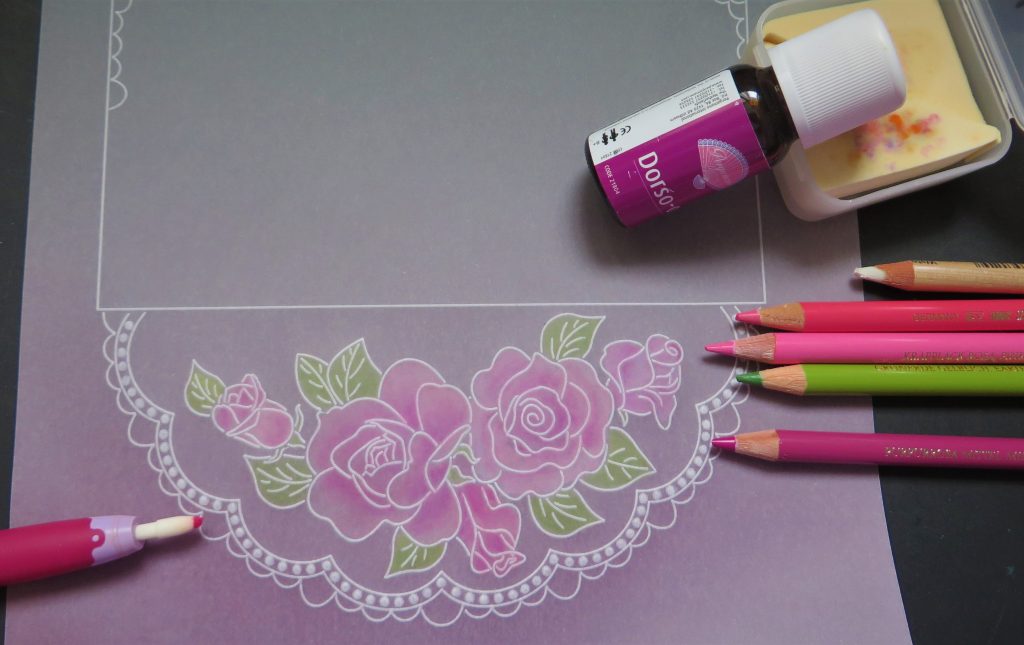
Step 7 – Whilst the embossed dots are resting, we can add some colour to the roses. When we want to add colour to parchment that is already coloured, we can take some colour out using the white end of the pencil eraser. That is because when the parchment was printed in the factory, it was done on the back. So if we turn the work over to the back and just rub out the ink where we wish to colour, it will give you a blank canvass to add whatever colour you wish to use, back in. Check out all of the pink dust that I have rubbed off. Also rub out the ink of the tiny roses at the opposite end of the piece. Use a soft brush to remove the dust.
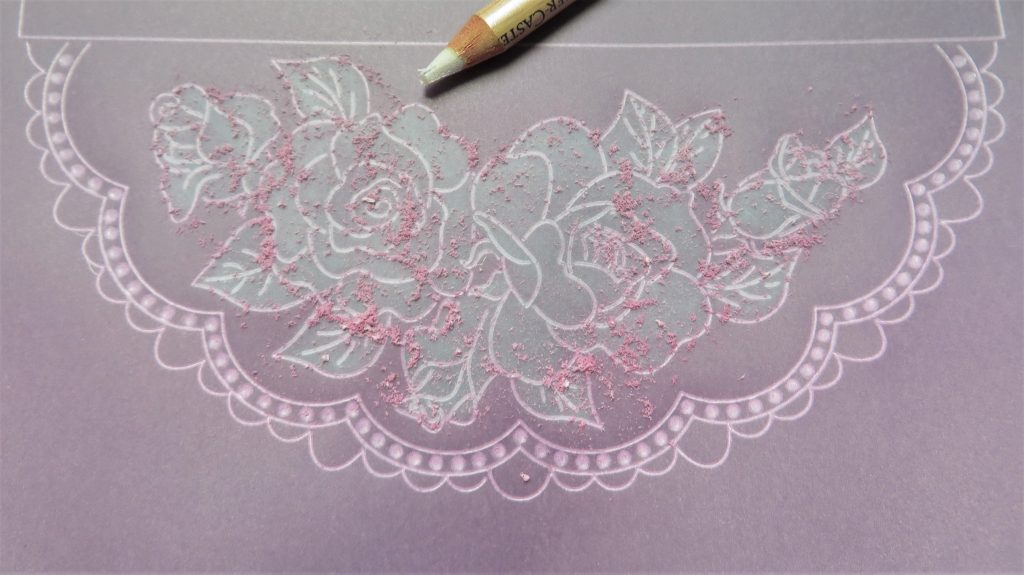
Step 8 – I used three shades of pink for the roses – a dark, medium and light. Working on the back, apply the darkest shade to the middle of each rose, (no need to be neat about this) leave a tiny gap, then add the medium shade. Again, leave a little gap and add the lightest shade at the ends of the petals. Blend these colours out using the nibs and Dorso oil. Scribble a little of the darkest shade into the tiny roses at the other end of the piece and blend out. Put some green into the leaves and blend these also.
Step 9 – Move down to the number 3 tool of the Starter Kit and whiten up the dots within the scallop border.

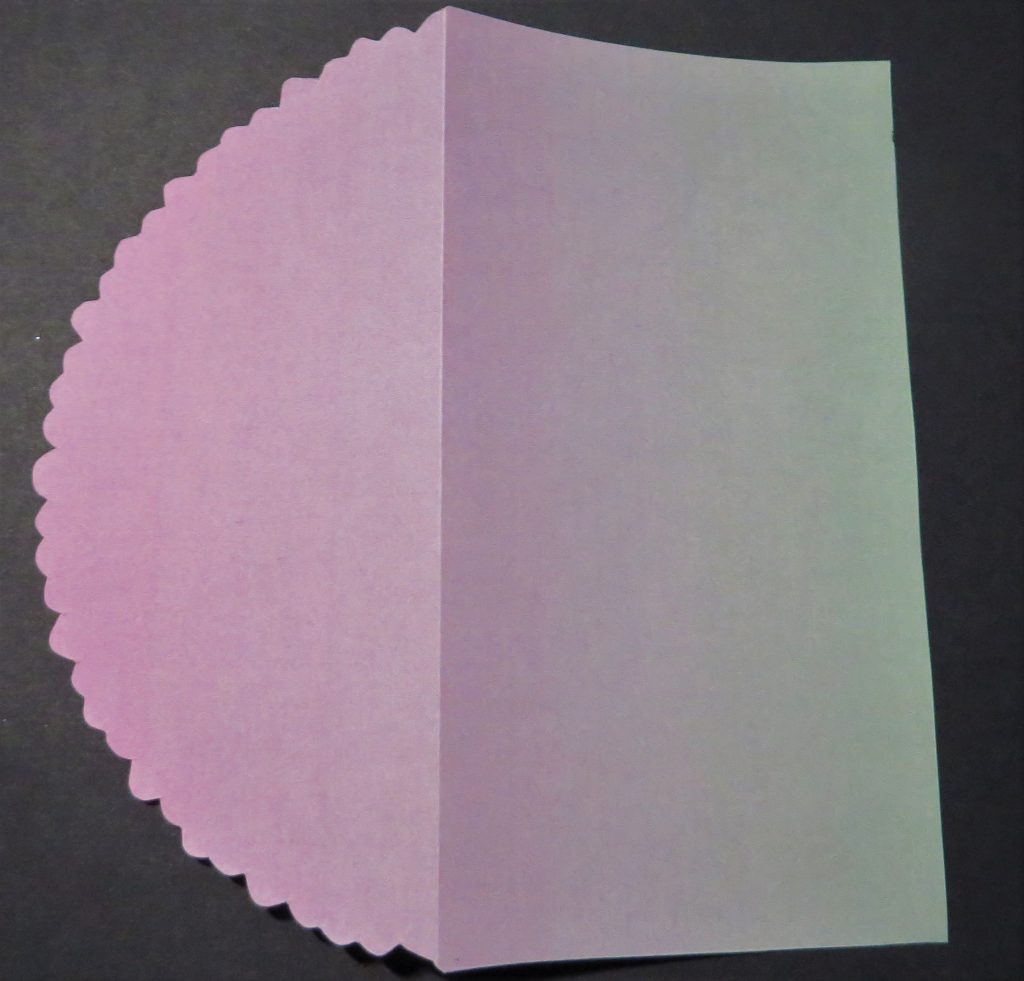
Step 10 – Here is where you decide how much perforating and snipping you wish to do. You can just go around the very edges of the whole piece with the two needle tool and then snip, or you can perforate all the scallops. There is a very good step by step blog on perforating and snipping out fine pieces. You will find a link on the Clarity Matters Blog and also on the Clarity Stamp Website, where there is a whole library of step by step tutorials. Paul Church also has videos from his Groovi Tuesday Facebook Lives – again, there are links on the website. Use a ruler to bend up the edges so that the piece with the roses will fold down over the pieces with the tiny roses and lace.
Step 11 – Take a piece of the corresponding pattern of Rainbow Paper, lay it face down onto the ‘It’s A Wrap’ plate, and fix it with some Groovi tabs. Wipe over it with a tumble dryer sheet. *You might need to use the light panel for this. Use the number 2 tool, very gently to go around the edge of the plate, excluding the bottom section. Use the embossed line to cut out the shape with a pair of scissors.
Step 12 – Fold the paper along the first fold line, apply a very feint line of Perga glue to the edge and stick this insert into the parchment card. Just put a little glue out onto a piece of scrap parchment, pick it up on the end of a cocktail, or pickle stick and apply the tiniest specs to the fold edge. Stick this in place and then fold the card together.
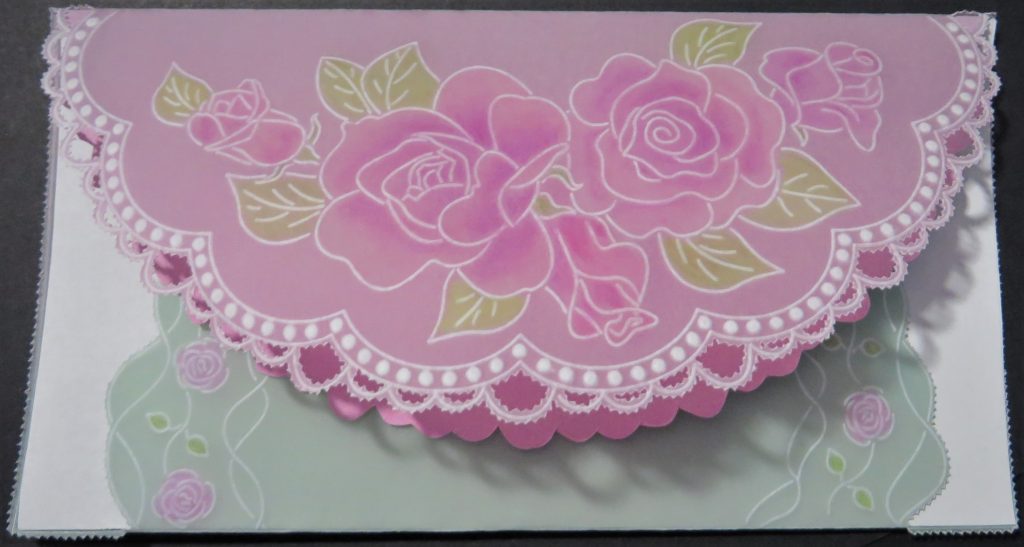
Another masterpiece from Glynis – thank you so much!
Everything that Glynis has used can be found over on the Clarity website HERE
If you are on Facebook and belong to our 2 groups – Groovi Worldwide and Clarity Worldwide, you may have seen that our fantastic design team taking part in our #SayItWithFlowers event
There is nothing like some beautiful flowers to brighten a day so why not head over to Facebook and share your floral makes!
If you have just found the Clarity Matters Blog or are new to Groovi, then make sure you sign up to the Clarity Newsletter to keep up to date with all things Clarity HERE
If you are looking for ideas and inspiration, then make sure you check out the Blog Tutorials section on the Clarity website HERE or head over to the Clarity You Tube page HERE
If you missed The Pergamano Shows on Create & Craft on Friday with Barbara, you can watch again HERE and HERE
Look at the week ahead…………….
Tuesday 19th: Groovi Tuesday with Paul – Live at 10am on Facebook & YouTube
Thursday 21st: SHAC Shack with Barb – Live at 10am on Facebook & YouTube
Friday 22nd: Crafting with Clarity with Barb on Create and Craft – 9am & 1pm
Take care and stay safe.
Paul & Glynis xxx
Good morning Paul & Glynis. Happy Easter to everyone on what so far is a lovely sunny day. I must confess I have already eaten some of my Easter egg which I won in a raffle on Friday. If there is no chocolate in the house I am not bothered but if it is staring at me it has to be eaten – no will power.
Another lovely project from Glynis this week with great step by step instructions. Would it be possible to have the instructions as a pdf so we could download for use when its not always possible to have access to the computer.
Loving all the flowers on FB – so many different designs & ideas.
Another inspirational project from Glynis. Thank you both for posting this.
Beautiful start to the day here, sun shining, birds singing and the trees shaking out their fresh green leaves. Today I am happy and planning to spend an afternoon crafting.
Happy Easter everyone.
Stay safe.
Thank you for a lovely project. Happy Easter everyone xx
Beautiful, Happy Easter to all. xx
Happy Easter to everyone – & thank you Glynis for a beautiful project Xx