Clarity’s Blog Tutorial: How To Make A 3D Star
Hello hello! Grace here.
I hope this finds you well? Happy? Enough?
Haha.
Well, we’re blessed to have the absolutely lovely Glynis Whitehead in the bloggy bubble building. We have so many ask us how to use some of our 3D plates. Well, here we go!
I’ll hand you over to the top notch teacher herself…

How To Make A 3D Star
Ingredients
Star Box A4 Groovi Tem-Plate (GRO-TE-40451-16)
Plate Mate for A4 Grids with Extensions (GRO-MA-41768-21)
*You can also extend your regular A4 Sq Plate Mate with Groovi Plate Mate Extenders (GRO-PA-41781-XX)*
Powder Blue x 10 Groovi Soft Tones Parchment Paper (GRO-AC-40404-A4)
Number 1&2 Tool from the Starter Kit (GRO-AC-40026-XX)
Red Liner tape (ACC-AD-30375-XX)
Scissors (or craft knife)
Ruler
How To
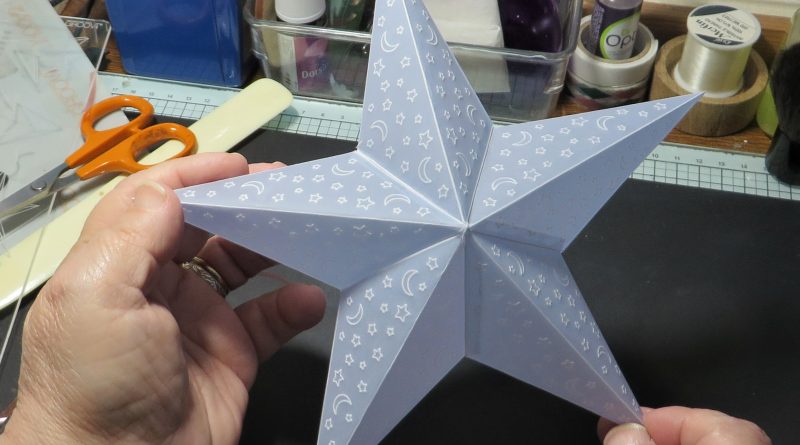
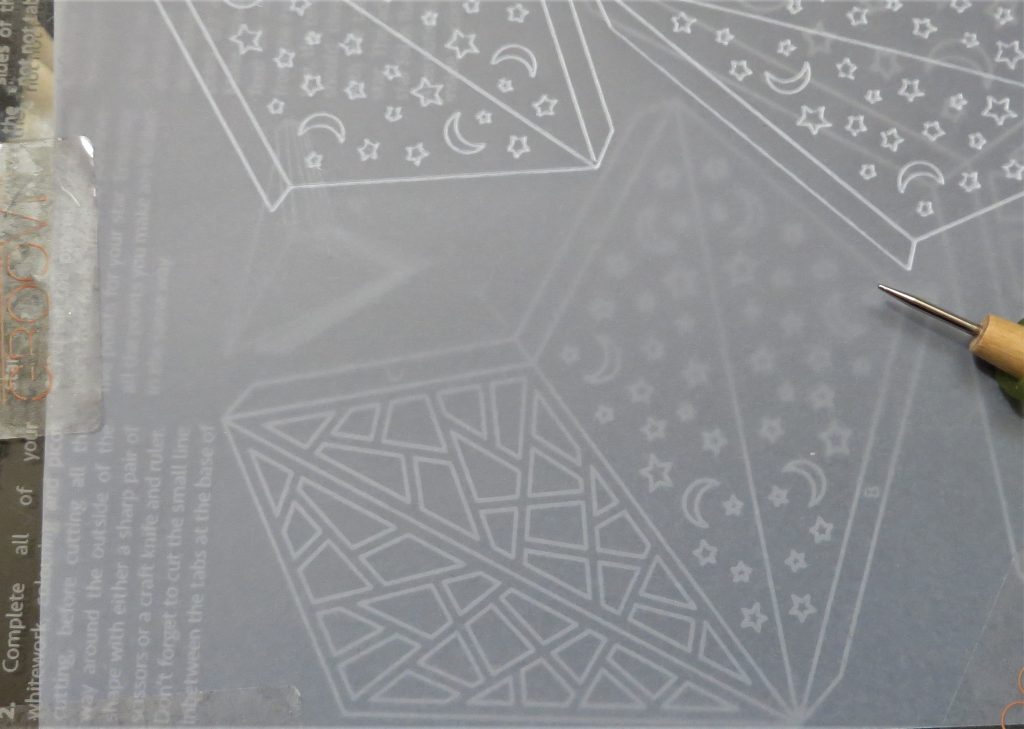
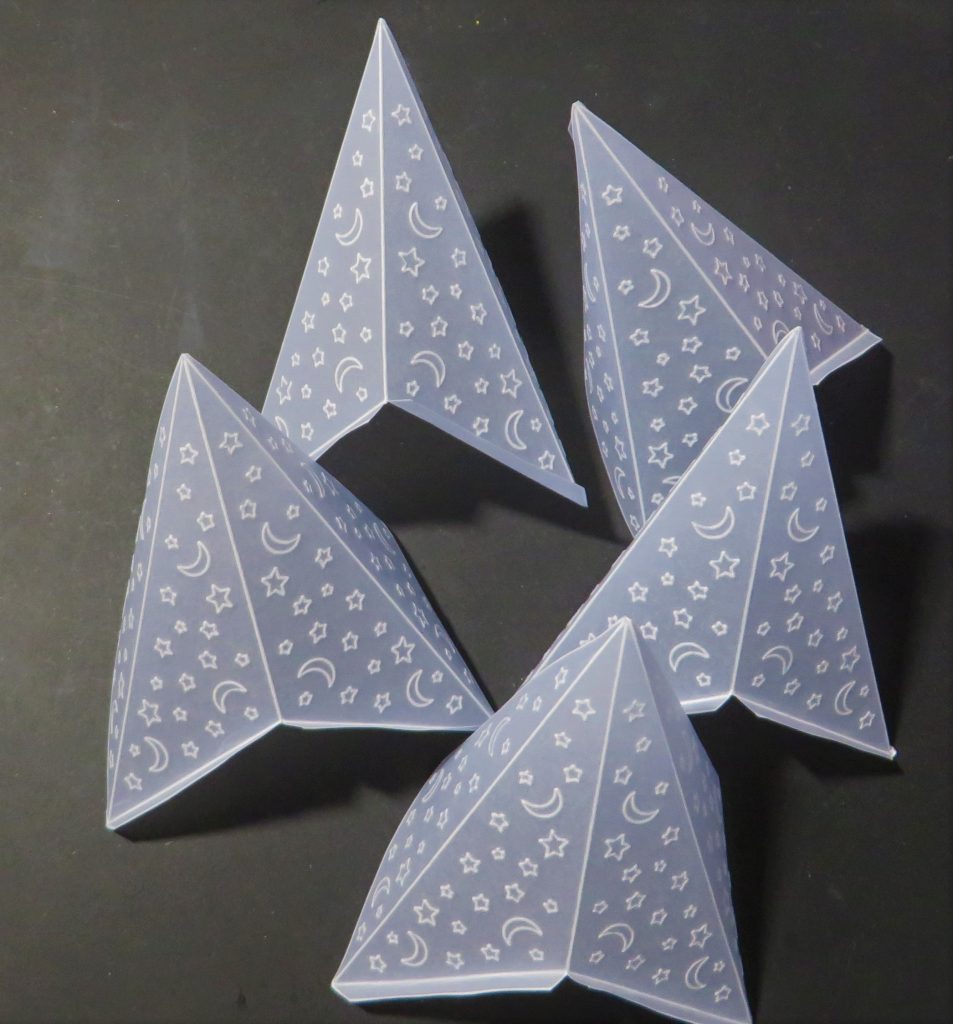
Step 1. Fix a piece of parchment to the Star Box Tem-Plate. I am going for the small star.
TOP TIP: If you are careful how you line up the star points you can get 5 points out of an A4 sheet of parchment.
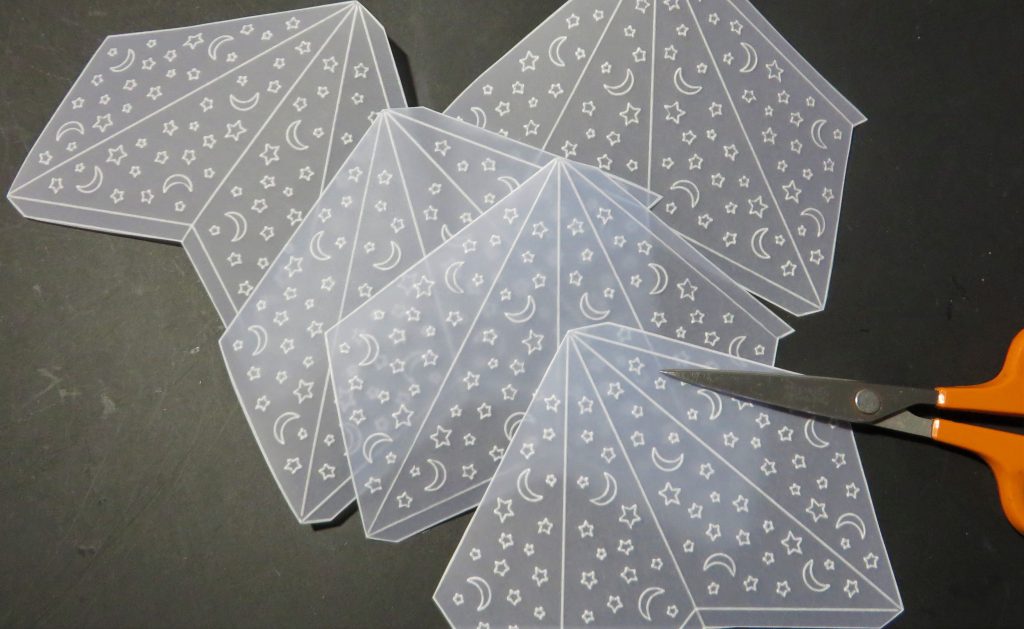
Step 2. Choose the artwork you wish to put into the star points. I have used the moons and stars. Once you have filled one section of the point, move the parchment and line it up to fill the next. Decorate all five points.
TOP TIP: There are many icons and patterns within the whole Groovi range that you can really use your imagination to decorate a star.
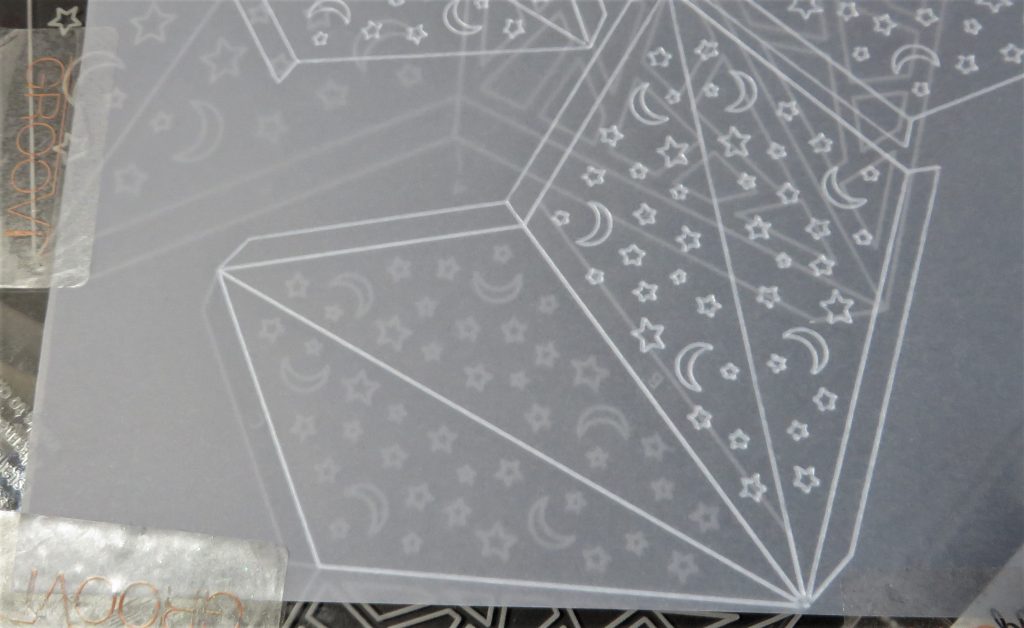
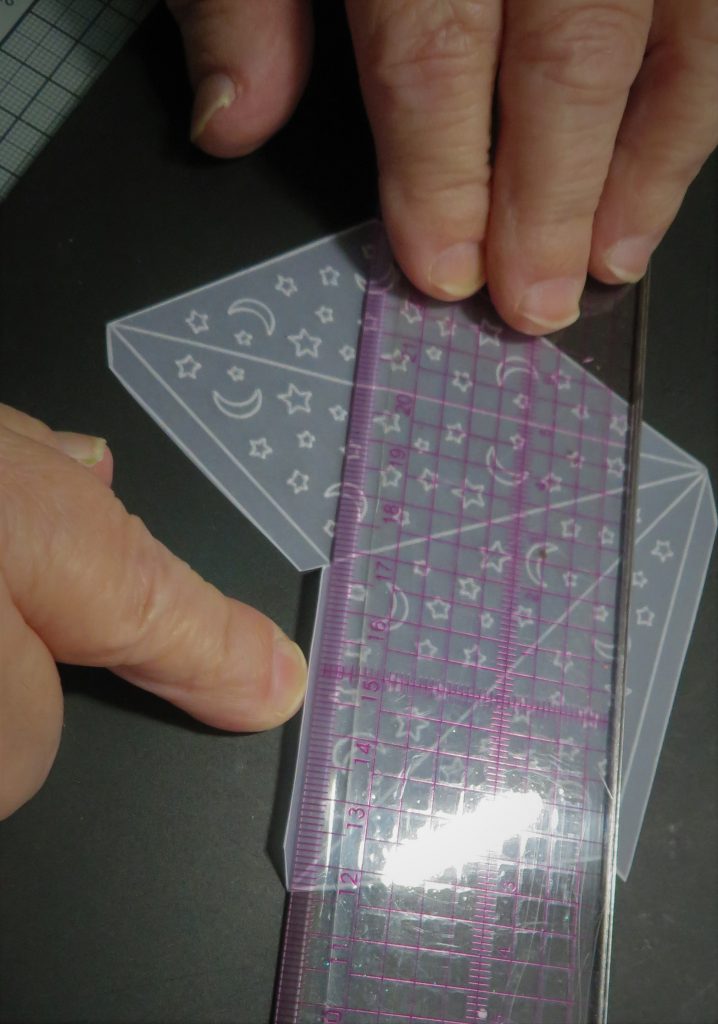
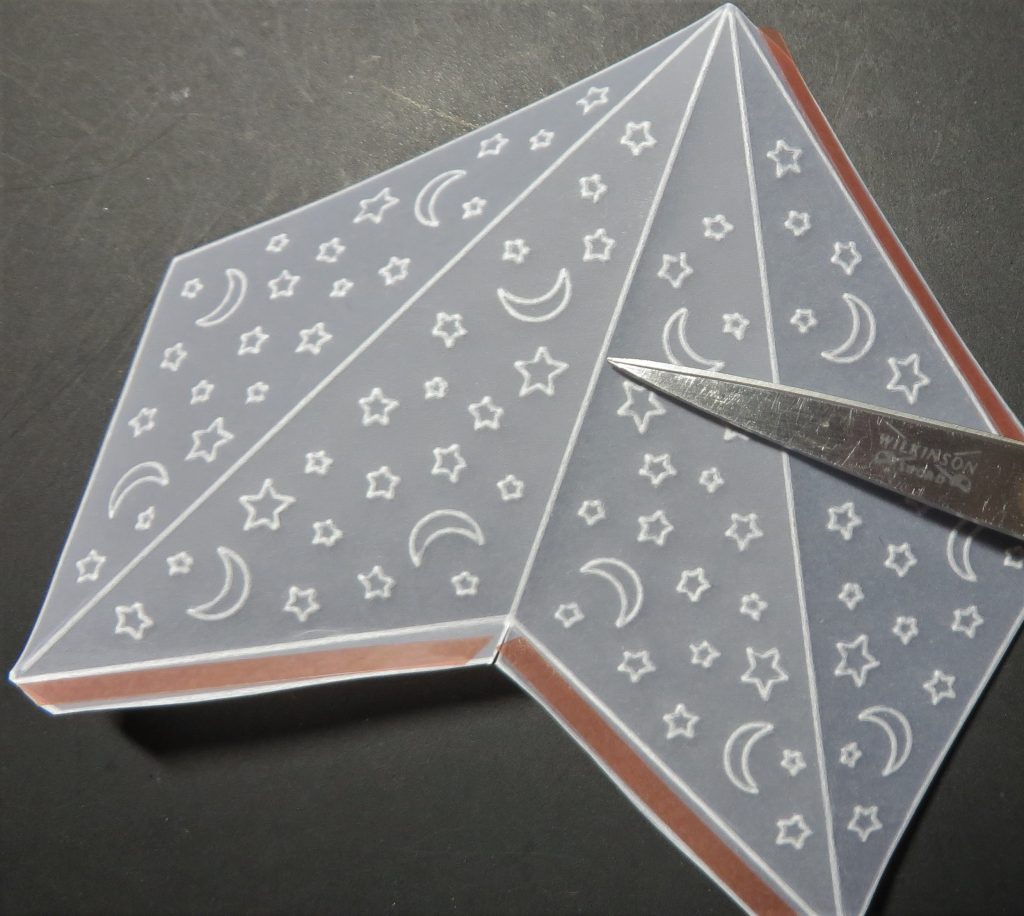
Step 3. The Tem-Plate itself has brilliant instructions and illustrations on it, so refer to them as well as this blog. Cut out all of the pieces of the star with a pair of scissors or a craft knife and ruler.
Step 4. Check out the instructions on the plate and identify the little cut you need to make at the base of the star to make two separate flaps (illustrated as A on the plate). These flaps need to be folded outwards.
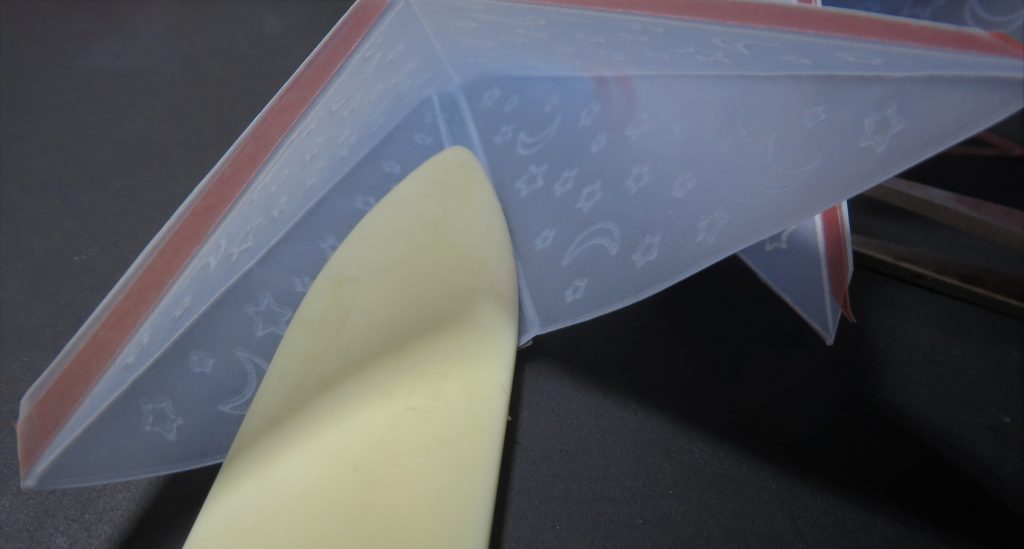
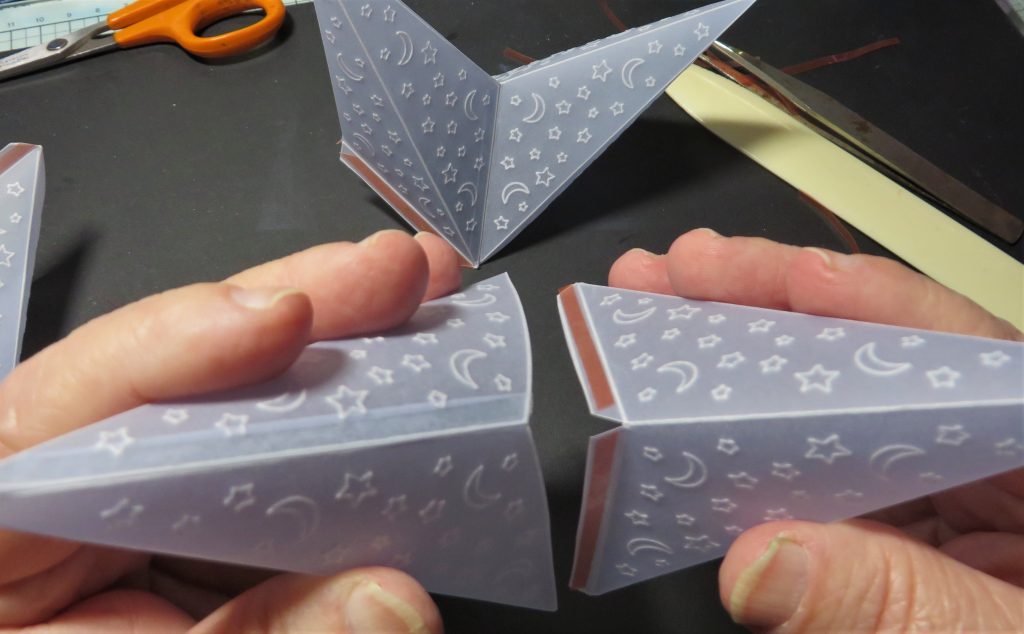
Step 5. As in Pic 4, use a ruler to bend inwards all the folds of the star points. Go very gently when making these folds as the parchment can crack. The side flap on each point also bends inwards.
Step 6. Flatten the points back out a little to enable you to put extra strong adhesive tape onto the tabs.
Step 7. Stick the back of the point down – it is easier to lay this flat too, to get a good adhesion. Press it down firmly so that it will hold nicely when you ‘pop’ the point back up again. Use a bone folder to burnish the join from the inside.
Step 8. Now offer up the base of the points so that the side with the flaps fit into the sides without flaps. As you go, keep laying the piece down and burnishing the joins from inside. Continue to go around until you get to the last join.
Step 9. The last point is the most fiddly to get into place. I found it easier to stick the front two tabs before sticking the back ones, rather doing one whole side and then the other. And you’re all set!
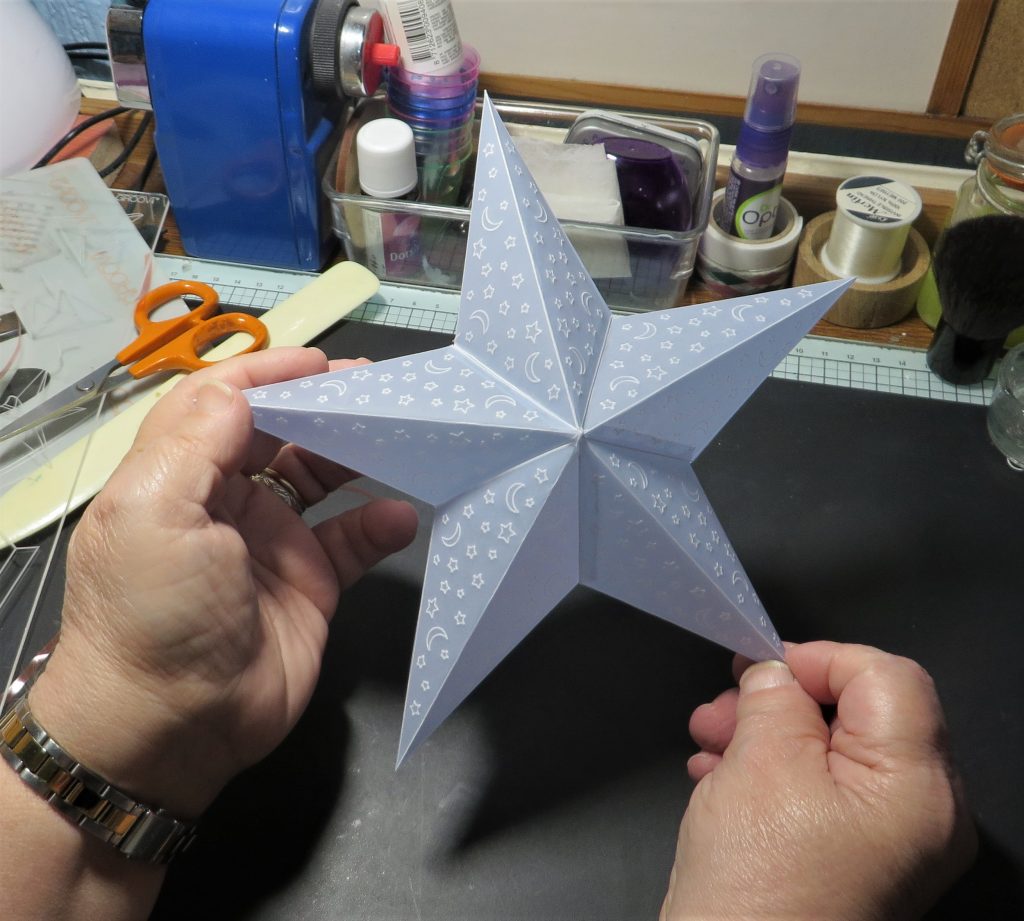
Voila! What a beautiful star. Perfect decorations for the tree, or around the house! Thank you, Glynis, you STAR 😉
If you like all things 3D, then check out some of the previous blogs:
Cube Box with Glynis HERE
Christmas Tree with Josie HERE
Christmas Cracker with Glynis HERE
As usual, everything that Glynis has used is in one place over on the Clarity website HERE
Just a reminder that Mum is back on The Craft Store for her usual 2 hour slot of all things crafty today at 2pm-4pm. You can watch online HERE or
Sky 673 (24/7)
Freesat 817 (24/7)
Freeview 85 (7am – 10pm)
Travel gently friends…
Lotsa love, Grace & Glynis xo
Clarity – The Home of Art, Craft and Well-Being.
How delicate and gorgeous is this star!!
Thank you Glynis for your tutorial.
Have a great Sunday everyone and stay save and healthy, Trijntje Huppel
Excellent to get that demo. I started a star last year and it‘s still not finished! Far too much picot cutting on my design! Lol. Seemed like a good idea at the time. Thanks for the demo, Glynis. Hxx
Hi Grace, Hi Glynis, Another Wow tutorial, culminating in a stunning star, Wow !!
Lots of love from Patricia xx
Hi Grace and Glynis, I made a star a few years ago now, think it’s now in sections again so might have to renew the glue or just start again ! Good to have the pictures though! X
Glynis the star is absolutely stunning I have the plate but to my shame I have never tried to make the star you have made me want to get crafting
thank you Glynis hope you are well my friend
Hi Grace you looking forward to the Christmas 🤶 break I bet you are stay safe and as your mum says travel gently hugs 🤗