Clarity’s Blog Tutorial: How To Make & Layer A ‘Side-On’ Butterfly
Hello hello! Grace here
I hope this finds you well?
We’re back again in the bloggy bubble this weekend, with the lovely Glynis Whitehead. And she’s got more fantastic tricks and tips up her sleeve! Woo 🙂 I’ll hand you right over…
How to make and layer a ‘side-on’ butterfly.
I showed you in a blog on 28th March 2021 how to make a lacy butterfly. Butterflies in profile are layered up differently and sometimes there are lines you have to ‘make up’ or find within the plate to complete a wing. So this tutorial is to show you how to achieve just that!
Ingredients
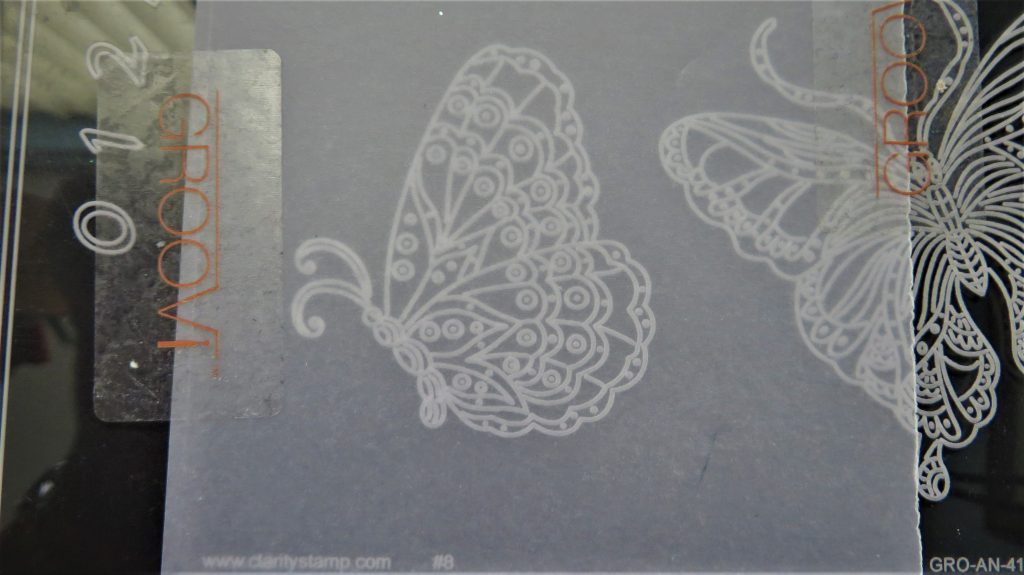
Cherry Green’s Butterfly Plate A5 (GRO-AN-41749-04)
Straight Basic Grid A5 Square (GRO-GG-40202-12)
Pergamano 1 needle bold perforating tool (PER-TO-70028-XX)
Pergamano 2 needle tool (fine) (PER-TO-70037-XX)
A5 Black Super Foam (GRO-AC-41765-XX)
Pergamano Perga Glue (PER-AC-70133-XX)
Pergamano Perga Cutters (PER-TO-70042-XX)
*Alternatively: Pergamano Perga Exclusive Scissors (PER-TO-70040)
Or Pergamano Ringlock Scissors (PER-TO-70041)*
Sticky Ink (PER-AC-70134-XX)
Perga-Glitter (PER-AC-70252-XX)
*Perga-Glitter Bundle (PER-AC-70305-XX)*
Instructions
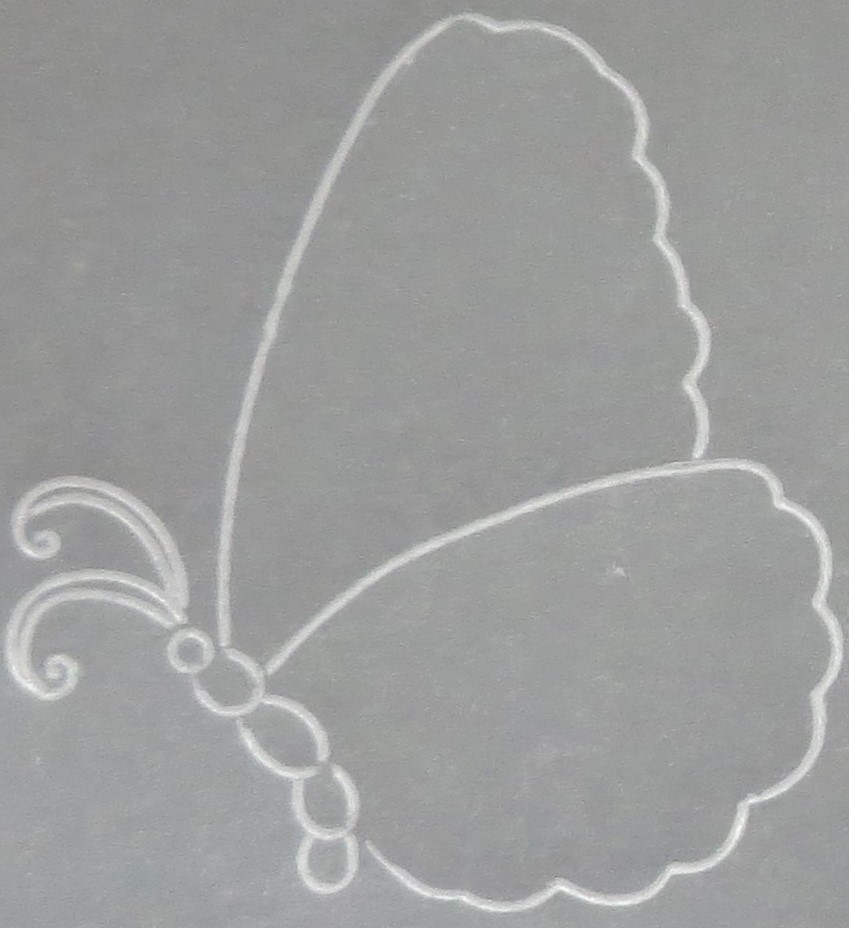
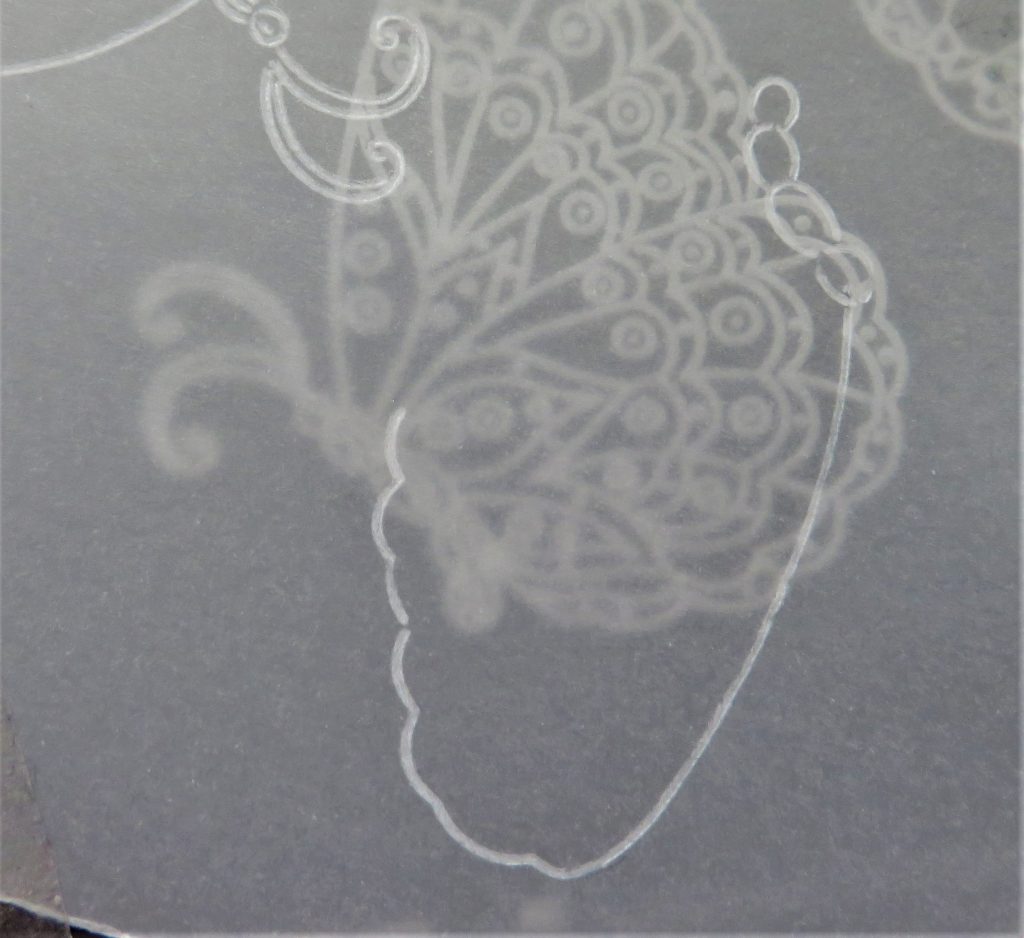
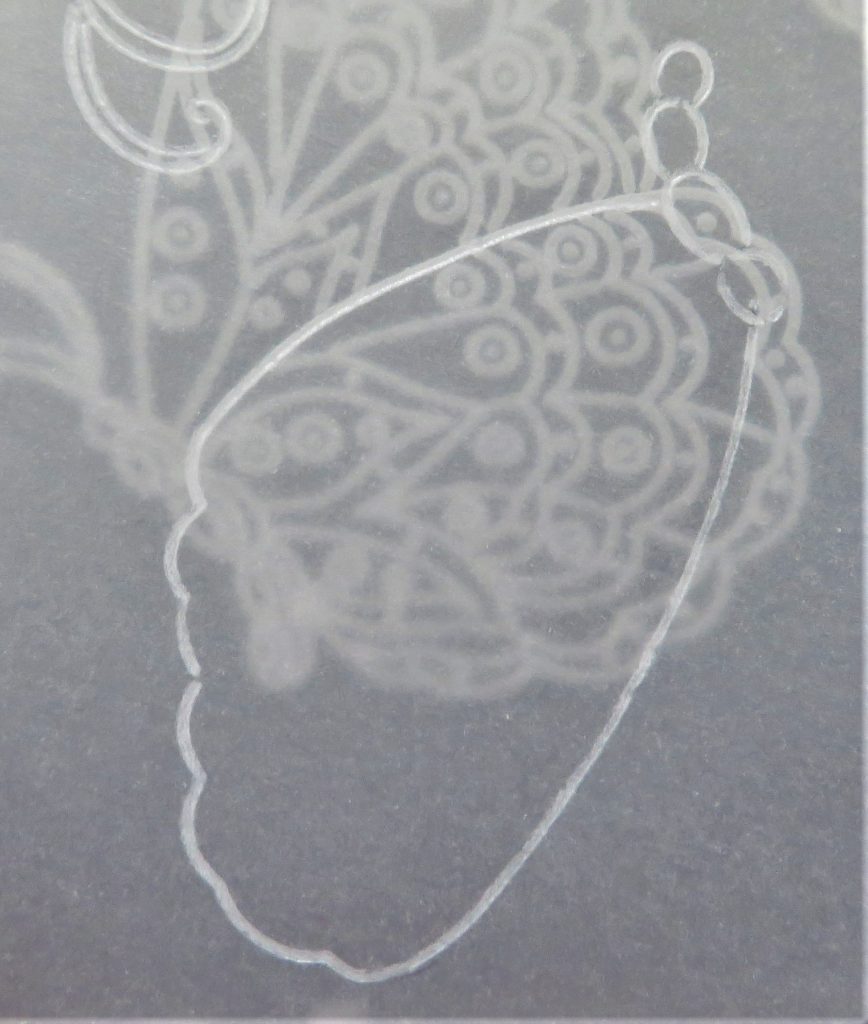
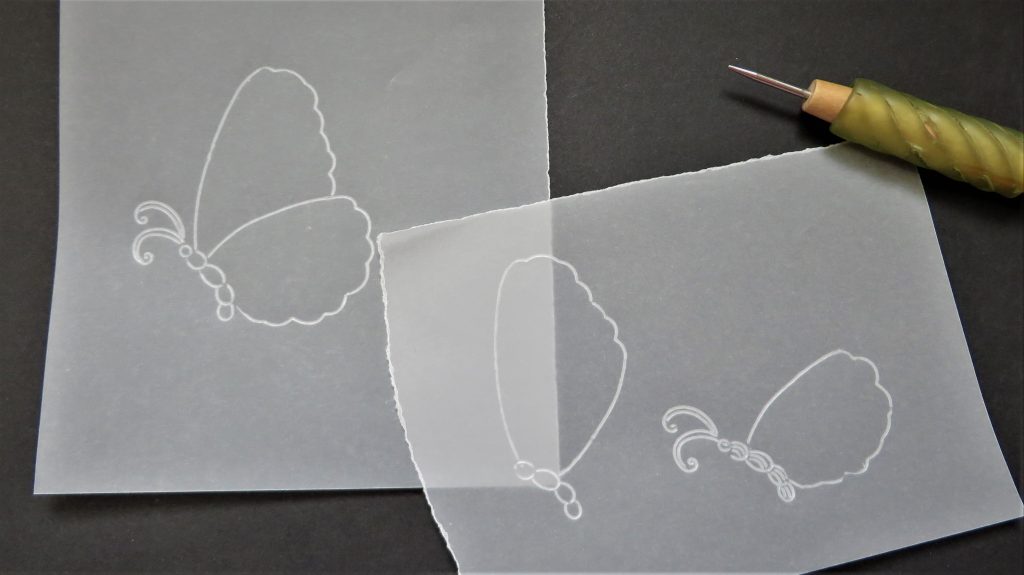
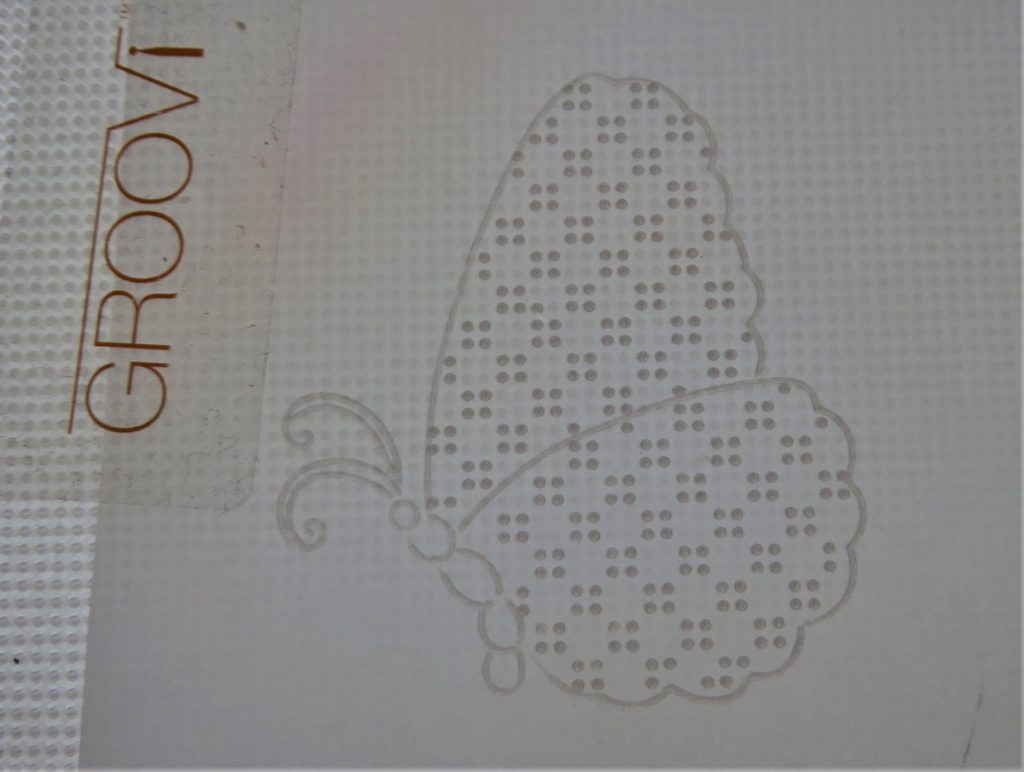
Step 1. Choose your butterfly and attach an off-cut of plain parchment over it. We just need the outline of the butterfly. Trace the design with the number 1 tool from the Starter Kit.
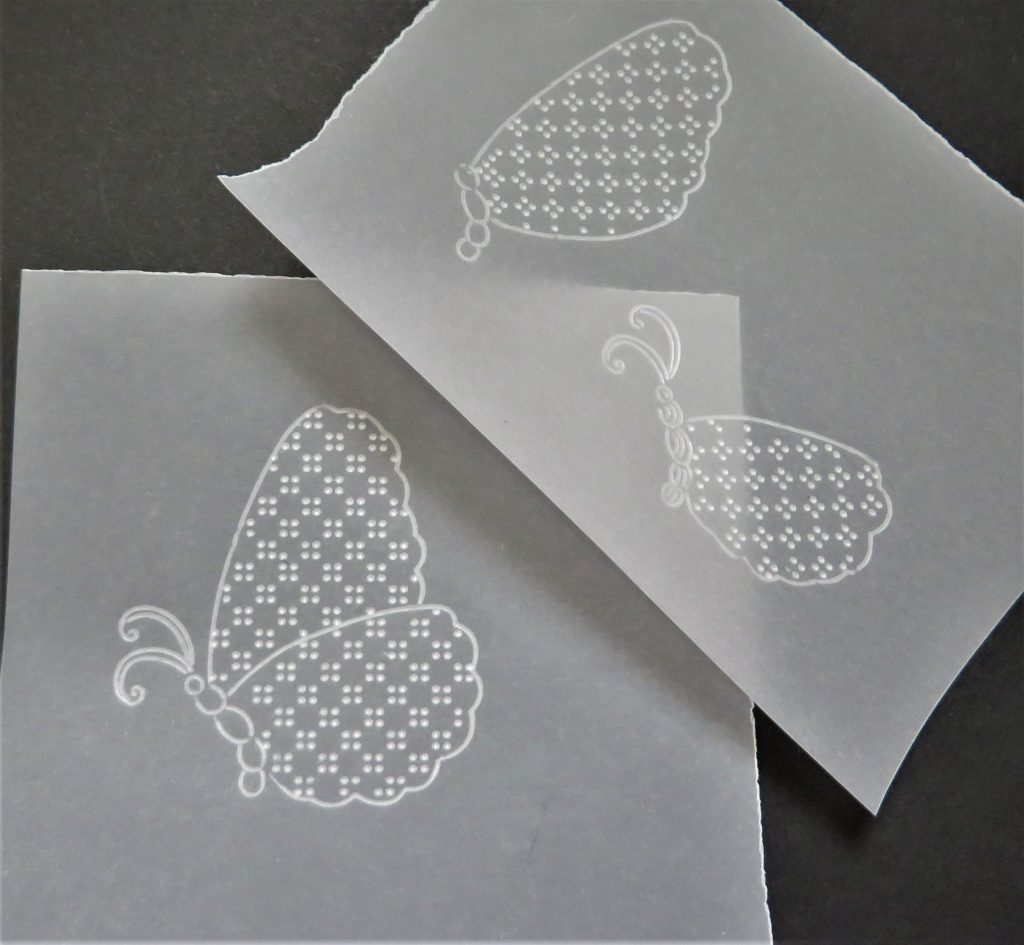
Step 2. Now we need to make the layers. Trace out the small wing and add the detail of the butterfly body.
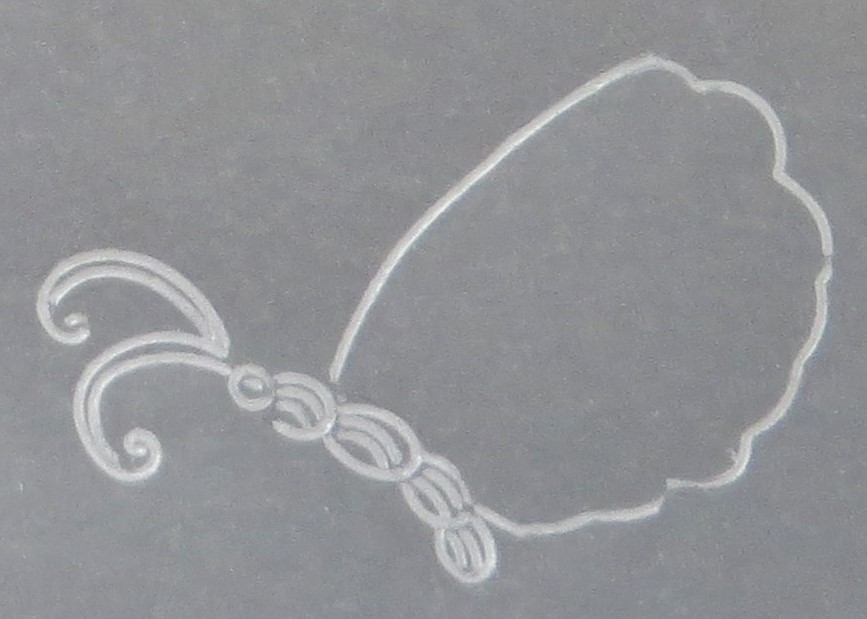
Step 3. Next, trace out the large wing, turning this upside down on the plate to line up with an edge which will complete the wing.
This is what you should end up with.
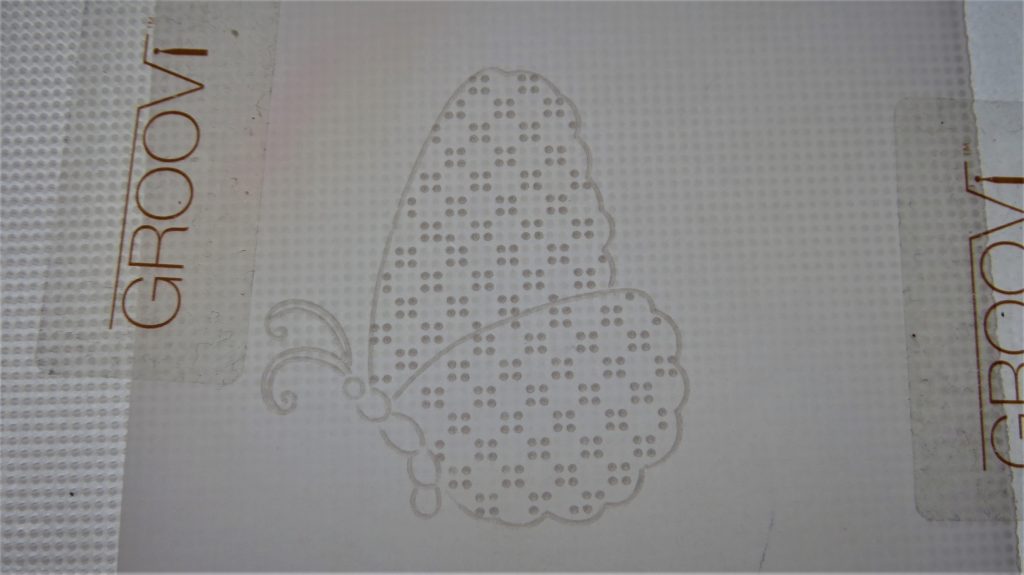
Step 4. Line up the work on the grid with right side down, and emboss the dots in a checkerboard pattern.
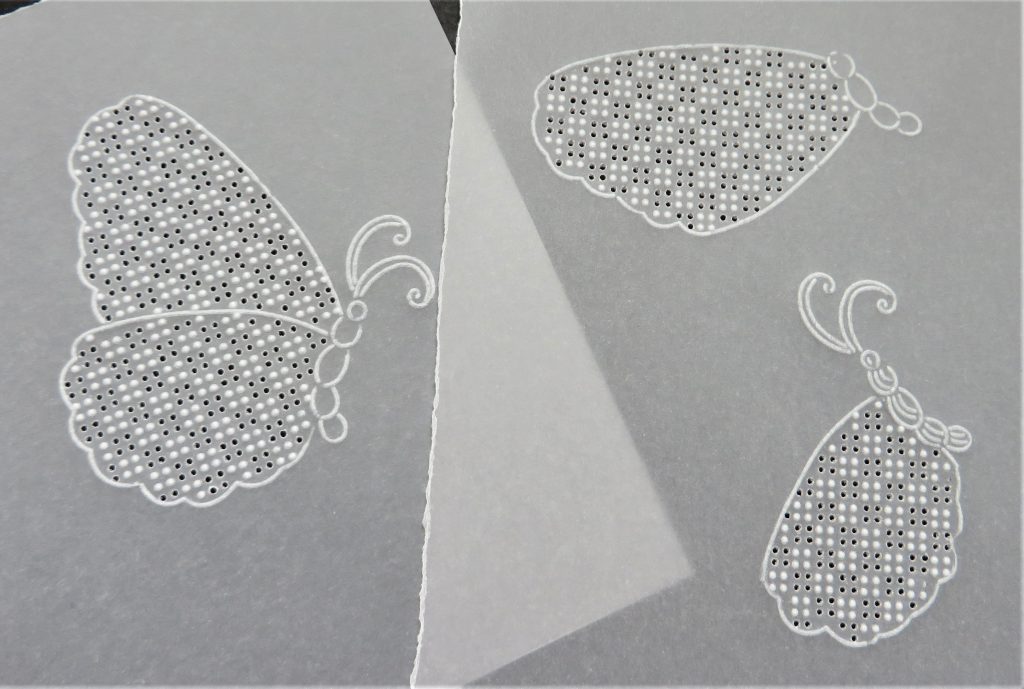
Step 5. Do this with all the pieces and you should end up with these.
Step 6. Now turn the pieces over so that you are perforating from the front, with four holes fitting within the embossed dots. Using the bold single needle tool, perforate the holes between the dots.
This is what you should have at this stage.
For instructions on how to cut the crosses of the pattern, check out the Blog from 28th March.
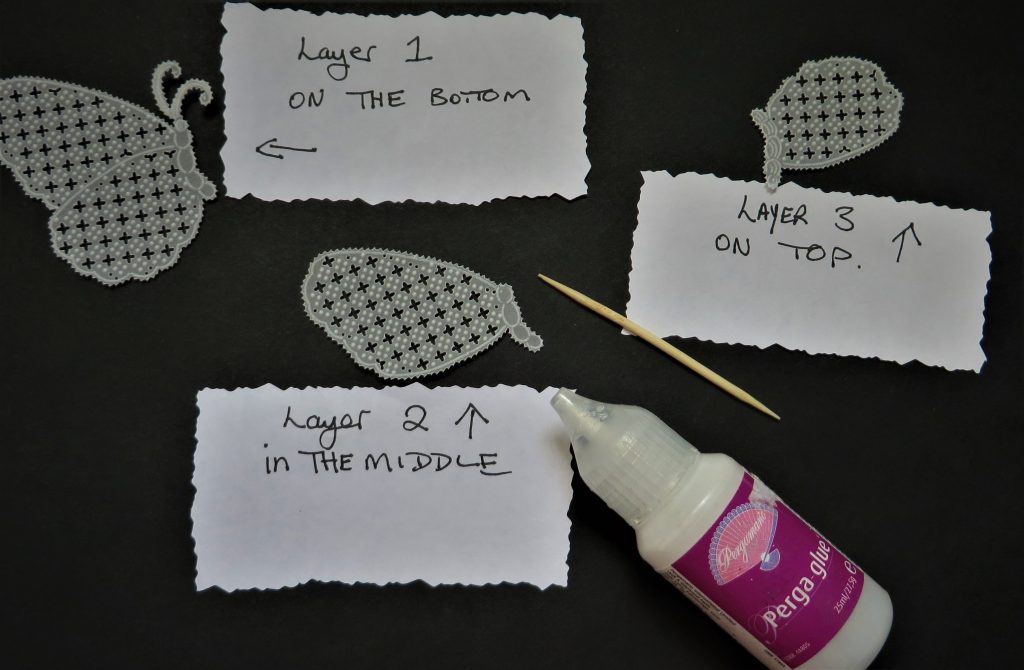
Step 7. Perforate all around the edges of the work with a two-needle tool and picot cut. Now to assemble our butterfly. Add a dot of glue to the body of the butterfly – avoid getting any on the actual wings. This is the order in which to glue them. When you have done this, the smaller wing at the bottom, will overlap the larger wing at the top.
If you are not yet at the picot cutting stage of your Groovi journey, the design is easy to cut out with a normal pair of scissors. You can reintroduce the butterfly antenna to your main piece of artwork and layer this on top.
Step 8. Once the butterfly is together, paint some sticky ink onto the wings, starting with the bottom layer and add some Perga-Glitter. You can do it before you assemble the butterfly, but this way helps to avoid getting glitter onto the layers of the body. If this happens you will find that there is no ‘grab’ when you want to glue it together.
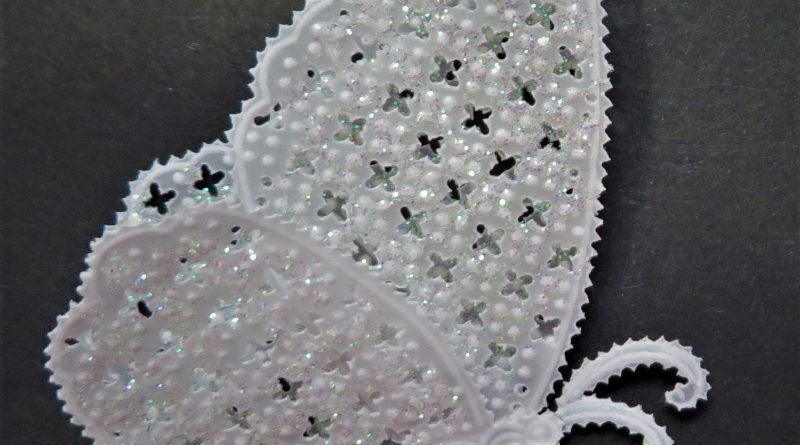
Here is the finished embellishment.
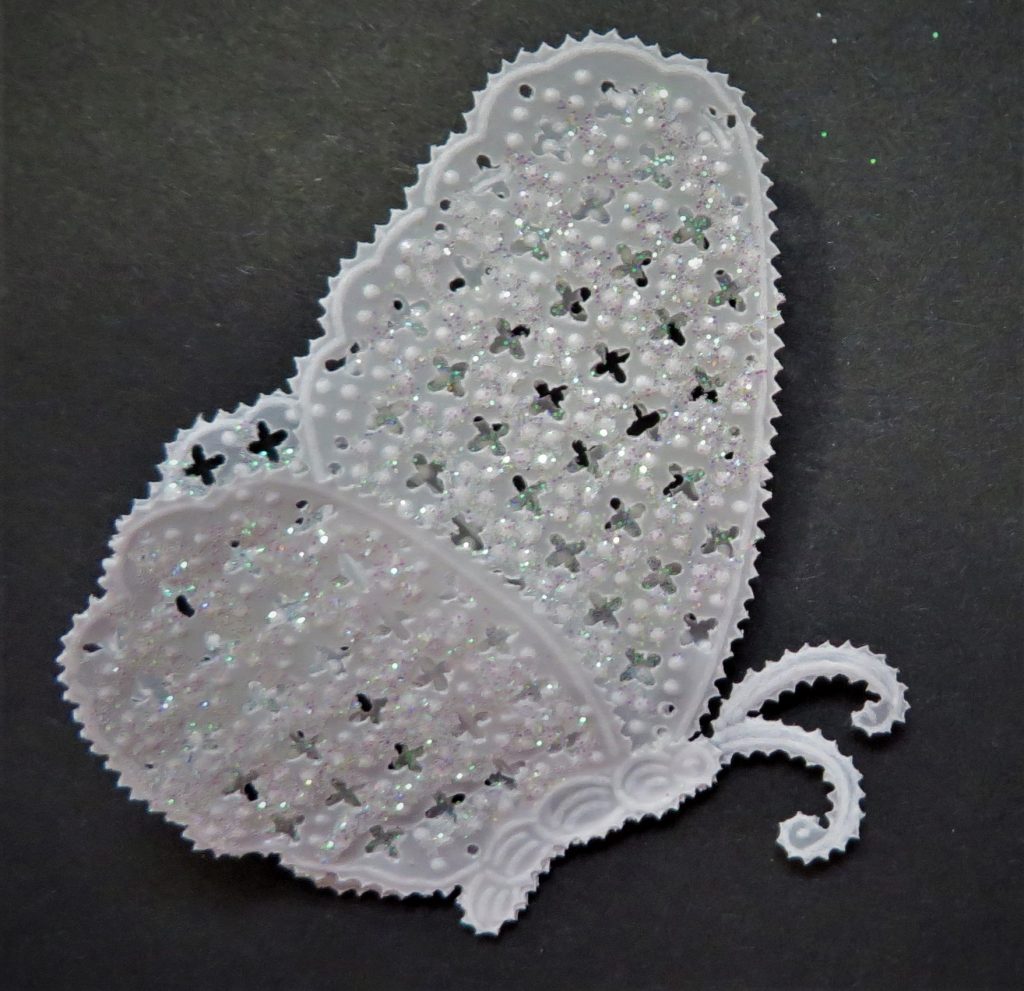
BEAUTIFUL!
How elegant and delicate does that look and will make a beautiful 3d embellishment for your artwork.
As usual, we have put everything in one place over on the Clarity website HERE
Don’t forget that The Pergamano Summer School starts again on Tuesday 14th September with the amazing Linda Williams. Linda will be continuing the gentle journey through her Multi Needle Volume I Handbook. Next week Linda continues with the 2nd part of the 5 needle tool
If you have missed any of the previous lessons, then you can catch up HERE We have also created a handy downloadable check list to make sure that you have everything ready for class!
Lotsa love, Grace & Glynis xo
Clarity – The Home of Art, Craft and Well-Being.
Hi Grace, Hi Glynis, A fabulous tutorial, as always, great inspiration and stunningly elegant.
Lots of love from Patricia xx
Hello Grace and Glynis,
How beautiful is this butterfly!!! Whis I had the time to make this, but very busy with packing the boxes for moving house in december so hardly time to do some parchment.
Take care and lots of love, Trijntje Huppel
A lovely project this week from Glynis, another to add to my to do list. Hope you are having a great time on your bonus trip to the UK. It was great to see you & your Mom on Friday night – your giggles were infectious !! Will you still be here this coming Friday for the stamping session ? If not have a safe journey home x
Hi Grace – Hi Glynis – what a beautiful tutorial – thank you so much – this really is inspirational & will be having a go at this.
Grace – just wanted to say a HUGE thank for Friday’s craft along – had such a great time from start to finish – Linda is a truly outstanding parcher – so thank you Linda & a big thank to your mum,yourself and Paul & as Sue said the giggles were definitely infectious 😂
Love Seta Xx
Looking forward to making this butterfly. Thank you again Glynis. Your projects are brilliant .