Clarity’s Blog Tutorial: How to 3 NEEDLE TOOL
Hello hello! Grace here
Well the Pergamano Summer School is underway. Did you attend the first lesson on Tuesday? If you missed the class or need to catch up, you can do so below or click HERE to view on our YouTube page.
As part of the Pergamano Summer School, Linda will be showcasing the various Multi-Needle Tools from her Handbook for Multi-Needle Tools Volume 1 book, which will then be followed up by a step-by-step project created by Glynis using that particular tool.
This week Linda was working with the 3 Needle Tool, so I will hand you over to the lovely Glynis.

Summer School Blog: 3-Needle Tool & Wheel Tool
Ingredients
Pergamano Handbook for Multi-Needle Tools Volume 1 by Linda Williams – (PER-BO-70291-XX)
Linda’s Wicker Chair Garden Groovi Plate A5 (GRO-OB-41514-04)
Garden – Hobbies and Pastimes Groovi Plate A5 square (GRO-OB-41477-03)
Tina’s Daisies & Buttercups Floral Delight Groovi Plate A5 Square (GRO
FL-41334-03)
3-Needle Perforating tool (PER-TO-70038-XX)
Wheel Embossing tool (PER-TO-70013-XX)
1mm Embossing Ball tool (PER-TO-70011-XX)
Nested Arch Tags Die Set and Groovi Plate (CLA-PA-20100-XX)
Number 1 & 2 tools from Starter Kit (GRO-AC-40026-XX)
1.5mm Embossing Ball tool (PER-TO-70004-XX)
3mm Embossing Ball tool (PER-TO-70005-XX)
6mm Embossing Ball tool (PER-TO-70016-XX)
A4 Translucent Perforating mat (GRO-AC-40307-A4)
A4 Translucent White Super Foam (GRO-AC-40603-A4)
Method
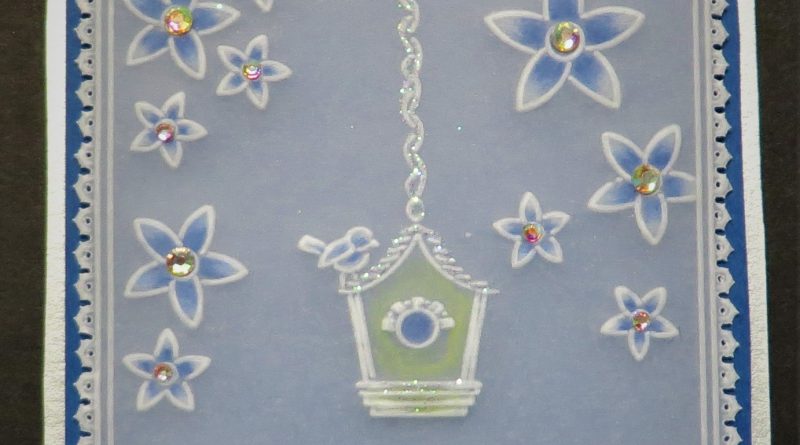
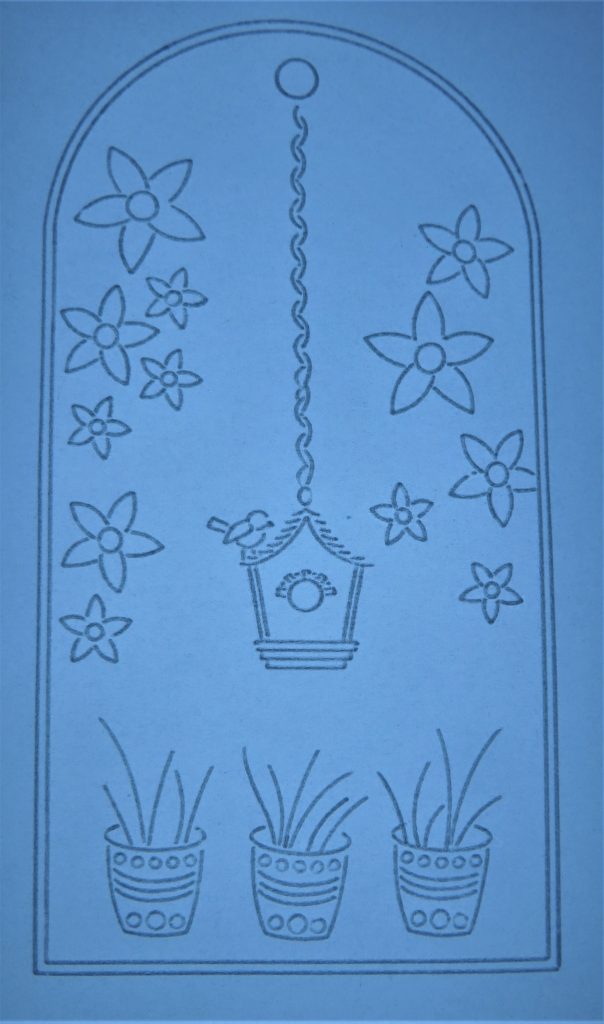
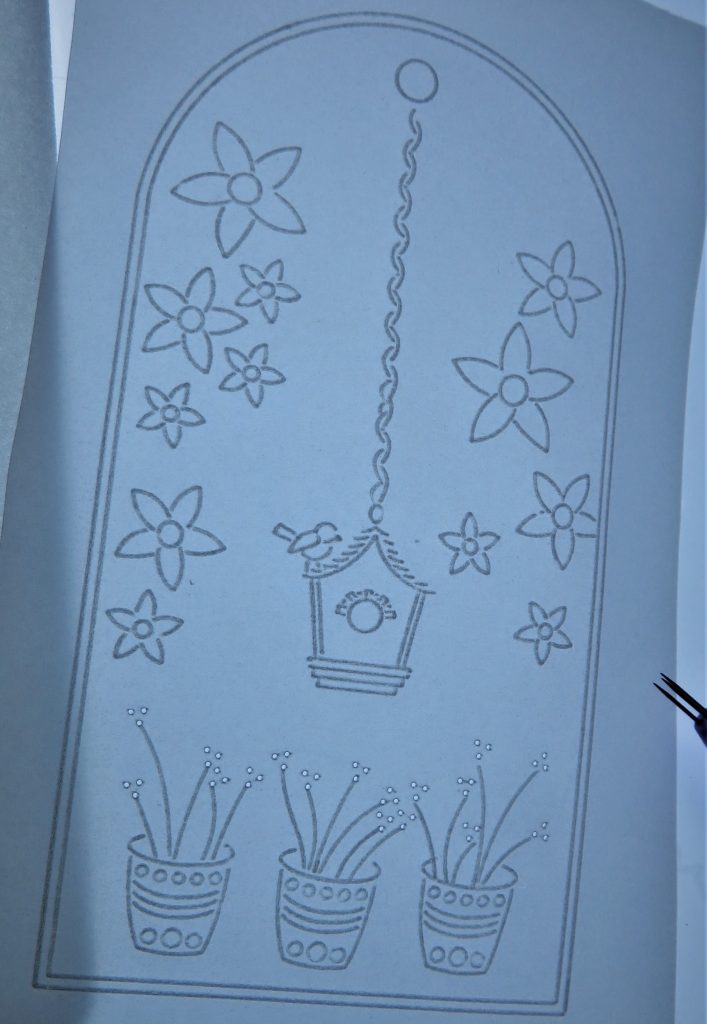
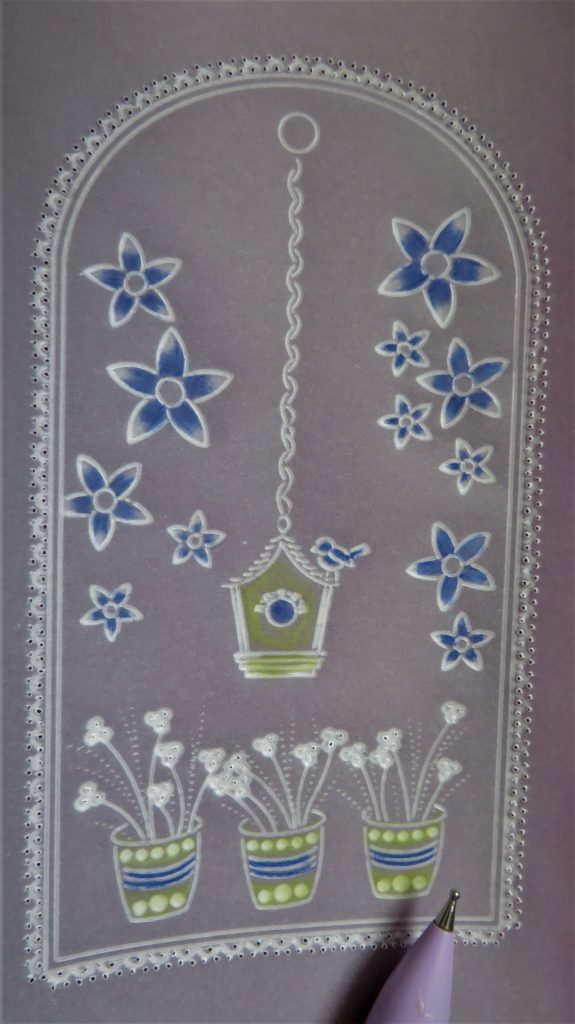
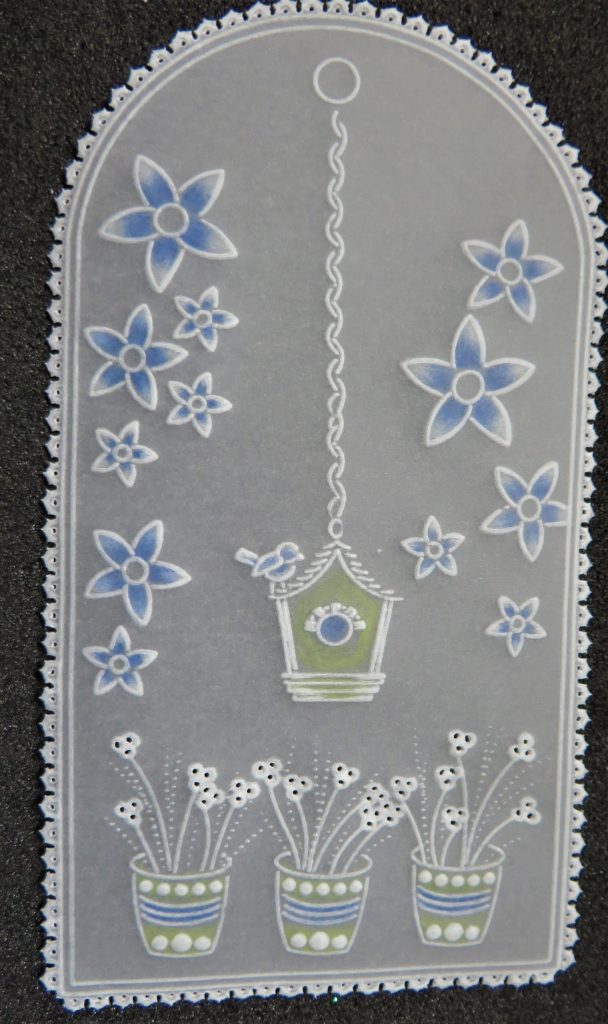
Step 1. Attach some plain parchment to the Nested Arch Tags Groovi Plate and trace out the 2nd tag from the outside. Use the number 1 embossing tool from the starter kit.
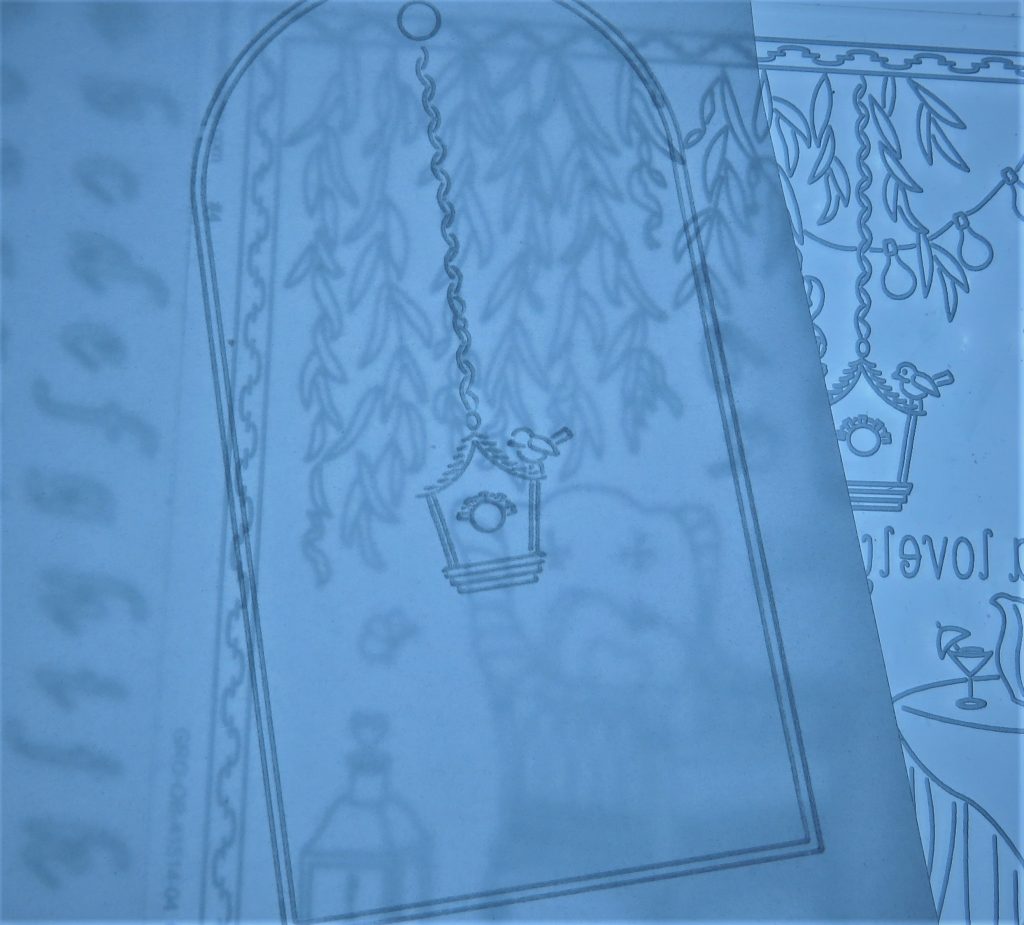
Step 2. Add the bird house from Linda’s Wicker Chair Garden Plate, extending the hanging chain so that it hangs from the hole at the top of the tag.
Step 3. Trace three pots from Tina’s Daisy and Buttercup plate, spacing them out across the bottom of the tag. Add some stalks, but don’t trace the flowers. Then add some flowers from the Gardening plate down the sides of the tag.
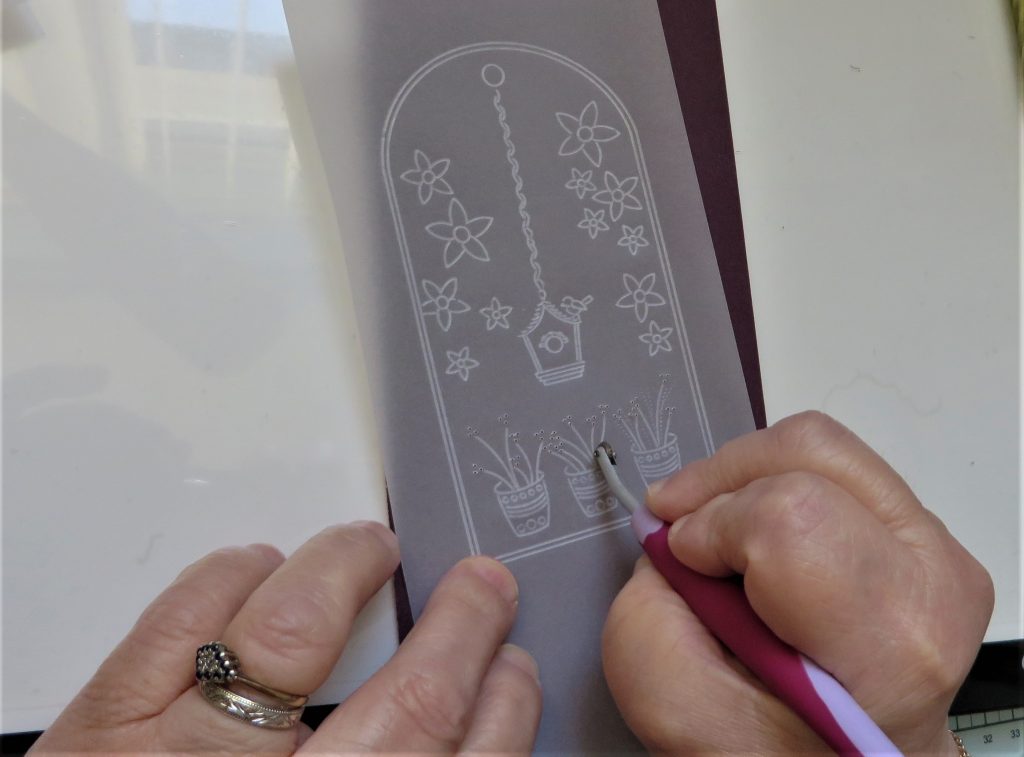
Step 4. Add some flower heads to the stems in the pots using the three needle tool – see Linda’s Handbook. I have used the A4 Translucent Perforating mat for this job as the perforations will be embossed.
Step 5. Add a few fronds using the Wheel Embossing Tool between the stems in the pots. To do this, you need to be off the embossing mat and putting a stout piece of card underneath. Something like the grey backing board from a paper pad or piece of mount board.
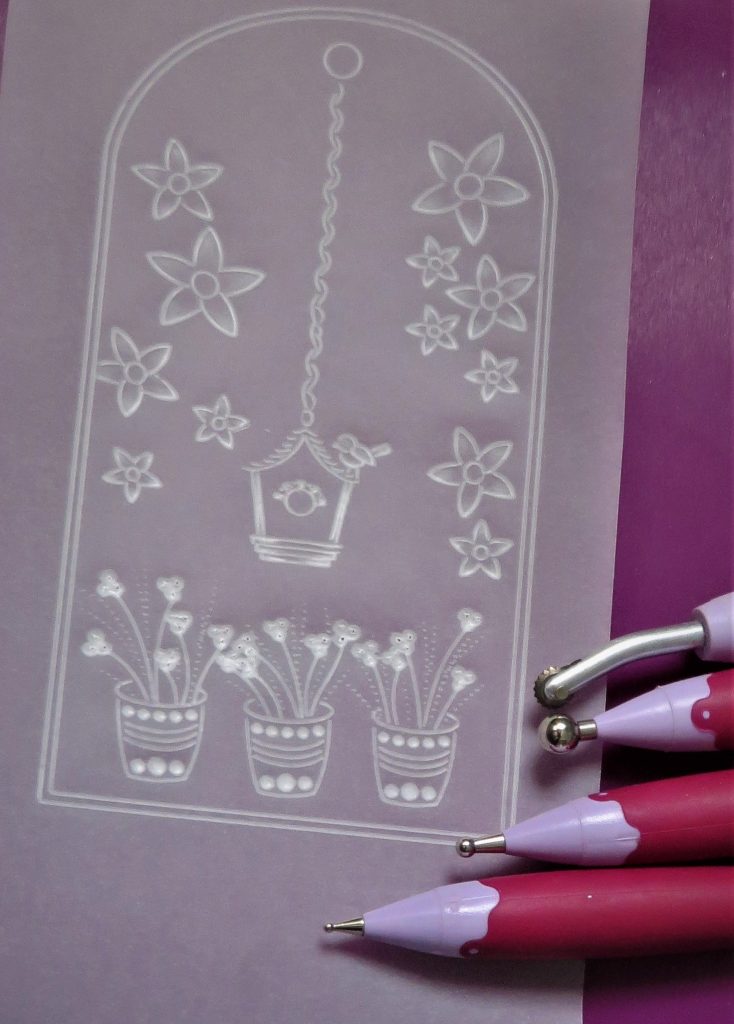
Step 6. Emboss all the elements. Use the 6mm ball tool at the ends of the large petals and the 3mm ball tool for the smaller ones (number 4 tool of the starter kit works, if you haven’t got this). You don’t need it completely white – just to add highlights.
Emboss the 3-needle perforations, using the 1.5mm or number 2 tool. Take your time and do not press too hard – the whiteness is gained by repetition of strokes rather than pressure. Do a small circle around each hole within the perforations.
*Do not worry if you find yourself flattening out the holes of the perforations, this will be rectified at the re-perforation stage.
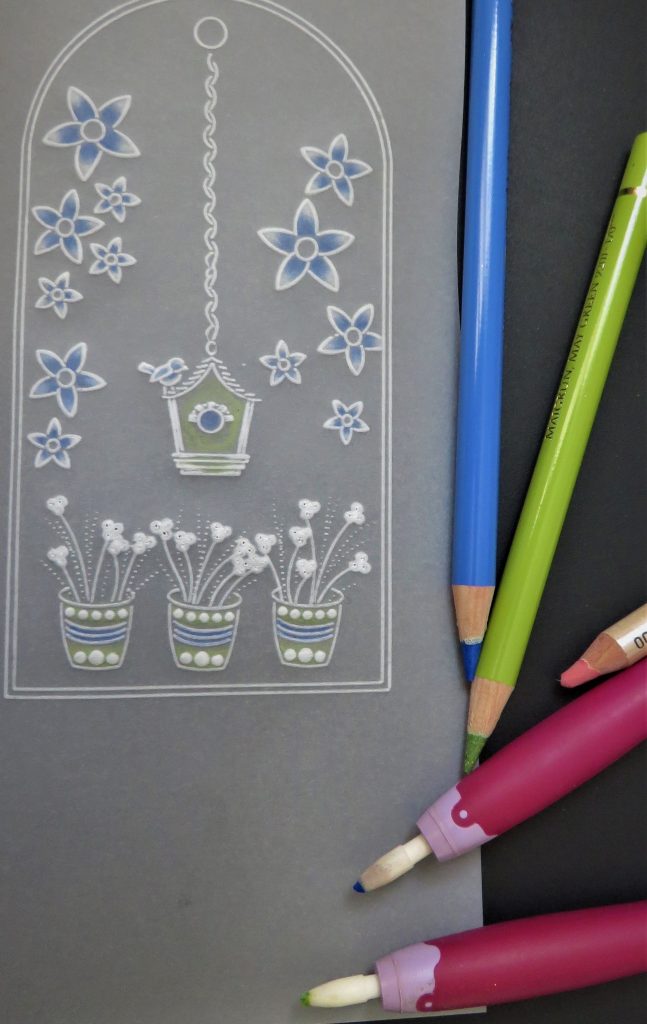
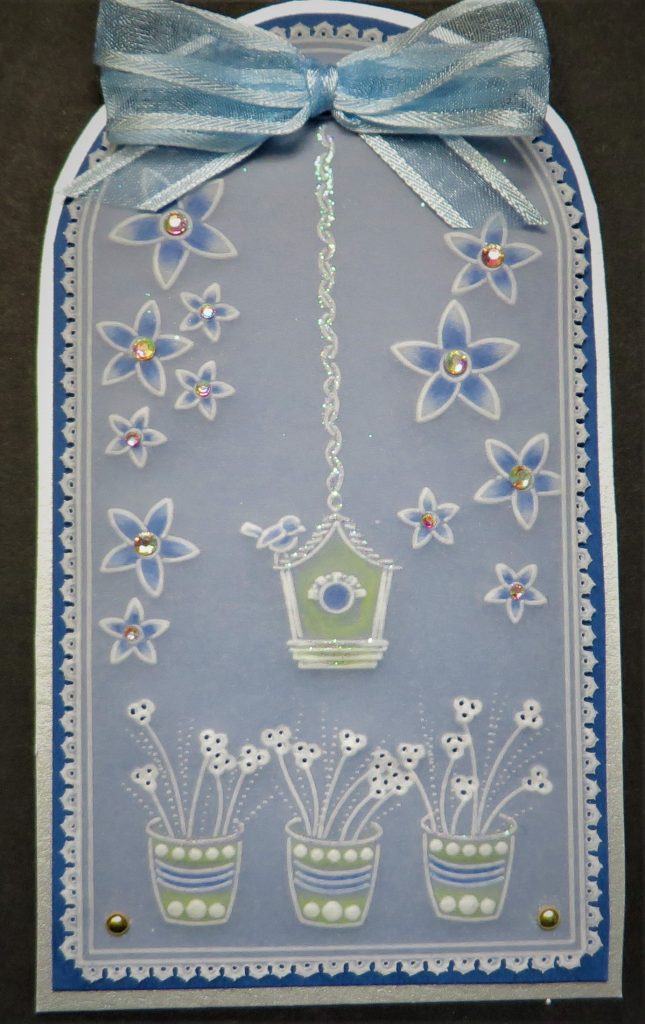
Step 7. Let’s add some colour to the flowers, pots and bird house.
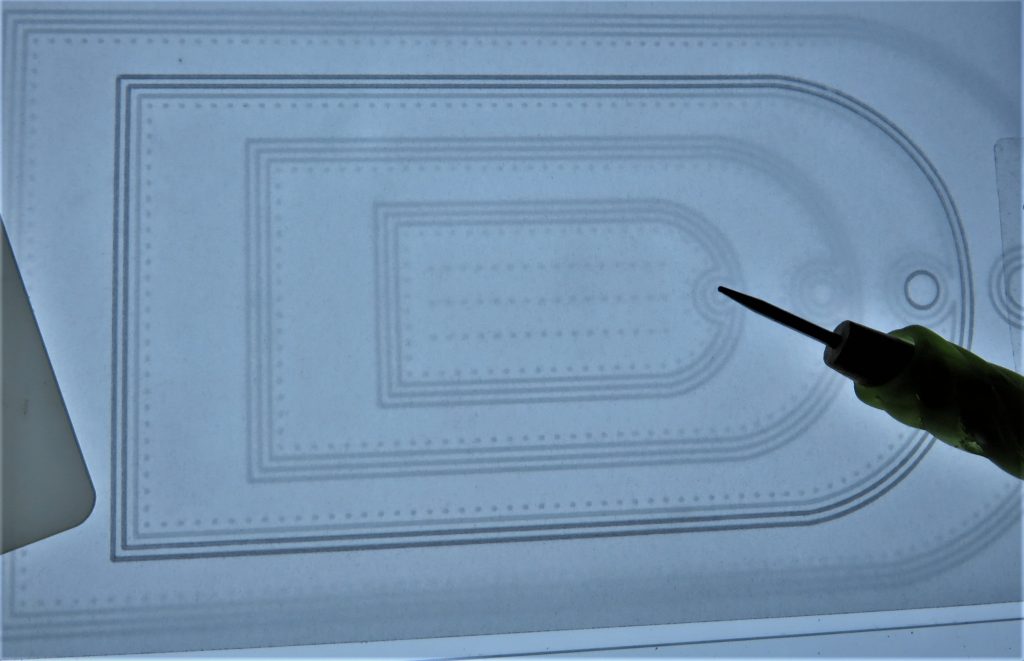
Step 8. Use your shallow perforating mat again and go around the edge of the tag. The pattern is on page 17 of the book. I am using the patterns within the red lines, at the top right-hand corner of the page.
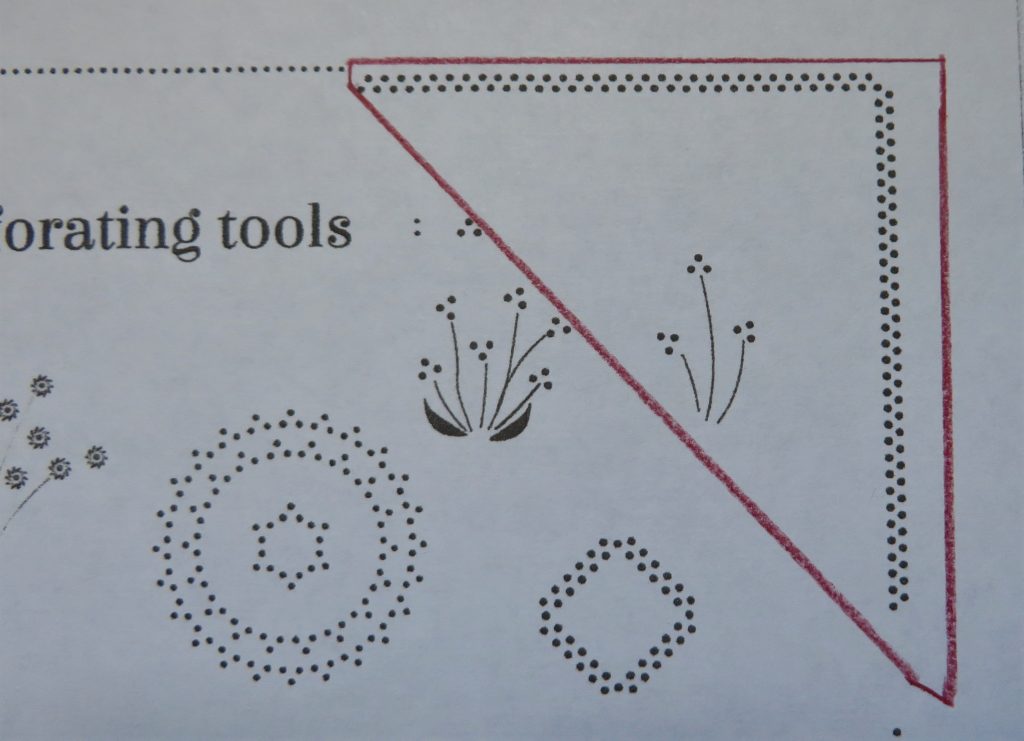
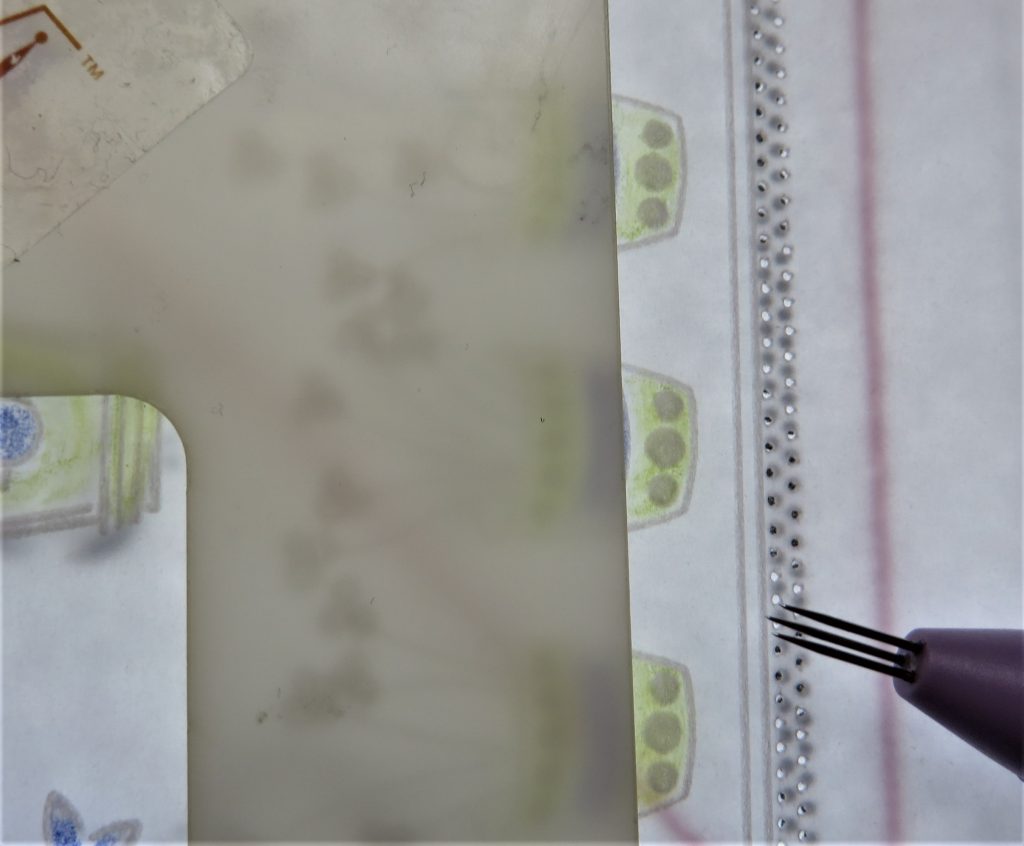
Step 9. Line up the outer line of your border with the dots, you can see these through the parchment paper. Align the three needles of the tool with each dot and perforate through the parchment and the paper. You can use this photocopy again. When you have come to the end of the dots on the photocopy, move the parchment along and carry this on around the whole outline of the tag.
TOP TIP: There are some really handy dots on the handles of all the perforating tools. These are crucial in helping you to line up the tool in the correct direction.
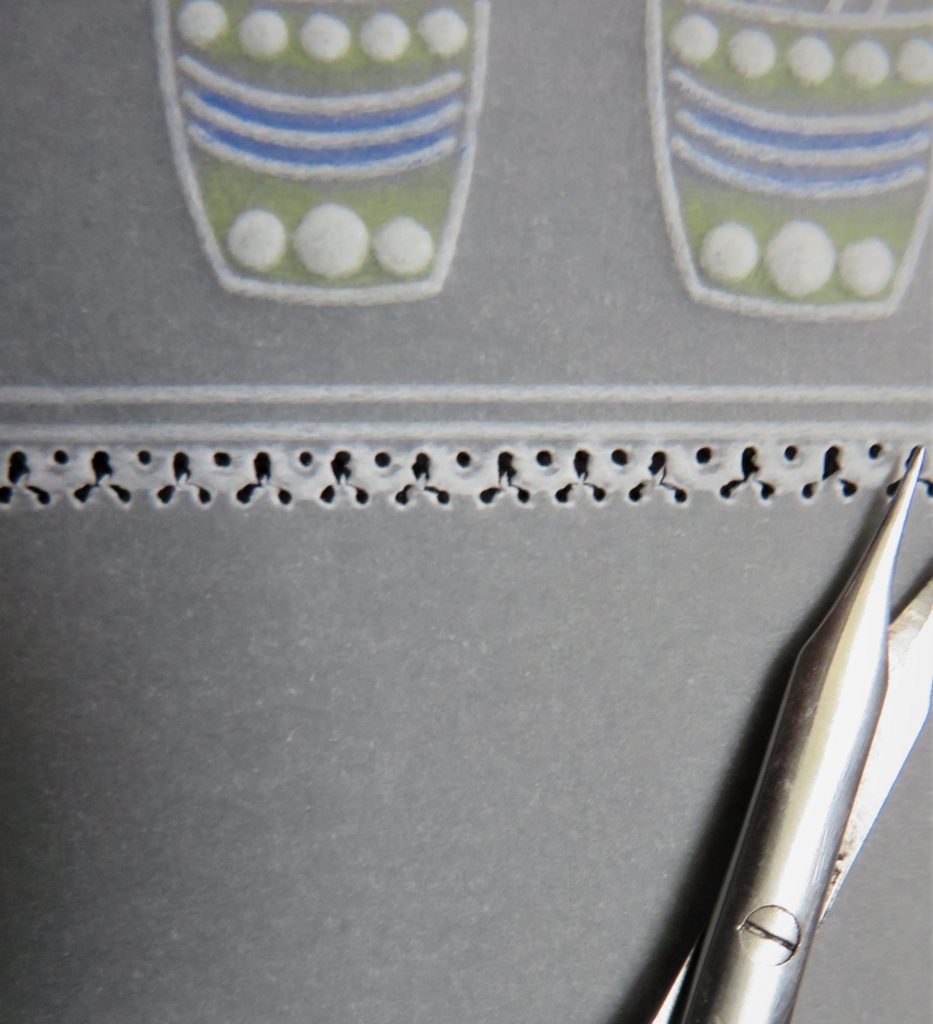
Step 10. Working on the back, and using a 1.5mm ball tool (or the number 2 tool) emboss an arch between each two 3-needle perforations. Again, take your time and do not press too hard. Do not despair if the piece looks a bit untidy at this stage. As Barbara say’s ‘it is not over until it is over’.
Step 11. Turn the work over so that you are working on the front again and re-perforate all the 3-needle perforations. When you do the flower heads, carefully put the three needles into the holes and give the tool a very gentle little twist to widen the holes a bit – be really careful not to rip the parchment at this stage.
TOP TIP: Practice on some scrap parchment first.

Step 12. When you snip the work out, there are three ‘snips’ to each little scallop. Snip in one direction first before turning the work and snipping in the other direction. Leave all the ones at the top of the scallop until this has been done – it will help stabilize the piece.
Step 13. Now snip out the piece completely and it is time to add some decoration and embellishments.
Step 14. I have attached mine with brads at the bottom and a tiny piece of double sided tape at the top, under the ribbon. Before attaching the ribbon, I have cut carefully around the shape of the tag and matted it onto a layer of silver card before cutting around it again. Then added the ribbon. And you’re all set!
Another stunning piece of artwork from Glynis. Everything that Glynis has used is in one place over on the Clarity website HERE and everything for the Pergamano Summer School is HERE
Don’t forget that the Clarity Offer of the Week is still running and is a must have for adding a quick and easy finishing touch to your project.

Lotsa love Grace & Glynis xo
Clarity – The Home of Art, Craft and Well-Being.
Thank you Glynis. This follows on really well from Linda’s class.
I think I have the ingredients (I’m one of those with all the gear but no idea) so will give it a go.
Hope you’re enjoying your time with the family Grace and thanks for taking time out to bring us this.
Fingers crossed my daughter and family will be visiting me in August. Not had a proper face-to-face catch-up since Christmas 2019.
Hello Grace and welcome home!
It will be a great time to enjoy being with your brother and at home.
Have a great time with your family!
Lots of love, Trijntje Huppel
Looks like a great project. I don’t have the tags any chance I could have width and height dimensions so I can try to make my own tag.
Hi Grace, Hi Glynis. Another stunning tutorial creating another stunning piece of Pergamano artwork, thank you for this beauty !!
I hope you are enjoying your great time with your Mum and Family, Grace.
Take care.
Lots of love from Patricia xx
Hello Grace,
So great of you to take time to introduce Glenys again this Sunday with a lovely project to practice our first summerschool lesson. Thank you Glenys, instructions and photo are very clear. Love the little tag.
Hi Grace
All printed out ready for me to have a go at this lovely project – if only pesky work didn’t get in the way!!
I hope you are having a fab time reunited with your family at last.
Lots of love from Katharine xx
Hi Grace – Hi Glynis – Another beautiful tutorial – thank you
Grace am sure your all still having a super duper time together – even with this very unsettled weather – it won’t put a damper on the fun you must all be having
Take care – Love from Seta Xx