Clarity’s Blog Tutorial: How to Determine the Size of Your Frame for Your Topper
Hello hello! Grace here.
I hope this finds you well, safe & happy on this gentle Sunday.
Another treat! The fabulously talented Josie Davidson is back in our virtual bubble 🙂 She has taken the time to put together a BEAUTIFUL step-by-step project for us.
I will hand you over to the lovely lady herself…

Ingredients
A4 Square Plate Mate (GRO-WO-40875-21)
A5 Square Plate Mate (GRO-MA-40002-07)
A6 Square Inset Plate Mate (GRO-WO-40133-11)
Merry Christmas Ribbon Lace Border (GRO-GG-41691-24)
Cameo Ivy (GRO-PE-40314-01)
Diagonal Grid (GRO-GG-40201-12)
Nested Square Picot Die Set (ACC-DI-30666-66)
Nested Square Picot Groovi Plate (GRO-PA-41035-15)
Super Foam (GRO-AC-40603-A4)
Pergamano Scissors or Snips
Groovi 1 and 2 Embossing Tool (GRO-AC-40026-XX)
Pergamano Bold 1, 2 & 4 Needle Perforating Tools (PER-TO-70342-XX)
Clarity 10mm Ribbon (ACC-MS-31107-XX)
Double-sided Red Liner Tape (ACC-AD-30375-XX)
4 Pink Clarity Brads (PER-AC-70270-XX)
A4 Translucent Parchment (GRO-AC-40024-XX)
A4 Pink Parchment (GRO-AC-40188-A5)
8×8 White Card Blank (ACC-CA-30620-88)
White Copy Paper
METHOD
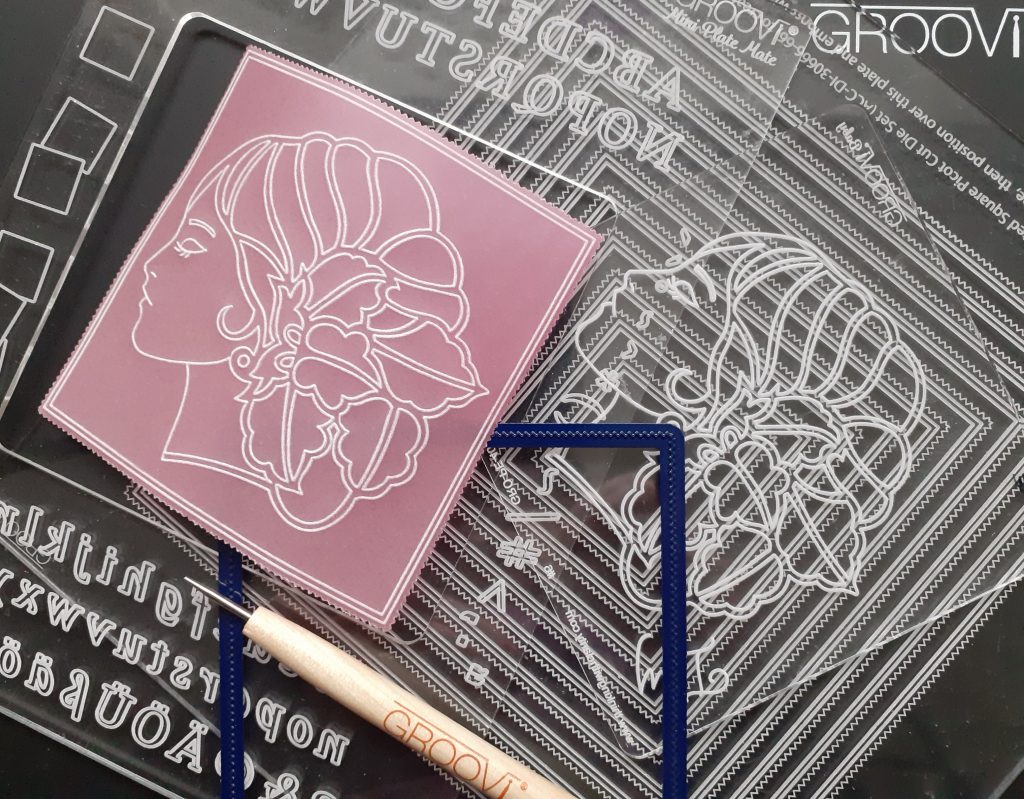
Step 1. Using the pink parchment and the copy paper, cut out the 6th die from the outside of the set. Remember to die cut from the front (paler) side of the parchment and emboss from the back (darker) side of the parchment. Using the No 1 Groovi tool, emboss the corresponding lines from the picot plate and Ivy (or one of the other lovely Cameo ladies).
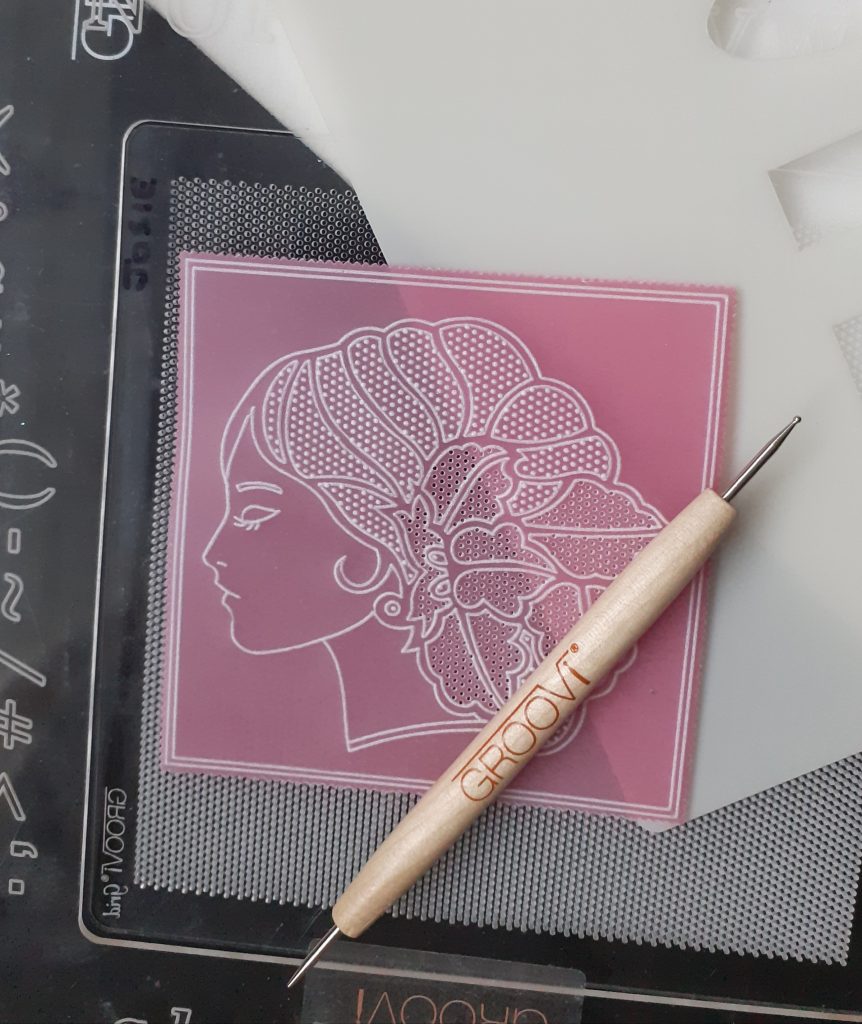
Step 2. Using the diagonal grid plate, emboss dots in the sections of hair with the No 2 embossing tool on the back of the parchment. Turn the parchment over and perforate every hole in the leaves using the No 1 needle bold tool. This can now be put on one side. Embossing and perforating dots is another way of adding “colour” without using pens or pencils.
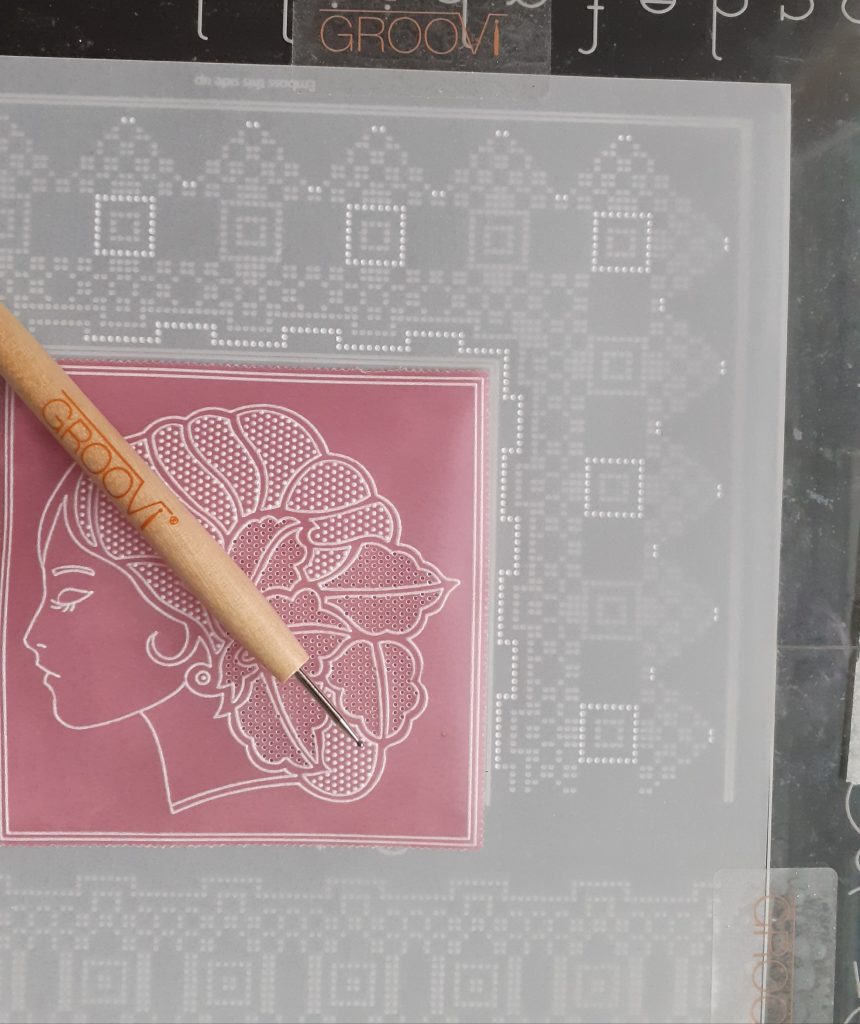
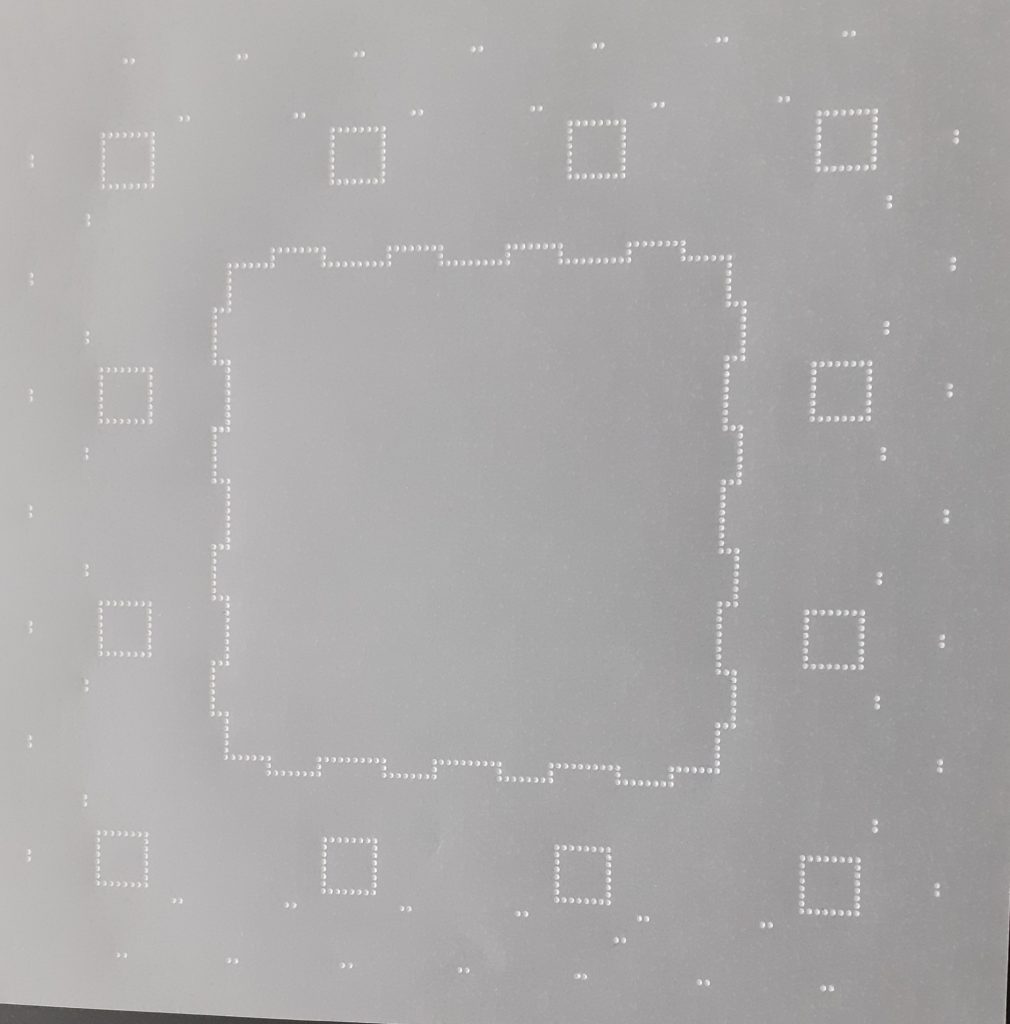
Step 3. Place your Ribbon Lace grid plate into your plate mate so that you can read ‘emboss this side up’ and secure it with a Groovi tab to prevent it from moving. Attach the translucent parchment to the plate, lining up two of the sides with the edges of the plate. This will help you to keep it straight when you turn it. Using the No 2 embossing tool; emboss the inner line, some of the squares and the sets of two dots along the outer edges. This is where you would check the size of your lace border, as you may not need to use all of the pattern on the plate.
Step 4. You now need to turn your work and realign the dots (registration marks) you have made with the dots on the plate. You need 5 points between each corner of the border. Carry on turning your parchment until you have made all the registration marks.
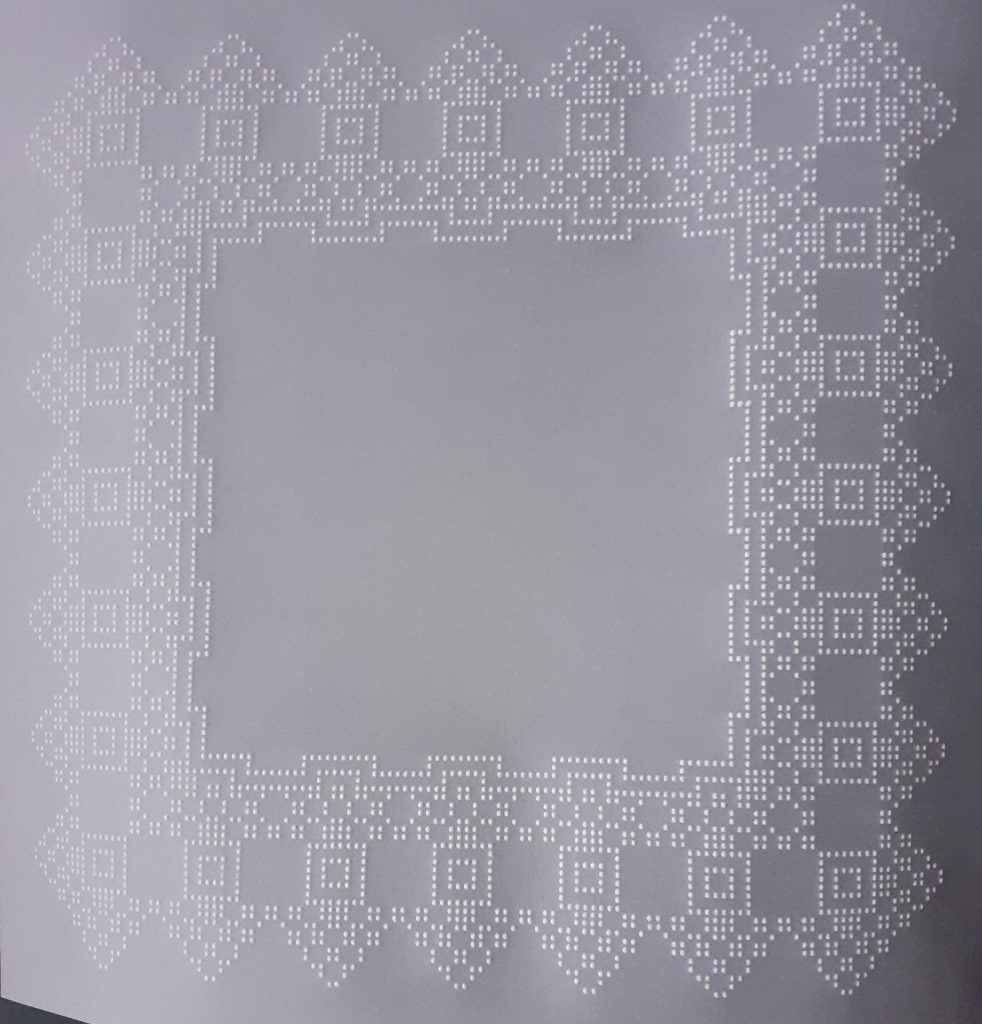
Step 5. Once you are happy that your design has all lined up correctly, you can now emboss all of the dots on the plate, turning your work around and realigning each corner.
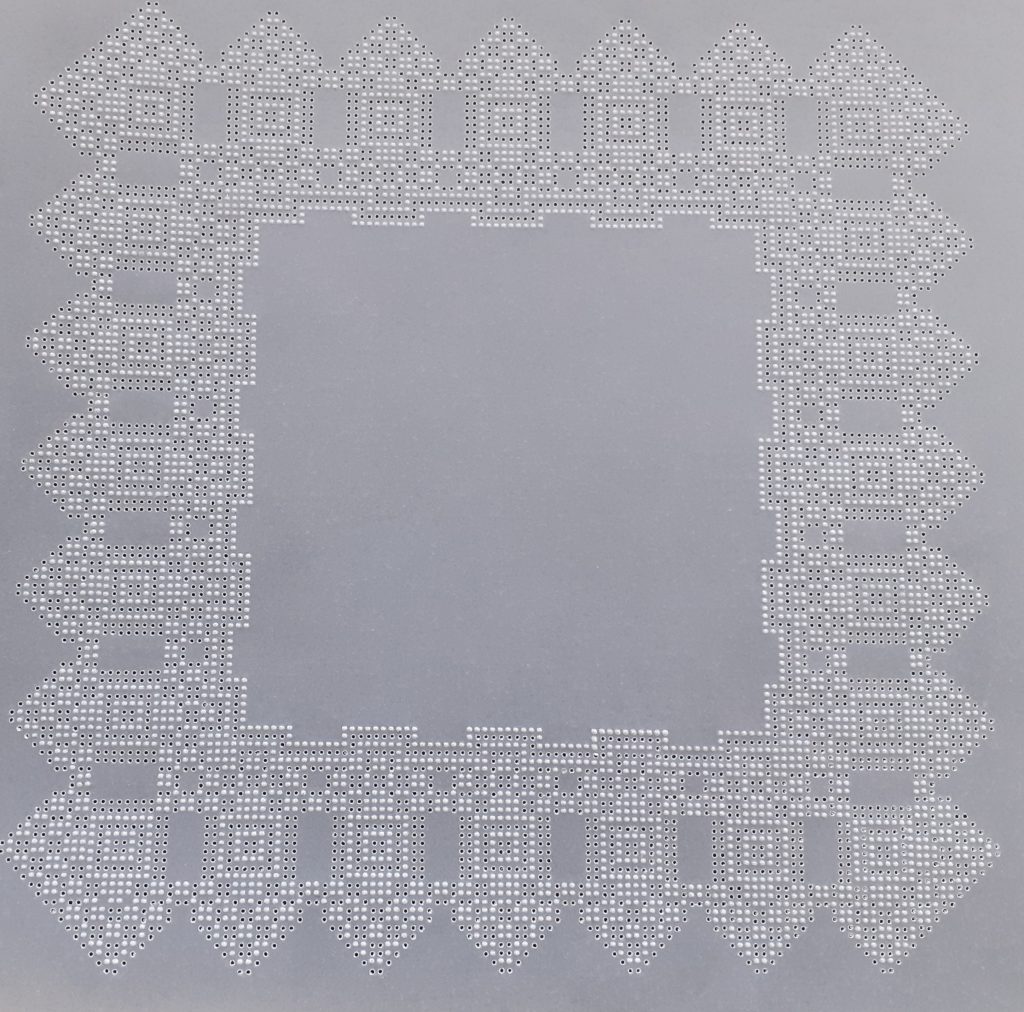
Step 6. Turn your plate over so that you can read ‘perforate this side up’ and secure in your plate mate. Turn your parchment over as you need to perforate from the front and align the embossed dots inside the holes in the grid. Working with the super foam under your plate and then perforate with the needle tools.
Step 7. Working from the inner perforations to the outside perforations and cutting the outer edge last, cut out the crosses, ‘oct’ shapes, and the slots. The ‘oct’ shapes have four wider gaps so cut these first.
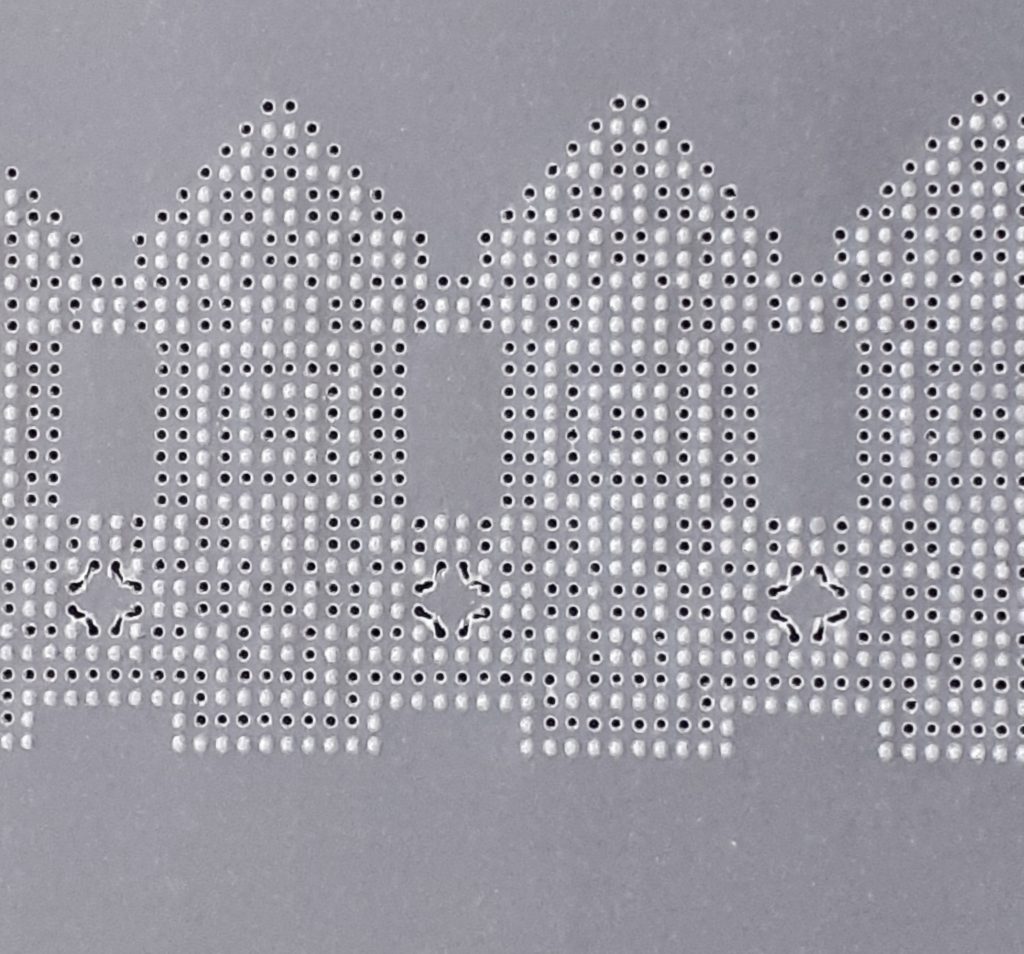
Then cut the narrower gaps.
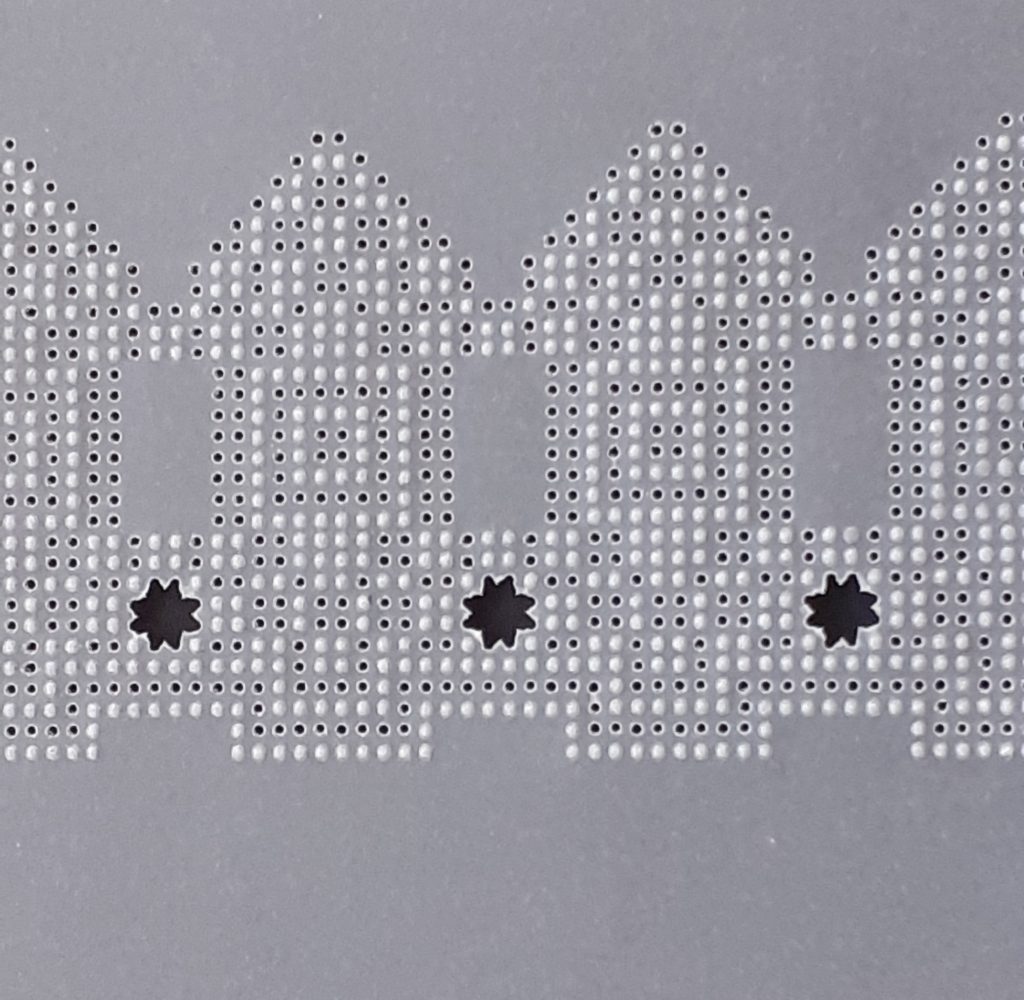
You will get neater picots inside the shape working this way. I always cut the wider gaps when working on lacework.
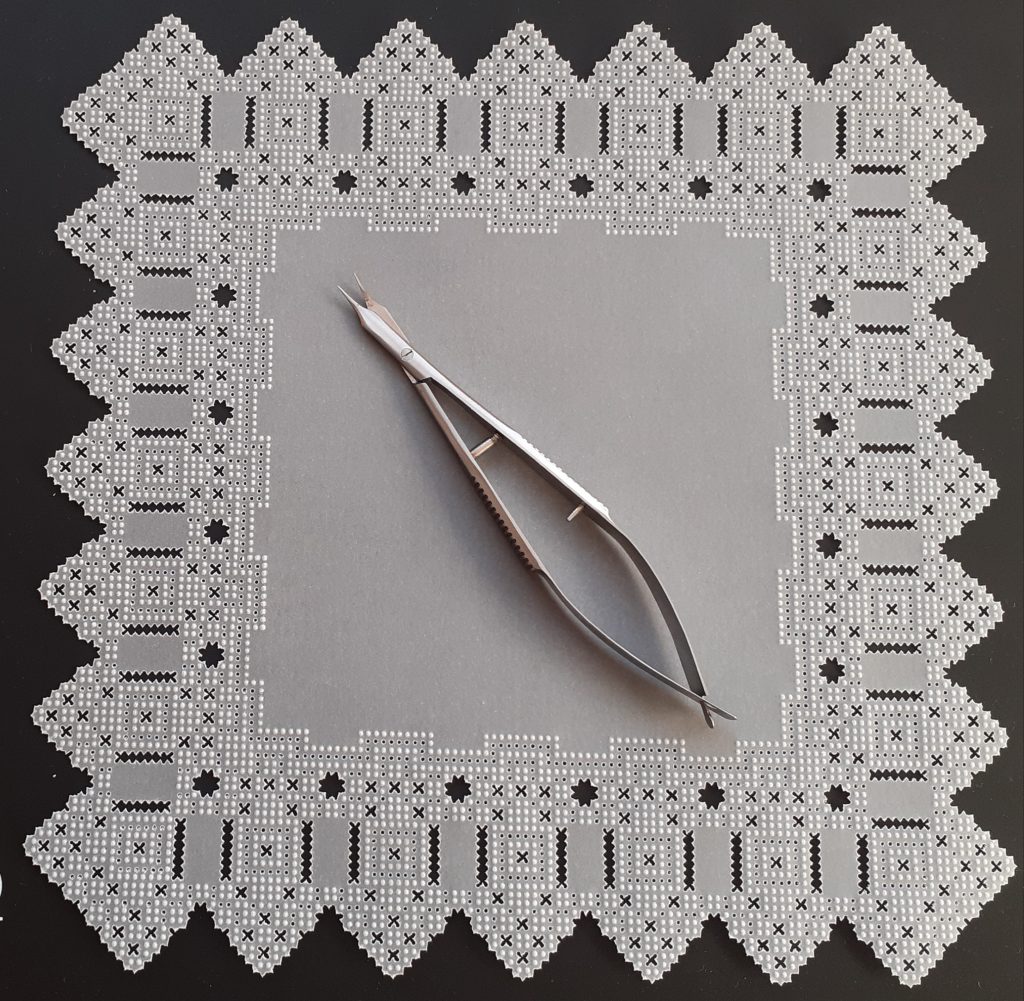
Step 8. This is the finished piece of lacework when all of the cutting is complete.
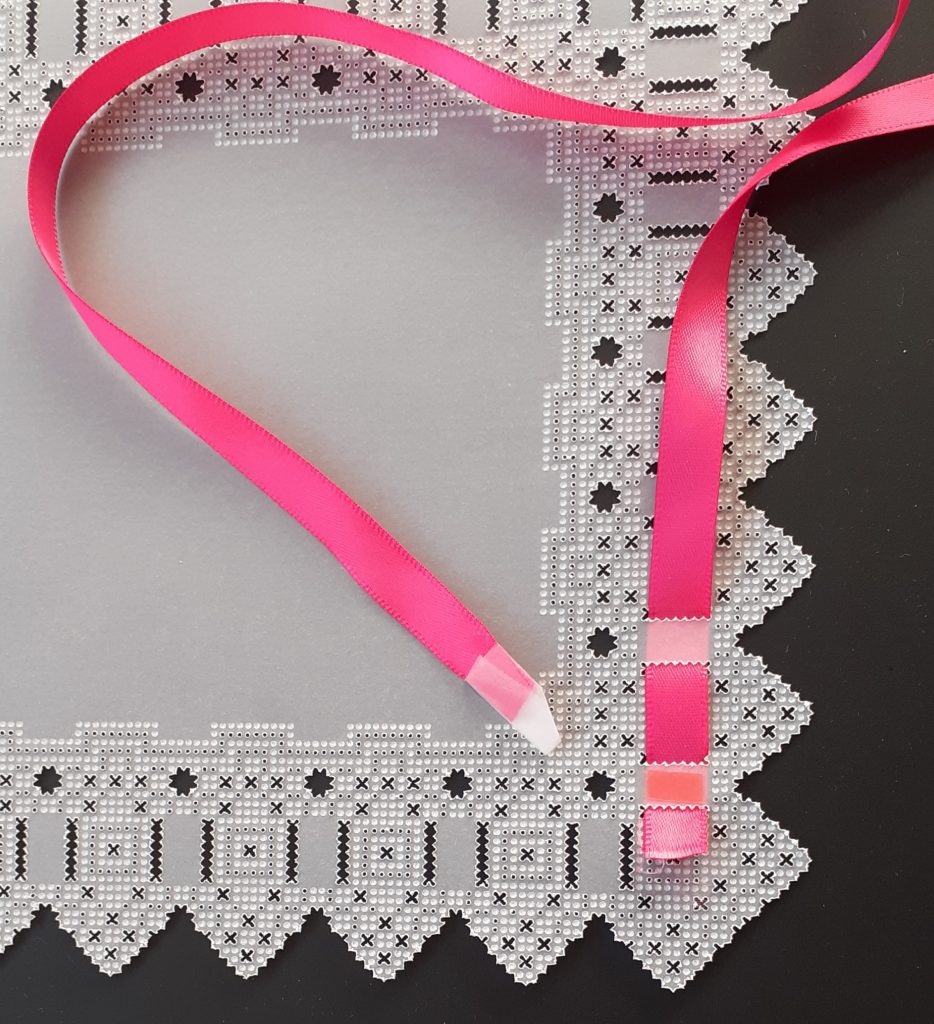
Step 9. Now we will thread the ribbon through the slots. Wrap a piece of Groovi tab around the end of the ribbon and cut a slope on one side as this will help when threading it through the slots – creating a needle. Weaving from the back of the first slot, pull the ribbon through to the front and leave a short piece at the back, thread through the next slot from the front to the back. Stick a small piece of red liner tape between the first two slots, on the back of the parchment, and stick the short piece of ribbon onto it. This will now hold the ribbon in place as you weave through all of the slots until you get to the end of the row. Again stick a small piece of red liner tape between the last two slots and stick the ribbon to it. Cut off the excess ribbon. Repeat this for the other three sides.
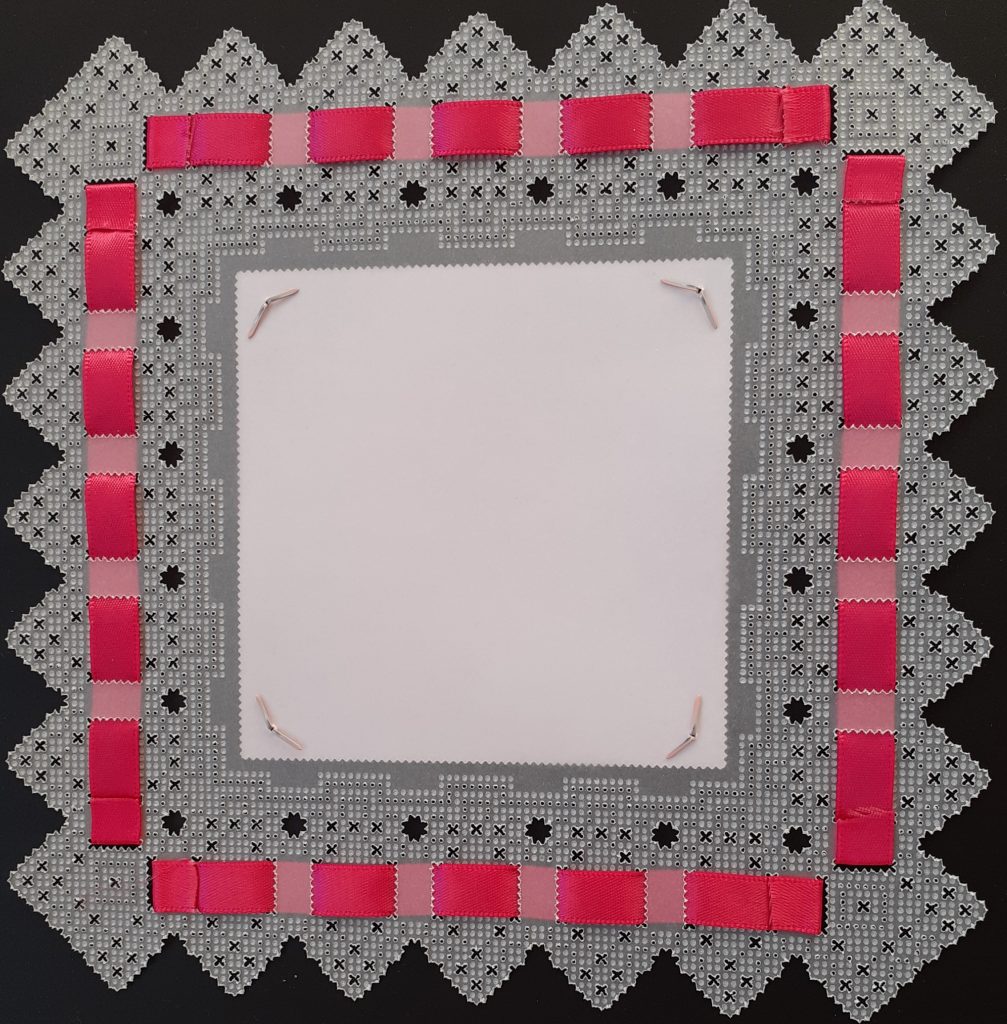
Step 10. Attach the picture (use the copy paper to back it) to the centre of your lacework using brads. Here you can see how your work should look from the back.
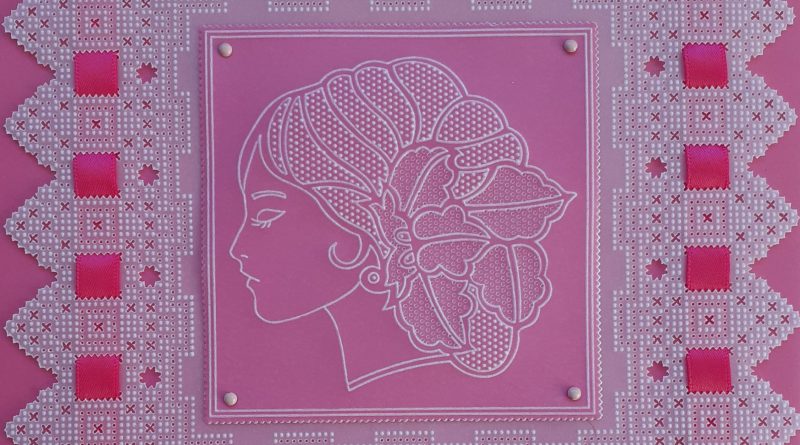
Step 11. Cut a piece of pink parchment to fit your 8×8 card blank and matt and layer your lacework onto it.
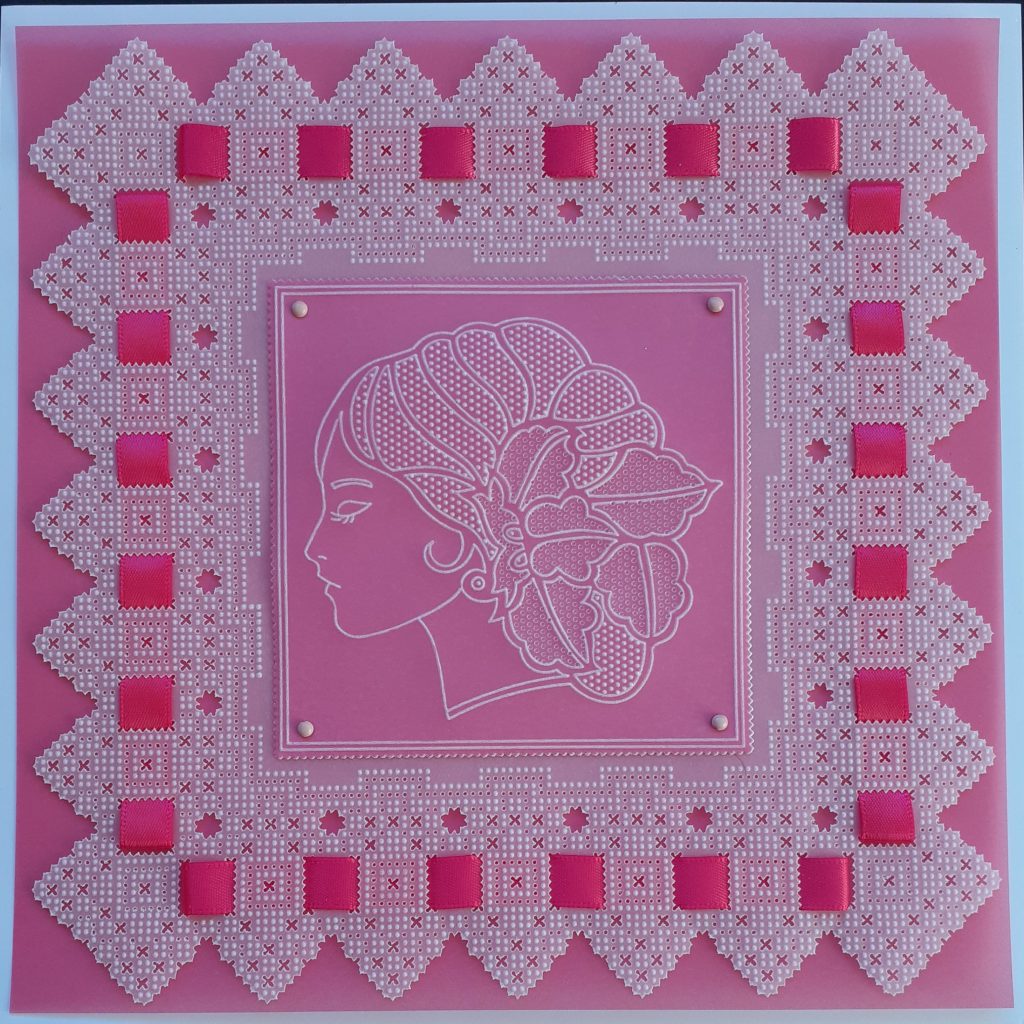
Voila! A particularly stunning card. Thank you for sharing your techniques with us, Josie!
As usual we have put everything in one place for you to investigate HERE
I don’t know about any of you, but I have an affinity for these ribbon cards. They make the Saturday Share blog almost weekly! I just think they’re SO pretty, but hadn’t seen a demonstration myself on how exactly to pull off this look. Josie makes it look so achievable. Why not give it a go? We are LOVING how many recreations we are seeing posted online! Fantastic.
As usual, if you fancy sending me any of your new work (Josie’s step by step, our other bloggy Sunday tutorials, or any new work really!) I’m always happy to receive it: Grace@claritystamp.com
For now though, enjoy the rest of your Sunday! As always, travel gently…
Lotsa love, Grace & Josie xo
Clarity – The Home of Art, Craft and Well-being.
What a brillliant step by step – everything is so clearly explained and shown. Thank you so much for this.
Beautiful project and Josie explains it all so well, easy for beginners to follow too.
Stay safe.
Grace, you need to pop over to the groovi Facebook page if you can, someone is spreading rumours that clarity has moved back to C&C and attracting a lot of comment xx
Beautiful demo Josie; thank you 🙂
I absolutely love these plates and have become quite addicted. Josie is amazing! Enjoy the rest of the weekend. XX
Another great project by Josie, thanks for sharing it with us. Have a great Sunday everyone,
Hi Grace, Wow Josie, this tutorial is fabulous and the finished creation is stunning.
Love from Patricia xx
Another brilliant project , thanks Josie
Hope you get your vaccination ok without any side affects
Couldn’t find Barbara s blog this weekend hope everything is ok