Clarity’s Blog Tutorial: How to Create Inky Backgrounds with Stencils on Parchment
Hello hello! Grace here.
I hope this finds you relaxing on this fresh Sunday! We’ve got another special treat. The brilliant Jane Telford is back in our virtual bubble, to share a GORGEOUS step-by-step project with us.
I personally have an affinity for bees! Perhaps because of my love of Beyoncé since childhood and bees are her signature ‘thing’. Her fan club is even called the ‘Beyhive’ and I’ve been a proud member since single digits. Or perhaps because bees do so much for our world and we need to save them at all costs!
Either way, this girl LOVES BEES!!!!! Even my bedding has bees on it! And Jane has been kind enough to gift us this tutorial of exactly that. Very happy over here 😀
I’ll hand you over to the pro!
Hi there! For this blog project, I wanted to use some of my favourite things and combine them into a Groovi project for you to have a go at.
As many of you know I love getting inky and particularly like using the Distress Oxide inks. What a revelation to find out that they work so well on parchment too. They make a fantastic colourful background on plain parchment. I have used my 3 favourite colours on this project.
Another favourite thing is using stencils, and again these work equally well on card and on parchment. Clarity makes some fabulous stencils so it’s always worth a look.
Another favourite thing of mine is nature and I am fascinated with bees (just like Gracie!). Having lived and worked in Manchester for a number of years, it seemed apt that as the bee is a recognised symbol on Manchester’s Coat of Arms that I should use a bee in my project today! (wahey, I went to University in Manchester. Another reason to love bees! – Grace)
Let’s get started!
Ingredients
Linda’s 123-D bumble bee, clover & coneflower A4sq plate (GRO-FL-40989-15)
Nested Squares extension & alphabet frame A4sq plate (GRO-WO-40538-15)
Framework squares A4sq plate (GRO-PA-40721-15)
Framework circles A4sq plate (GRO-PA-40722-15)
Celtic alphabet, A4 sq plate mate & sticker tabs plate set (GRO-WO-40906-XX)
Clarity Stencil Brushes (ACC-BR-30006-XX)
Framework circles stencil 7″ x 7″ (STE-PA-00423-77)
Framework squares stencil 7″ X 7″ (STE-PA-00424-77)
Leafy swirl & dotty wave 4 x 4-inch petite stencil set (STE-PA-00376-44)
Feather & script 4 x 4-inch petite stencil set (STE-WO-00420-44)
Distress Oxide Ink – Mustard Seed (INK-DO-50418-XX)
Distress Oxide Ink – Picked Raspberry (INK-DO-50422-XX)
Distress Oxide Ink – Salty Ocean (INK-DO-50424-XX)
Perga liners (PER-CO-70063-XX)
Plain A4 Parchment (GRO-AC-40024-XX)
8×8 card blank (ACC-CA-30620-88)
8 Silver brads (PER-AC-70275-XX)
Pergamano excellent – embossing mat (PER-AC-70075-XX)
Shader embossing tool (PER-TO-70003-XX)
2 needle Bold perforating tool (PER-TO-70279-XX)
Piece of pale blue parchment (GRO-AC-41404-A4)
Low tack tape (ACC-AD-30109-XX)
Method
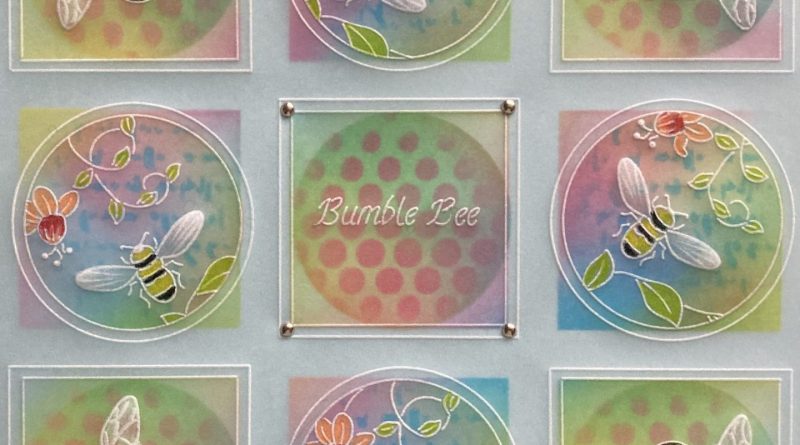
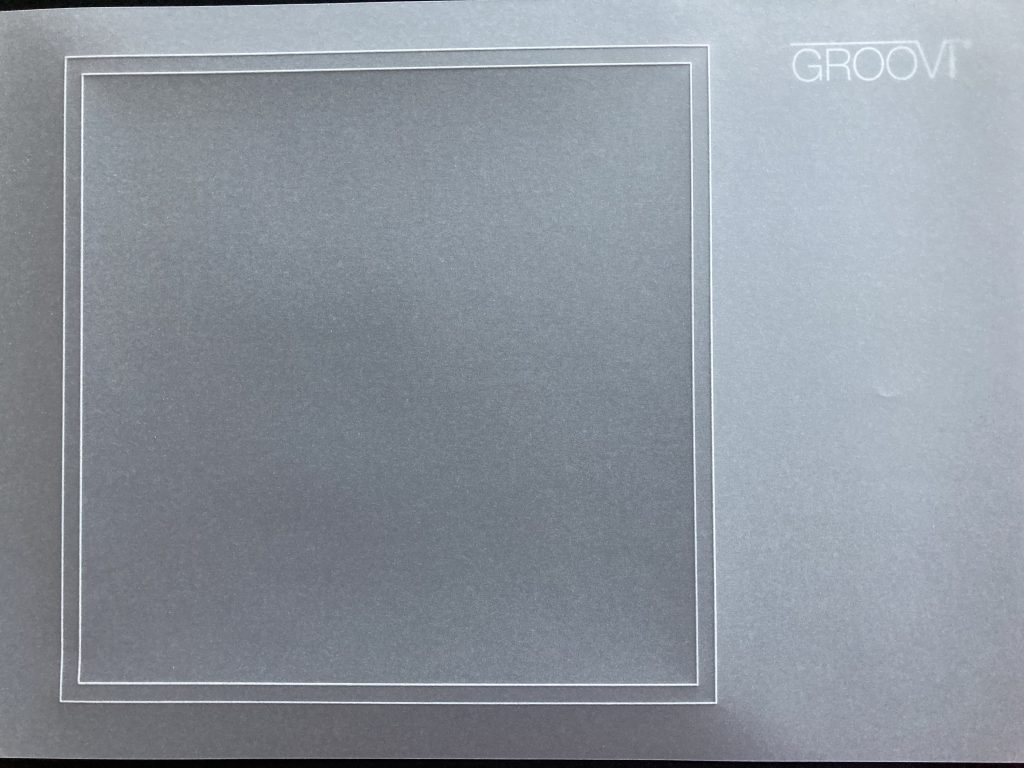
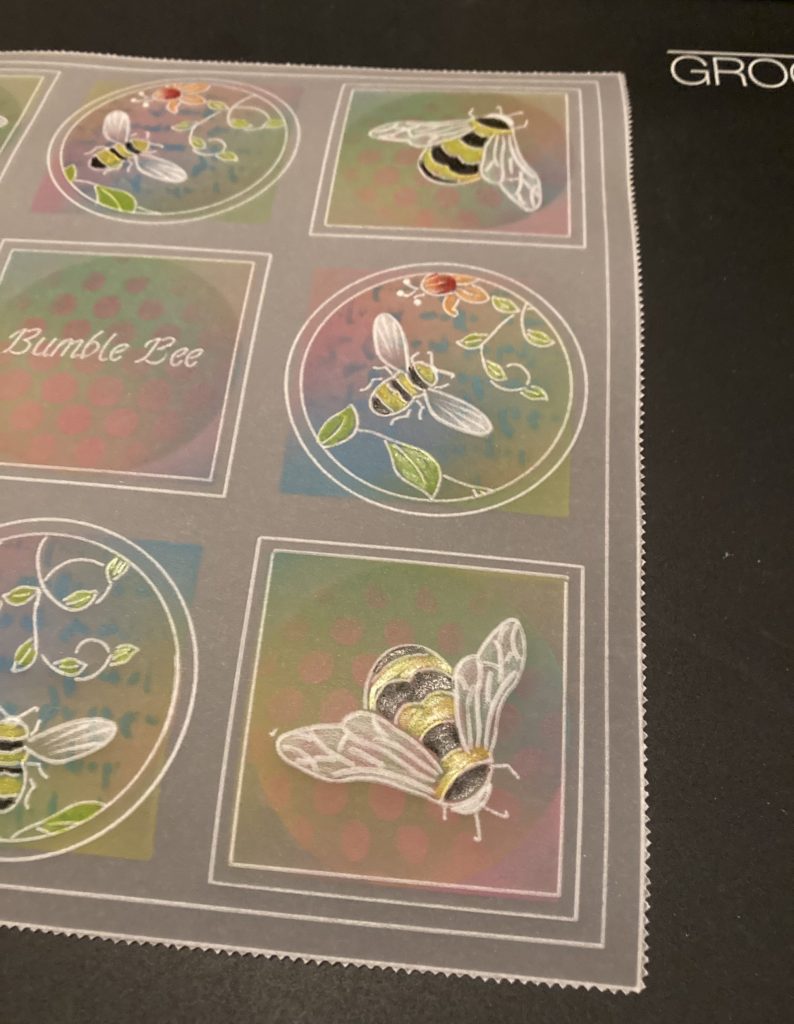
Step 1. Using plain A4 parchment and the nested square extension plate emboss the 3rd and 4th lines to create a frame.
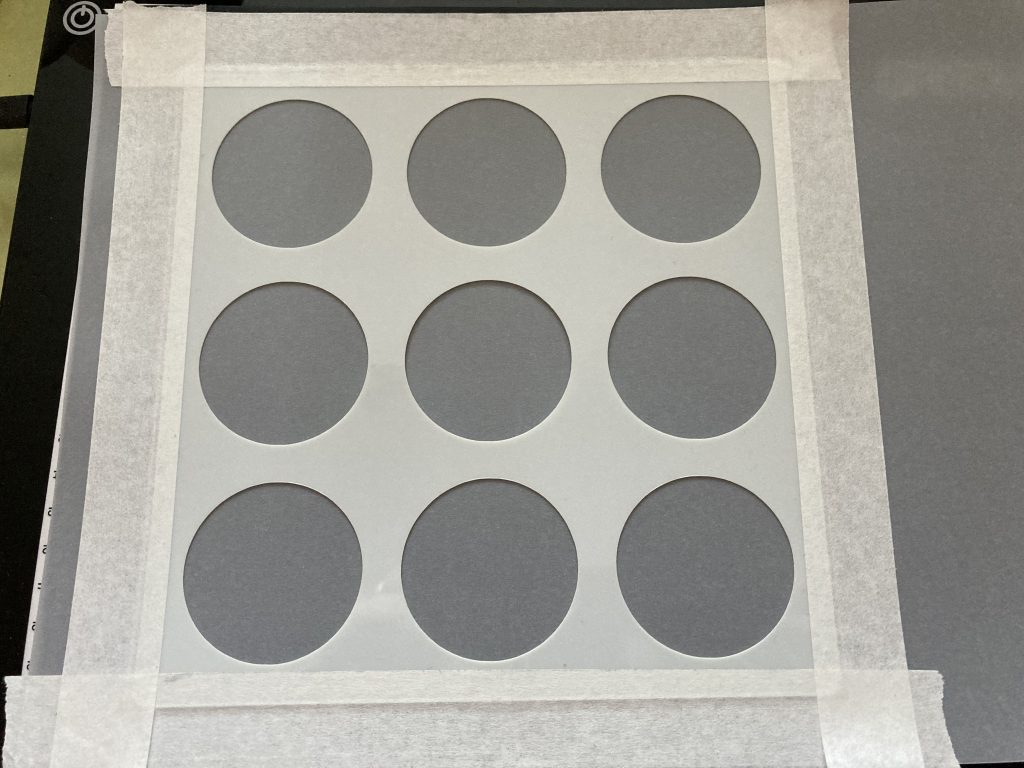
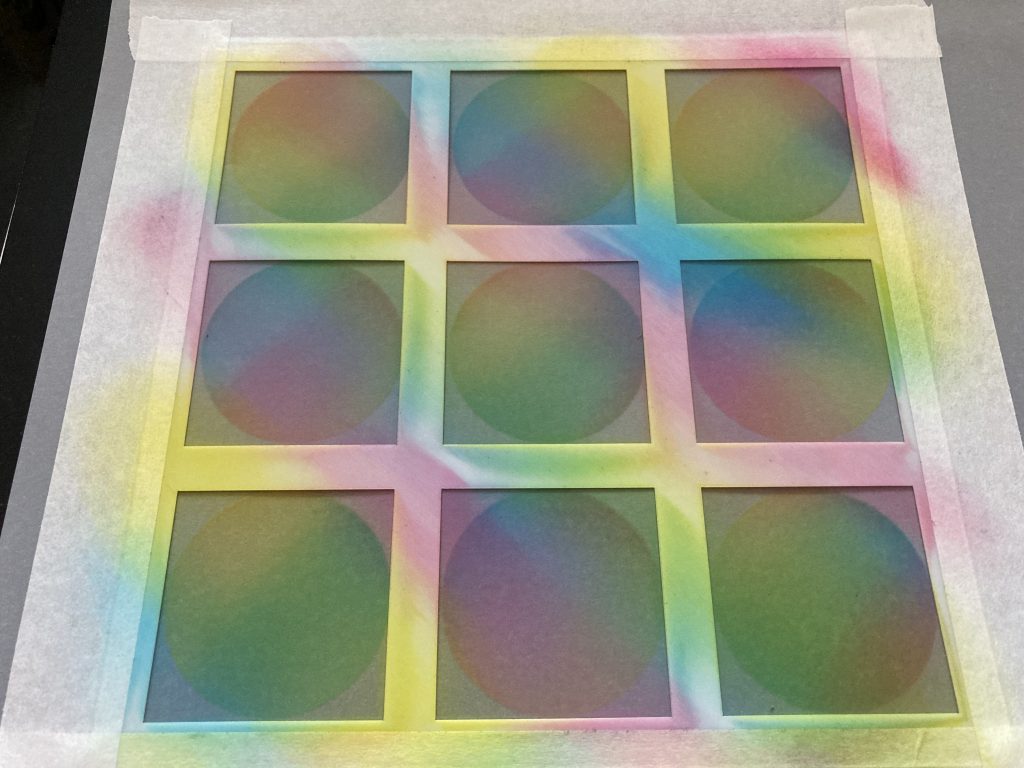
Step 2. Place the parchment face down on your craft mat and line up the circle Framework stencil within the frame and attach it to the parchment with low tack tape.

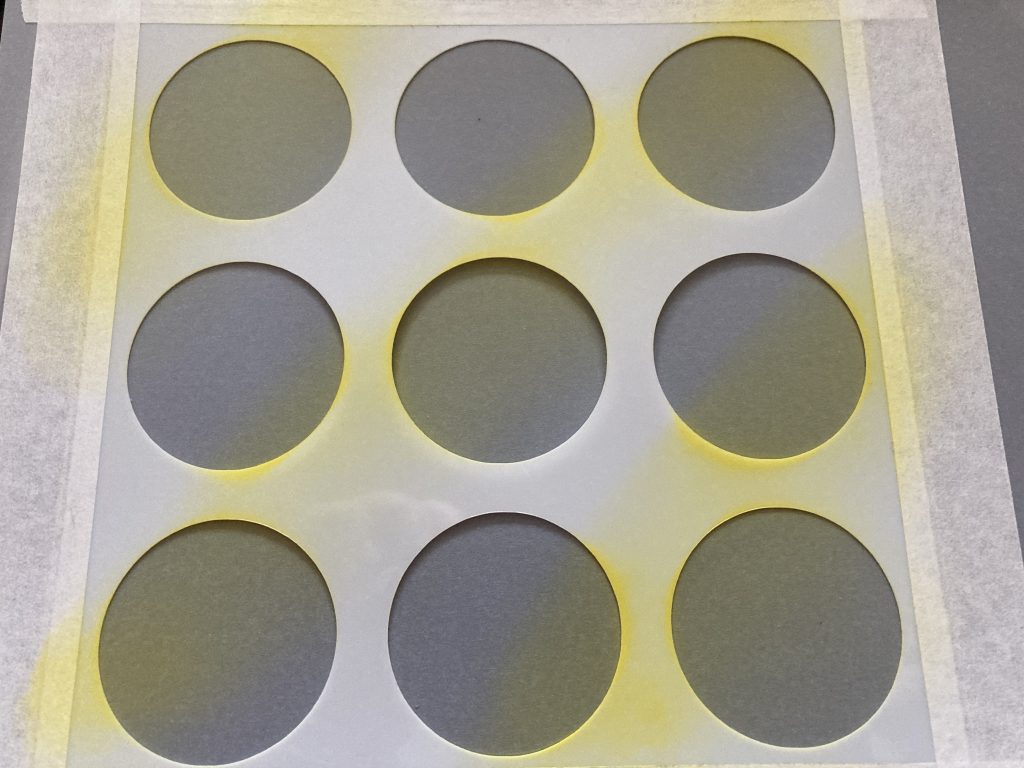
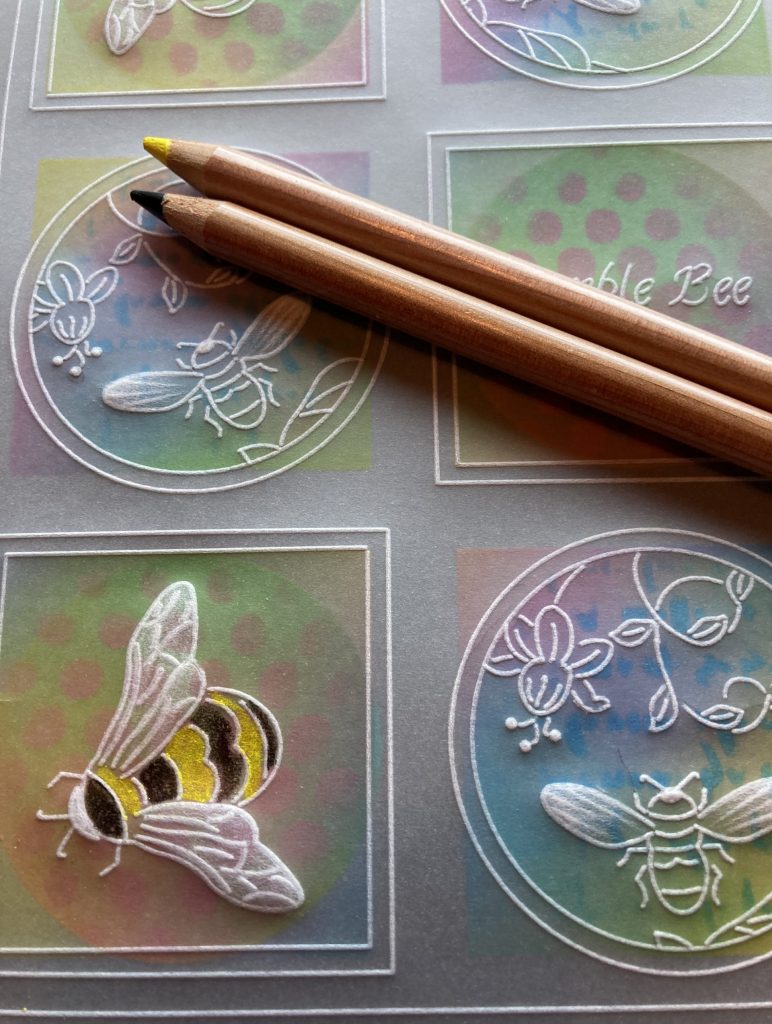
Brush yellow oxide ink in diagonal stripes over the stencil and parchment.
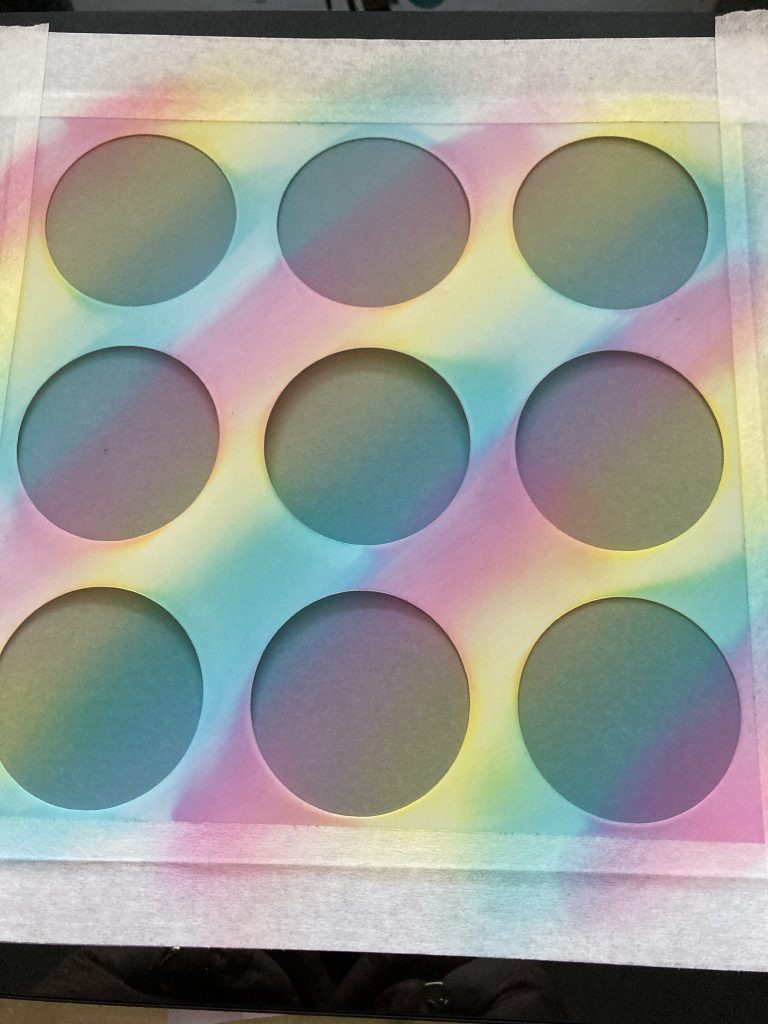
Repeat with the blue and the pink overlapping the colours but keeping the stripes going in the same direction.

Carefully remove the tape and stencil.
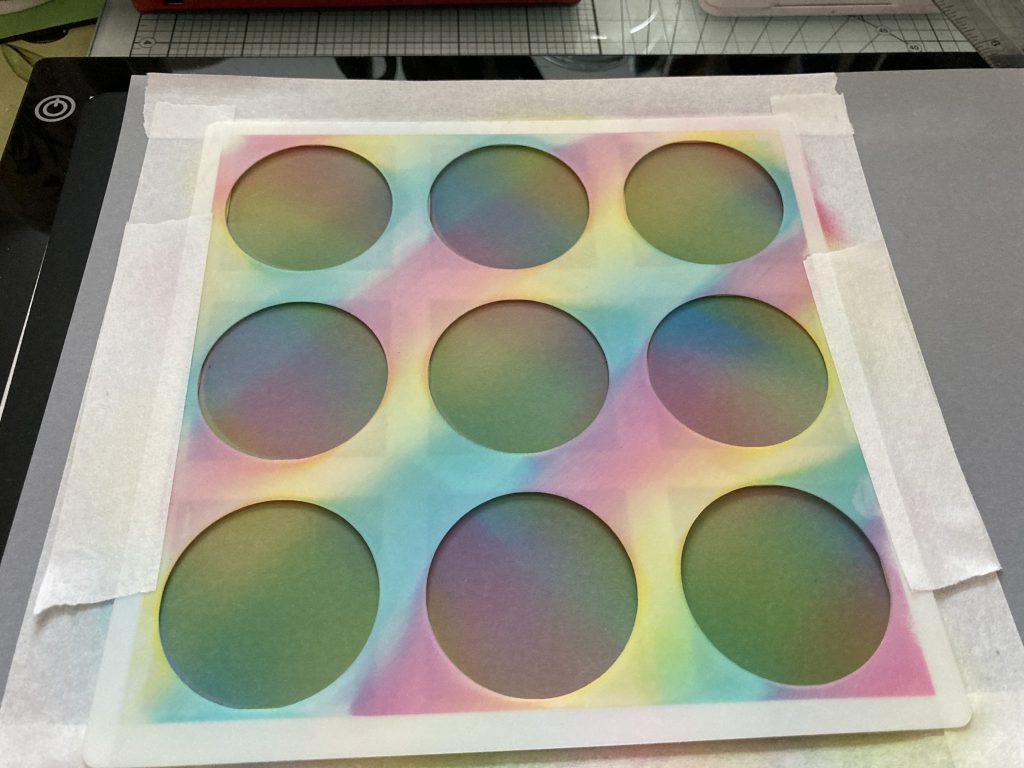
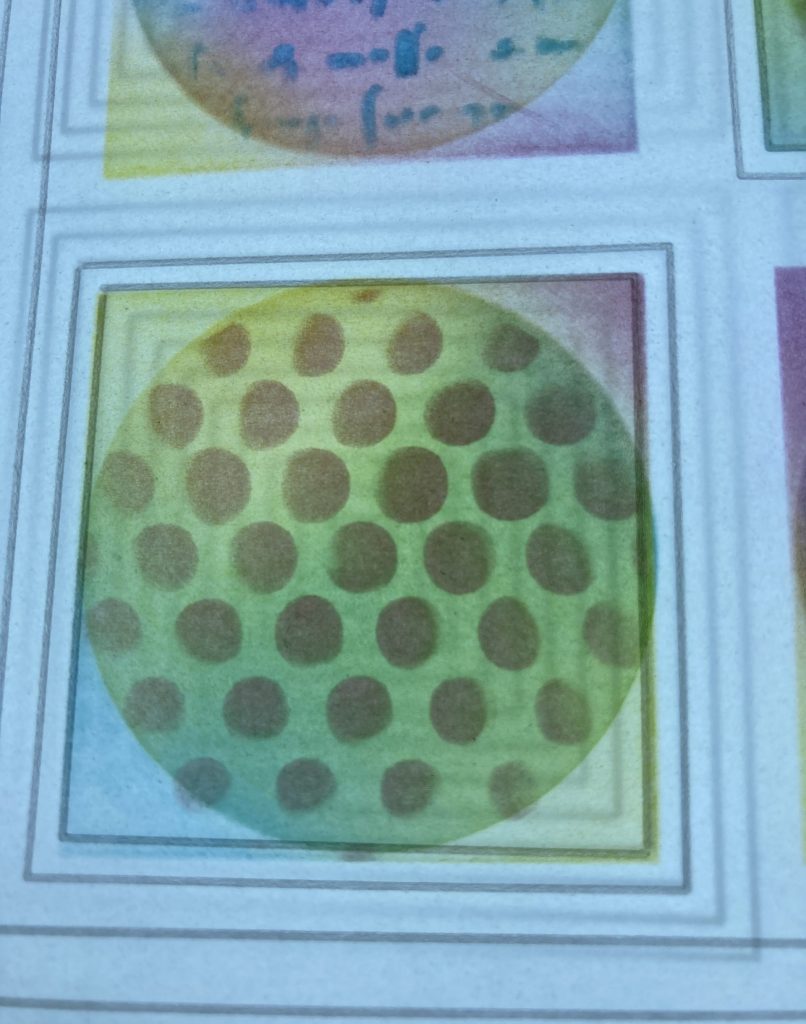
Step 3. Replace the circles with the squares stencil and repeat the inking but with the stripes going in the opposite direction.

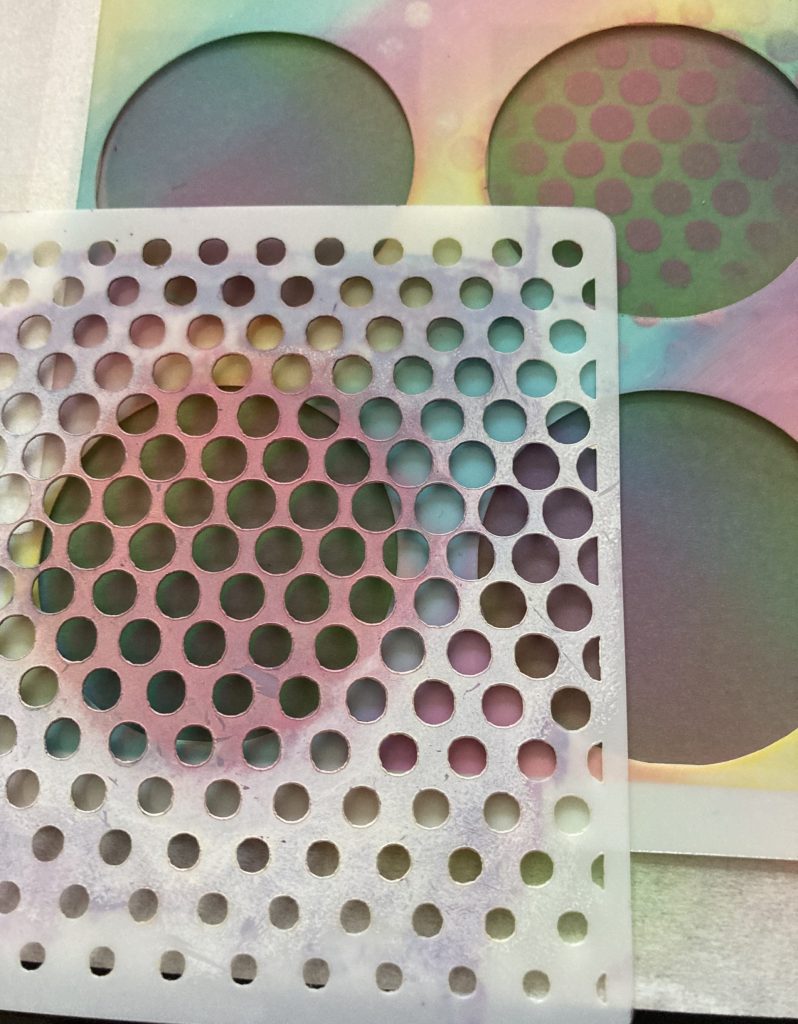
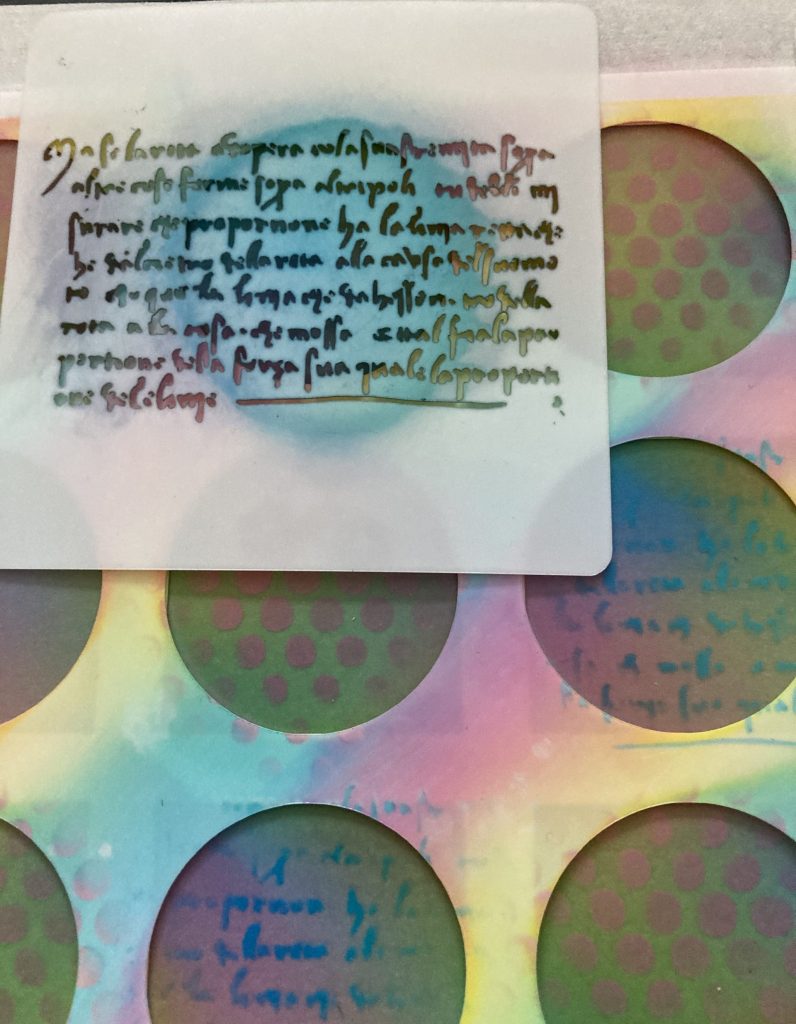
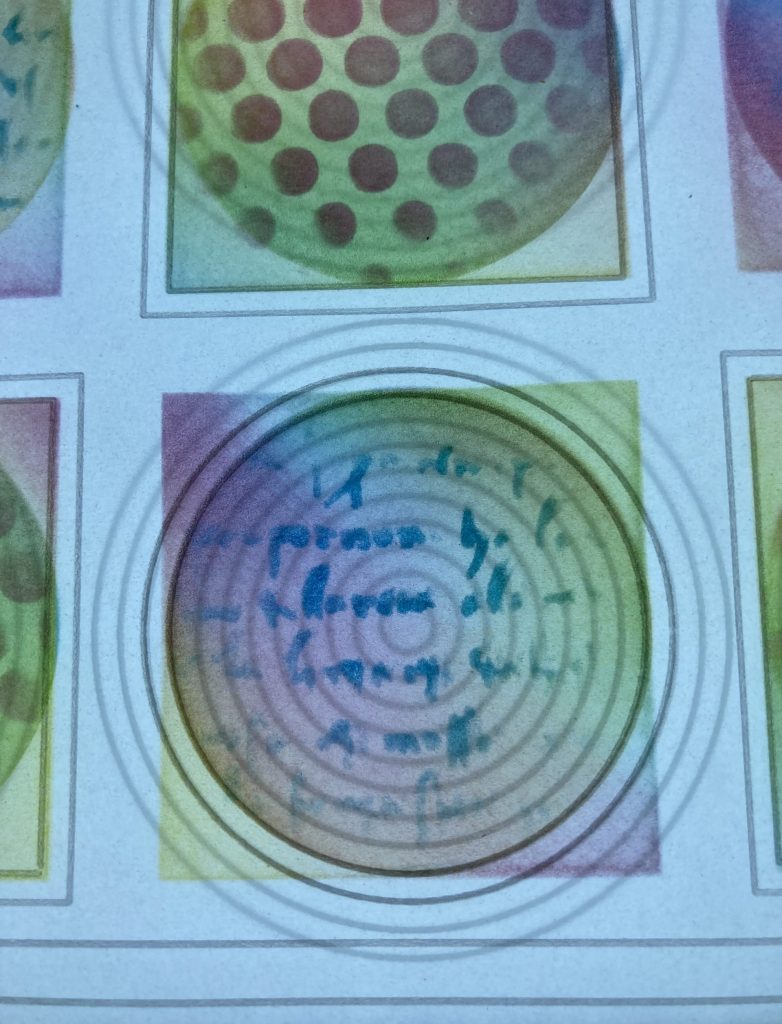
Step 4. Put the circle stencil back over the squares and using the dotty stencil and script stencil add dots and script using pink and blue inks brushed through. Remove all stencils and let the ink dry for about 10 mins.
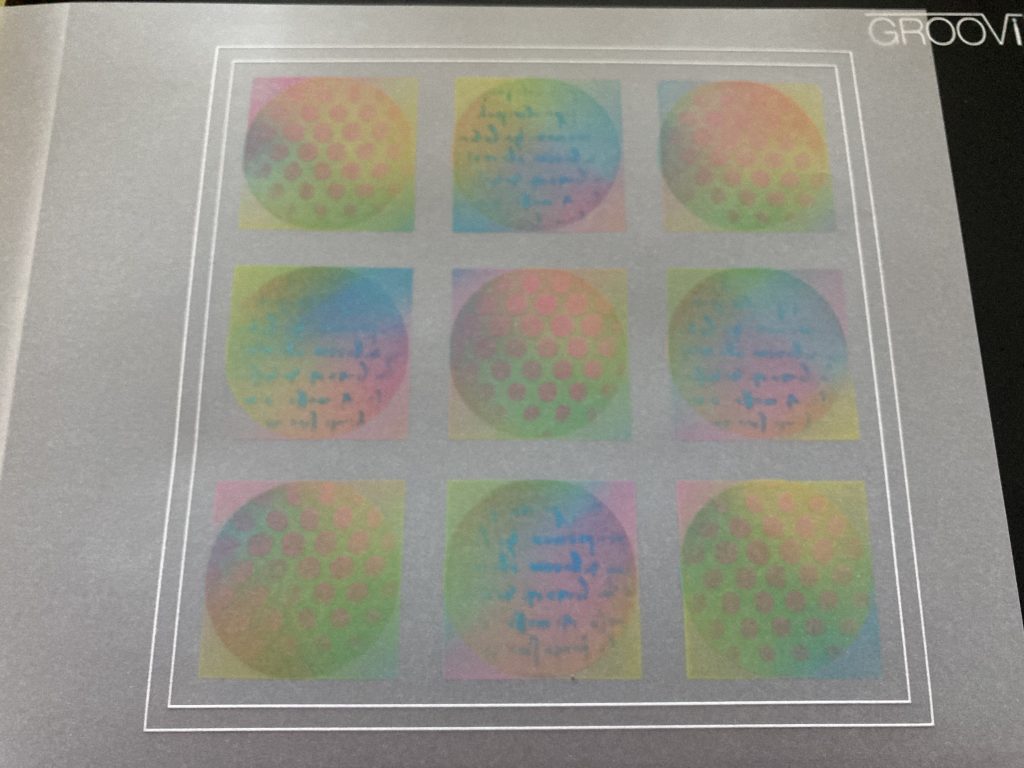
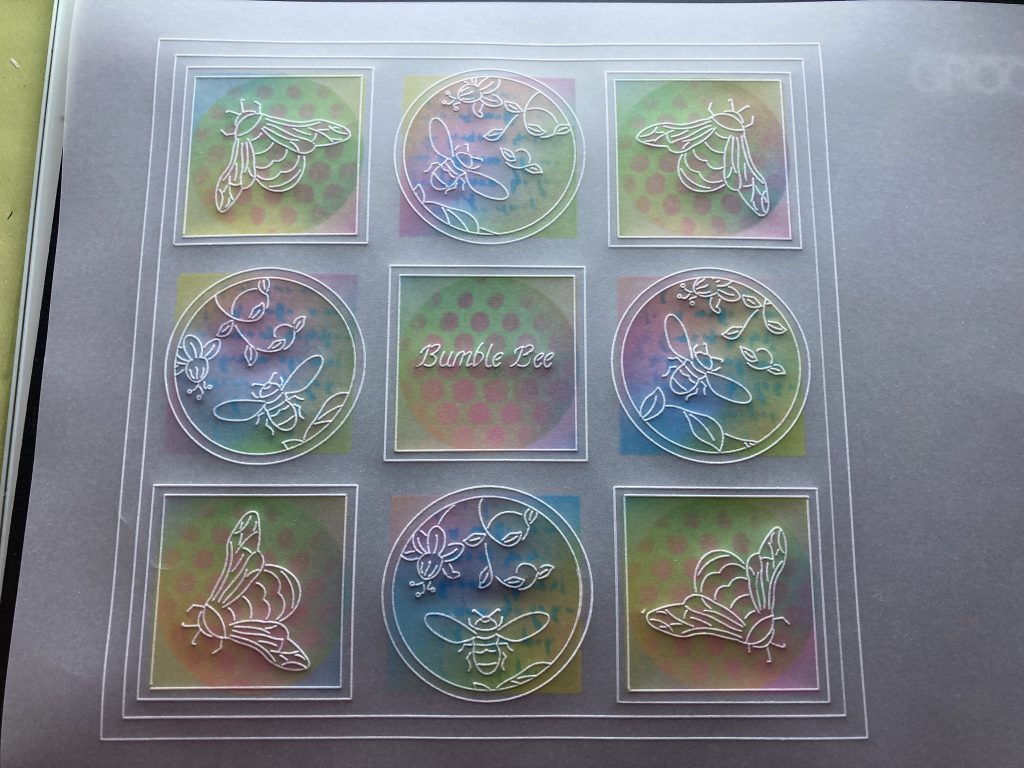
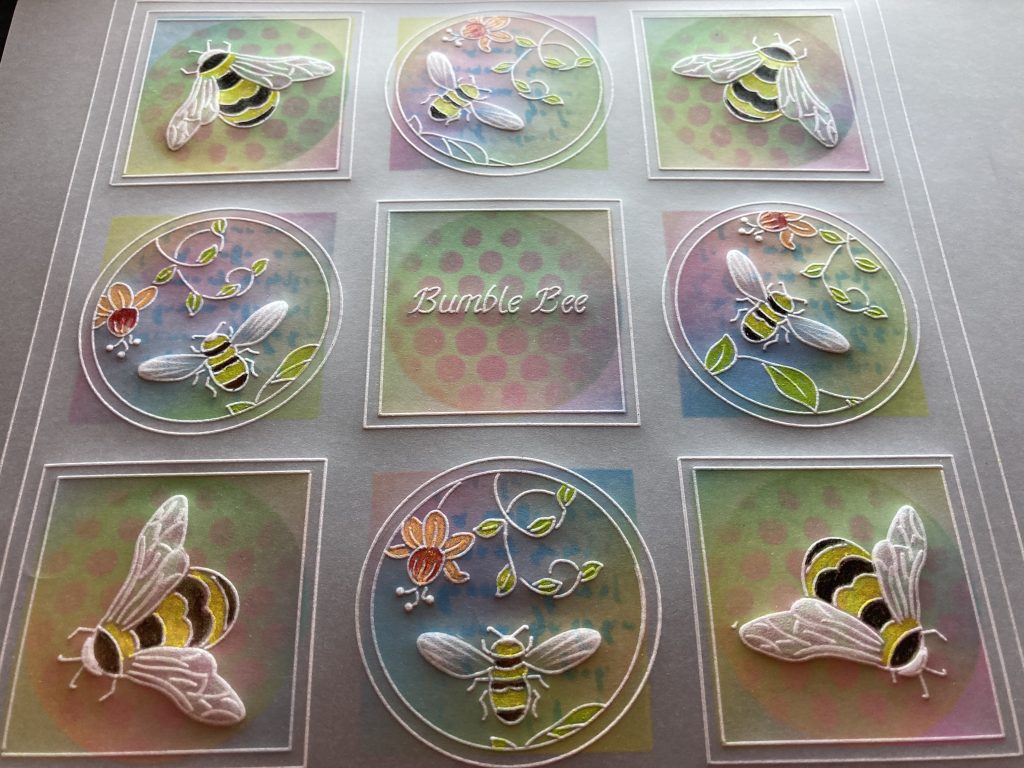
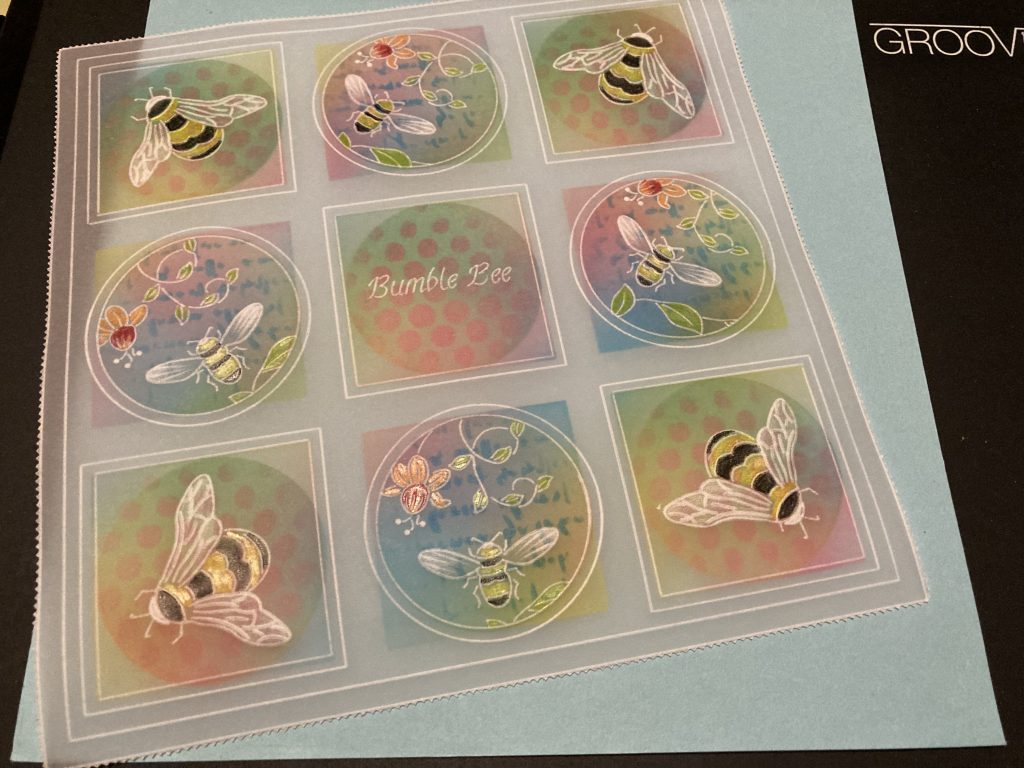
Step 5. Using the framework square Groovi plate line up with the inky squares one at a time and emboss the square that touches the lines and one out from the inky square to frame it. Repeat on all 4 corners and centre squares.
Step 6. Using the framework circles add circles around the ones you missed out from the squares.
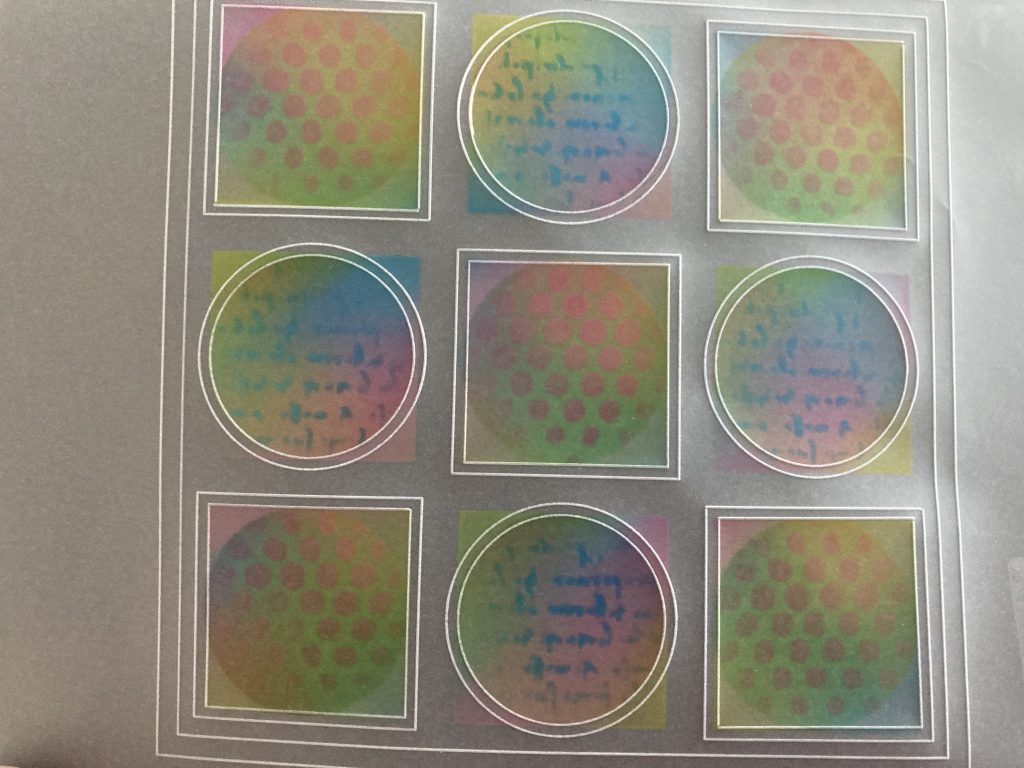
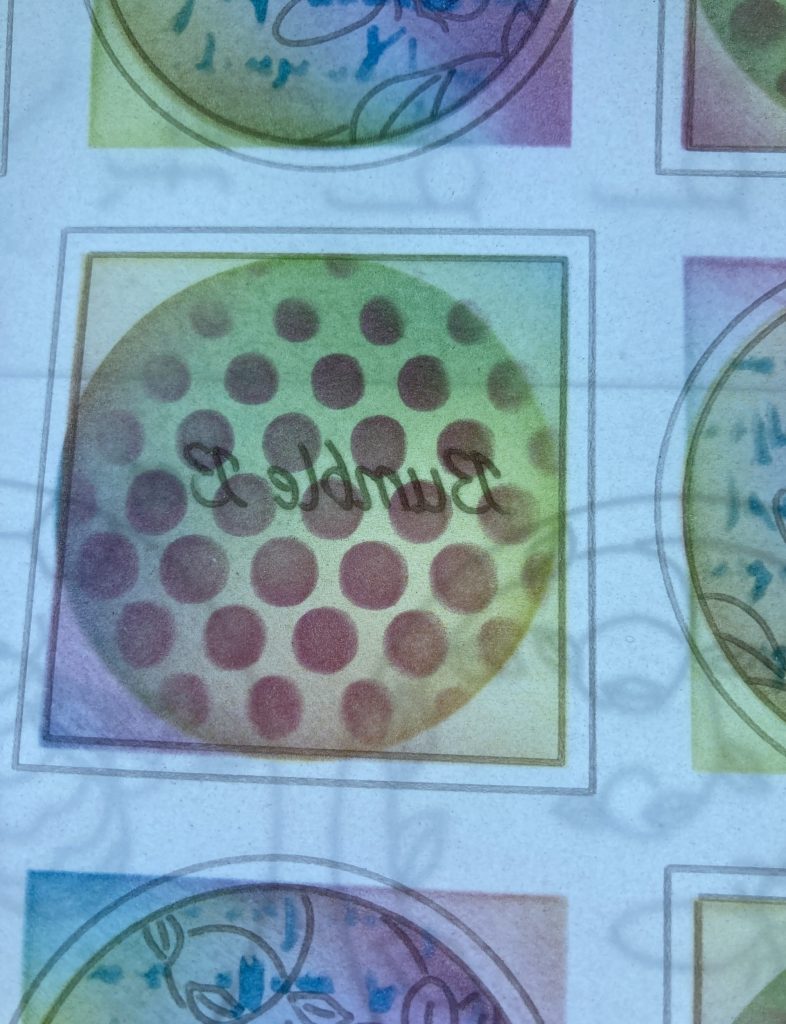
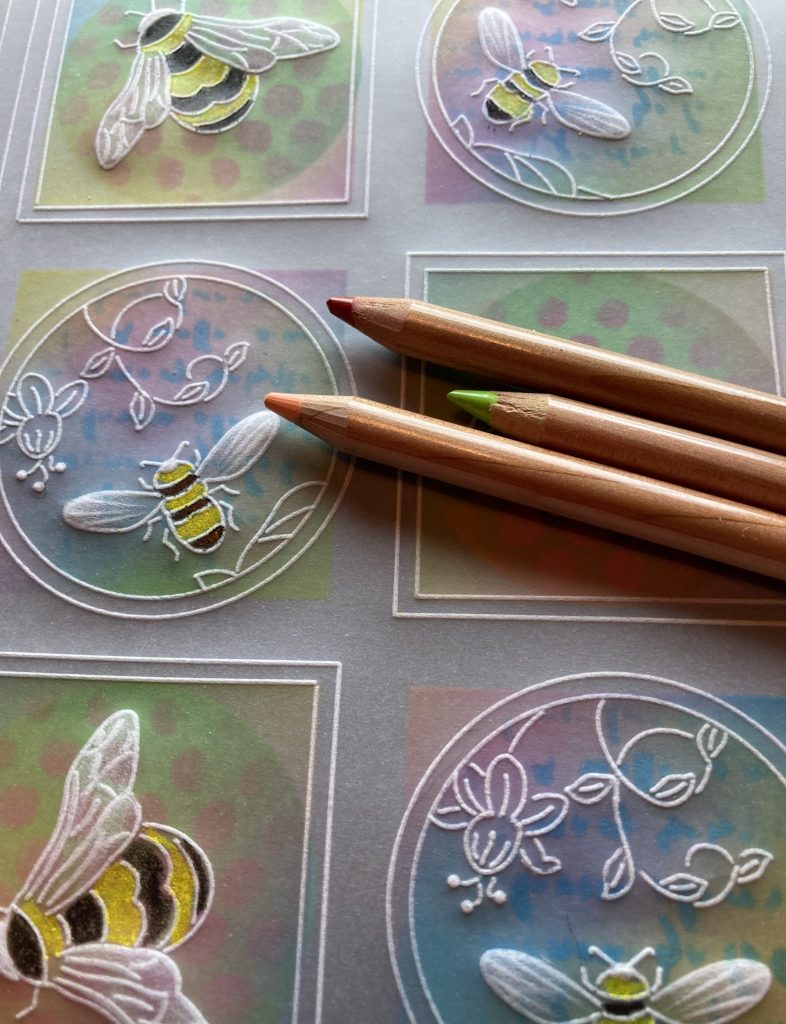
Step 7. Using the bumblebees from the plate add the middle-sized bee to the corner squares facing in different directions. Then add the small bee and flowers to the circles and the words in the centre square.
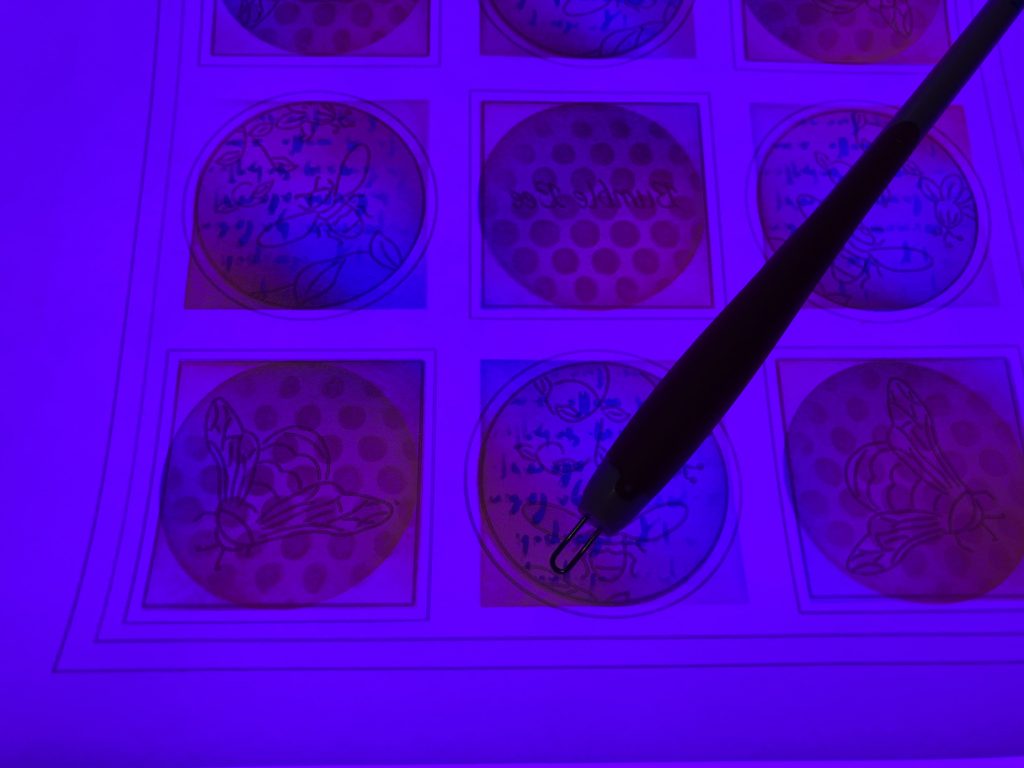
Step 8. Emboss white work in the wings of the bees using the pink mat and the shader tool. It doesn’t need to be bright white.
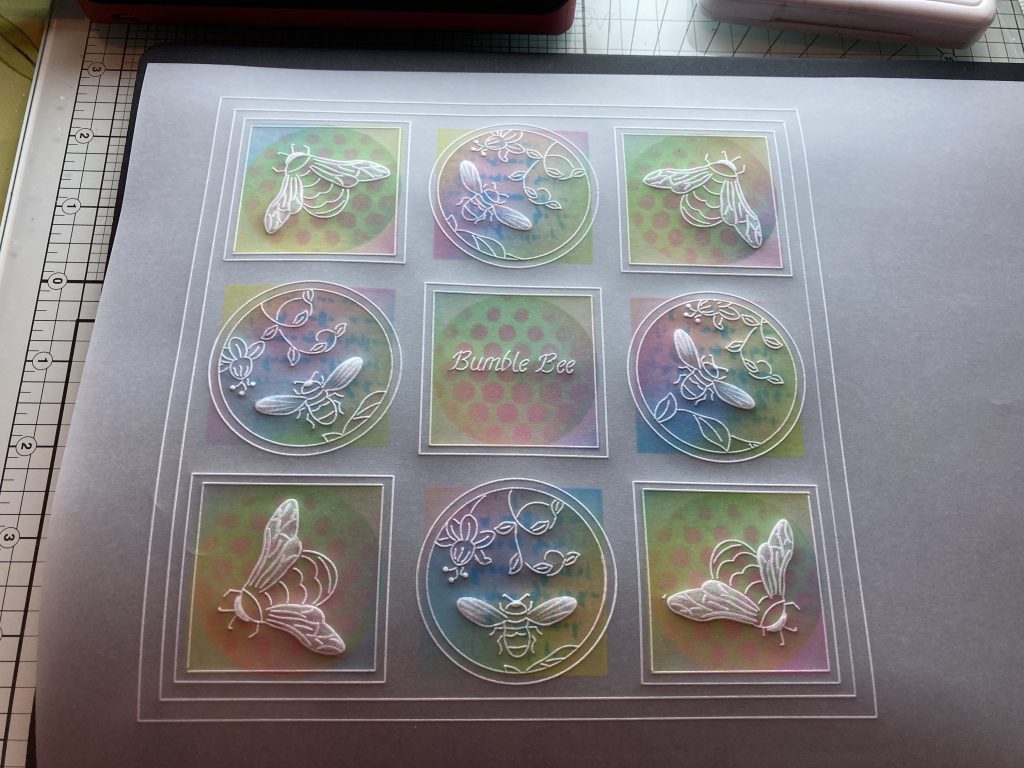
Step 9. Use Perga liners B pencils to add colour on the FRONT of the parchment to the bees add flowers.
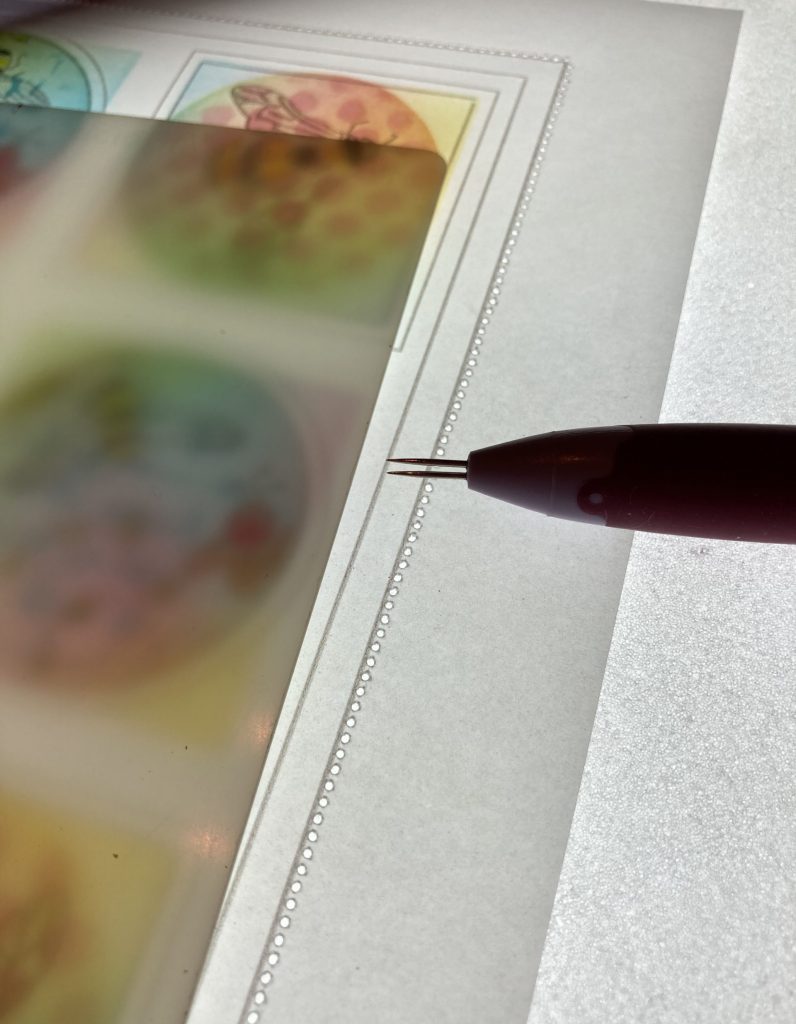
Step 10. Perforate around the square frame using a 2 needle Bold tool Cut away the waste.
Step 11. Cut a piece of pale blue parchment to 19½cm x 19½cm. Mount the parchment on it using brads to attach it.
Step 12. Mount onto a 8 x 8 card blank.
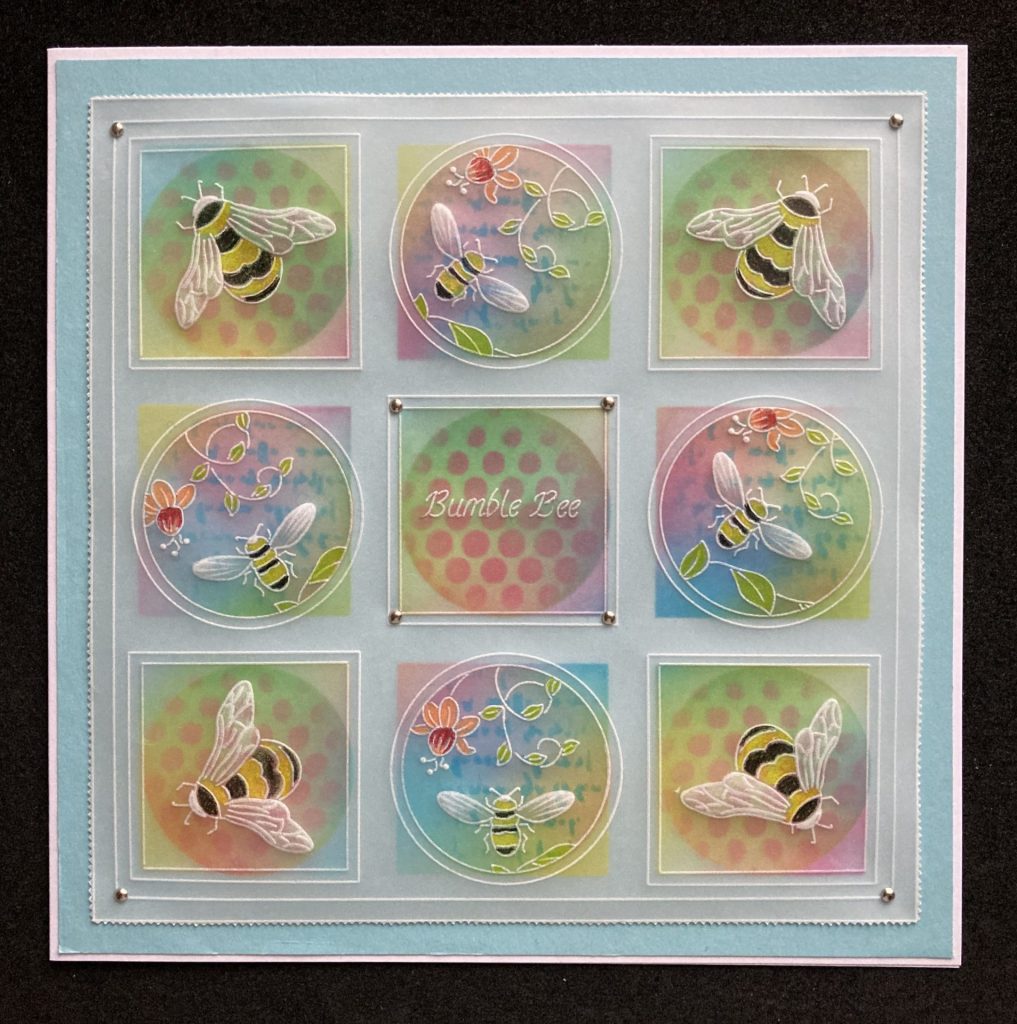
Voila!! WOW. Grace here! I cannot get over how beautiful and special this card is. Might be one of my all-time favourites. *gasp*
Thank you Jane for sharing your tips and tricks with us!
As usual, all of the ingredients are available HERE
I hope to see many of you recreate this fabulous project! If you do, please feel free to email it to me! I would love to see them… and have my inbox chocker block full of bees! Grace@claritystamp.com
For now though, enjoy the rest of your Sunday! Travel gently…
Don’t forget to tune in to HOCHANDA.com today:
Mum is on from 2pm-4pm with some amazing stamps – perfect for the boys and men in your life. Then Paul is launching a brand new Groovi One Day Special at 6pm & 8pm designed by the lovely Linda Williams.
Lotsa love, Grace & Jane xo
Clarity – The Home of Art, Craft and Well-being.
Jane, this is absolutely wonderful. Can’t wait to try this. Not thought about embossing onto parchment before, such a versatile project. LOVE IT💕🥰
This is so beautiful thank you, I will attempt this fantastic bee plate x
That’s is beautiful xxx loving the bees
Not a bee person myself, but Definitely will have a go at making this card. Love the design. Well written instructions. Thank you Jane and Grace.
Wow another masterpiece by Jane , will have a go at this when I get the stencils ,
Gotta love the Bees 🐝🐝🐝🐝
Love this effect, Jane and Grace. Gill Askam used inks on parchment on a card she sent me and it was absolutely beautiful, as is yours, Jane. Must give it a go – full of good intentions! Lol. Have a good day, Grace. Looking forward to 2 p.m. Lots of love. Hxx
A lovely card it looks very interesting to create, makes a lovely card for an bee keeper. The one problem I have with 8×8 cards is that they do not fit into a post box’s ‘mouth’ very easily.
Hi Grace I hope you are having a good day. Thank you for sharing this gorgeous project. Take care. Hugs xxx
That is one beautiful card and a new trick to add to our groovi bag. Great job, I love it. Wish I had a plate I could use. One coming that might fit but that background is fabulous.
That is very pretty. My husband is a bee-keeper so I’ve been up really close and personal to the honey bees, and the honey, excess to their own requirements, which we extract is delicious! We also have solitary bees leave their offspring in the bee-houses and trough on our front porch. Even the postman is fascinated when he delivers and watches them flying in and out. 🙂 Bees of all varieties really are wonderful little critters!
Love the effect of the oxide inks on the parchment. Thanks Jane for a wonderful step by step. Think I will give this ago. If I ink the parchment now it can dry overnight ready for embossing tomorrow or even later on this evening.
Thanks Grace for bringing us another Sunday blog
Beautiful card Jane and so well explained. Never dreamt Oxides would work on parchment. Love Suex
Omg that’s absolutely gorgeous, I am definitely going to try this, just need to clear a space and find the ingredients which are lurking around here somewhere 😂. Thank you so much Jane snd Grace x
Love this bee-project Jane! It’s beautiful!
Did see some of the show with Barbara this afternoon,but had some phonecalls because our daughter has her birthday today.
Now will watch Paul on Hochanda.
Stay save and lots of love, Trijntje Huppel
Lovely card, thank you for your blog project, will have to try this. xxx
Hi Grace, Wow !! Wow !! Wow !! Jane this is positively STUNNING !!
Lots of love from Patricia xx
Hi Grace & Jane. I don’t do parchment, but this card is just stunning! Like you Grace, I love bees – ‘Deborah’ means industrious or ‘bee-like’, so this card is right up my street. xx
WOW Jane this is amazingly “bee-autiful”. Thank you for sharing xx
Brilliant project so well explained Jane. Love the idea of using oxides on parchment. Thank you for sharing.
I have used alcohol inks on parchment, but never oxides. Will have to try this soon. The bee card is lovely.
Fabulous design, and I really love the mixed media within it xx