Clarity’s Blog Tutorial: How To Emboss, up close
Hello hello! Grace here.
I hope you’re all enjoying our 50% off sale this week on the Pergamano website! Have you been participating in all the competitions and giveaways we’re putting out on the blogs? Most winners will be announced next week (except for the Groovi SHAC competition that we put out on Monday! I’ll announce those 3 winners on Friday’s blog!) so you have some time to enter!
So why the second blog of the day? Well, Linda Williams has shared another step by step with us. Aren’t we lucky?
Make sure to check out her step by step on whitework, which was posted this morning! So impressive. And there’s more where that came from!
Allow me to hand this over to Linda…
Embossing – such endless possibilities for a different look!
Linda here!
Following on from my previous blog on shadow embossing, I wanted to share with you the possibilities that are open to you by just varying your embossing. Over the years I have tried and experimented with many different methods and here are some of them…
Sample 1
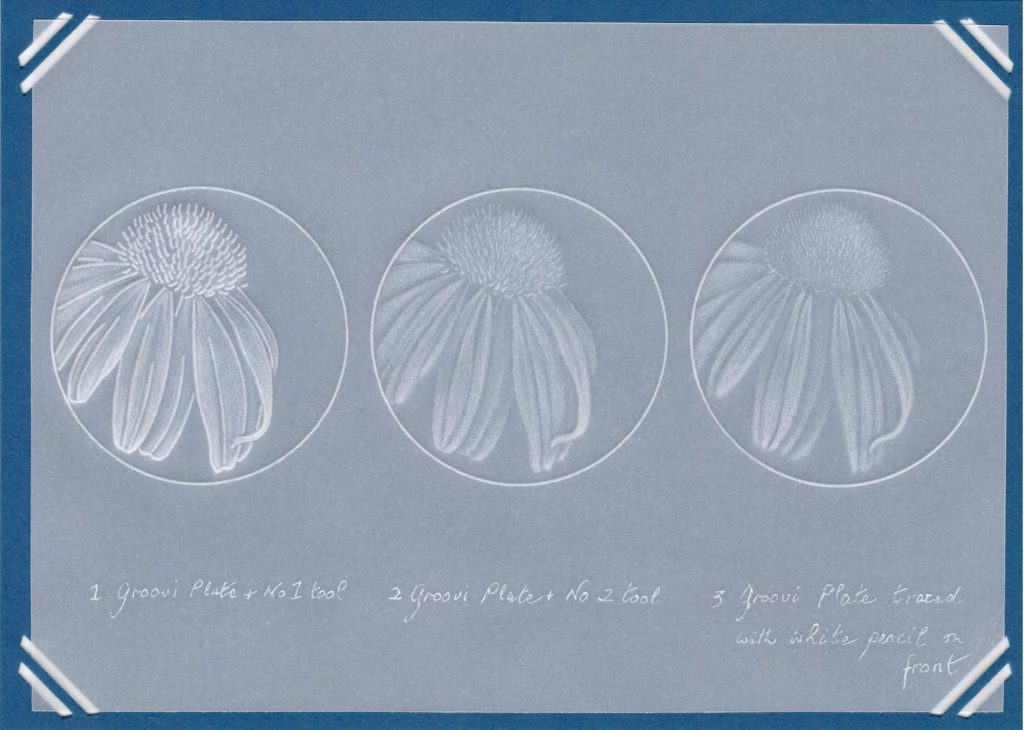
Here you will find a sample I did to illustrate the different ways that you can use your Groovi plate. I have used the largest Coneflower image from Linda’s 123-D Bumble Bee, Clover & Coneflower A5 Groovi Plate.
Image number 1 shows an embossed flower where the initial line art has been done with the number 1 Groovi tool. This gives a solid white outline.
On image number 2 the outlines of the flower have been embossed very gently with the number 2 Groovi tool. Can you see the difference; the outline is much more subtle. I have attempted to fade the outline into the shadow embossing. I explained this in my previous blog.
Image number three had no outline embossing whatsoever. I traced the image from the plate using a white Pergamano pencil. Then I rubbed out my pencil lines when I had done my shadow embossing.
Which do you prefer? Have a go at all of them; you will be surprised at what you can achieve!
Sample 2
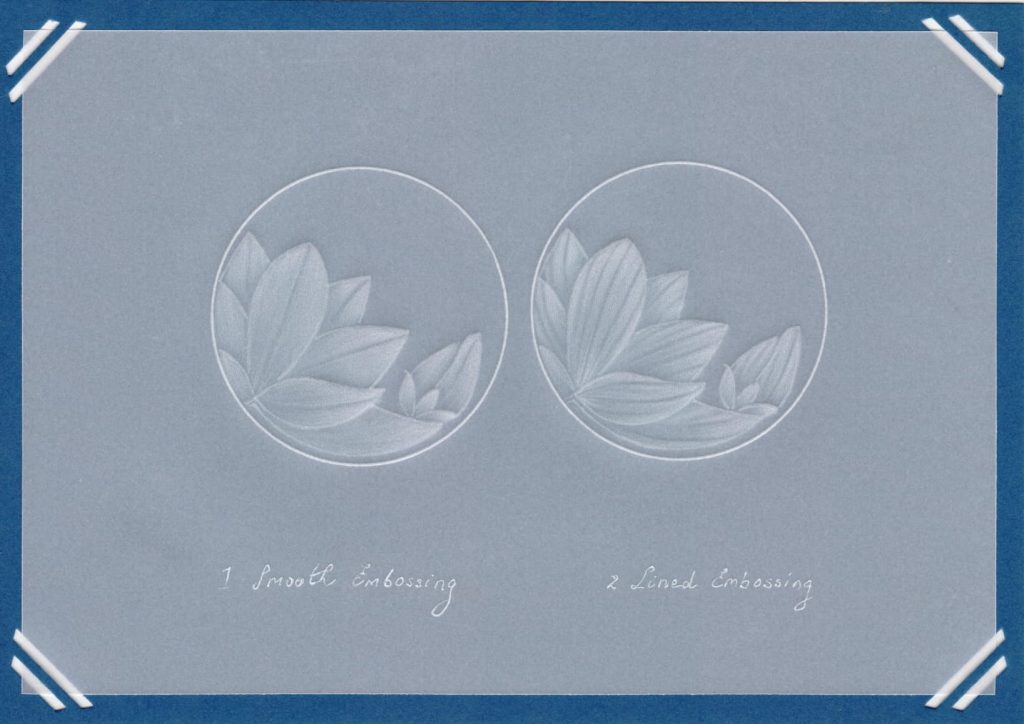
Food for thought this one! Should your petals be stripy or should they be smooth, or maybe a combination of both? The choice is always yours! In nature you will find that some petals and leaves are covered in striations. You may want to replicate this. You sure can with an embossing tool. I have used the largest Waterlily from Linda’s 123-F Dragonfly, Water Iris & Water Lily A5 Groovi Plate.
Image number 1 shows smooth embossing which has been done in the way that I explained to you in today’s earlier blog. I left a gap in the embossing where the centre vein would be.
Image number 2 shows the same flower but this time there are lots of striations on the petals. The method of embossing is the same; you just have to be more careful about where you put the gaps.
Sample 3
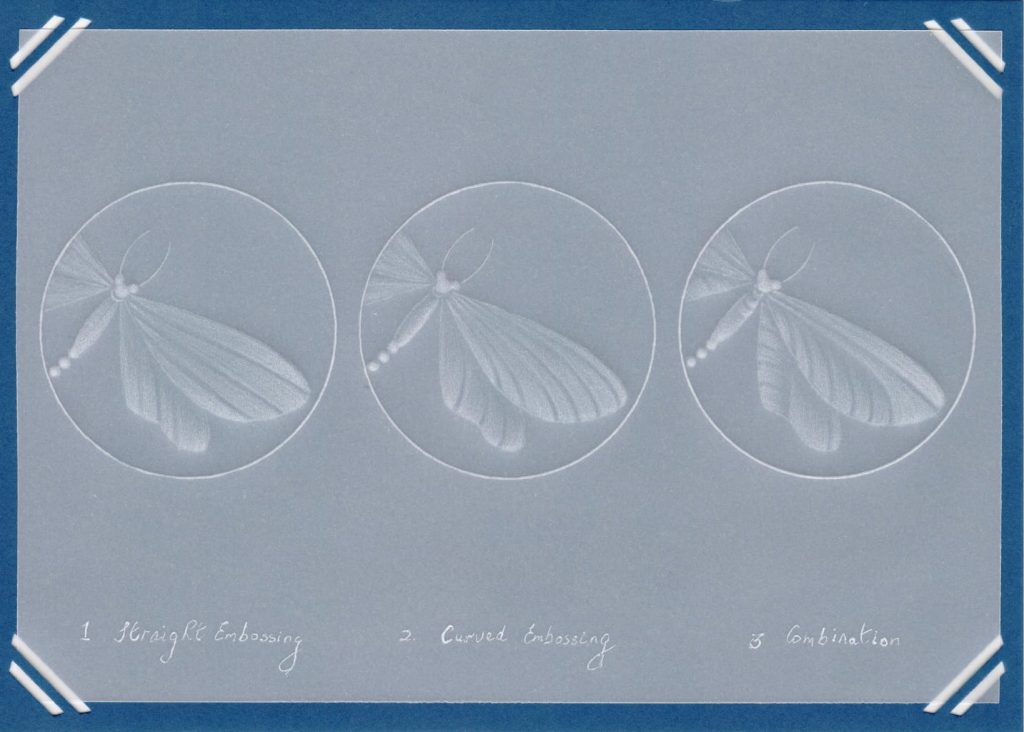
Here I have used the largest Dragonfly from Linda’s 123-F Dragonfly, Water Iris & Water Lily A5 Groovi Plate.
On image number 1 you can see that I have kept my embossing as straight as I can. There are no curves whatsoever. This is not my favourite way of embossing as I feel it does not give a natural look.
Here on image 2, look at the difference a slight curve and flick of the embossing tool creates. The dragonfly looks more realistic.
Image number 3 takes your embossing to a completely different level! Isn’t this fun? Do try it out; it’s a combination of straight and curved embossing all going in different directions. So interesting!
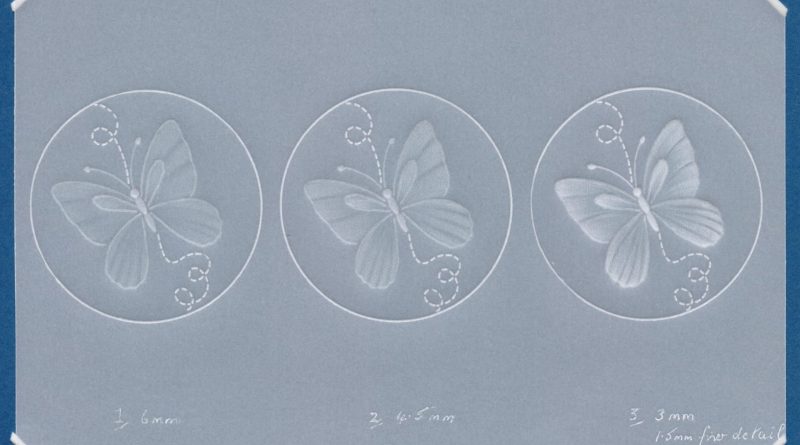
Sample 4
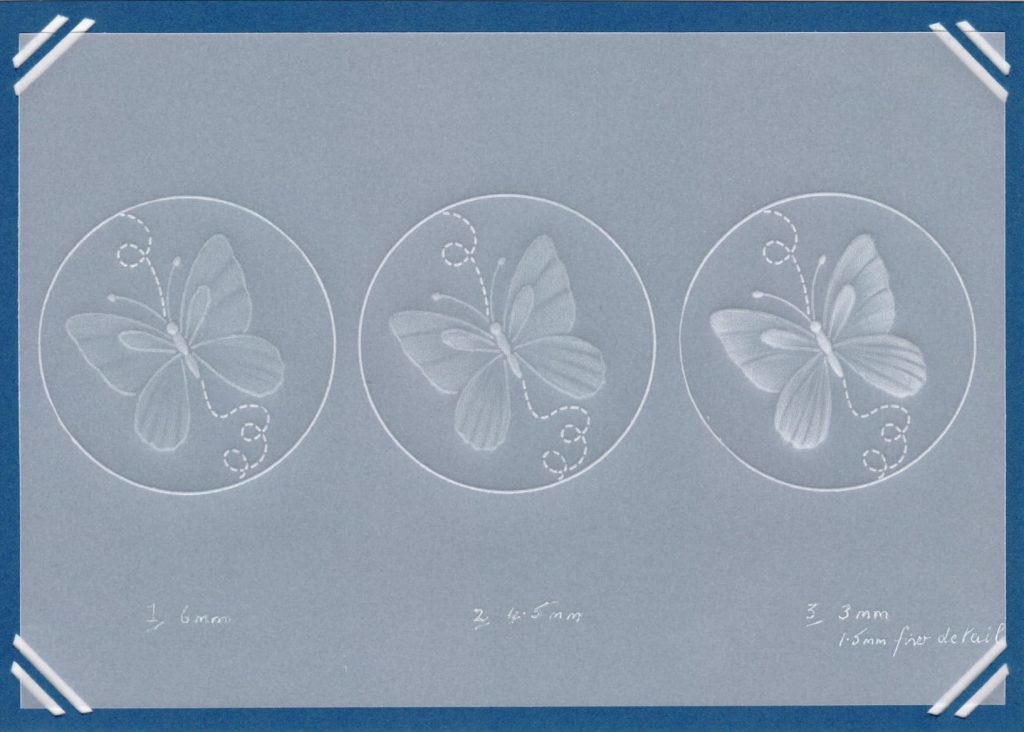
I put this one in just because I can! Everyone loves a butterfly, that’s for sure!
I have used the middle butterfly from Linda’s 123-E Butterfly, Lavender & Mallow A5 Groovi Plate.
Emboss the butterfly lightly with the number 2 embossing tool. The broken line and circular frame are embossed with the number 1 embossing tool.
Emboss in layers starting with the 6mm Pergamano ball tool. Leave some gaps if you wish (image 1). Notice how even the slightest curve in the embossing creates a lovely shape to the wings.
When you have a good base layer, go down a size and use the 4.5mm ball tool (image 2).
Finally finish off with the 3mm ball tool and the 1.5mm for the finer details. Don’t do too much with these as you want to show all the shades of grey and white (image 3).
Don’t you just love this craft!!! I have been parching for nearly 25 years and it never ceases to amaze me. Also I am still learning things I never knew from this lovely, kind family of likeminded people.
Oh team Clarity!
Love, Linda x
How generous is that? Thank you, Linda!!
Speaking of generous, I’d like to add another opportunity to win a Pergamano gift card! Try any of the above techniques (doesn’t have to be a finished card) and email them to me (grace@claritystamp.com). I’ll pick 3 winners by next week and they’ll win a £25 (or $ equivalent) gift card!
Lotsa love, Grace xo
Clarity – The Home of Art, Craft and Well-being.
Thank you very much Linda. x
WOW just WOW 🤩 X
Another great blog, thanks Linda for another step by step to the embossing. Someone was asking about embossing earlier on the FB page & I pointed them in the direction of this blog page for this mornings step by step.
Now to try the techniques out to see what I can come up with – a great prize so it it would be rude not to at least give it a go – thanks Grace
Hi Grace
Another fab tutorial, thank you. I know I’ve got some of Linda’s 1,2,3 plates, I must look and see if I’ve got the beautiful daisy. Take care
Love Diane xxx
Yes, SO impressive! Big Thank You to Linda for this tutorial (and to you Grace, for posting it) – SO helpful. I have ‘requested’, or rather suggested, before that Linda should produce a DVD tutorial (or several!); I would be the first one to buy! To have instructions at hand is so much more convenient than to have to search through reams of blogs and posts to find previously posted step-by-steps! I wonder if anyone else would find a DVD helpful, and may be those ‘in power’ at Claritystamp could think about it ….
Warmest good wishes, Jutta x
Just noticed this blog! I love those techniques, Linda. I will try and give this a go! Time is always the issue for me! Lol. Hx
Thank you for all the help, teaching and inspiration you give us
What a shame. I looked yesterday and could only find the blog for the 20th. Found it now too late, but it will be lovely to have a go after reading, Love Linda’s work. And have quite a few of her plates, think I have some in my order. Will have a last look today. Thank you grace. Love xx