Clarity Matters Blog Tutorial: How To Use Multi Needle Tools On Your Design
Hello hello! Grace here.
I hope this finds you well and enjoying your Sunday.
We are joined by the incredibly talented Glynis Whitehead. Glynis has kindly put together a step-by-step project for us!
I’ll pass you over to our teacher 🙂

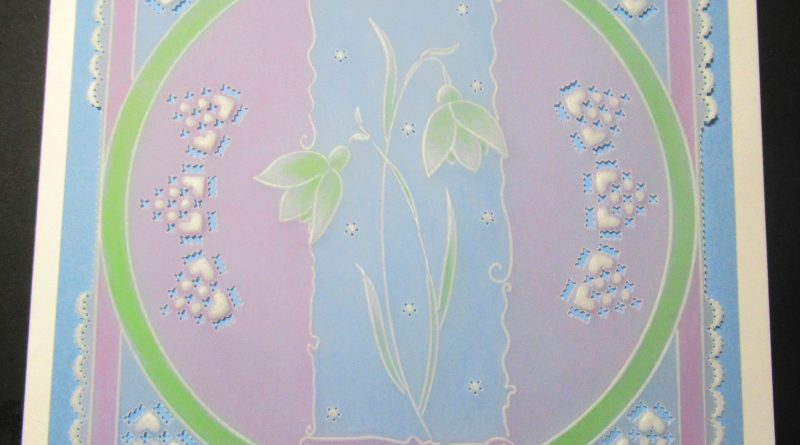
Snowdrops – the Bloom of Bravery
Ingredients
Barbara’s SHAC Floral Panels – Snowdrops A5 Sq Plate (GRO-FL-41922-03)
Nested Circles A5 Sq Plate (GRO-PA-40051-03)
Nested Squares A5 Sq Plate (GRO-PA-40037-03)
Linda Williams’s Handbook 1 for Mult-Needle Tools (PER-BO-70291-XX)
Linda Williams’s Handbook 2 for Multi-Needle Tools (PER-BO-70355-XX)
Pergamano Perforating Needles:
Fine Four-Needle (PER-TO-70036-XX)
Moon Tool (PER-TO-70031-XX)
Five in a Circle Tool (PER-TO-70025-XX)
Two-Needle Tool (PER-TO-70037-XX)
Embossing Tools:
1,2,3 & 4 Groovi Tools
Pergamano 6mm Ball Tool (PER-TO-70016-XX); 4.5mm (PER-TO-70015-XX)
3mm (PER-TO-70005-XX), 1.5mm (PER-TO-70004-XX)
Faber Castell Polychromos Pencils (ACC-PE-30797-XX)
Pergamano Blending Nibs (PER-AC-70299-XX)
Dorso Oil (PER-CO-70066-XX)
A5 Piece of Plain Parchment (GRO-AC-40020-A5)
Light Blue Backing Paper (GRO-AC-40775-A4)
6×6 White Card blank (ACC-CA-30618-66)
Method
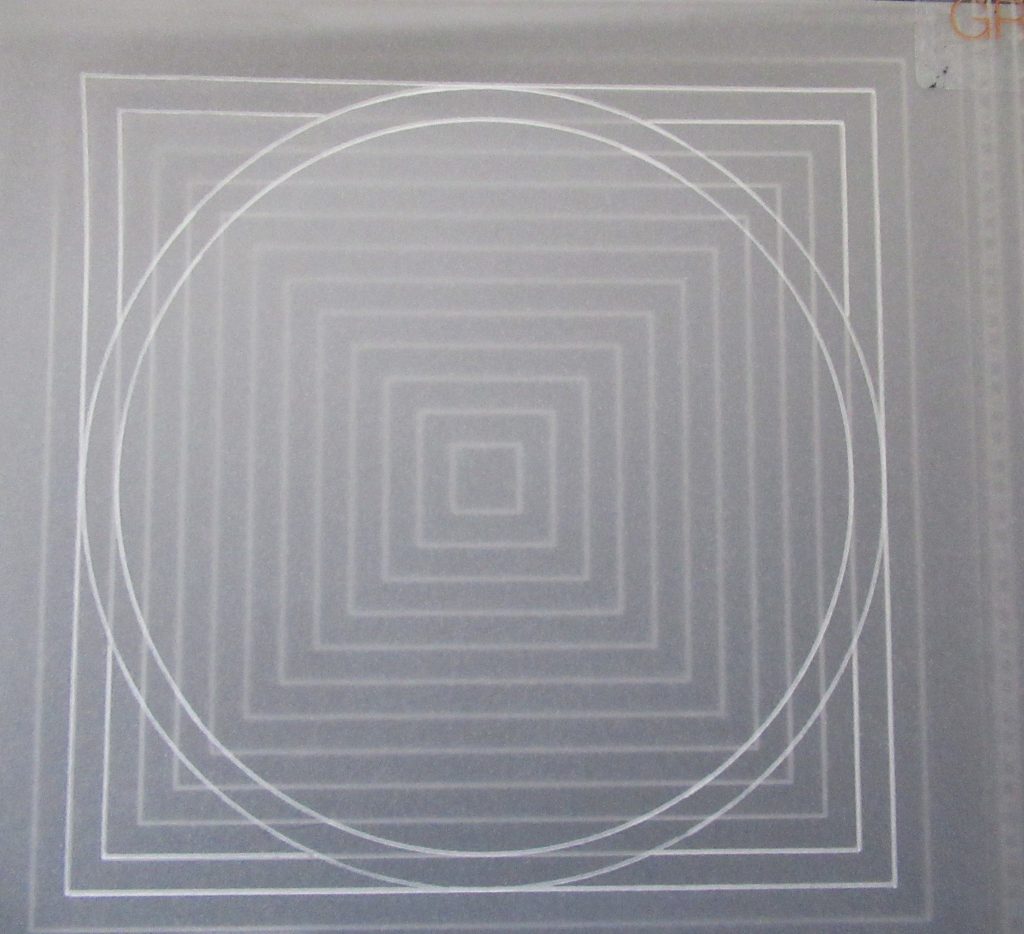
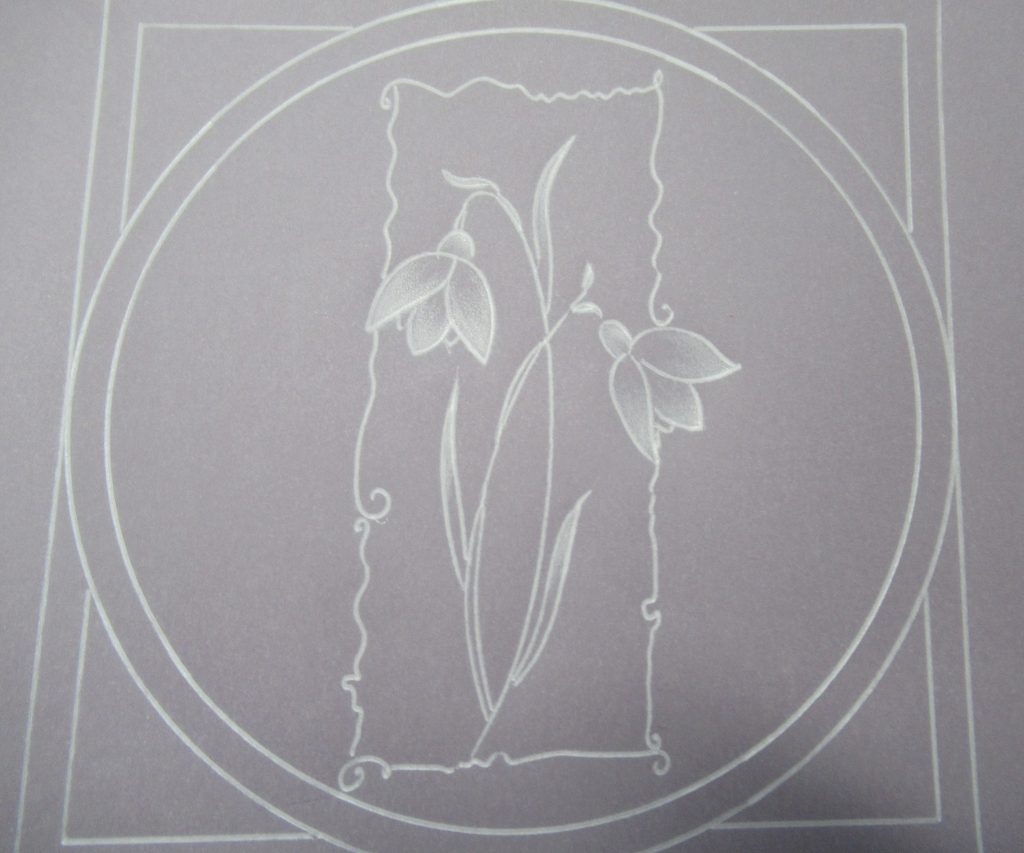
Step 1. Fit the nested circle plate into your plate mate and line up your parchment with the edges of the plate. Then emboss the 2nd and 3rd lines in from the edge of the plate.
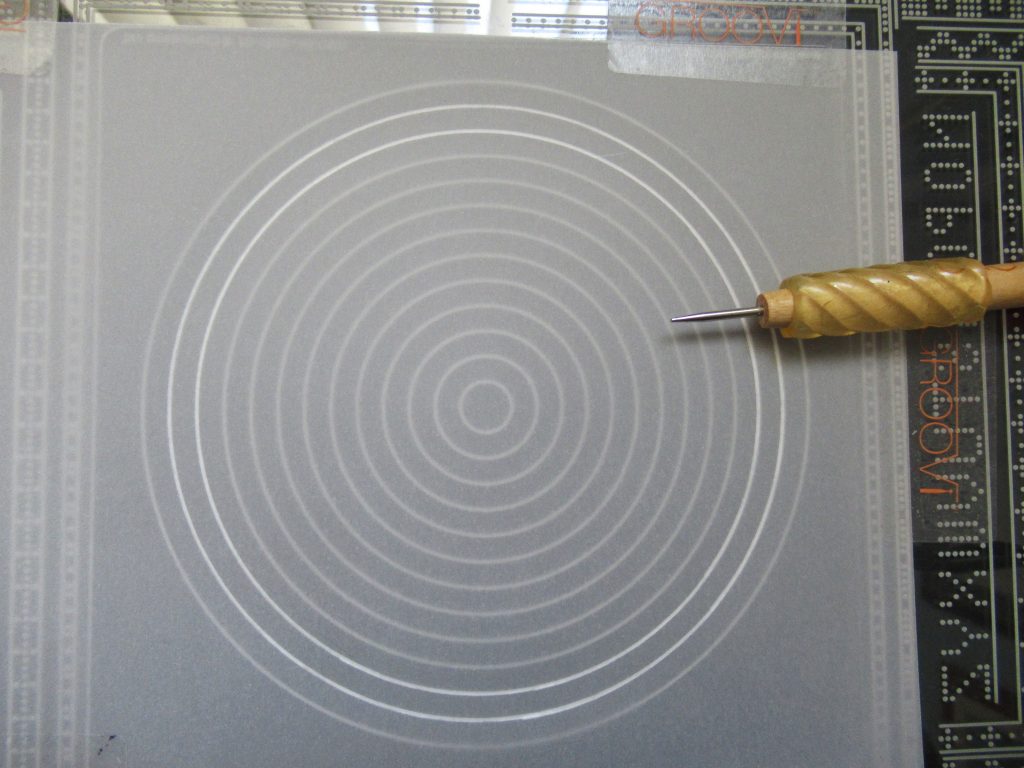
Step 2. Do not remove the parchment from the plate mate. Just take out the nested circles and replace them with the nested squares and you will find that they are lined up perfectly for embossing the corners of the frame by embossing the 2nd and 3rd lines from the edge.
TOP TIP: Be careful not to go through your circle frame when embossing the 3rd line.
Step 3. Now use the Snowdrop plate. Line up the parchment so that the snowdrops are in the centre of the circle and you can get the outline nearest the blooms into the ring. Emboss the Snowdrops (and the outline) with the number 1 Groovi tool.
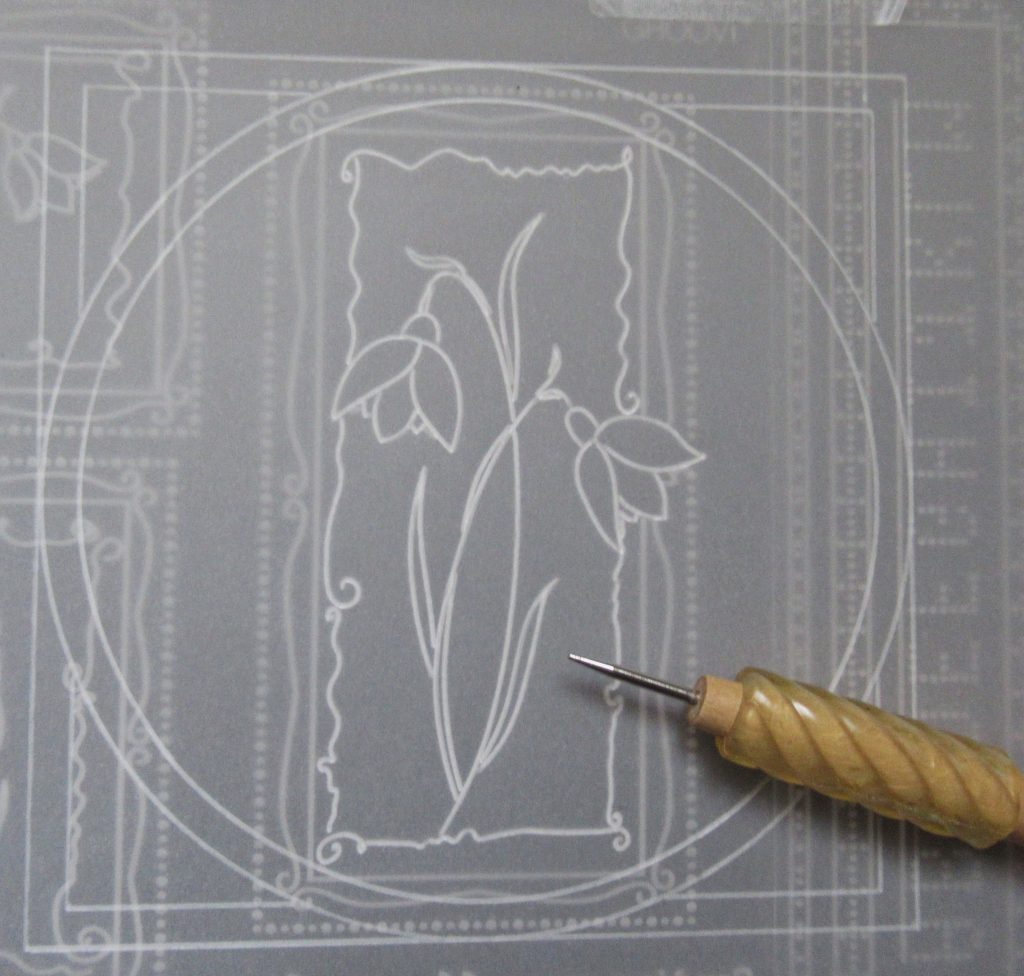
Step 4. Using the 6mm Ball tool, emboss the petals of the snowdrops – the front three petals of both flowers. Start from the point of the petal and work towards the top. Just do this lightly, then let the parchment rest.
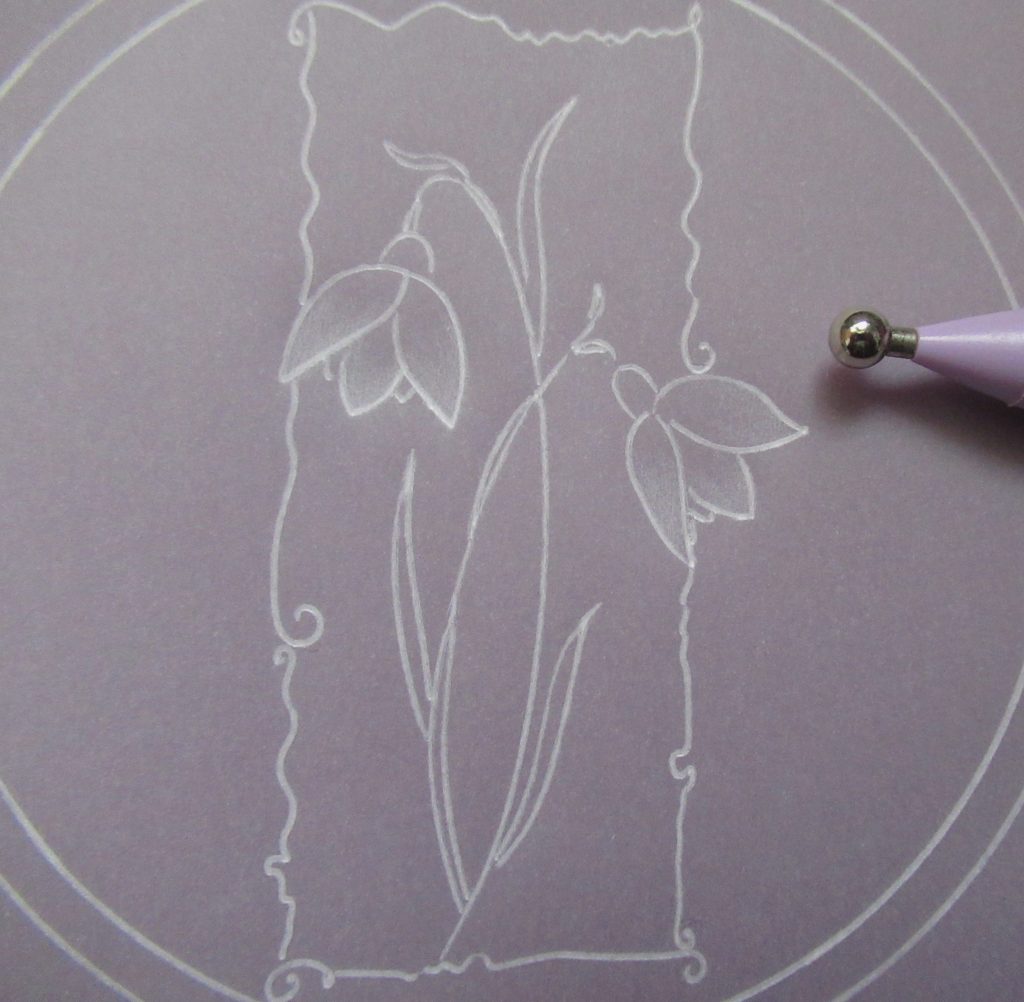
Step 5. Continue with the embossing… Do another layer of embossing on the main petals with the 6mm tool, then move down to 4.5mm. Use the 4.5mm also for the little bit where the bloom is joined to the stem. Use the 3mm ball tool for the ends of the leaves.
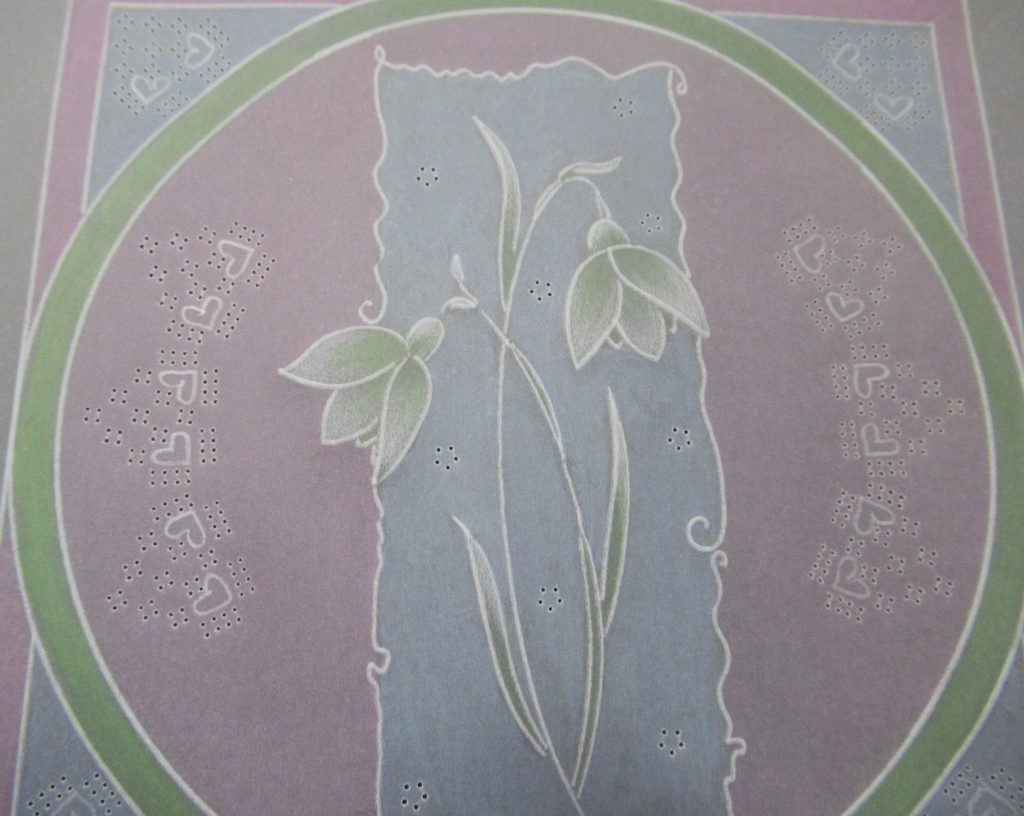
Step 6. Time for some colour. I used Polychromo pencils for this piece;
a light blue for the panel and inside the corners, pink for the inner circle and square frame, some light green on the leaves, and a little into the petals and the circle frame. When you apply the pencil, go lightly and on the side of the point. Blend the colour out with a blending nib and a tiny bit of Dorso oil. Go in a small circular motion to ensure an even distribution of the colour.

Step 7. The 4-needle perforations come from page 21 of Linda’s Handbook Volume 1. Photocopy the page so that you can pierce through the parchment and paper together.
Lay the parchment right side up over the paper pattern and onto a shallow perforating mat and match the needles up to the dots. Go slowly when you do this. Do a pattern down each side of the circle and one part of it into each corner. Mark the hearts, lightly with a white pencil.
TOP TIP: Remember to move to a hard mat to trace the hearts.
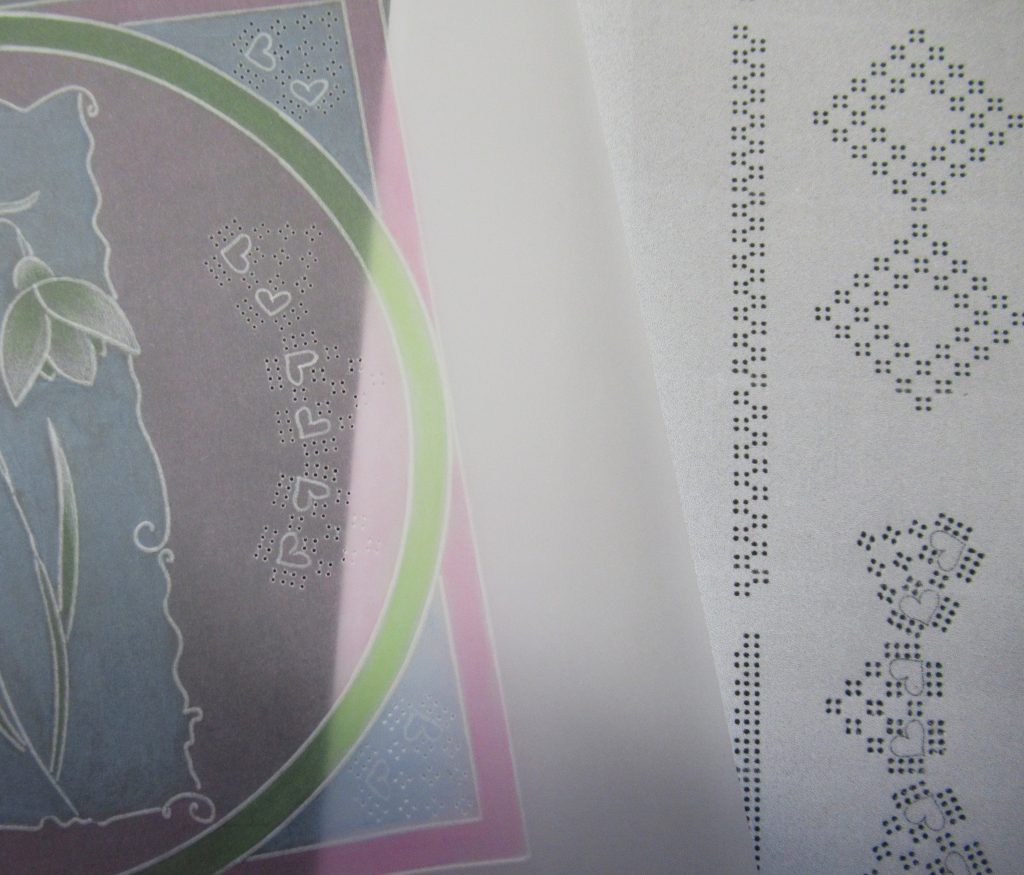
Step 8. Use the 5-in-a-circle tool to shallow perforate randomly in the panel around the snowdrops.
Step 9. Emboss the hearts, the dots within the four-needle design, and also the five-in-a-circle perforations. Use the 3mm ball tool on the hearts and do a few layers to get the whiteness. Use the 1.5mm ball tool for the five-in-a-circle perforations. Also with the 1.5 mm tool, put some dots in between the four in the hearts design.
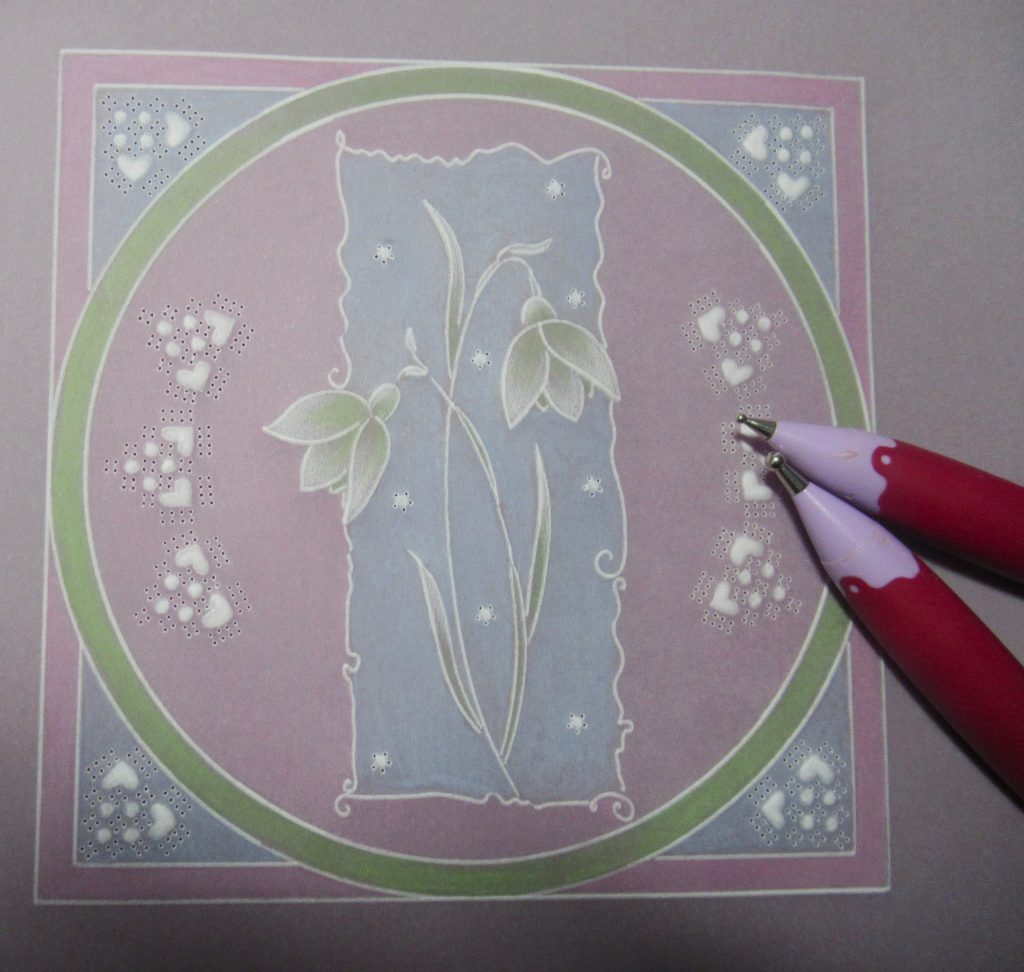
Step 10. Shallow perforate with the Moon Tool – this is illustrated in Linda’s Handbook for Multi-Needle Tools Vol 2. Line up the tool against the edge and perforate it 7 times in each direction on the corners. Use the 2-needle tool to perforate in the gaps down all four sides. Emboss the moon shapes with a 3mm ball tool, gently.
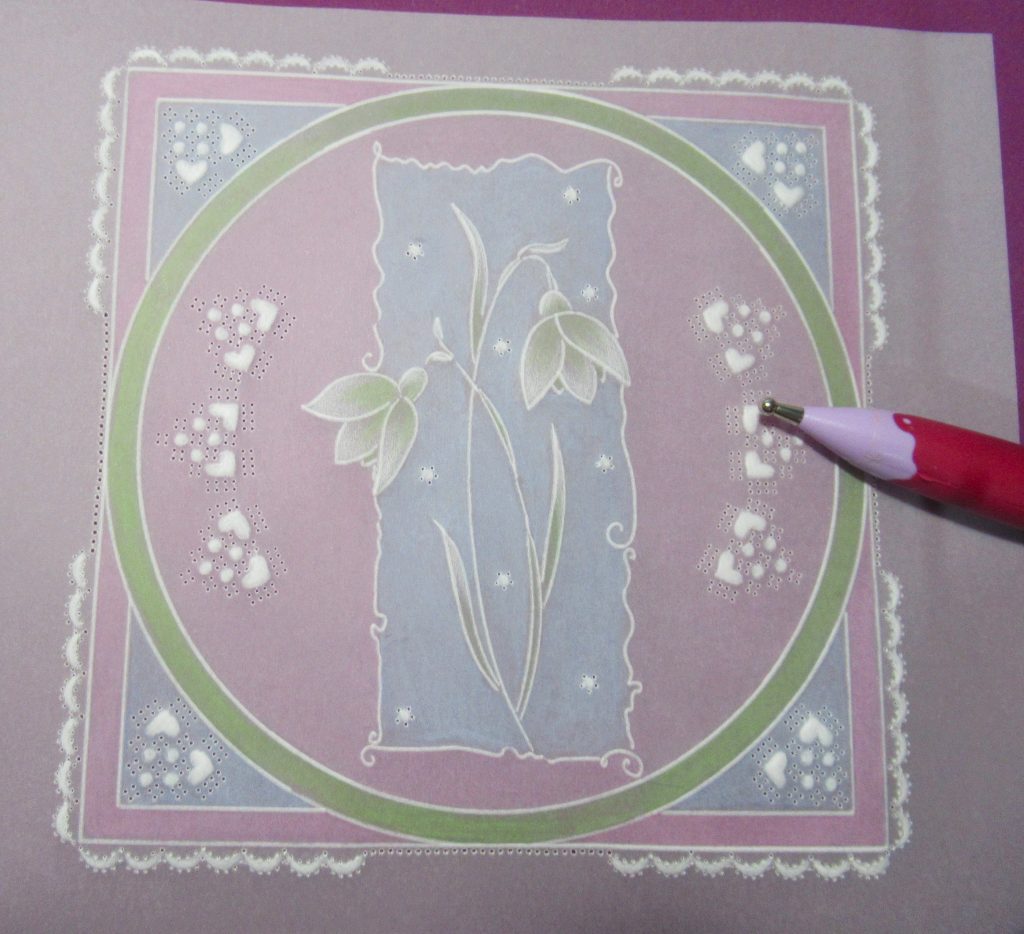
Step 11. Deeply re-perforate all the perforations, using a fine single-needle tool if you have trouble relocating all the needles. Then snip out all the slots and crosses of the four-needle design around the edges.
Remember to turn the parchment as you go to ensure nice even picots.
Now mat and layer the work, first onto a light blue background paper and then onto a white card blank. Use gold or silver brads to do this. And you’re all set!
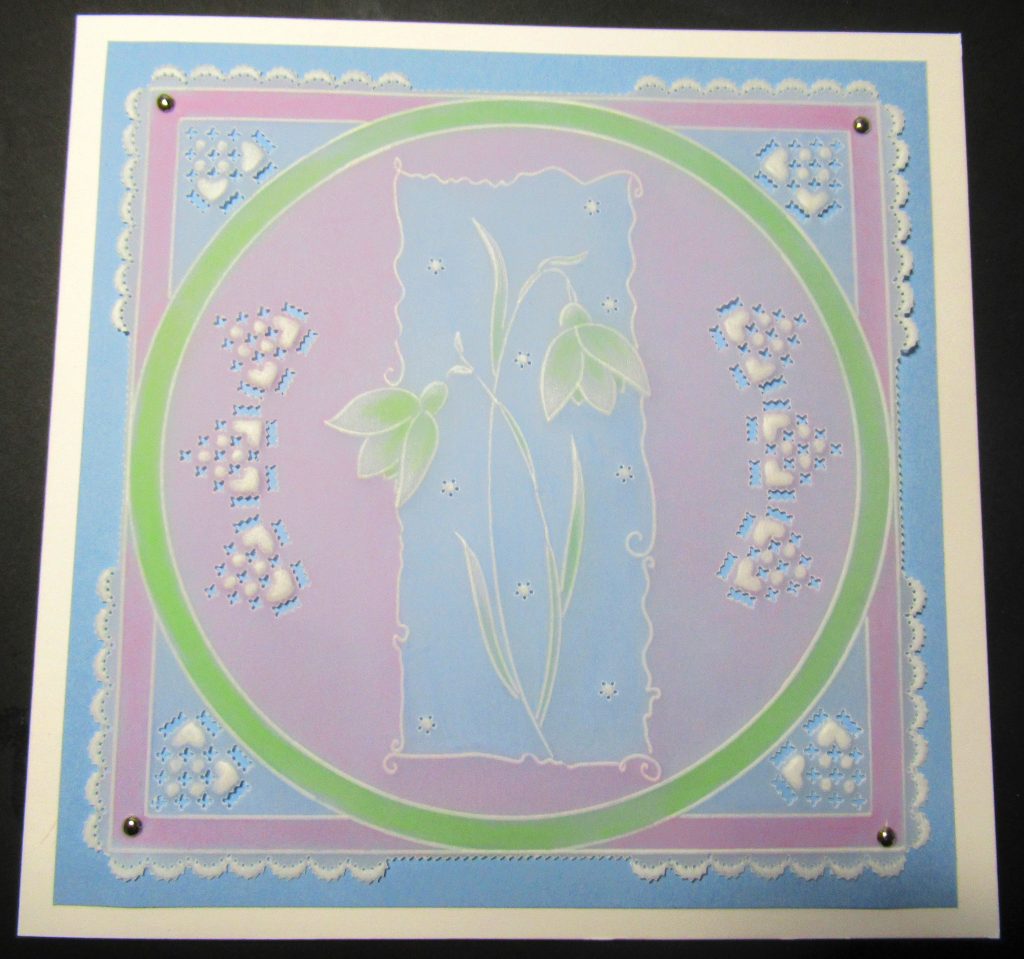
What a fantastic card! Thank you, Glynis, for sharing your tips and tricks with us and making it much more acheivable.
Everything that Glynis has used in this particular step-by-step project, can be found over on the Clarity website, HERE.
Don’t forget that we are celebrating the Coronation of King Charles III over on the Clarity website this weekend. Get an extra 23% off your order once your basket reaches £30 or more (after your Craft Club discount). The discount will be applied automatically at checkout.

All orders placed up until midnight Tuesday will be entered into our Royally Regal Golden Prize draw and be in with a chance of winning a £100 Clarity Gift Voucher – a prize certainly fit for a king!
Now, looking ahead… lots of things to look forward to, as always. Don’t forget that Mum is on TV today, 3pm-5pm. Woop woop!
Here is our schedule for the week ahead:
Sunday 7th May:
Clarity Classics with Barbara on Create & Craft – 2 hours – 3pm-5pm Tuesday 9th May:
Groovi Tuesday with Paul – 10am Live on Facebook and YouTube
Thursday 11th May:
The Pergamano Show with Tina Cox on Create & Craft – 2 hours – 11am & 3pm
But for now, I must be off! Lots to do before enjoying Mum’s show this afternoon! See you there.
Travel gently, friends.
Lotsa love, Grace & Glynis xoxo
Clarity – The Home of Art, Craft, and Well-Being.
Great project Glynis, Step by step explained. And thank you Grace for putting it all together.
Great step by step. Makes a fabulous card.
Thanks Glynis.
Thank you Glynis, a great inspirational step by step. x
Thank you Grace & Glynis – Another lovely project to do
Love Seta Xx
Just realised that I hadn’t commented although I read it yesterday. Another great step by step by Glynis which I think could be adapted with other plates if need be but as there is a sale on an ideal to top up my stash with missing items !!
Thank you Grace & Glynis for another great Sunday Claritymattersblog xx