Clarity Matters Blog Tutorial: How To Create a Vase of Flowers
Hello hello! Grace here.
I hope this finds you well and enjoying your Sunday!
We are joined by the super-talented Clarity Design Team member, Glynis Whitehead. She has kindly put together a step-by-step tutorial for us.
Free tuition from the best crafters there are?! What a dream. Thank you, Glynis! I’ll hand you right over…

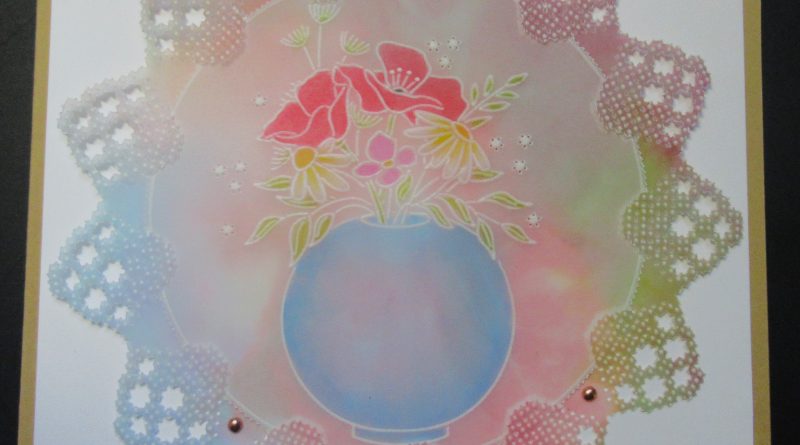
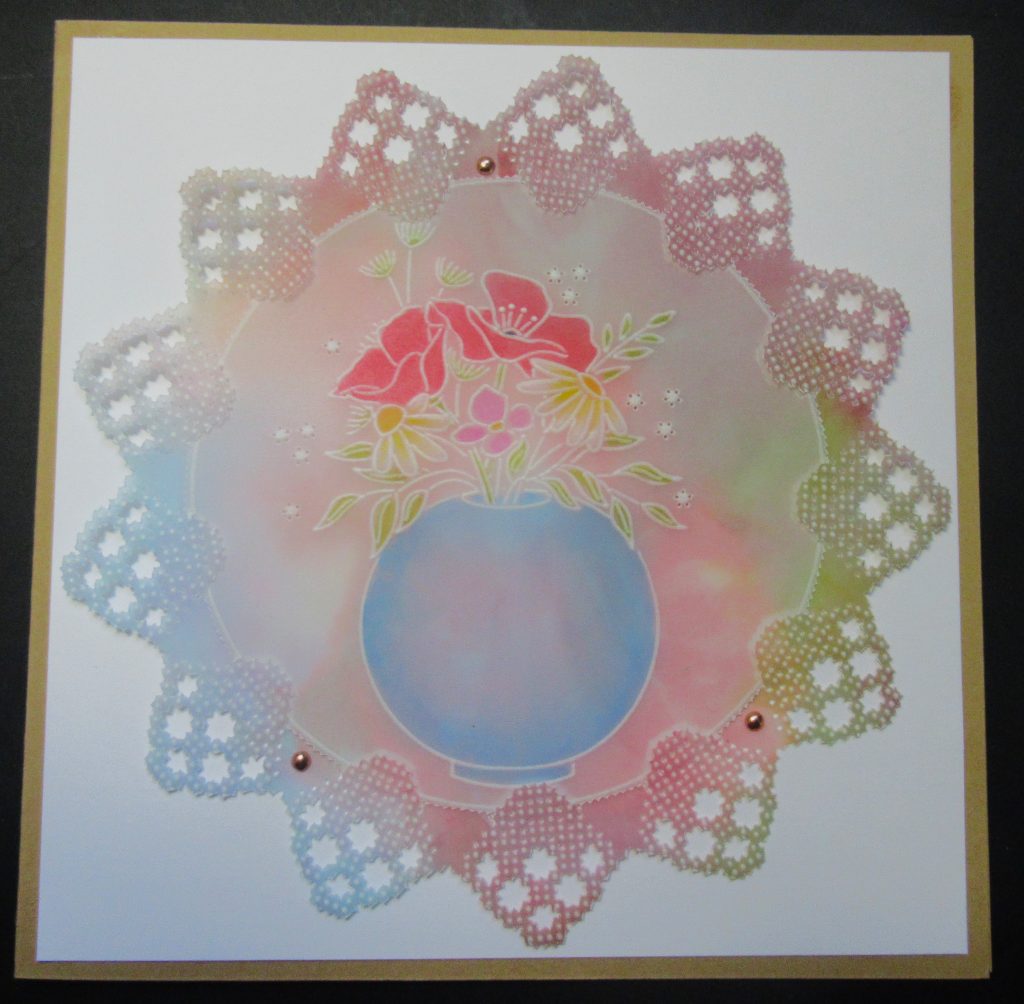
A Pot of Flowers
Ingredients
Floral Bouquets and Vases A4 square Plate (GRO-FL-41941-15)
Nested Circles A5 square Plate (GRO-PA-40051-03)
Josie’s Gridwork Circles Design 2 (GRO-GG-42054-12)
Toscana Designer Parchment (ACC-CA-30933-88)
Perga Liner Pencils (PER-CO-70063-XX)
Pergamano Perforating tools:
Single Needle Bold Perforating Tool (PER-TO-70028-XX)
Two Needle Fine Perforating Tool (PER-TO-70037-XX)
Five in a Circle Perforating Tool (PER-TO-70025-XX)
6 X 6 Kraft Card blank – Kraft card blank (ACC-CA-30753-66)
Method
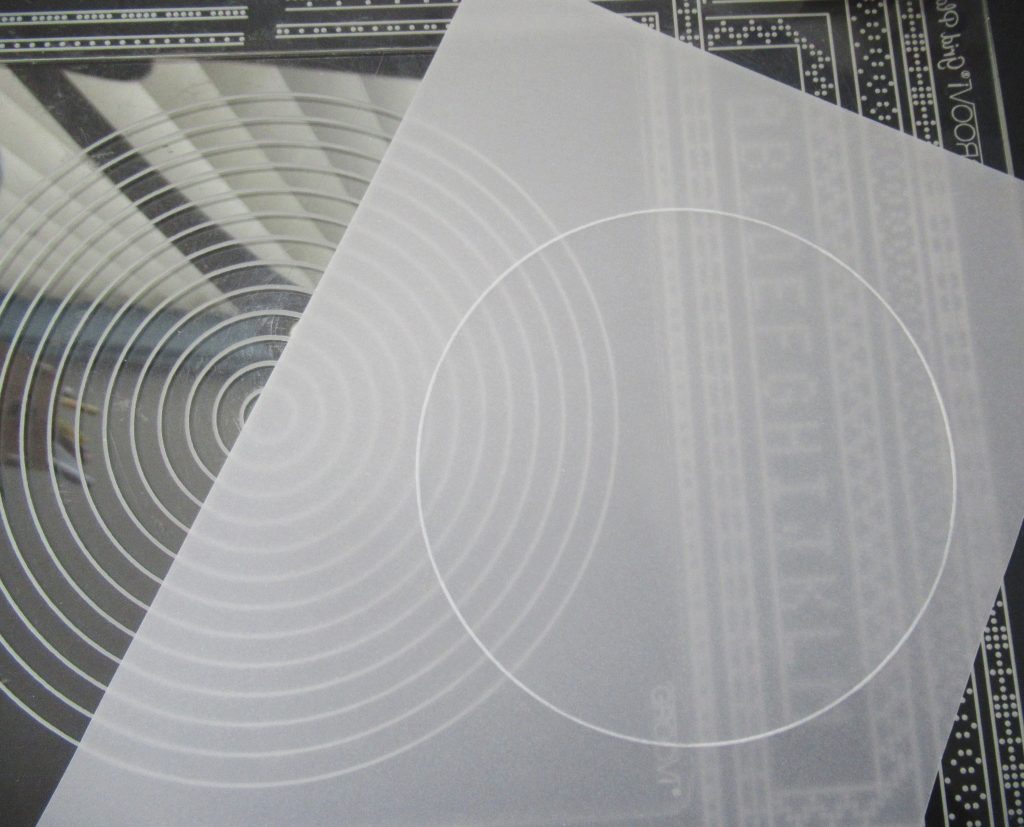
Step 1. Take your designer parchment and attach it to the circular grid, front side up (remember that the lightest, matt side is the front).
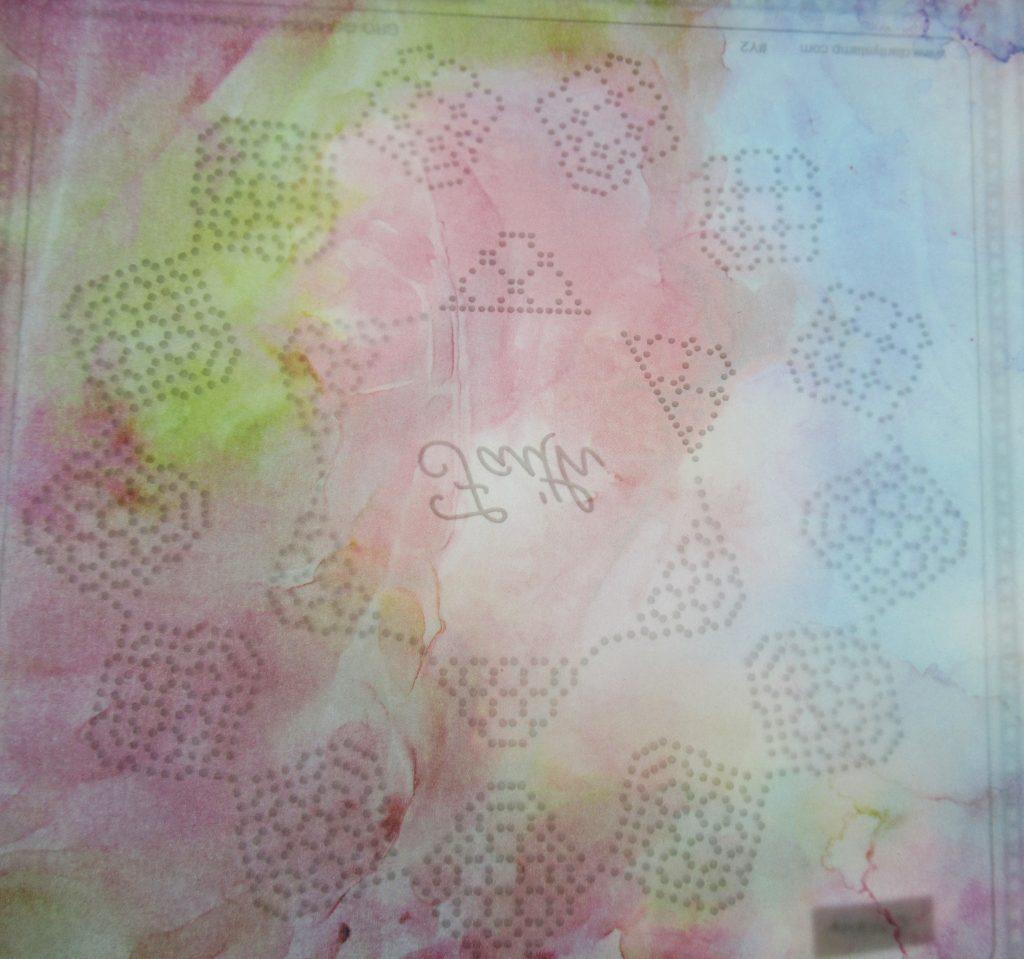
Step 2. Using the Bold single needle perforating tool, perforate all the holes in the segments of the grid. When you run out of segments, move the parchment round and you will find that the ends of one of the perforated segments will ‘plug’ into the holes of the grid and you can then complete the circle.
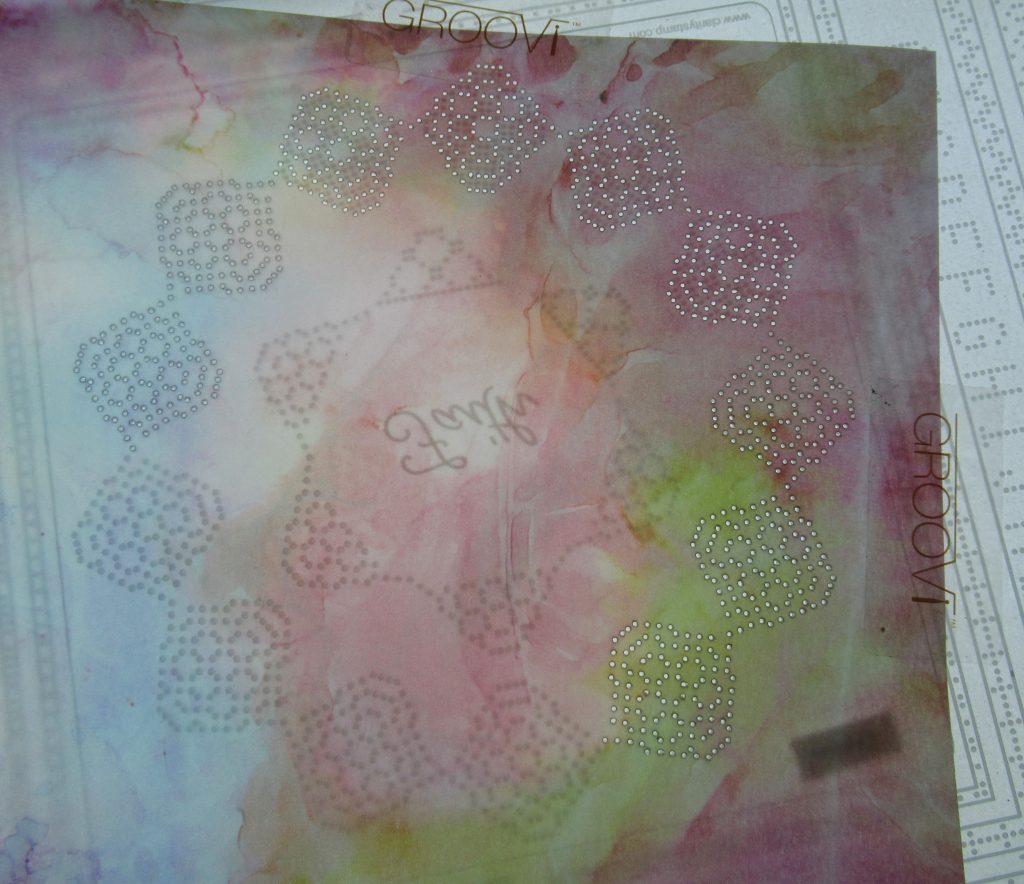
Step 3. Turn the work over and, working on the back of the parchment, line up the work so that the dots in the segments are aligned between the perforations. Use the number 2 Groovi tool to emboss the dots. Move the work around to keep lining up the work with the dots until you have completed the circle.
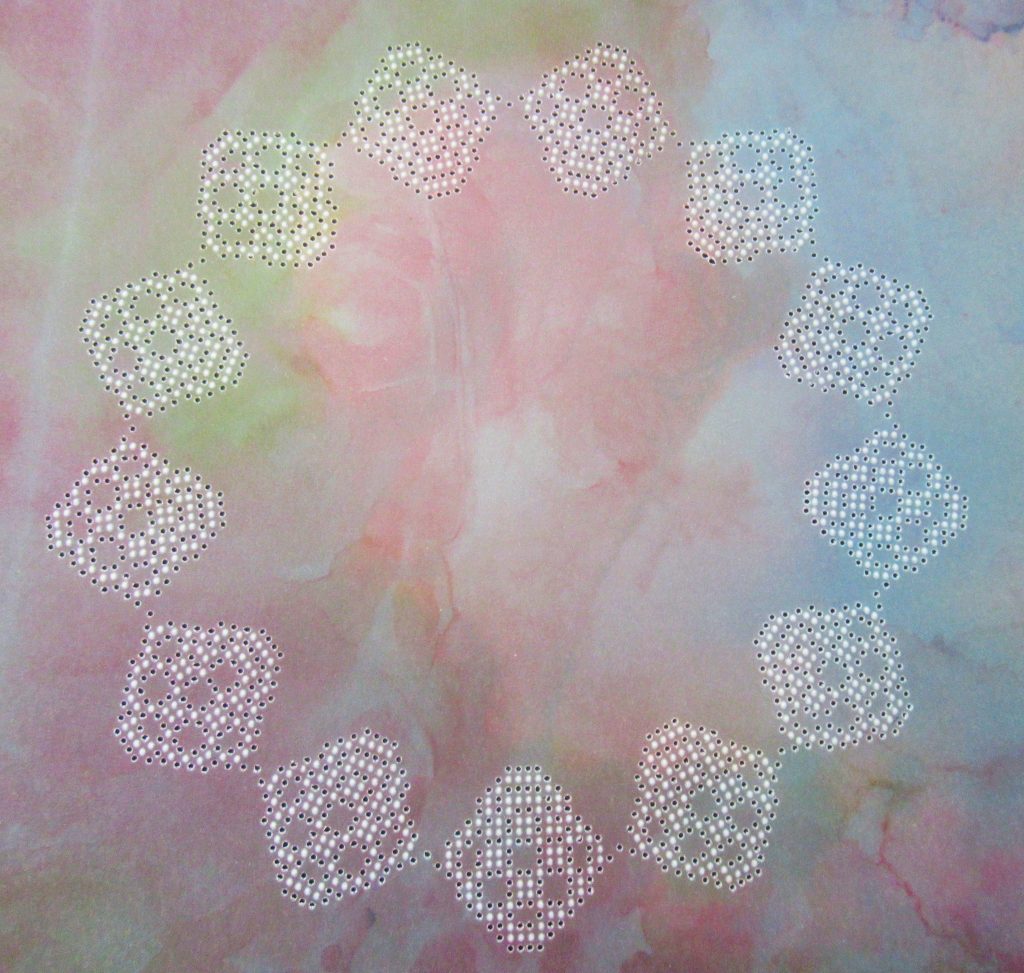
Step 4. Line up some plain parchment and attach it to the nested circle A5 plate and emboss the 4th line in from the edge.
Step 5. Line up the circle so that the bouquet is in the centre and be sure to leave enough room for the vase. Leave off the stalks completely.
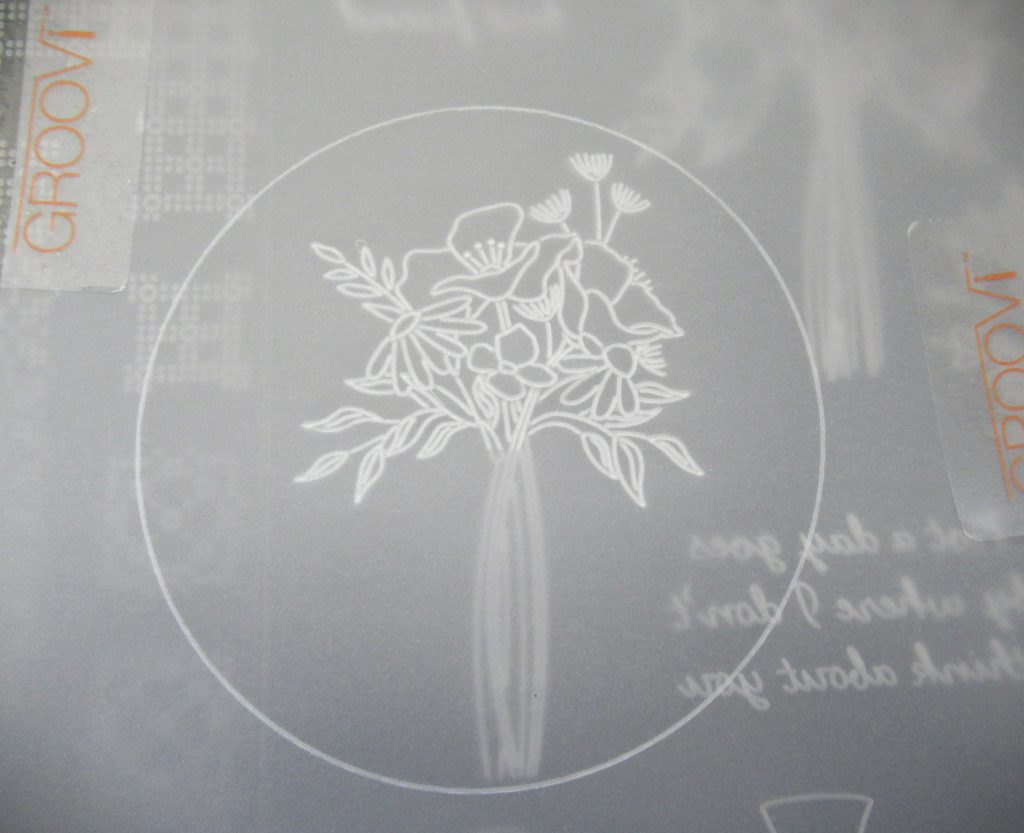
Step 6. Line the parchment up so that the flowers sit nicely in the vase.
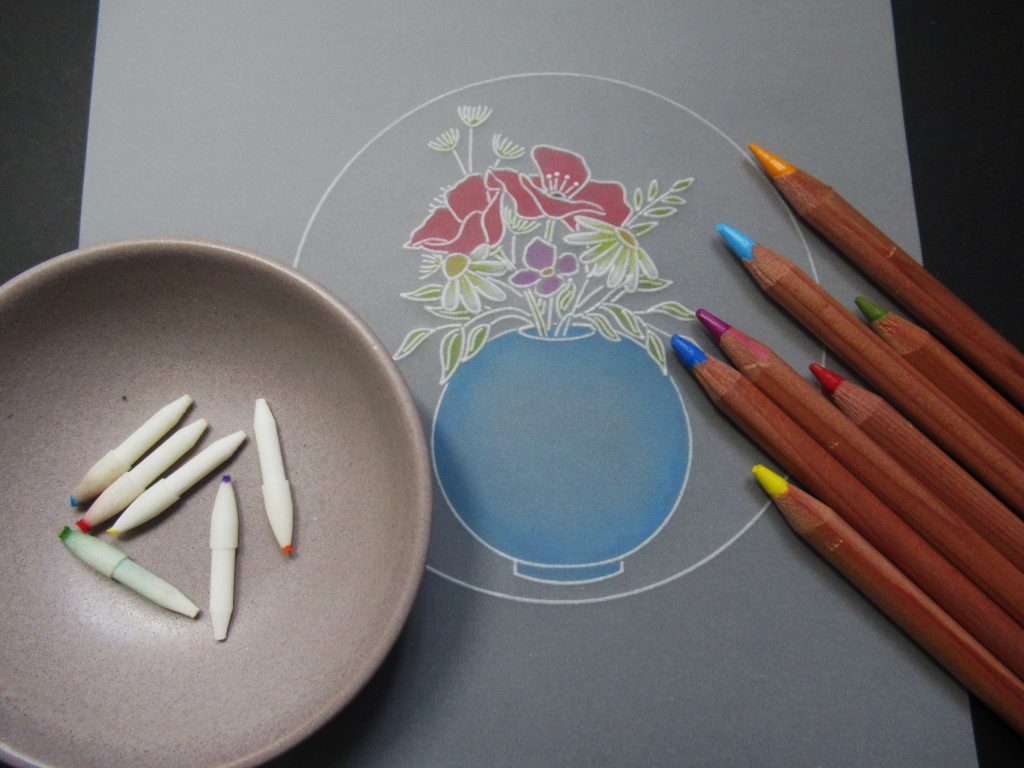
Step 7. Time to give it some colour. Using Perga Liner B pencils, (have used 4 and 16) to colour the edges of the bowl in the darker blue and the centre in the lighter shade. Spread out the colours with a blending nib and Dorso oil. The lighter colour in the middle of the vase will help give some shape.
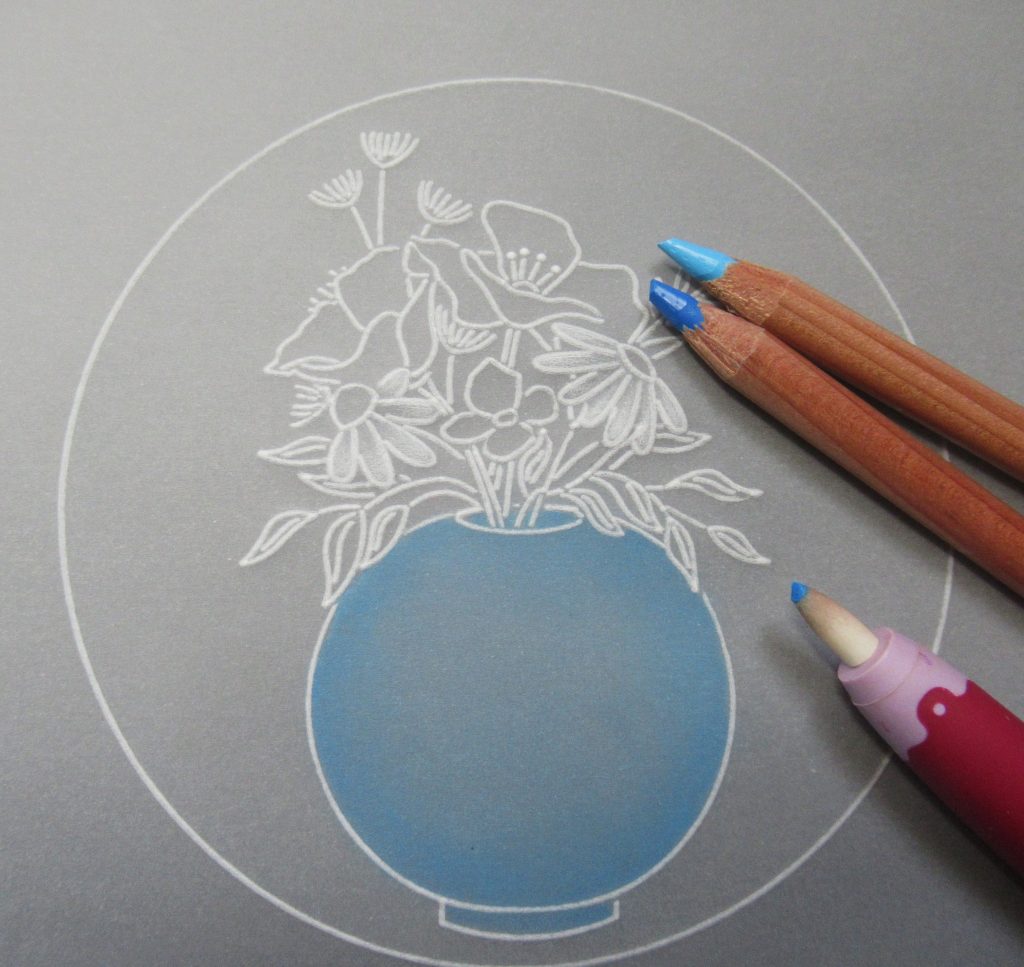
Step 8. Colour the flowers and leaves, again with Perga Liner B pencils 11 for the poppies, 8 for the daisy petals, 9 for the flower centres, 14 for the forgetmenot, 15 for all of the leaves. The centre of the poppy with 2.
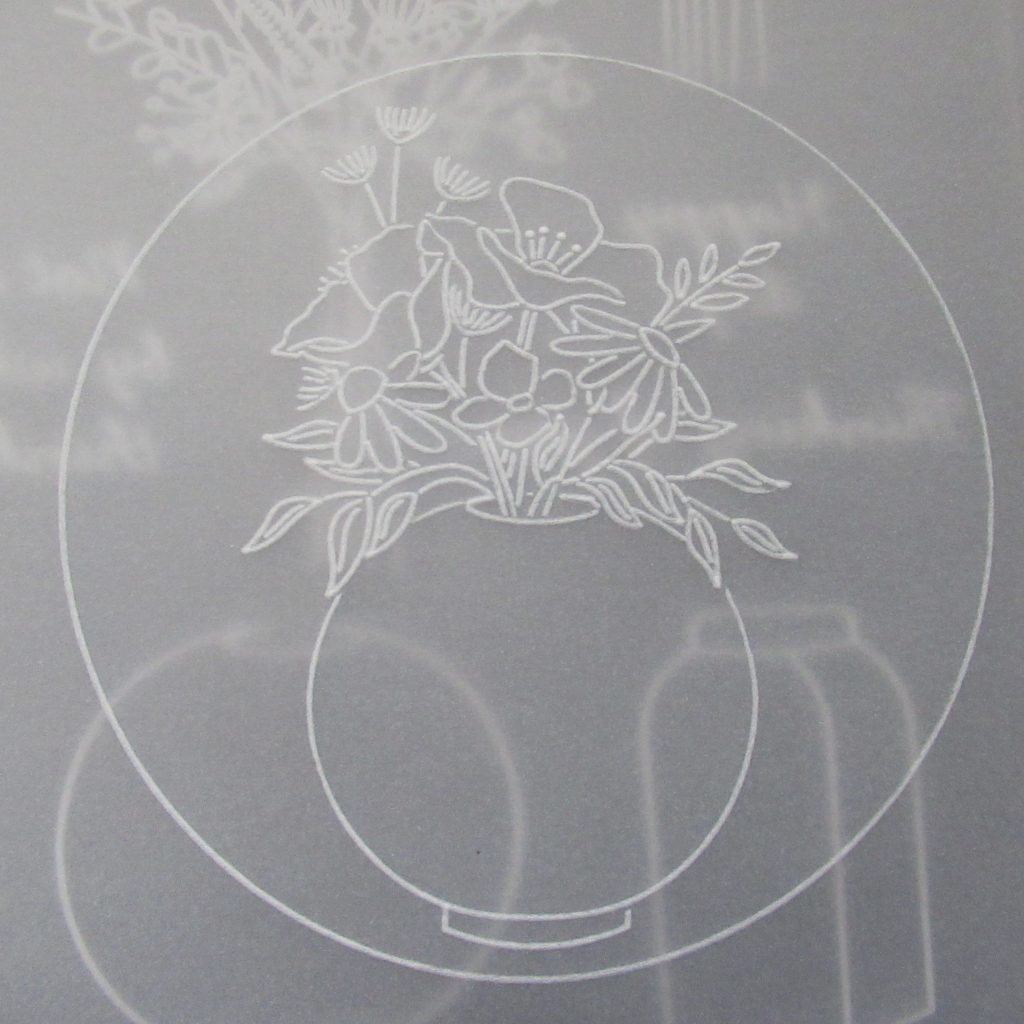
Step 9. Shallow perforate with the Five in a Circle tool, to add some extra fullness to the bouquet, and emboss some dots into the middle of the perforations, then go around the outside of the circle frame with a two-needle tool.
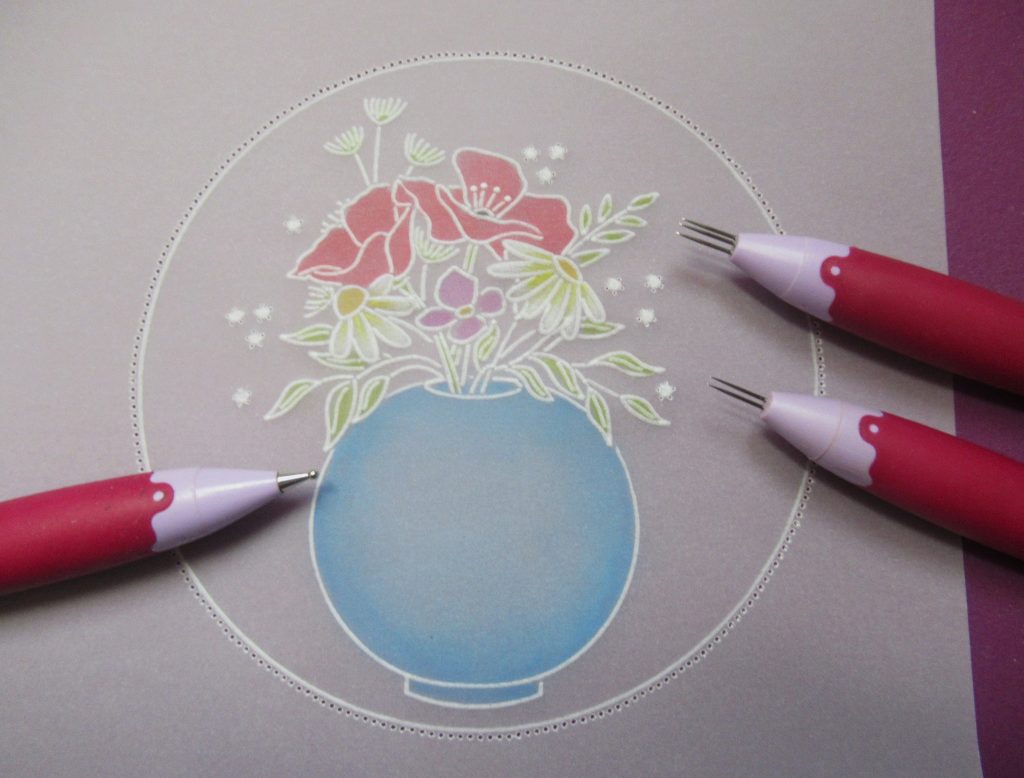
Step 10. Use a single needle tool to re-perforate the ‘five in a circle’ perforations and then snip out the circle.
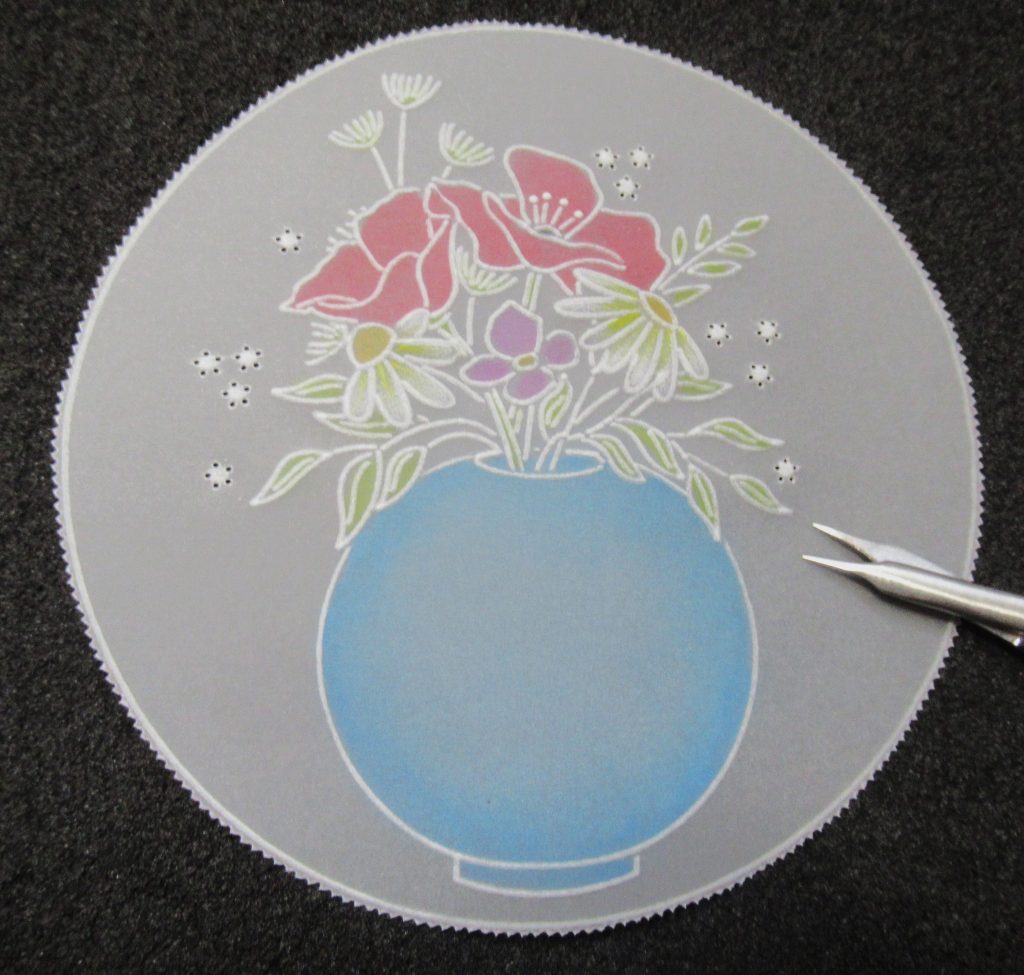
Step 11. As with all grids, Josie’s Circular grids come with a cutting guide, so follow this to help you to snip out the lace pattern. Also, perforate around the bottom of the sections. Then you can trap the circle into the frame.
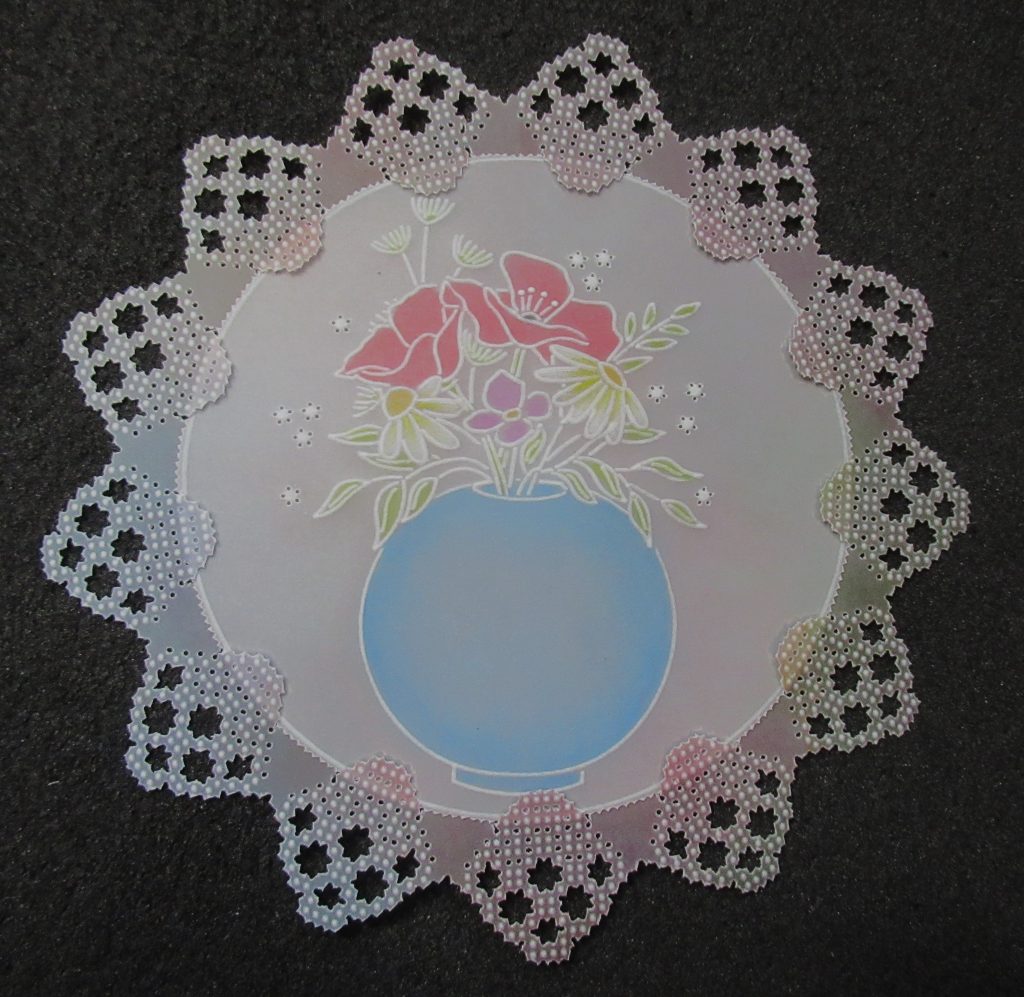
Step 12. Mat and layer the work, firstly onto a 5 x 5-inch piece of white card and then onto a 6 x 6-inch Kraft card blank.
How pretty is that? I just love the artwork Glynis creates. Always oh-so-special. And actually incredibly achievable when broken down into steps. Thank you, Glynis, for offering up your tips and tricks for the rest of us!
Everything that Glynis has used can be found on the Clarity website, HERE.
If you do give this project a try yourself, please remember to share it on Groovi Worldwide and/or email it to me (Grace@claritystamp.com). We love to see your work!
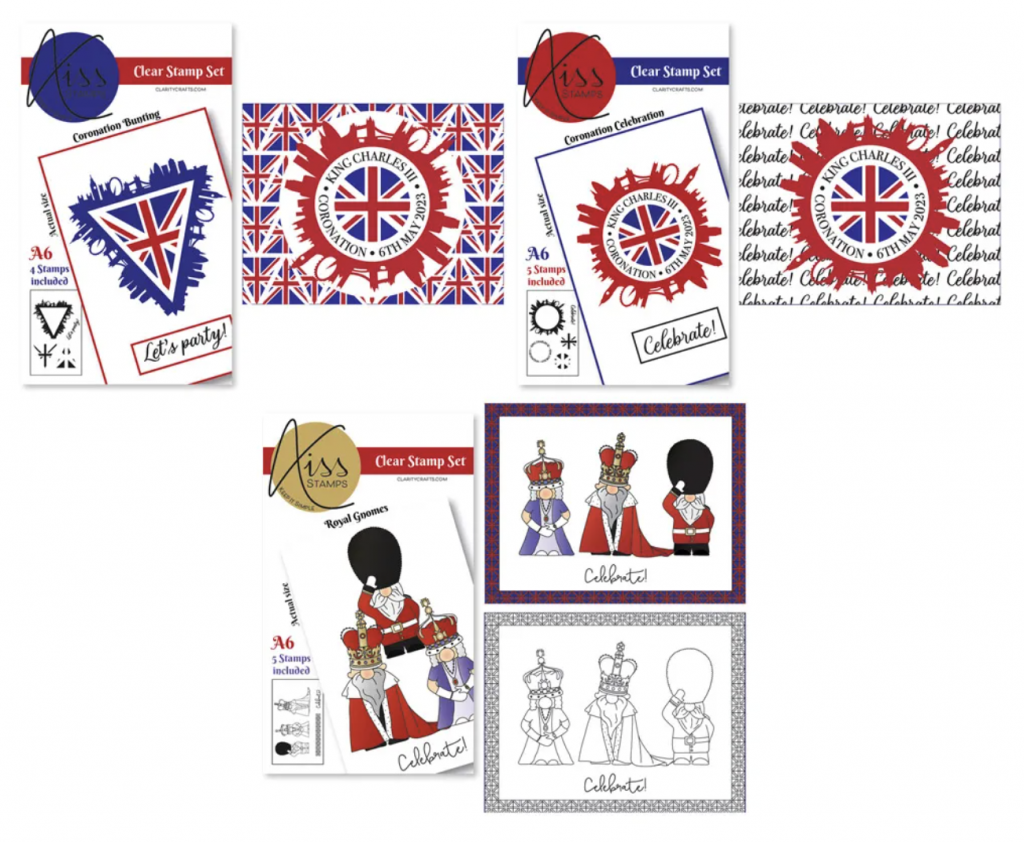
In other news… As many of you know, Mum and Dave are heading to Buckingham Palace on Wednesday, for the Coronation Garden Party!! How very exciting. Have you seen our CORONATION-themed products? They’re absolutely fabulous.
So special!
Looking ahead… it’s a somewhat quiet week (what’s that?!) but there are a couple Clarity things to look forward to, as always. Here is our schedule for the week ahead:
Tuesday 2nd May:
Groovi Tuesday with Paul – 10am Live on Facebook and YouTube
Sunday 7th May:
Clarity Classics with Barbara on Create & Craft – 2 hours – 3pm-5pm
We’ll see you there! But for now, we’re off to enjoy the rest of the weekend. I hope you do too.
Travel gently, friends.
Lotsa love, Grace & Glynis xoxo
Clarity – The Home of Art, Craft, and Well-Being.
Good morning Grace & Glynis, can’t believe I am first to comment but no doubt by the time I press post there will be more. Another great step by step by Glynis that makes it so doable for everyone as long as they have the plates of course but then its a great one to put on the to do list for when they have.
Thanks Glynis for doing these projects for us along with the rest of the DT that also contribute over the weeks.
Look forward to hearing all about the Garden Party, can see now why your mom chose the 3rd rather than the 9th as she has 2 hours on TV next Sunday which with the travelling must be tiring.
Have a great day & week everyone xx
That is very pretty ! Thank you,Glynis.
Thank you Glynis and Geace for giving us another great project.
Thank you Grace and Glynis beautiful as usual. I am having difficult seeing to do pricking but could probably do the flowers. Have a lovely weekend xxxx