Clarity Matters Blog Tutorial: How To Create A Reflection
Hello hello! Grace here.
I hope this finds you safe, well and enjoying your Sunday. It’s Mothering Sunday! Happy Mother’s Day to all you Mothers out there!
We are joined today by the fabulous Jane Telford. She has kindly taken the time to put together a step-by-step blog tutorial. I’ll hand you right over to Jane!

In this step-by-step project, I will show you how to create a reflection using the mini gel press and add a brayered edge to the card. The little gel press shapes are fantastic for giving instant backgrounds but they can also help with creating reflections.
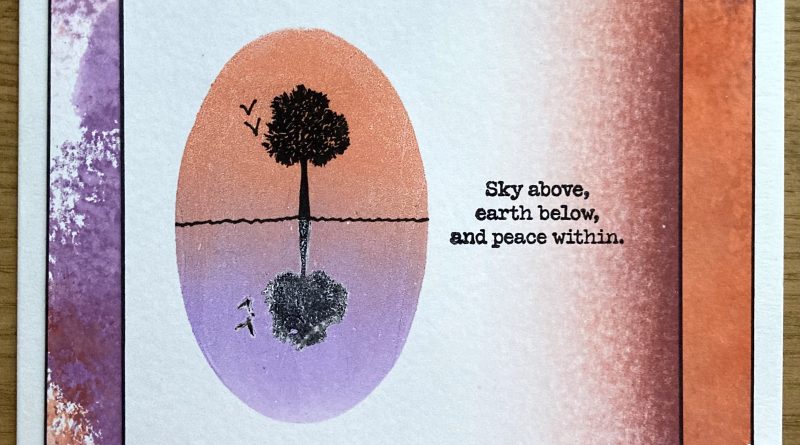
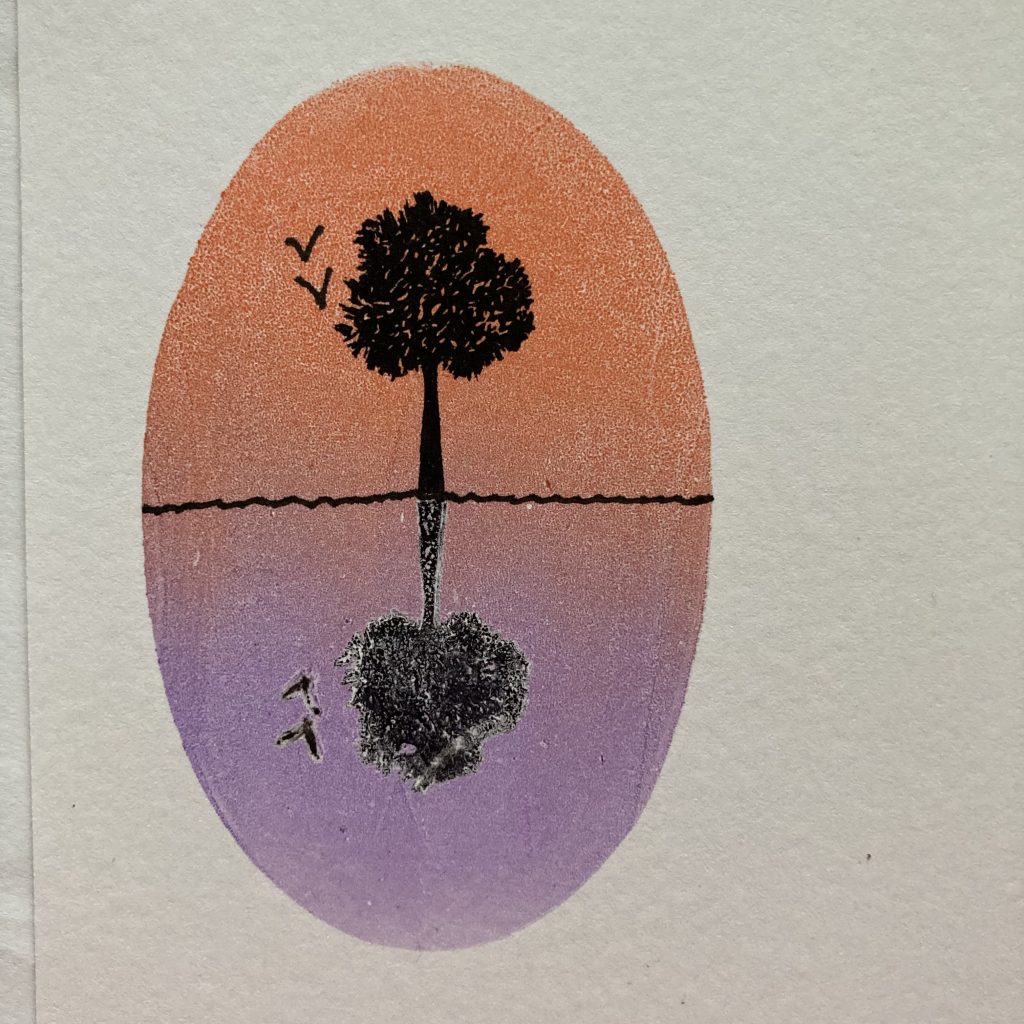
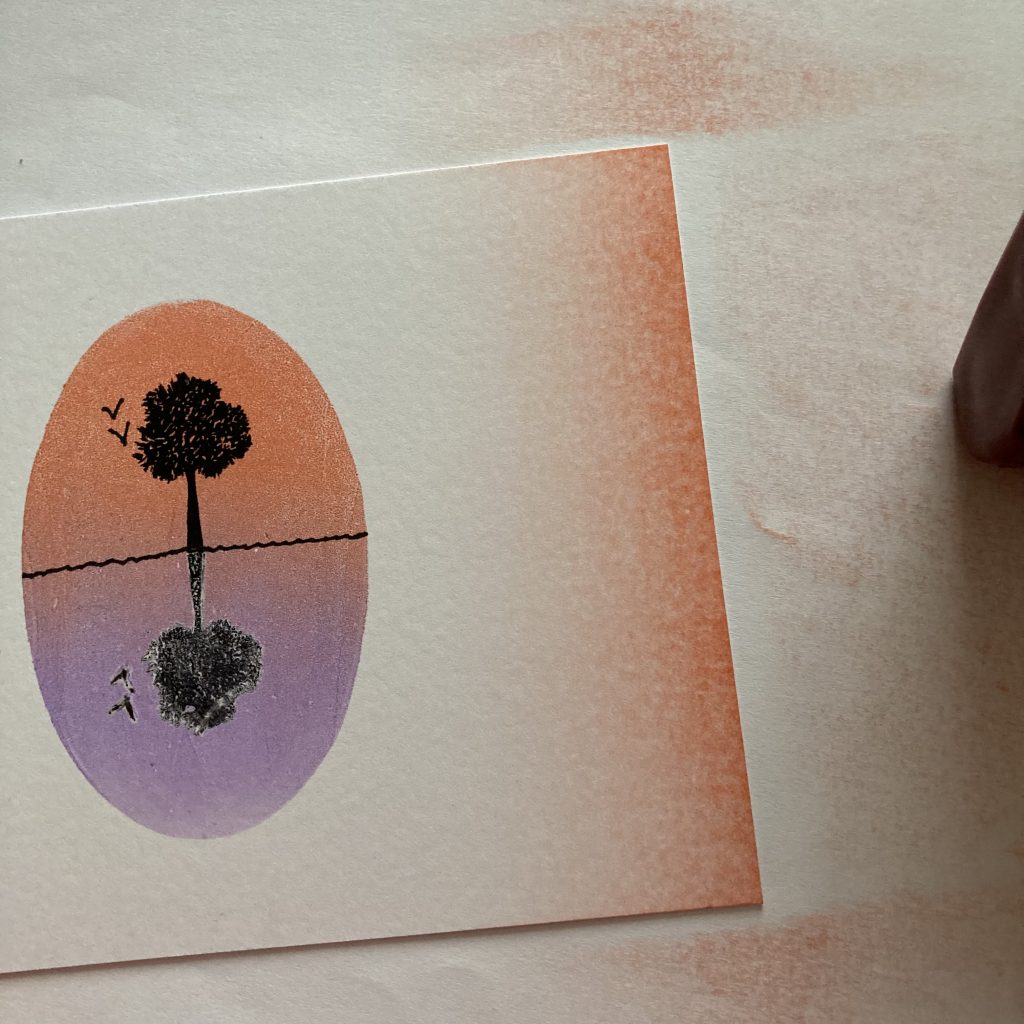
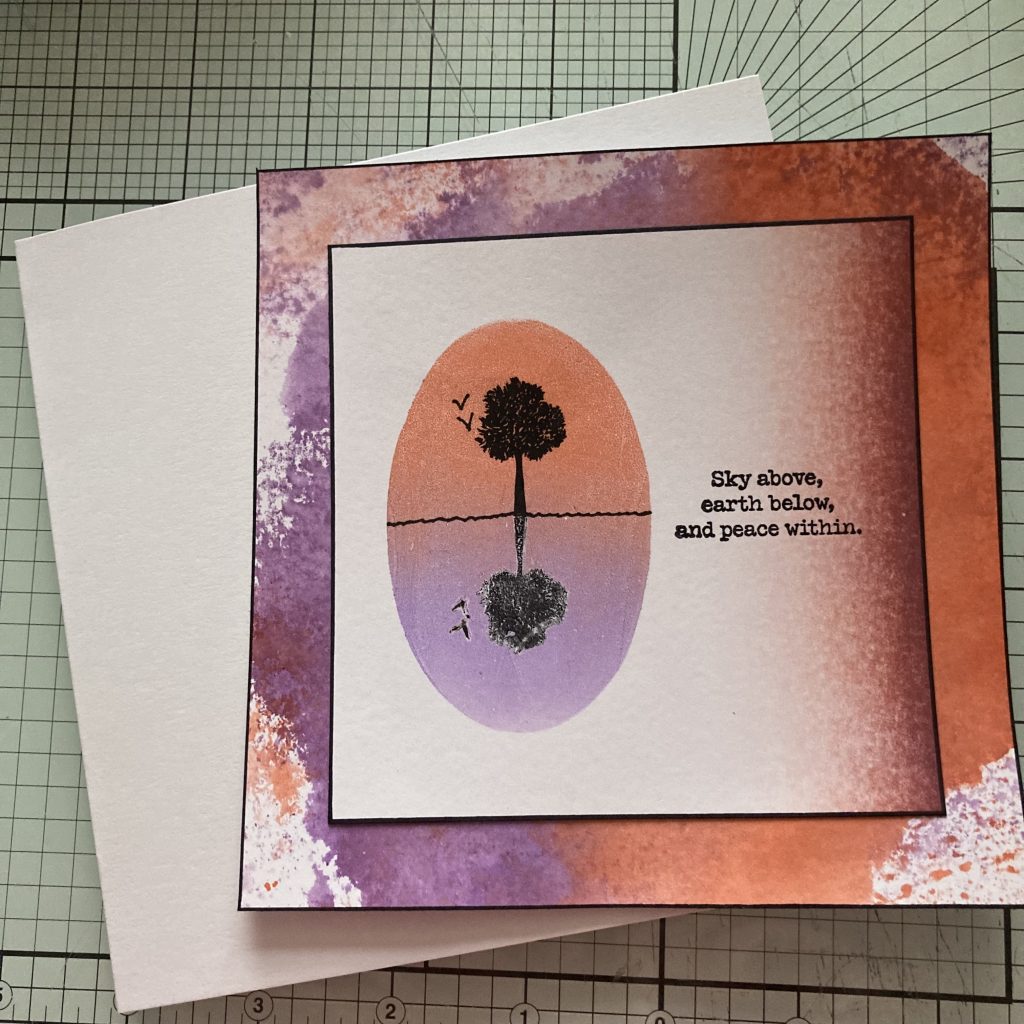
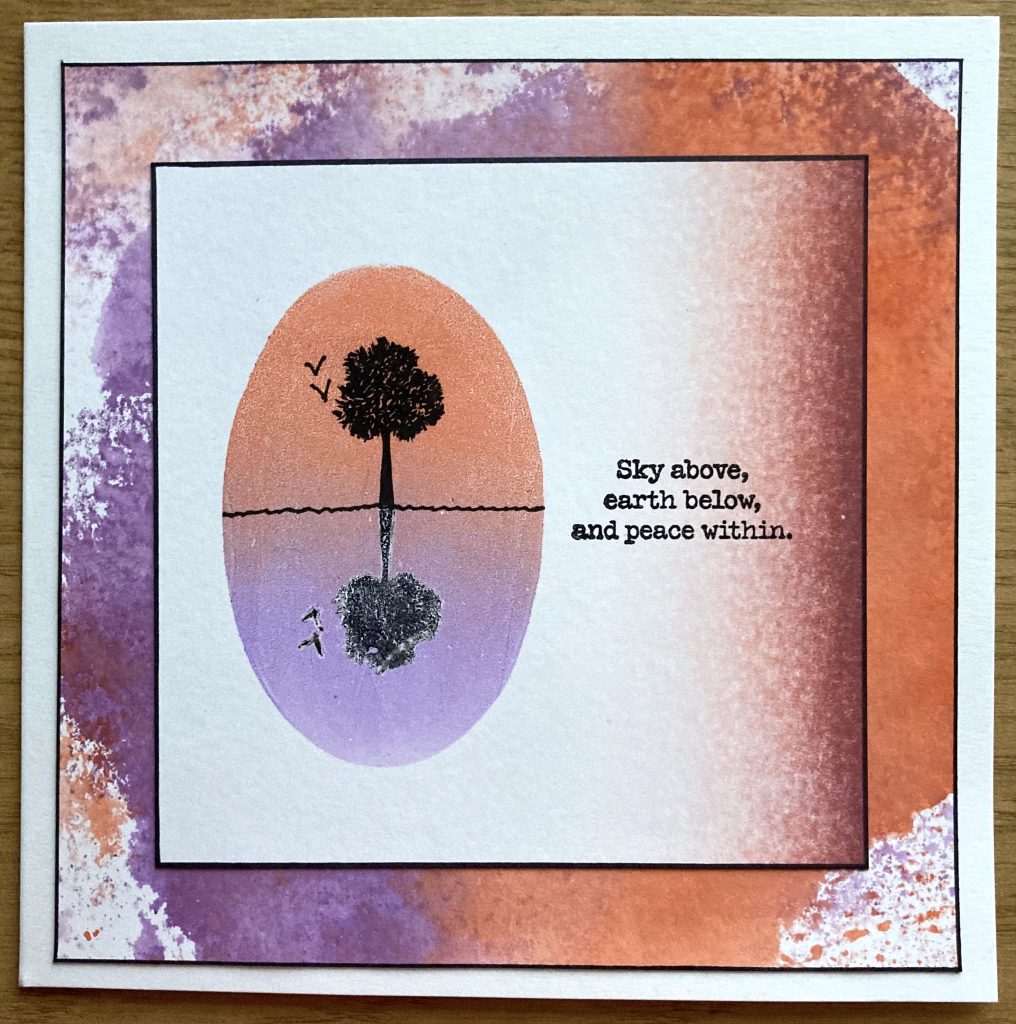
This is where we are headed.
Ingredients
7×7 Stencil Card (ACC-CA-30095-77)
Kiss By Clarity Build-A-Scene Grunge Trees A6 Stamp Set (STA-TR-11468-A6)
Gel Press Petites Set 2 (Rectangle, Oval & Hexagon) & Mega Mount 4″x4″ (ACC-GP-31380-XX)
Distress Ink Pad – Wilted Violet (INK-DP-50352-XX)
Distress Ink Pad – Ripe Persimmon (INK-DP-50096-XX)
Archival Ink Pad – Jet Black (INK-AR-50030-XX)
Speedball Brayer (ACC-BY-30096-XX)
Clarity Blending Mat A4 (ACC-MS-30214-XX)
Micron Pen Set Of 7 (ACC-PE-30778-XX)
6×6 Card Blank (ACC-CA-30618-66)
A4 Paper
Black Sharpie Pen
Method
These are all the things you’ll need to start with…
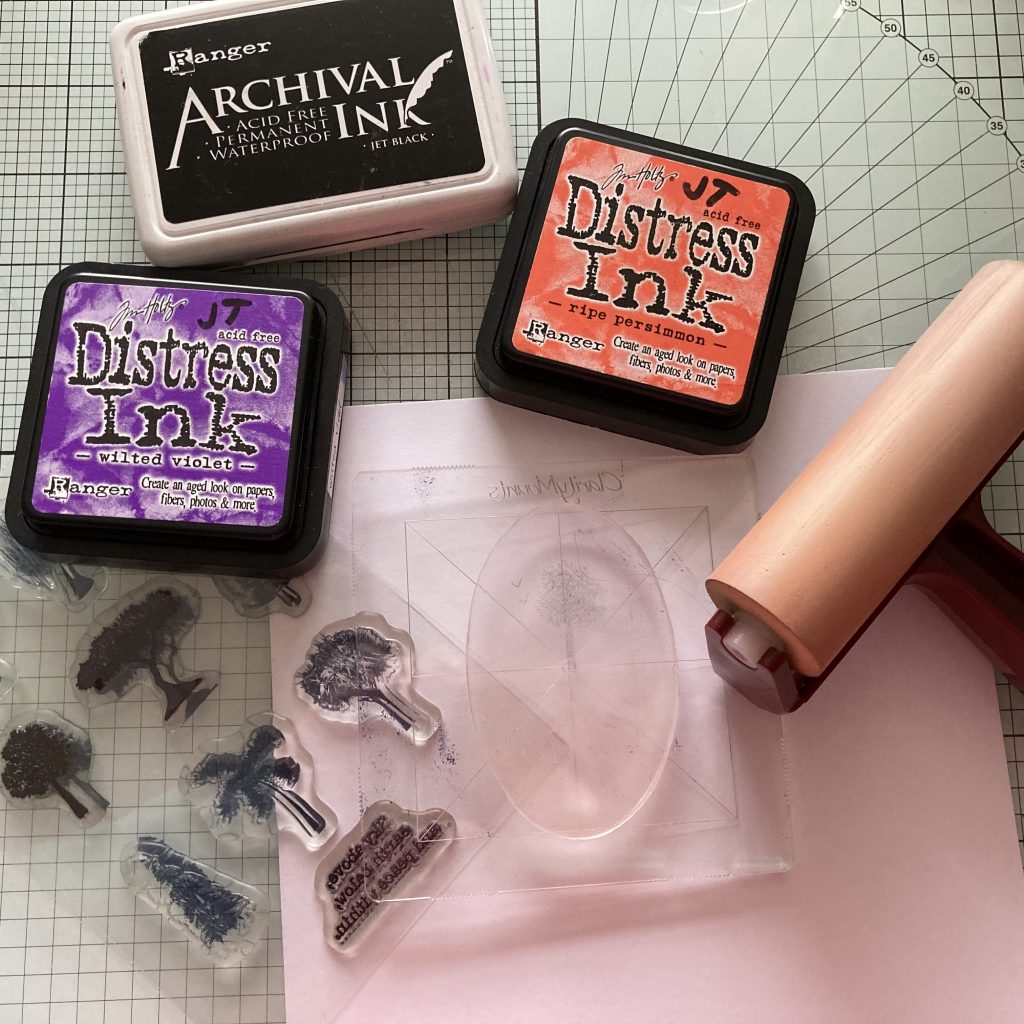
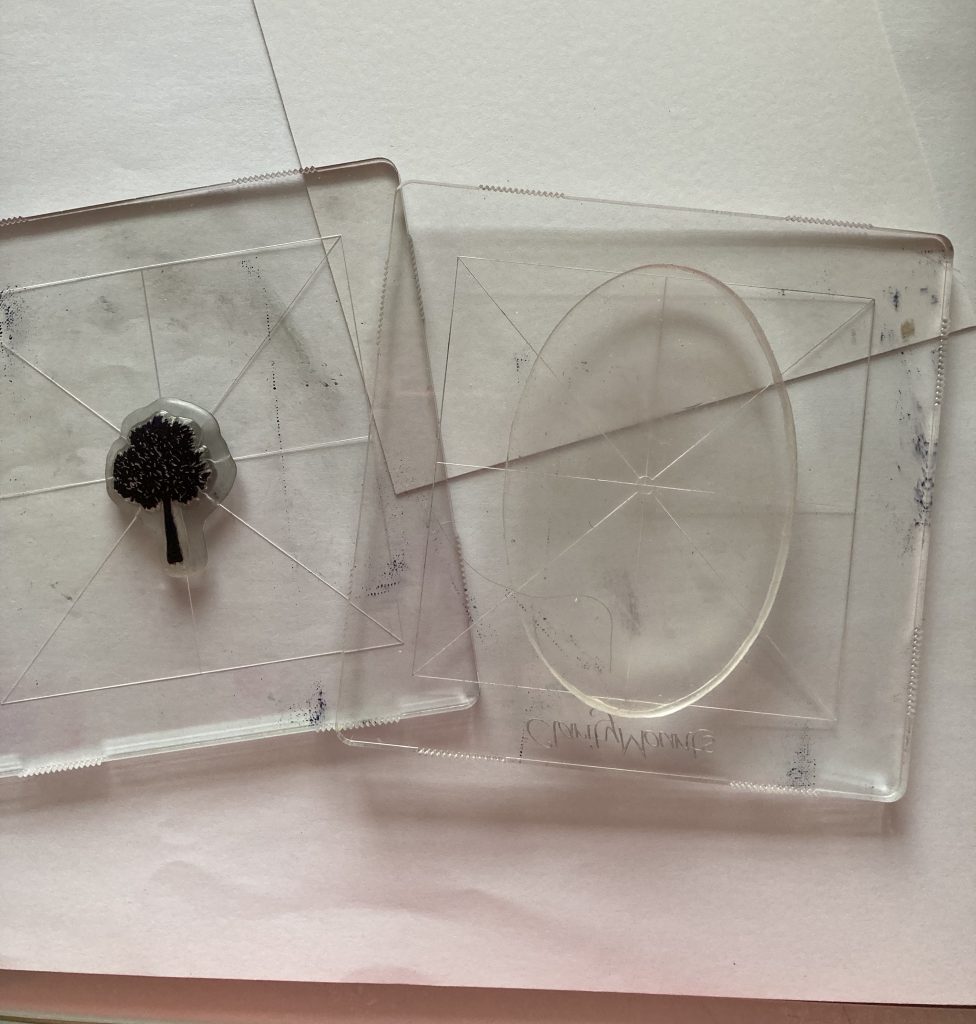
Step 1. Put the oval shape on the 4×4 mega mount and choose the tree you want to use. Put that stamp on another mount. Cut the stencil card to 11x11cm.
Step 2. Add ink direct from the pad with orange at the top and purple at the bottom. Leave a little gap between them so you don’t contaminate your ink pads.
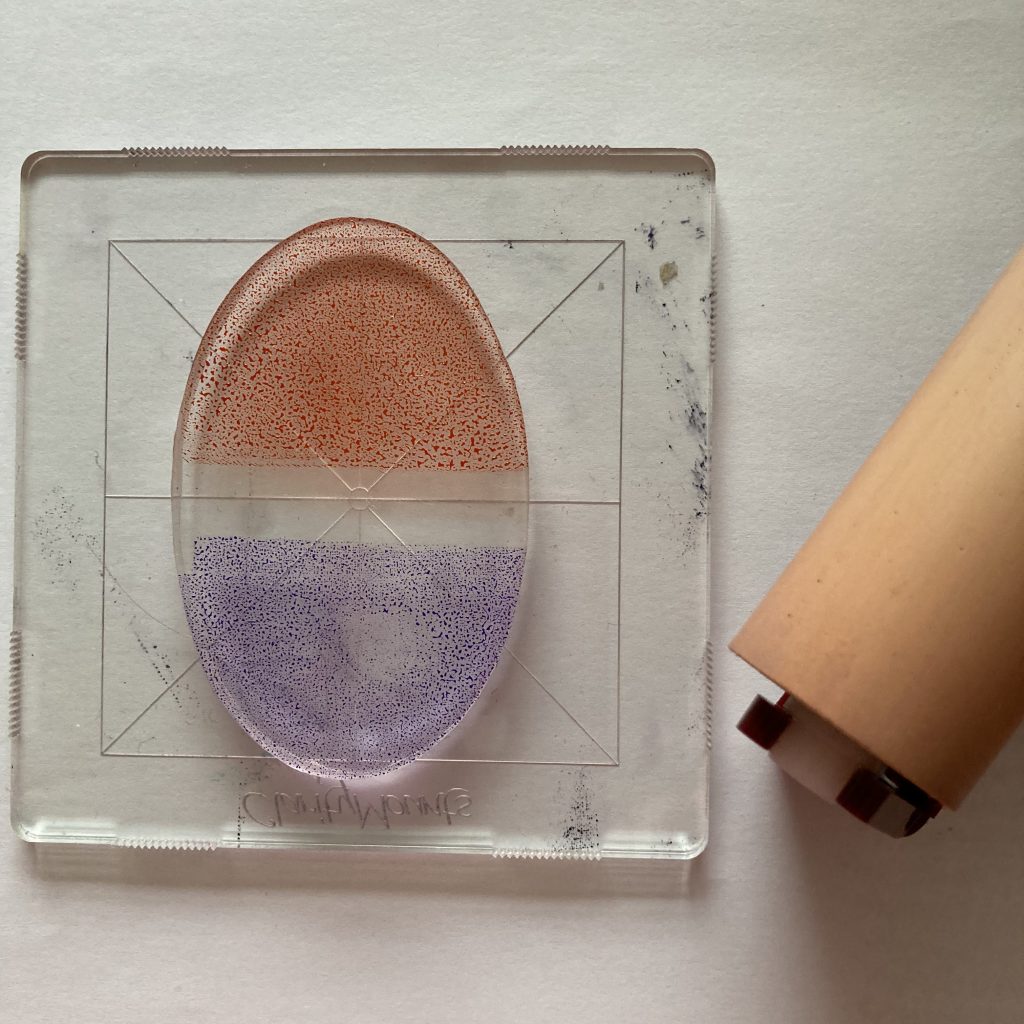
Step 3. Use your brayer to smooth out the ink and blend it a little in the centre by moving up and down slightly. Don’t overdo this or the ink will mix too much. Clean off the brayer to use again later.

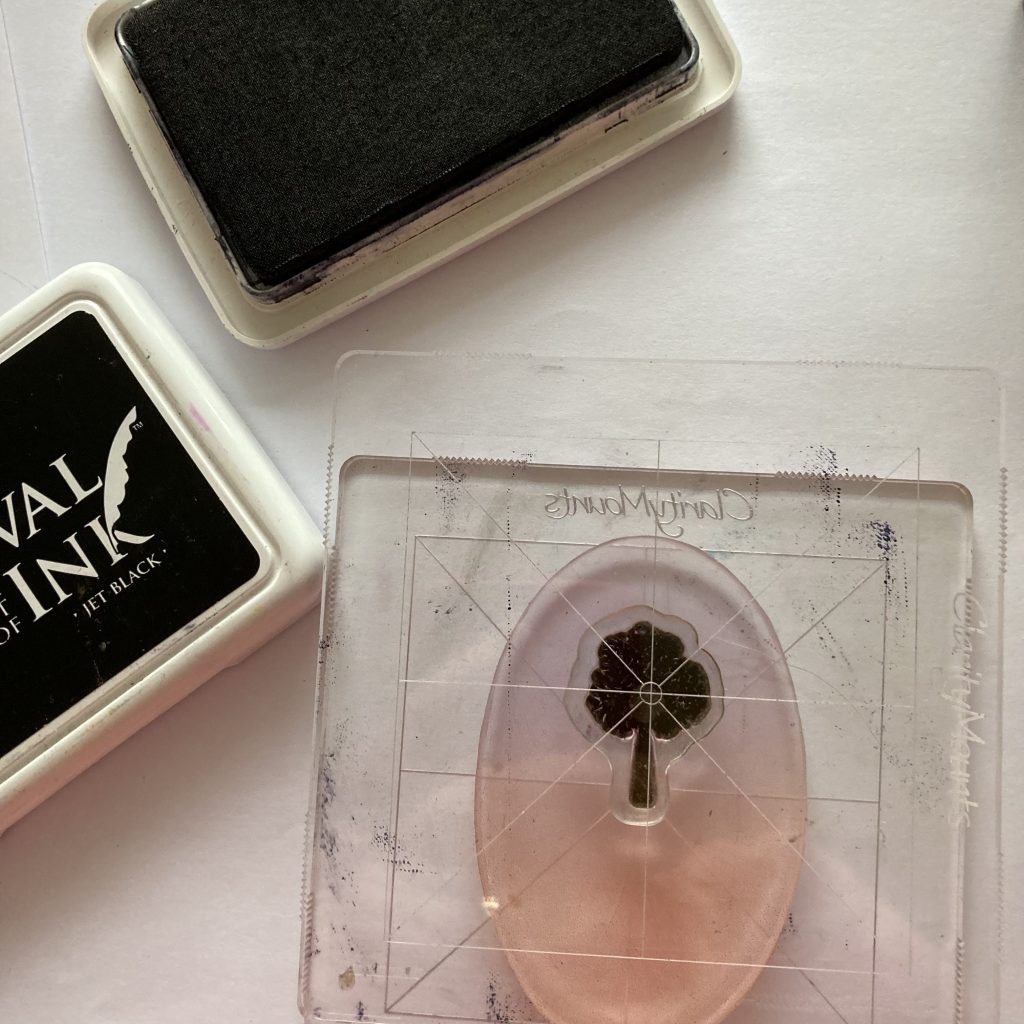
Step 4. Ink the stamp with black Archival and stamp it in the purple end of the gel press. I found it easier to turn the mount around so the purple was at the top. Be careful not to slide and also don’t press it on too hard.
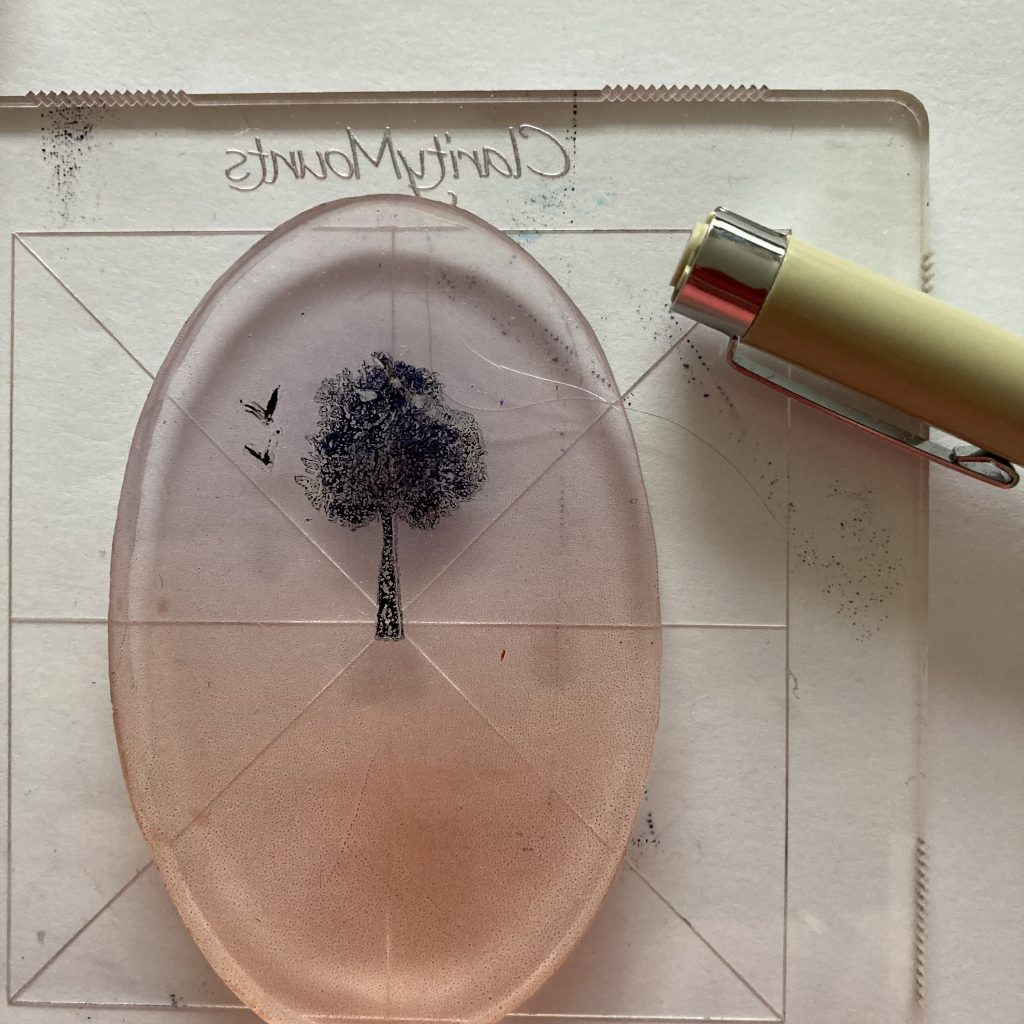
Step 5. Use a black micron pen to draw some bird shapes on the gel press. Again, don’t press too hard.
Step 6. Turn the mount round so that the orange is at the top, then pick it up and position it over to the left of the card but central from top to bottom. Press firmly to transfer the ink. You will be able to see this happening.
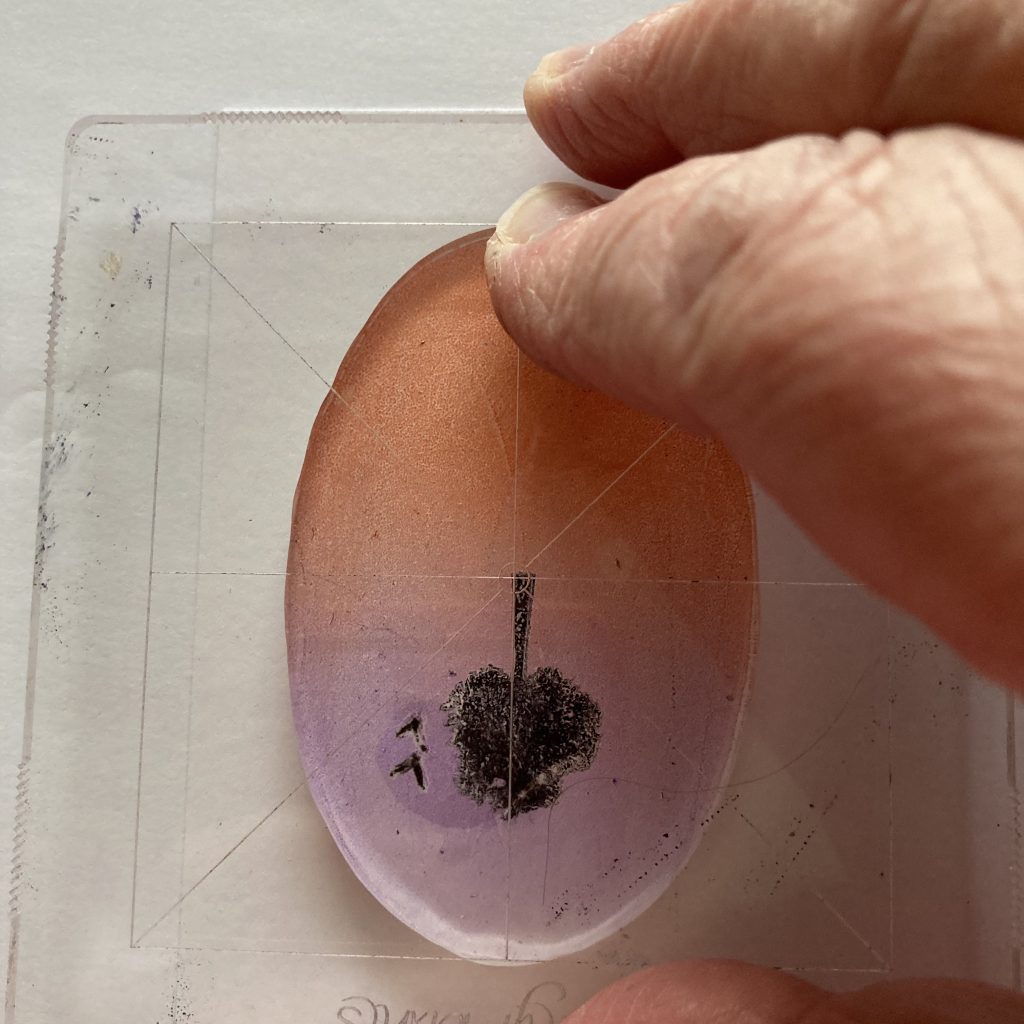
Step 7. Lift the gel press away from the card and it should look like this. You can clean the gel press with water and a paper towel to get rid of any excess ink. If the black has stained it, a little blending solution will bring it off. The staining does not stop it from working in the future, however.

Step 8. Ink up the stamp again with the black Archival and stamp into the orange end so the trunk bases line up. Use a micron pen to draw in the birds.
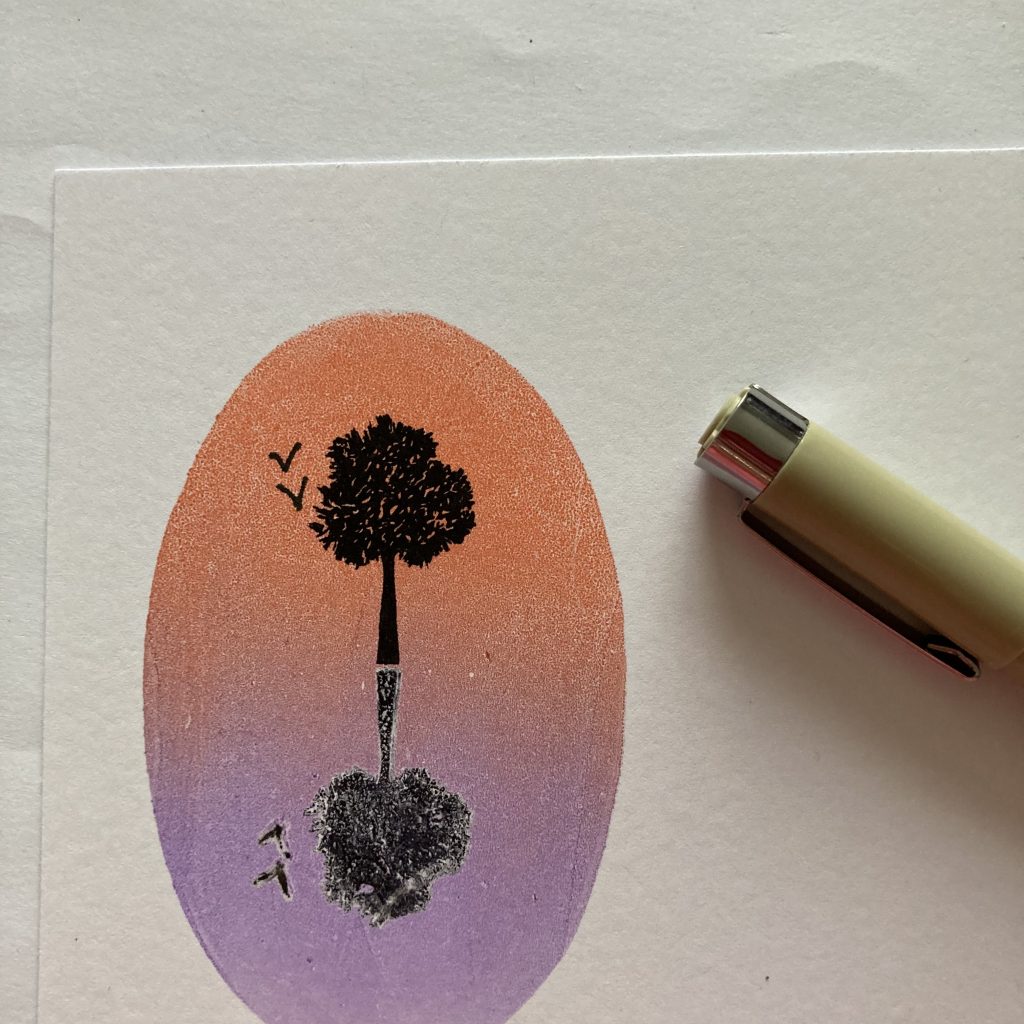
Step 9. Draw a wiggly line across the oval shape at the point where the two trees meet.
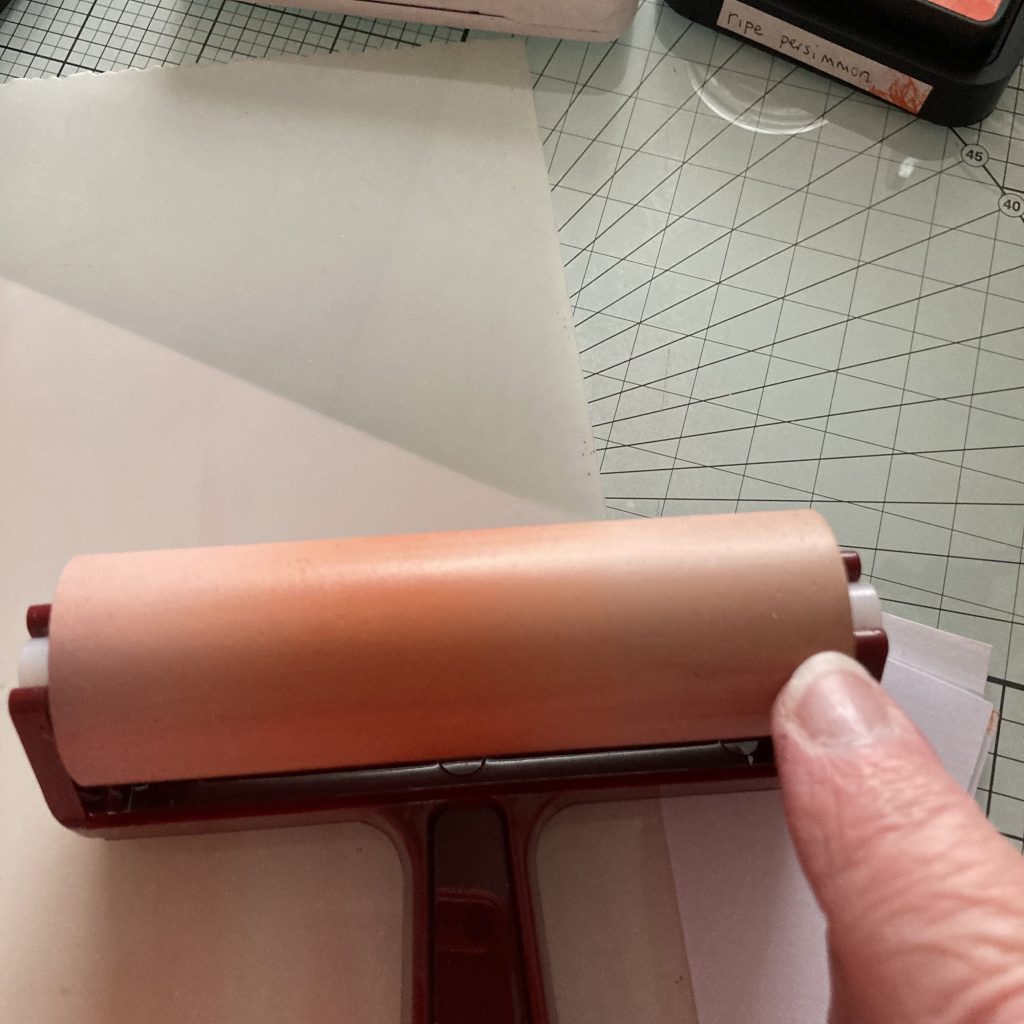
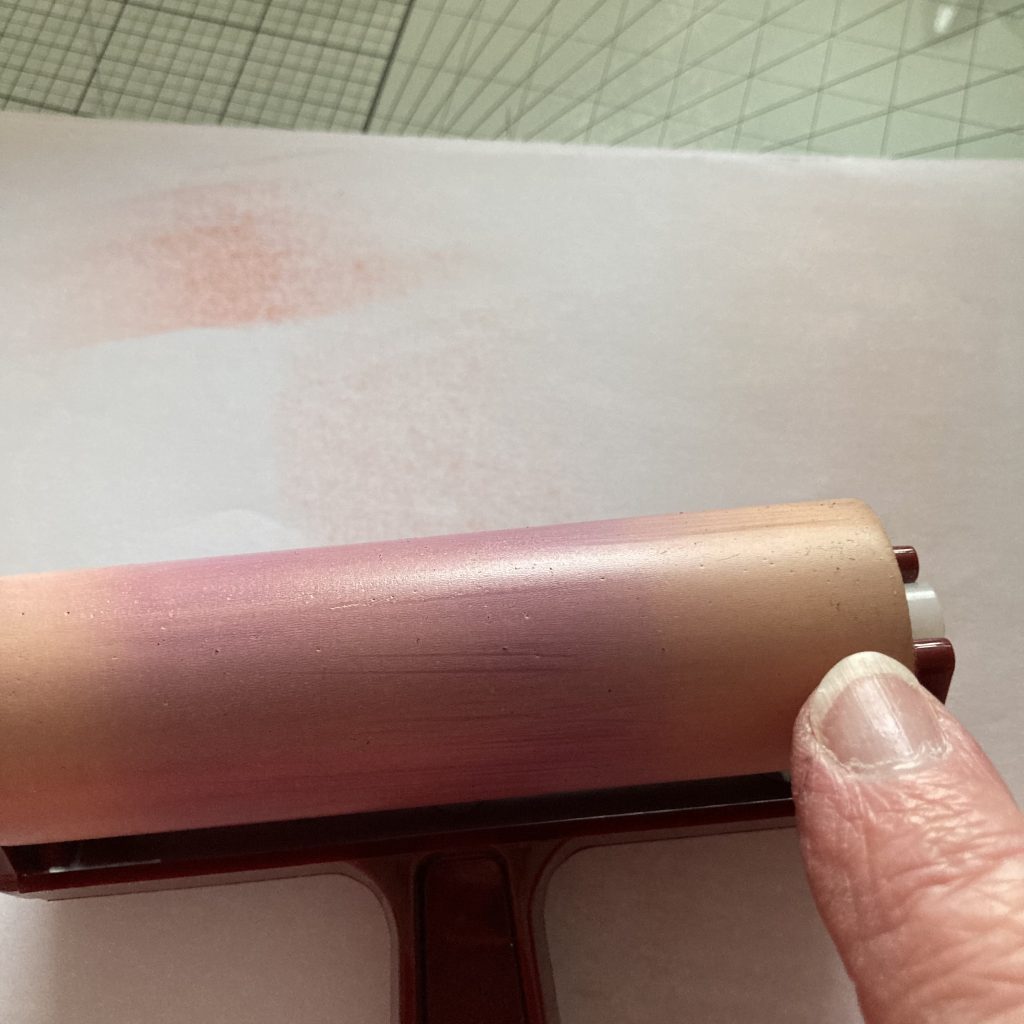
Step 10. Take the clean brayer and put some orange ink on one side of the blending mat. Smooth it out with the brayer leaving the part nearest your thumb free from ink. It will depend if you are right or left-handed as to which side needs to be clear.
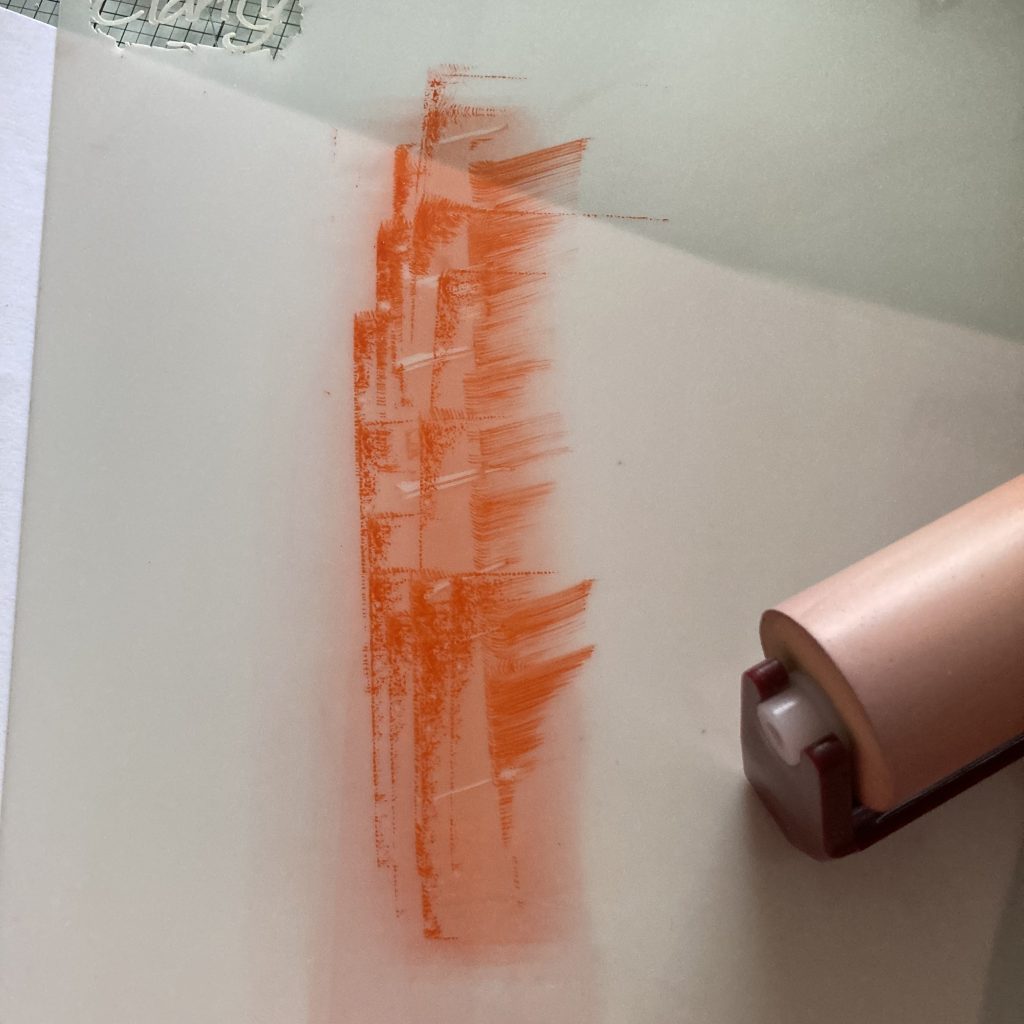
Step 11. Starting off the card, roll the brayer quickly up and down over the edge and bring the ink into the centre of the card. Clean the brayer.
Step 12. Repeat this process with purple ink but don’t bring the purple ink in as far as the orange. Leave any ink on the blending mat.

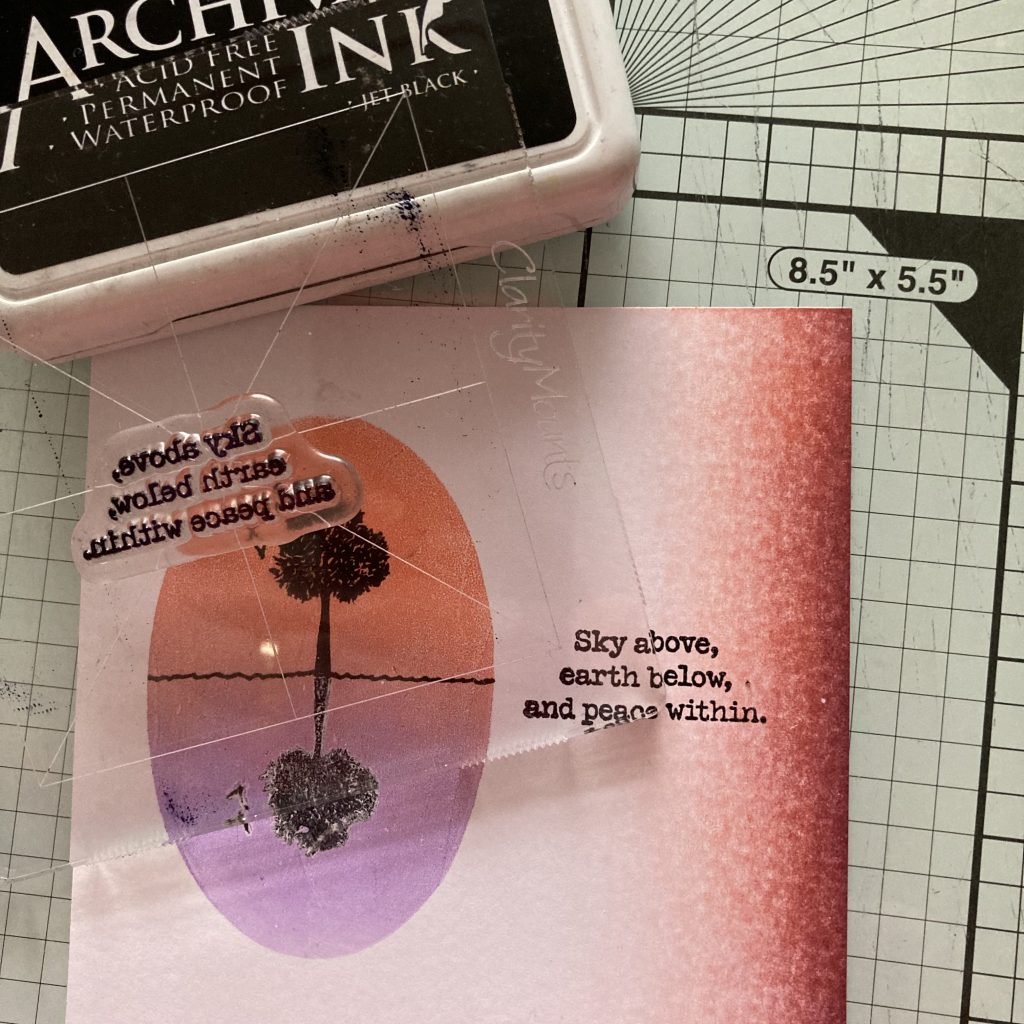
Step 13. Put the sentiment on a mount and stamp it into position with the black Archival ink pad.
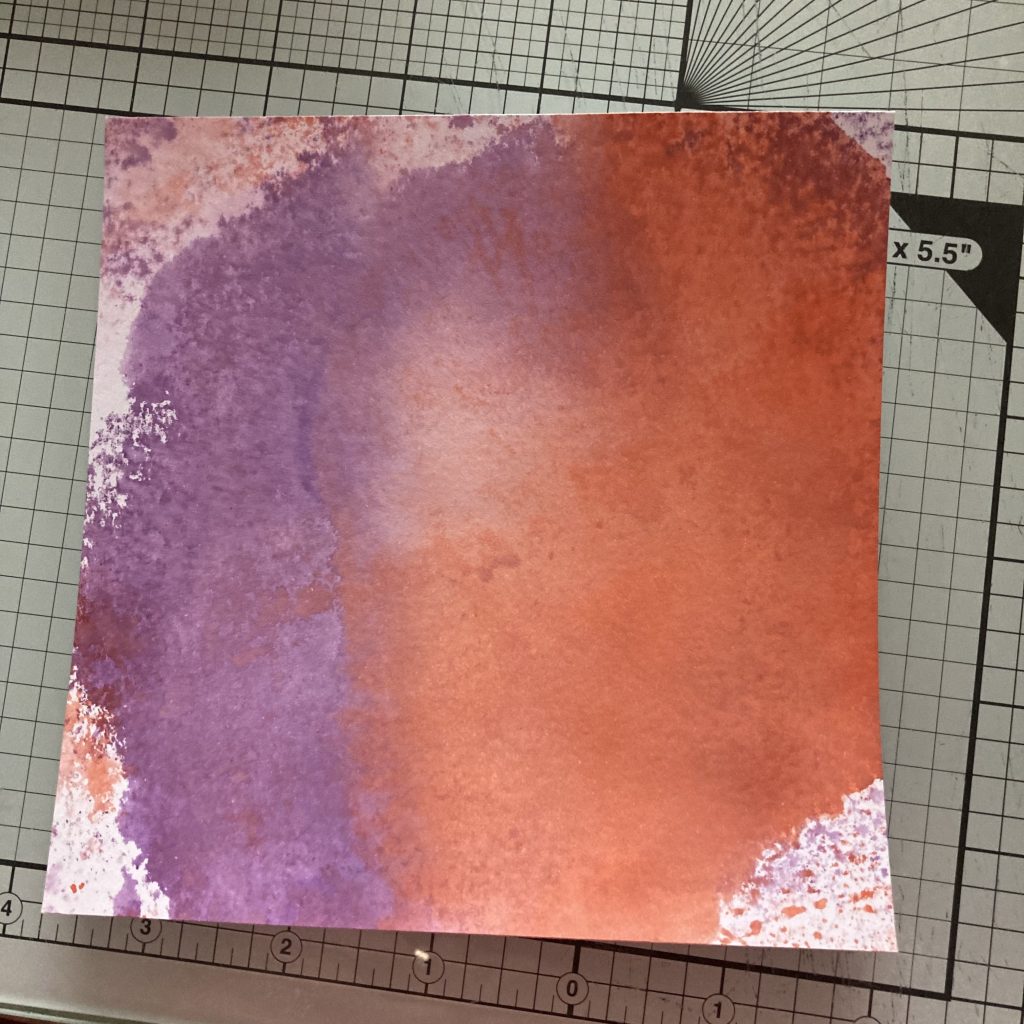
Step 14. Take a second piece of stencil card. Spritz the ink that is left on the blending mat with water and drag the card through the ink. Add more ink if you think you need it. Lift and move the card dabbing it into the ink until most of the card is covered. Some white parts are fine. Dry this thoroughly with a heat tool, then trim it to measure 14x14cm.
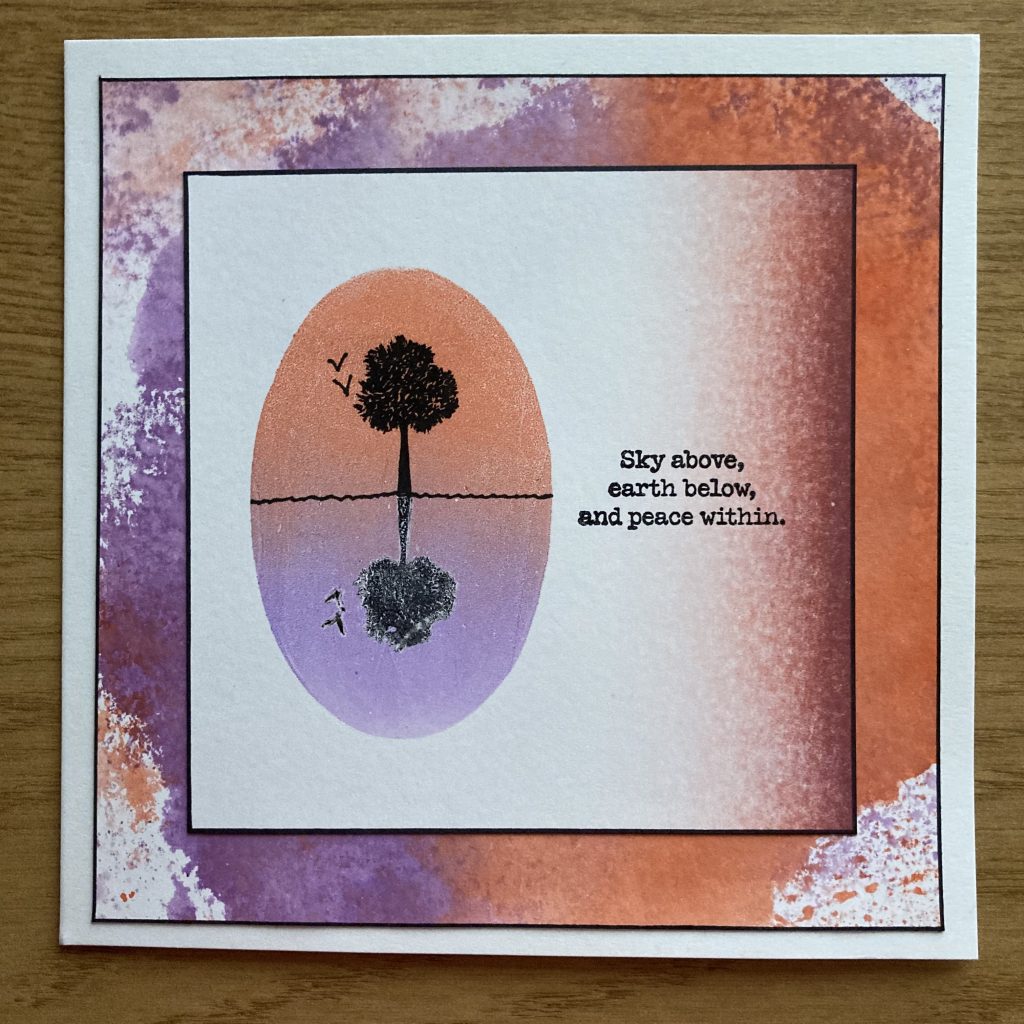
Step 15. Edge both pieces of card using a black sharpie pen. Stick the topper to the background piece then adhere this to the front of a 6×6 card blank.
The project is now complete!
Wow, Jane! That is a gorgeous card. I just love that reflection effect. Thank you for sharing your tips and tricks with us. We appreciate you!
If you’d like to have a go at this project (or any of our step-by-step blog tutorials) then don’t forget to post your artwork on our Facebook Communities; Clarity Worldwide and Groovi Worldwide.
Everything Jane has used can be found HERE on the Clarity website.
Now, looking at the week ahead:
Monday 20th Mar:
SHAC Shack with Barbara – 10am Live on Facebook and YouTube
Tuesday 21st Mar:
Groovi Tuesday with Paul – 10am Live on Facebook and YouTube
Thursday 23rd Mar:
The SHAC Shows with Barbara & Paul on Create & Craft – 3pm & 7pm
Friday 24th Mar:
Crafting with Clarity with Barbara on Create & Craft – 9am & 1pm
Friday 24th Mar:
Crafting with Clarity with Paul on Create & Craft Extra – 11am
Saturday 25th Mar:
Get Groovi with Tina on Create & Craft – 1pm & 5pm
How exciting that Mum is back in the SHAC! Our bus driver is back, and I’m sure she’ll have a warm and busy welcome back.
Happy Mothering Sunday!
And we’re still the same Grace & Mum Team.
For now though, I’m off!
Travel gently, friends.
Lotsa love, Grace & Jane xoxo
Clarity – The Home of Art, Craft, and Well-Being.
Thanks Jane for another great step by step to show how to do a reflection. I bought the mini gel plates at the NEC after watching Barbara work her magic with them in 2019 I think, which would have been the last time we were there before the pandemic & also celebrating Barbara’s 60th birthday. They have for the majority of that time sat on my shelf – where I can see them every time I reach for a Clarity folder – so its about time I dusted them down & started playing with them.
It won’t be today though as we have the family coming for lunch to celebrate Mothering Sunday after I have taken mom to church. She finds it strange after probably more than fifty years that she is not the one organising the flowers for the children to take home but its time for her to sit back & let someone else take the reins.
Take care everyone, its going to be a busy week at Clarity Towers xx
Thank you so much for this Jane. I’ve always been very wary of trying this technique for a reflection as I didn’t want to ruin my geli plate, didn’t know I could clean it with blending solution to get rid of the stain. It was the staining I didn’t like as I find it distracting when using the plate again. I’m certainly going to give this a try now. Have a good week everyone xx
Happy Mothers Day Jane, thanks for a fabulous step by step.
Hope you have a wonderful day.
Happy Mother’s Day to Barbra too. Glad you feeling better.
Love me and Miss K
Brilliant tutorial Jane, might even give it a go myself even though im not really a stamper! That’s the real test when you manage to get some converts!!! Have a lovely rest of the weekend Grace and love to all and Happy Mothers Day xx
Love this Jane. Brilliant step by step instructions.. Cannot wait to have a go. Thank you for sharing your skills and knowledge. X
Never thought to use the mini gel plates, always used the Brayer to do reflections as shown by Barb in the early days. Now I know they can be cleaned with blending solution I will use them more.
Thank you both for this step by step, it looks great.
Good to see your mum back on the bus. We have missed her and look forward to the 300th show.
Take care 🍒
This is wonderful, will definitely try it. So looking forward to the SHAC tomorrow! Have a good Mothering Sunday all those who miss their mothers and those who are mothers themselves.xx
wow Jane that was a lovely project and very informative. You bet I will be doing this one, thanks
great step-by-step Jane – thank you! I’ve got mini gel plates and never get them out to use. No excuse not to, now!
Thank you Jane, for this great step-by-step demo. I need to give this a go. xx
Jane, brilliant, love your step by step and beatiful out come xx
Hi Grace, love the photos of you and your Mum. Thanks for the step by step Jane, have everything I need, have to give it a go. Take care everyone. Bx
Hi Grace,
Is it your birthday today or have I got that wrong. If it is then Happy Birthday to you.