Clarity Matters Blog Tutorial: How To Make A Bookmark Card
Hello hello! Grace here.
I hope this finds you well and enjoying your Sunday.
We are joined by the wonderfully talented Maggie Byford. She has kindly prepared a fabulous step-by-step project for us, using Tina’s Daisy Frame & Dandelion Tag Plate.
I’ll hand you right over to our lovely teacher…

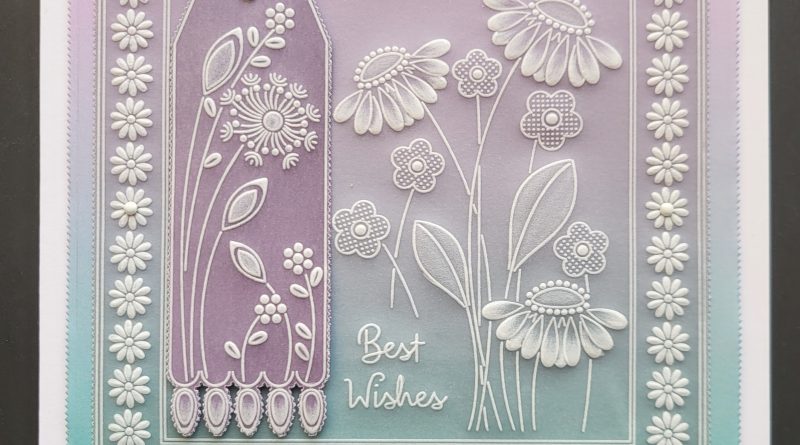
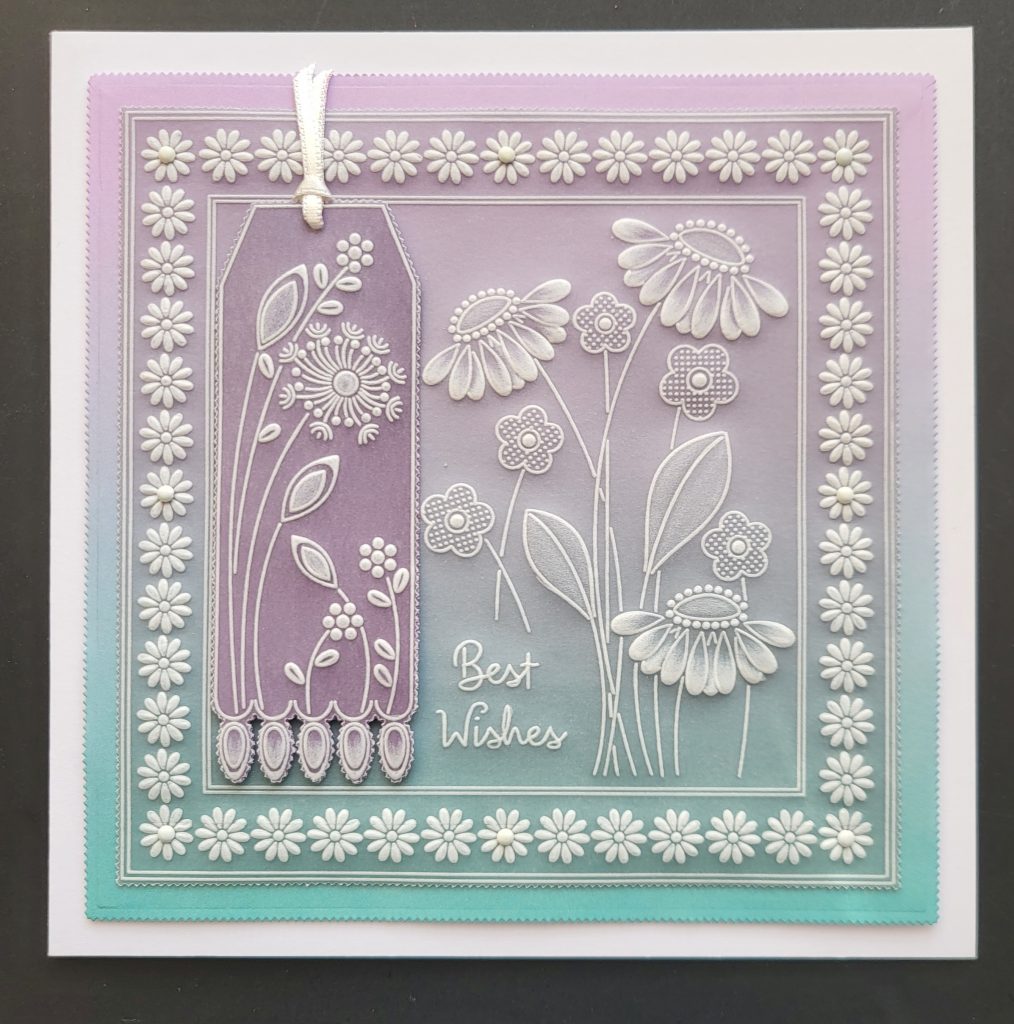
In this tutorial I’d like to show you how I made this lovely Bookmark Card. I was inspired to make this when I first saw Tina’s Daisy Frame and Dandelion Tag Plate. The tag design on it made me think it could double-up as a matching Bookmark to be enclosed with the card as a gift. Or perhaps it could become a part of the card in that it could be temporarily attached to the front whilst in transit, then be removed and used by the recipient when the card is no longer on display! Here is what the card looks like with the Bookmark attached.

The basis of my Card and Bookmark is embossed Whitework, but if you prefer to add colour in the areas I’ve embossed then please do so using any medium of your own choice. Also, at the end of my Instructions you’ll see I’ve given you 4 different ideas for bookmarks which I hope will inspire you to design some of your very own!
INGREDIENTS
Tina’s Daisy Frame & Dandelion Tag A5 Square Plate GRO-FL-41180-03
Barbara’s Christmas Sentiments A5 Plate GRO-WO-41608-03
Special Day Sentiments A5 Square Plate GRO-WO-41408-03
Alphabet A5 Square Plate Mate GRO-MA-40002-07
Nested Square Picot Cut A4 Square Plate GRO-PA-41035-15
Nested Squares Die Set Clarity Fresh Cut Dies ACC-DI-30603-66 (optional)
Alphabet & Numbers A4 Square Plate (2-part) GRO-WO-40875-21 (optional)
Pergamano Multi Grid 28 Straight A4 Bold PER-GR-70109-XX OR
Straight Basic Bold A4 Groovi Piercing Grid GRO-GG-40528-17
Straight Super Fine A4 Groovi Piercing Grid GRO-GG-40626-17 (optional)
Black & White 12×12” Super Foam GRO-AC-41759-XX (also sold separately)
Rainbow Parchment – Lavender Fields A4 GRO-AC-42004-XX
Rainbow Paper – Lavender Fields A4 GRO-AC-42016-XX
Pergamano 1-Needle Bold Perforating Tool PER-TO-70028-XX
Pergamano 2-Needle Bold Perforating Tool PER-TO-70279-XX
Pergamano Excellent – Embossing Mat PER-AC-70075-XX
Groovi Embossing Tool 1 and 2 GRO-AC-40026-XX
Groovi Embossing Tool 3 and 4 GRO-AC-40027-XX
Pergamano 1m Ball Tool – Extra Small PER-TO-70011-XX
Pergamano 3mm Ball Tool – Large PER-TO-70005-XX
Pergamano 4.5mm Ball Tool PER-TO-70015-XX
Pergamano 6mm Ball Tool – Extra Large PER-TO-70016-XX
Groovi Sticker Tabs x 16 GRO-AC-40437-XX
Groovi Guard GRO-AC-40345-XX
Ringlock Scissors PER-TO-70041-XX
Pergamano White Brads PER-AC-70269-XX
Perga Glue PER-AC-70133-XX
Card Blanks Pre-scored x 20 7×7” White ACC-CA-30619-77
Bookmark Sleeves PER-AC-70131-XX (optional)
Dry tumble dryer sheet
Cocktail stick (to use with Perga Glue)
3mm ribbon
Single hole punch
Re-positional tape
Designer Paper
METHOD
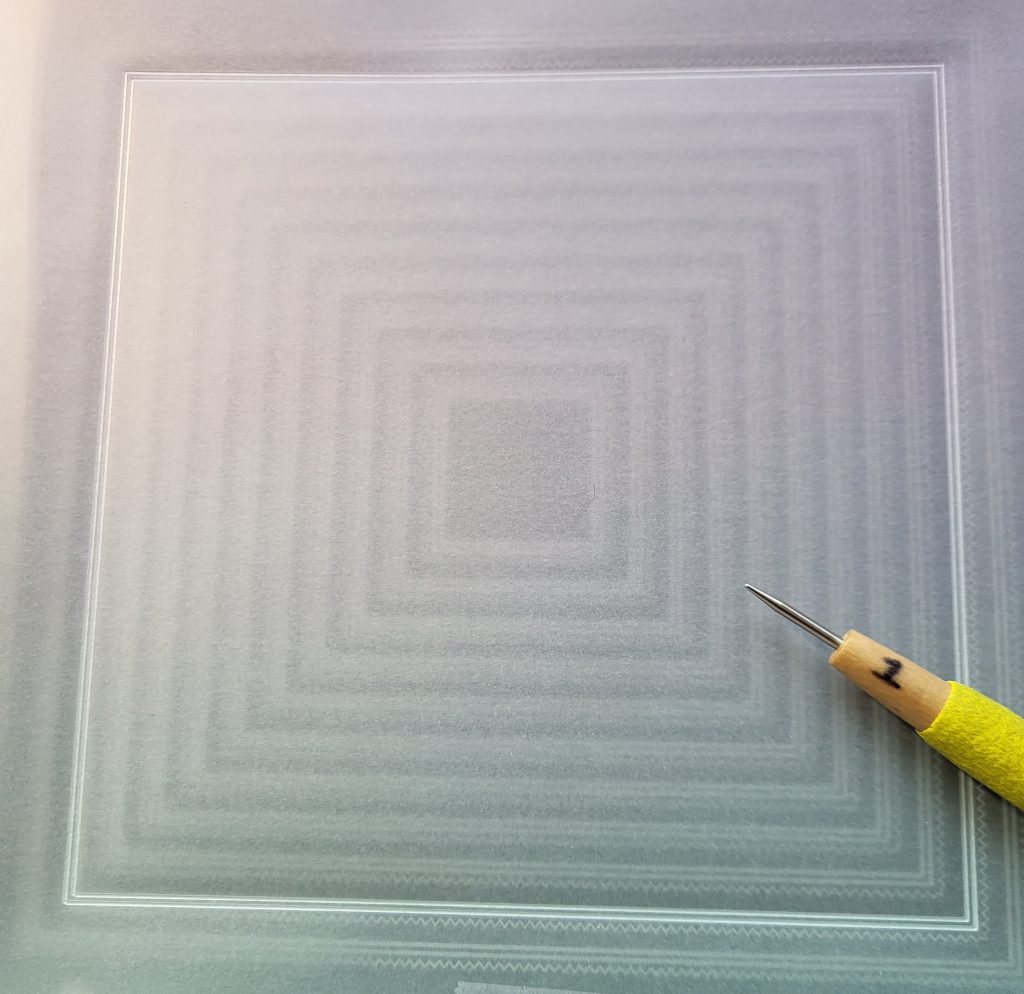
Step 1. Insert the Nested Squares Picot Cut plate into the A4 Square Plate Mate (if you have one – it’s the one that splits in two). Attach your Lavender Fields parchment (with the shiny side facing upwards) to the plate using Groovi Stickers or removable tape, and wipe a dry tumble dryer sheet across the surface to make embossing easier. Use Groovi #1 tool to emboss around the 2nd largest square on the plate.
TOP TIP: I used my Groovi Guard to keep the parchment flat whilst I embossed the lines.
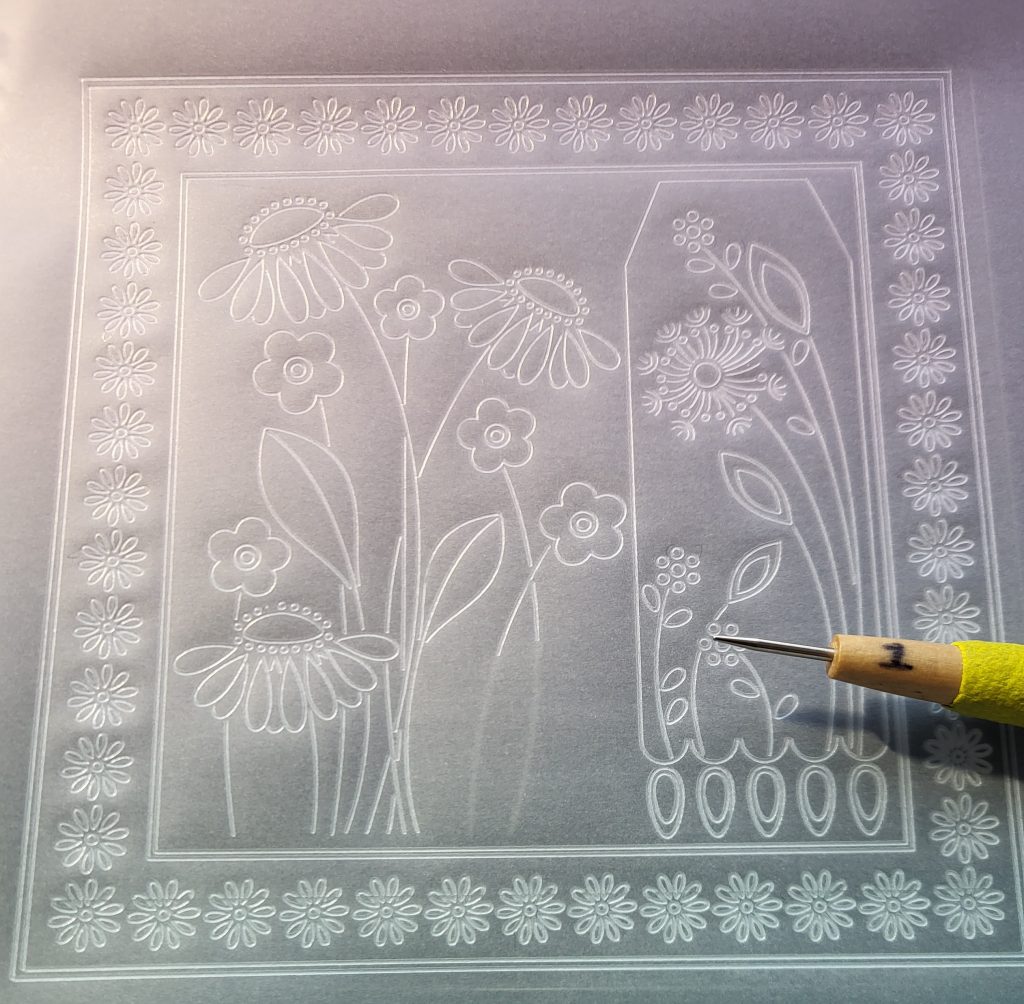
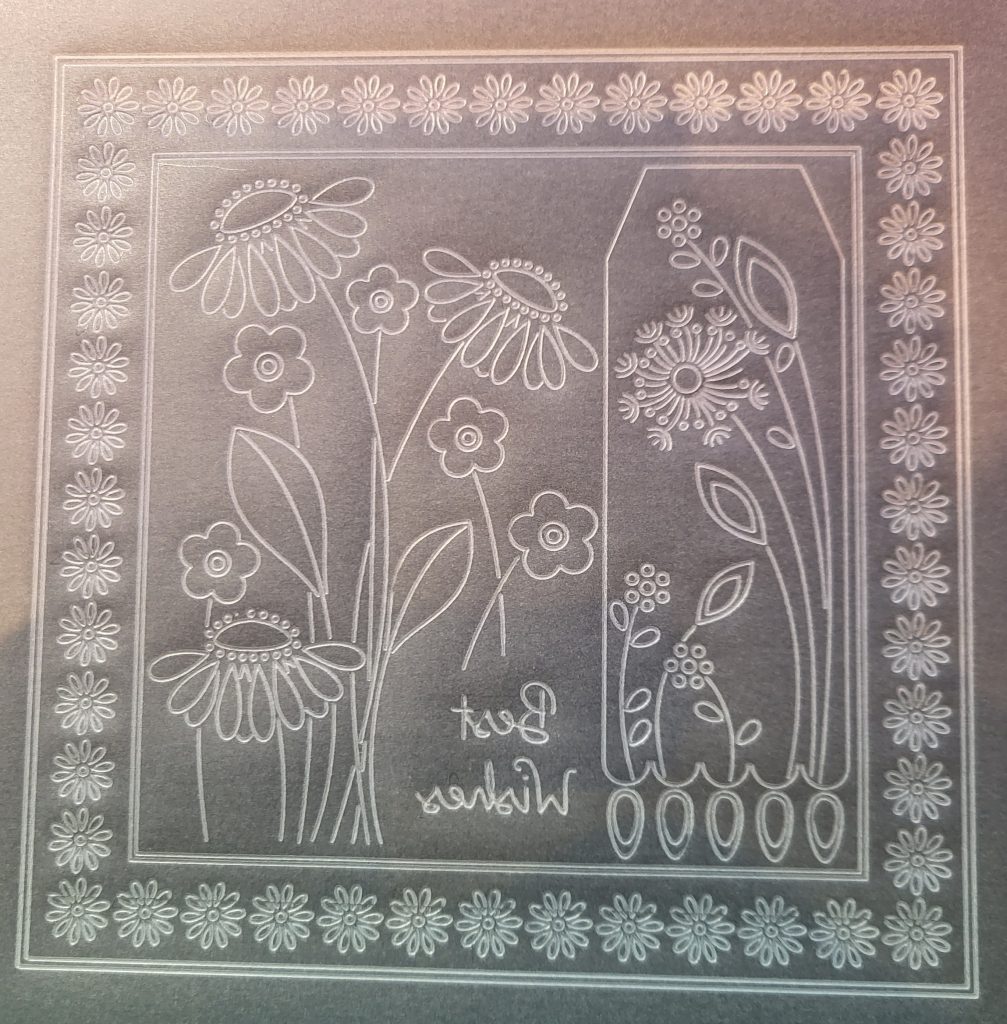
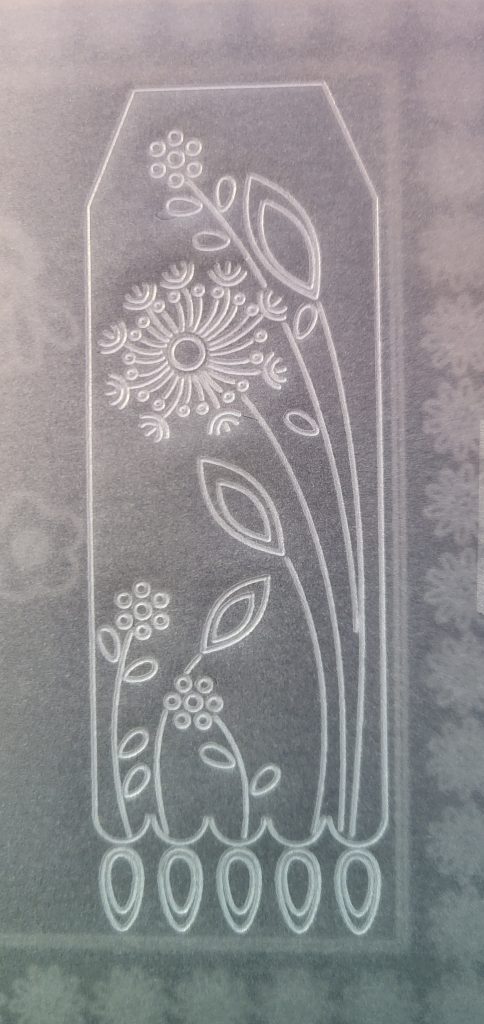
Step 2. Insert Tina’s Daisy Frame plate into the A5 Plate Mate. Carefully centralise and re-attach your parchment to the plate and emboss everything on the plate except for the bottom part of the two flower stems, as can be seen on the picture.
Step 3. Using the Sentiments plate, carefully align your parchment, front facing downwards, over the word “Wishes” on the plate and emboss it where shown on the picture.
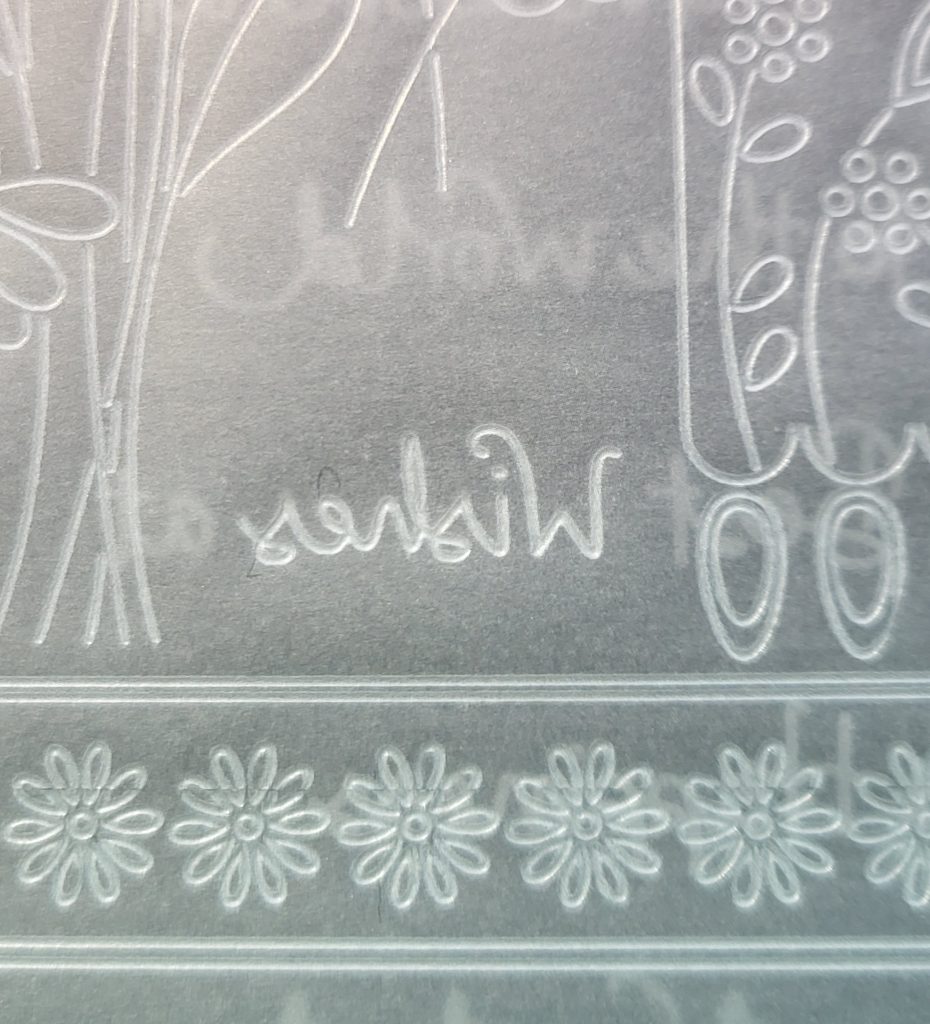
Step 4. Just above the “Wishes” emboss the word “Best”.
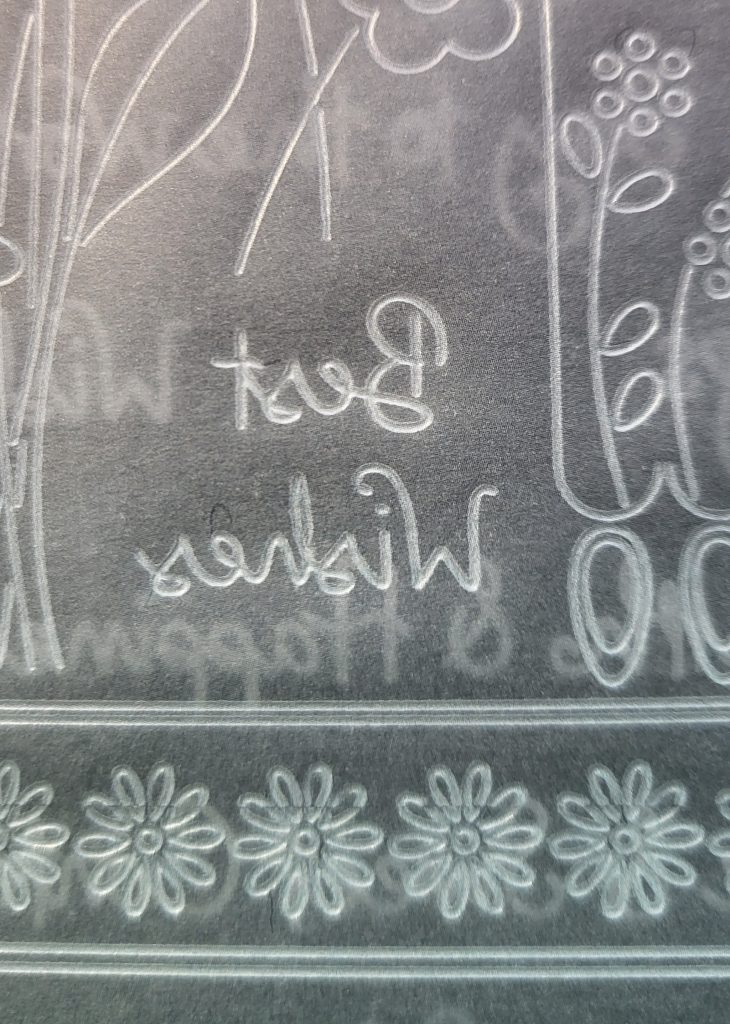
Step 5. Your work should now look like this.
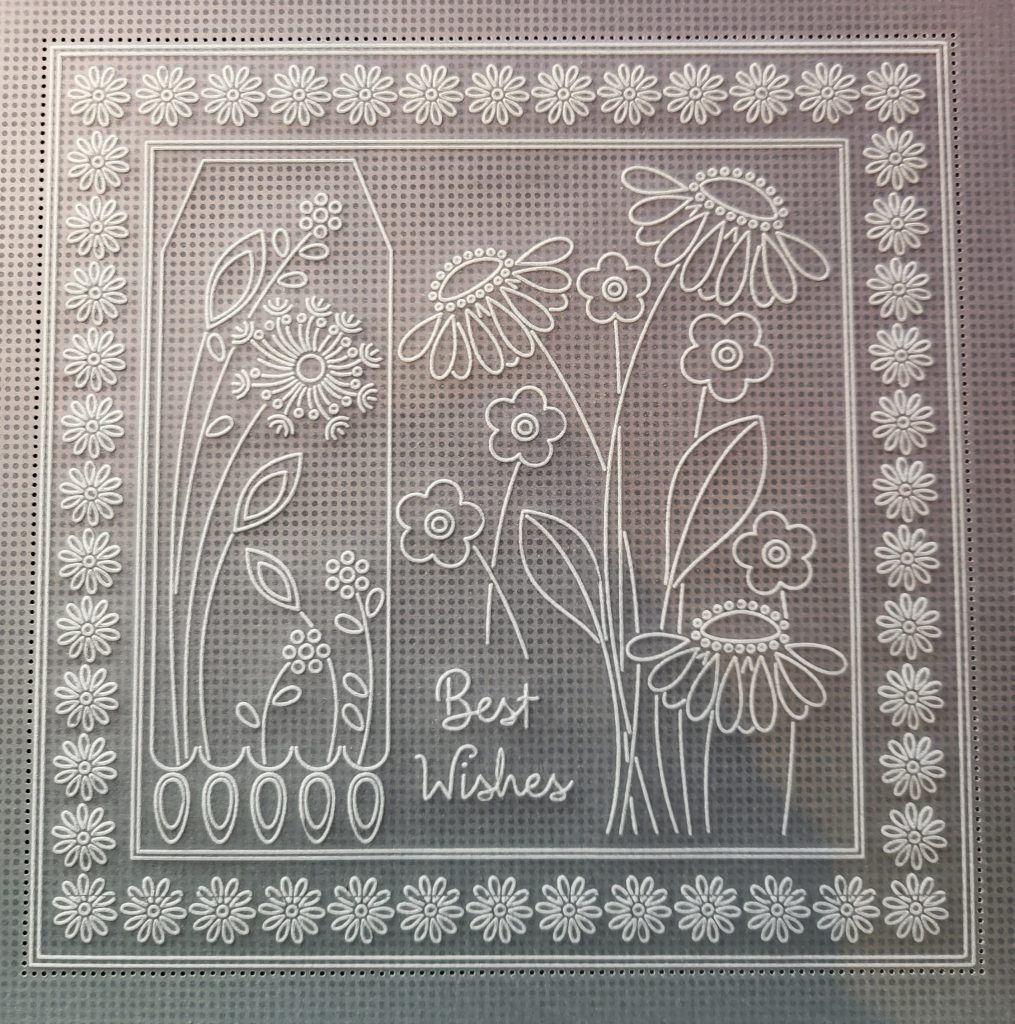
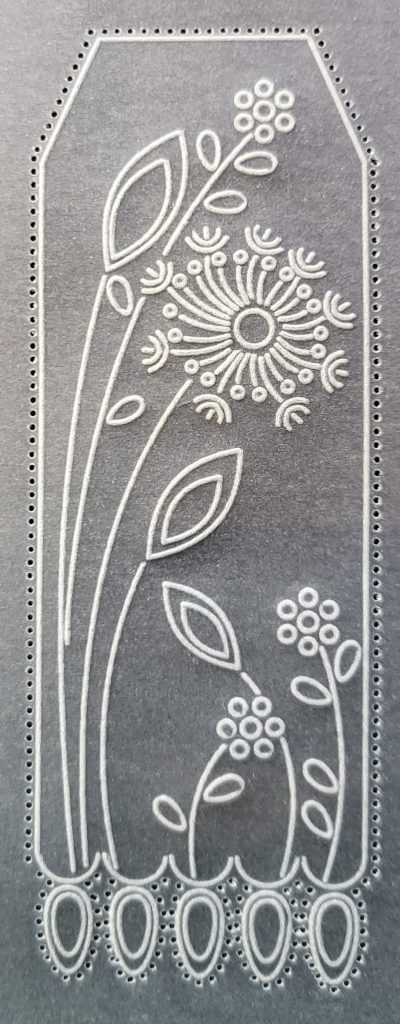
Step 6. Carefully align your parchment, front facing upwards, onto the Straight Multi Grid (or Straight Basic Bold Groovi Grid if using) so that the holes on the grid line-up nicely around all 4 sides of the outer square, keeping as near to the embossed lines as you can get them. When you are happy with the alignment, re-attach your parchment and place everything onto a thick Black Super foam mat (or White version if using the Groovi Grid), then use your 1-Needle Bold tool to perforate all around the outer embossed lines as shown on the picture.
Note: As an alternative to perforating the holes over a grid you can perforate them freehand over the thick mat using a 2-Needle Bold tool.
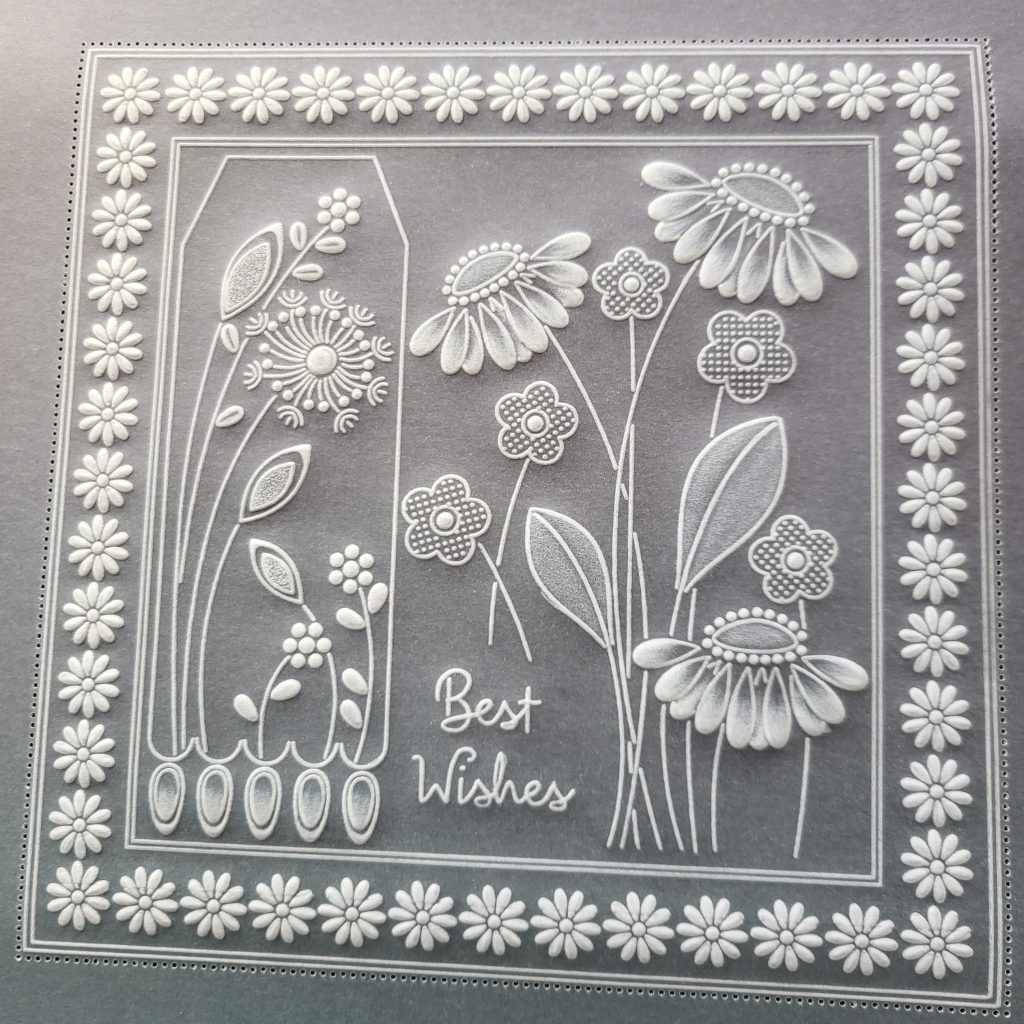
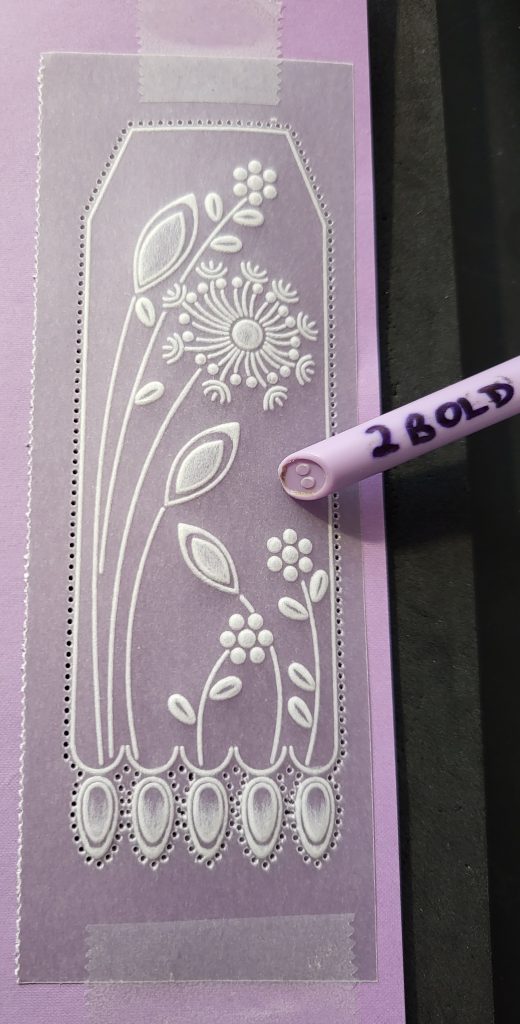
Step 7. Using various embossing tools, emboss the flowers and leaves as you can see them on the picture (I used various sizes from Groovi #1 to #4, and Pergamano 1, 4.5 and 6). For the embossed grid dots in 5 of the flowers I used a Fine Straight Multi Grid placed in a diagonal position.
Note: Alternatively, at this point you can omit any of the embossing and colour-in instead, using a medium of your own choice.
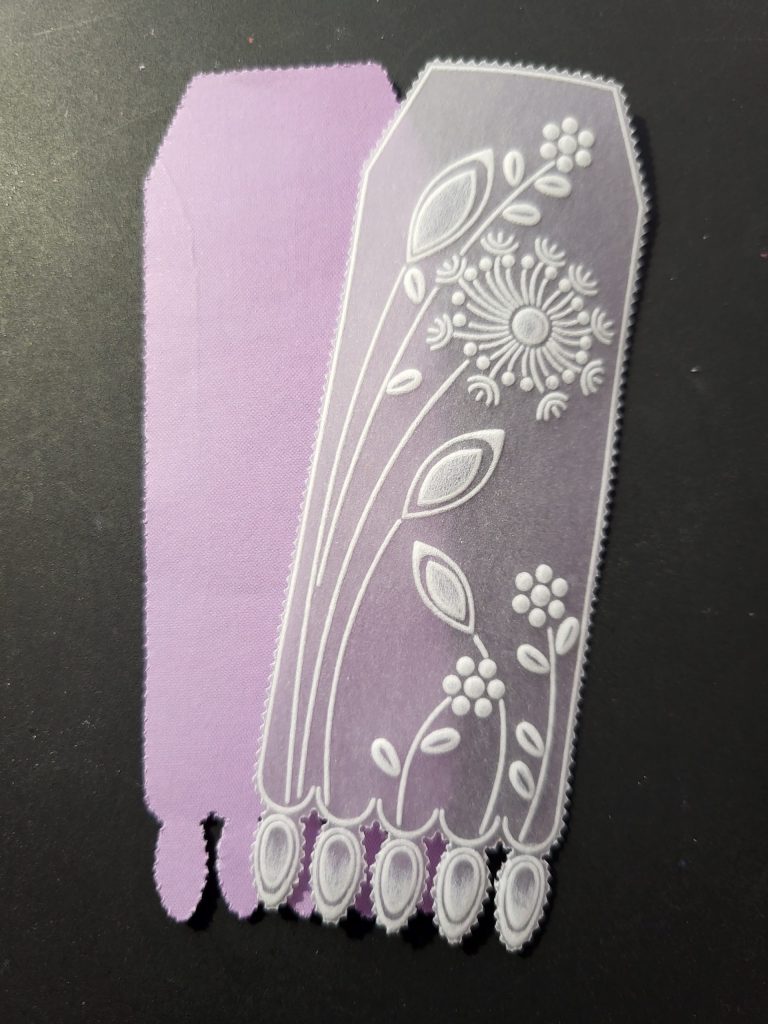
Step 8. Using Tina’s Daisy Frame plate and a spare piece of Lavender Fields parchment (shiny side facing upwards) emboss all of the tag design.
Step 9. On the front perforate all around the straight edges of the tag, as well as the drops shapes at the bottom, with a 2-Needle Bold.
Step 10. On the back use various embossing tools to emboss the flowers and leaves as you see them on the picture (or alternatively colour them in if you wish). Then place your parchment, front facing upwards, onto the front of a slightly larger piece of Lavender Fields paper and temporarily attach them together with low tack tape. Place them onto a thick black Superfoam mat and use your 1 or 2-Needle Bold to re-perforate the holes on the parchment all the way through both layers.
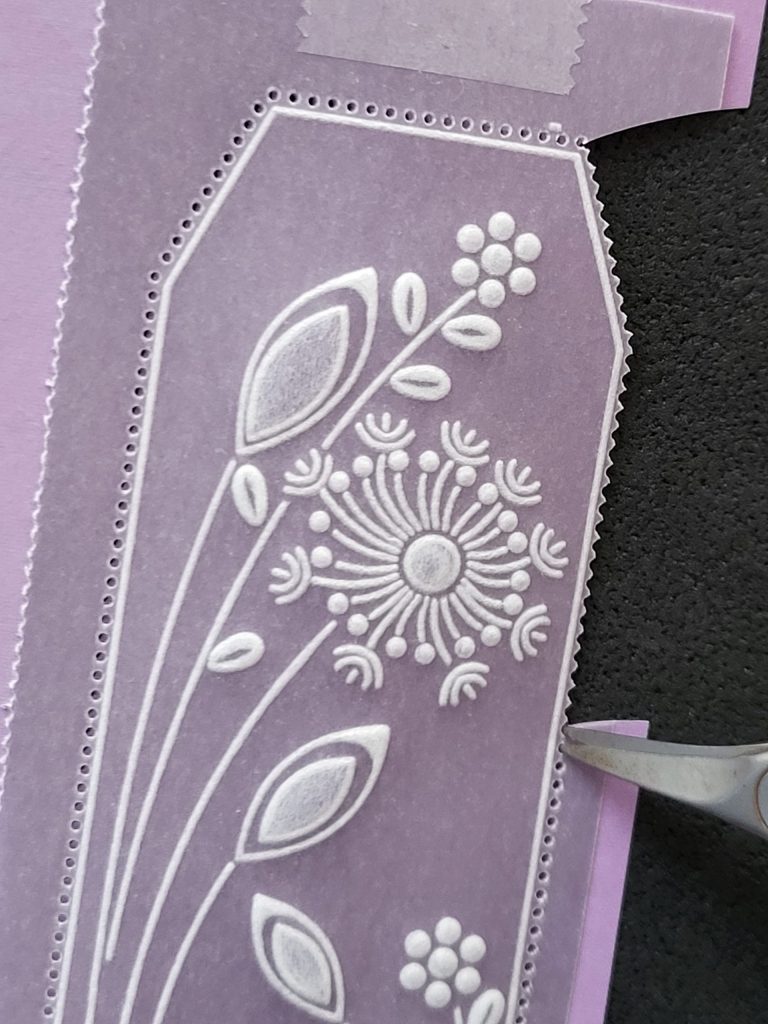
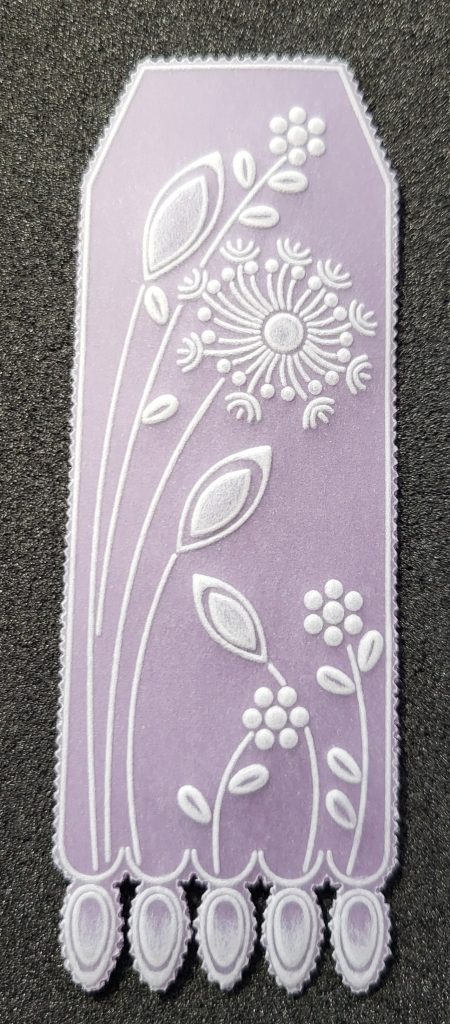
Step 11.Use parchment scissors or snips to snip between the 2-Needle perforations on both layers together, or separate the layers and snip them out separately.
You now have two separate pieces which need to be attached to each other.
To do this, use very tiny dabs of Perga Glue on the fine tip of a cocktail stick to add a very fine line of glue to the underside cut-edges of your parchment on top, then fix to the front of the paper underneath.
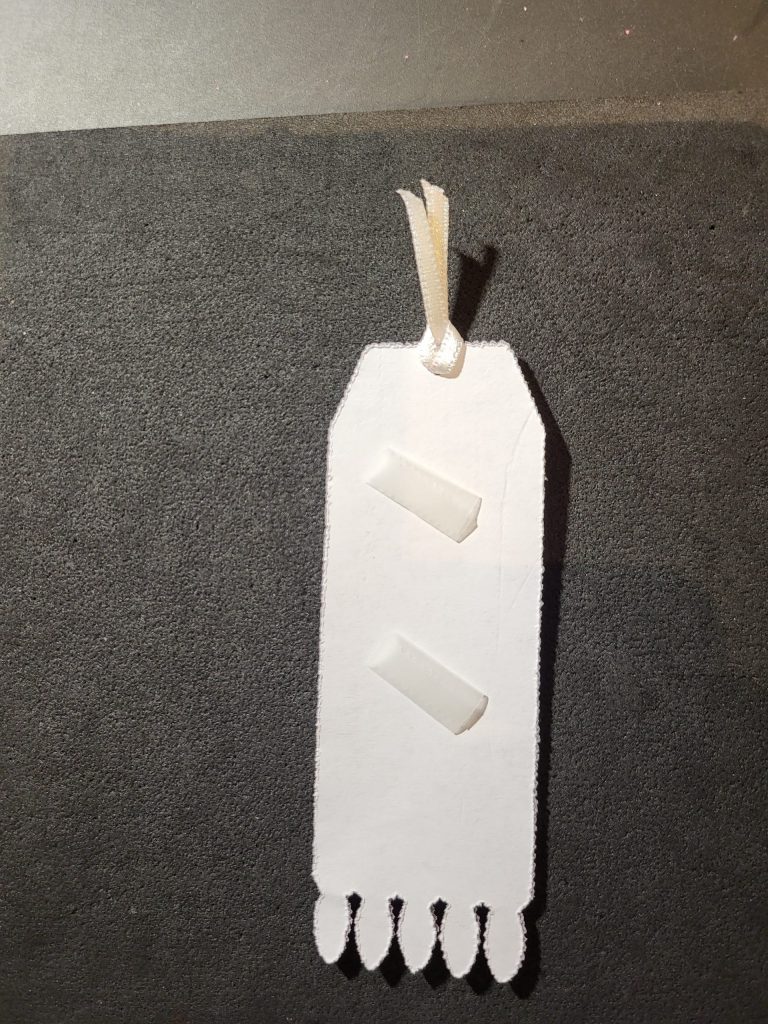
Step 12. Use a single Hole Punch to punch a hole near the centre top of the Bookmark and thread a 3mm wide piece of ribbon through it and fasten off. Use ordinary scissors to cut the ribbon ends to a slant. Cut two pieces of re-positional tape (not cellotape) and roll each between your thumb and forefinger with the sticky side on the outside. Press them onto the back of the Bookmark as shown.
Step 13
Finishing
· Use parchment scissors or snips to cut between the 1-Needle perforations around the outer embossed lines on the main parchment.
· Mount the Bookmark over the tag design on your finished card and press the Bookmark down firmly to secure it albeit temporarily (this is so that the recipient can remove the Bookmark easily then discard the rolled-up tape).
· Cut a piece of Lavender Fields background paper to size (15cm square) or alternatively run it through your die cut machine as I have done, using the 2nd largest die from the Nested Squares Die Set.
· Attach your parchment onto the front of the background paper using white brads, then mount all onto the front of pre-folded white card 7×7” square.
And you’re all set! Here is the finished card.
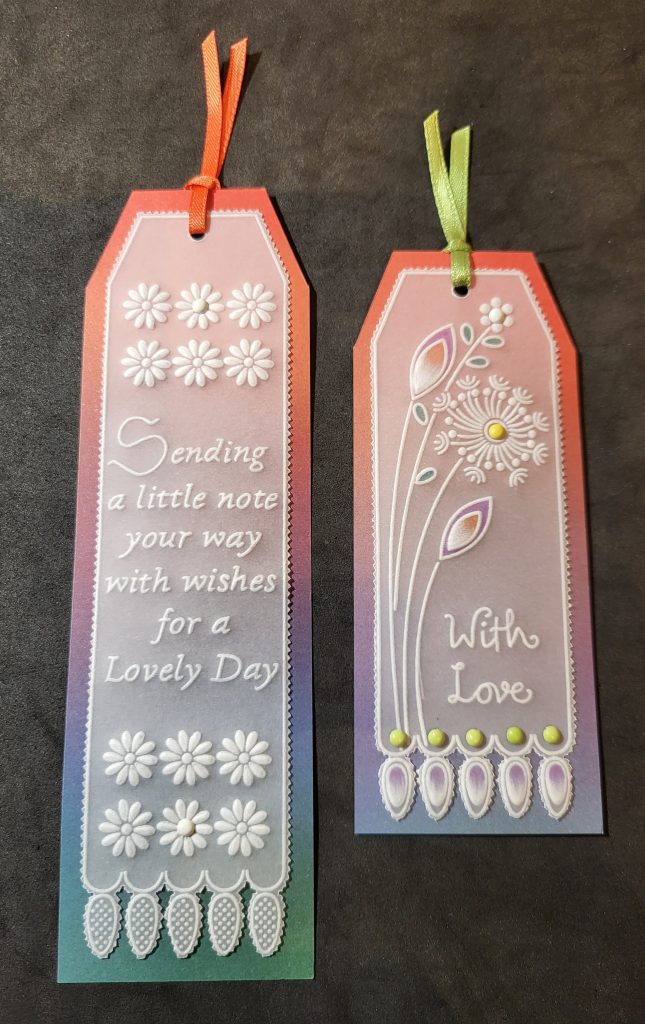
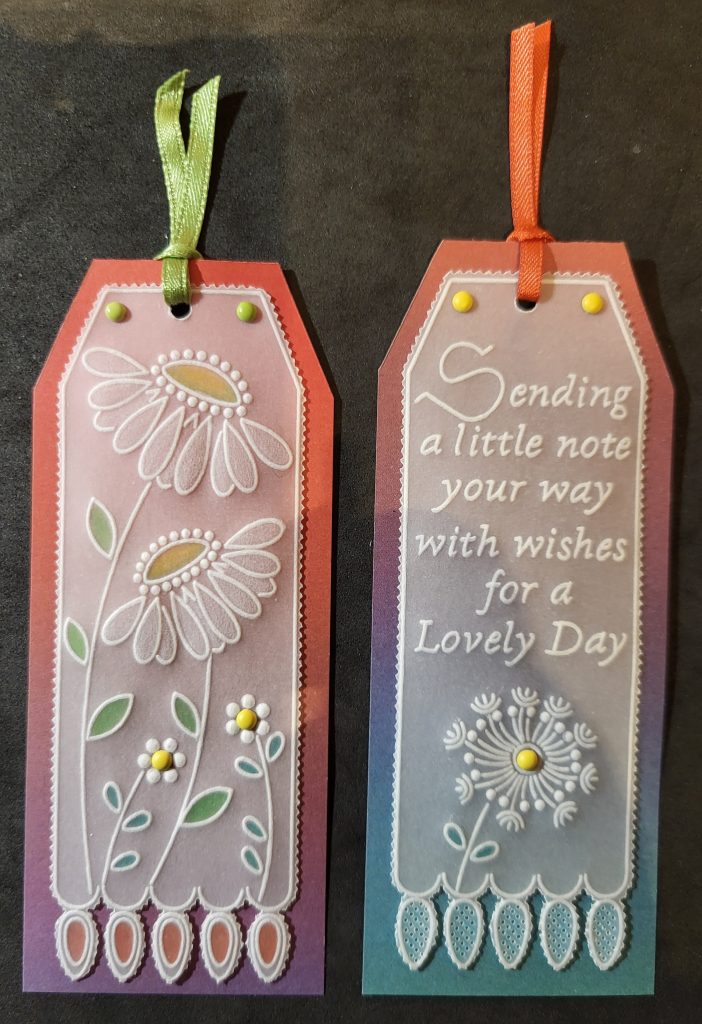
BONUS BOOKMARK DESIGNS
Still using Tina’s Daisy Frame and Dandelion Tag plate, here are some bookmark ideas I’ve put together for you. Where I’ve used any sentiments these can be found on the Ingredients list.
- Firstly, I suggest you create some Bookmark blanks as shown. For the longer bookmark I simply extended the length a little.

- Create some designs on each of the blanks using a mix of designs from Tina’s plate. Emboss or colour in as desired, perforate and snip all around the bookmark, then mount onto backing paper cut to size (I used Designer Paper cut to a width of 4.5cm – the length size is up to you). Small coloured Pergamano Brads are ideal for attaching the parchment to the background paper, but you will need to cover the backs of the brads with an extra layer of paper.
Note: Bookmark Sleeves are available measuring 5 x 22cm, which can be cut to your desired length.
Gosh! What a stunning card. Thank you, Maggie, for sharing your tips and tricks with us! And for breaking down such a beautiful project into easy to follow steps. A card and a gift!
If you’d like to give this project a try yourself, don’t forget to share your artwork on Groovi Worldwide. And/or email it to me – Grace@claritystamp.com
Everything that Maggie has used in this particular project can be found on the Clarity website HERE.
Now, looking at the week ahead…
Sunday 5th Feb:
Crafting with Clarity with Paul on Create & Craft – 3pm – 5pm
Tuesday 7th Feb:
Groovi Tuesday with Paul – 10am Live on Facebook and YouTube
Thursday 11th Feb:
The Pergamano Show with Tina Cox on Create & Craft – 11am & 3pm
Travel gently, friends.
Lotsa love, Grace & Maggie xoxo
Clarity – The Home of Art, Craft, and Well-Being.
Thanks so much Maggie. I love this plate and it is one of the most used in my stash. I shall look forward to trying this beautiful design. X
What a lovely project – thank you Maggie xx
Fabulous card and bookmarks. Definately on to do list when eyesight improved
Lovely project Maggie and I will definitely be doing this one, thanks for the inspiration xx
A lovely project Maggie, one for my to do list. Sat at eye clinic with drops in my eyes so will look again when I get back home x
Lovely project Maggie with a few really useful tips along the way . Will have to have a go at some point xx
What a fabulous project. Hoping to have a go at this. Thank you.x
Beautiful tutorial and inspiration. Thank you Maggie.
A great project Maggie, thank you. x
Thank you for a lovely project, Maggie. It’ll go in my library of projects to be done eventually.