Clarity Matters Blog Tutorial: How To Use Pebeo Acrylic Paint
Hello hello! Grace here.
I hope this finds you well and enjoying your Sunday.
We are joined by the wonderfully talented Josie Davidson. She has kindly prepared a fabulous step-by-step project for us, using Linda Williams’ Girl On A Swing Groovi Plate!
I’ll hand you right over to our teacher…
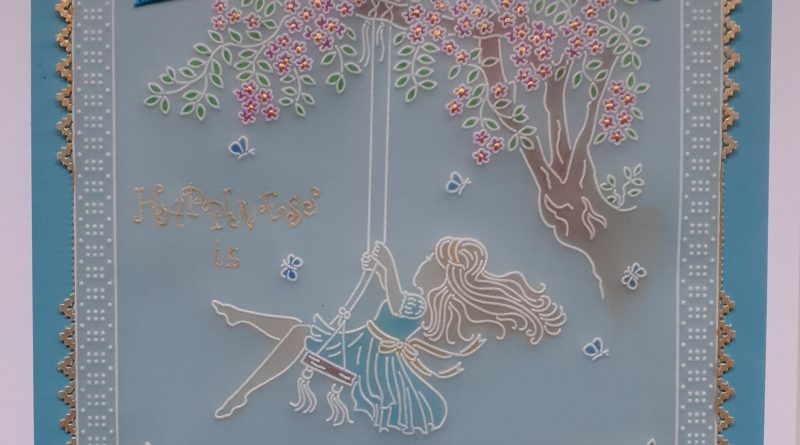
Girl On Swing

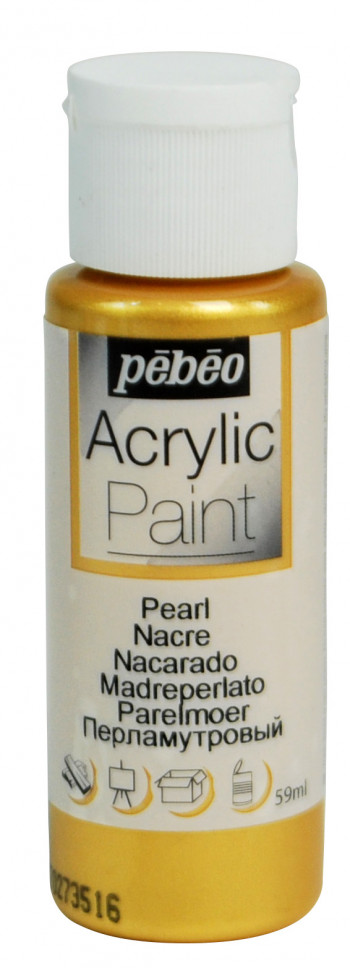
This blog shows 3 ways of using the Pebeo gold acrylic paint. I love to paint over my multi needle tool perforating to give the outer edge an opulent gold finish but I have also used it to ‘dip dot’ the centres of the flowers and for the gold lettering.
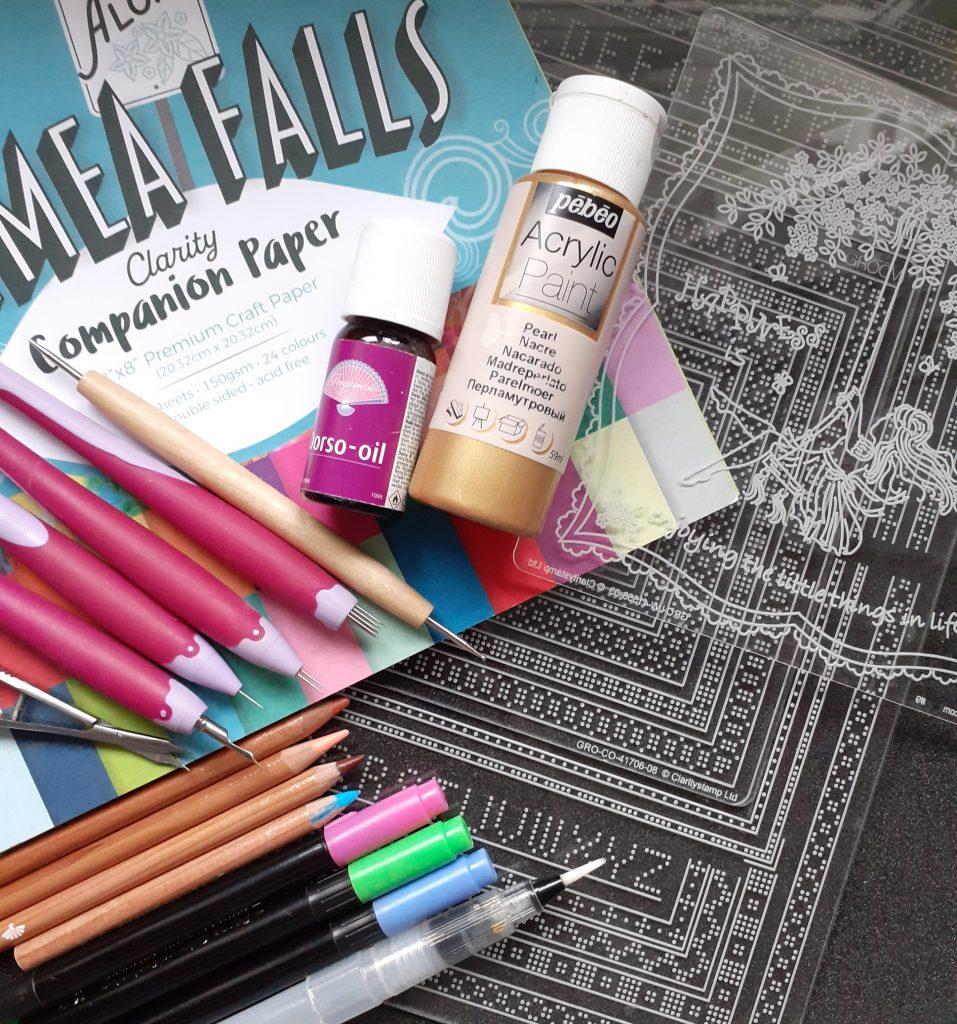
Ingredients
Linda’s Girl on Swing (GRO-LW-41558-03)
Plate Mate for Grids (GRO-CO-41706-08)
Groovi Tool 1&2 Tool
Pergamano Semi Square Tool (PER-TO-70021-XX)
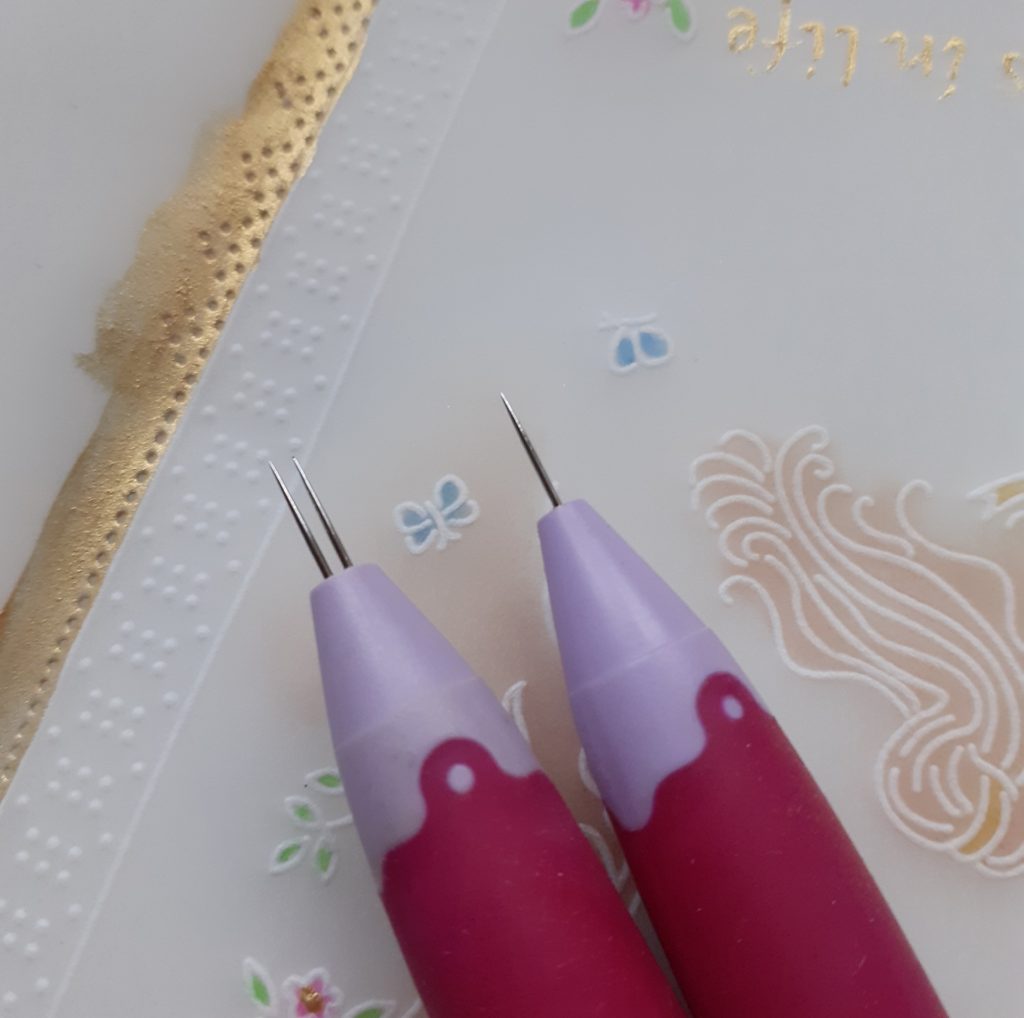
Pergamano Fine Two Needle Tool (PER-TO-70037-XX)
Pergamano Fine Single Needle Tool (PER-TO-70035-XX)
Pebeo Gold Acrylic Paint (ACC-PA-31303-XX)
Watercolour Brush Pen (ACC-PE-30874-XX)
Mix Mat (PER-AC-70304-XX)
Mapping Pen (PER-TO-70039-XX)
Thin Foam Mat Picot Foam (GRO-AC-40625-XX)
Thick Foam Mat (GRO-AC-41765-XX)
Scissors or Perga Cutters
Pergacolours 5, 13, 16 (PER-CO-70060-XX)
Pergaliners 3, 9, 10, 12, 16 (PER-CO-70063-XX)
Blending Pen, Nibs and Dorso Oil (PER-AC-70431-XX)
Clarity Double Faced Ribbon (ACC-MS-31107-XX)
Waimea Falls Companion Paper (ACC-CA-31343-88)
7×7 White Card Blank (ACC-CA-30615-77)
A4 Plain Parchment (GRO-AC-40024-A4)
Pergamano Gold Brads (PER-AC-70274-XX)
Groovi Tabs (GRO-AC-40437-XX)
Double Sided Tape (ACC-AD-30375-XX)
Piece of Scrap Black or Dark Card
Tumble Dryer Sheet
Pot of Water
Method
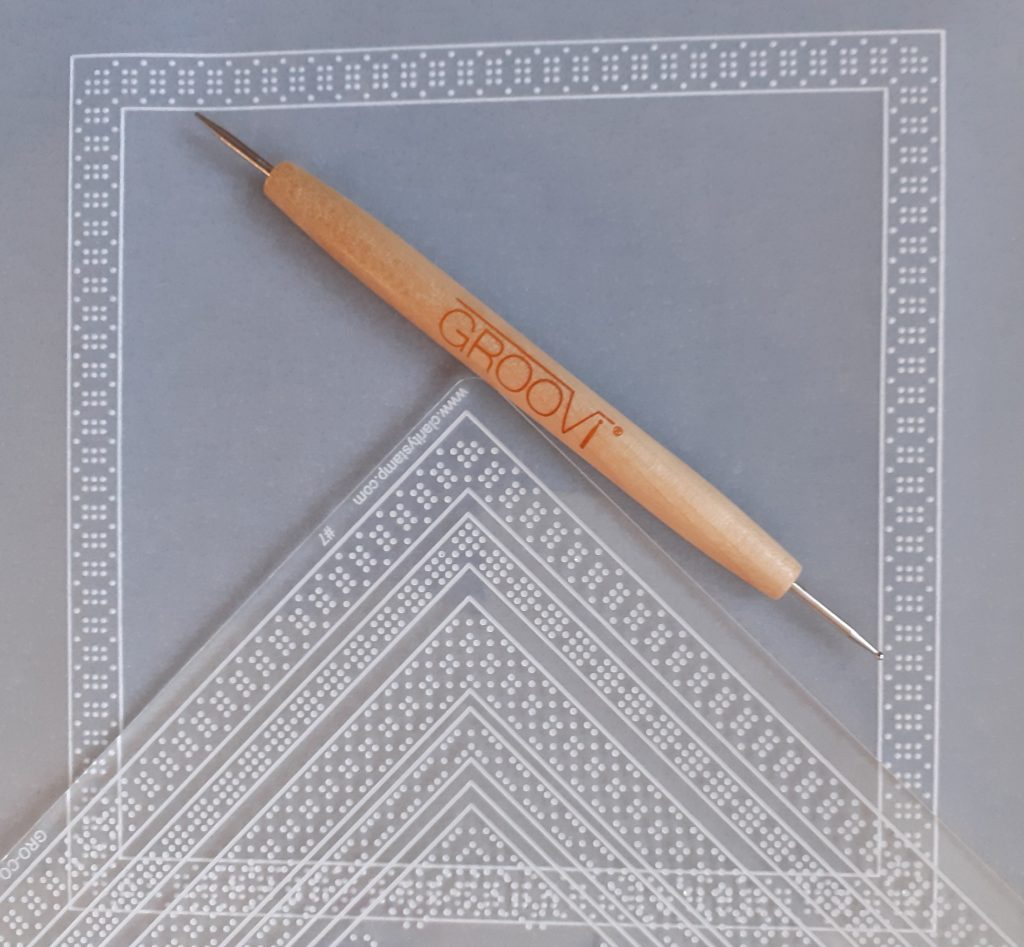
Step 1. Place the grid plate inside the grid plate mate and attach in place with a Groovi Tab to prevent it moving while you work. Wipe the parchment with the tumble dryer sheet and attach to the plate mate. Use the Groovi No 1 tool to emboss the lines of the outer grid design and the No 2 tool to emboss the dots.
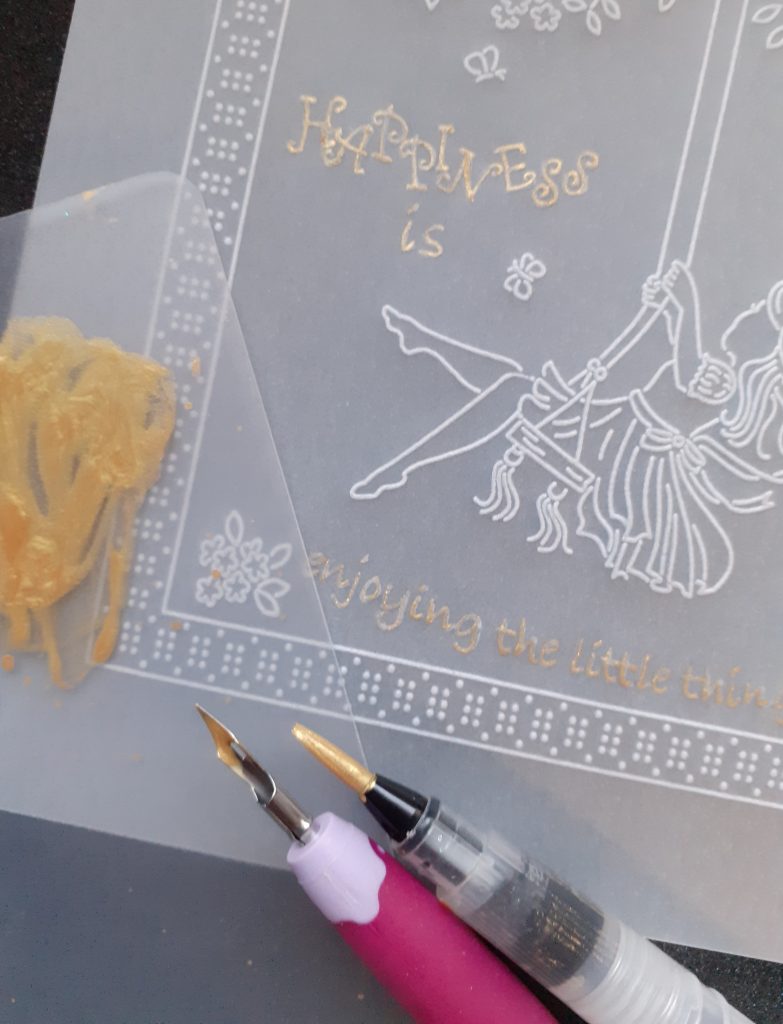
Step 2. Place the Girl on Swing plate inside the plate mate and emboss the words with the No 2 tool. Emboss the rest of the design with the No 1 tool.
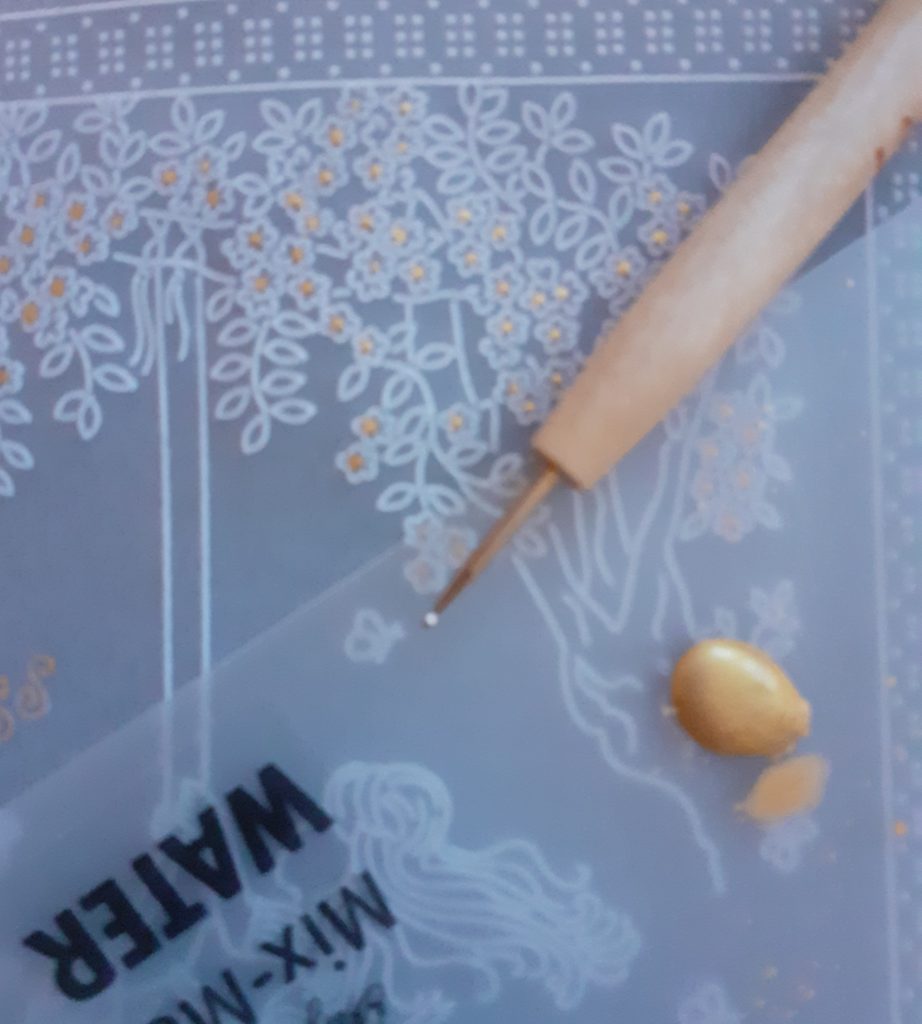
Step 3. Place a small amount of gold paint onto your mix mat and water it down until you have a consistency that will flow from your mapping pen. You will need to keep trying it on a scrap piece of parchment. Trace the words with the gold; you will need to keep rinsing your mapping pen and reloading it between each application. Use the water brush to load the ink onto the nib of the mapping pen. If you feel that the writing would be better with a second layer of gold, then wait until it is completely dry before doing this.
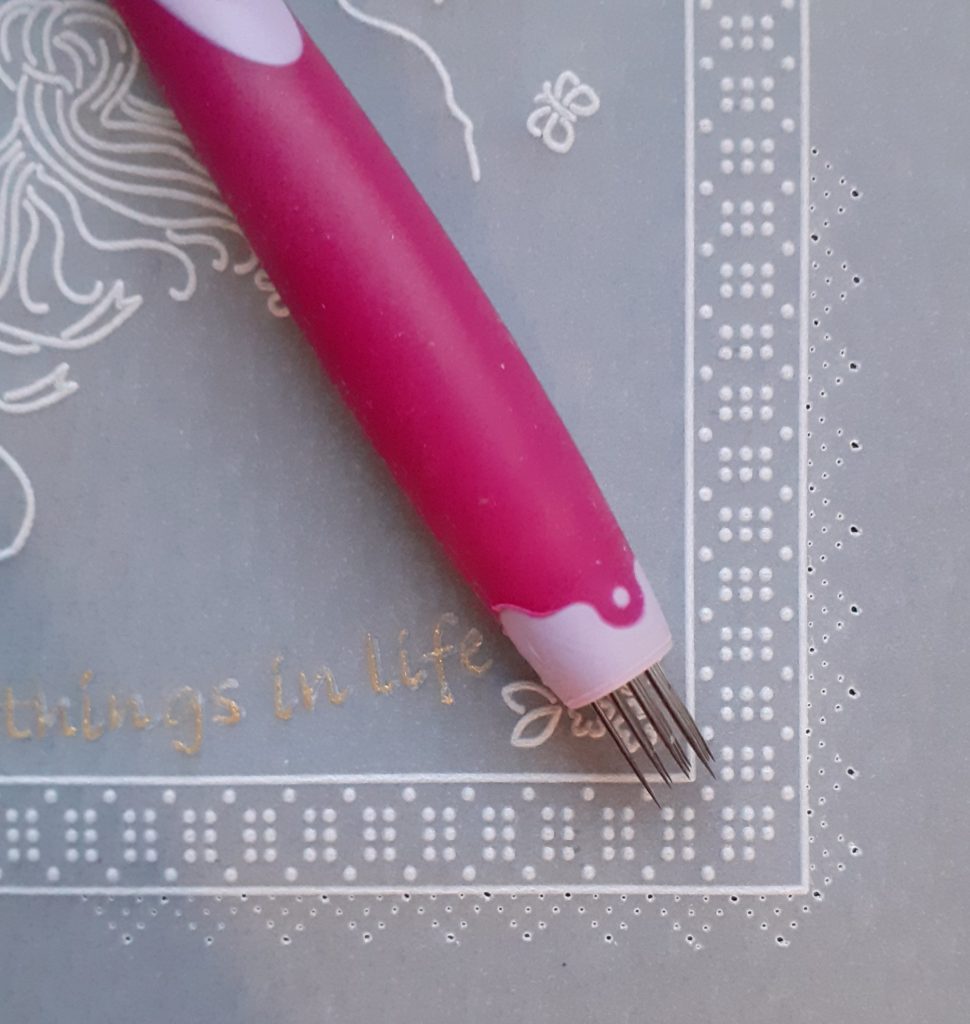
Step 4. Shallow perforate around the outer edge of each corner with the semi square tool. I did 9 perforations from each corner.
Step 5. Working on the front of the parchment, dip dot a gold centre in each of the flowers. Place a small amount of the gold paint on your mix mat, dip the No 2 Groovi tool into the paint and dot onto the centre of the flower.
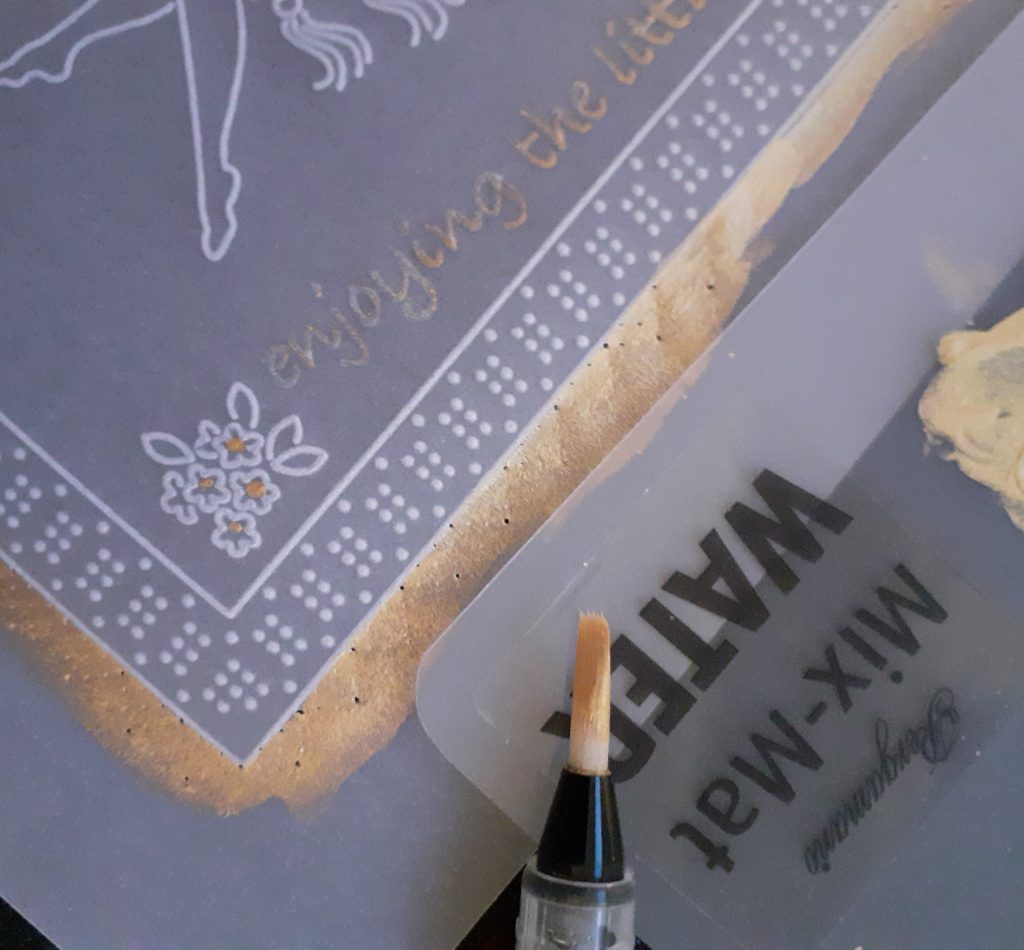
Step 6. Using the water brush, paint over the semi square perforations with the gold paint and the centre area between them. Your water brush can be slightly damp to do this and you don’t need to water the paint down. Place the piece of dark card under your work as some of the paint will go through the perforations. Don’t worry if the parchment looks a little buckled at this stage, it will flatten out once it is re-perforated and cut out.
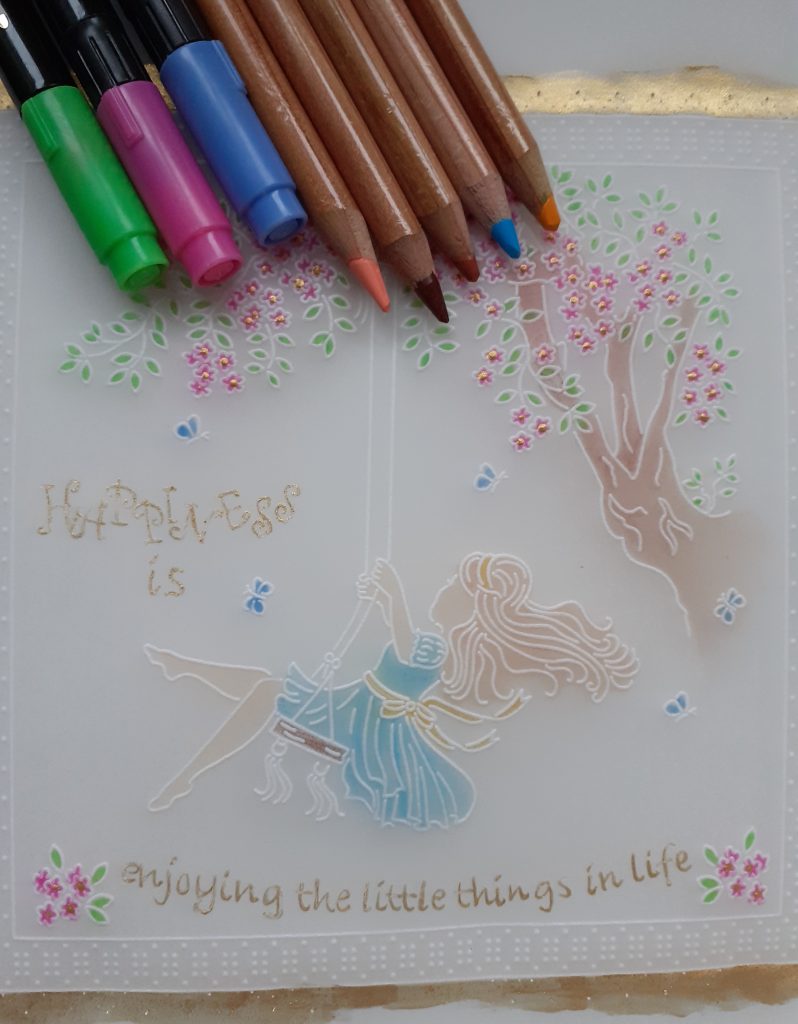
Step 7. Colour the back of your work with the Perga Colours and Perga liners. I used the Perga Colours for the leaves, flowers and butterflies. The remainder of the design was coloured with the Perga Liners and blended with Dorso Oil.
Step 8. On your thick foam mat, re-perforate the semi square perforations with the single needle tool. Perforate the centre area between the perforations with the two needle tool.
Step 9. Cut out the perforations around the outer edge with scissors or Pergacutters.
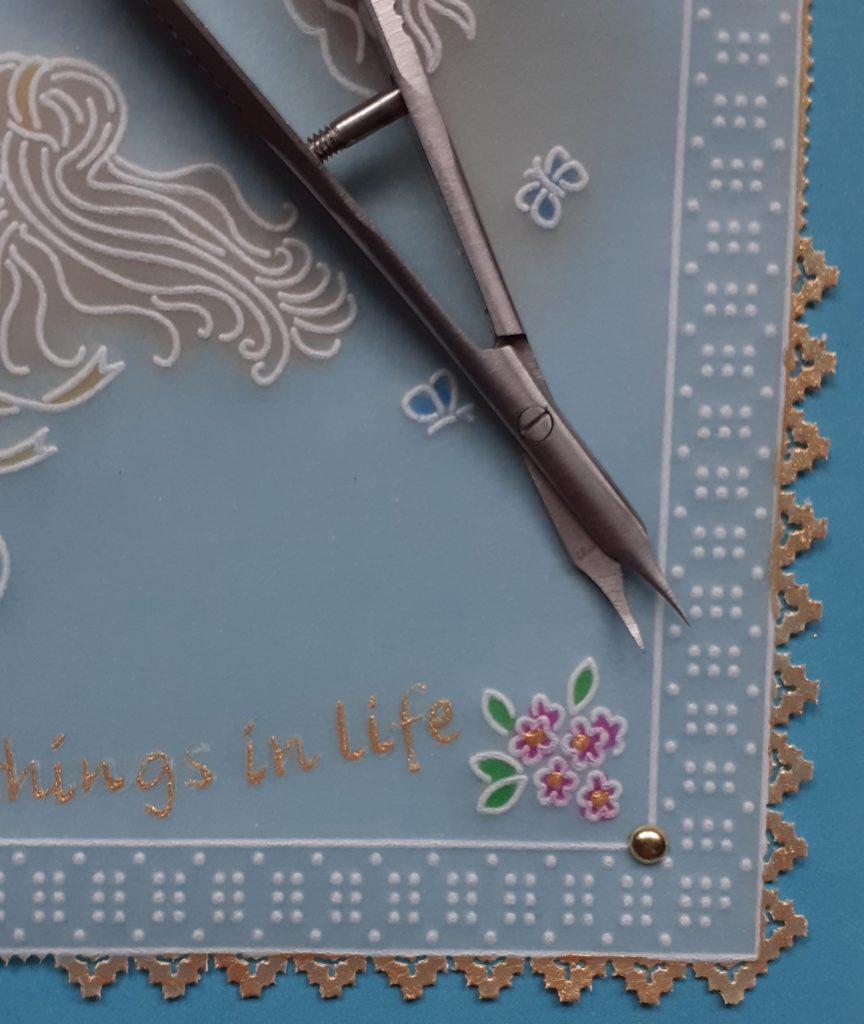
Step 10. Cut your backing paper to a 15.5cm square. Attach your finished artwork to the backing paper with gold brads and stick to your card blank with double sided tape. Make a bow from the ribbon and attach to the top of your card. And you’re all finished!
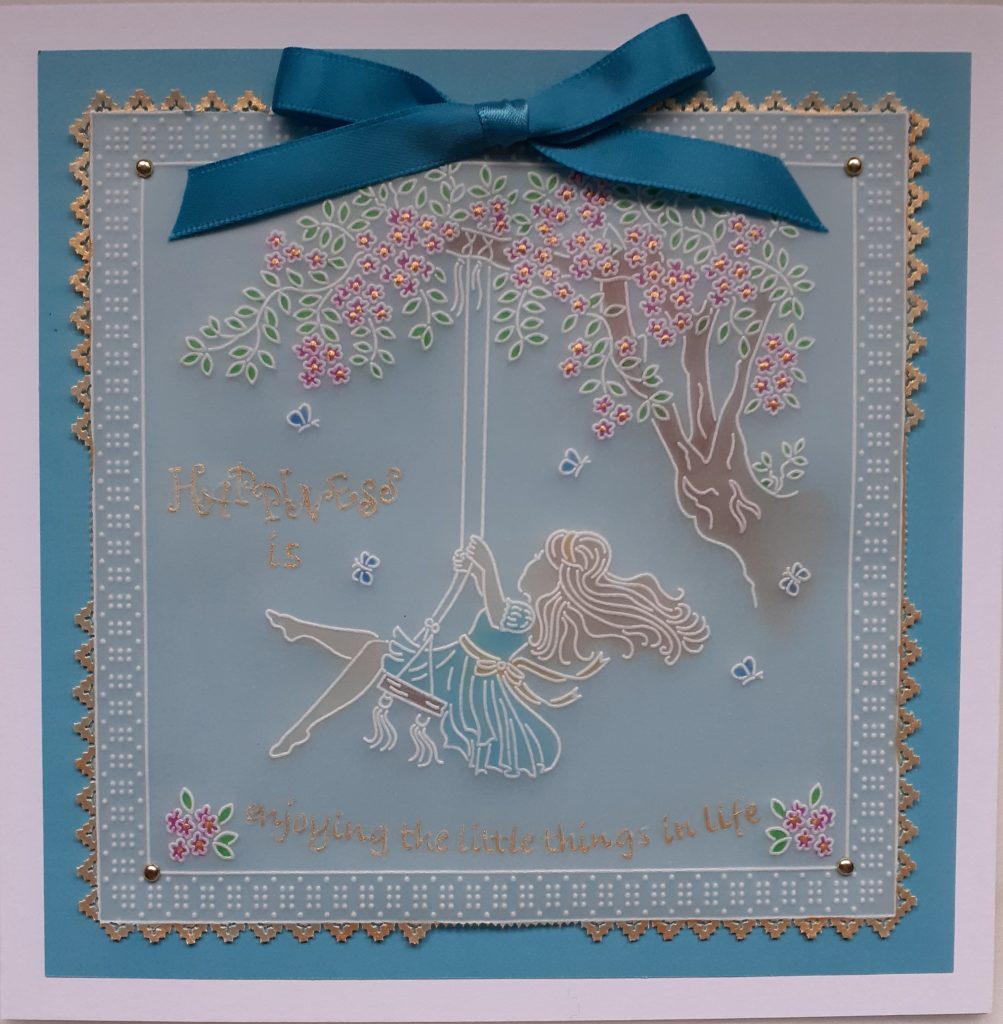
Gosh! What a stunning card. Thank you, Josie, for sharing your tips and tricks with us! And for breaking down such a beautiful project into easy to follow steps.
We also have the Pebeo in Silver and White – available HERE
If you’d like to give this project a try yourself, don’t forget to share your artwork on Groovi Worldwide. And/or email me – Grace@claritystamp.com
You can find everything that Josie has used in this particular project, HERE.
Now, let’s look at the week ahead…
Tuesday 31st Jan:
Groovi Tuesday with Paul – 10am Live on Facebook and YouTube
Sunday 5th Feb:
Crafting with Clarity with Paul on Create & Craft – 3pm – 5pm
Just a little bit of lovely craftiness to look forward to.
Travel gently, friends.
Lotsa love, Grace & Josie xoxo
Clarity – The Home of Art, Craft, and Well-Being.
I would never have thought of painting over perforations so this was an eye opener. Thanks Josie.
I will try this next time the paints come out. 🍒
Great tutorial Josie, very pretty and full of hints and tips.
Thank you! 💐 xx
Fabulous tutorial as always. I too would never have dreamed of painting over the perforations – brilliant. Thank you so much for sharing xxx
Josie, would pintura gold or pinta perla work the same as Pebeo?
I don,t know whether Pebeo is available in Australia.
I haven’t tried them but you could try using them on a piece of scrap parchment x
I can’t see why they would not work. The best way to find out is to do a test piece on scrap parchment. Nothing ventured nothing gained!!!!!!
Lovely tutorial and project Josie – what a wonderful way of
adding a special touch to your perforating – thank you for
sharing your tips
Love Seta xxx
Thanks Josie for a lovely project. I had seen that you had used the pebeo paint but not what order you did it in. It seems so much easier to paint first then picot cut.
Already the last Sunday in January & over a month since Christmas – where did that time go to ?
Grace, I will be thinking of you all tomorrow x
Barbara sending best wishes and love for a speedy recovery. X
This too shall pass.