Clarity Matters Blog Tutorial: How To Create A Lace Frame with Ease!
Hello hello! Grace here.
I hope this finds you well and ready to get crafty with your Sunday.
We are joined by the super-talented Josie Davidson, from the Clarity Design Team. Josie has put together a step-by-step project for us.
Lucky us! I’ll waste no more time and hand you straight over to our teacher 🙂

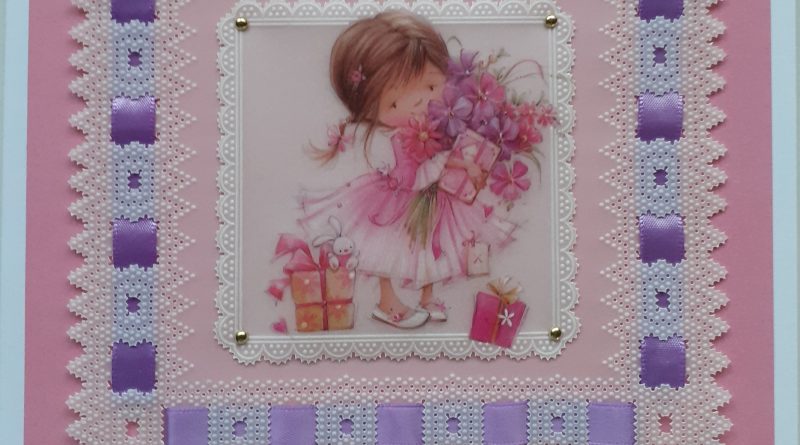
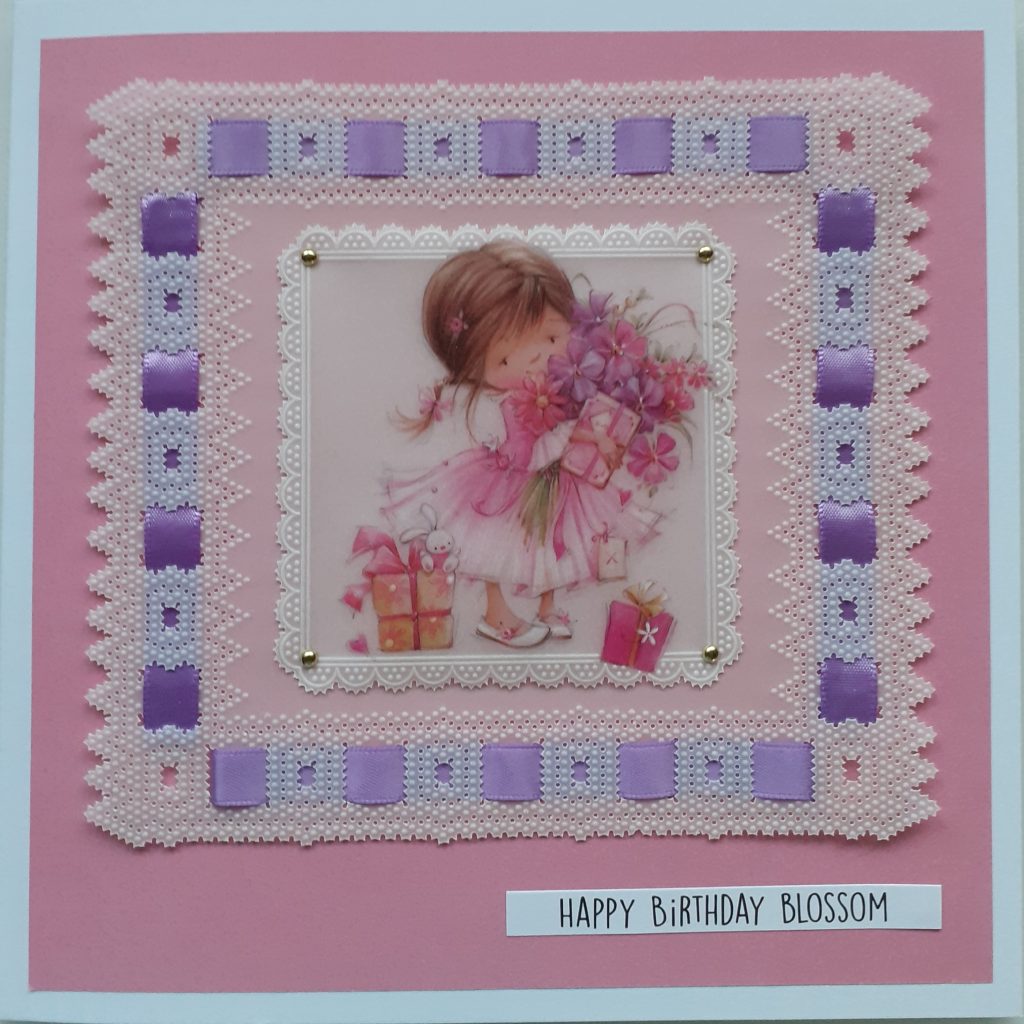
Happy Birthday Blossom
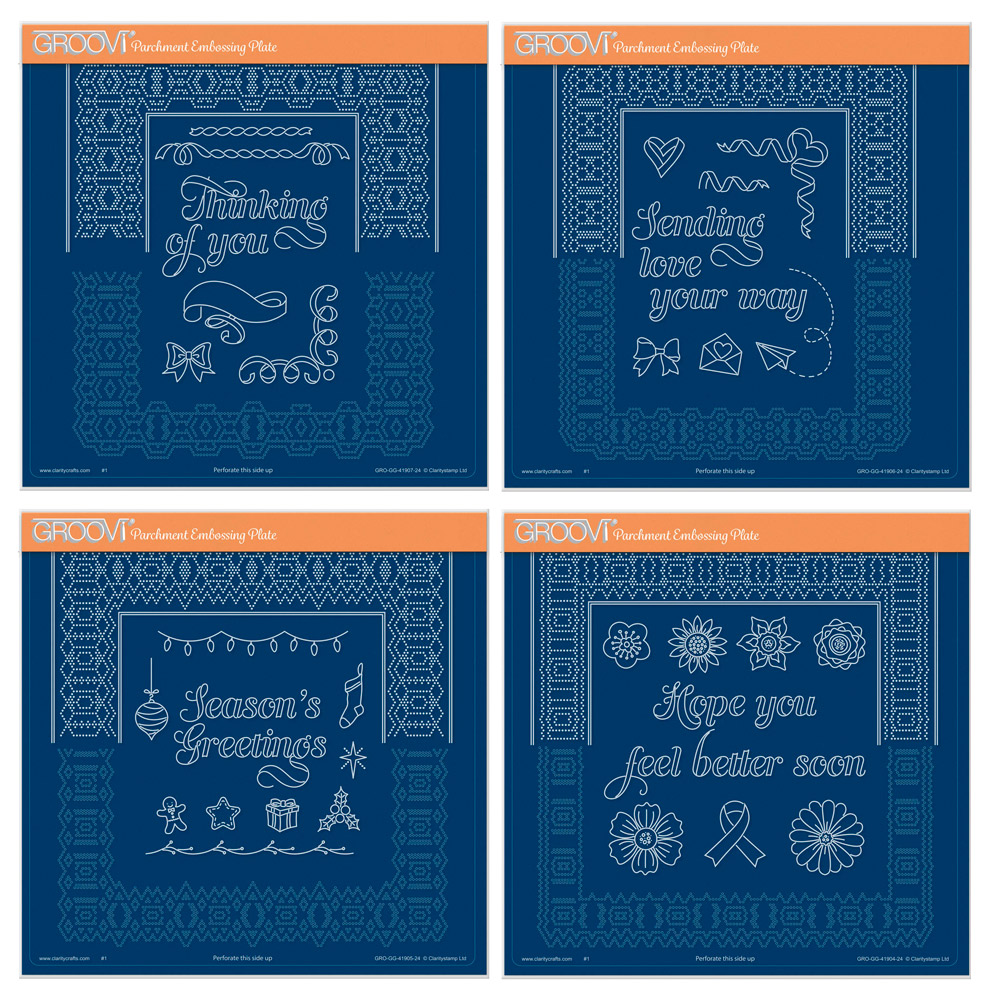
In this project, we will look at how to make the ‘Hope You Feel Better Soon’ diagonal ribbon grid smaller to fit around a centre topper. The lace border has also been used with what you may think of as the bottom of the pattern along the sides, all of the diagonal patterns can be used in this way.
Ingredients
Josie’s Feel Better Soon Diagonal Ribbon Lace Duet A4 Sq Groovi Piercing Grid (GRO-GG-41904-24)
Alphabet A5 Sq Groovi Plate Mate (GRO-MA-40002-07)
Nested Scallop Squares A5 Sq Groovi Plate (GRO-PA-40557-03)
Groovi Plate Mate For A4 Sq Grids (GRO-MA-41768-21)
A4 Parchment Poppets – Flower Collection (PER-PA-70392-A4)
A4 Plain Parchment (GRO-AC-40020-A5)
Pergamano embossing tools 4.5mm, 3mm, 1.5mm
Groovi 1&2 Tool (GRO-AC-40026-XX)
Pergamano 1-Needle Bold (PER-TO-70028-XX)
Pergamano 2-Needle Bold (PER-TO-70279-XX)
Scissors or Pergacutters
Groovi Tabs (GRO-AC-40437-XX)
Kiss Stickers (ACC-SC-31323-A5)
Clarity Satin Ribbon (ACC-MS-31107-XX)
Thick Perforating Mat (GRO-AC-40603-A4)
Picot Foam (GRO-AC-40625-XX)
Embossing Mat (PER-AC-70075-XX)
Waimea Falls Companion Paper (ACC-CA-31343-88)
7×7 White Card Blank (ACC-CA-30615-77)
Gold Brads (PER-AC-70274-XX)
Clarity Tape Roll-A-Tape (ACC-MS-31065-XX)
Red Liner Tape (ACC-AD-30375-XX)
Method
TO MAKE THE TOPPER
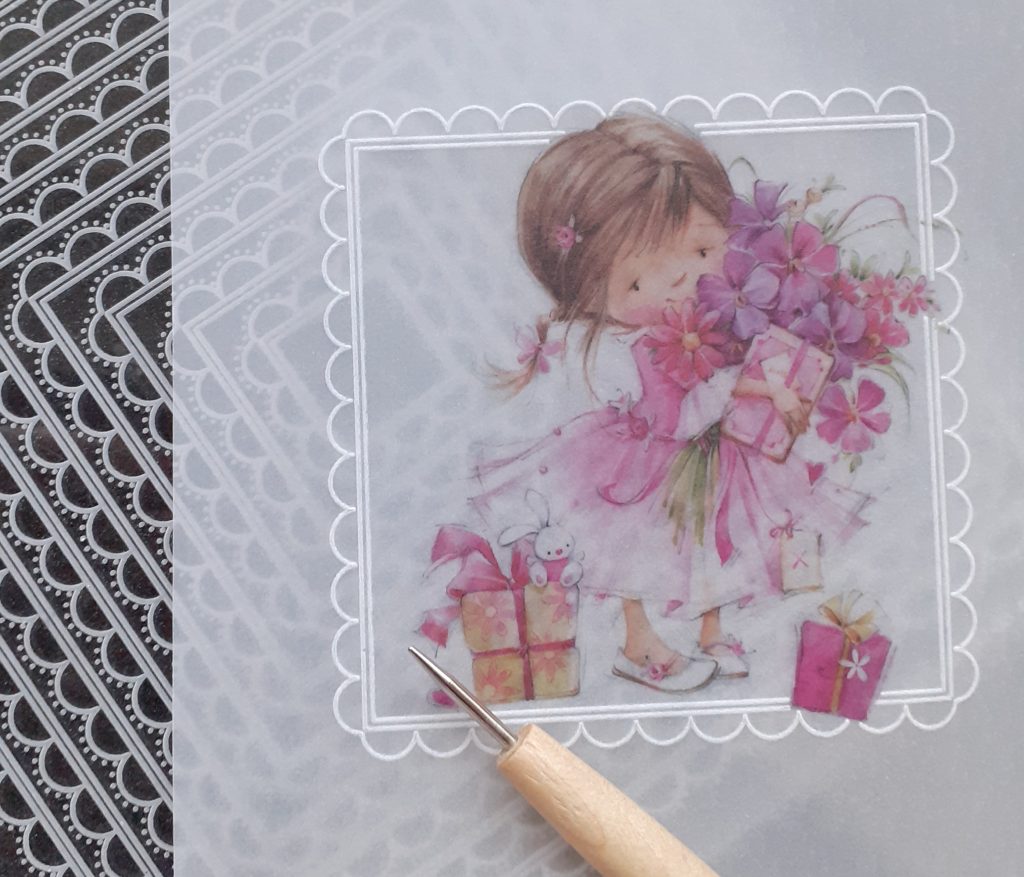
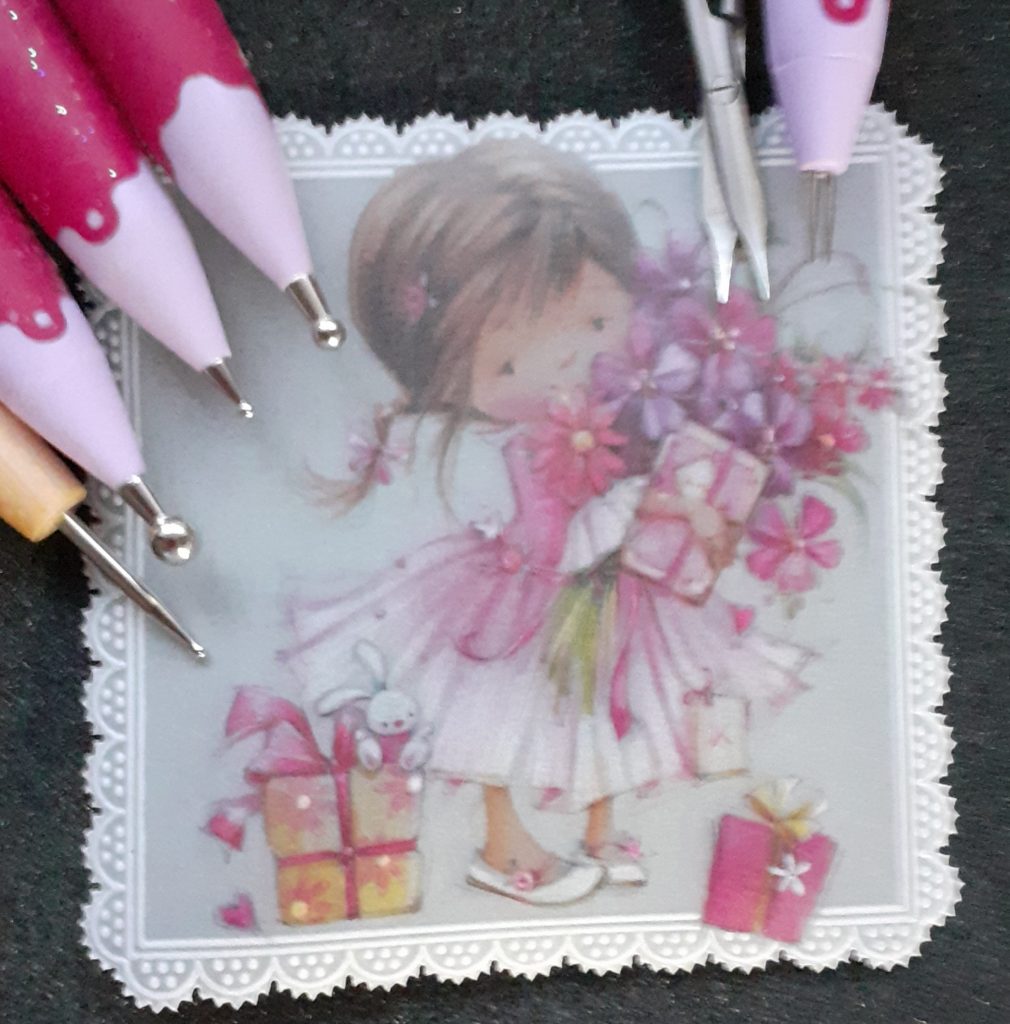
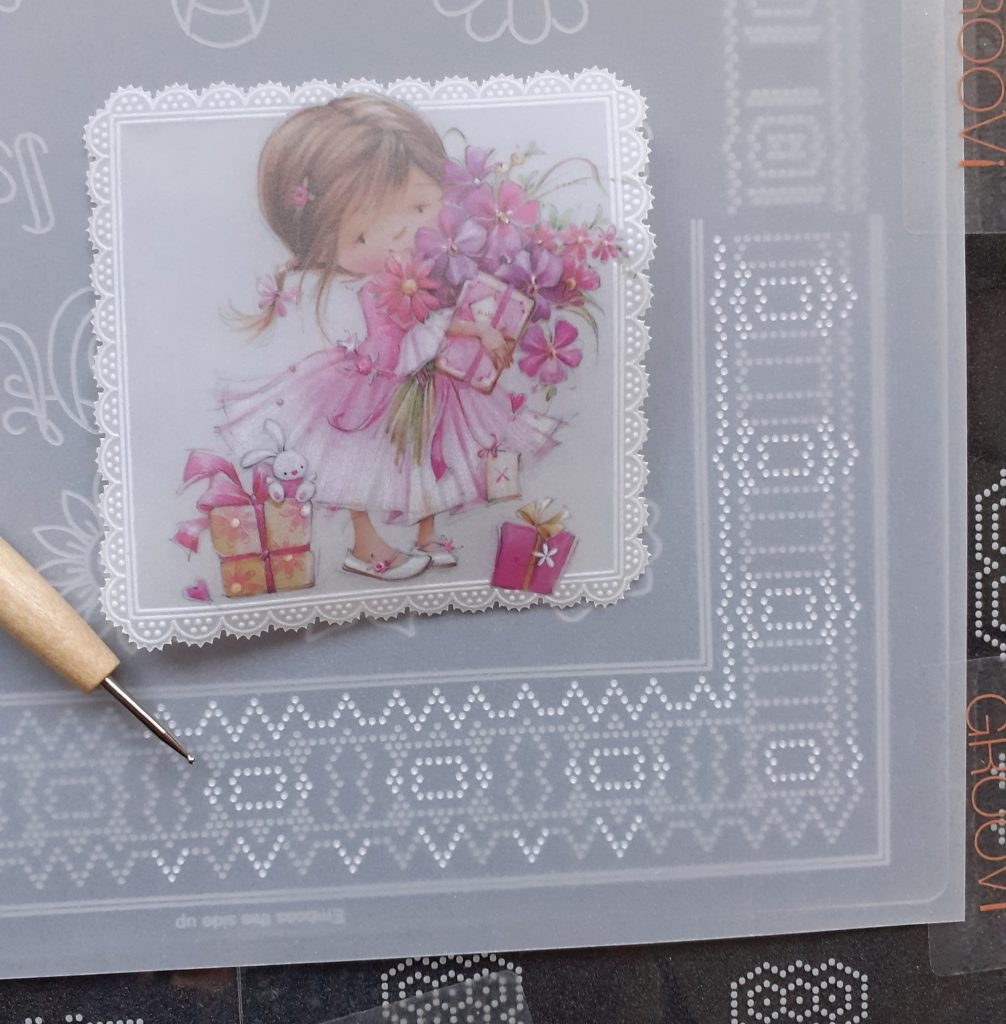
Step 1. Choose one of the medium-sized poppets (I used Primrose). Place her with the shiny side down onto the plate and use the Groovi No 1 tool to emboss the 5th scalloped square from the outside around her. Some of your Poppet may go into the scalloped border so be careful to emboss around her.
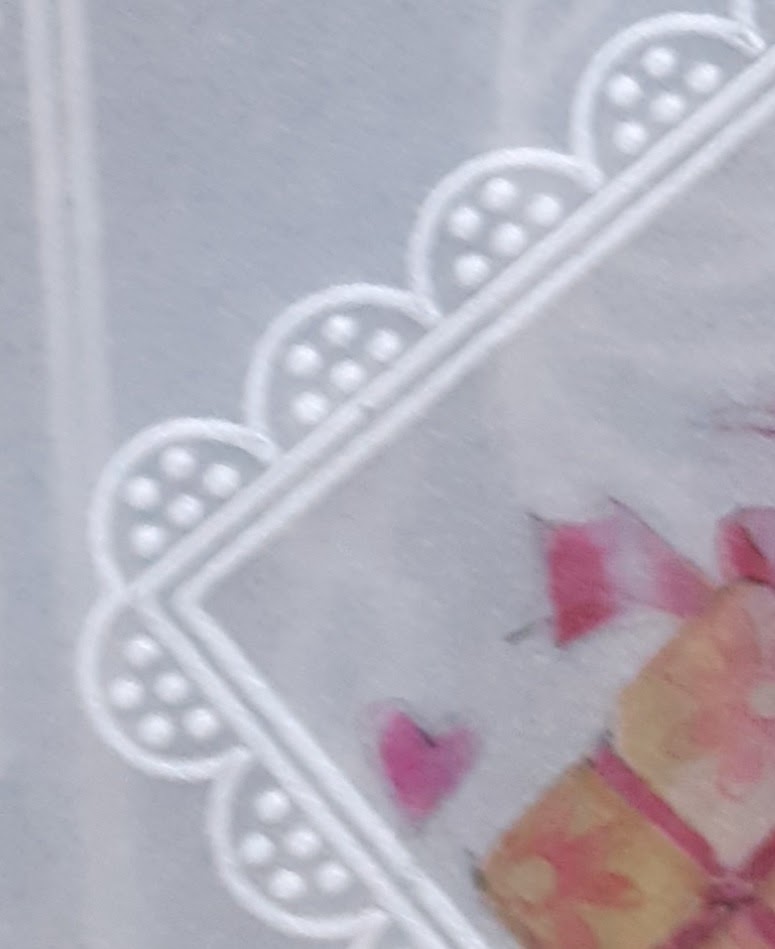
Step 2. Emboss a set of 5 dots in each scallop from the ribbon plate. You will find the dots in the diamond shapes (along the bottom edge of the embossing design) on the plate.
Step 3. Emboss your poppet as desired (from the back of the work) with the embossing tools. Perforate around the outer edge of the scallops with the 2-needle tool from the front of your work and then picot cut.
To Make A Lace Border
Step 4. Place your lace border plate inside the A4 plate mate (with the words ‘Emboss this side up’ facing you) and hold them together with Groovi tabs. This will stop the plate from moving as you work and help to prevent your square from being out of line when you get to the last corner.
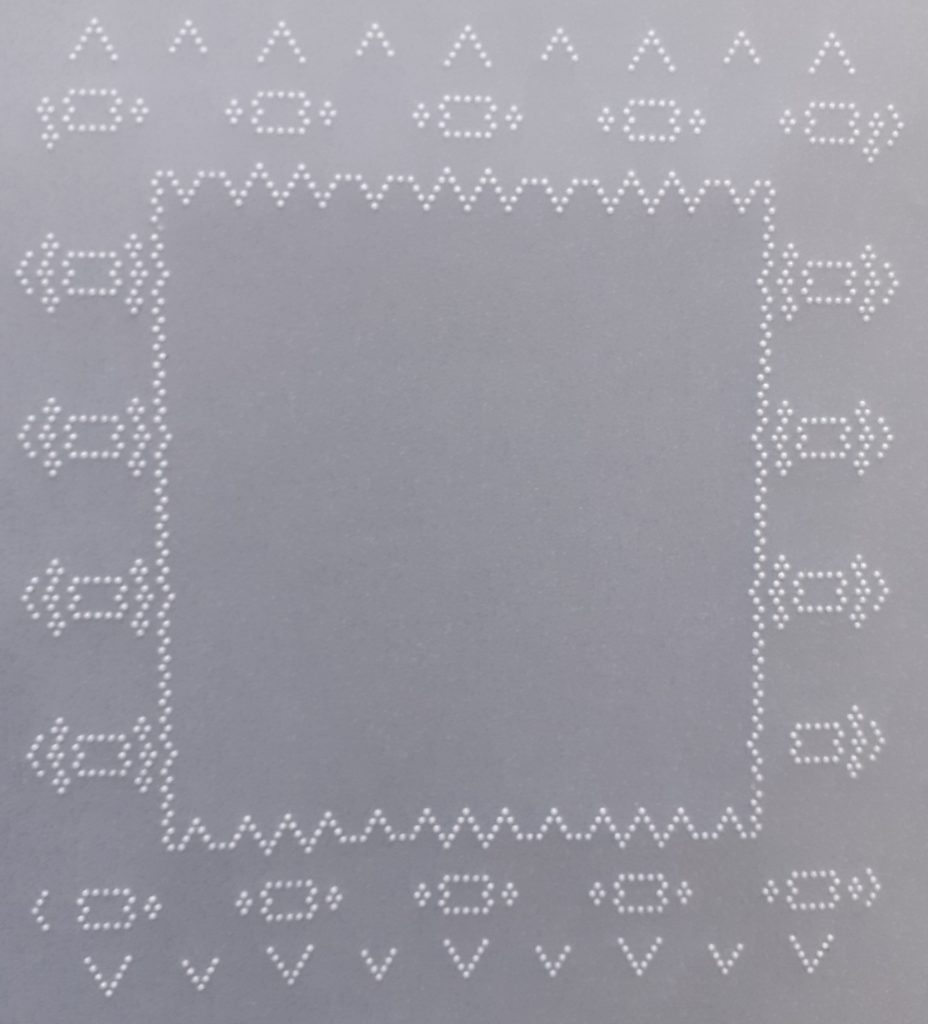
Line the edge of your parchment up with the lines of the plate mate. This will also help to keep your work straight. Attach well with Groovi tabs and use the Groovi No 2 tool to emboss areas of the design by pressing into the dots. I like to emboss all of the centre lines and then the areas of the outer part of the design. These are known as registration marks and will be used to line up the pattern as we work around the square.
Use the poppet topper as a guide to help work out what size your border needs to be, and always stop short of where you would like the next corner as you may go too far with your embossing.
Step 5. Once the first corner has been embossed you can remove the tabs and slide your work along to the opposite corner. Again, use the topper to check that your border is the correct size. The dots you have embossed will slot into the dots in the grid plate. Once you are happy that it is straight, secure it with Groovi tabs and emboss the registration marks in the second corner.
Step 6. Turn your parchment around and repeat step 2, lining the dots of one side up to complete the third corner. Move the parchment along to the opposite corner and complete the fourth corner.
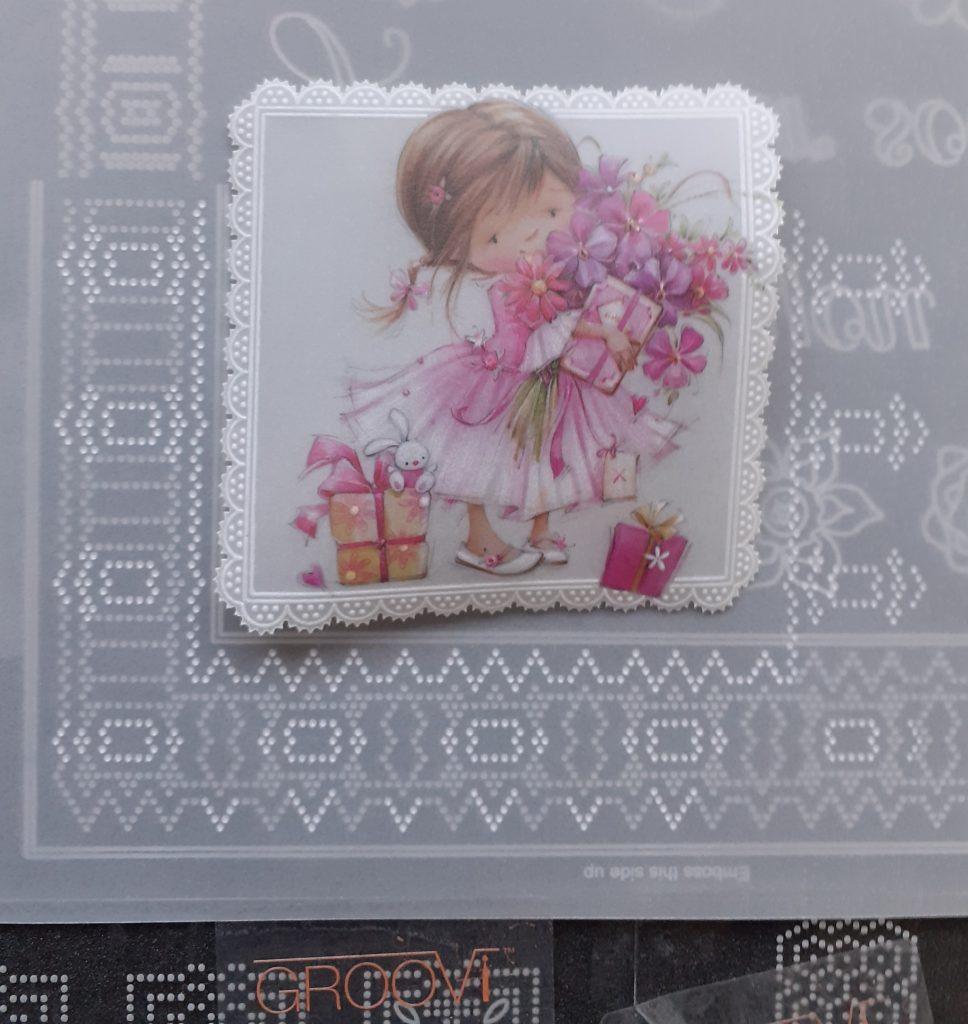
Your work should look as shown below.
Step 7. You can now complete all of the embossing.

Step 8. We will now work on a thick foam mat to do the perforating.
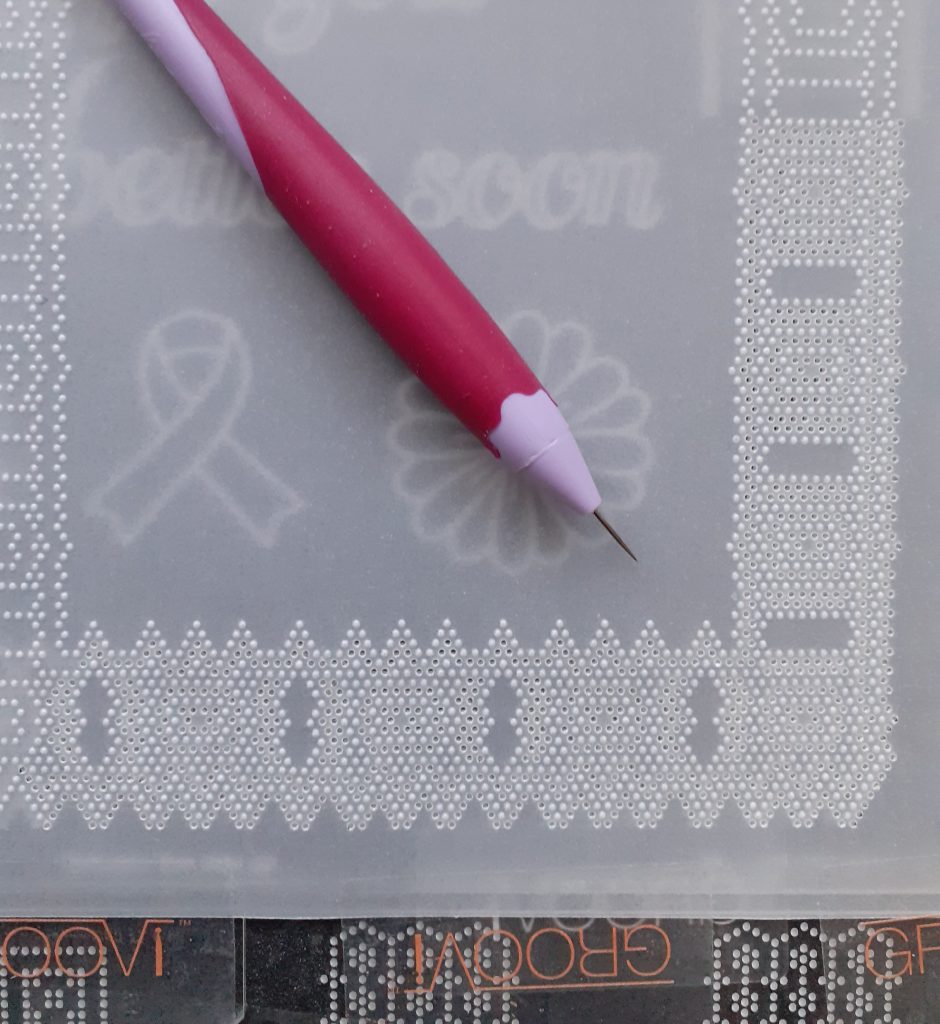
Turn the plate over so that you can read ‘Perforate this side up’. Turn your parchment over and align the holes in the grid between the embossed dots, attach securely to the plate mate. Use the bold single-needle tool to perforate the holes in the grid, holding the tool upright and going down the full length of the needle.
Step 9. Complete all of the perforations in your border.
Step 10. Picot cut the design in the border, following the guide that came with your plate. Always cut the outer edge of the border last.
Step 11. Use a Groovi tab to make a threading point on one end of your ribbon. Thread the ribbon through the slots and use the red liner tape to secure each end of the ribbon on the back of the work along each of the four sides of the border.
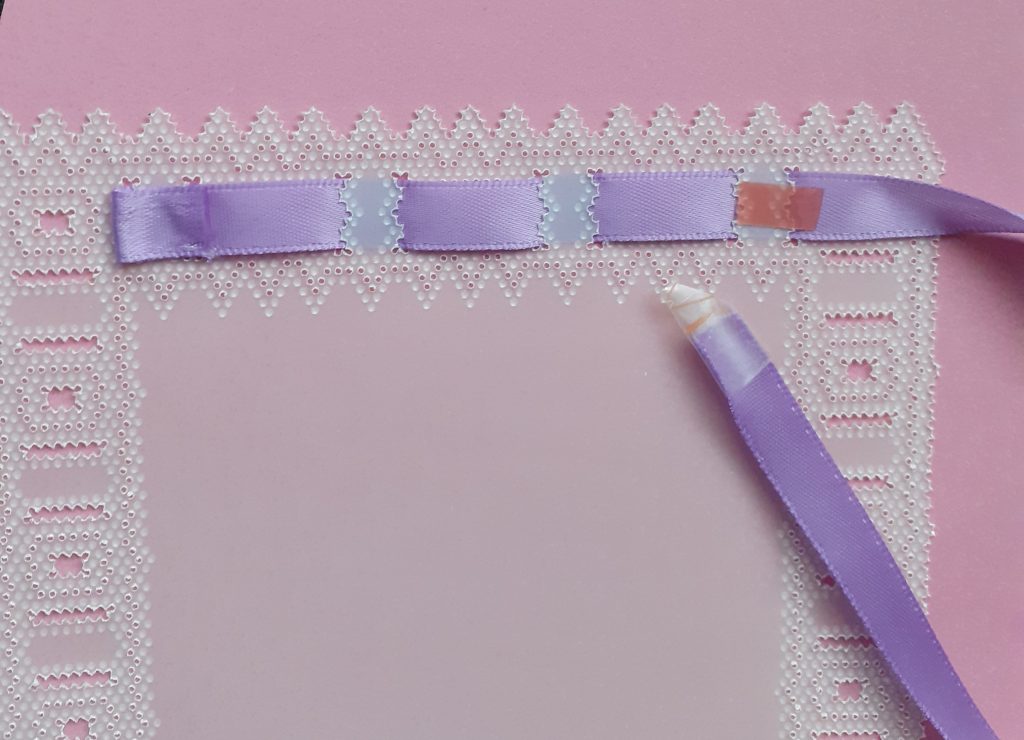
Step 12. Cut your backing paper to a 6.5-inch square and attach the border to it using the red liner tape along the back of the ribbon. Attach your topper to the centre of the lace border with the brads. Attach the finished piece to the card blank using the roller tape pen. Add a word sticker in the bottom section of the backing paper.
I mounted my lace border higher up the backing paper, not in the centre, to leave room for the word sticker below. And you’re all finished!
What a gorgeous card! Thank you, Josie, for sharing your incredible tips and tricks with us. I have a soft spot for these ribbon cards, as anyone who looks at the Saturday Share Blog will know!
Everything that Josie has been used, can found on the Clarity website HERE
If you like these designs, then Paul has been showcasing one of the other Diagonal Ribbon Grids in Groovi Tuesday, there are 4 designs in the set and are a great way to get started if you want to give lace/grid work a go
Episode 1 HERE or below
Episode 2 HERE or below
Paul will also shining a light on these designs with some extra shows on Create & Craft next Sunday (see below)
Looking at the week ahead, we have lots to keep you entertained this week………..
Tuesday 17th Jan:
Groovi Tuesday with Paul – 10am Live on Facebook and YouTube
Wednesday 18th Jan:
Groovi One Day Special with Paul on Create & Craft – 6pm & 9pm
Thursday 19th Jan:
Groovi One Day Special with Paul on Create & Craft – 10am & 2pm
Saturday 21st Jan:
Get Groovi with Tina on Create & Craft at 1pm & 5pm
Sunday 22nd Jan:
Get Groovi with Paul on Create & Craft at 4pm & 8pm
Travel gently, friends.
Lotsa love, Grace & Josie xoxo
Clarity – The Home of Art, Craft, and Well-Being.
Thank you.Grace and Josie.
🍒
Thank you Grace & Josie for another lovely clear step by step project on how to make the most of the ribbon plates & making a topper using the printed Poppets. I hadn’t thought of taking the Poppet into the frame like that but it looks so pretty.
Safe journey on Tuesday/Wednesday Grace & I will be thinking of you all over the coming days as many of us have done over the last week xx
A beautiful example of what can be achieved with the parchment poppet.
Fabulous project Josie. Thank you!
Safe travels to you Grace. I know it’s for sad reasons but I hope you are able to enjoy being back home with your Mum.
I’ll be thinking about you all. Xxx
Dear Grace. So very sorry to read the news, have been thinking of you all. Safe journey home. I came back on Friday from San Francisco and have stayed with one of my granddaughters for two days , you will fly over the house as you land, have been watching them today. Will be thinking of you. Love and hugs. Xx. Just keep remembering all the lovely things you have shared over the years,