Clarity’s Matters Blog Tutorial: How To Combine A Lace Frame With Your Design
Hello hello! Grace here.
Happy Christmas from Team Clarity!

We hope that you’re enjoying yourselves, wherever in the world you are, and having a healthy, peaceful Christmas Day.
We are joined this weekend by the fabulous Jane Telford. She has prepared a Christmas step-by-step project for us to follow. Lucky us! I’ll hand you right over to Jane…

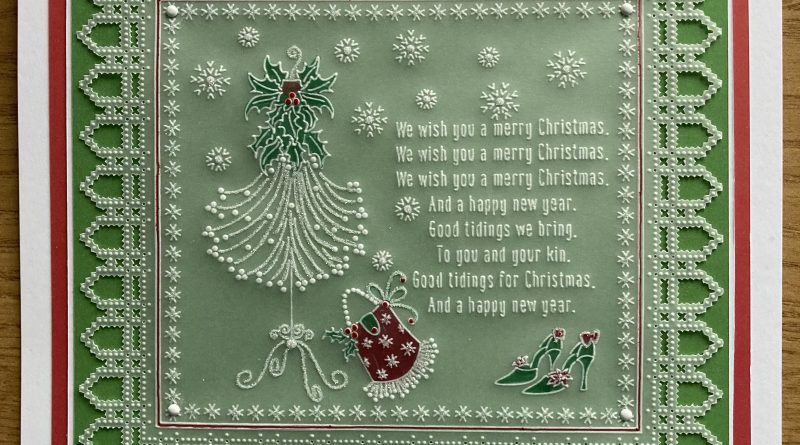
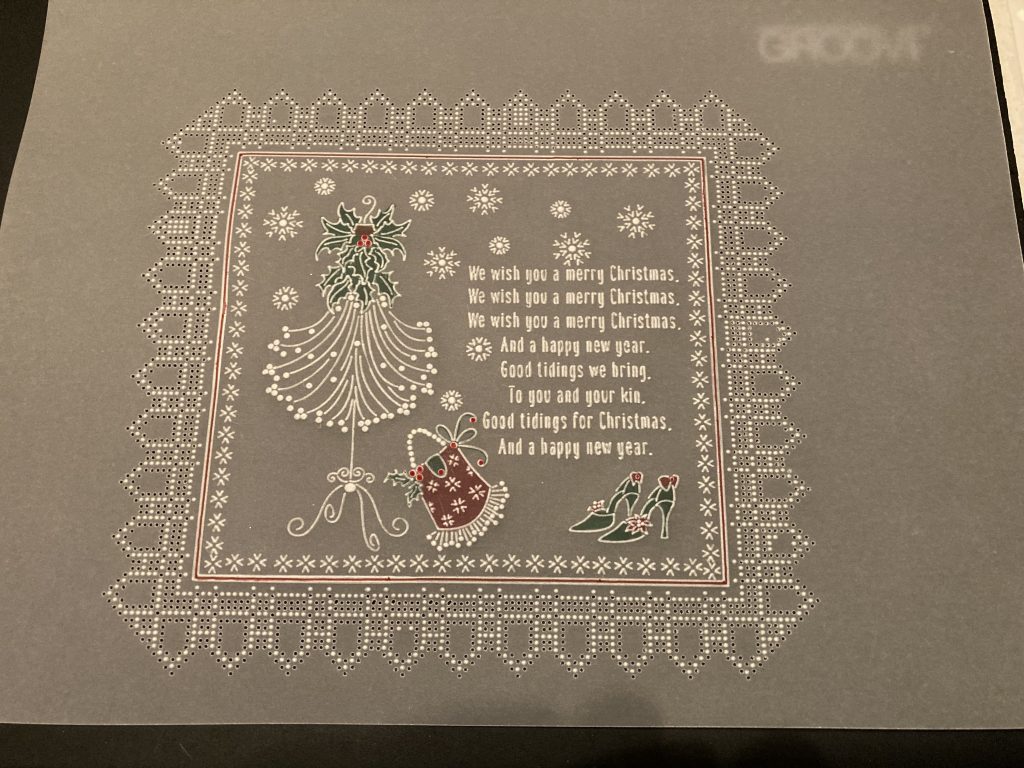
Hello! Happy Christmas. I love these Christmas Treasures plates by Linda Williams. I can see just how useful they will be… and not just for Christmas.
Here is a project using the fifth set of those plates. This is where we are headed…
Ingredients
Josie Davidson’s Arch Lace Duet A5 Sq Groovi Grid (GRO-GG-41658-12)
New Year Party Plate (GRO-CH-42038-03)
We Wish You A Merry Christmas Plate (GRO-CH-41919-03)
Groovi Plate Mate For A5 Sq Grids (GRO-CO-41706-08)
Black Dual-Purpose Groovi Mat A4 (GRO-AC-40194-A4)
Clear Parchment (GRO-AC-40024-A4)
Light wave (ACC-LP-30352-A4)
Groovi® Embossing Tool 0.8mm – 1.3mm (GRO-AC-40026-XX)
Groovi® Embossing Tool 2.0mm – 2.8mm (GRO-AC-40027-XX)
1.5mm Embossing Tool (PER-TO-70004-XX)
1-Needle Bold (10229) Perforating Tool (PER-TO-70028-XX)
Perga Colours Exclusive (PER-CO-70060-XX)
4 White Brads (PER-AC-70269-XX)
Ringlock Scissors (PER-TO-70041-XX)
8×8 Card Blank (ACC-CA-30620-88)
Sticky Ink (PER-AC-70134-XX)
Perga Glitter (PER-AC-70252-XX)
Mapping Pen (PER-TO-70039-XX)
Method
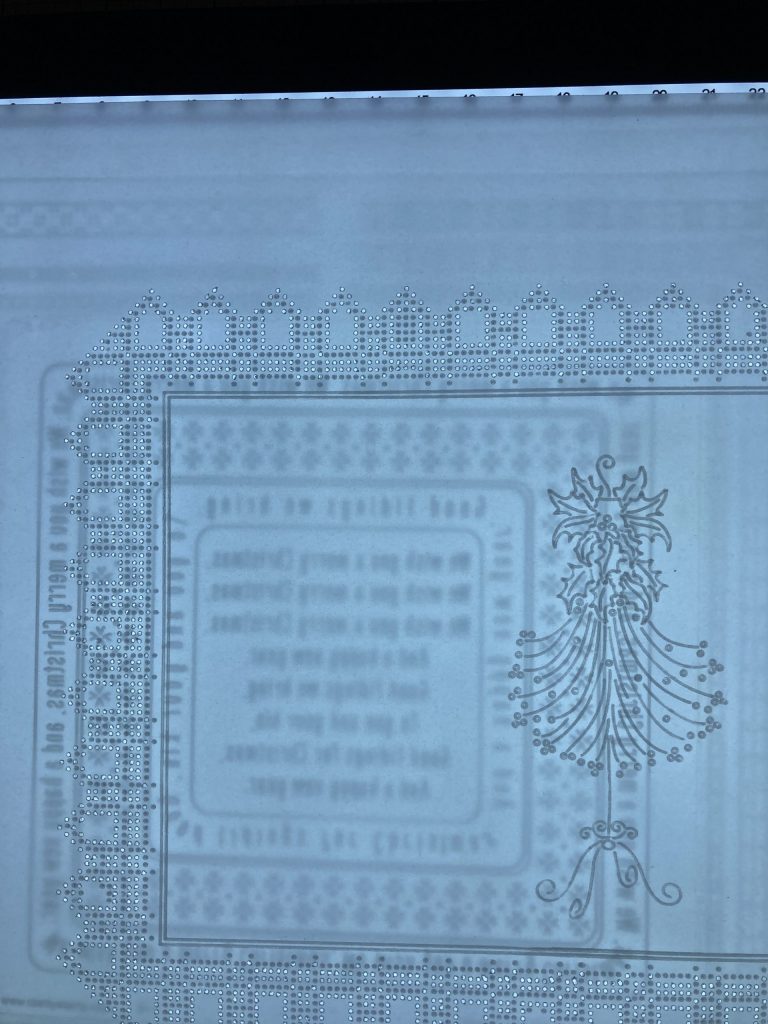
Step 1. Put a piece of plain parchment over the arch lace plate and plate mate. Use the lines on the plate mate to make sure the parchment is straight.
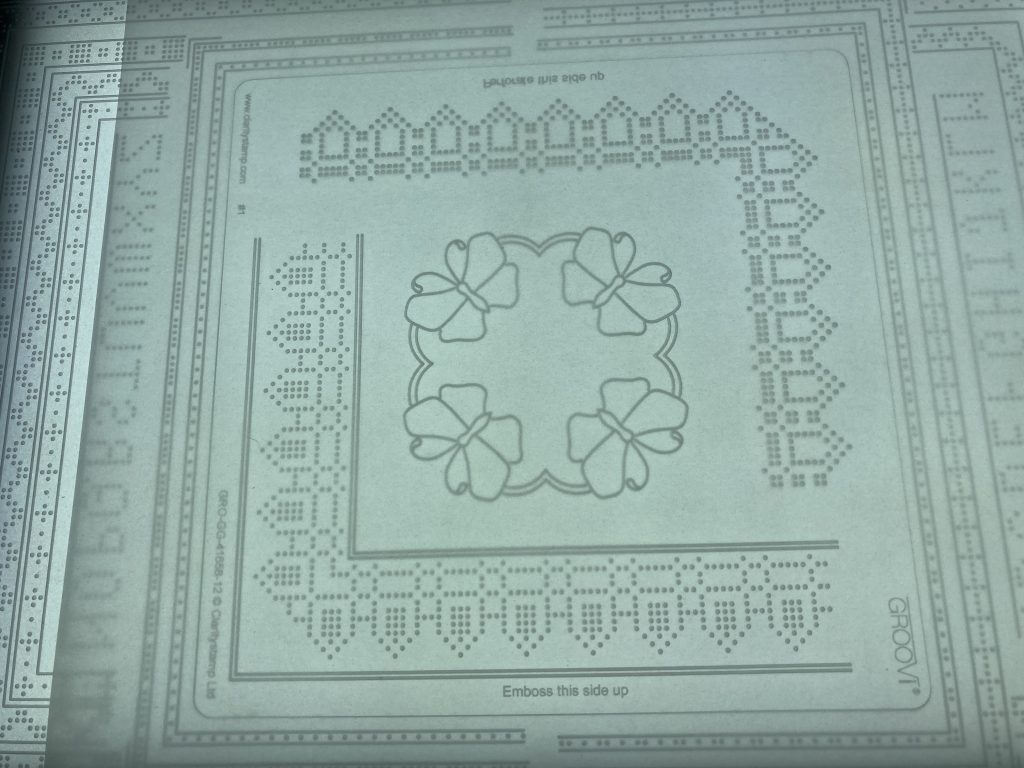
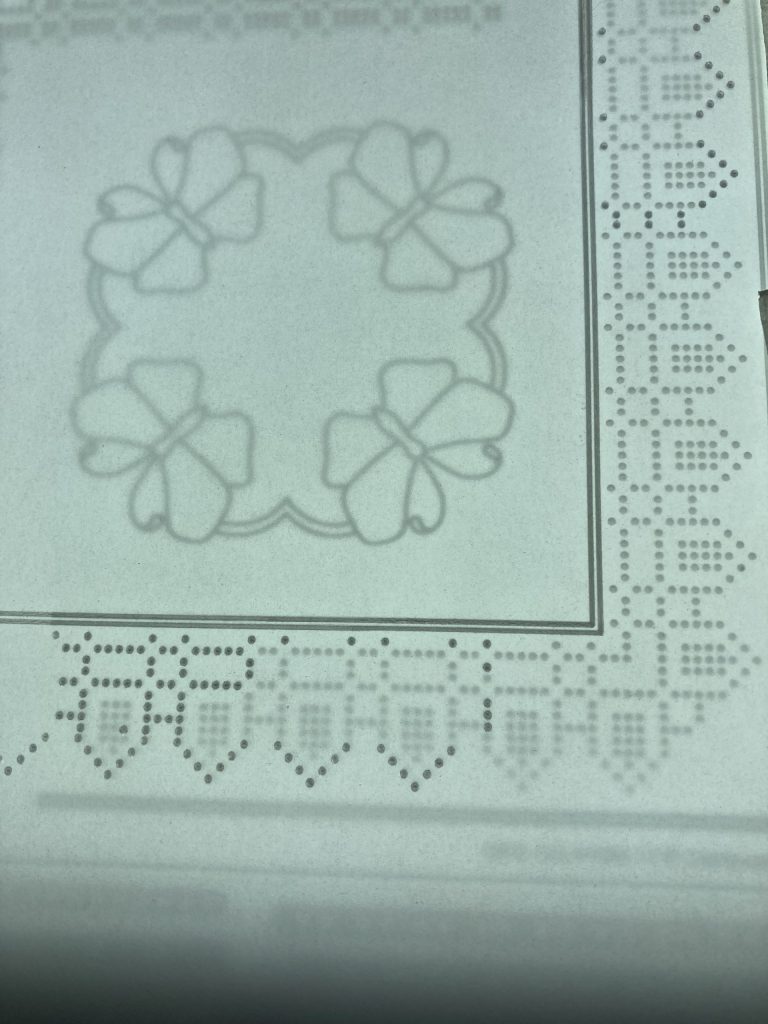
Step 2. Emboss one corner as shown and then move it up. Use the two other plates to work out how long you need the lace border. Complete the border using registration marks.
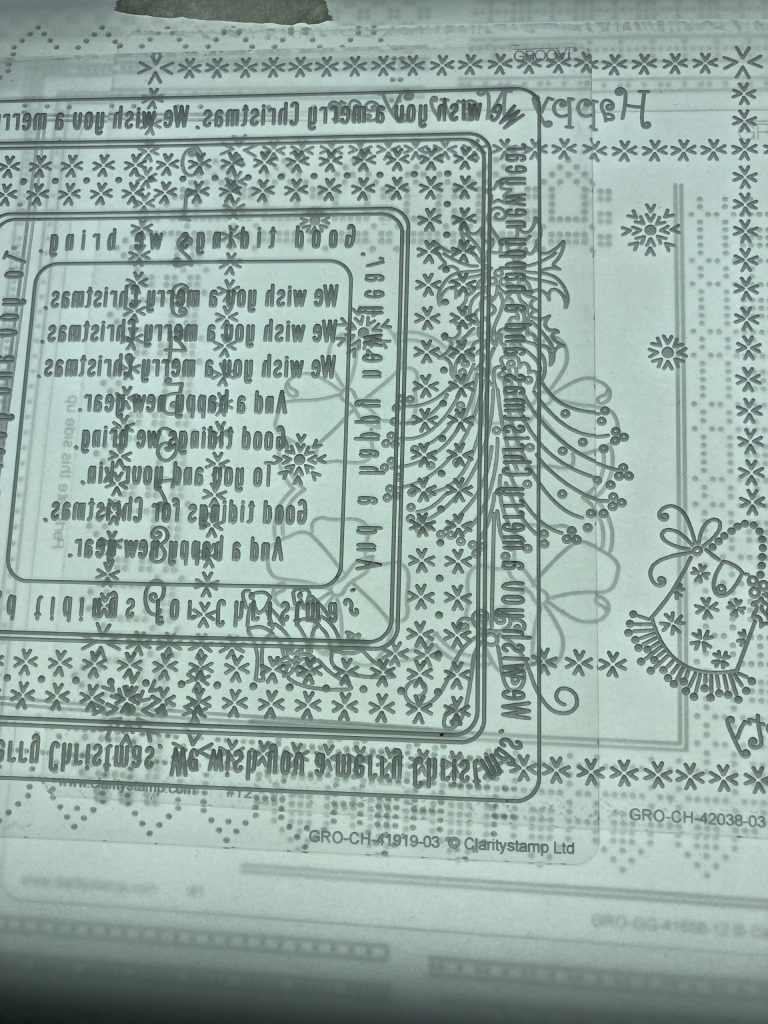
Step 3. Once the frame is complete reposition it and complete the embossing of the border.
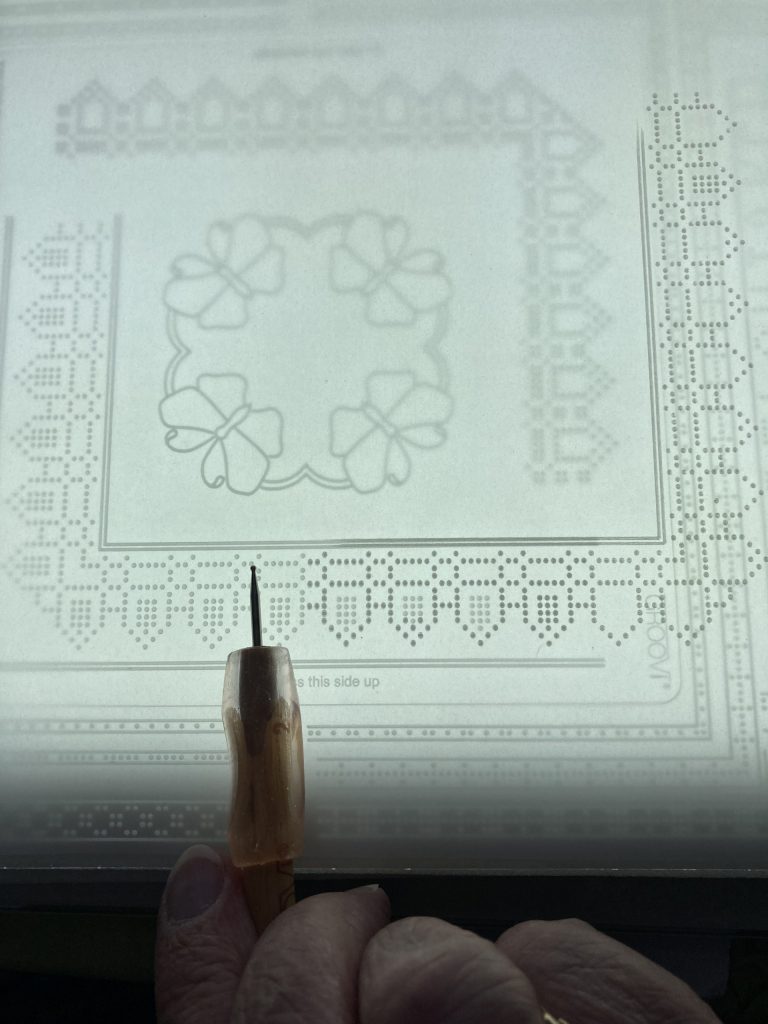
Step 4. Turn the plate and the parchment over and line up the embossed area with the holes ready to perforate. I use pins to help line up and hold the parchment in place. Complete the perforations using a 1 needle bold tool.

Step 5. Emboss the main image off the New Year Party plate.
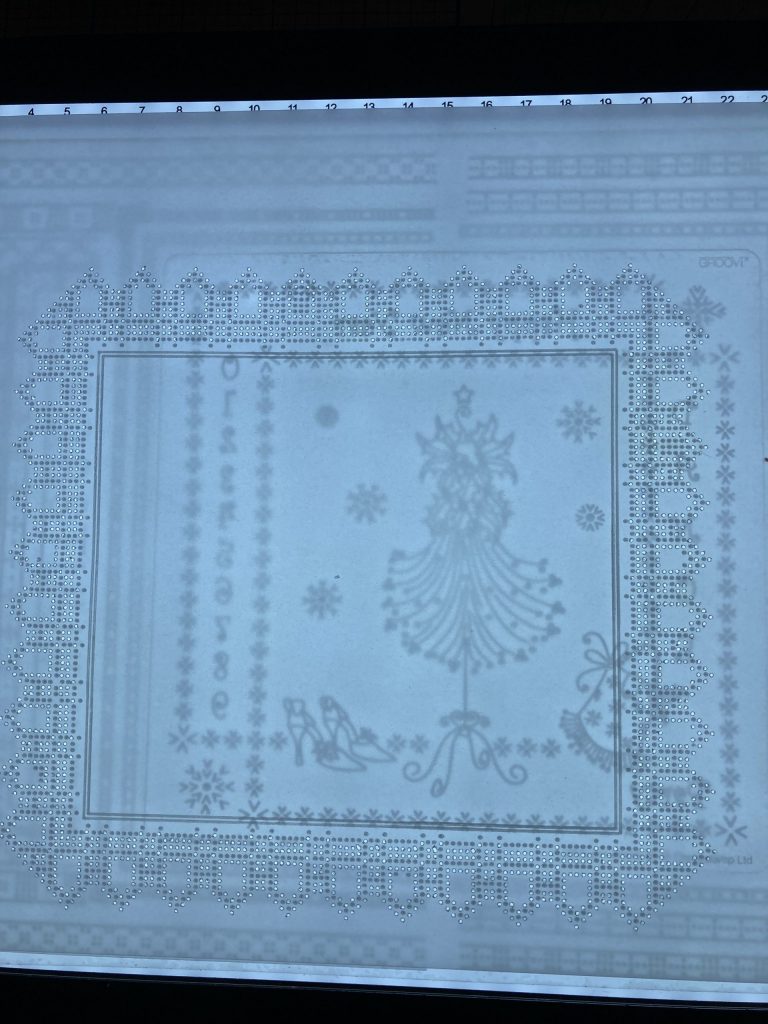
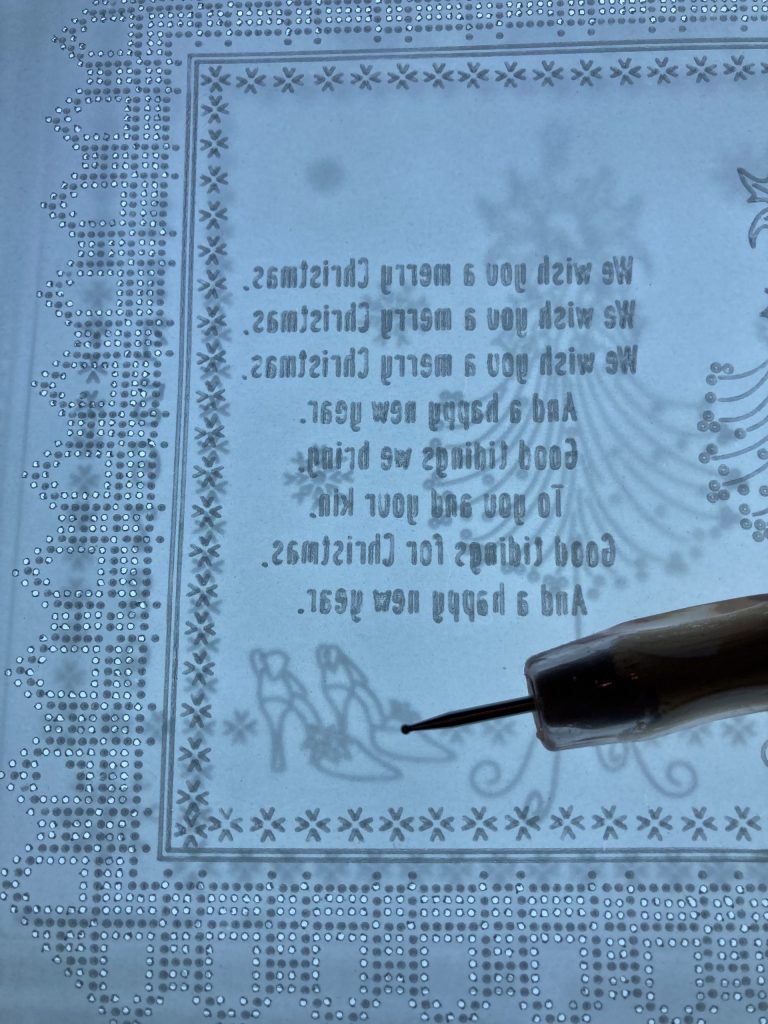
Step 6. Emboss the verse only from the centre of the We wish you plate.
Step 7. Emboss the stars around the inside of the double lines.

Step 8. Add the shoes, snowflakes and the bag to the design.
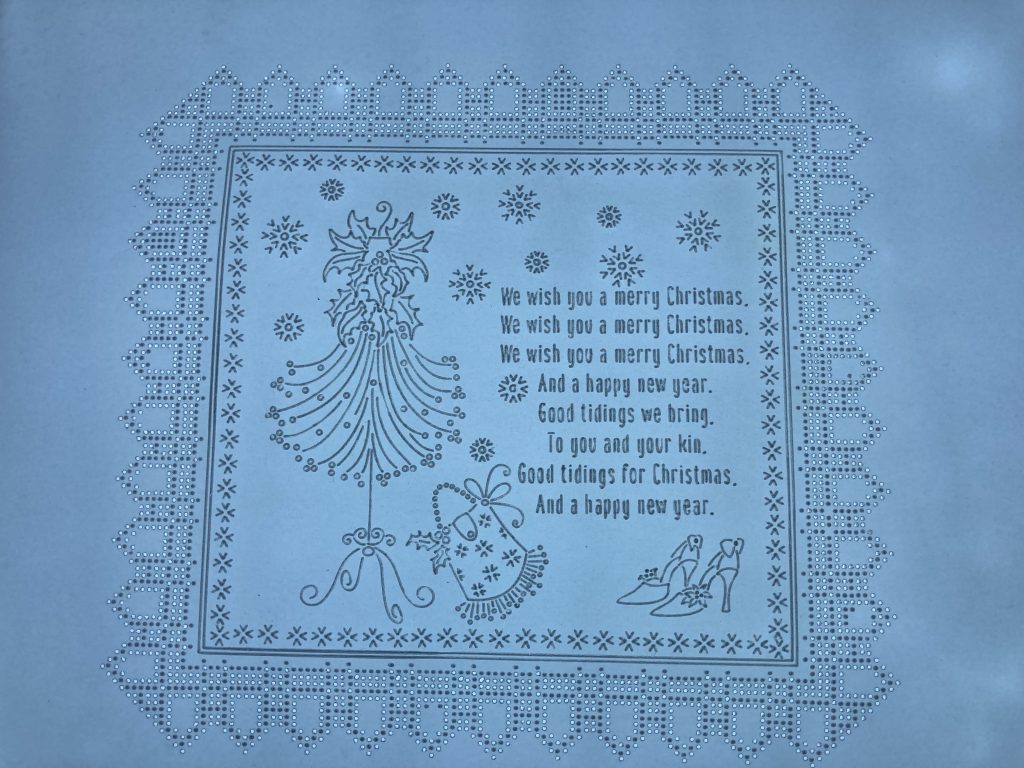
Step 9. The design should now look like this.
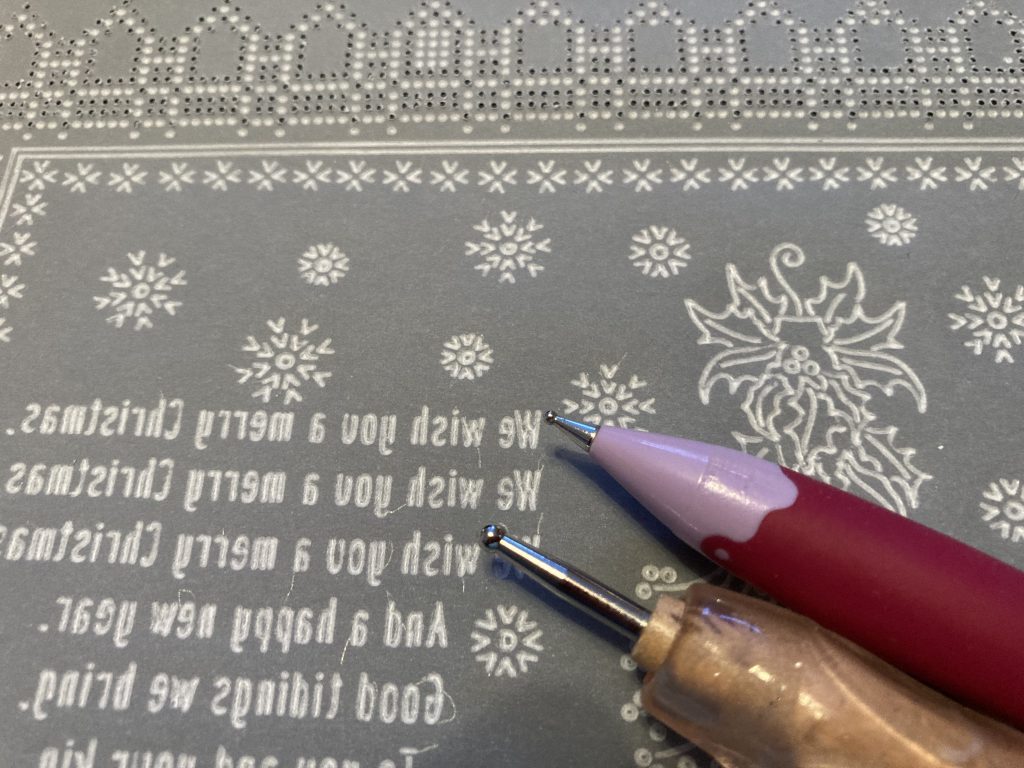
Step 10. Use Groovi 3 & 4 tool and 1.5 mm tool to do whitework in the small areas.
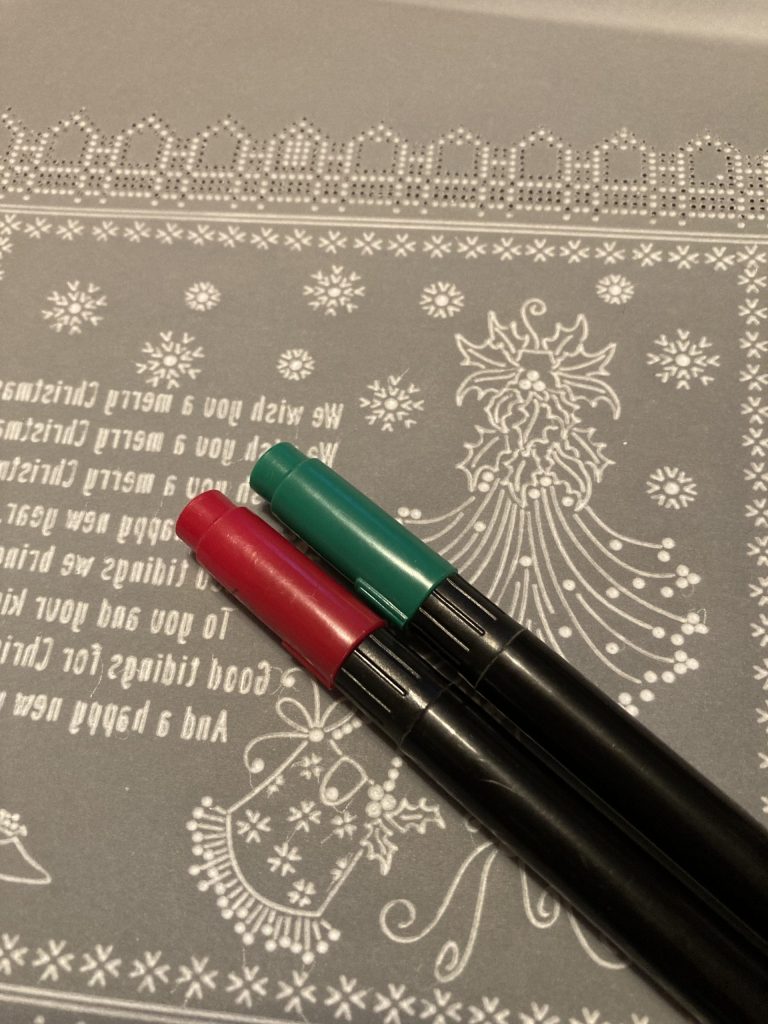
Step 11. Colour with perga colours red 26 green 30 and brown 21.
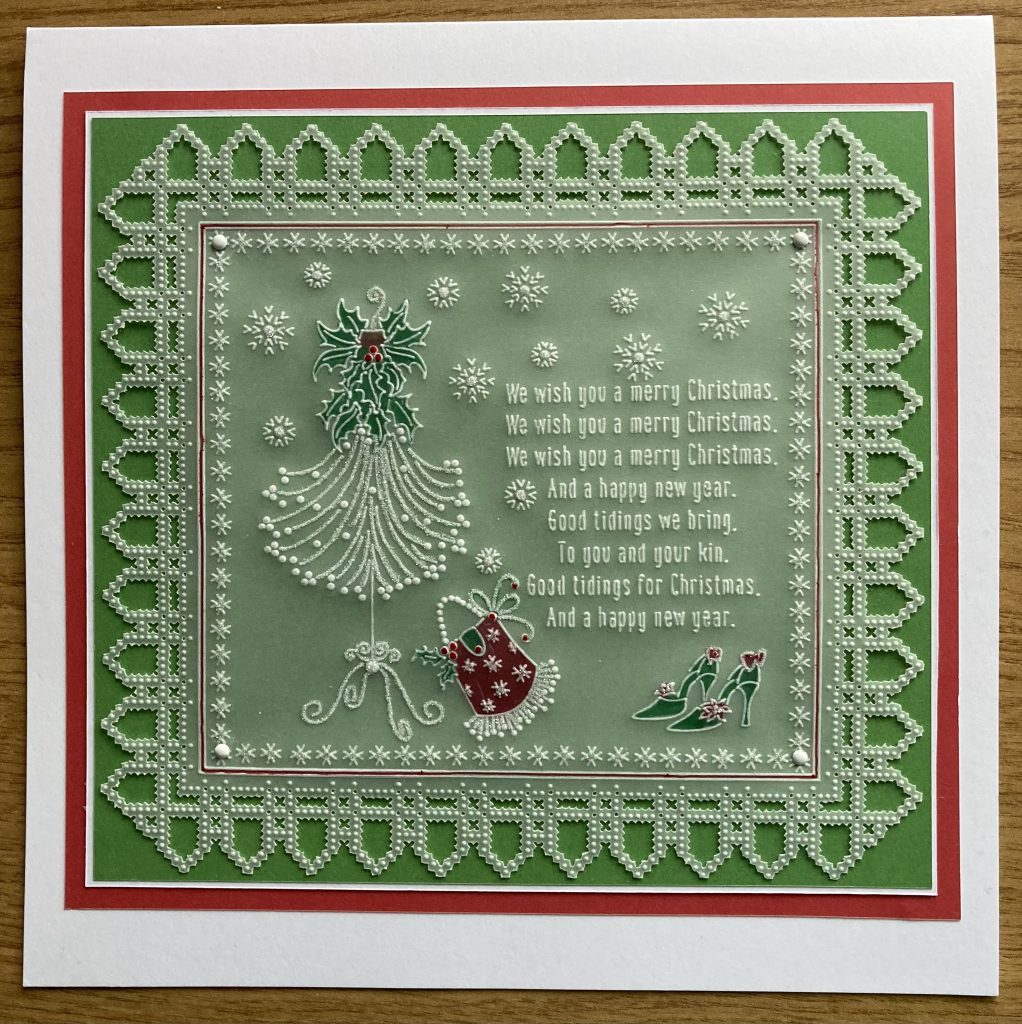
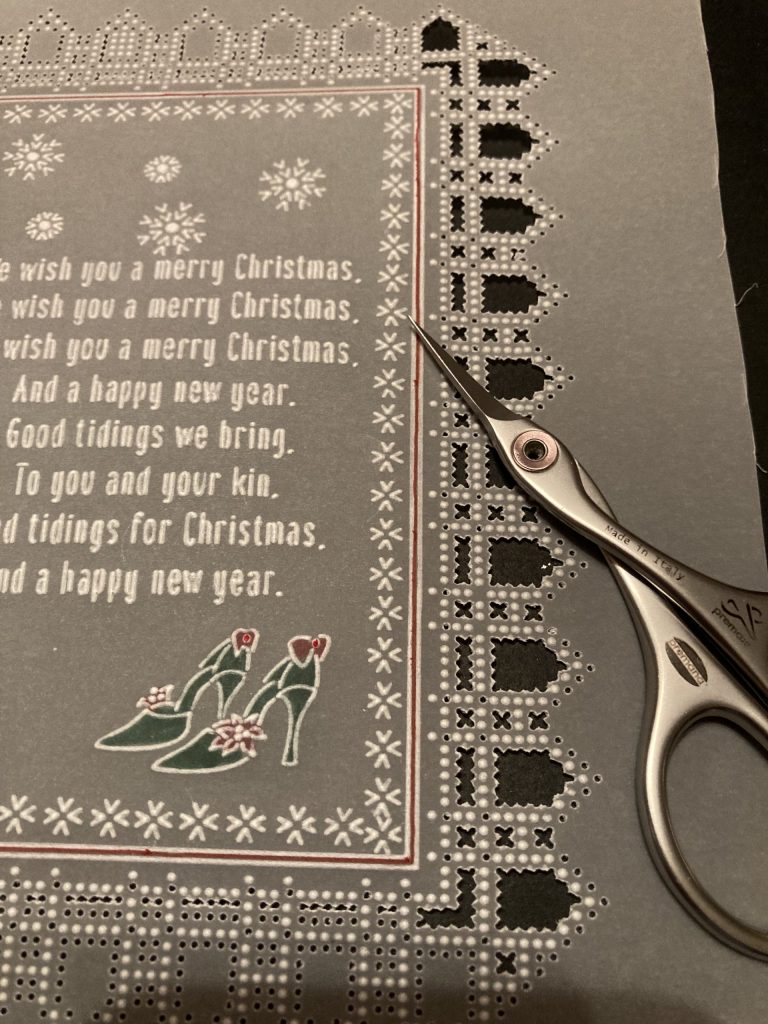
Step 12. Cut waste from in the lace border then from around the outer edge.
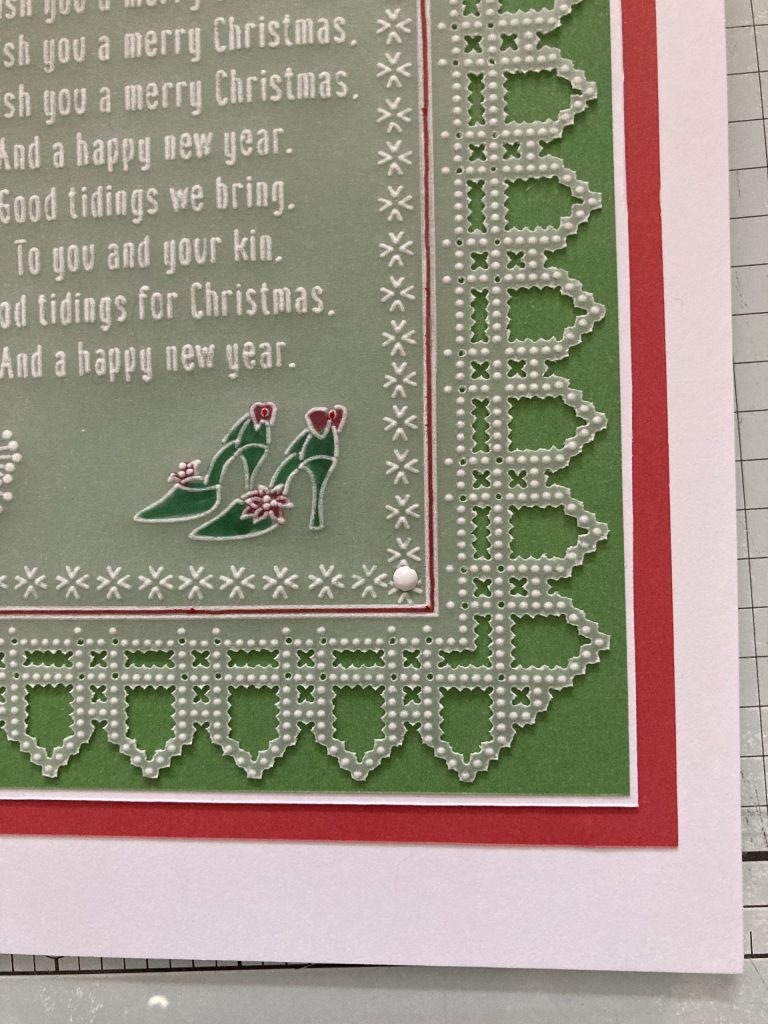
Step 13. Cut green paper Shenandoah Companion paper 17½ x 16 cm, white card 17.8cm x 16.3cm and red Amazonia Companion paper 18.6cm x 17.2cm. Mat and layer onto an 8×8 card blank.
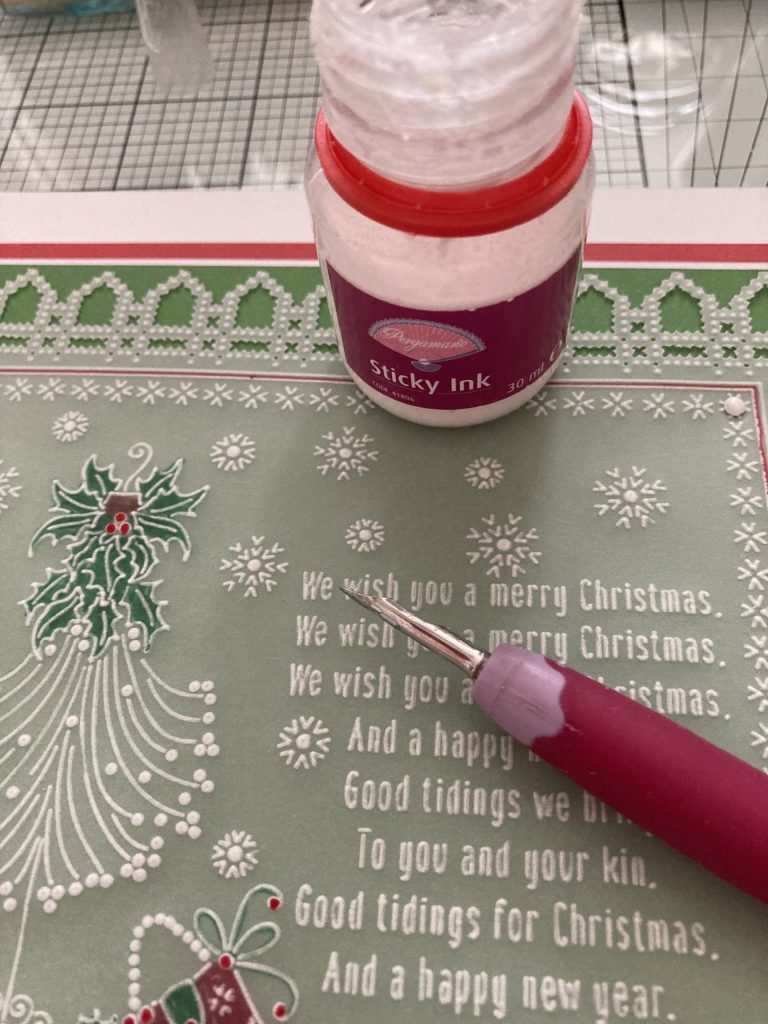
Step 14. Use a mapping pen with sticky ink to add glitter to the card.
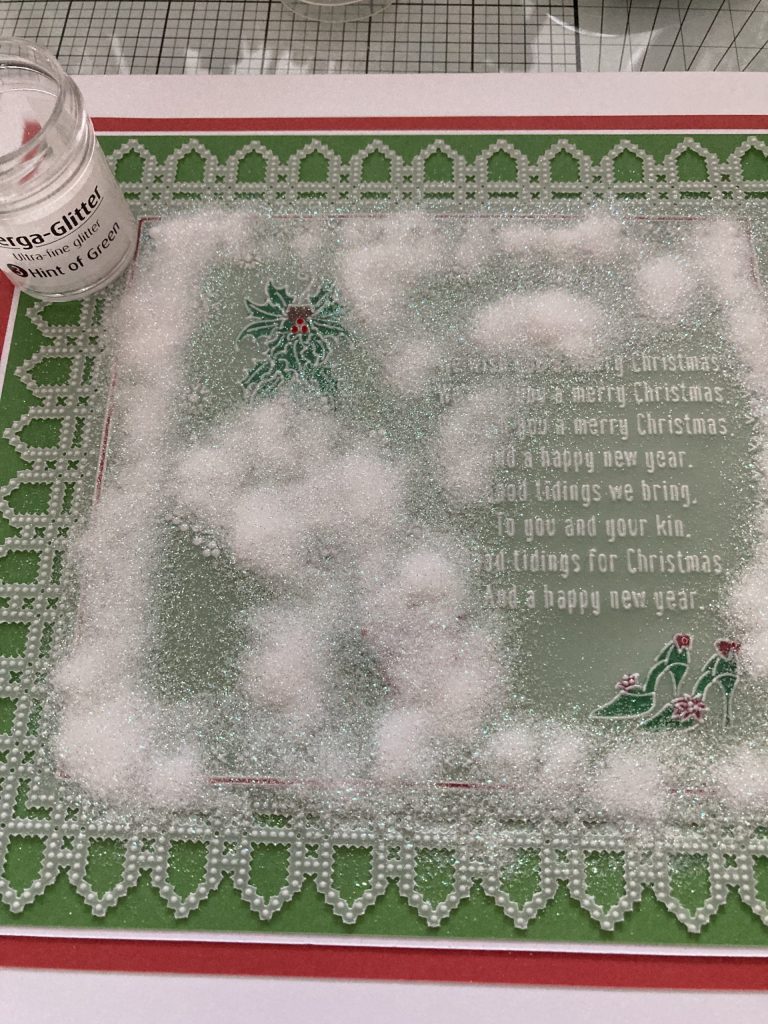
You have now completed your project.
BEAUTIFUL! Thank you so much, Jane, for sharing this step-by-step project with us. Sometimes we can look at these epic pieces of artwork, and not know where to begin! But you make it achievable. Thank you!
Everything that Jane has used in this particular project can be found over on the Clarity website HERE. In fact, ALL step-by-step projects can be found on the website, alongside their product list.
In other great news, you may want to take advantage of our Parchment Price-Lock offer before the prices increase again on the 3rd January. Get in there whilst you can!
Click HERE to investigate more.
And don’t forget that Mum is doing a festive Coffee & Mince Pies SHAC Shack at 10am today. Just a sharing of artwork, a get together and a catch up. It’ll be lovely! Watch HERE or below
Looking at the week ahead Mum, Paul and the Clarity Elves are having a bit of a break. A few of the Elves will be in the office between Christmas and the New Year and the phone lines will be manned between 8am & 1pm on the 28th, 29th and 30th, but don’t forget that the website is open 24/7!

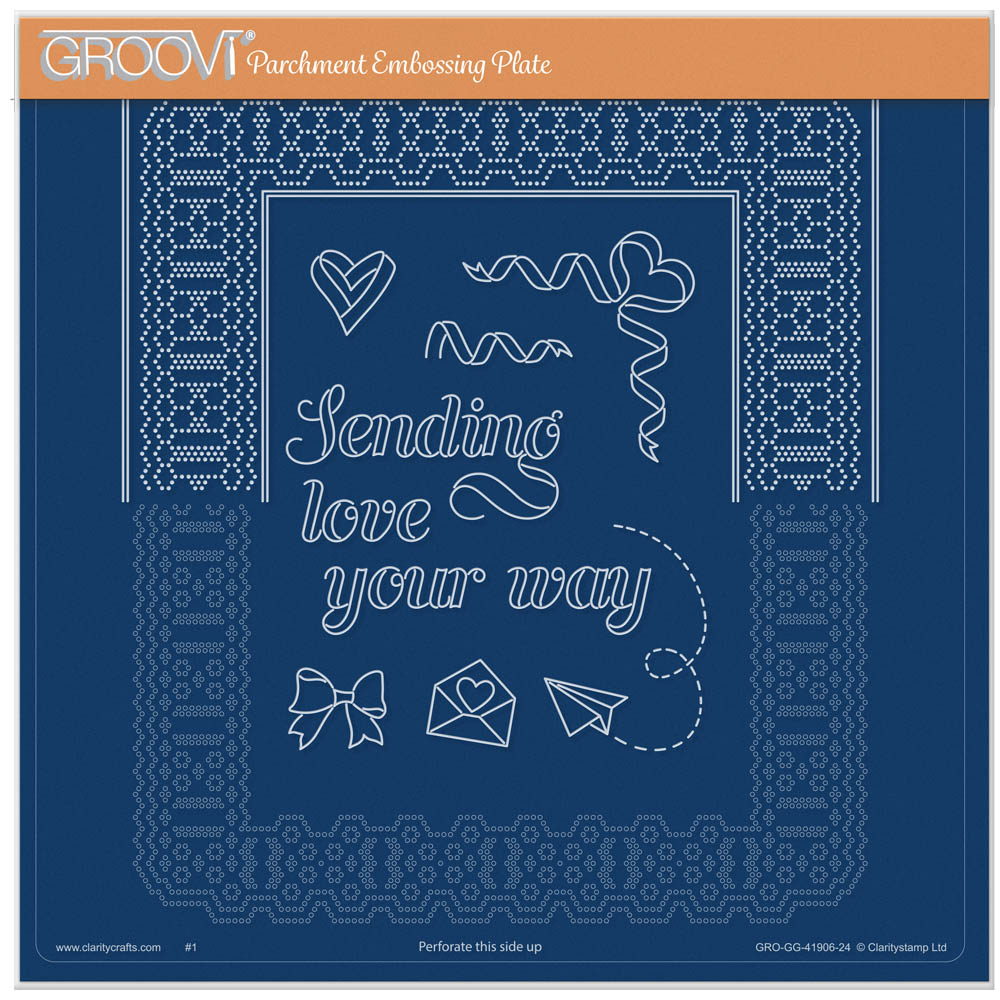
Paul will be back with Groovi Tuesday at 10am on Tuesday 3rd January 2023 (!) using Josie’s Sending Love Diagonal Ribbon Lace Duet A4 Sq Groovi Piercing Grid.
Available HERE.
And Mum will be back in the SHAC Shack at 10am on Monday 9th January. She looks forward to seeing you there!
I’ll see you next Saturday, for our Saturday Share Blog. I can’t wait to see what you’ve created! Don’t forget that you can always email me your artwork, I love to receive it! Grace@claritystamp.com
Right then. I’m off to enjoy the Christmas festivities!
Travel gently, friends. And enjoy your day, for whatever it is.
Lotsa love, Grace & Jane xoxo
Clarity – The Home of Art, Craft, and Well-Being.
Lovely project Jane! Thank you for the clear step by step instructions. Looking forward to a few quiet minutes after the festivities when I can have a go – a card to store for next year. Why not start early?
Merry Christmas to all the Clarity Team. x
Thank you Jane, a lovely project to do when I have some down time!
Thank you, Grace for taking the time to organise all the Clarity Matters blogs.
Enjoy your family time x
A lovely card Jane, thanks for sharing the step by step instructions. Would make a great 18th birthday card, just need to exchange the holly & verse. Thinking cap on as I need one for February. Merry Christmas everyone & look forward to another wonderful year of crafting in 2023. Hope all your friends are safe in New York Grace with all the extreme weather that has blown in all over the USA. x
Jane does make it so easy to follow. Thank you both for blogging this on Christmas Day.
We are having a very relaxed 12 days of Christmas starting today, the turkey is in the oven, the veg are prepared, the table is set and the wine is chilling. No pressures, no worries.
I love Christmas ❤️ 🎅❤️
Good job you left New York before the blizzard and are now safely ensconced with your family.
Happy Christmas to you all.
🍒
A great step by step for a beautiful card, thank you. Seasons Greetings to you all. x
Thank you Jane for this – loved the tip about using pins to hold the work in place whilst perforating the grid. Hope you have a safe journey back home Grace xxx