Clarity’s Matters Blog Tutorial: How To Make A 3D Owl
Hello hello! Grace here.
I hope this finds you safe, happy and feeling crafty!
We are joined this weekend by the fabulous Glynis Whitehead. She has kindly put together a step-by-step project for us, How To Make A 3D Owl. How Christmas-appropriate! I’ll hand you right over to Glynis…

Owl To Make A 3D Owl
Ingredients
A4 Plate Mate for Grids (GRO-MA-41768-21)
Mama Owl A4 Square Plate (GRO-TE-40877-15)
Baby Pink Groovi Soft Tones Parchment Paper A4 (GRO-AC-40403-A4)
Pergamano Embossing Tool – 6mm (PER-TO-70016-XX)
Pergamano Embossing Tool – 4.5mm (PER-TO-70015-XX)
Pergamano Semi-Circle Mini Perforating Tool (PER-TO-70034-XX)
Pergamano 2-Needle Tool Fine (PER-TO-70035-XX)
or Bold (PER-TO-70279-XX) (whichever you prefer)
Groovi tools from Starter Kit
Perga Colours Exclusive Pen – # 8 & 20 (PER-CO-70060-XX)
Groovi Tabs (GRO-AC-40403-A4)
Red Liner Tape Or 3mm Double-Sided Tape (ACC-AD-30375-XX)
Method
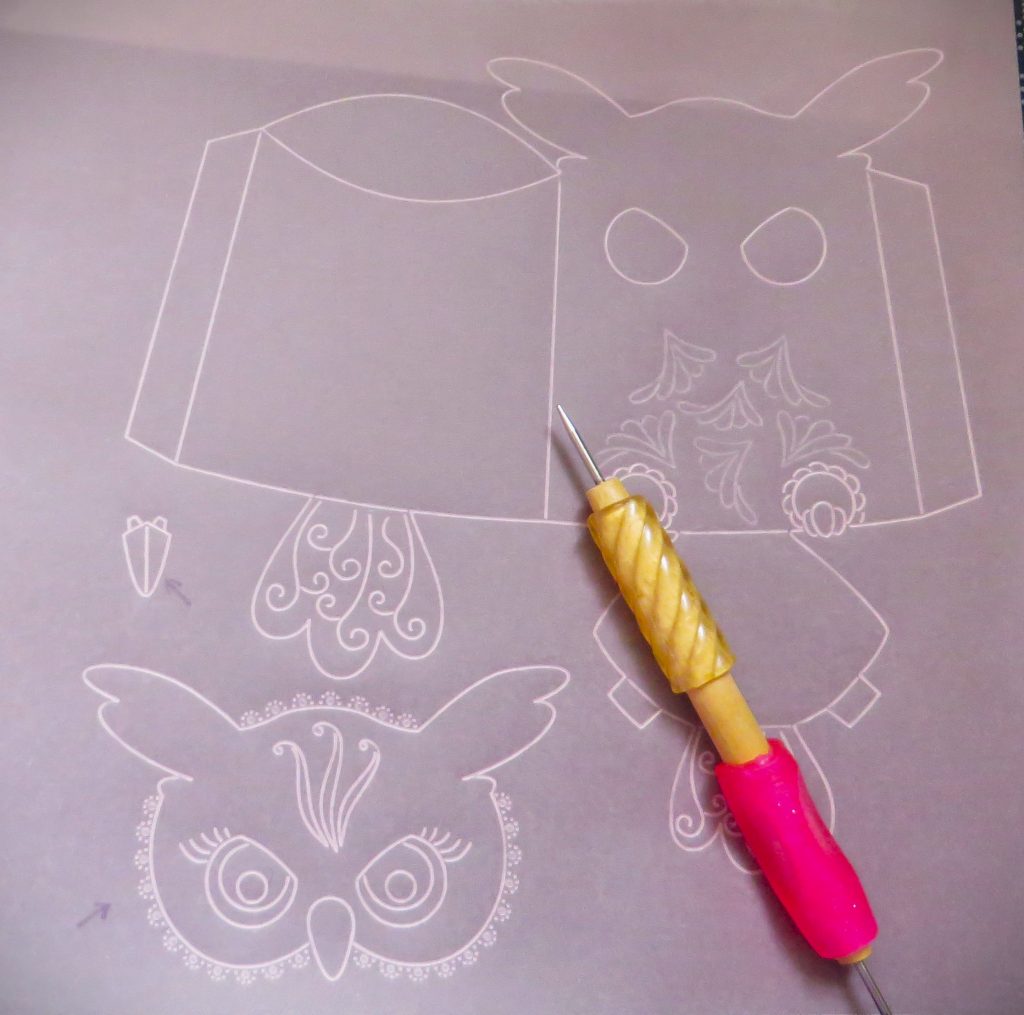
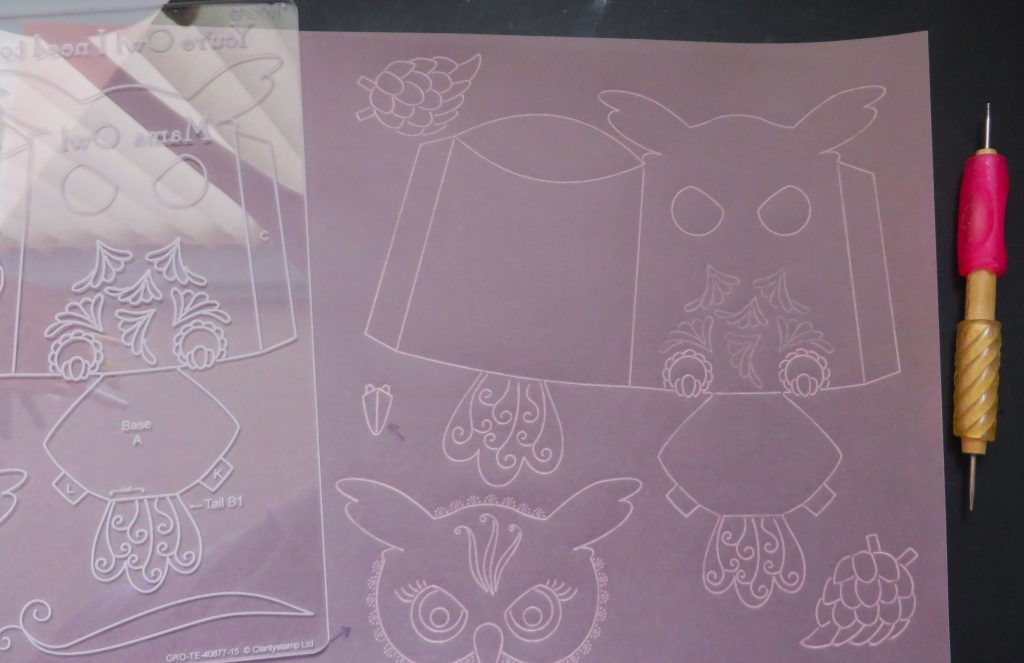
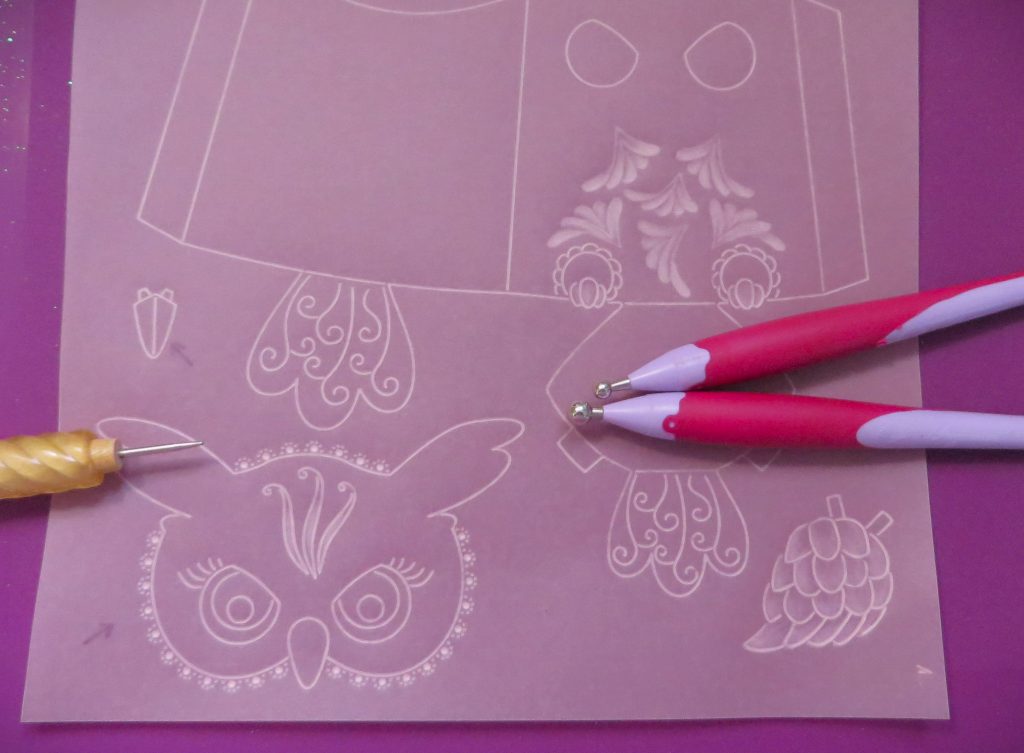
Step 1. Make sure that you are embossing on the correct side of the parchment. The deeper, shinier side is the back and the more muted side is the front, so you need to secure the parchment with the more muted side downwards onto the plate. Use Groovi tabs to keep it in place and wipe the parchment over with a tumble dryer sheet to help the tool glide in the grooves. I have decided not to include the plumage from the plate so will not emboss those.
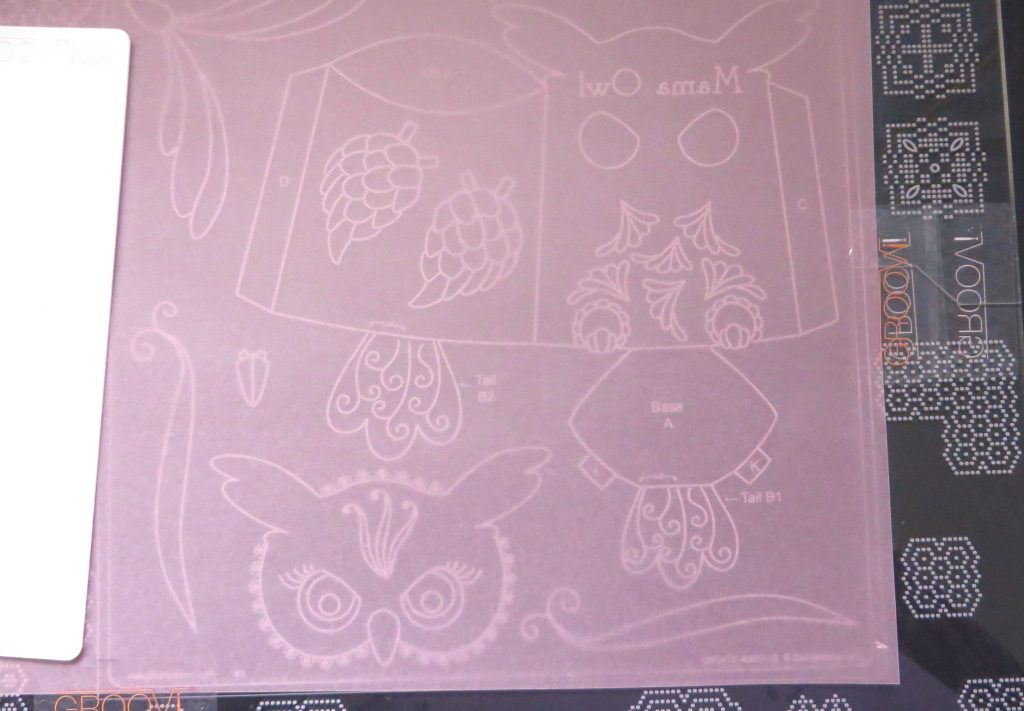
Step 2. Using the number 1 tool, trace out the large outline of the owl and just do the eyes. Emboss the feather icons with the number 2 tool, as we are going to emboss those, and the feet on the front of Mama. The beak and face also need to be embossed. I have marked these with an arrow for you.
Do not trace the wings as they will be traced on a separate piece to be attached later.
Step 3. Move the parchment around the plate to get the wings and any extras you might want to add yourself. Keep the plate handy so that you can see the references provided by Linda Williams. These will aid you at the construction stage.
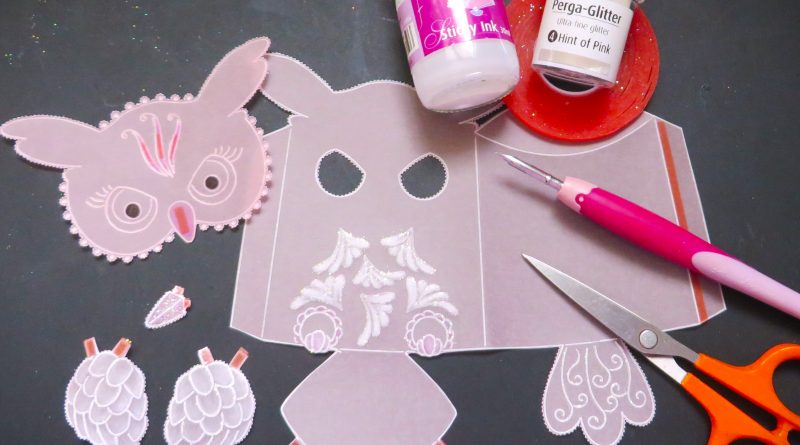
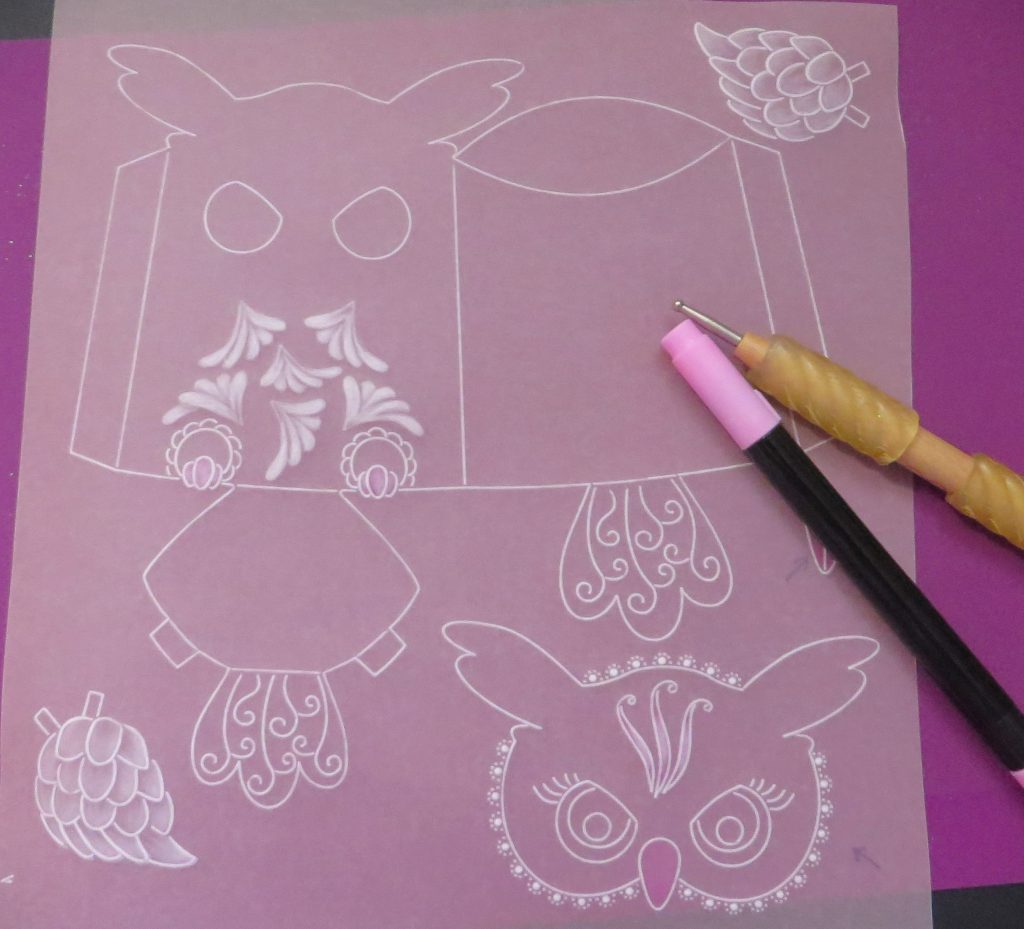
Step 4. Cut off the excess parchment and preserve that for other projects or decoration. Use the 4.5mm embossing tool to emboss the feathers on the front of the owl. Just do a light layer to start with and let the parchment rest. Move onto the 3D wings. I only embossed those enough to show some highlights and lowlights – to add shape and dimension and give the appearance of layered feathers. With the number 2 Groovi tool, emboss all the dots around the 3D head of the owl. Add some highlights to the claws and feathers on the front of the owl. The feathers down the front of the owl have had two layers of embossing with the 6mm ball tool, and one layer with the 4.5mm ball tool. Continue to emboss (and rest!) the parchment until you are happy with the results.
Step 5. After one last embossing layer on the front feathers (using the number 4 tool) I coloured in the beak, head feathers and toes of the owl using the number 8 Perga Colour pen. Colour in the pupils of the eyes with black (number 20). This is all done on the back of the work.
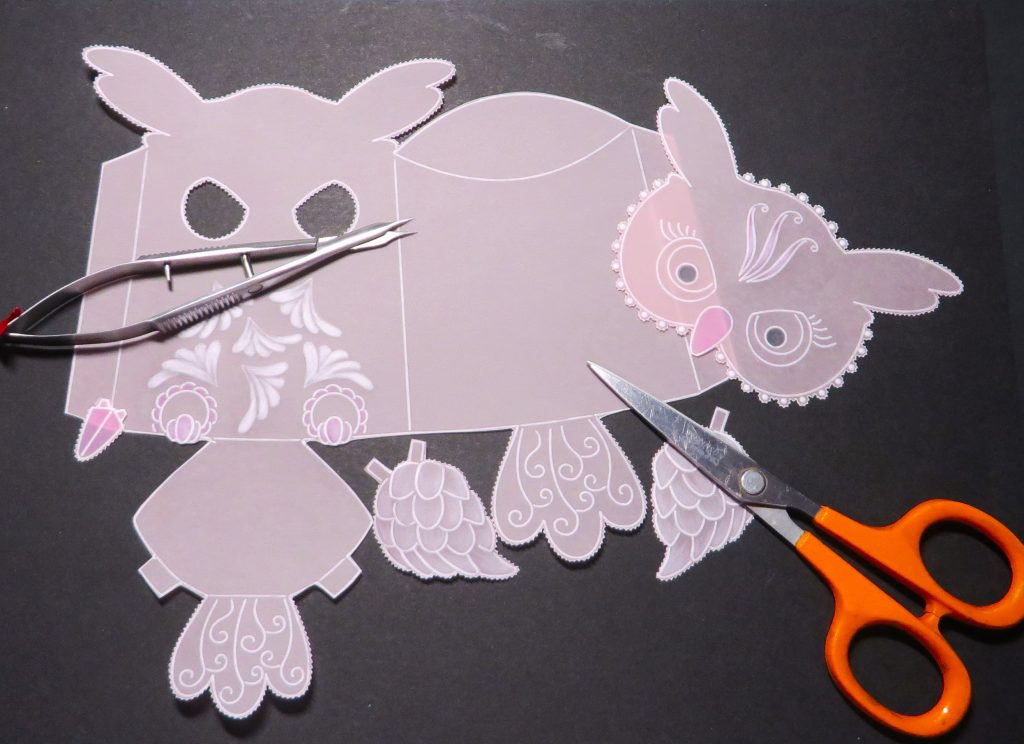
Step 6. Time to cut out the pieces now. The scallop-shaped dots around the 3D head exactly match the needles of the semi-circle mini Pergamano perforating tool. Be careful and go slowly with this as you need to match all the dots with the needles. Then go around the ears with a 2-needle tool. Go around the inside of the eyes, head and ears of the large image, the wings, tail feathers and 3D beak with the 2-needle tool also. Cut all the rest out with ordinary scissors.

Step 7. Picot cut out all the perforated pieces, using Pergamano Scissors or cutters. Then cut all the other pieces with ordinary scissors. If you are not up to picot cutting, then ordinary scissors will do the whole job for you.
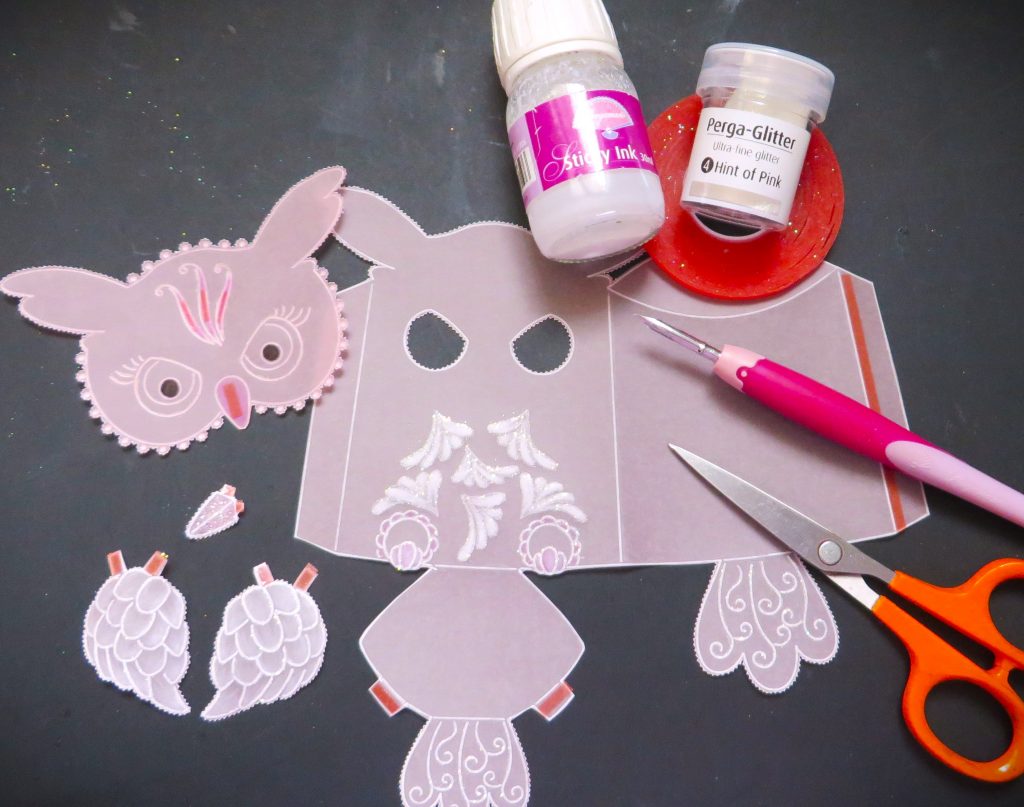
Step 8. Decorate the owl using some sticky ink and glitter. Put red liner tape onto all of the tabs marked C, K, L, the tiny tabs on the 3D beak and on the back of the 3D face – some thin slivers of tape along the three head feathers and behind the beak.
Step 9. Here is a YouTube video to show you how I construct the owl. Be kind, as it is warts and all!! Haha!
Step 10. Use a white gel pen or Posca pen to add highlights to the pupils of the eyes. And your owl is complete!
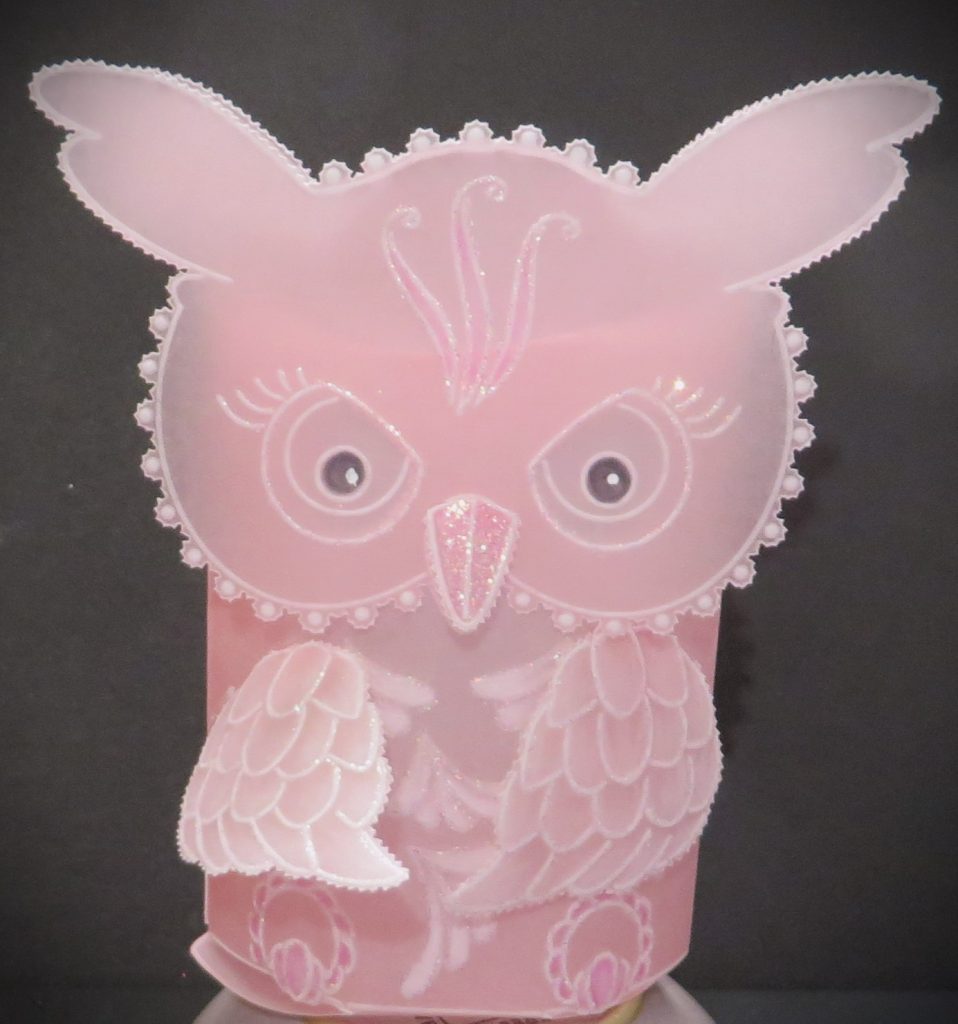
Thank you, Glynis! What a cool project. And so achievable once it’s been broken down into steps. I just love the owls… so delicate and even pretty in pink here, but quite intense looking hahah! That stare! What do you think they’re thinking or saying?
We’d love to see your versions of this project. Don’t forget to email them to me at Grace@claritystamp.com and post them on Groovi Worldwide.
As usual, we put everything used in these projects into their own shopping page. Everything that Glynis has used can be found HERE on the Clarity website.
Did you join Mum on Friday for the final Christmas Treasures Craftalong? Well if you missed it, then you can catch up HERE or watch below.
Monday 19th Dec:
SHAC Shack with Barbara – 10am Live on Facebook and YouTube
Tuesday 20th Dec:
Groovi Tuesday with Paul – 10am Live on Facebook and YouTube
Thursday 22nd Dec:
SHAC Shack with Barbara – 10am Live on Facebook and YouTube
Sunday 25th Dec:
Christmas Morning SHAC Shack with Barbara – 10am Live on Facebook and YouTube
Right, I’m off! I have a plane to catch this evening. GUESS WHERE TO?
Travel gently, friends.
Lotsa love, Grace & Glynis xoxo
Clarity – The Home of Art, Craft, and Well-Being.
Hope your journey goes well, happy Christmas
thanks Glynis for a lovely project & video to show how to complete the owl which will be useful for many of us who have the plates in our stash.
Safe Journey Grace & Mark, its still chilly here today – had a flurry of snow rather than the rain that was forecast but its meant to be getting warmer from now on up to Christmas.
I love owls and have made the owl family plus a few odd ones as there is so much on Linda’s plates to experiment with. Thanks for the step by step too.
Have a safe journey and enjoy London on your way to your mum.
Wishing you a MERRY CHRISTMAS AND AHAPPY. NEW YEAR.
What a superb little owl you have shown us how to make Glynis! And I love the video! I could just imagine Pete behind you with the phone, recording you! Perfect. Thank you so very much for spending so much time making this Sunday project for us. You are such a good friend x x x
How does it make baby 3D owl?