Clarity’s Matters Blog Tutorial: How To Make A Lace Star
Hello hello! Grace here.
I hope this finds you well and feeling crafty.
We’re joined today by the talented Maggie Byford. I’ll waste no more time and hand you right over to the lovely lady herself…

How To Make A Beautiful Hanging Star Christmas Decoration
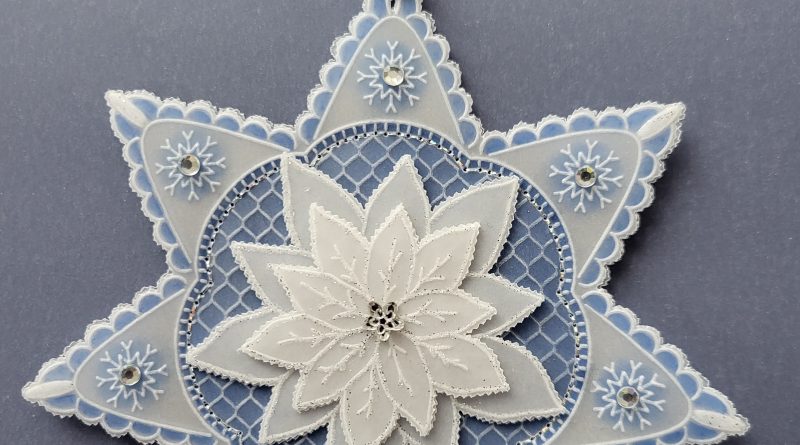
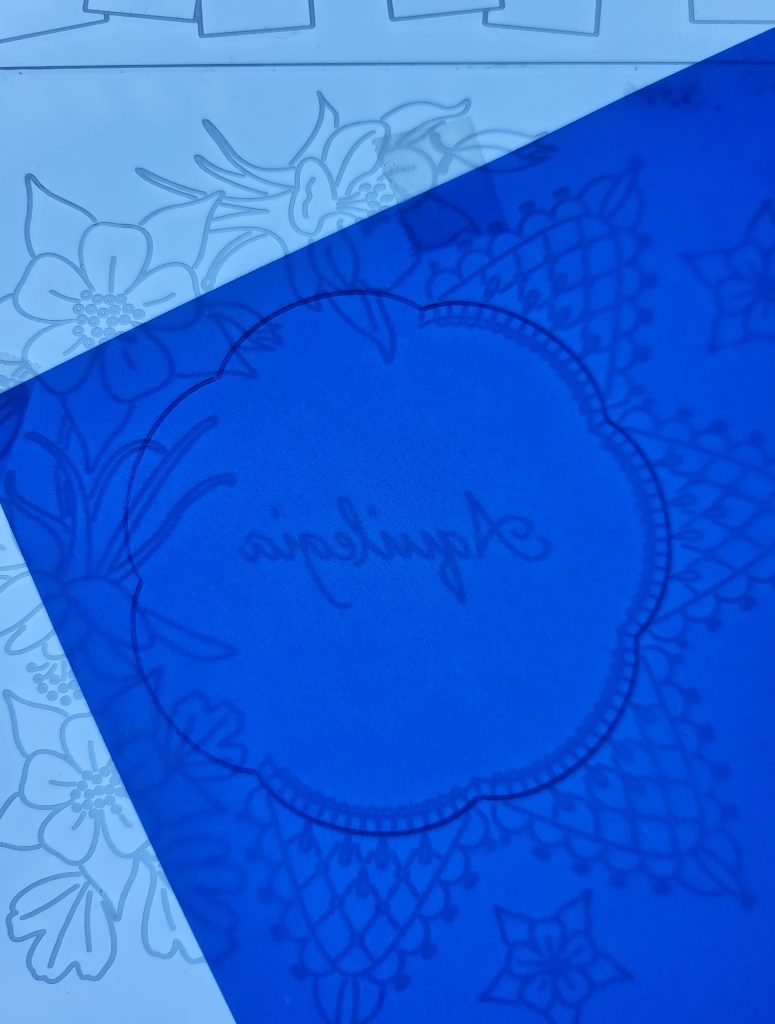
It was Linda’s beautiful Aquilegia plate that inspired me to make a Christmas decoration and here is a picture of how it turned out.
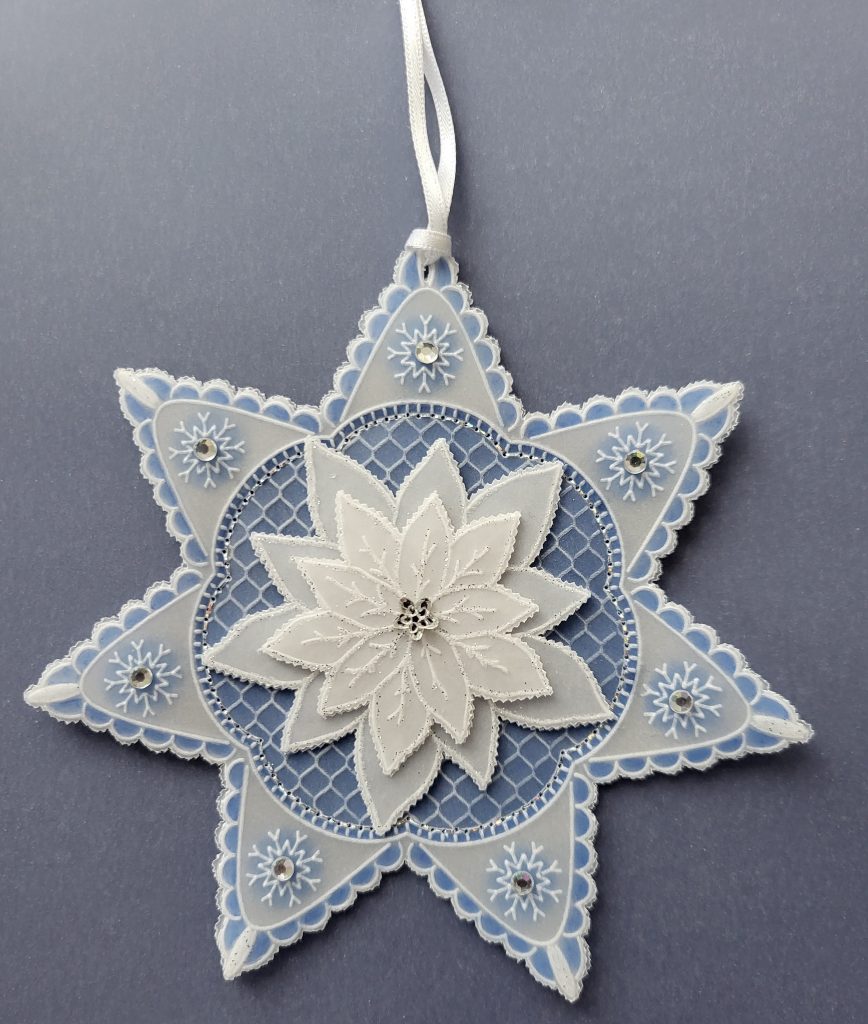
It just goes to show how versatile the Groovi plates are, and how you can swap and change between plates to create an “any occasion” project!
My Christmas Star decoration can be mounted onto a Christmas Card, hung around the home, or take its place hanging from a Christmas tree – which is where mine will be going. It is a two-sided project that looks the same on the front as it does on the back. I hope you enjoy making this one and perhaps you’ll be inspired to make your own version using the many plates I’m sure that you’ll have in your stash! Enjoy.
Ingredients
Linda’s Aquilegia & Lace A5 Sq Plate (GRO-FL-40920-03)
Jayne’s Poinsettia Name A5 Sq Plate (GRO-FL-40388-03)
Large Lace Netting A5 Sq Plate (GRO-PA-40339-03)
Jingle Bells A5 Sq Plate (GRO-CH-40740-03)
Alphabet A5 Sq Plate Mate (GRO-MA-40002-07)
Groovi Embossing Tool 1 and 2 (GRO-AC-40026-XX)
Pergamano 1-Needle Bold Perforating Tool (PER-TO-70028-XX)
Pergamano 2-Needle Bold Perforating Tool (PER-TO-70279-XX)
Groovi A4 Clear Parchment (GRO-AC-40024-A4)
Periwinkle Blue & V.Violet Groovi Duo Parchment Paper (GRO-AC-40778-A4)
Pergamano Sticky Ink and Silver Glitter Bundle (PER-AC-70305-XX)
Needle and Silver Thread
Groovi Sticker Tabs x 16 (GRO-AC-40437-XX)
Black Dual-Purpose Groovi Mat A4 (GRO-AC-40194-A4)
A5 Black Super Foam (GRO-AC-41765-XX)
Pergamano Excellent – Embossing Mat (PER-AC-70075-XX)
Groovi Guard (GRO-AC-40345-XX)
Ringlock Scissors (PER-TO-70041-XX)
Pergamano Blending Pen Nibs & Dorso Oil -Colouring Kit (PER-AC-70431-XX)
Polychromo Pencil – Ultramarine 120 (ACC-PE-30797-XX)
Dry tumble dryer sheet
Soft brush + Folded white paper for catching glitter
Method
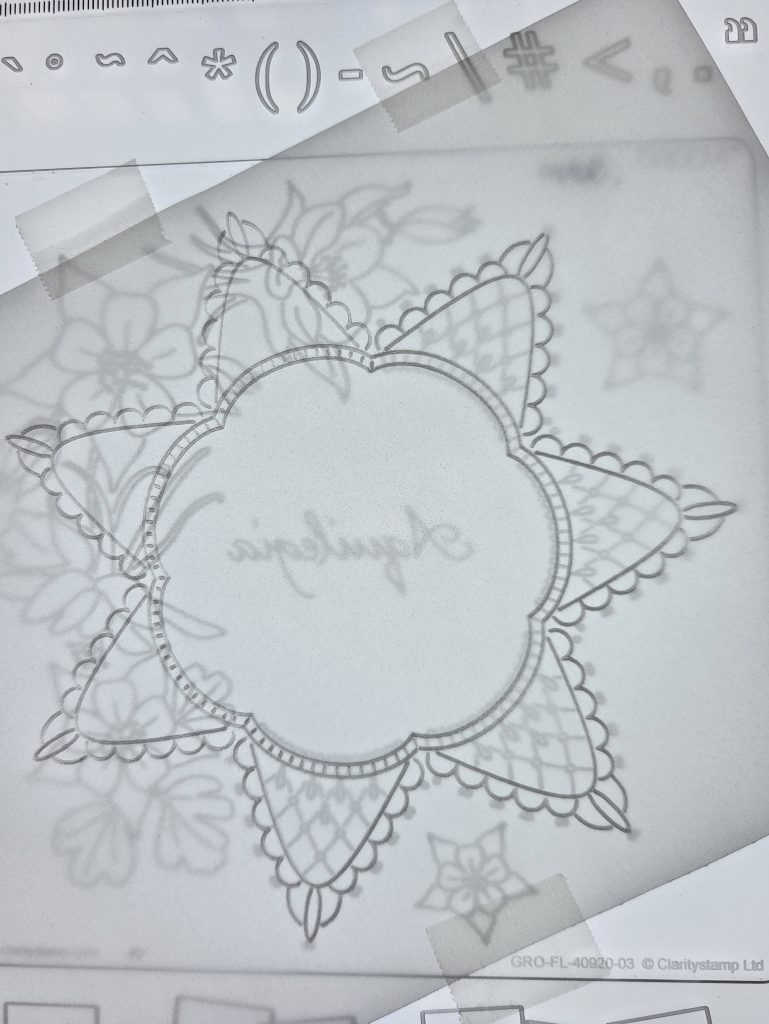
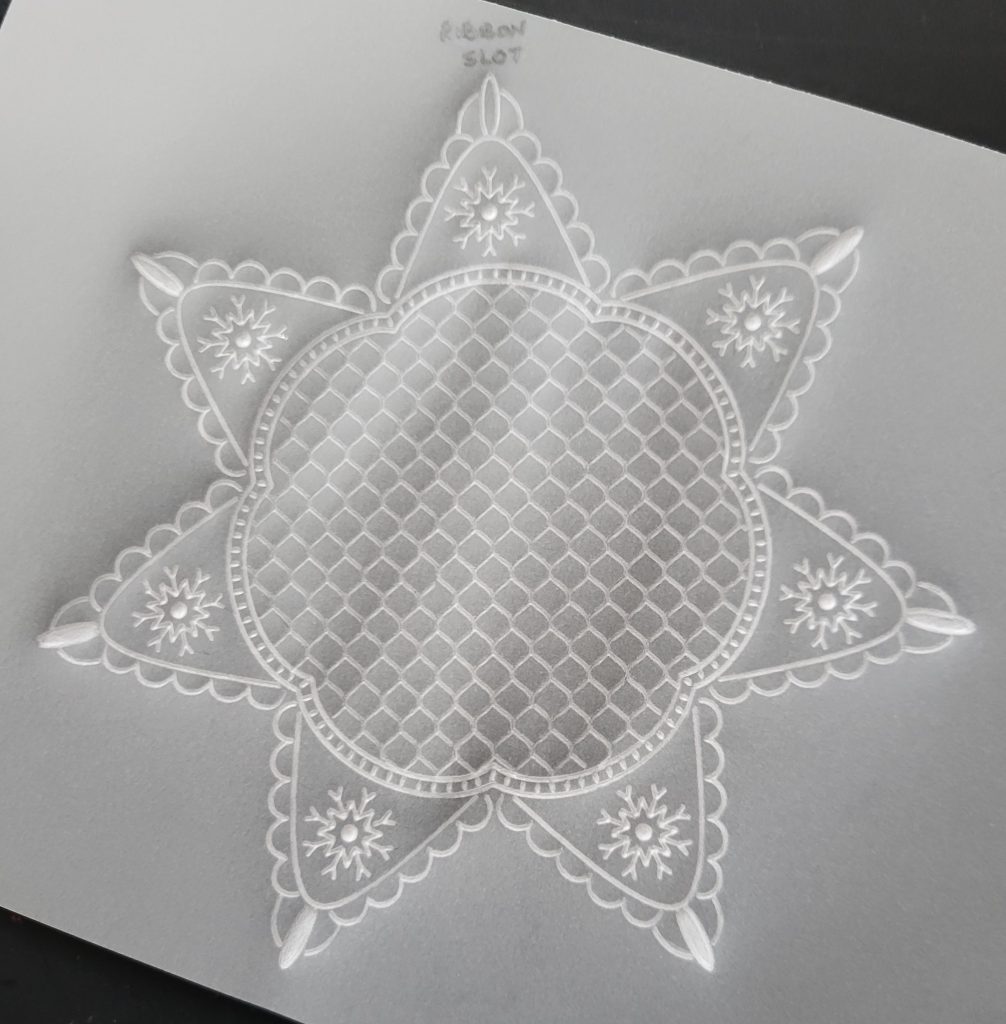
Step 1. The Star framework consists of 7 sections and you will start by embossing the first 4 sections.
Using A4 clear parchment and the Aquilegia Plate, wipe a dry tumble dryer sheet across the surface. Use your Groovi #1 tool to emboss only those outlines that you can see on the right of the picture.
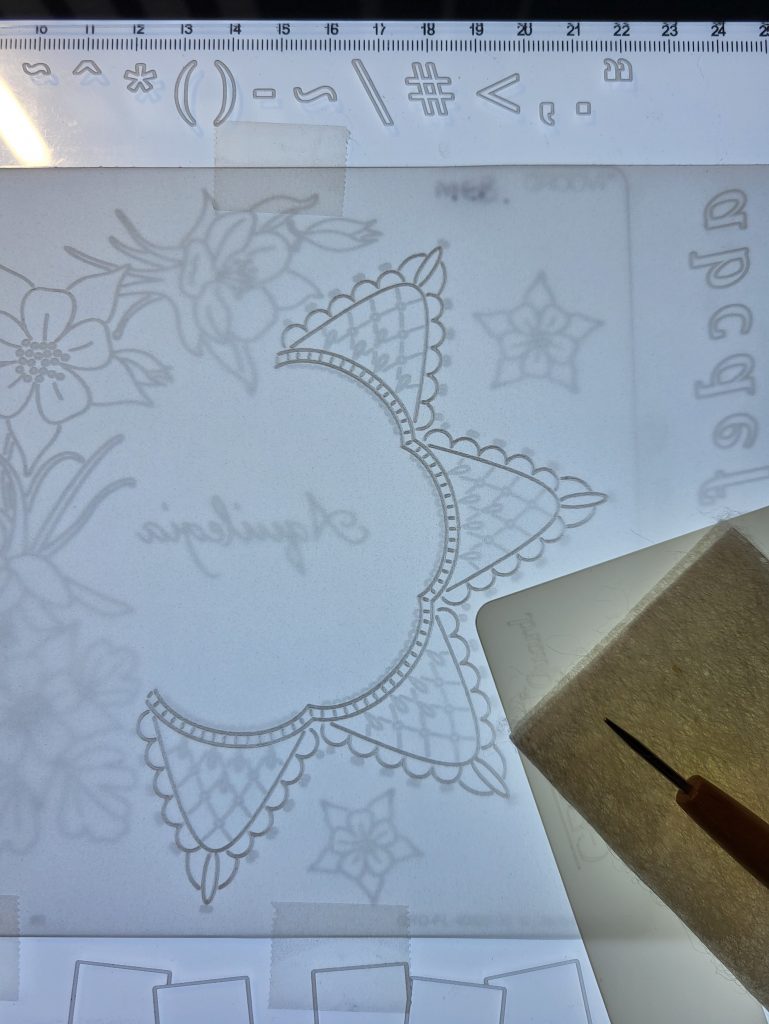
Step 2. Leave the Aquilegia Plate where it is, release your parchment and carefully re-align and re-attach it to the plate so that your 4 embossed sections are on the left and the 3 remaining sections to be embossed are on the right.
TOP TIP: To keep your parchment flat whilst working on your embossing you can use a Groovi Guard. It will also help to keep your parchment free of greasy marks as well as give you somewhere to place your resting hand.
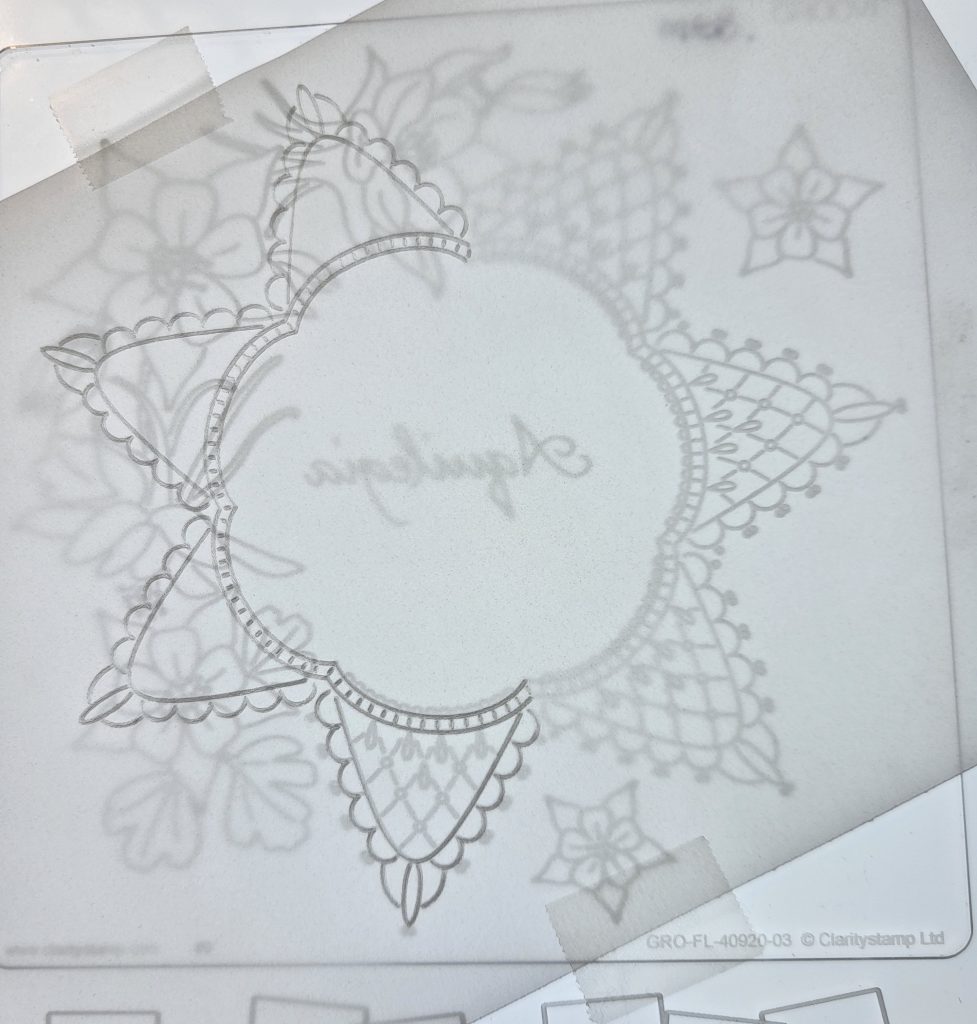
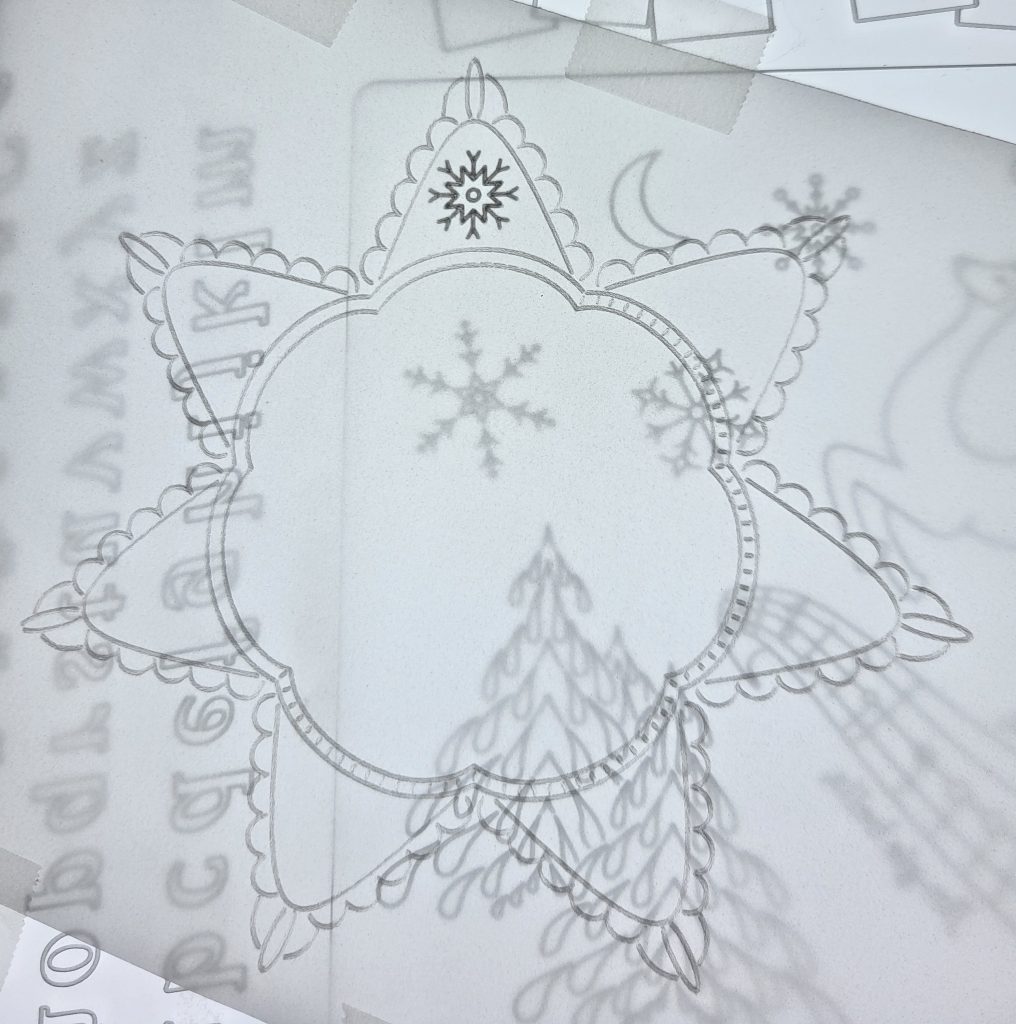
Step 3. Emboss the 3 remaining Star sections on the right of the plate to complete the 7-Star framework.
Step 4. Use the Snowflake Plate to emboss a snowflake within a Star section as shown below, then repeat in all the remaining 6 sections.
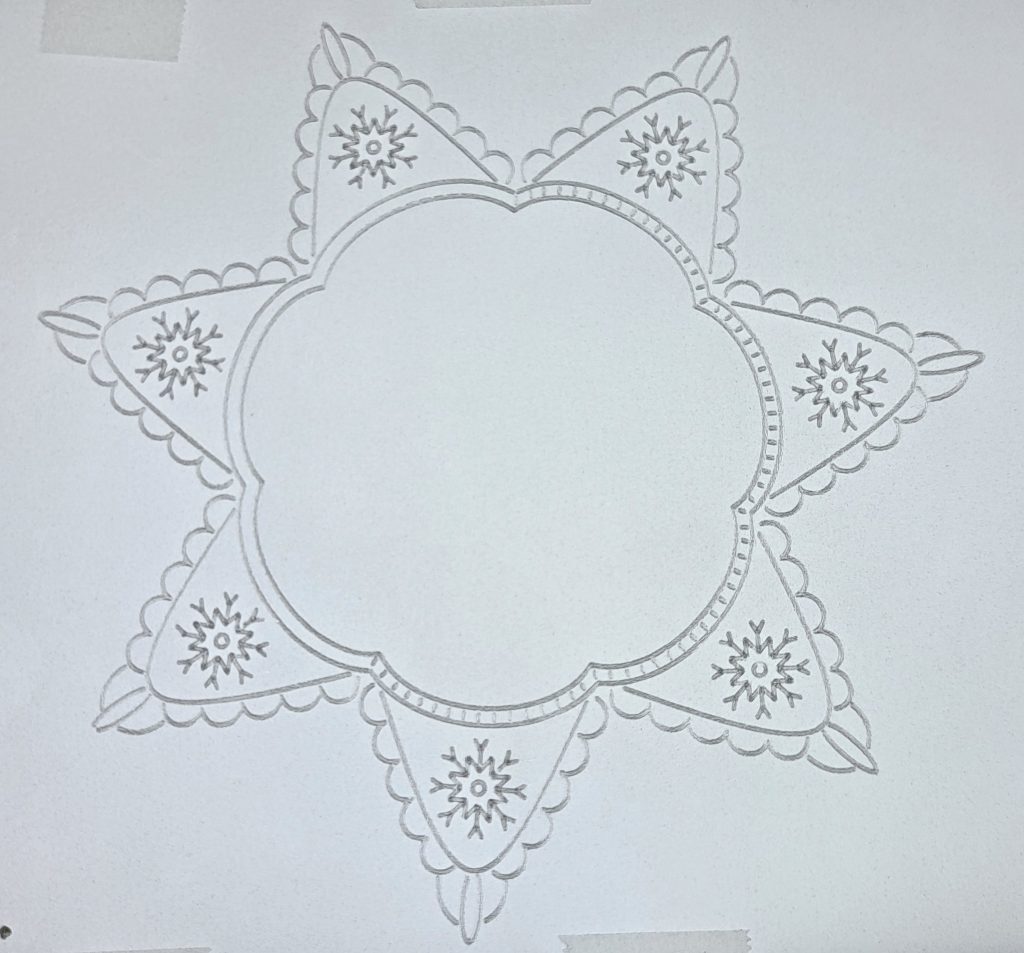
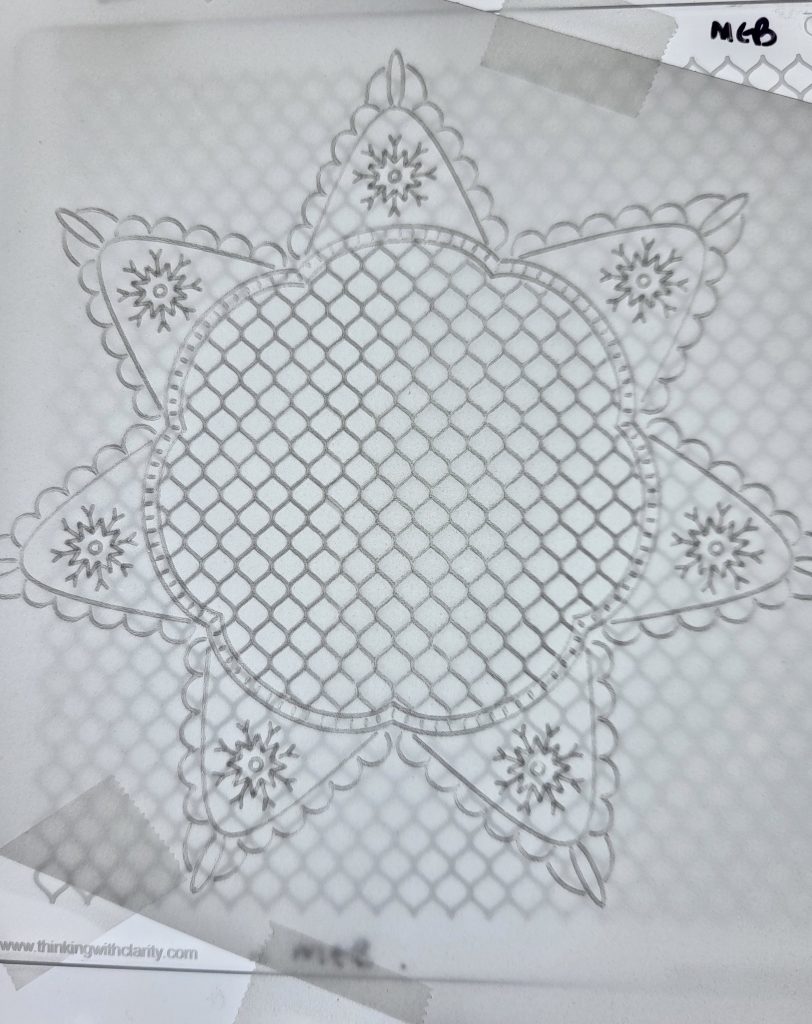
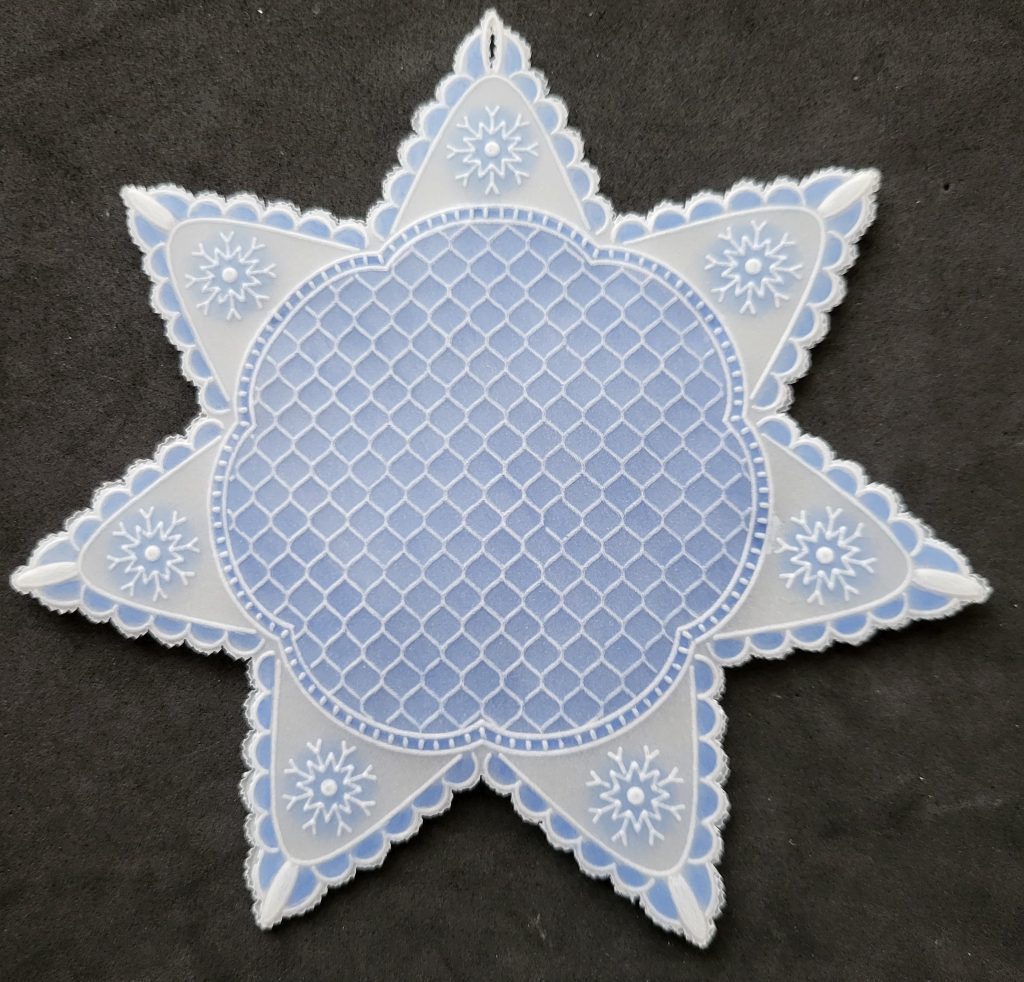
Step 5. Use the Netting Plate to emboss within the central area as shown on the picture.
TOP TIP: Your parchment may start to curl up at this stage and your Groovi Guard will help to keep it flat whilst you work. Once you have finished, leave your parchment to rest for a while under a heavy book or object.
Step 6. Put your plates to one side and place your parchment face down on an embossing mat. Use your Groovi #2 tool to emboss the dots within each of the snowflakes. Use Groovi #3 to emboss the drop shape at the top of each Star section but leave one of them unembossed as this drop shape will be perforated out to form a slot in which to thread a ribbon through later to form a hanger.
Step 7. Place your parchment face down on a firm surface (such as the front of your black duo mat) and use Polychromos 120 Ultramarine to add colour to the scallop shapes around the Star sections, in the middle of each snowflake, and in the central netting area.
TOP TIP: When colouring the netting area, it is best to use the side of the pencil lead to add the colour as it will be easier to blend.
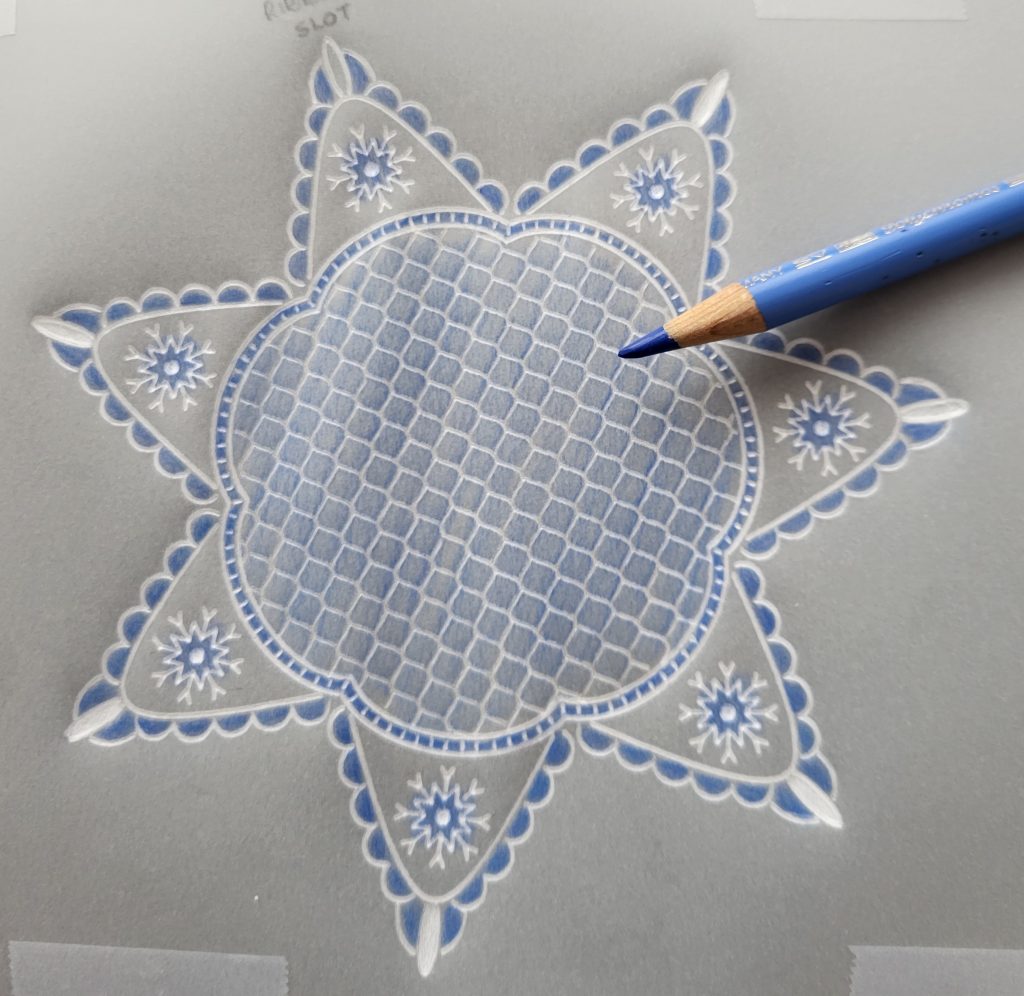
Step 8. Blend the Blue colouring using Dorso Oil, a blending pen, and a new blending nib.
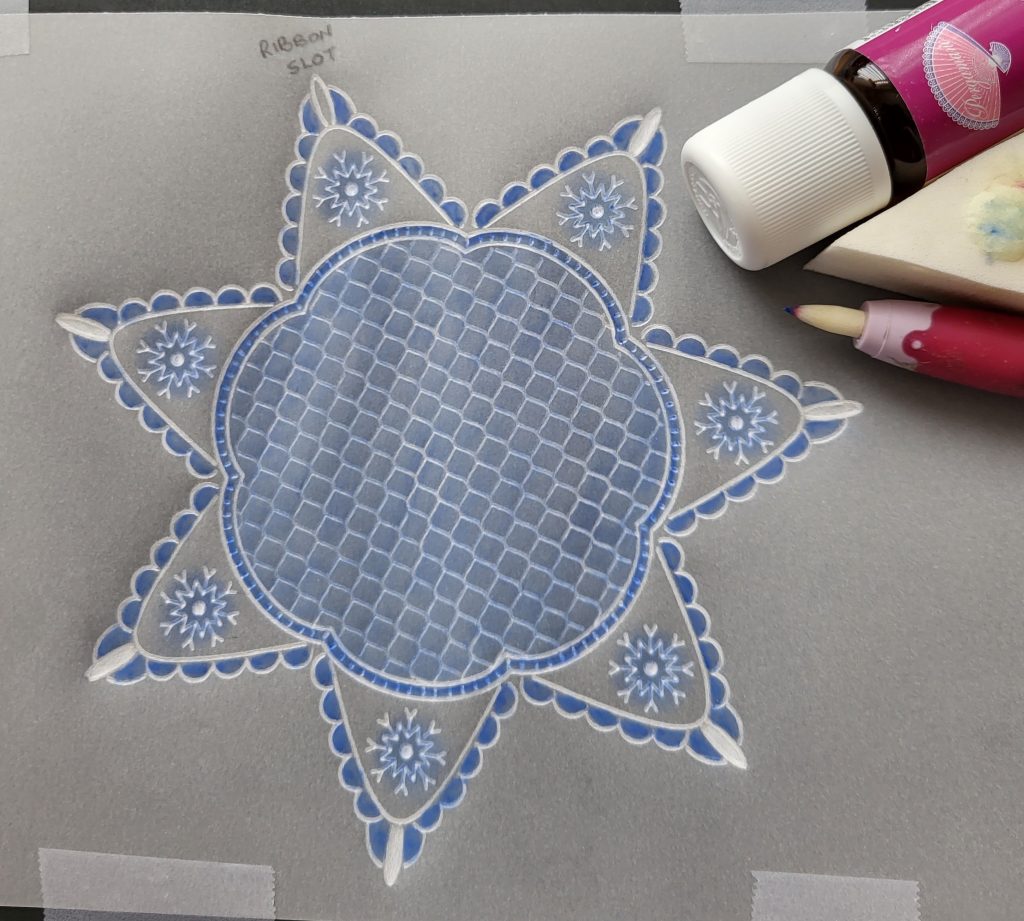
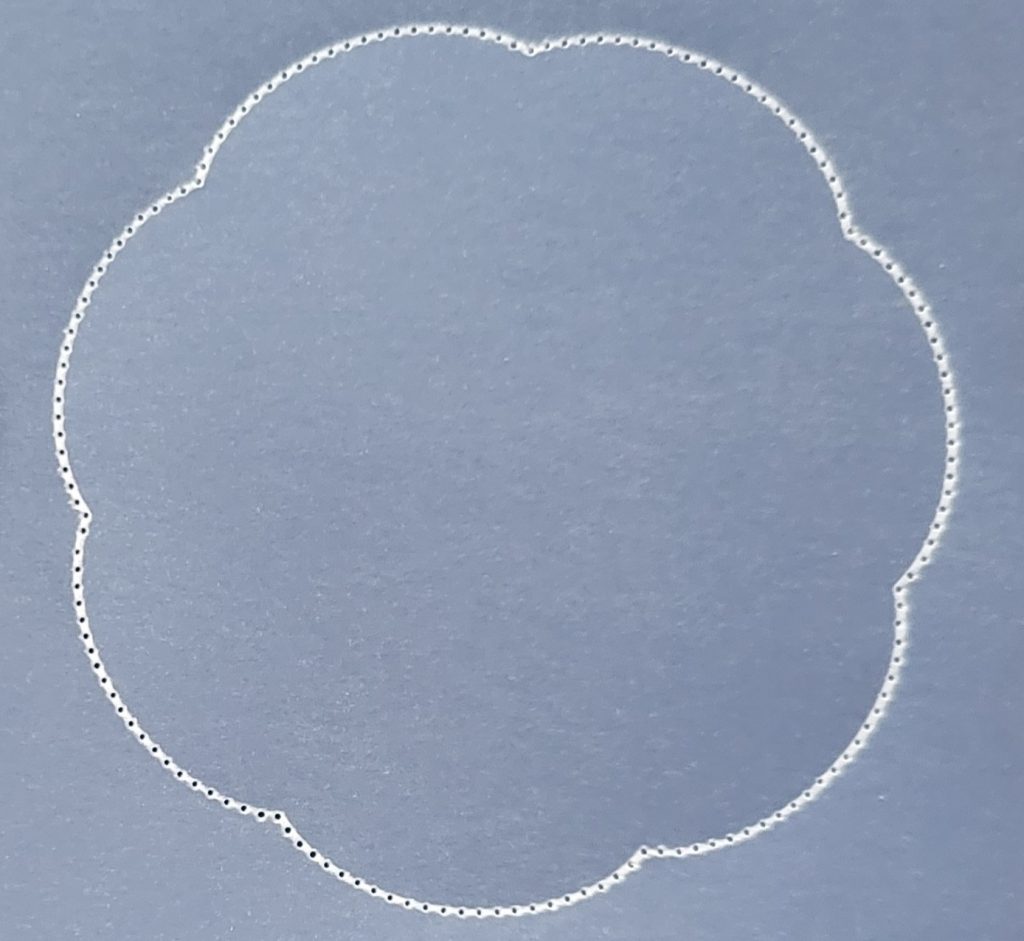
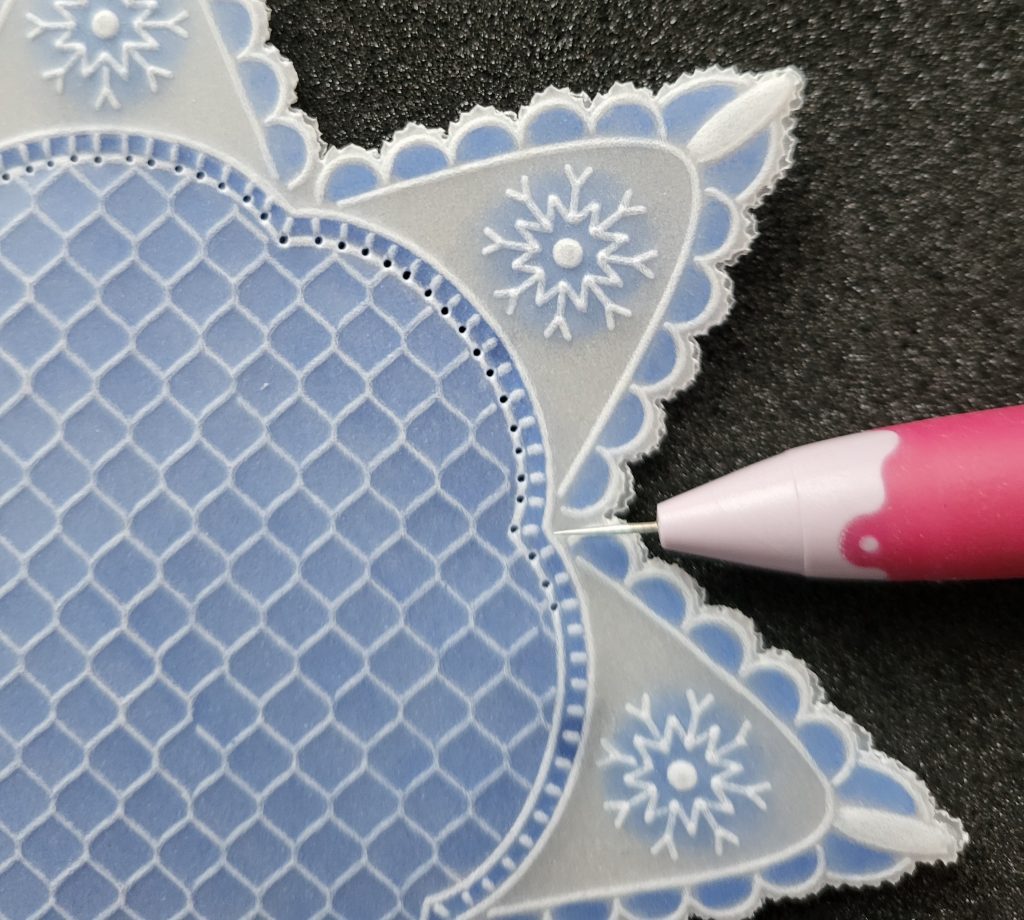
Step 9. Place your parchment face up on a thick perforating mat such as a black super foam mat, and use your 2-Needle Bold to perforate all around the outside of the Star sections as well as inside the unembossed drop shape (ribbon slot).
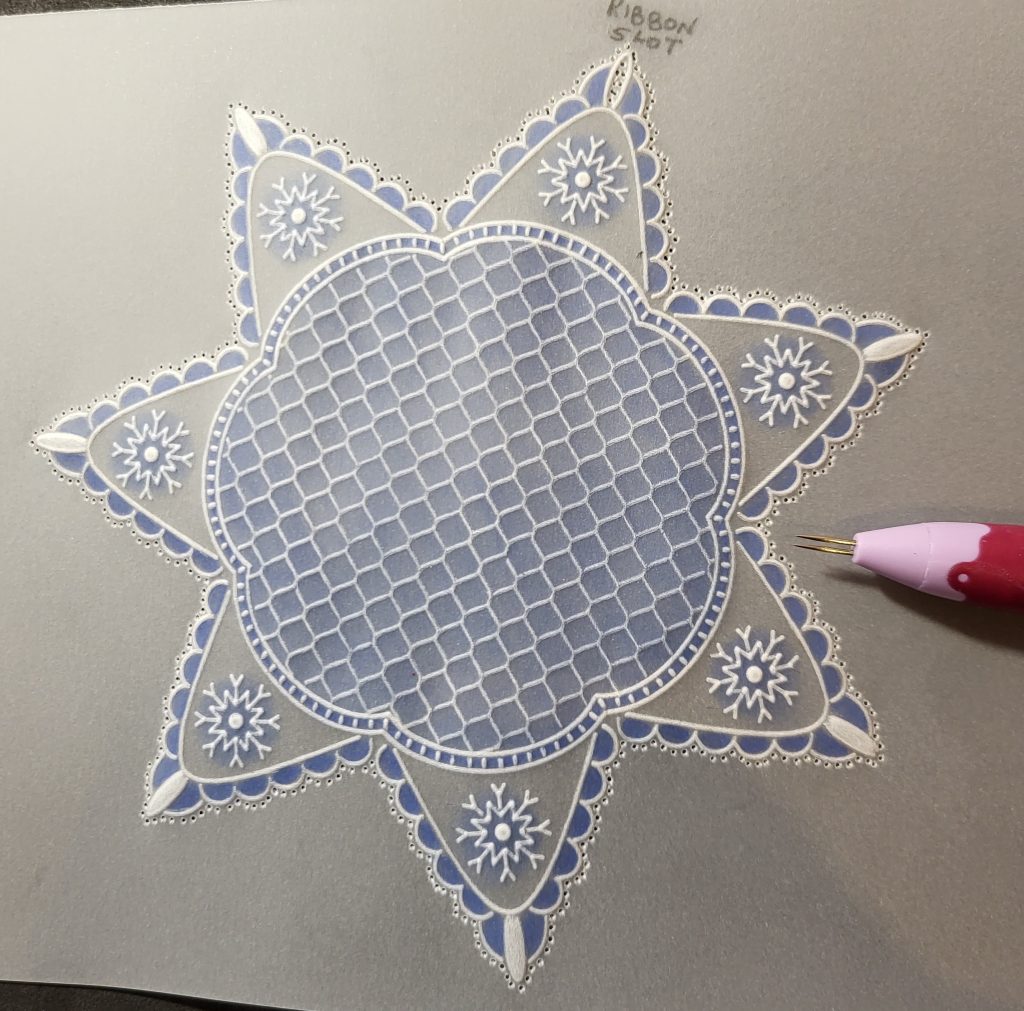
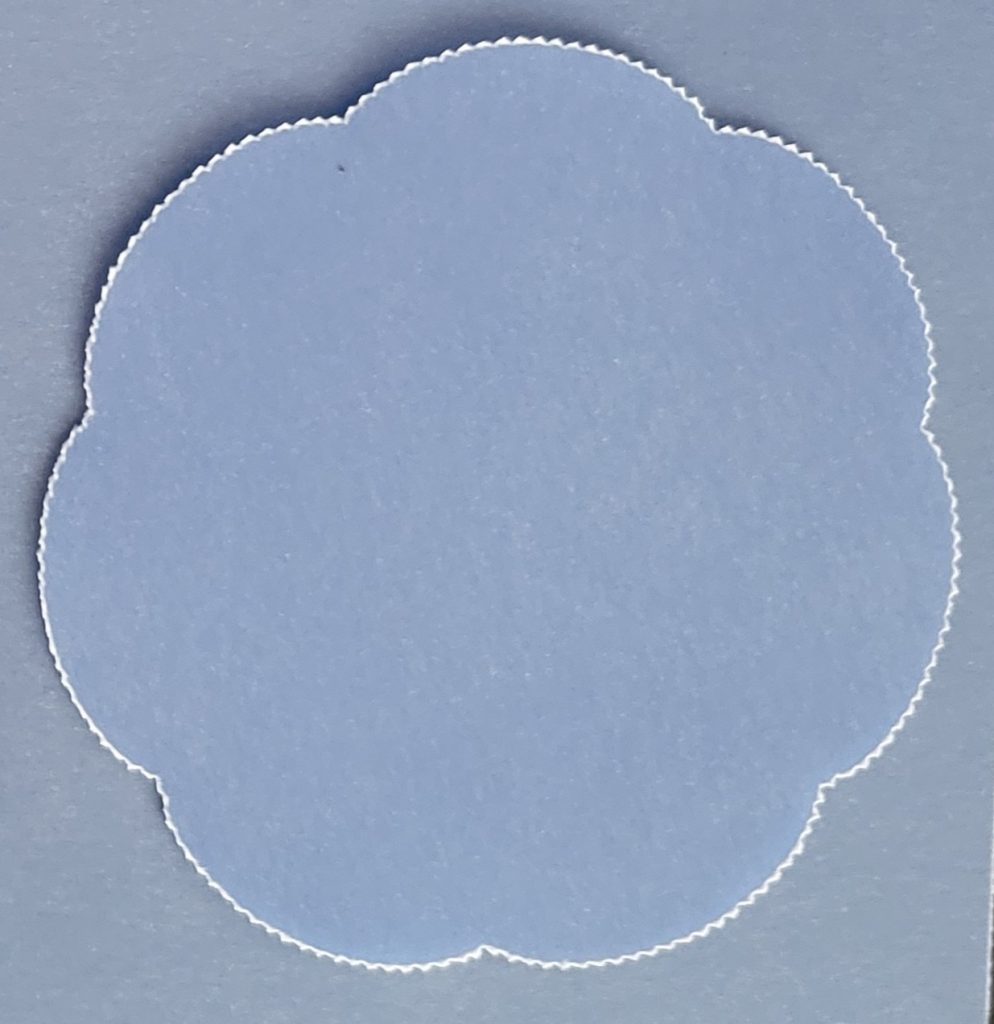
Step 10. Use parchment scissors or snips to cut between all the 2-Needle perforations, including inside the ribbon slot.
TOP TIP: When you have finished it would be a good idea to place your cut-out Star under a heavy book or object to rest/flatten whilst you continue with the other elements.
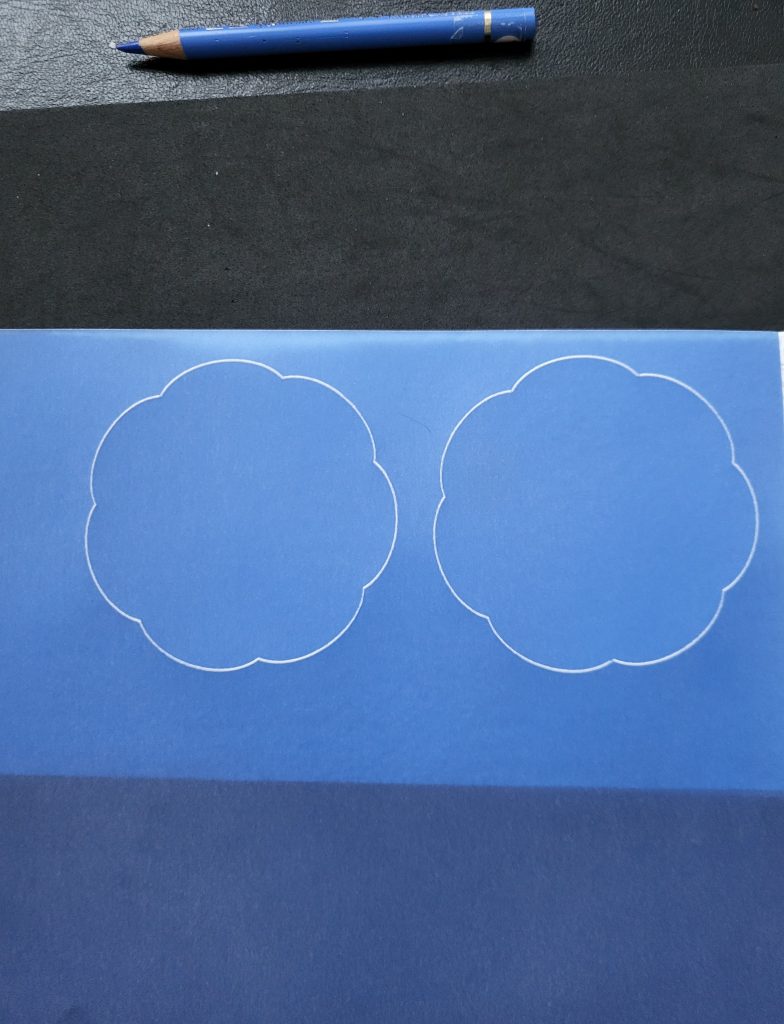
Repeat Steps 1 to 10 to make another Star so that you have a matching pair.
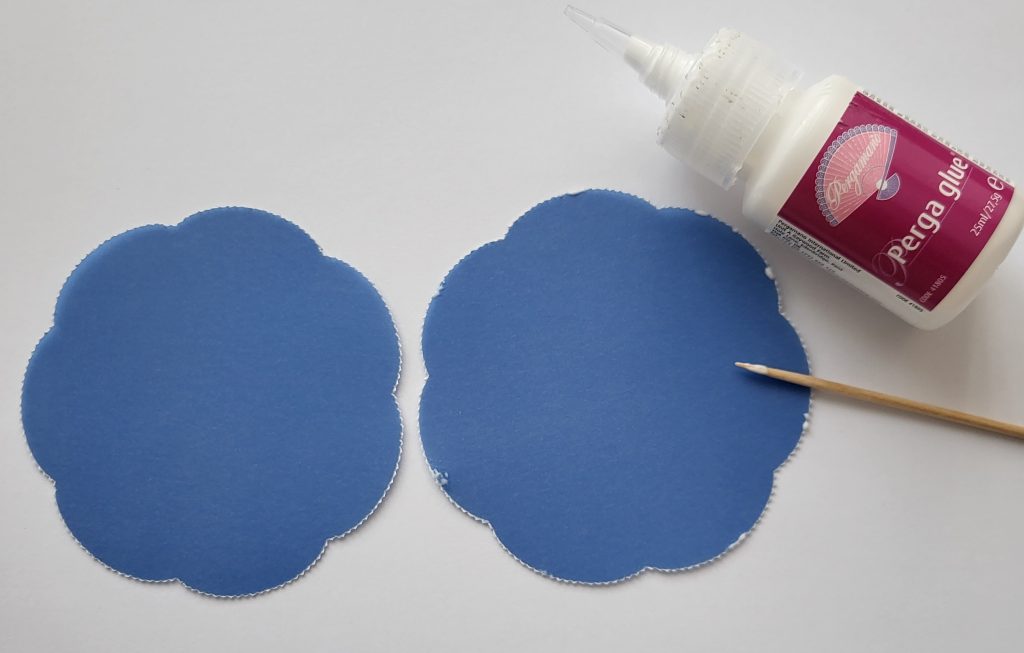
Step 11. You now need to make a separate double insert in Blue parchment to fit between the 2 stars, behind the central netting design.
Using Blue parchment (dark, shiny side facing up) and the Aquilegia Plate wipe a dry tumble dryer sheet across the surface and use Groovi 1 to emboss only the outside line of the inner double outline as shown.

Step 12. Leave the Aquilegia Plate where it is, release your parchment, carefully re-align and re-attach it to the plate with your embossing on the left, then complete the design by embossing on the right so it looks like this.
Repeat Steps 11 and 12 to make another Blue Insert so that you have a pair.
Step 13. Place your Blue Inserts (with the lighter, matt side facing up on both of them) onto a thick perforating mat and use your 2-Needle Bold to perforate through the embossed white outlines on both of them separately.
Use parchment scissors or snips to cut between all the 2-Needle perforations.
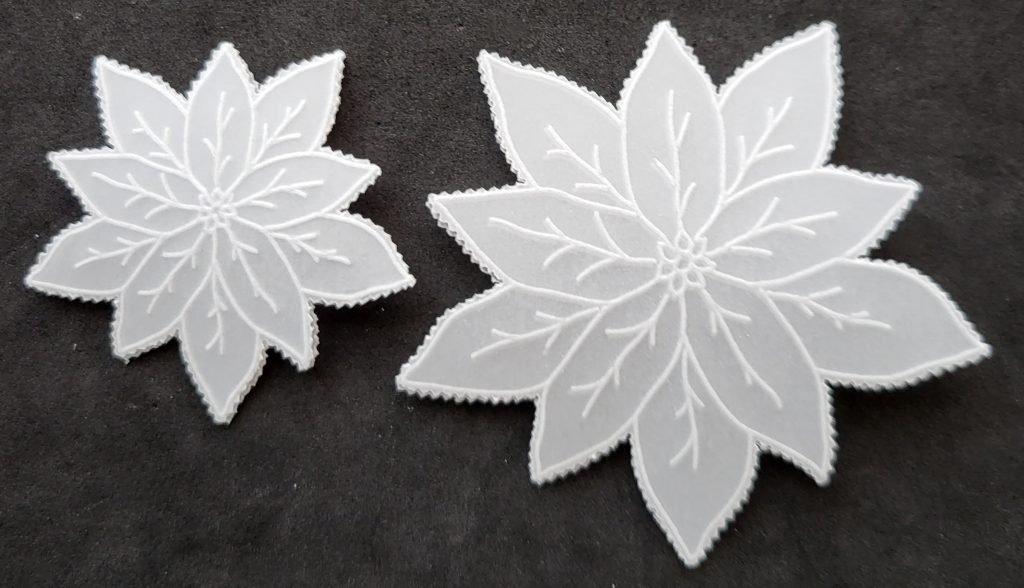
Step 14. Using the Poinsettia Plate and a separate piece of clear parchment emboss two large flowers and two medium flowers so it looks like this.
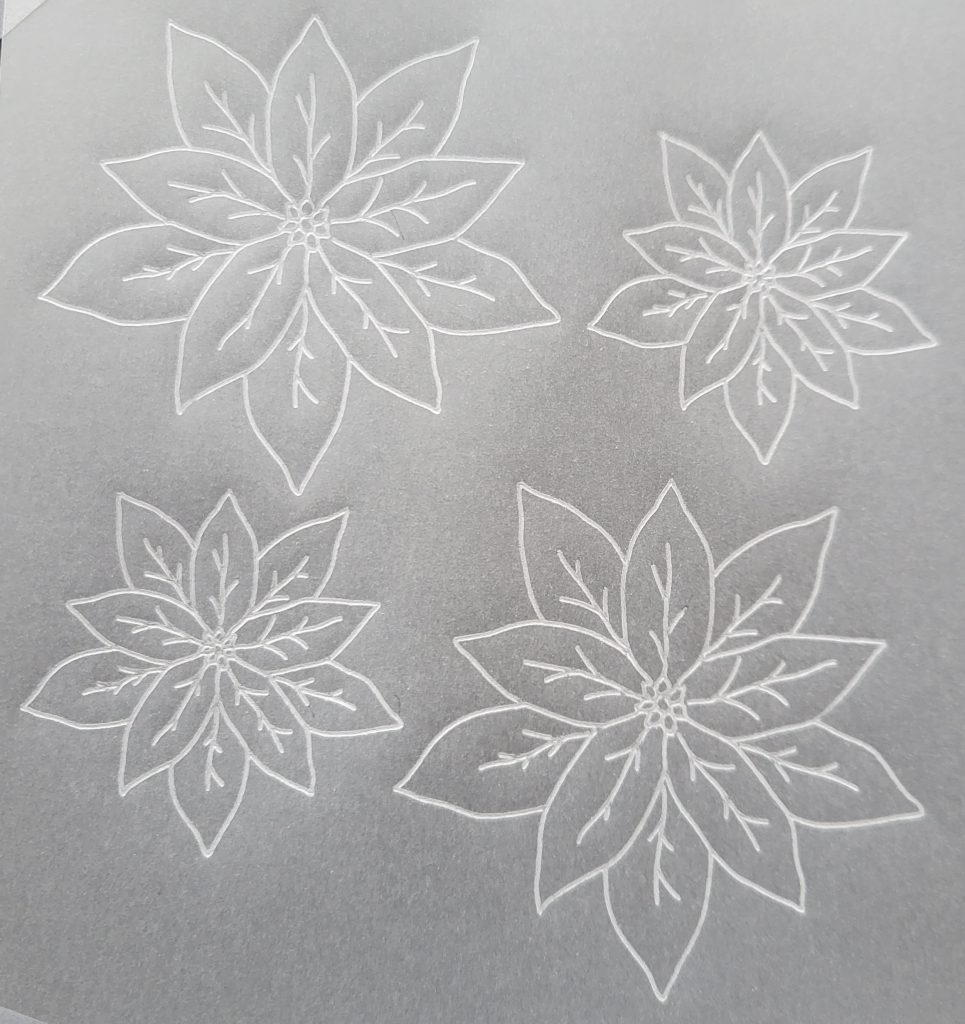
Step 15. Use your 2-Needle Bold to perforate around all of the flowers then cut between the perforations using parchment scissors or snips. On the picture, the four flowers are cut out and displayed with the two completed Stars and the two Blue Inserts.
If you want to have flowers on the back of the Star, as well as on the front, then Repeat Steps 14 to 15 to make an extra set.

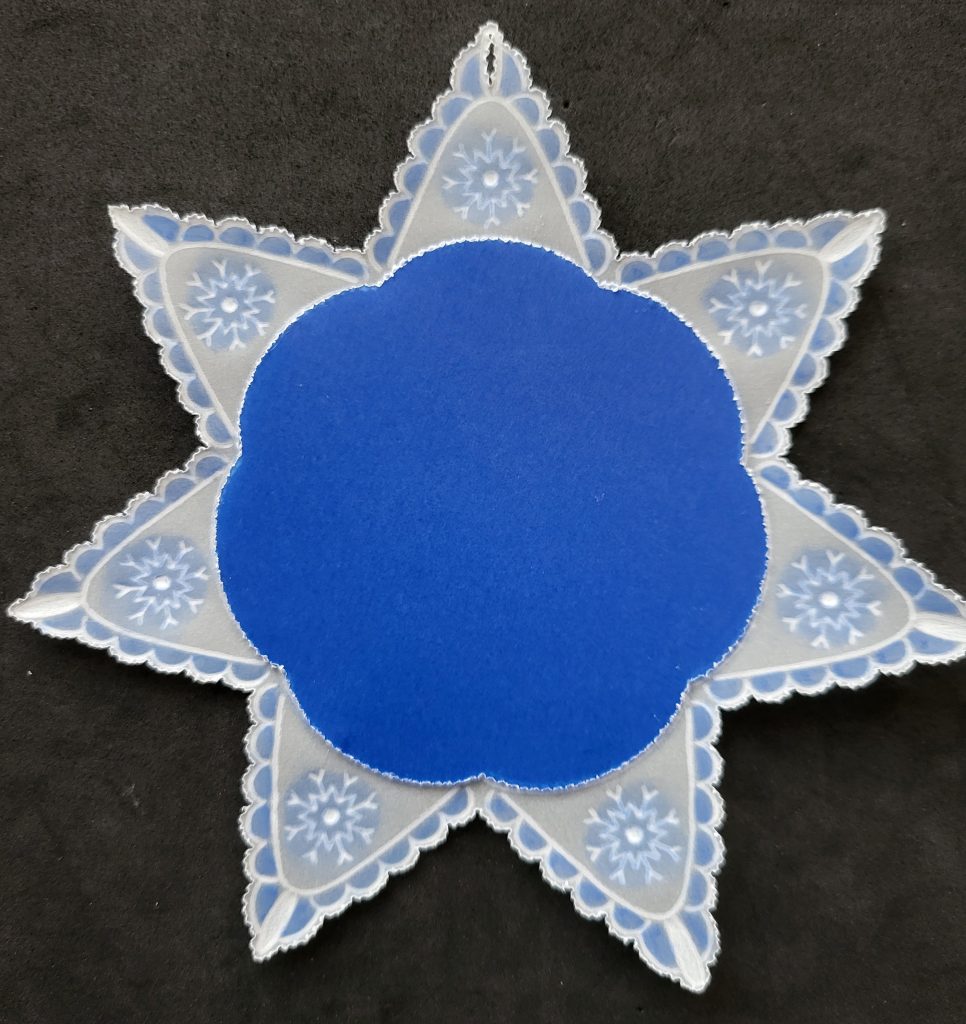
Step 16. Place both Inserts in front of you with the lighter, matt sides facing up. Using a very small amount of Perga Glue on the end of a cocktail stick, place a tiny amount in just 3 or 4 places around the cut edges of one of the Inserts as shown, then join both pieces together making sure that the shapes match up and the dark, shiny sides are on the outsides.
Step 17. Using tiny dabs of glue on a cocktail stick, in the same way as above, attach the Blue Double Insert to the back of one of the completed Stars.
Step 18. Add more tiny dabs of glue to the cut edges of the Blue Insert as shown.
Step 19. Attach the inside of the other Star to the Blue Insert making sure to match up the outer Star sections as well as the cut-out ribbon slots. You then need to use more tiny dabs of glue to join the outer Star sections to each other (along the inside of the cut edges only). When finished it should look like this, with the perforated ribbon slots at the top.
Step 20. Layer one large flower on top of the other large flower (matching up the petals and veins) and attach them together with tiny dabs of glue on a cocktail stick along the inside cut edges of each petal on the top flower. Do the same for the two medium flowers. When finished they should both look like this.
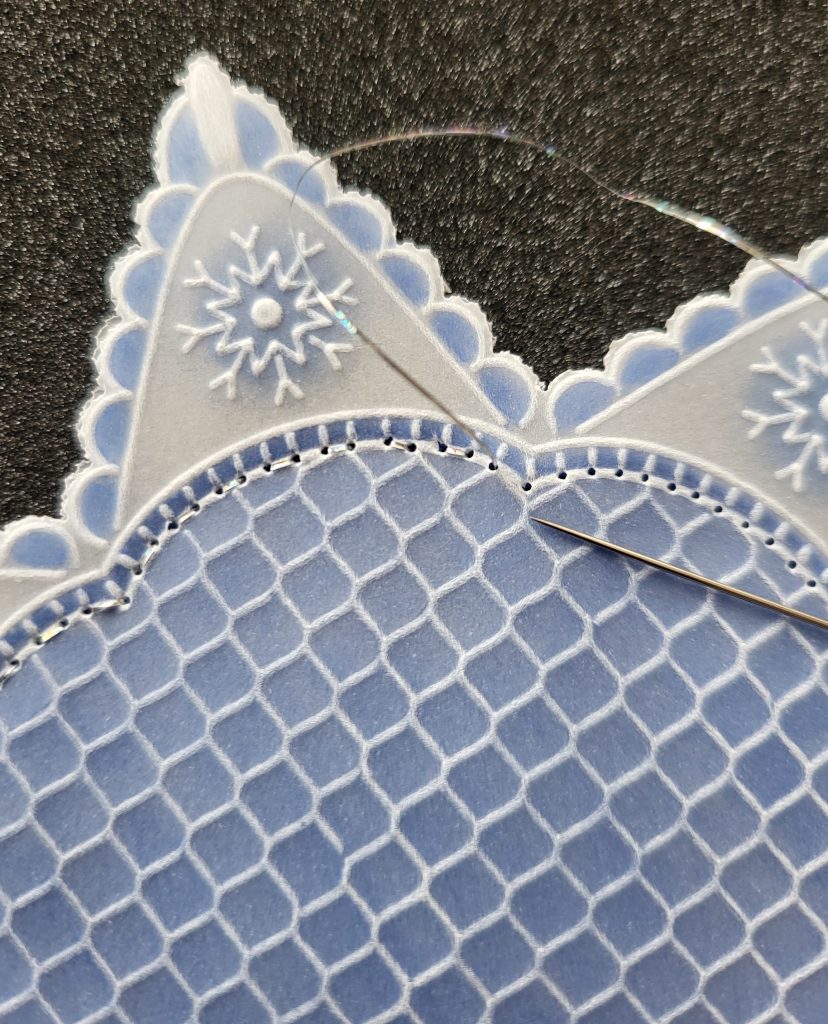
Step 21. Place the joined-up Stars on a thick perforating mat and use a 1-Needle Bold to perforate, through all layers, along the inside embossed white line of the central double-outline as shown in this close-up.
Step 22. Use a needle and silver thread to sew a running stitch between the 1-Needle perforations as shown in the close-up, then go around once again to fill in the gaps of the previous running stitch.
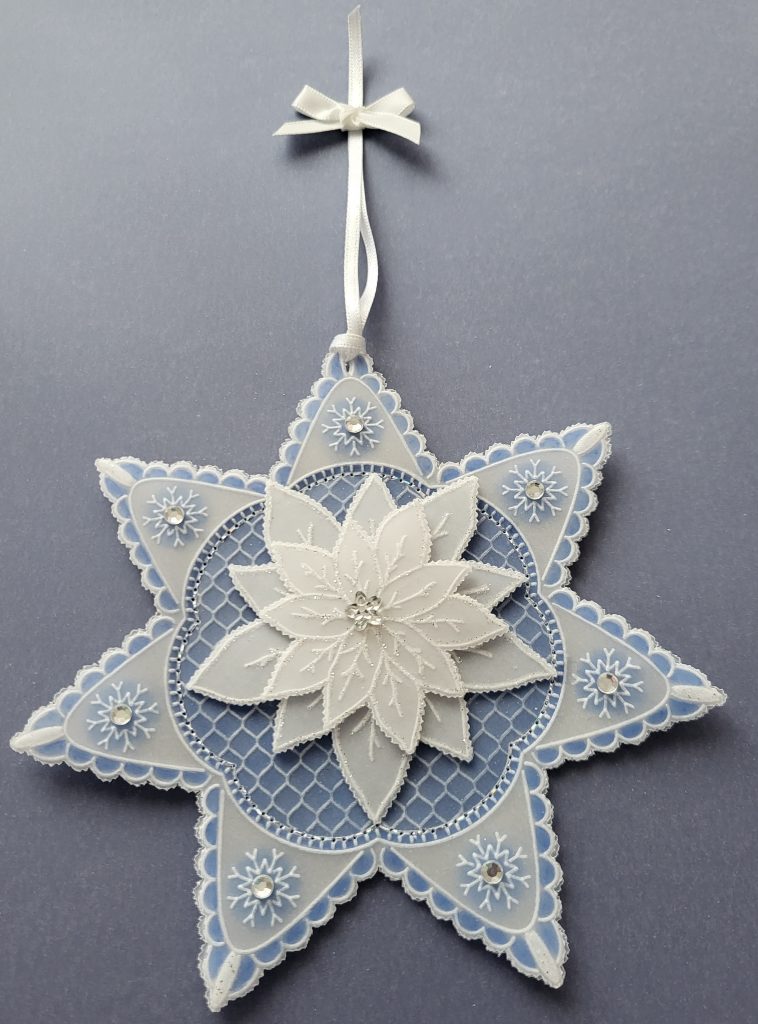
Step 23. Use Sticky Ink and an old pen nib to apply silver glitter to the drop shapes at the top of the Star sections, as well as to the petals and veins on the Poinsettia flowers. Use a soft brush to gently brush away any excess glitter.
Create a Hanger for the Star using a strip of white ribbon threaded through the slot at the top of the Star.
Layer and attach the small flower on top of the larger flower using narrow 5x5mm foam pads.
Add adhesive gems to decorate if desired.
Here is the finished Star.
WOW! That is absolutely stunning. How gorgeous would that look on the Christmas tree? Or hanging in a window? That’s divine.
Thank you, Maggie, for sharing your tricks and tips with us.
If you have a go at this project yourself, we’d love to see your work! Please share on Groovi Worldwide and/or email to me (Grace@claritystamp.com)
Everything that Maggie has used can be found on the Clarity website HERE
Now, looking at the week ahead…
Monday 12th Dec:
SHAC Shack with Barbara – 10am Live on Facebook and YouTube
Tuesday 13th Dec:
Groovi Tuesday with Paul – 10am Live on Facebook and YouTube
Thursday 15th Dec:
SHAC Shack with Barbara – 10am Live on Facebook and YouTube
Friday 16th Dec:
Christmas Treasures Craft Along with Barbara – 7pm Live on Facebook and YouTube
We’re beginning to wind down for the holidays, but we’re still here to keep you company!
Right, I’m off. Enjoy the rest of your weekend.
Travel gently, friends.
Lotsa love, Grace & Maggie xoxo
Clarity – The Home of Art, Craft, and Well-Being.
Thank you Maggie, for a beautiful project. I have been looking for ideas now that my Christmas cards are finished and this is perfect. I do have the main ingredients required, but can easily improvise on the rest. I am looking forward to trying this!
Thanks Grace and Maggie. X
That is beautiful! Thanks,Maggie!
This is absolutely immaculate. I love this masterpiece! It is something to treasure and bring out year after year, isn‘t it . Thank you so much, Maggie!
Lovely project. Thank you Maggie
Absolutely beautiful! I have the aquilegia plate but will have to improvise with the rest so I’m definitely going to give this a go. Lovely to be used as a Christmas card which then becomes a gift. xx
What a lovely project. Loved the tip regarding placing the work under a heavy book to flatten back down again whilst completing another section. The close up photos were really useful as well. Thank you for sharing xxx
Wow this is beautiful Maggie and so many skills used in it. I loved this project the minute you showed it to me and I’ve been looking forward to see exactly how you made it.
Thank you for sharing it with us all. Xxxx
Gorgeous project. Haven’t time this year but next year for sure.x
Thank you for sharing this step by step. Absolutely gorgeous.
Beautiful project
Wow what a beautiful piece, lovely to make as tree hanger toppers for cards so people can then hang it on the their tree in the future. Will get all my must be done Christmas projects finished first then try this. Would make a nice extra present for family to take home to hang on their tree.
Thanks Maggie for the wonderful step by step instructions.
Stay safe & warm everyone – we have a light covering of snow this morning – hopefully it won’t come to anymore than that xx
What a stunning project, thank you Maggie. Don’t think I’ll have time this year but definitely on my ‘to have a go at list’ . Love it. X
Wow this is amazing – definitely going to have a go at this!!!
Beautiful, thank you Maggie for sharing. x
So very beautiful, thank you for sharing x
Definitely a WOW !!!
What an absolutely BEAUTIFUL project – thank you
Love Set a Xx
Hvala, da svoje znanje delite z nami! Čudovito delo, gotovo ga bom preizkusila!