Clarity’s Blog Tutorial: How To Stitch Parchment to Cardstock
Hello hello! Grace here.
Happy Sunday. I hope this finds you well, safe and feeling creative.
We are joined this weekend by the fabulously talented Glynis Whitehead. She’s such a wonderful teacher. Glynis has kindly prepared a step-by-step project for us. Let’s dive right in!

Christmas Baubles Wrap-Around
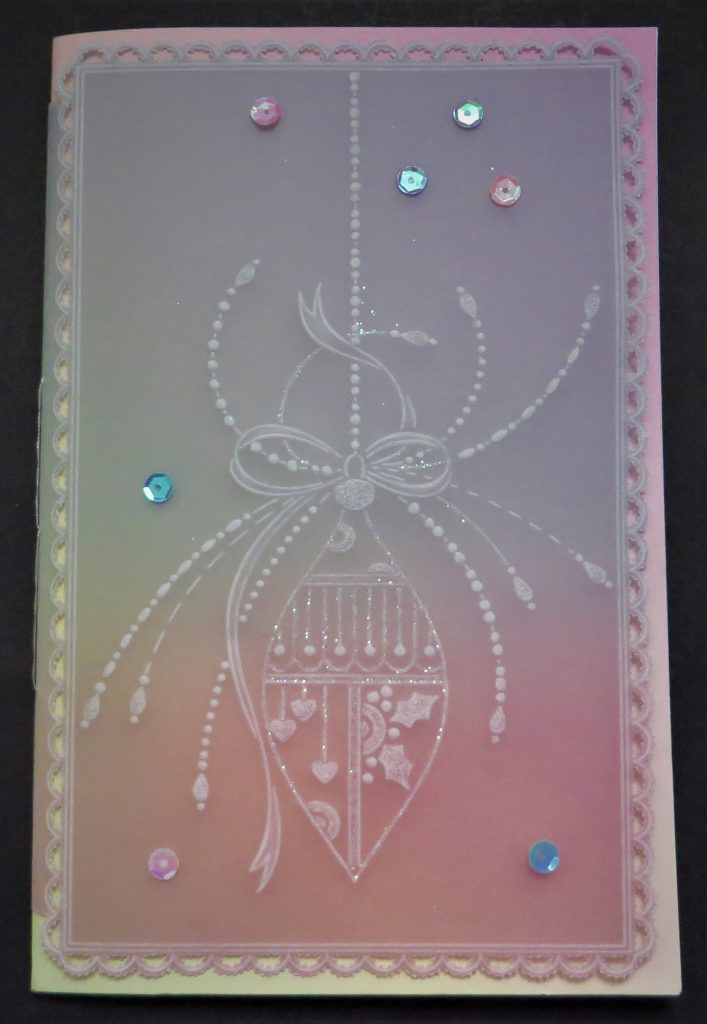
We are often asked for different ways of attaching our parchment to the cardstock. Usually, the answer is brads and glue (where it can be hidden)… but here is another way! I’ll show you how to make a wrap-around and stitch the parchment into place along the spine. I thought this would make a lovely Christmas card for someone special.
Ingredients
Tina’s Christmas Baubles A4 Sq Groovi Plate (GRO-CH-41009-15)
Nested Scallops Rectangles A5 Groovi Plate (GRO-PA-40587-04)
Rainbow Duo – Parchment & Paper Pastel Rainbow (GRO-AC-42024-XX)
1.5mm Pergamano Embossing Ball Tool (PER-TO-70004-XX)
4.5mm Pergamano Embossing Ball Tool (PER-TO-70015-XX)
Pergamano Perforating Tool – Single Needle Fine (PER-TO-70035-XX)
5 x 7 Inch Card Blank
Method
Step 1. Make sure that you will be embossing on the back of the paper. The back is the side with the sheen – if you are not sure, then emboss a little dot in the corner, the side with the whitest dot is the front.
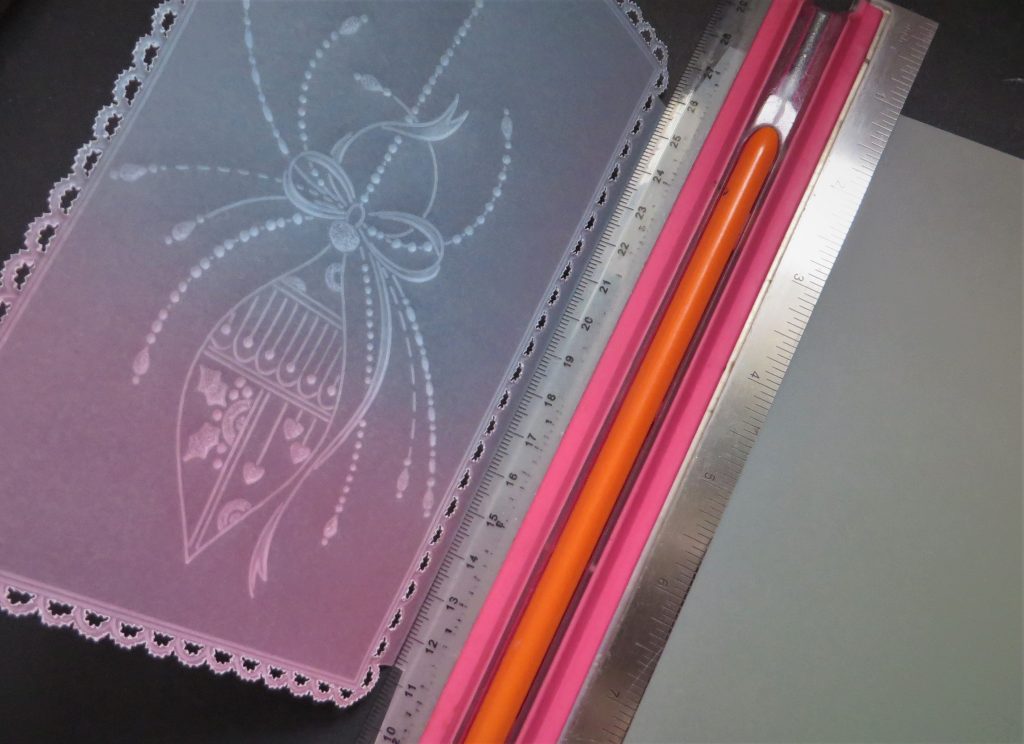
So, with the front-facing downwards, attach the parchment to the nested scallops (left-hand side of the parchment) and emboss the third lines and scallops out from the edge.
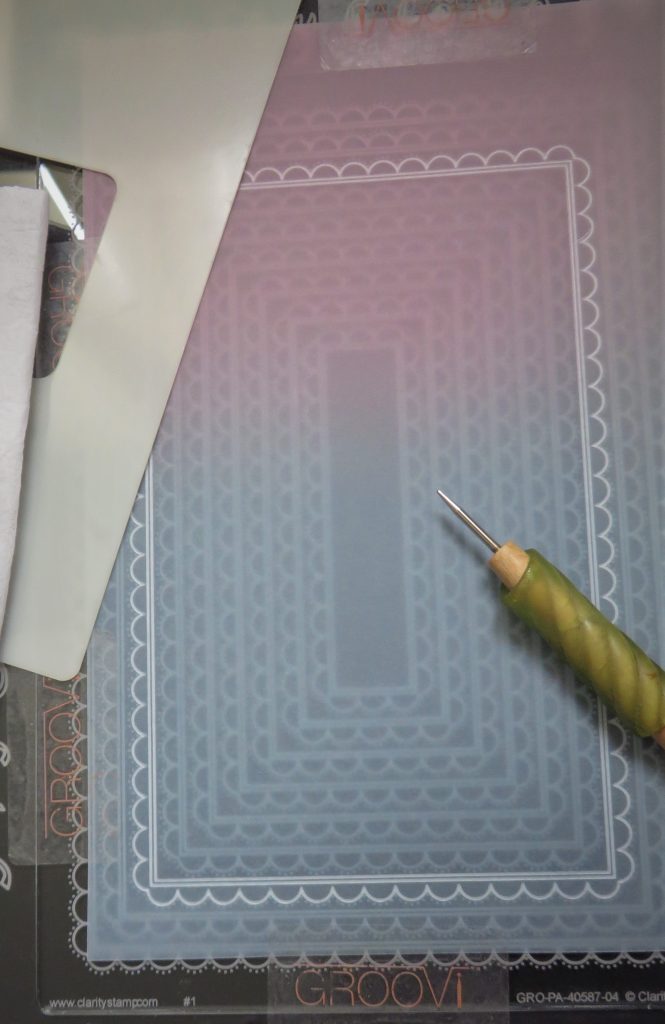
Step 2. Attach the parchment to the bauble plate, centralising the bauble in the scalloped frame. Do not emboss the string yet.
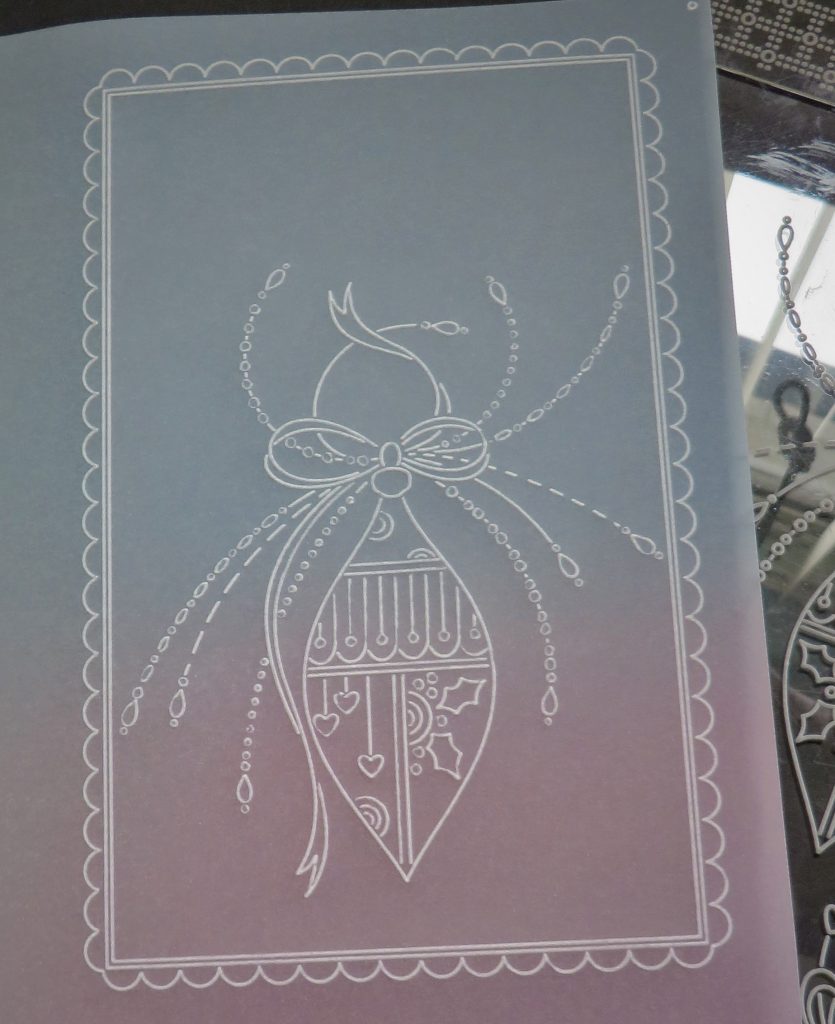
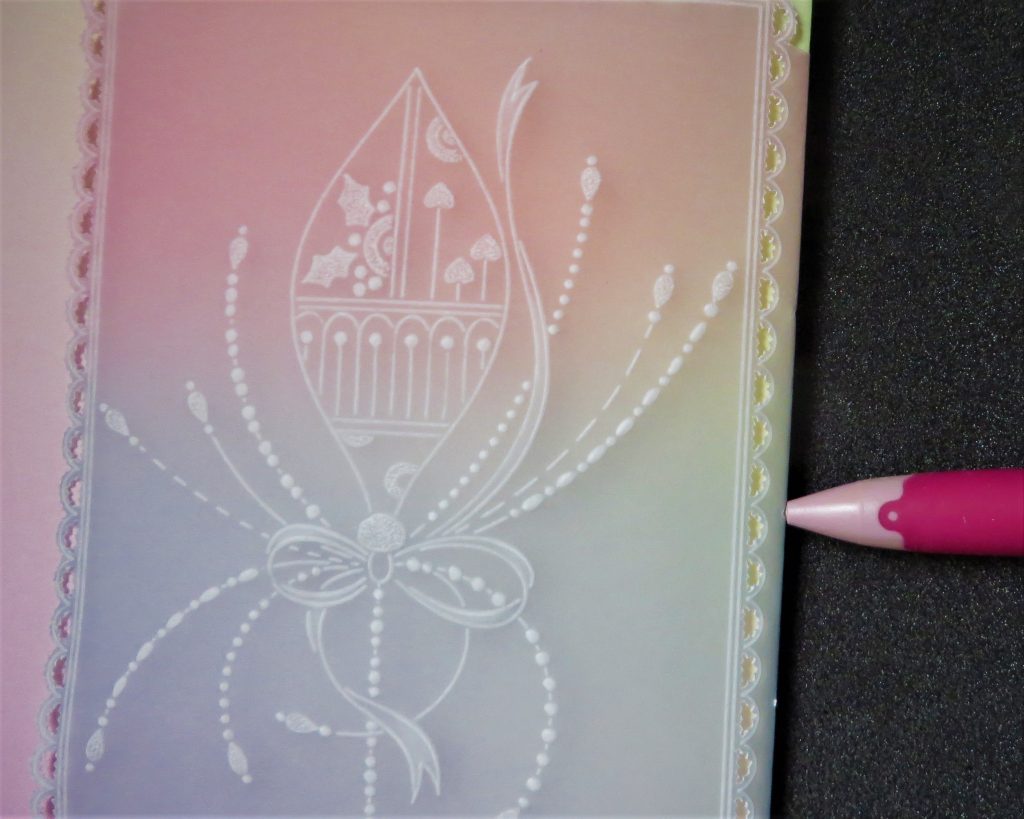
Step 3. For the bauble string, I chose to use the dots attached to the round ‘holly bauble’. But it’s your choice!
Step 4. Emboss all the dots in the strings and fronds.
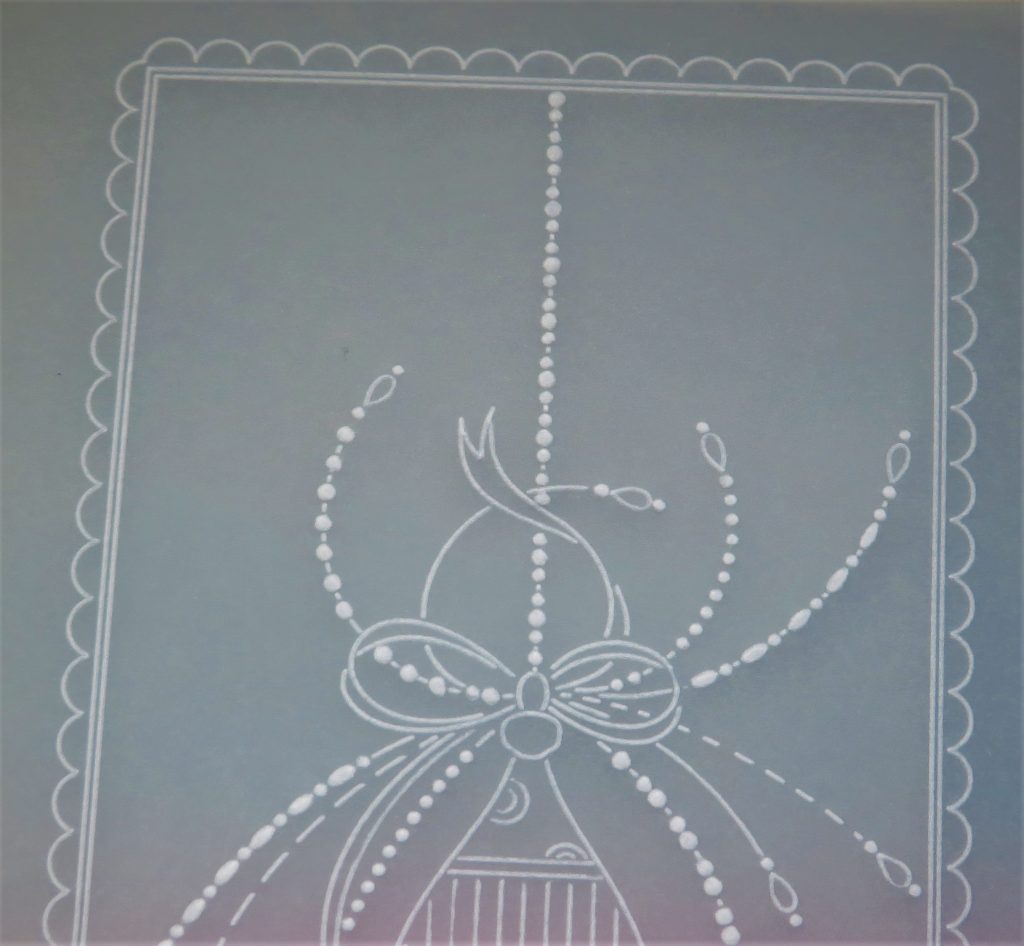
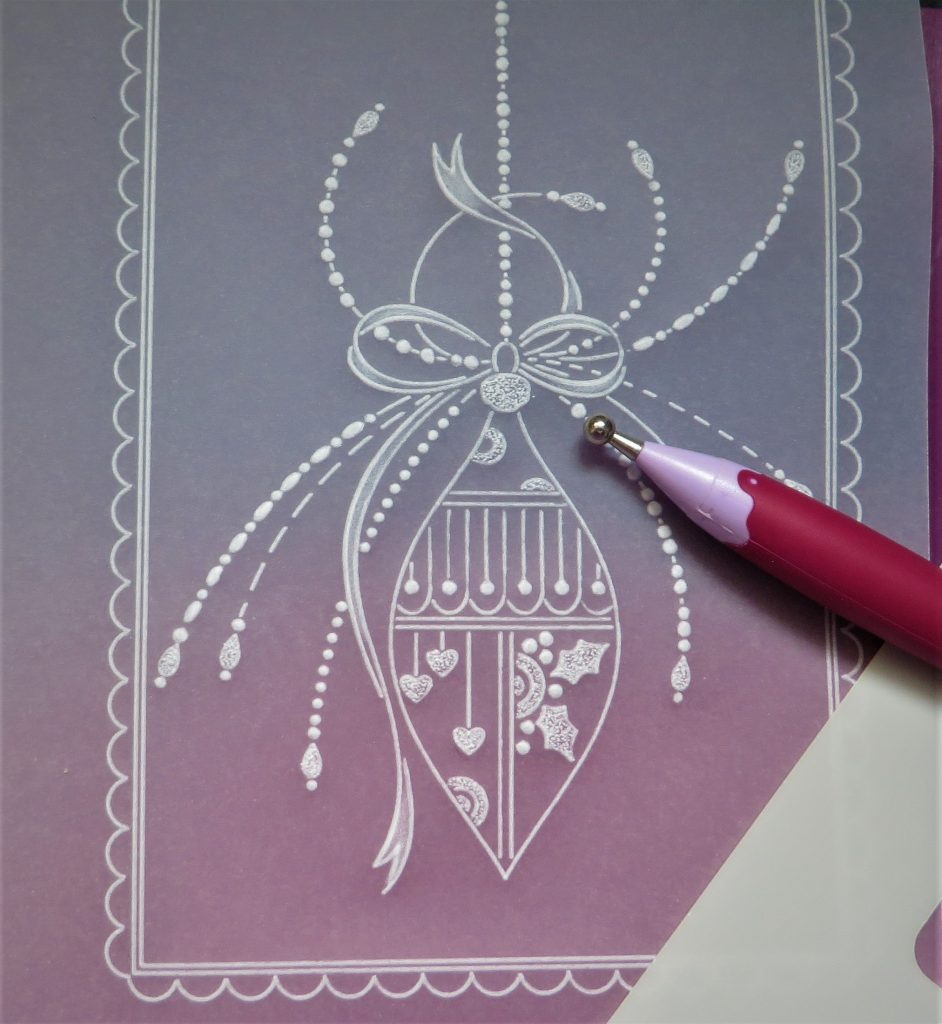
Step 5. Still working on the back… stipple the holly leaves, hearts, large droplets, bauble top and half circles. To do this, you will need a stout piece of card or mount board underneath. Then use your bold one needle tool to tap, tap, tap until you have whitened the area with many little white dots.

Step 6. Use the 4.5 mm ball tool to put highlights onto the ribbon. Consider where the shade and light would be.
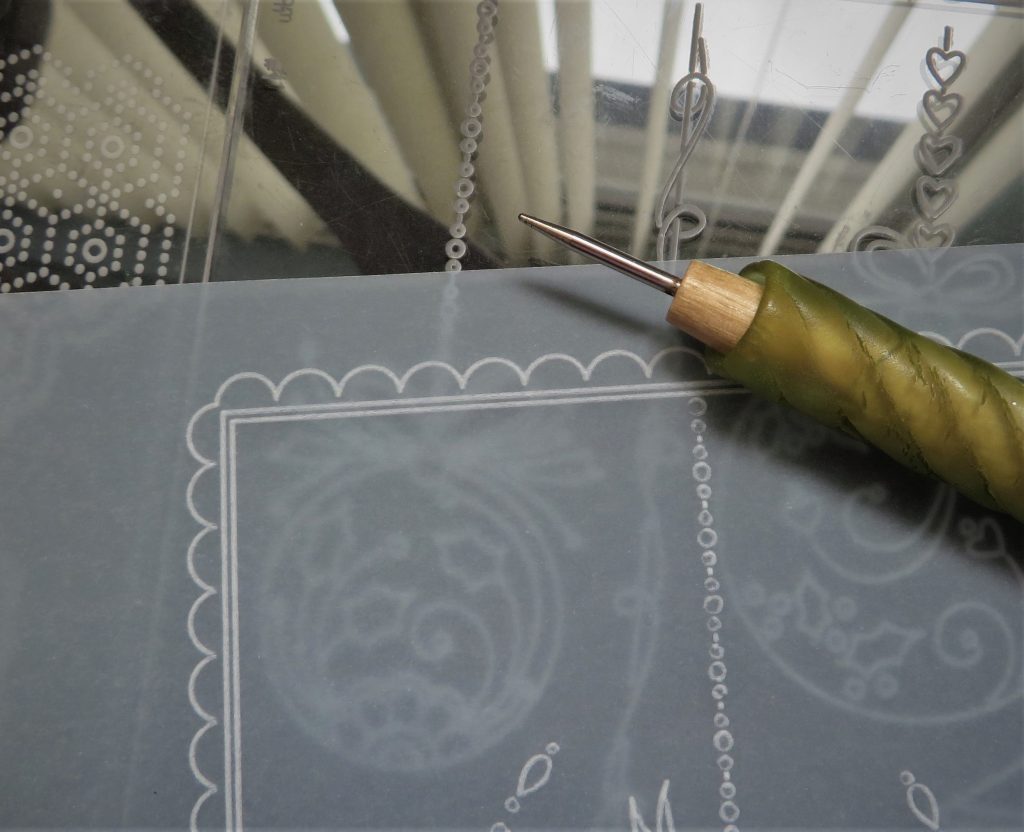
Step 7. Using your 2-needle tool, go around the inside of all the scallops They can be coloured in (on the back) if you don’t wish to cut them out.

Step 8. Now go around the outside of the scallops, but just on 3 sides. Like the photo below, go around the two corners, but just perforate the first scallop at the top and bottom. The fold of the card will be on this side, so we’re not going all the way across.
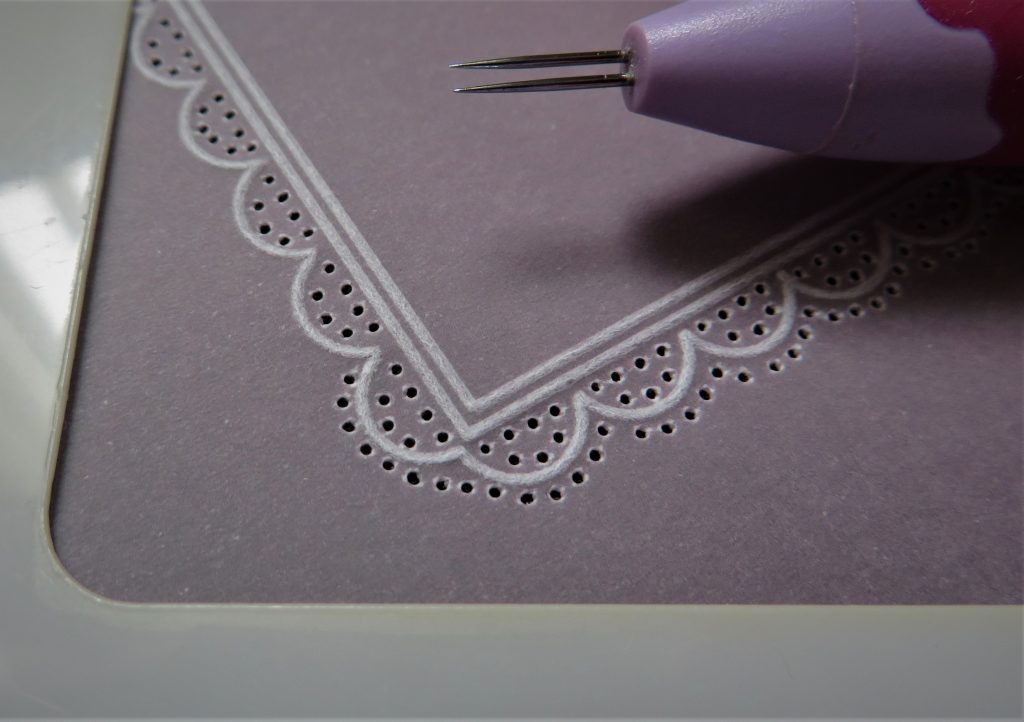
Step 9. Carefully snip all of the perforations.
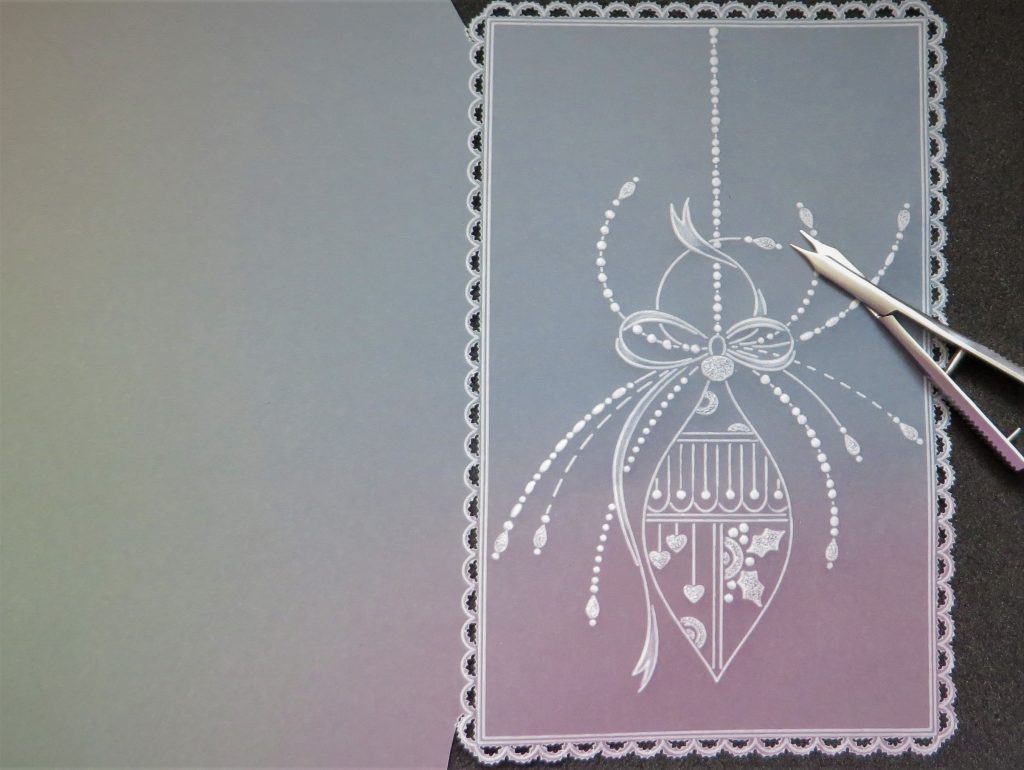
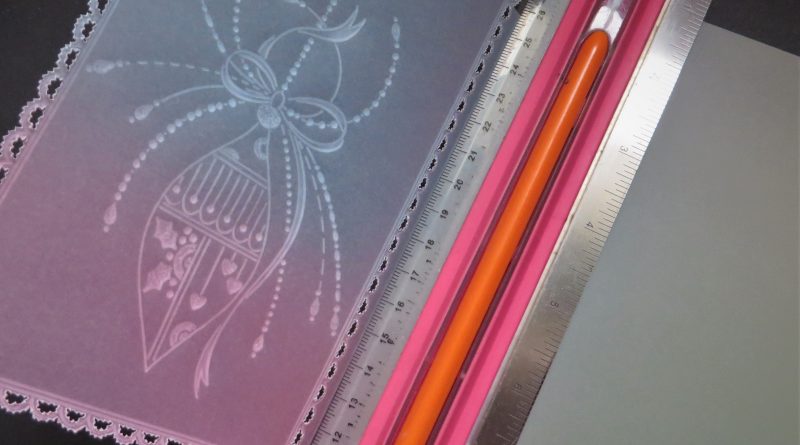
Step 10. Fold and cut a piece of Pastel Rainbow paper to 5 x 7 inches and (down the back near the fold of the card) attach this to a folded card blank with some double-sided tape.
Step 11. Use a ruler to help fold along the spine of the parchment layer of the card.
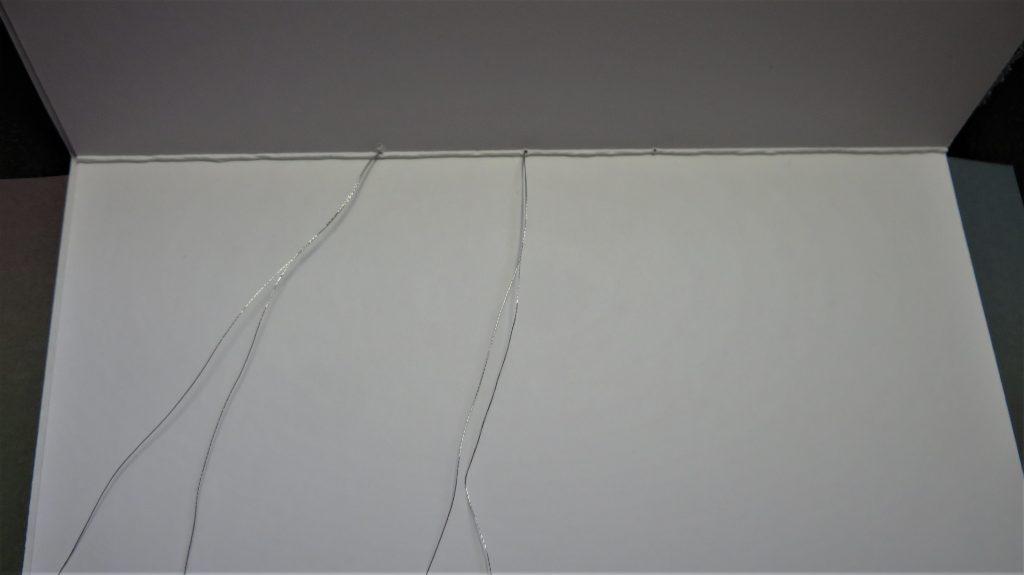
Step 12. Lay all the layers flat with the spine facing you, and then use a 1-needle tool to push through and make holes to stitch through. One hole in the centre and then one on either side, about 2 inches apart.
Step 13. Thread a needle with your thread of choice – I chose a silver metallic. Draw it through the eye so that it is doubled. From the inside of the card, sew through the centre hole.
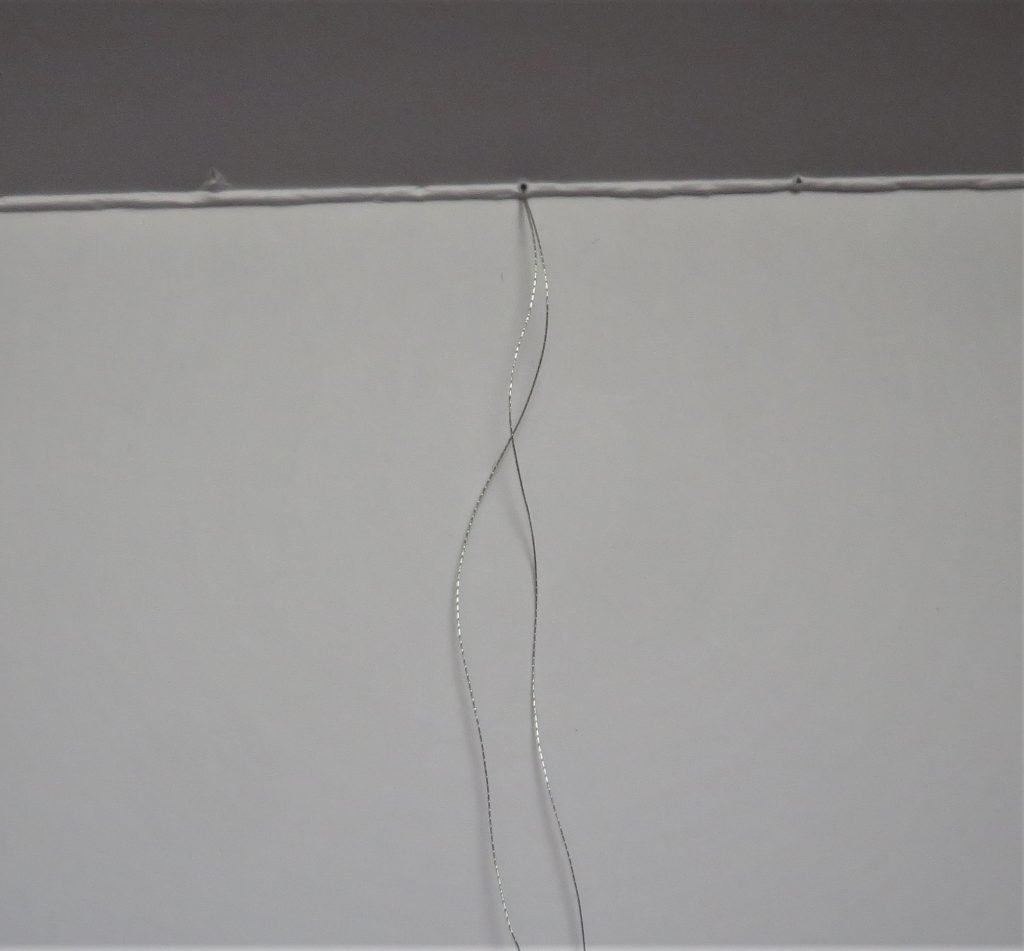
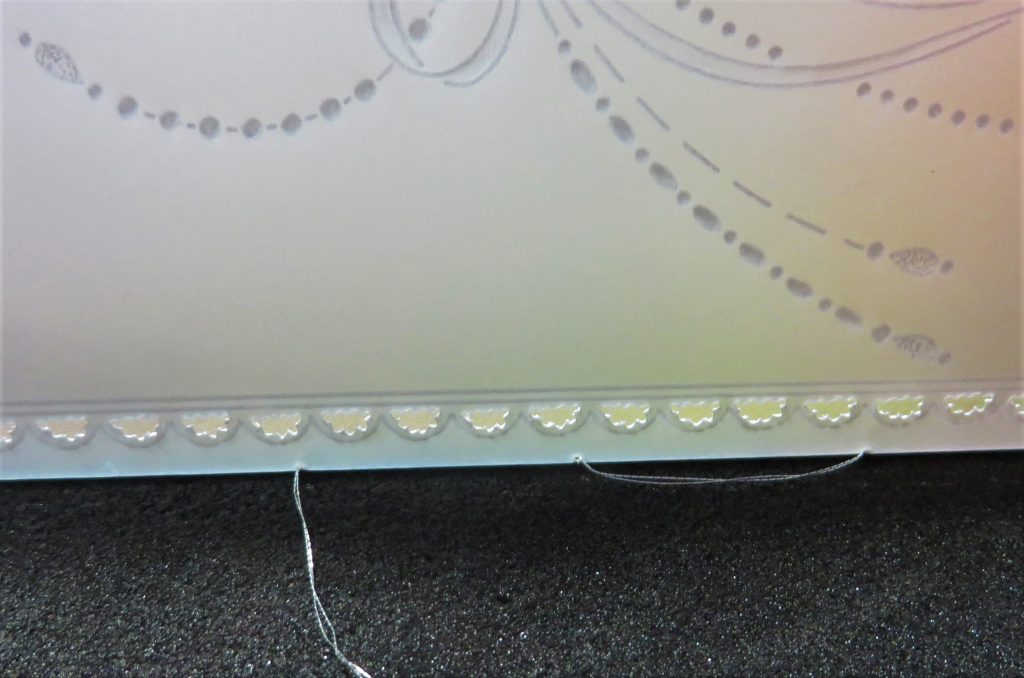
Step 14. Take the needle and thread from the outside back to the inside through one of the other holes.
Step 15. Now take the thread through the other hole back to the outside.
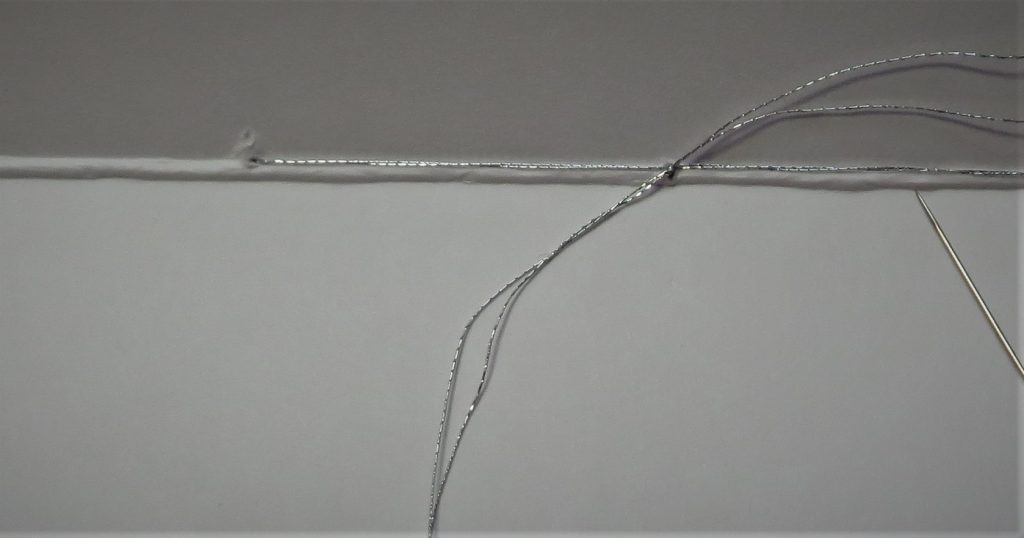
Step 16. Go back through the centre hole to the inside and make sure the two ends are on either side of the long stitch down the centre spine. Then tie the ends and make a tight knot. Be careful not to cut the card with the thread.

Step 17. Using either a trimmer or ruler and craft knife, trim all the layers. Add glitter and gems as you wish.
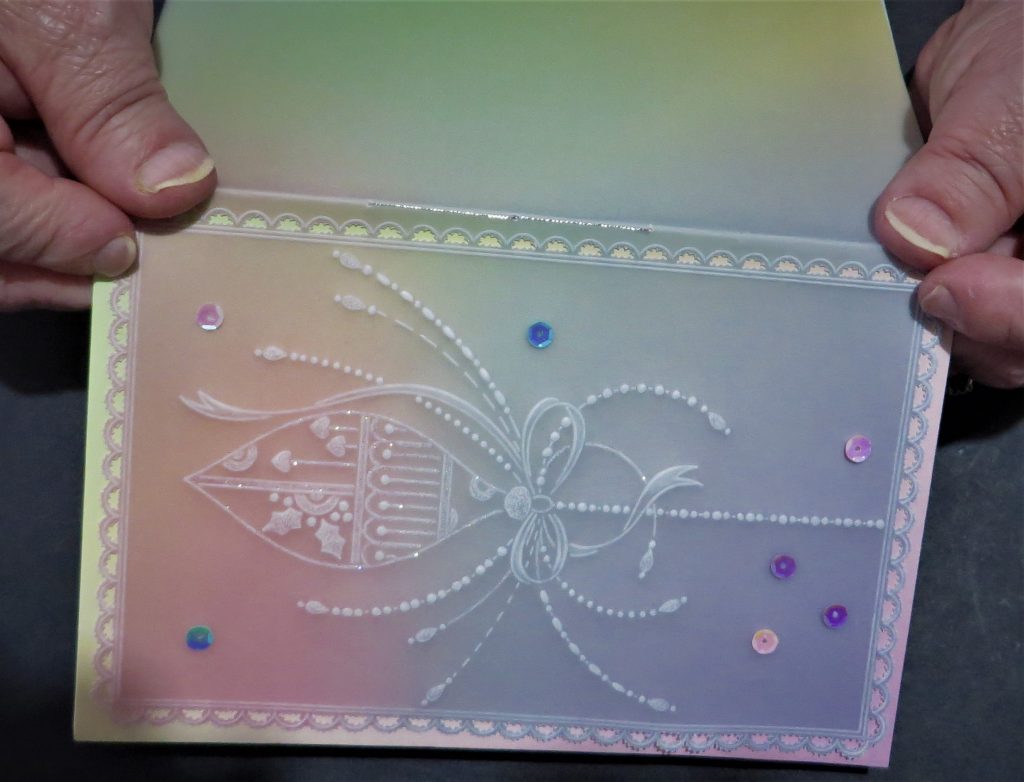
And you’ve found a new way to attach your parchment artwork!
What a beautiful card. Thank you for sharing your tips and techniques with us, Glynis! That is so clever. Does anyone fancy having a go? If you do, please send me your results! Grace@claritystamp.com – We love to see your inspired work.
Everything that Glynis has used can be found on the Clarity website HERE
The week ahead at Clarity Towers
Tuesday, August 23rd:
Groovi Tuesday with Paul – Live at 10am on Facebook & YouTube
Thursday, August 25th:
New & Exclusive with Mum and Paul on Create and Craft – 4pm & 8pm
Friday, August 26th:
New & Exclusive with Mum and Paul on Create and Craft – 8am
Crafting with Clarity with Mum on Create and Craft – 9am & 1pm
Lotsa love, Grace & Glynis xoxo
Clarity – The Home of Art, Craft, and Well-Being.
Thank you for showing us this brilliant, alternative way, to attach the parchment to the card base. I’ll definitely have to try and remember this one xx
Beautiful Glynis. Always great to know different ways of attaching. X x ❤️
Lovely project, thank you x
brilliant idea. I thought the parchment was going to be stitched but wondered if it was too stiff. Obvious way really to mount on paper.
Lovely card Glynis. I’m not as brave as you, I cut my card prior to attaching the parched design.
Thanks Glynis for another great project, will give it a go as I have the plates & haven’t tried this way of attaching parchment to a card before.
Thanks Glynis. When I first learned parchment craft with a Pergamano tutor this was the only way we attached parchment to card. I still use this method ( or brads ) on all my work and only use glue to attach butterflies or bows. I am sure many new parches will be glad of your step by step to improve their skills.
Thanks Grace for the selection of artwork yesterday. Superb as always.
Stay safe 🍒
Dear Glynis . Thank you for those instructions a lovely card as usual. I have just made a wrap card for one of my granddaughters and was wondering how to attach a card inside. Will have a go . Would send a photo but not sure how to on this.
Thank you Glynis, great to know of another way of attaching parchment to a card.
Hi Glynis- Wonderful and informative tutorial& thank you for showing another way a card can be attached
Love Seta Xx