Clarity’s Blog Tutorial: How To Take Your Fairy & Lace Plates Even Further!
Hello hello! Grace here.
I hope this finds you safe, happy, and enjoying your Sunday!
We’re blessed to be joined this weekend with the super talent, Jane Telford. Jane is both a valuable member of the Clarity design team and also our good friend. We love us some Jane! I’ll hand you over to the lady herself…

Fairy and Lace
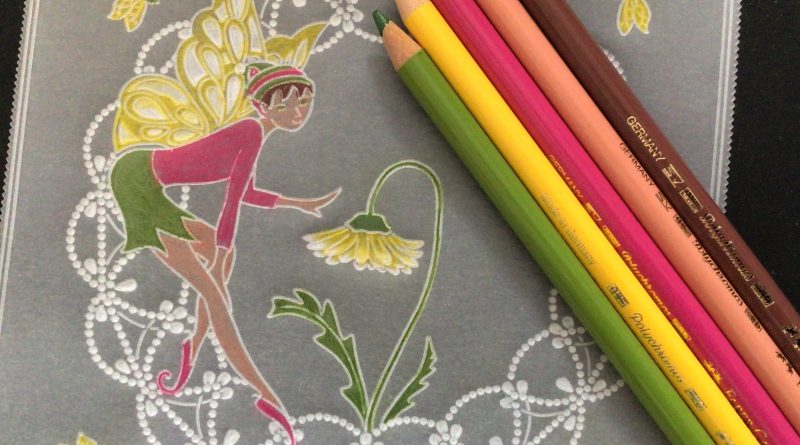
The Lace and Flower Plates (designed by Linda Williams) are so pretty that I could use them all the time. For this project, I used the Daffodil plate but instead of the Daffodils, I added a fairy to the lace. I think it works well as the fairy I chose had just the right shape to fit in the circle. This is where we’re headed…

Ingredients
Linda’s Daffodil & Lace A5 Square Groovi Plate (GRO-FL-41647-03)
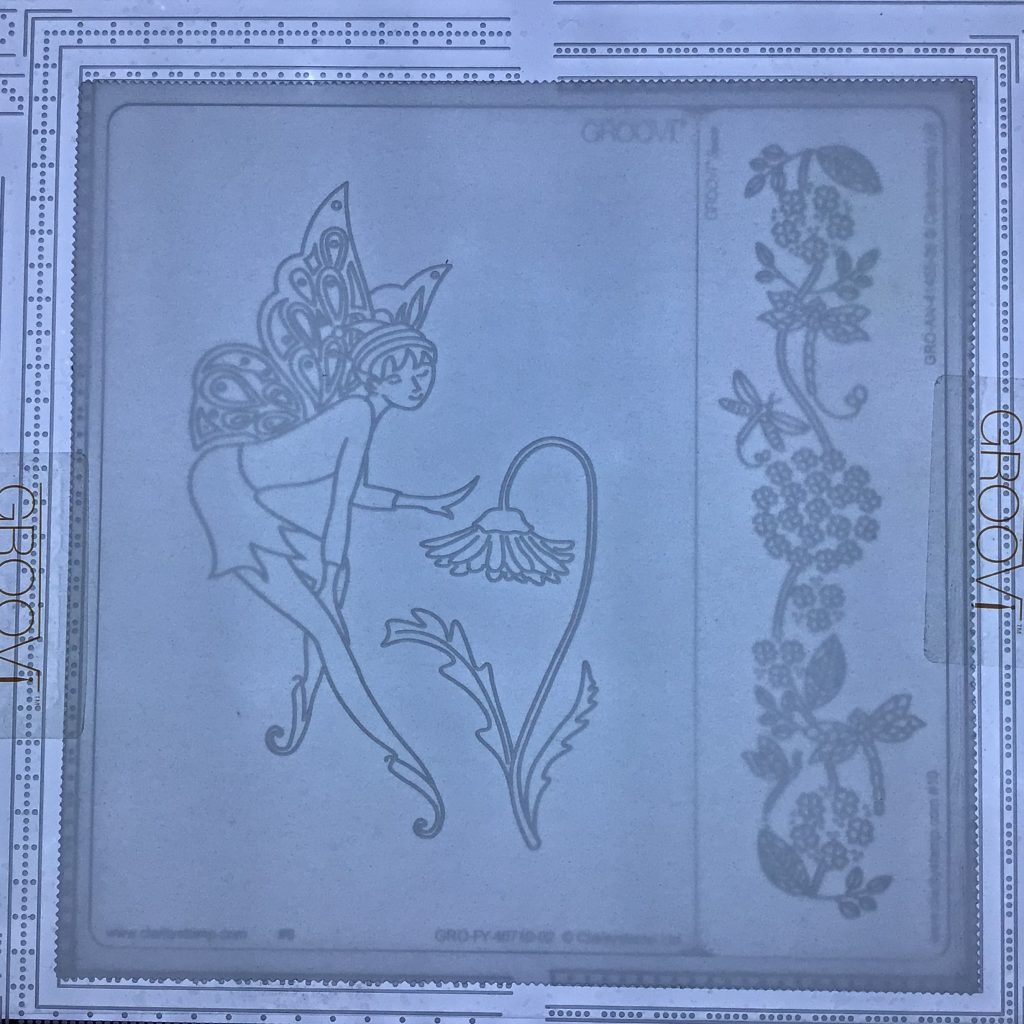
Fairy 3 A6 Groovi Plate (GRO-FY-40710-02)
Dragonflies Groovi Spacer Plate (GRO-AN-41455-06)
Nested Squares Picot Cut Die Set & Groovi Plate (ACC-DI-30698-66)
Groovi Plate Mate For A5 Sq Grids (GRO-CO-41706-08)
1mm Ball Tool – Extra Small (PER-TO-70011-XX)
Groovi Embossing Tool 2.0mm – 2.8mm (GRO-AC-40027-XX)
LightWave (ACC-LP-30352-A4)
A4 Translucent White Super Foam (GRO-AC-40603-A4)
Faber-Castell – 60 Polychromos Colour Pencils (ACC-PE-30797-XX)
Dorso Oil (PER-CO-70066-XX)
Pergamano Blending Pen Nibs (Pack Of 10) (PER-AC-70299-XX)
4 White Brads (PER-AC-70269-XX)
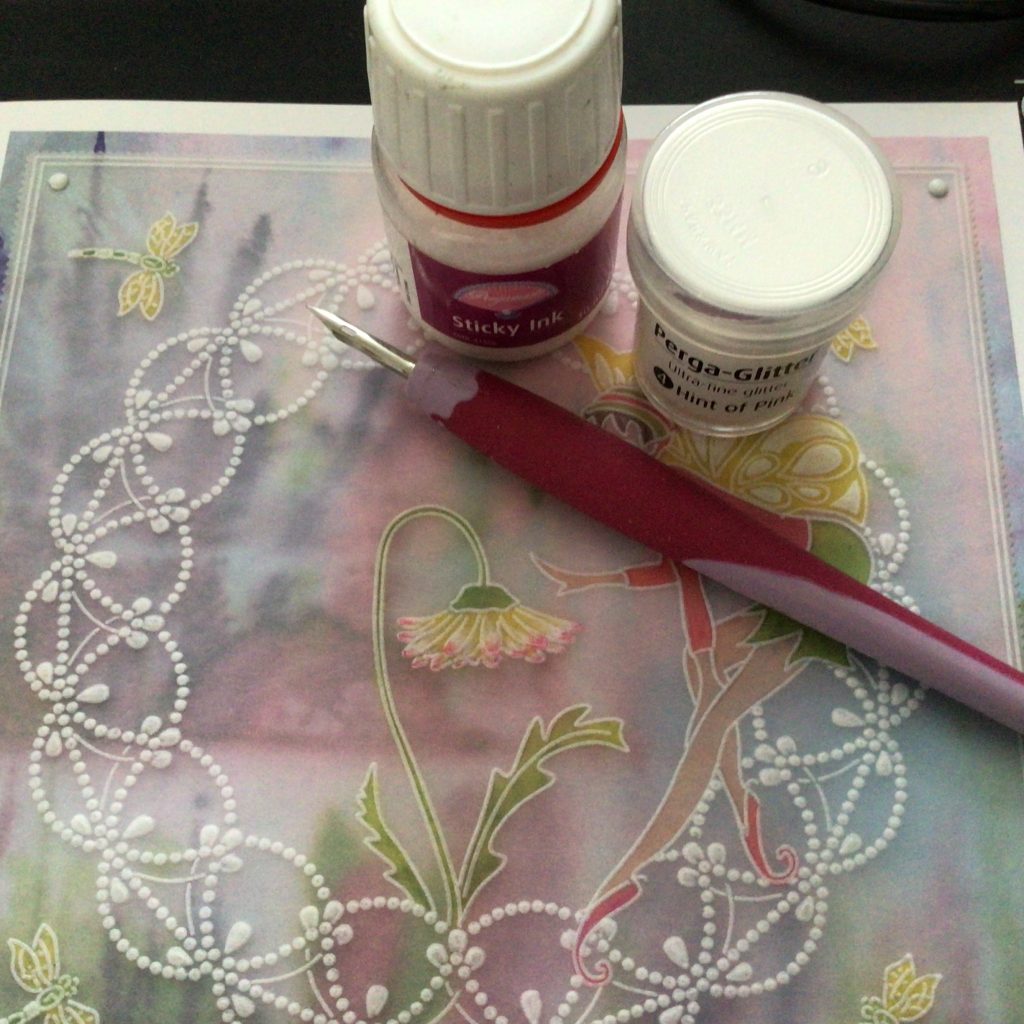
Perga-Glitter (PER-AC-70252-XX)
Feel Good Factor Words Sticker Collection (ACC-SC-31048-A5)
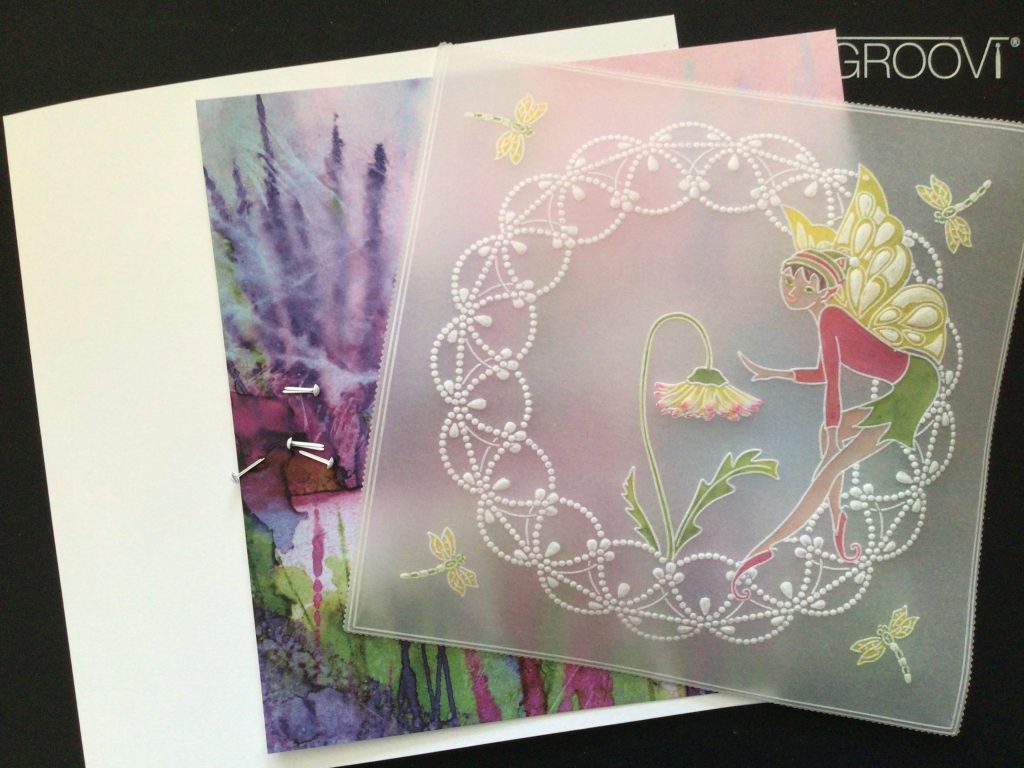
Barb’s Favourite Toscana X10 Designer Paper Pack 8×8″ (ACC-CA-30919-88)
7×7 card blank (ACC-CA-30619-77)
Method
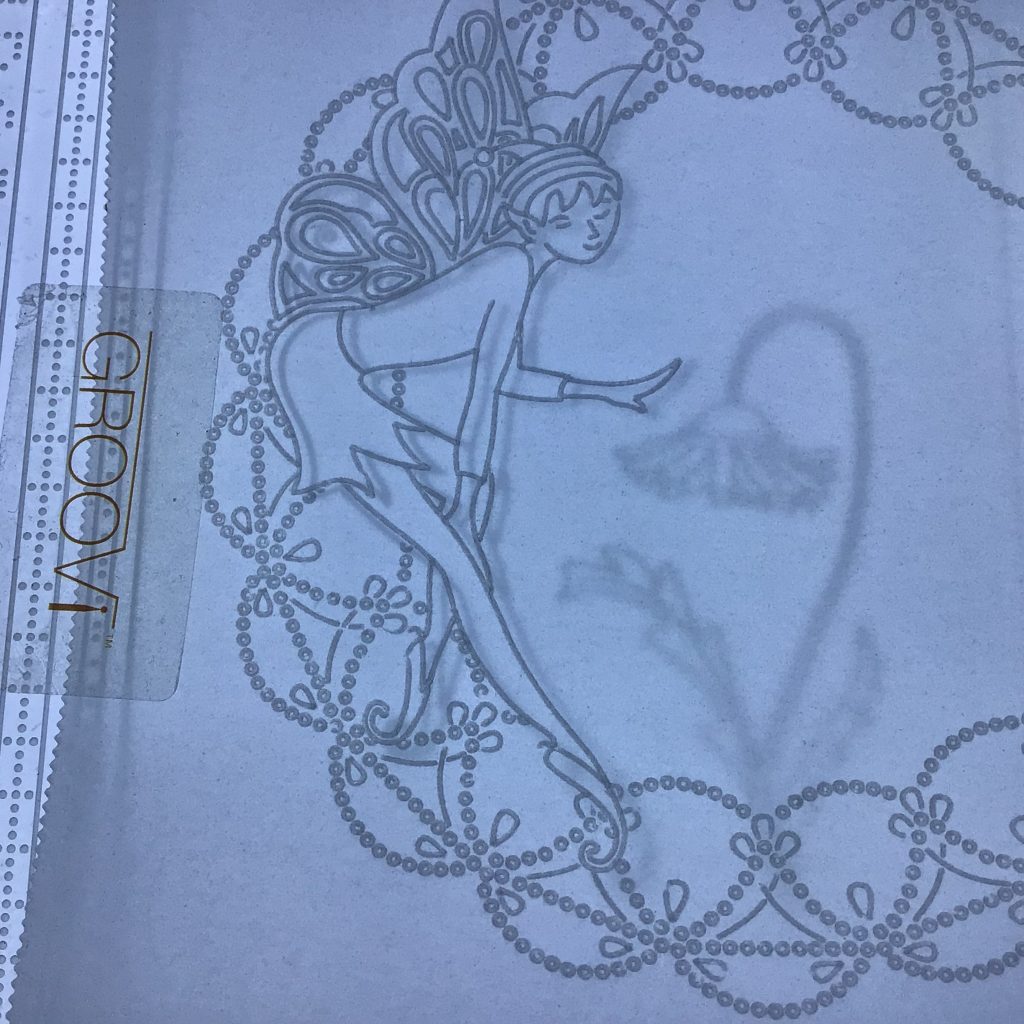
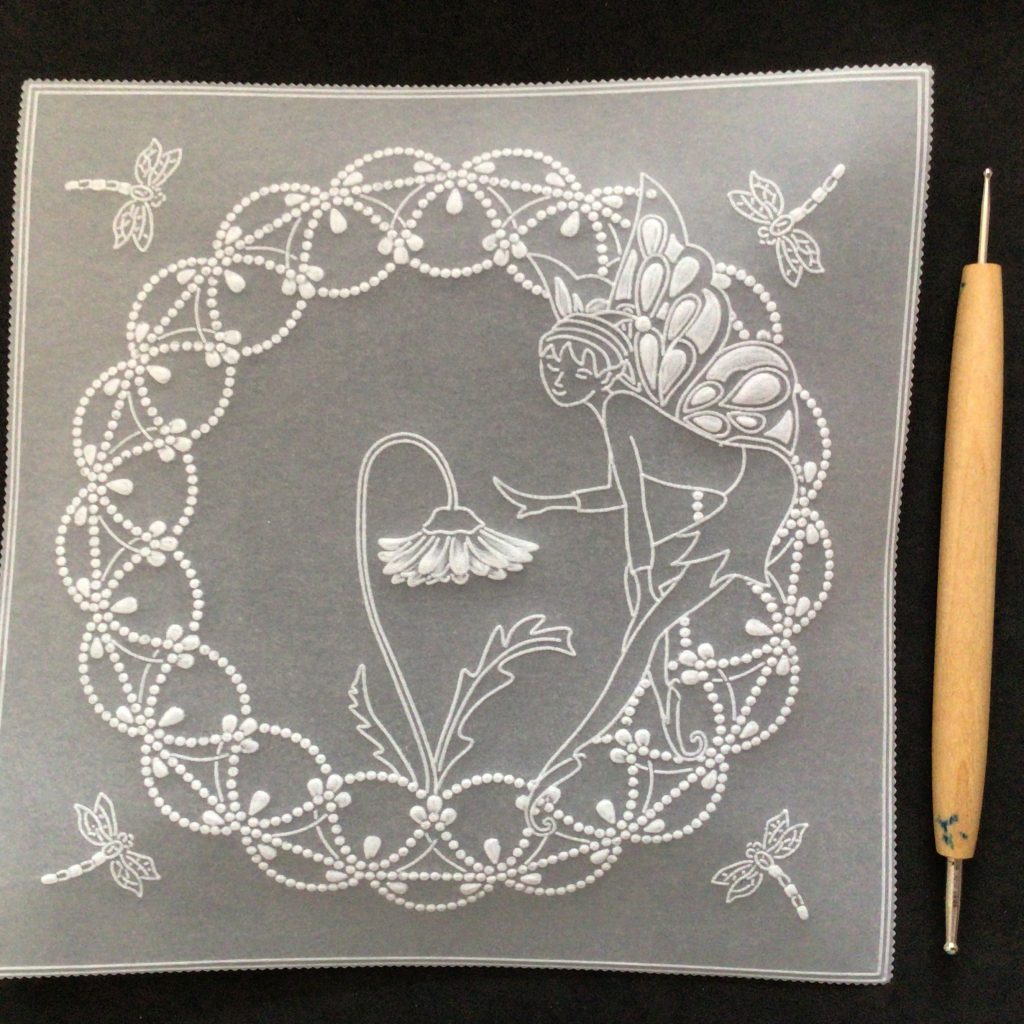
Step 1. Cut a piece of plain parchment using the largest square die. Put the fairy plate in the plate mate (with the spacer to fill the gap) and trace out the fairy.
Step 2. Change the plates to the Daffodil plate and trace out the lace.
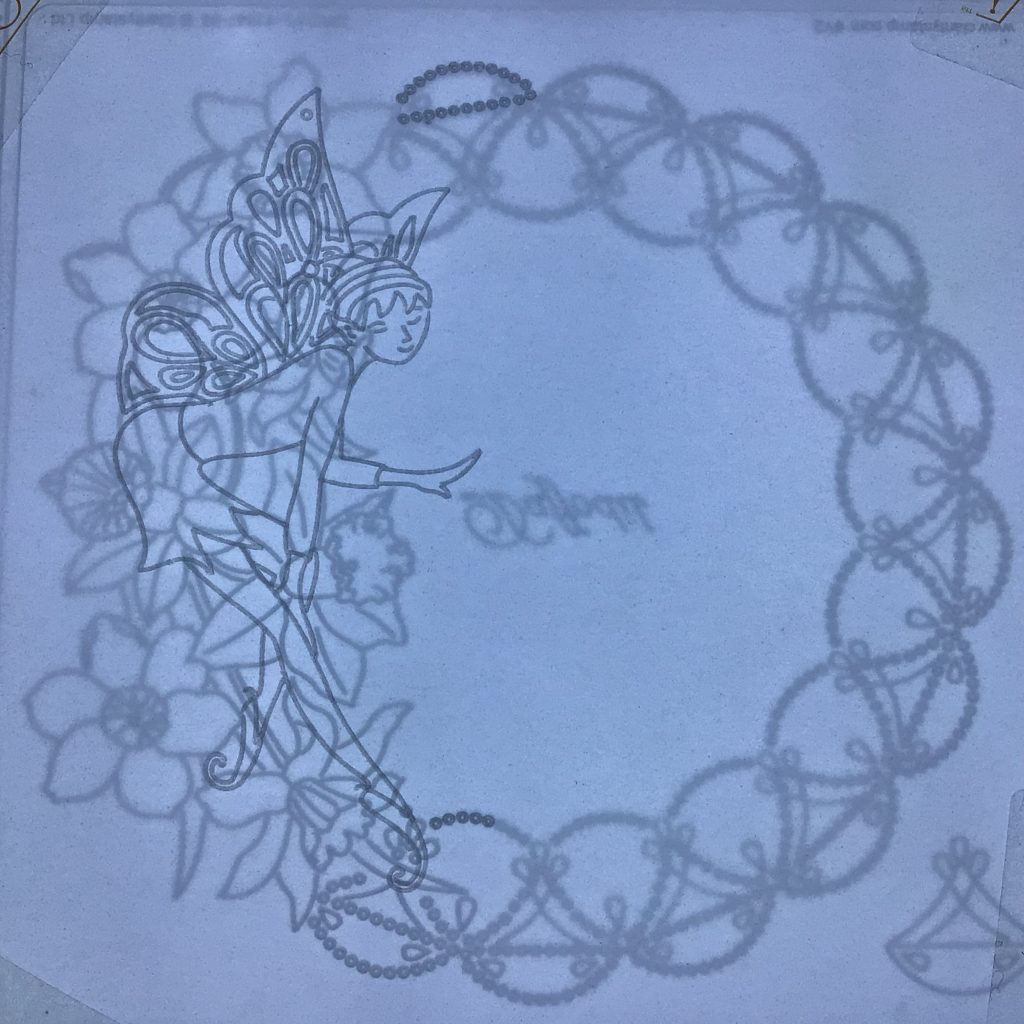
Step 3. Move the parchment around and add more lace around the fairy, so that it looks like she’s sitting on a complete circle of lace.
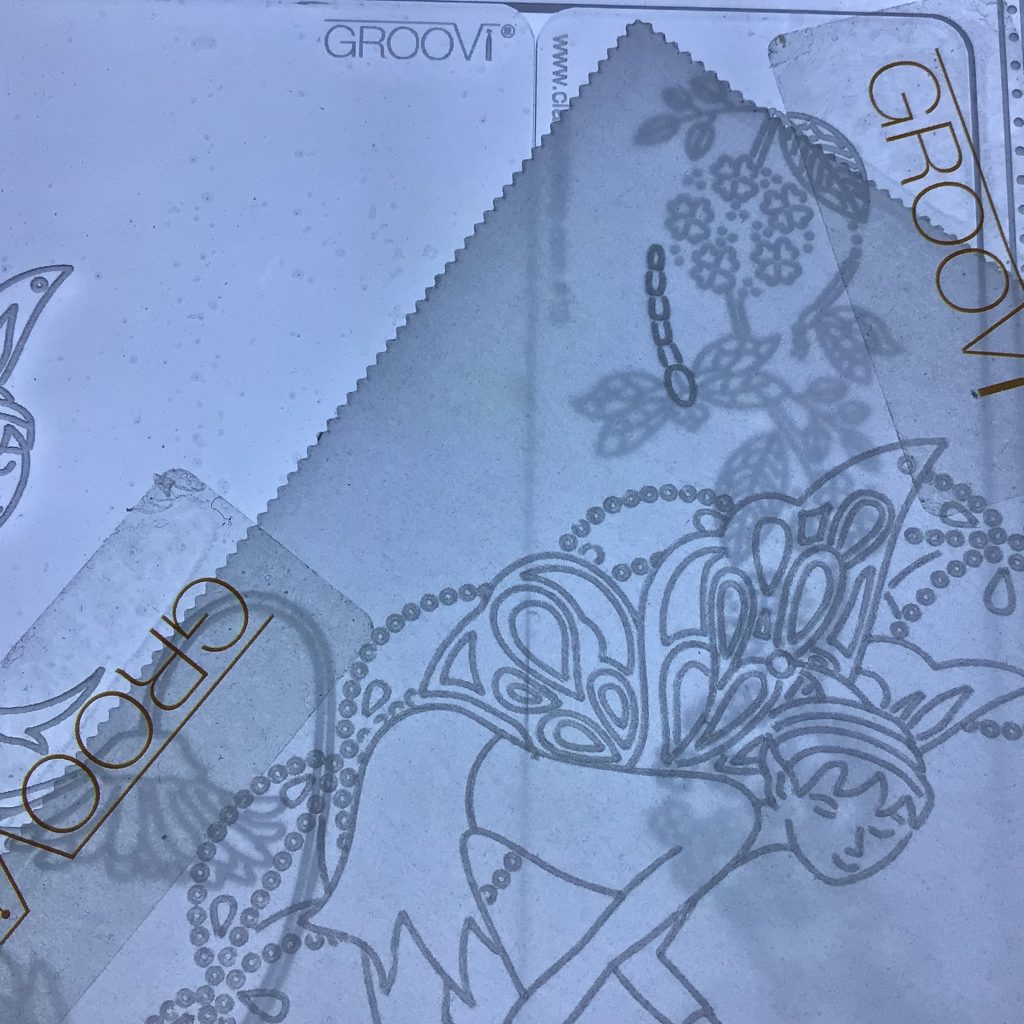
Step 4. Put the fairy plate and spacer back into the plate mate and trace out the daisy.
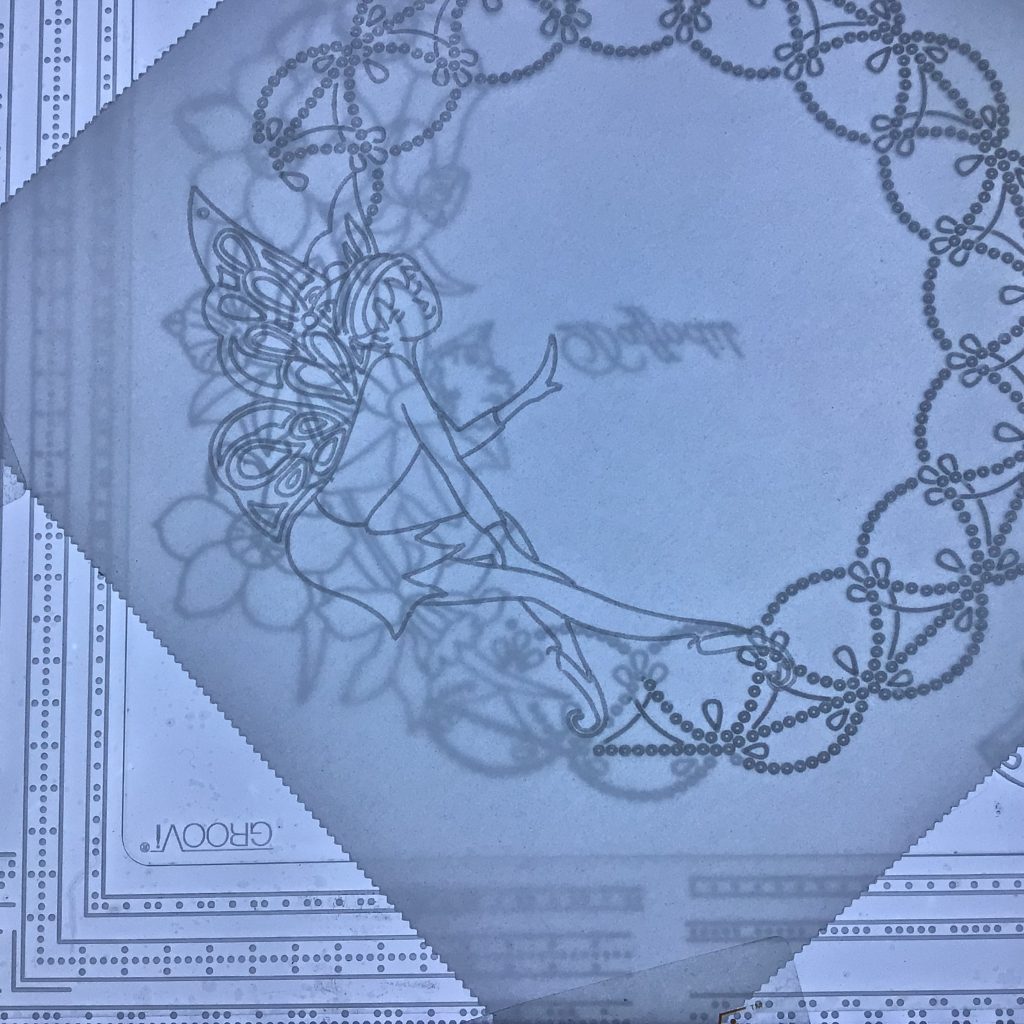
Step 5. Reposition the parchment and trace out a dragonfly in each corner (from the spacer plate).
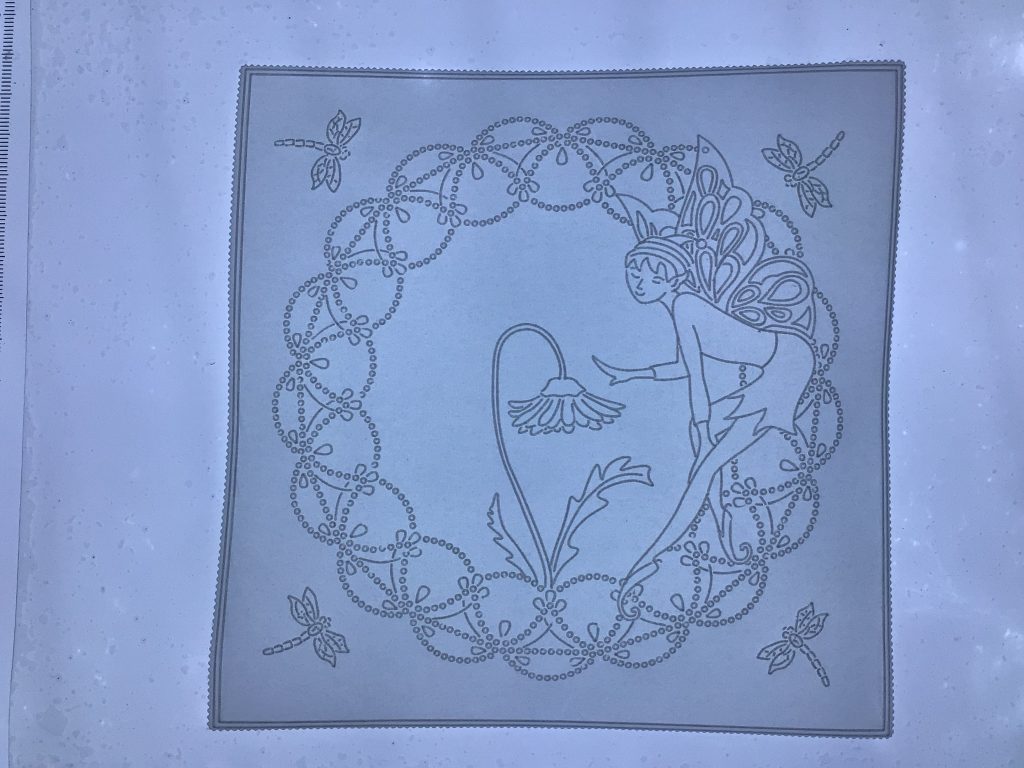
Step 6. Now emboss the double line around the edge using the Picot square Groovi plate. Your finished line art should look like this.
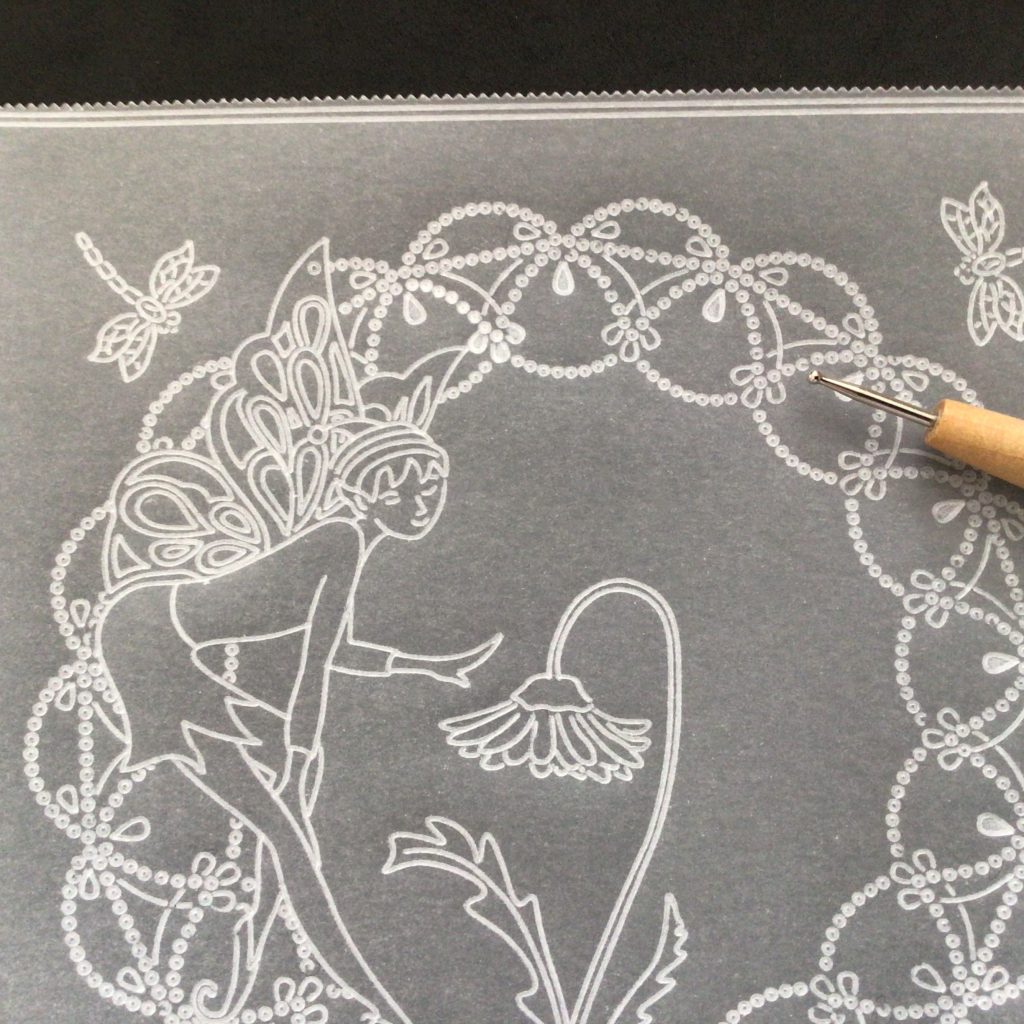
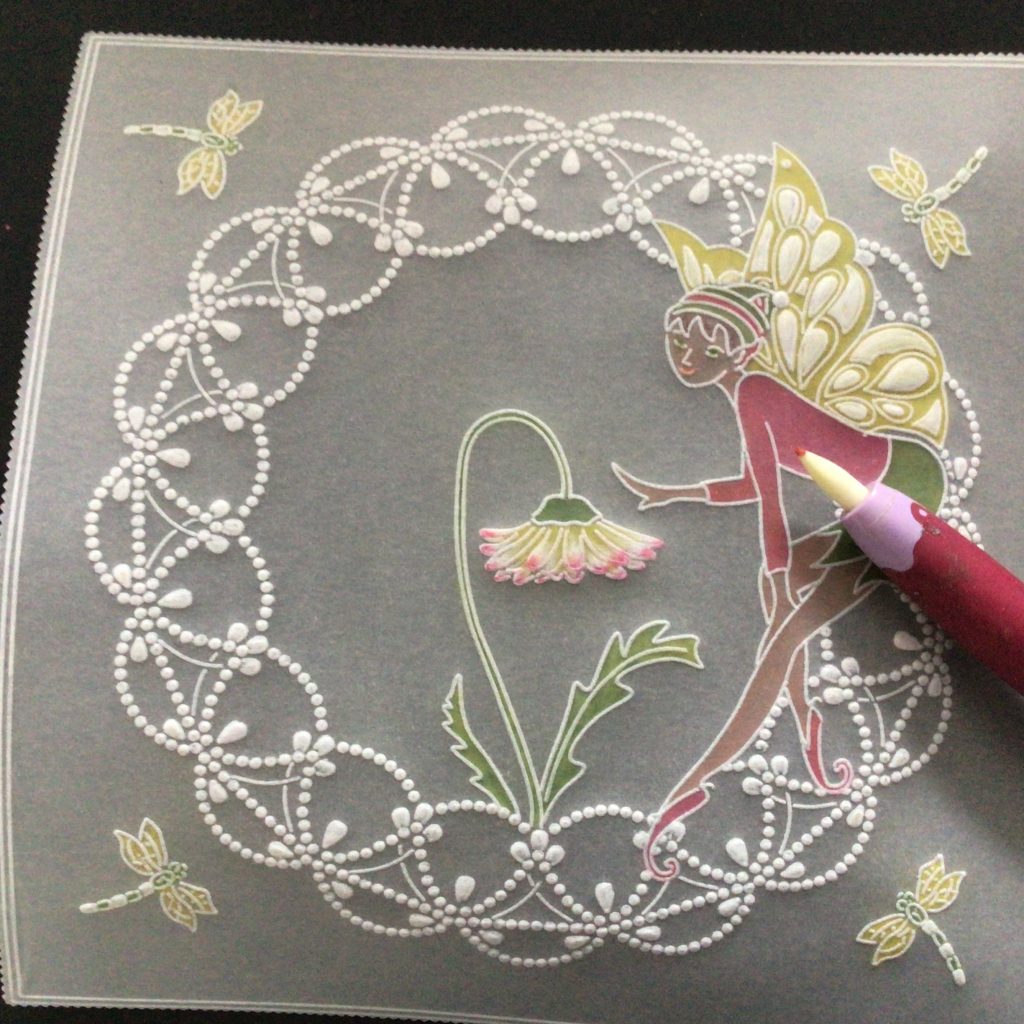
Step 7. Using the number 3 & number 4 Groovi tools, emboss some whitework in the lace, the fairy, the daisy, and the dragonflies.
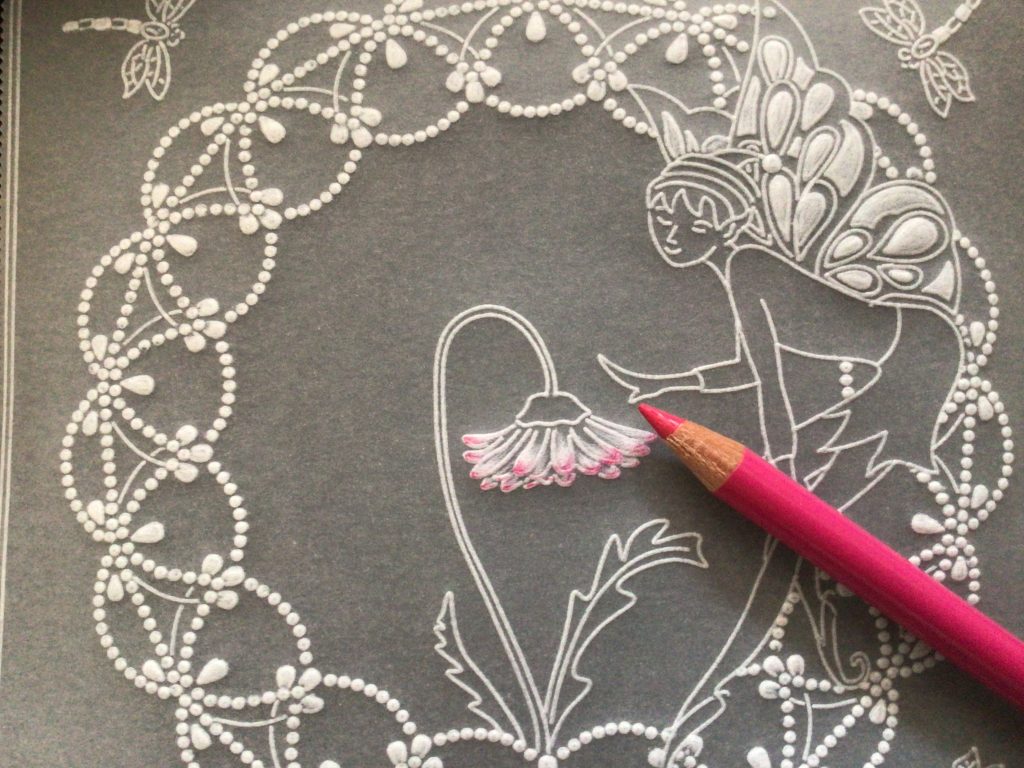
Step 8. Using a pink Poly chromo pencil, add a touch of colour to the daisy petals on the front of the parchment.
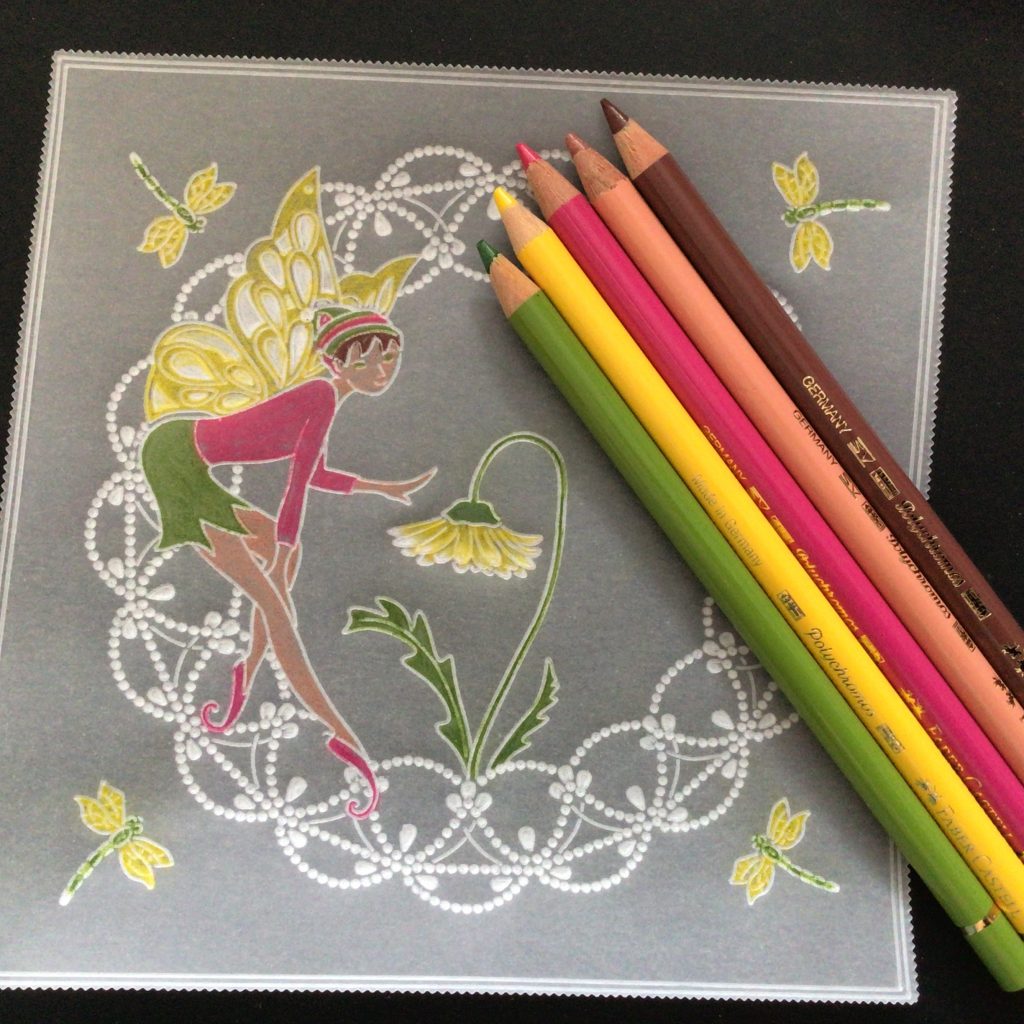
Step 9. From the back of the parchment, colour the rest of the design.
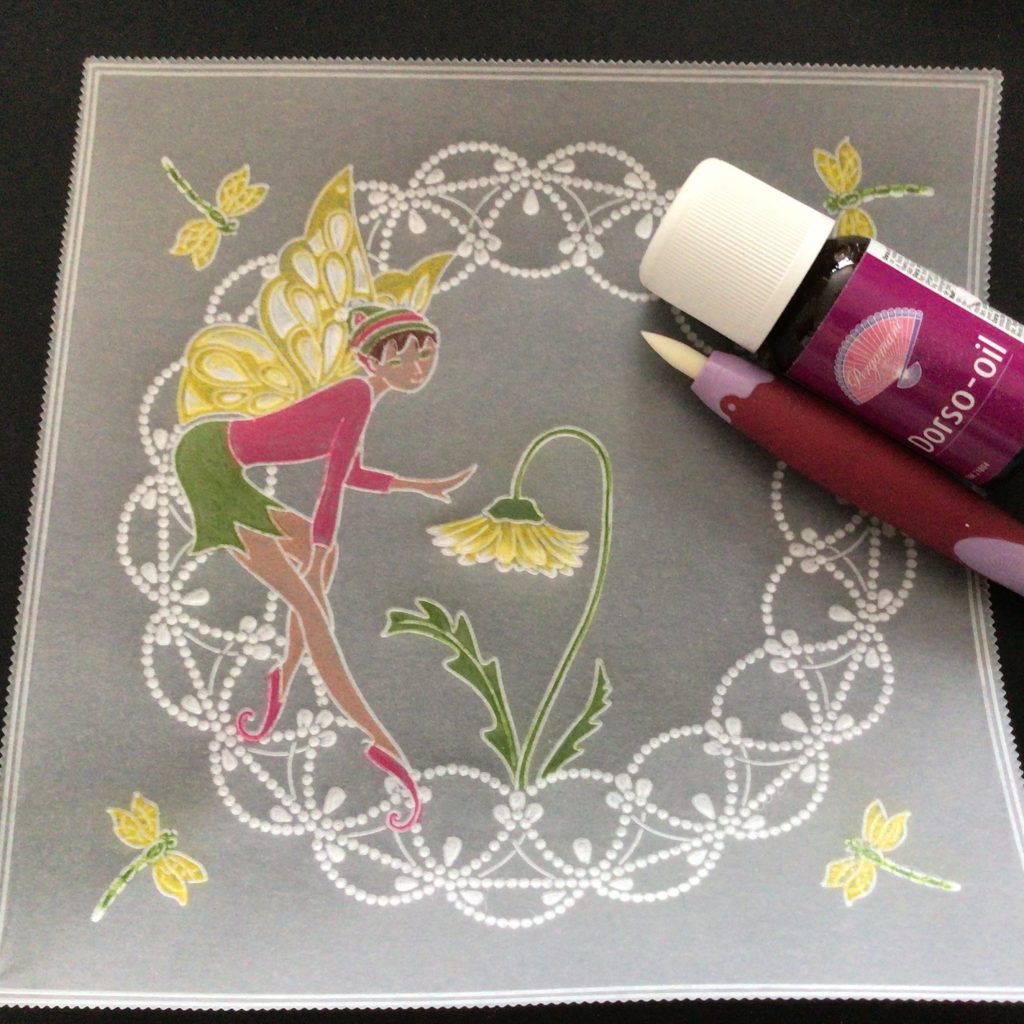
Step 10. Use blending nibs and Dorso oil to smooth out your colouring.
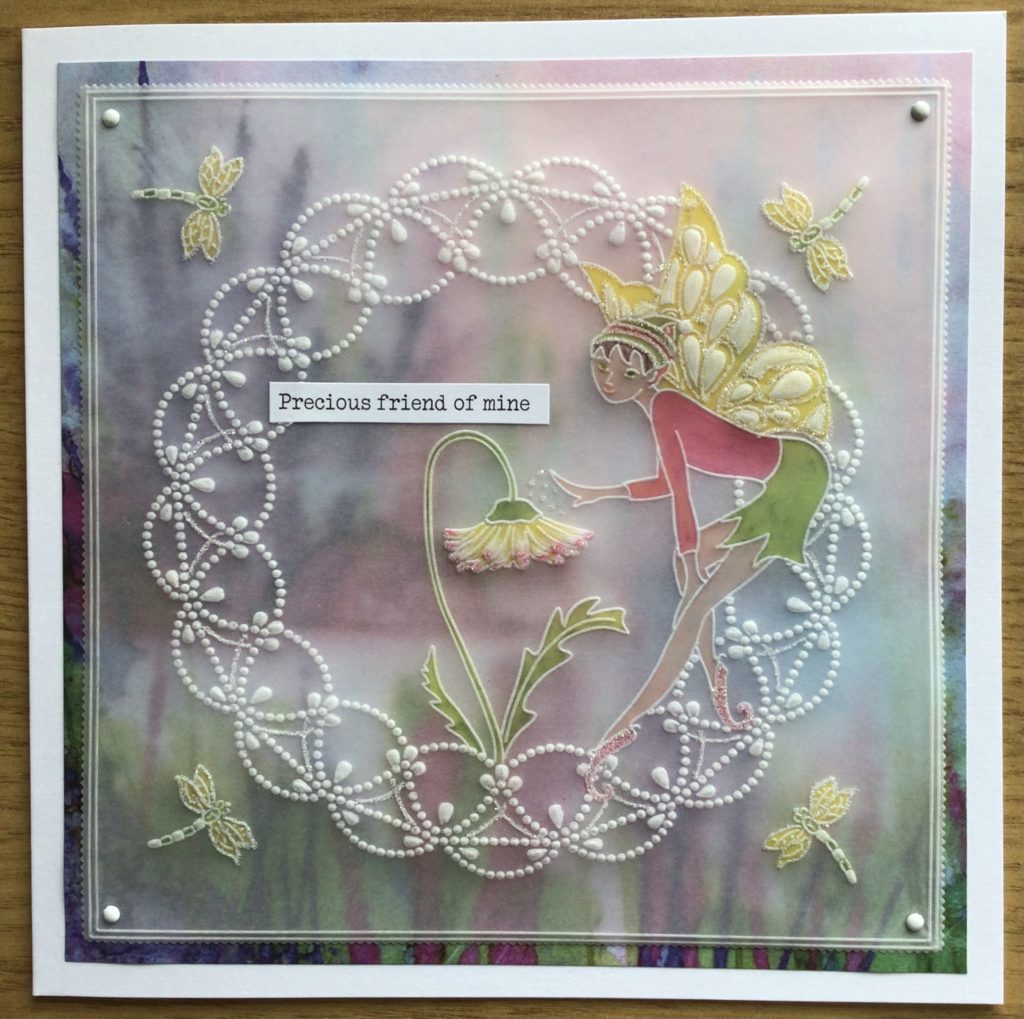
Step 11. Cut a piece of designer paper to 6½” x 6½”. Attach the parchment to it using brads. Attach to a 7×7 card blank.
Step 12. Use the mapping pen and sticky ink to add glitter to the design.
Step 13. Marvel in your work. The project is now complete!
Hope you like it. Jane x
WE DO LIKE IT, JANE. VERY MUCH. Love it, in fact! Thank you for sharing your step-by-step tutorial with us. You, Jane, are indeed a precious friend of ours, so how appropriate your card and its message are.
As usual we have put everything that Jane has used in one place over on the Clarity website HERE
Looking at the week ahead…………….
Monday 25th – SHAC Shack with Barb – Live at 10am on Facebook & YouTube
Tuesday 26th: Groovi Tuesday with Paul – Live at 10am on Facebook & YouTube
Wednesday 27th: Get Groovi with Paul on Create and Craft at 7am & 12pm and 2pm on Craft Extra
Thursday 28th: SHAC Shack with Barb – Live at 10am on Facebook & YouTube
If you have a go at this card yourself, please feel free to send it to me! We love to see the results. Grace@claritystamp.com
Right, I’m offski! I hope you enjoy the rest of your weekend, wherever in the world you are and however you might be spending it.
Travel gently.
Lotsa love, Grace & Jane xoxo
Clarity – The Home of Art, Craft and Well-Being.
Love this design. Now wish I had the fairy plates. Guess a spend might come on
Beautiful.
Lovely idea Jane, this might be my project today.
Hi Grace & Jane, spotted Jane’s post on FB before opening your blog this morning & commented that I thought it was a great combination of plates. Nice to bring the older plates out to join the newer ones just proving how easy it is to mix & match with the Groovi plates. You just need to remember to add the elements in the right order – the ones you want at the front first & then add the background. Note to self on that one !!
The sun is shining today but still a chilly wind, have a few plants to go in the garden that we fetched from moms old garden yesterday but I think a bit of crafting first to give it a chance to warm up outside !!
Have a good week Grace, looks as if we have plenty to keep us occupied xx
Love this Jane & Grace I will try it, you make it look so easy and the designs you make are so beautiful. Thankyou
Hi Grace and Jane. I love this project Jane and am looking forward to seeing it reproduced by other Groovi-ists. xx
Magical. Thank you.