Clarity’s Blog Tutorial: How To Use The St James’s Grid Duet Plate
Hello hello! Grace here.
I hope this finds you well, safe and enjoying your Sunday.
I have something that will make it far more enjoyable! 😉
Make a note! Mum is on Create & Craft this afternoon, 3-5pm!
You can find a lovely little gallery of some of the beautiful artwork made with the Crescent Moon HERE.
And don’t forget that we’re also on telly on Monday (tomorrow) at 7am & 12pm and then at 1pm on Create & Craft Extra with an EPIC collection of Fresh Cut Dies. Lots to look forward to and be distracted by. Come keep us company!
All the viewing details are as follows:
Create & Craft – Freeview 85, Sky 683, Freesat 813 and Virgin 748
Create & Craft Extra – Freeview 95, Sky 673 and Freesat 817
Now onto our weekly blog tutorial. Woop woop!
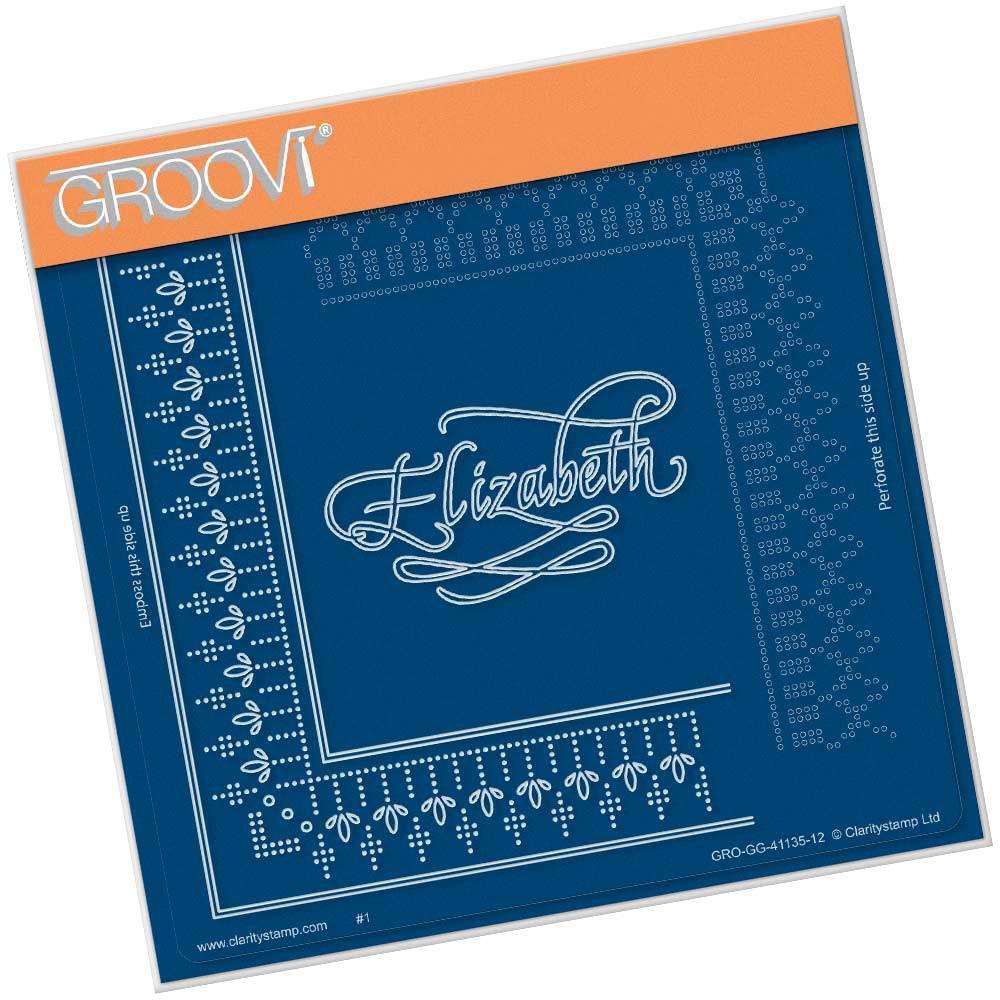
This week on Groovi Tuesday, Paul (and Gola) guided through and easy to follow lesson on how to create a frame using the Queen Elizabeth Lace Duet Plate. Over the course of the month, Paul will be working through this design
If you missed this weeks episode, or any of the previous Groovi Tuesday/Pergamano School episodes, you can watch them all HERE on our Clarity YouTube page
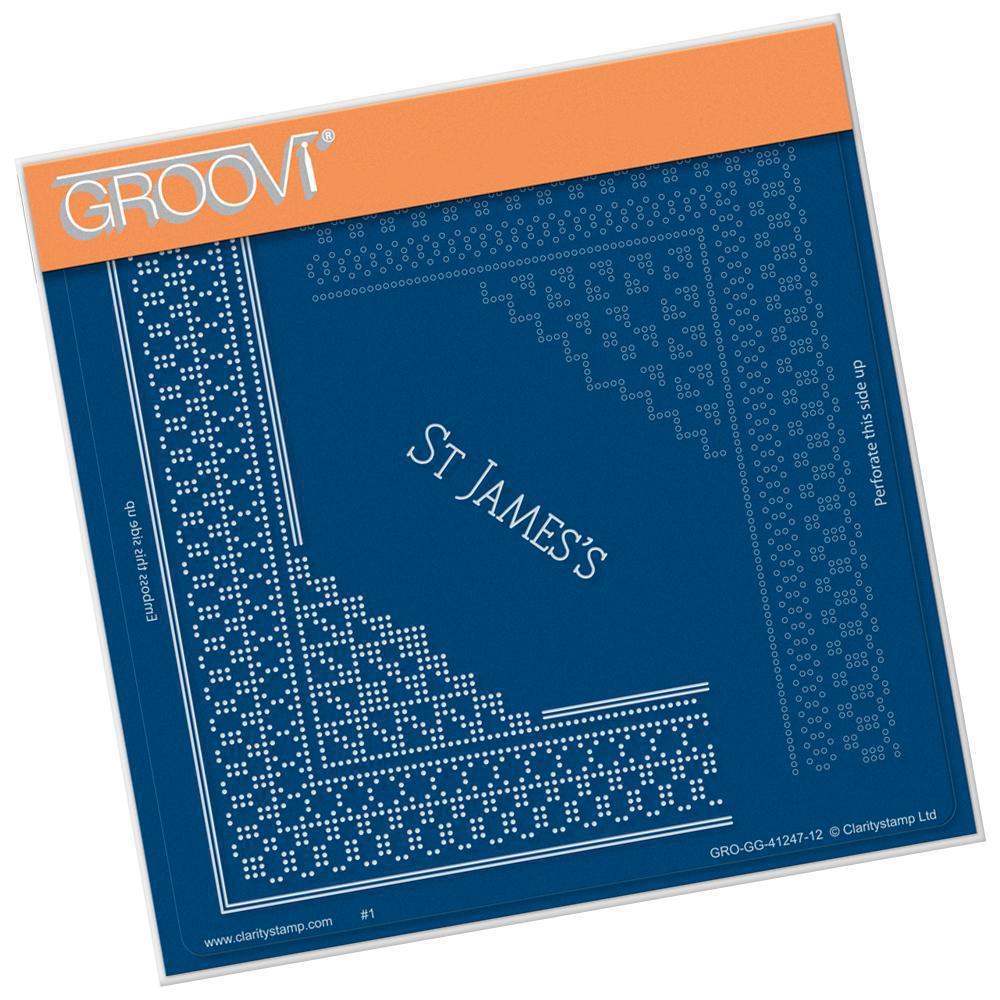
We’re joined this week by the super duper talented Josie Davidson, who is going to share a step-by-step project with us using the St. James Plate. These Palace plates are popular and often asked about, so this is very helpful for many of us!

Today, Josie is going to work specifically with the St. James Plate, because it does work slightly differently to all of the other lace border plates.
I’ll hand you right over to the pro… Hey Josie!

ST JAMES’S PLATE TUTORIAL
Ingredients
St. James’s Palace Lace Corner A5 Square Grid Plate (GRO-GG-41247-12)
Groovi Plate Mate for A5 Sq Grids (GRO-CO-41706-08)
Pergamano 1.5mm Embossing Ball Tool (PER-TO-70004-XX)
Or Groovi No 2 Tool (GRO-AC-40026-XX)
Pergamano 1 Needle Tool (PER-TO-70028-XX)
Optional: 2 Needle Bold & 4 Needle Bold Perforating Tools
Pergamano Scissors or Perga Cutters
Groovi Tabs (GRO-AC-40437-XX)
A4 Translucent Parchment (GRO-AC-40024-XX)
Tumble Dryer Sheet
Method
Step 1. Place your plate inside the platemate so that you can read the words ‘Emboss this side up’ and secure with a Groovi tab. Attach the parchment to the grid, lining up the edges of the parchment with the lines on the grid. Rub the parchment with the tumble dryer sheet and begin to emboss the dots around the outer edge, plus some of the dots in the design. Do not emboss the dots in rows 8-11 from the outer edge of the design.
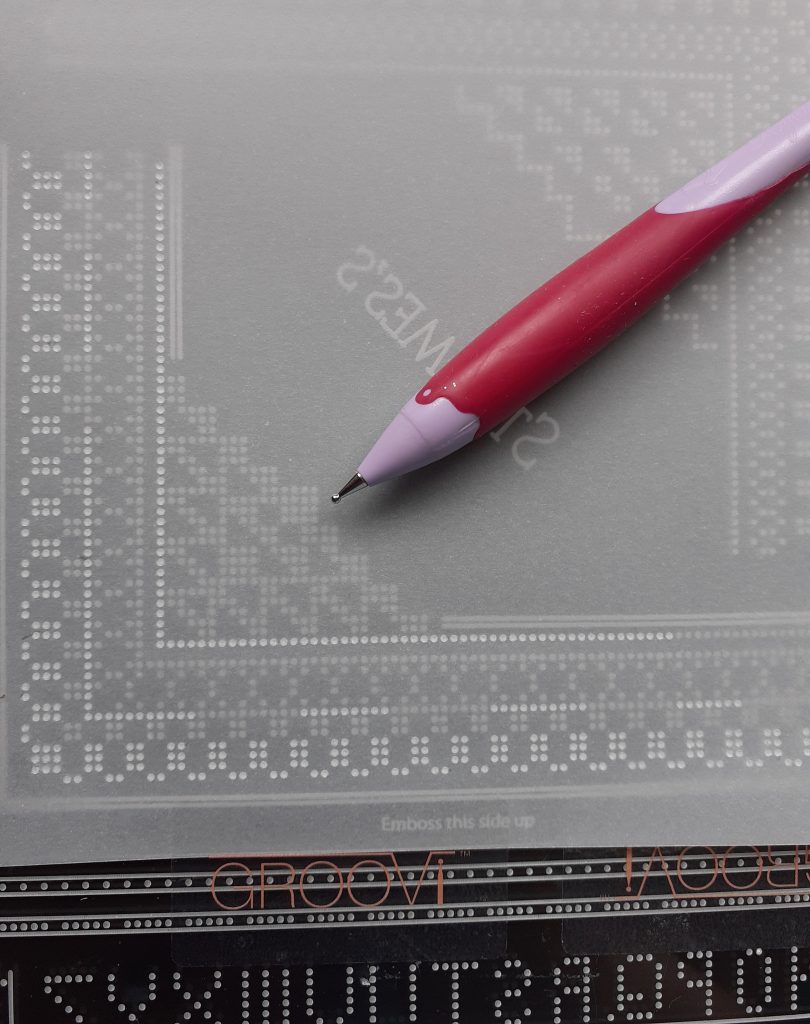
Step 2. Turn your work and realign the dots you have embossed into the engraved dots in the plate. Remember to use the lines of the grid platemate to keep your parchment straight.
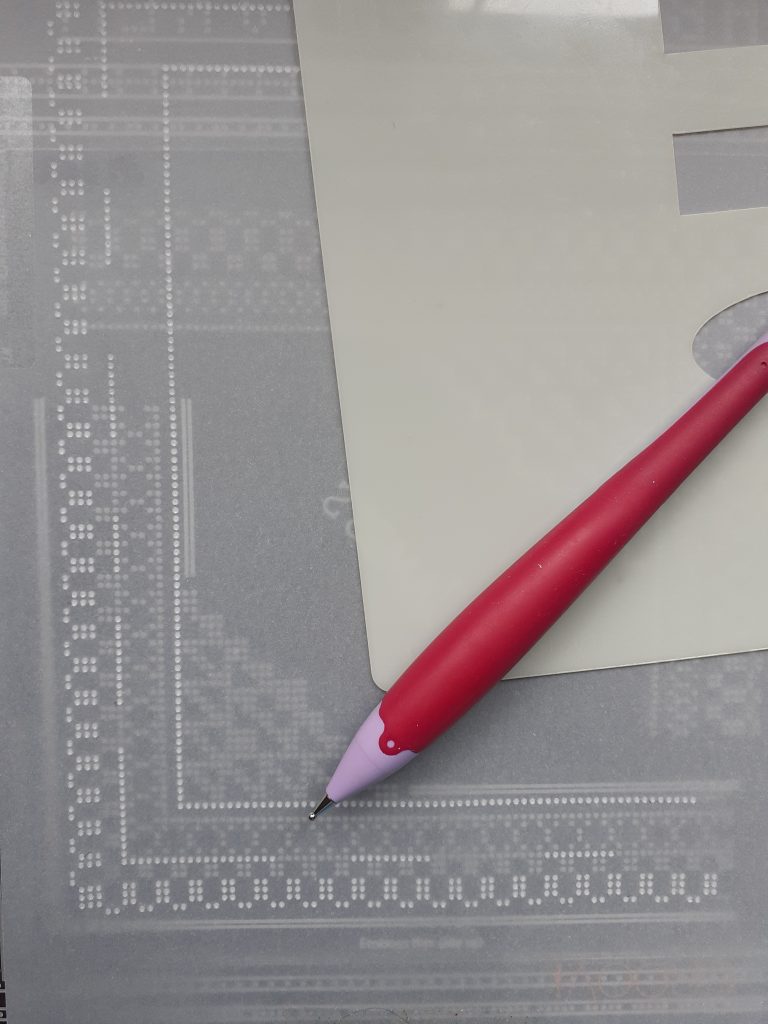
Step 3. Once you have worked all four corners you can begin to put in the missing dots and the photo corners. But still do not emboss the dots in lines 8-11.
Step 4. Now it’s time to emboss the dots in rows 8-11. Starting at the corner, you need to decide how far towards the centre of each side you would like this pattern to go. You can go part way or up to the centre from each corner but don’t go over the centre point. I have 9 repeats of the pattern from the corner.
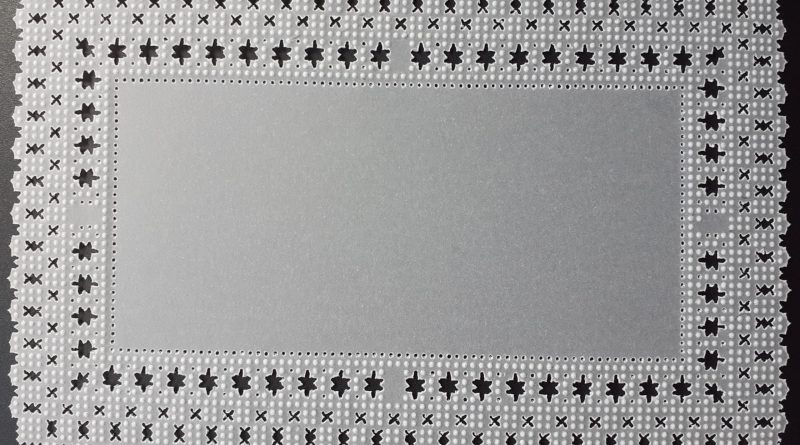
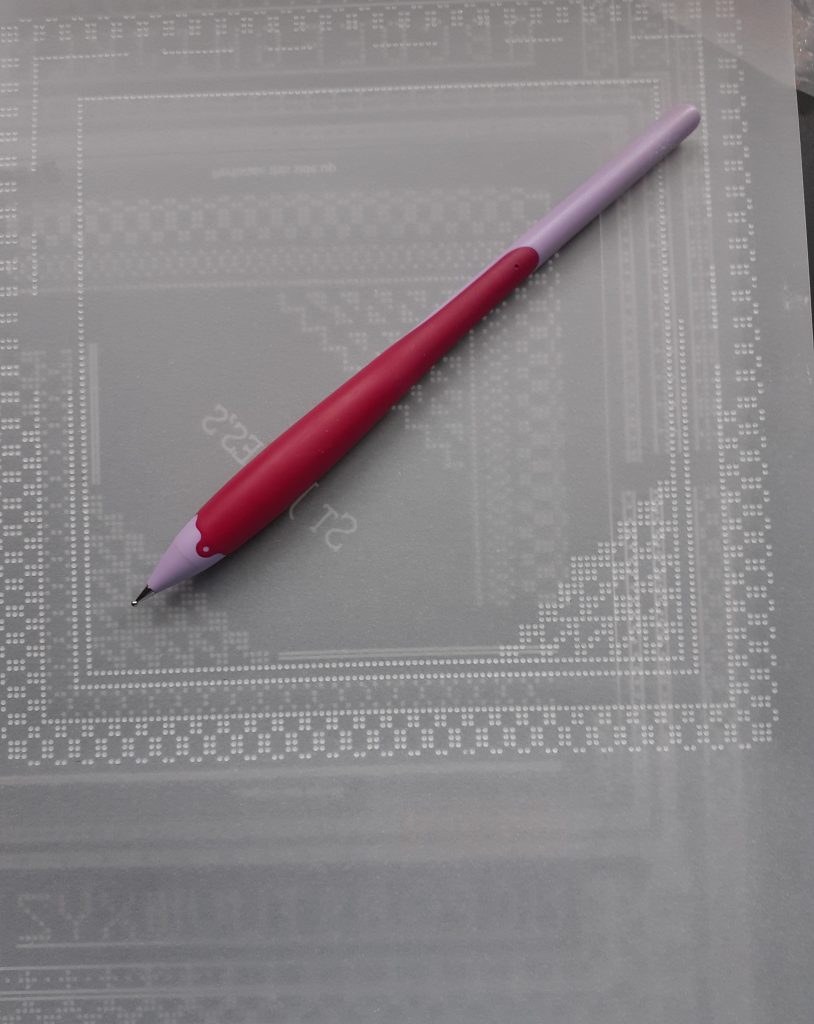
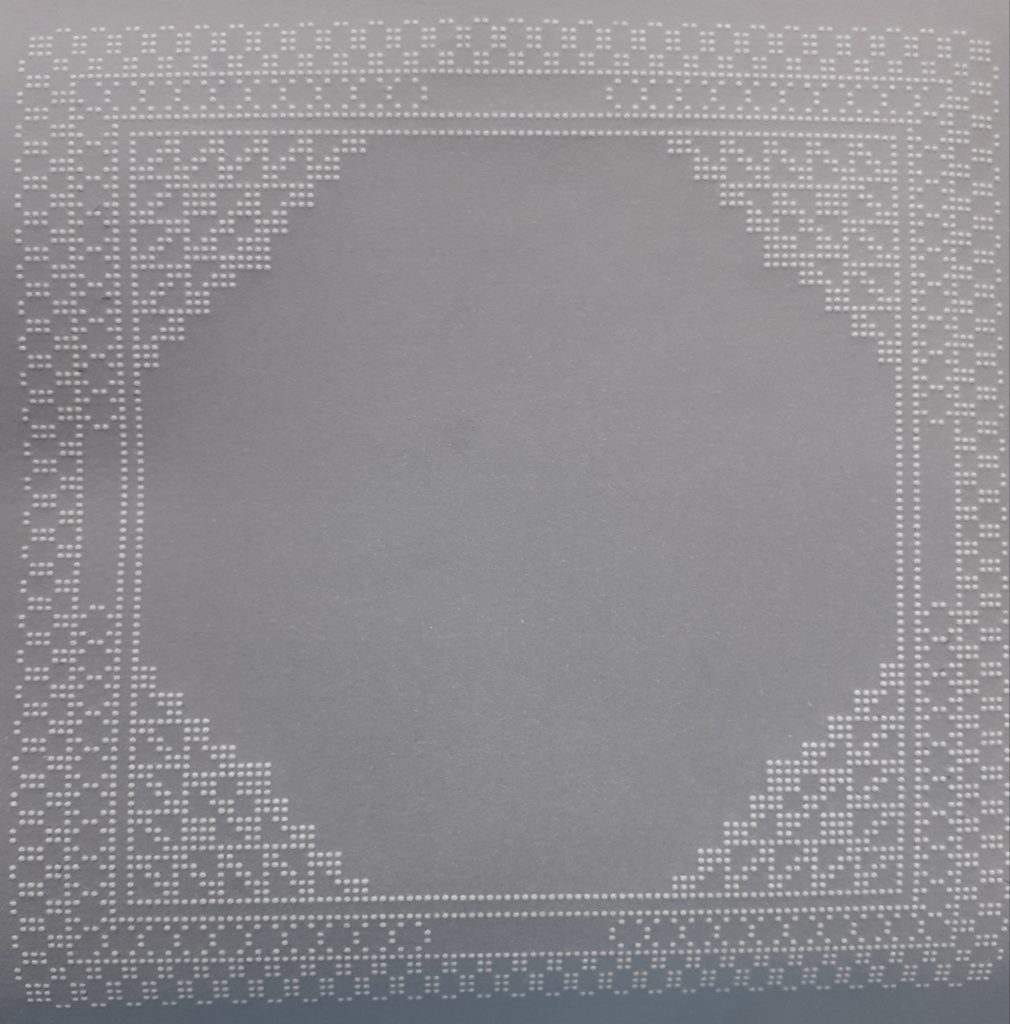
Step 5. When you have completed all of the embossing your work will look like this.
Step 6. Turn the plate over so that you can read the words ‘Perforate this side up’. Perforating is done from the front of the parchment so you need to turn your work over. Align your embossed dots with the holes in the grid and attach the parchment securely. Perforate with needle tools of your choice, only perforate the holes in lines 8-11 that fit inside your embossed dots.
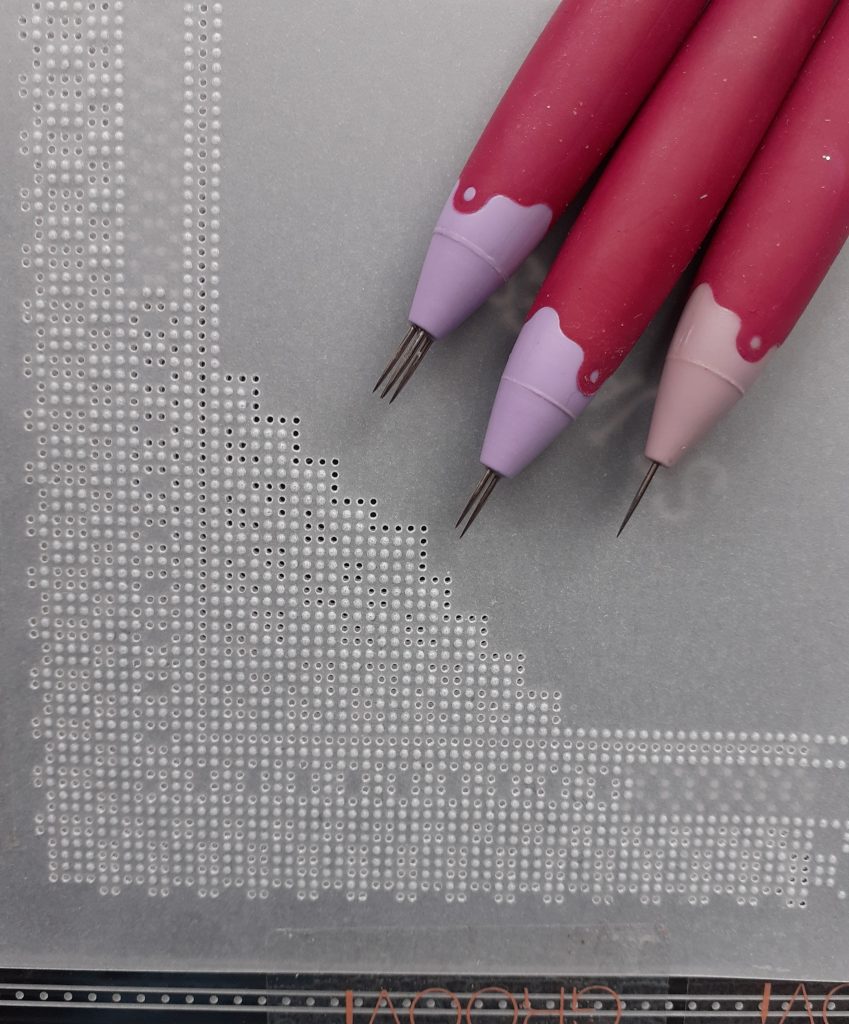
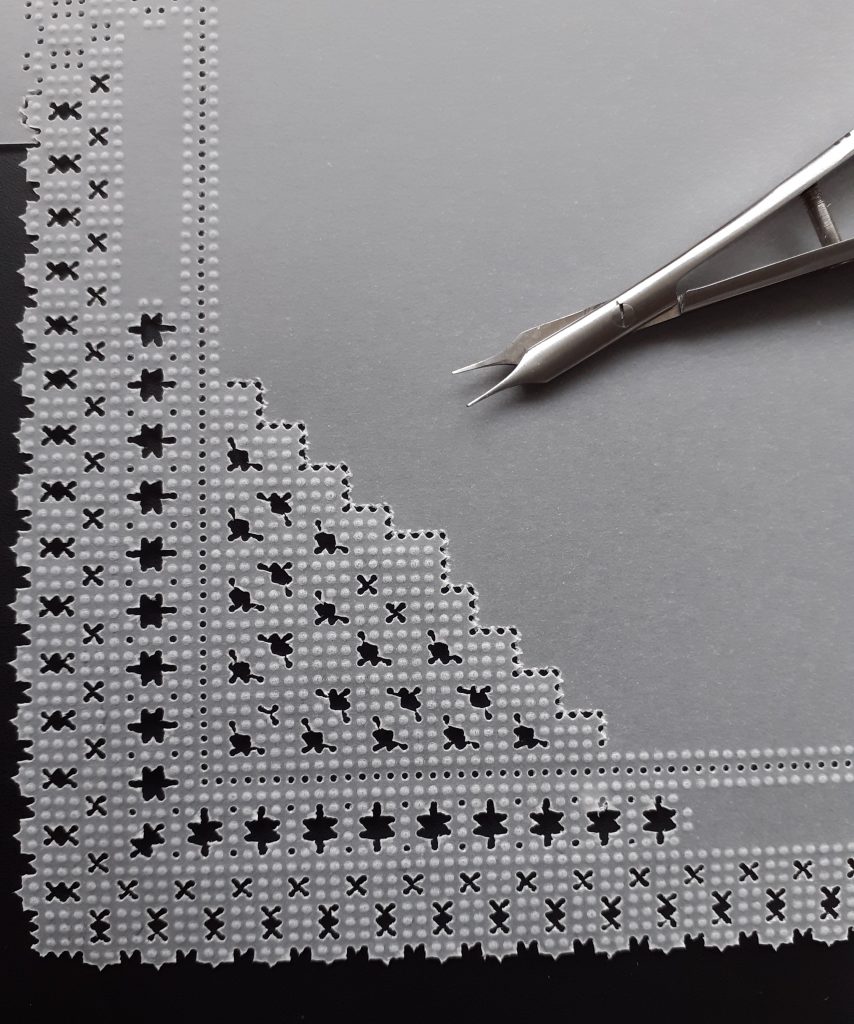
Step 7. Perforate all of the corners and sides of your work. Following the cutting guide that came with your plate, picot cut the design. Make sure to work from the centre and cut the outer edge last.
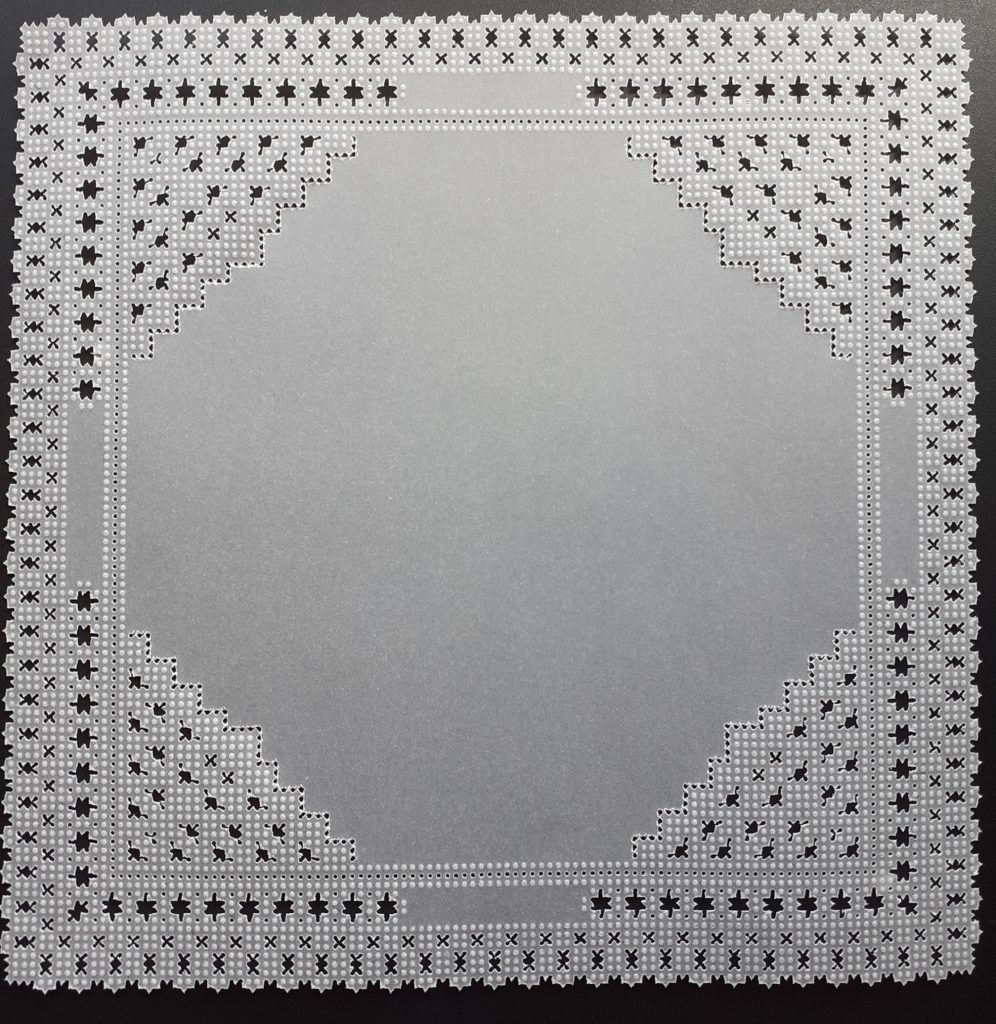
Your finished piece will look like this.
TOP TIP:
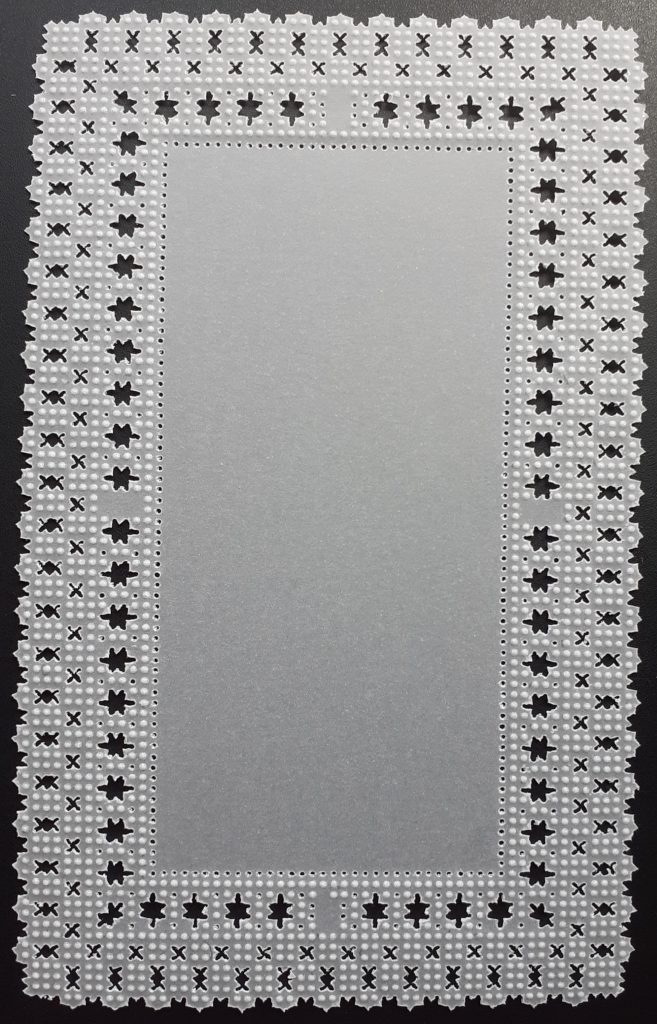
If you decide to work rows 8-11 your finished piece will look like this – you will notice that this is a rectangle instead of a square. You can determine the shape of your finished piece depending on what you would like to frame in the centre.
WHOA! That is impressive, Josie. Thank you so much for the guidance, tips and tricks. It’s certainly a challenge when you don’t have someone brilliant like Josie guiding you! Whose up for a challenge? If you can recreate this design (in a square or a rectangle) and email it to me (Grace@claritystamp.com) I’ll enter you into a raffle for a £30 gift voucher! Deadline: March 31st.
Everything that Josie has been used can be found over on the Clarity website HERE
I love a good challenge. And it makes it even more fun when there’s a potential prize to be had for participation!
Go on… I dare you.
Will you join Mum over on Create and Craft at 3-5pm today? We do hope so 🙂

See you there! Travel gently.
Lotsa love, Grace xo
Clarity – The Home of Art, Craft and Well-Being.
Thank you so much Josie xx
merci beaucoup jacqueline
Hi Grace, just realised I read the blog yesterday but didn’t comment. A great project by Josie, will have to check which plates I have. A great incentive from you Grace with the offer of a gift voucher. Hope you get a great response.
Will catch up with you next weekend, hope you have a good week x
I have this plate, but have only used the corner, to have a practice at some picot cutting, so must try to do a frame. Thank you Josie for a brilliant demo. xx