Clarity’s Blog Tutorial: How To Use A Semi-Circle Tool (Part 2)
Hello hello! Grace here.
I hope this finds you well? Happy? Safe? Warm? I hope so.
After a short break, the wonderful Linda Williams is back in the Pergamano School classroom and continuing to guide us through her Multi-Needle Tool Handbook – Volume 1

If you have only recently joined us here on the Clarity Matters Blog, where have you been?!
What is the Pergamano School? For more information, click HERE where you can find out all about it and catch up on the previous lessons – all for free!
Let me introduce you to Linda’s super talented classroom assistant – Glynis Whitehead. On the Sunday following Linda’s lesson, Glynis guides us through a step-by-step project using the tool in question – perfect! I’ll hand you over to the lovely lady herself…

Ingredients
Pergamano Handbook for Multi-Needle Tools Vol 1 by Linda Williams (PER-BO-70291-XX)
Nested Arch Tags Groovi Plate A5 (GRO-PA-41465-04)
Feminine Corset Groovi Plate A5 (GRO-FA-41552-04)
Semi-Circle Perforating Tool (PER-TO-70017-XX)
1.5mm Embossing Ball tool (PER-TO-70004-XX)
3mm Embossing Ball tool (PER-TO-70005-XX)
4.5mm Embossing Ball tool (PER-TO 70015-XX)
6mm Embossing Ball tool (PER-TO-70016-XX)
Tools from the Starter Kit
Faber-Castell Polychromos Pencils (ACC-PE-30797-XX) or Perga-Liner Pencil
(B) (PER-CO-70063-XX)
Blending nibs (PER-AC-70422-XX)
A4 Translucent Perforating mat (GRO-AC-40307-A4)
A4 Translucent White Super Foam (GRO-AC-40603-A4)
Indian Summer Designer Paper (ACC-CA-30524-88)
Method
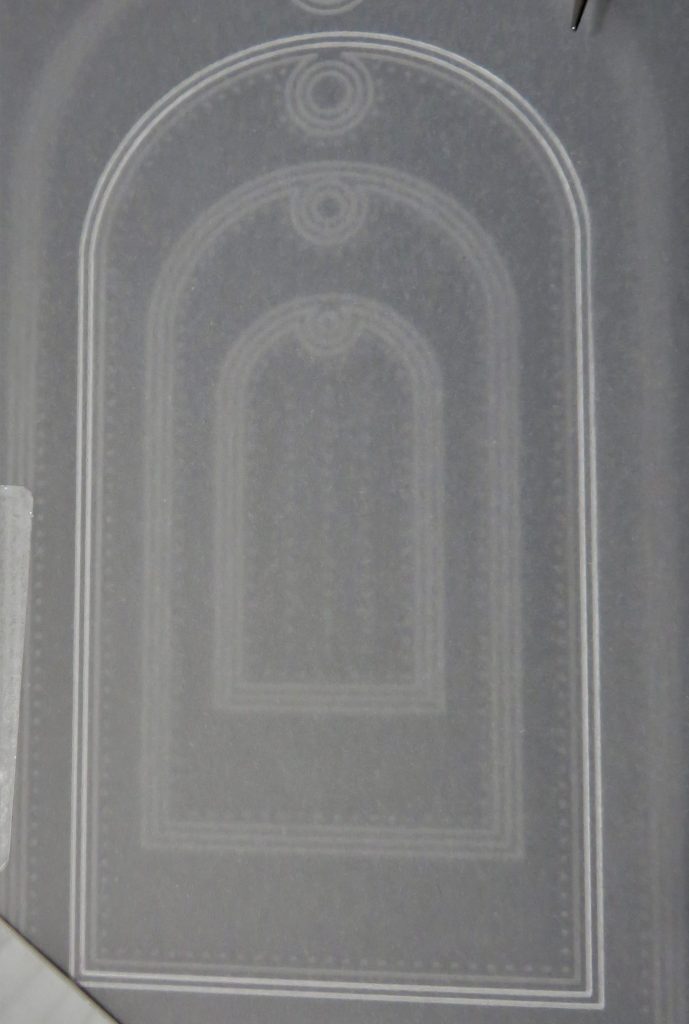
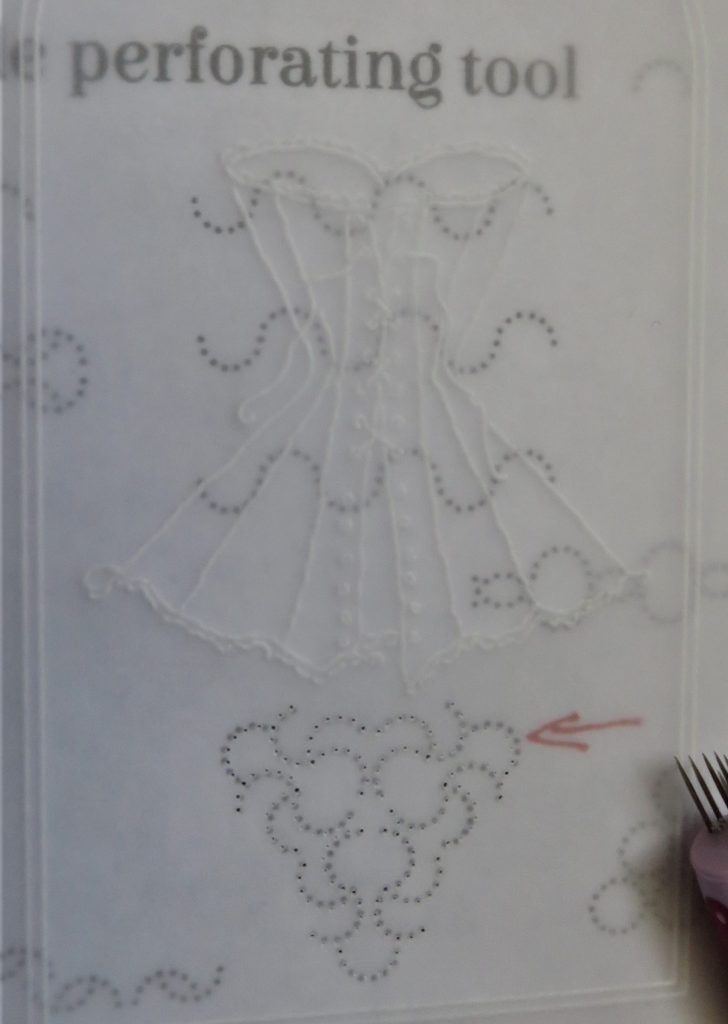
Step 1. Trace out the 2nd largest tag from the Nested Arch Tag Groovi plate.
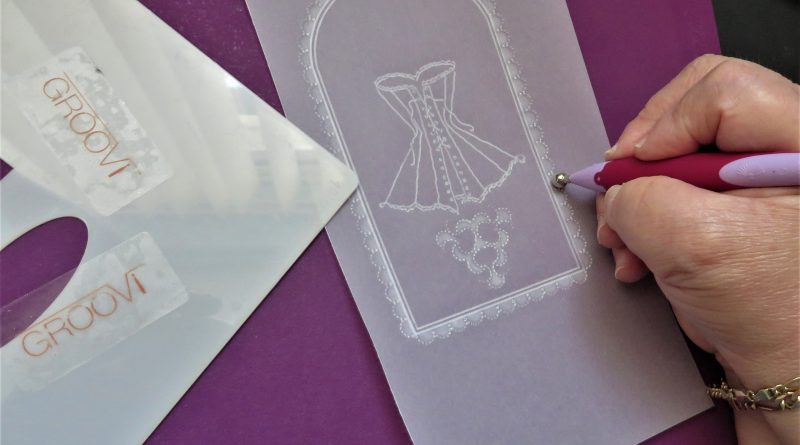
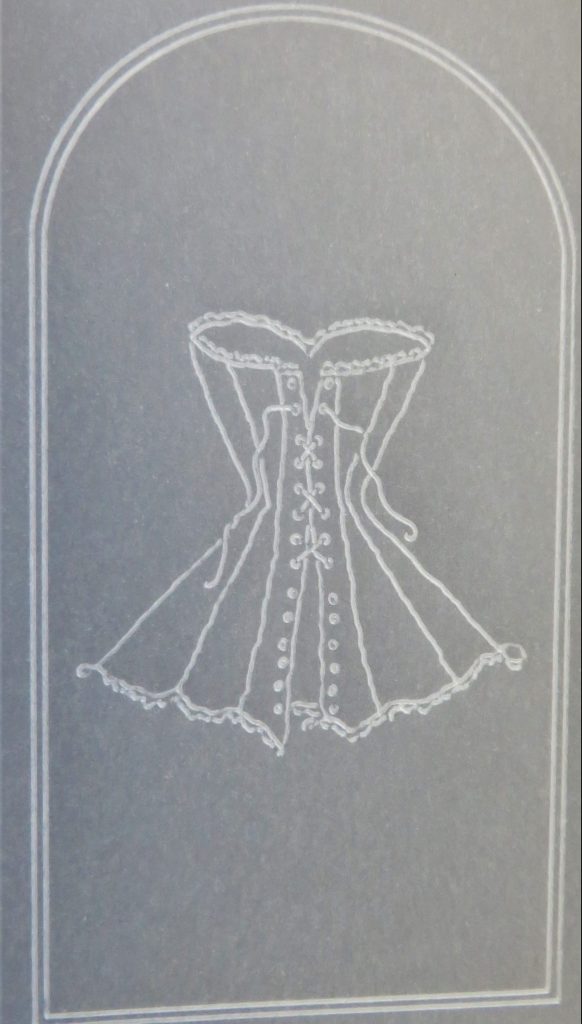
Step 2. Add the corset from the Feminine Corset Groovi plate to the centre of the tag, leaving enough room for the Semi-circle needle tool work.
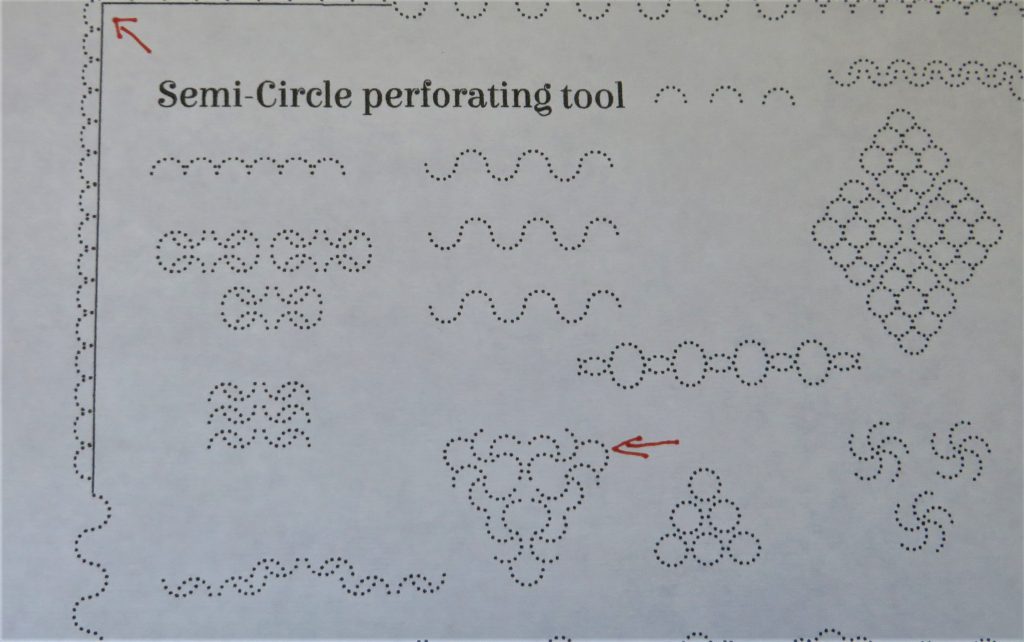
Step 3. The Semi-circle tool is illustrated in Linda’s handbook on pages 30-33 and you need to photocopy the sampler on page 33. I have marked the patterns I will use for this project with red arrows.
Step 4. Lay the pattern onto a shallow perforating mat and line the parchment up on top of it and secure with Groovi Tabs. Then line up each needle with the dots underneath the parchment and perforate through the parchment and the paper, giving you shallow perforations that you can emboss in between.
Step 5. Now add the scallops to the outside of the tag. We will be making these totally white and we will be needing to allow the parchment to rest in between layers of embossing, so we can work on the rest of the tag. If you need to use the pattern to help you do the edge, line up the needles with the dots underneath the parchment as in stage 4.
TOP TIP: It is good to start at each corner and meet in the centre with the perforations. Then you can spread them out and tiny gaps between them will not be noticed. This has happened at the top of the tag, but you can hardly see it.
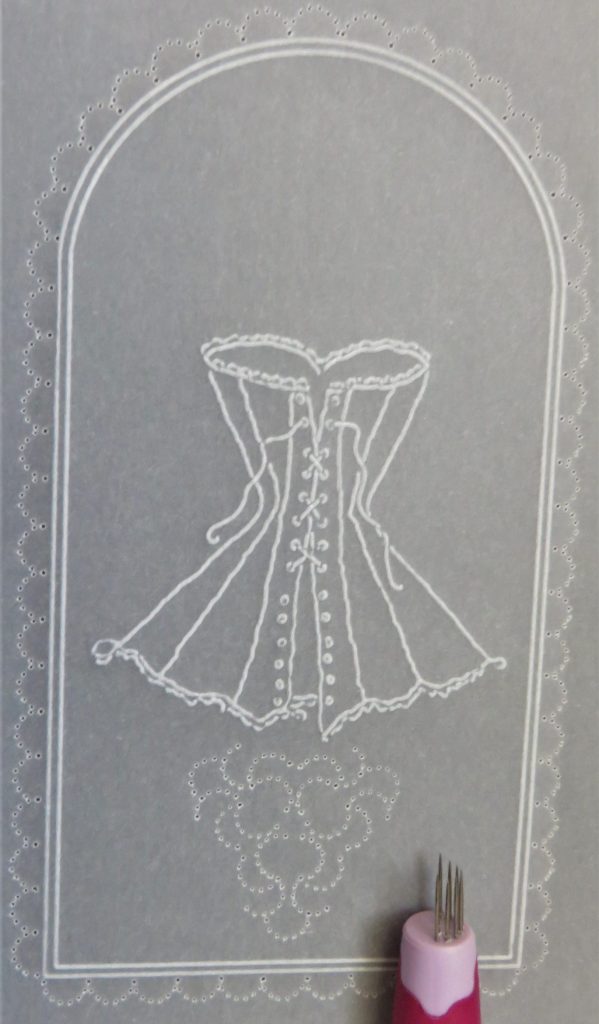
Step 6. This now needs to rest. As you can see, I have started with the 6mm embossing ball tool and I had a poly bag on the embossing mat to add resistance (Linda’s top tip).
Step 7. Add some colour to the corset. I used a light and darker blue pencil. Put light at the top and on the skirt of the corset. Put darker blue in the centre and the inside of the corset and blend the two colours together. Add some light embossing to add highlights and make the lacy edge white.
Step 8. I have added a new line on the inside of the tag and some semi-circle icons from Linda’s patterns (instructions for these are on Semi-Circle Tag Part 1 blog). The embossing has had 2 layers with the 6mm ball tool and 1 layer with 4.5 mm ball tool so far.
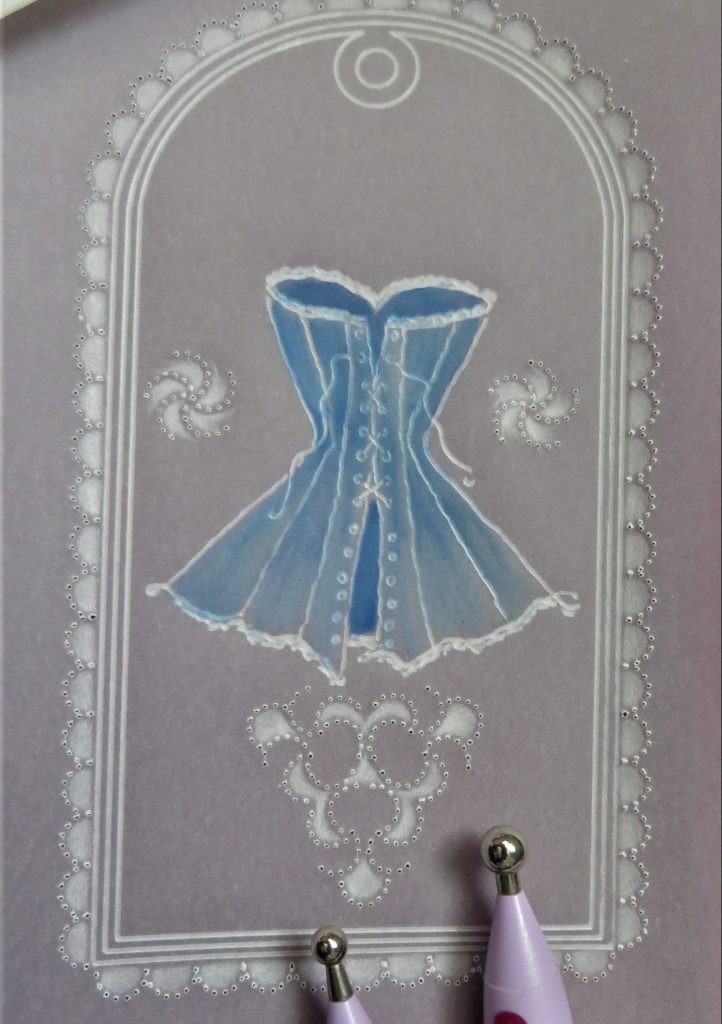
Step 9. Go ahead and emboss again with the 3mm ball tool until you get the whiteness you desire. If you wish to enhance the very edges of the embossing, then use the 1.5mm ball tool very lightly and gently.
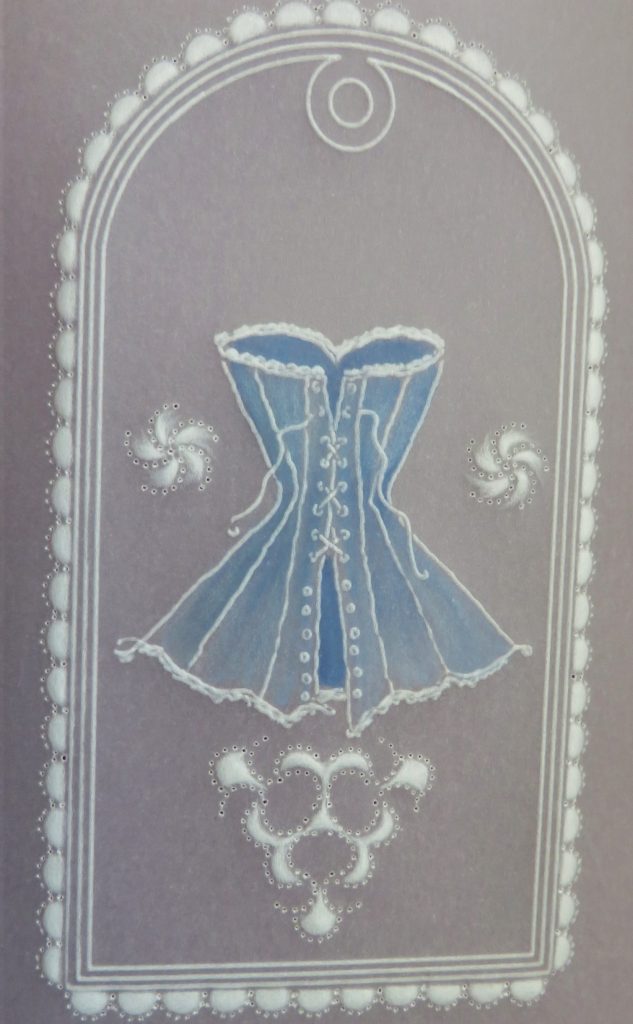
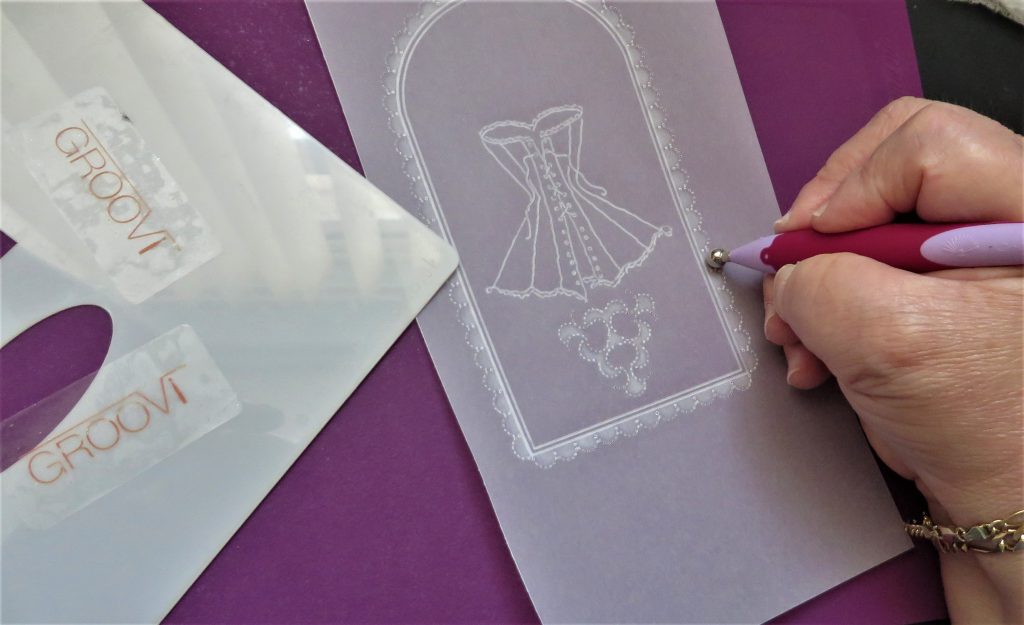
Step 10. Re-perforate all the semi-circle perforations with a 1 needle tool and on a thick foam mat. Then snip around the edge of the tag, remembering to turn the work as you go to get neat picots around the scalloped edge. It’s time to mat and layer the work up and add a bow and embellishments.
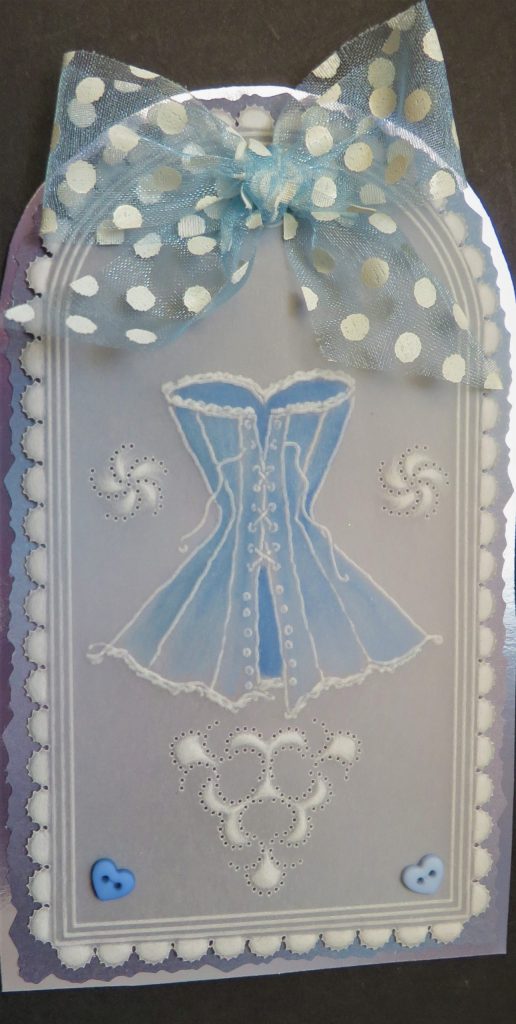
Voila! What a gorgeous step-by-step project. You’d keep this tag forever wouldn’t you?! Thank you, Glynis, for your wonderful tips and techniques! What would we do without you?
As usual, everything needed to recreate this magic is in one place over on the Clarity website HERE.
Also, don’t forget to check in on my Mum. She is on the TV today from 2pm until 4pm over on The Craft Store. You can find out more HERE.
For now though, travel gently and enjoy the rest of your weekend…
Lotsa love, Grace & Glynis xo
Clarity – The Home of Art, Craft and Well-Being.
Hi Grace & Glynis, another great tag to go with the session on Tuesday. For some reason I don’t appear to have the corset plate but I am sure I can find something suitable to fit. I was sorting out my folders yesterday & have put all the school projects together along with photocopies of the last 2 needles in the book so they are ready when we need them. I have the Sunday projects in a smaller one but I think I will put the 2 together so I can see what can be done with each needle tool. It will also free up some space on my shelf for this years club folders !!
A nice sunny day here with blue skies but haven’t ventured out yet. Hope your snow has gone Grace. Enjoy your week – don’t work too hard x
Love your tag demos. Definately one for my to do list. Thank you
Thank you so much for this it’s gorgeous xx
Love this one. Will definately give it a go! Thank you Glynis.x
Thank you Glynis for another one of your lovely projects 👍
Xx
Enjoyed Linda’s recent Lesson on the Semi Circle Tool. Glynis yours are lovely. I like the border with the small semi-circle in between the large semi-circle. It makes a lovely border
Enjoyed your Lesson on Tuesday Linda. Where do I find the Colouring Pencils you will be using for the next Lesson,please. Are they Faber Polychromos or Pergamano Exquiste Pencils.