Clarity’s Blog Tutorial: How To Make A Groovi Box
Hello hello! Grace here.
I hope this finds you well and enjoying your Sunday!
We are joined again this week by the FABULOUS Glynis Whitehead. This is a perfect tutorial in the lead up to Christmas! Glynis is going to show us how to make a Groovi box. The perfect little boxes for Christmas, whether it be for table decorations, something for the stocking or even tree decorations!
I’ll hand you over to the pro 🙂

How to Make a Box
There are so many times when we wished we could find a pretty little box to make a gift really special. The Groovi Christmas Box is brilliant for such a task. I have used it on several occasions, not just for Christmas. Adding flowers, leaves, needle tool patterns etc. can make the box special for any time of year!
This time, I need a box to present a special little gift in this Christmas, so I am making this with the festive season in mind.
Ingredients
Groovi Plate Mate for Grids with Extenders (GRO-MA-41768-21)
Groovi Plate Mate for A5 Square Grids (GRO-CO-41706-08)
Christmas Box A4 Groovi Tem-Plate (GRO-TE-40371-16)
Small Snowflake Grid (GRO-GG-40727-12)
Large Snowflake Grid (GRO-GG-40728-12)
Iris & Wisteria Duo Parchment Paper (GRO-AC-40766-A4)
Groovi Embossing Tool 1 & 2 (GRO-AC-40026-XX)
Pergamano 1.5mm Embossing Ball Tool (PER-TO-70004-XX)
Perga Glue (PER-AC-70133-XX)
Perga Crystals (PER-AC-70404-XX)
Red liner tape (ACC-AD-30375-XX)
Method
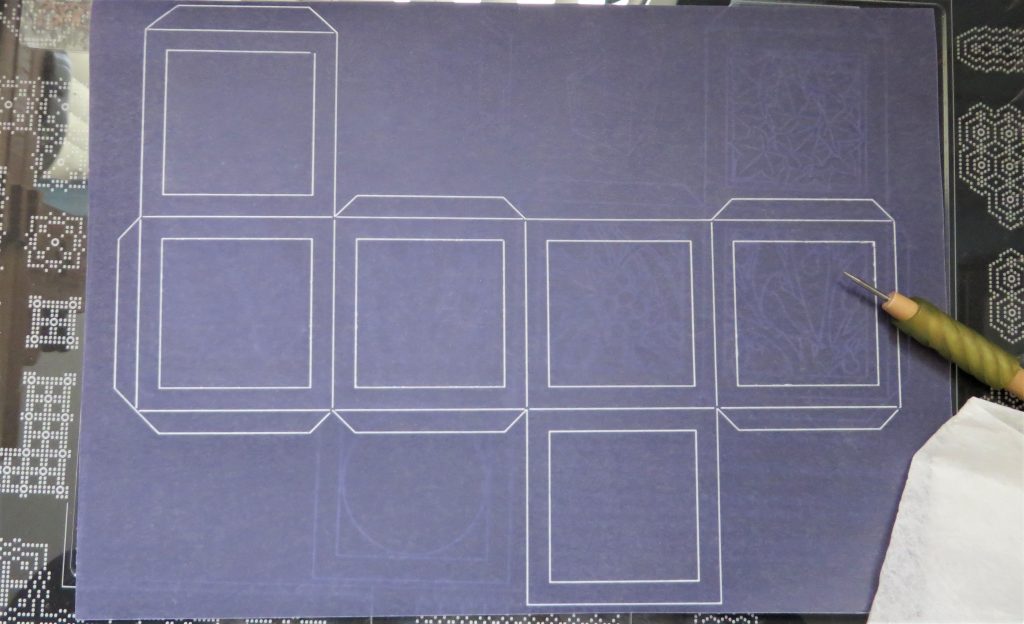
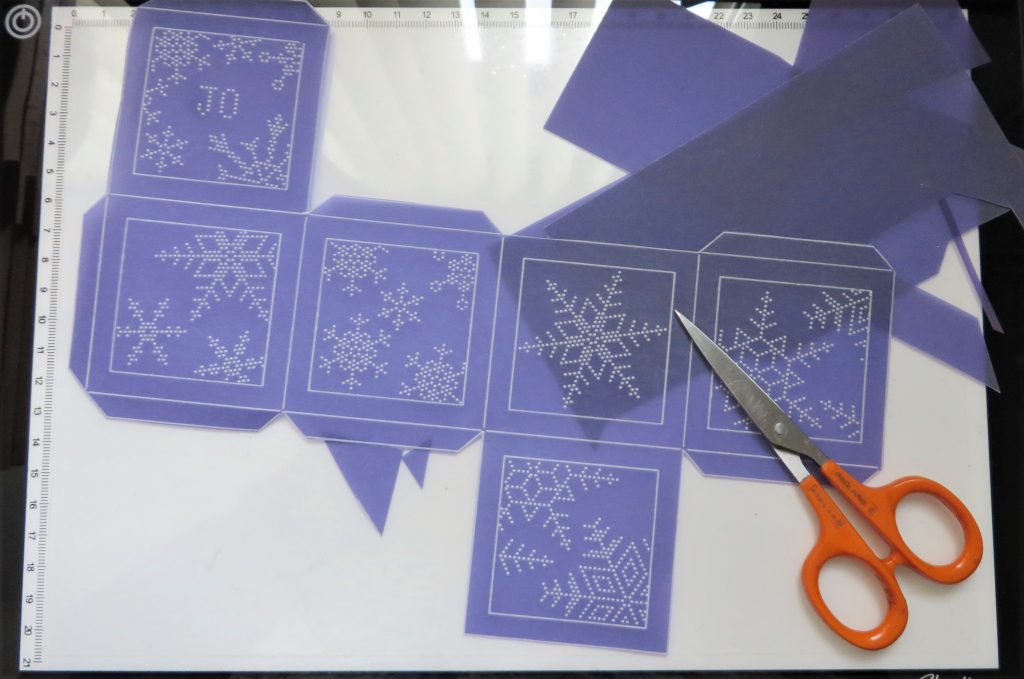
Step 1. Line up your parchment over the box, rub over with a tumble dryer sheet, then emboss the outline using the number 1 tool. Leave out the patterns within the squares.
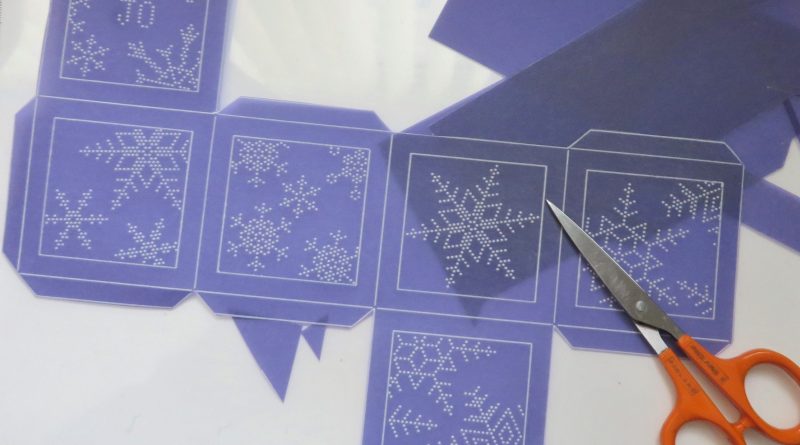
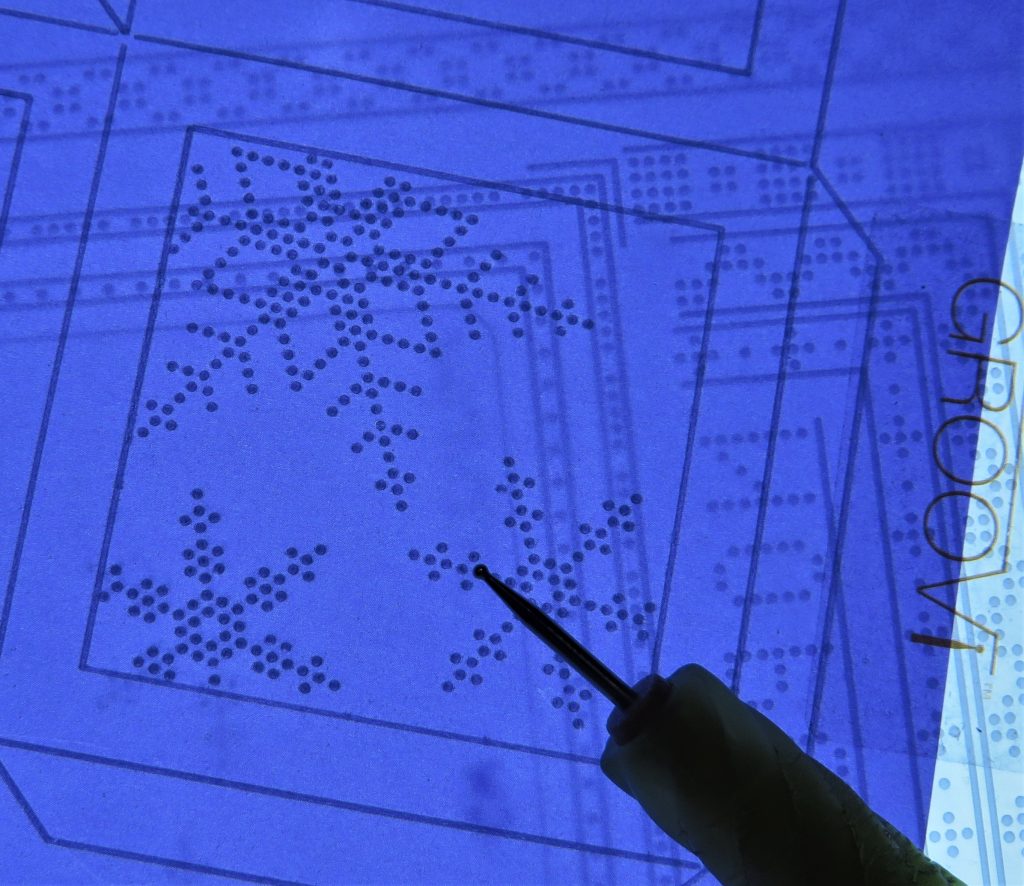
Step 2. Use a mixture of snowflakes from the Small and Large Snowflake plates to decorate the panels of the box. Take some ‘off the edge’ as well as putting whole ones in some of the panels. *This has to be done with the number 2 tool from the starter kit or 1.5mm Pergamano Embossing tool.
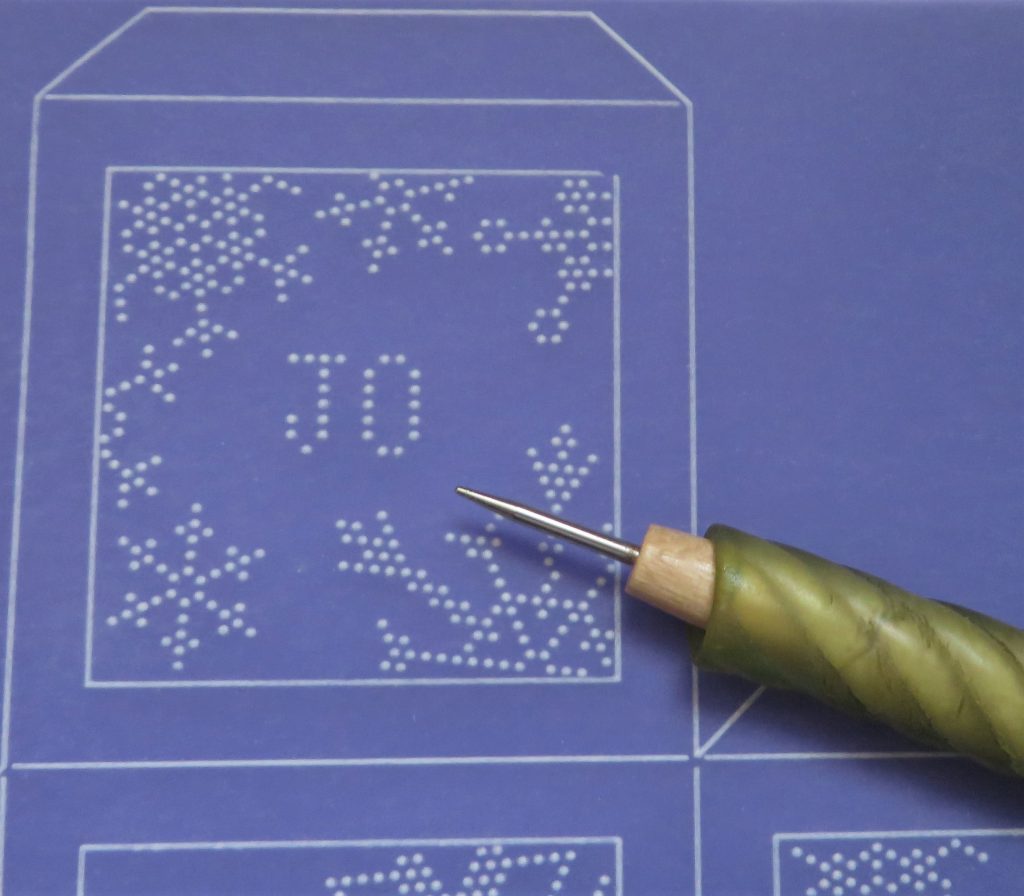
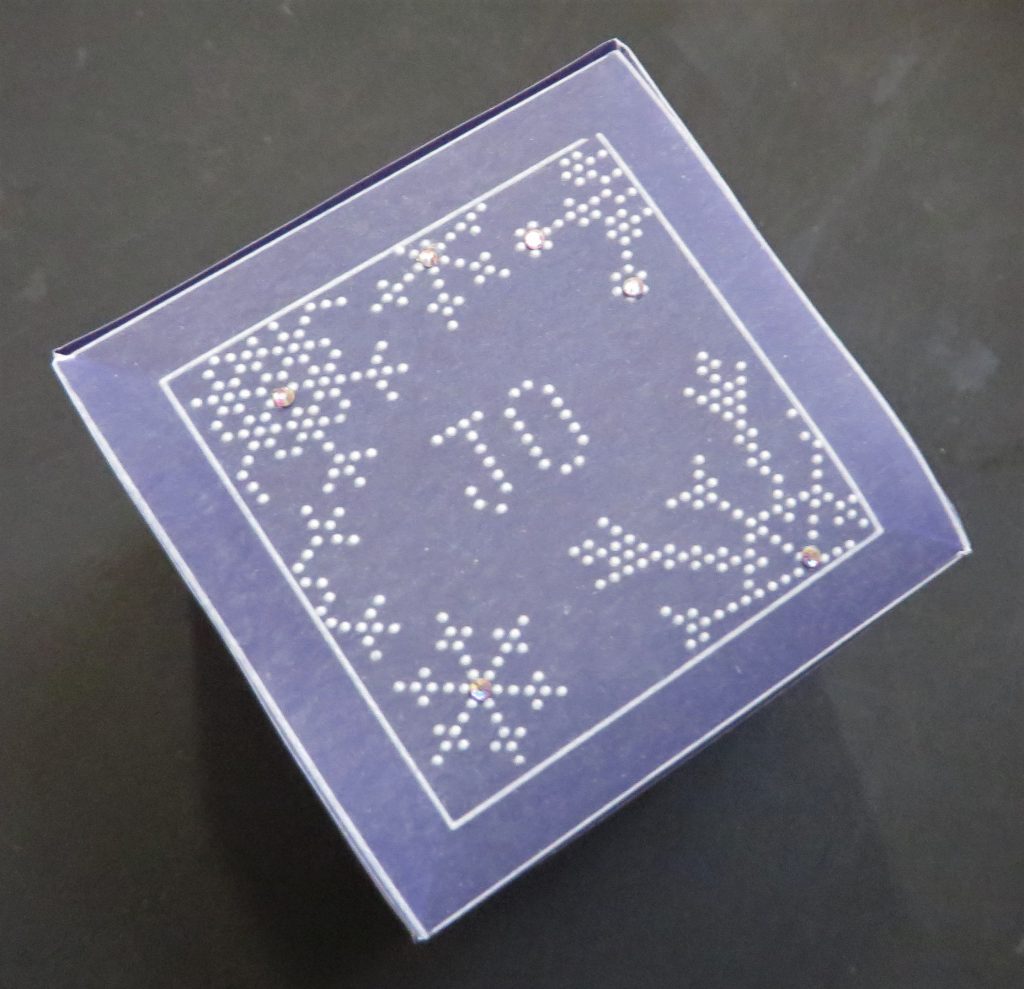
Step 3. I want to put the name of the recipient on the top of the box, so if you want to do that too, then make sure you identify the lid of the box by checking the diagram on the box plate. *I have written Jo’s name onto a scrap piece of parchment and will turn this over to help me get the ordering of the letters right.
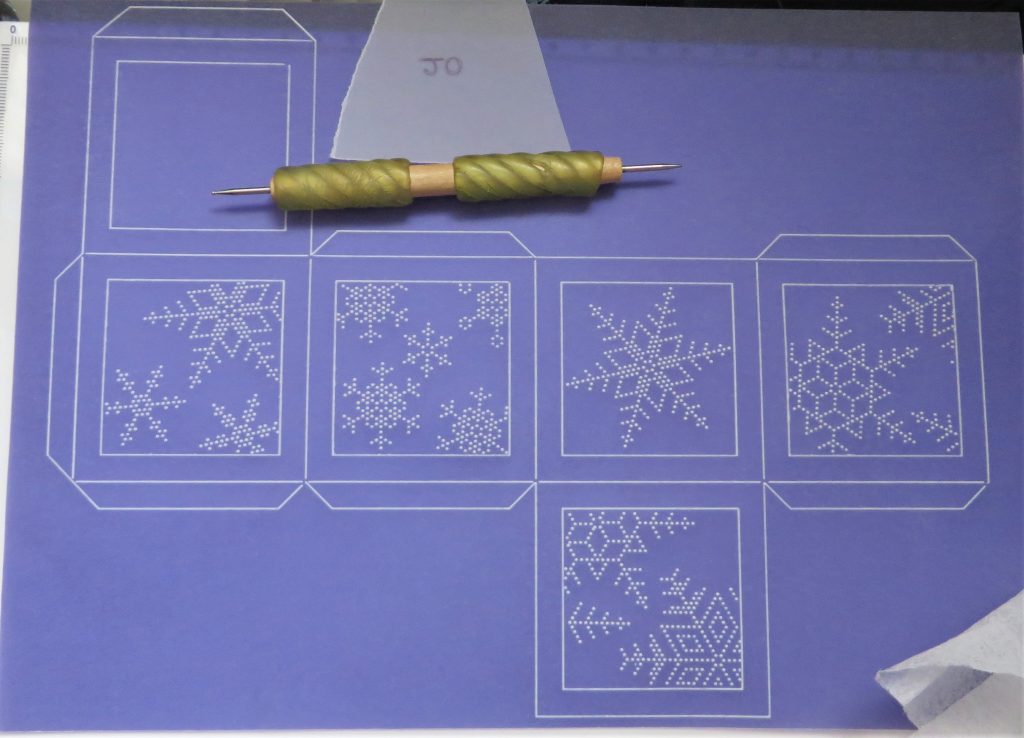
Step 4. I have added the letters using the Plate Mate for A5 square grids – there is a really cool alphabet on there.

Step 5. Add some more snowflake embellishments around the edges of the lid.
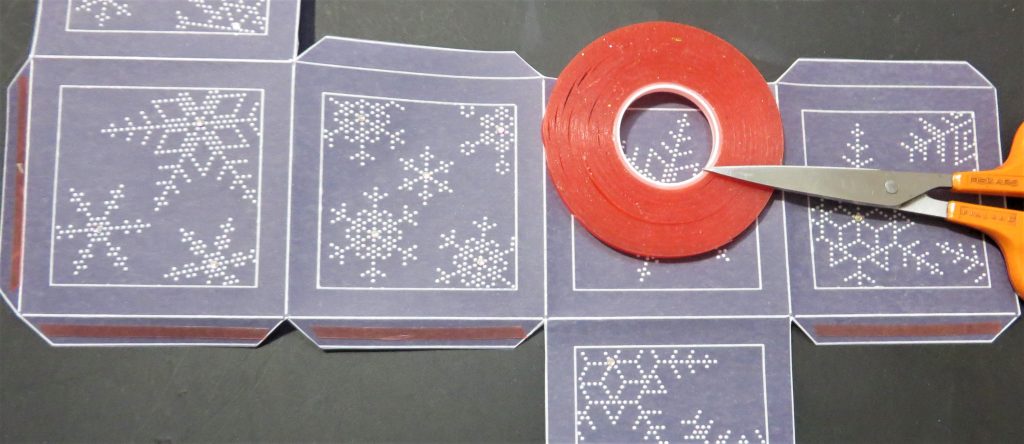
Step 6. Cut out the box with a sharp pair of scissors.
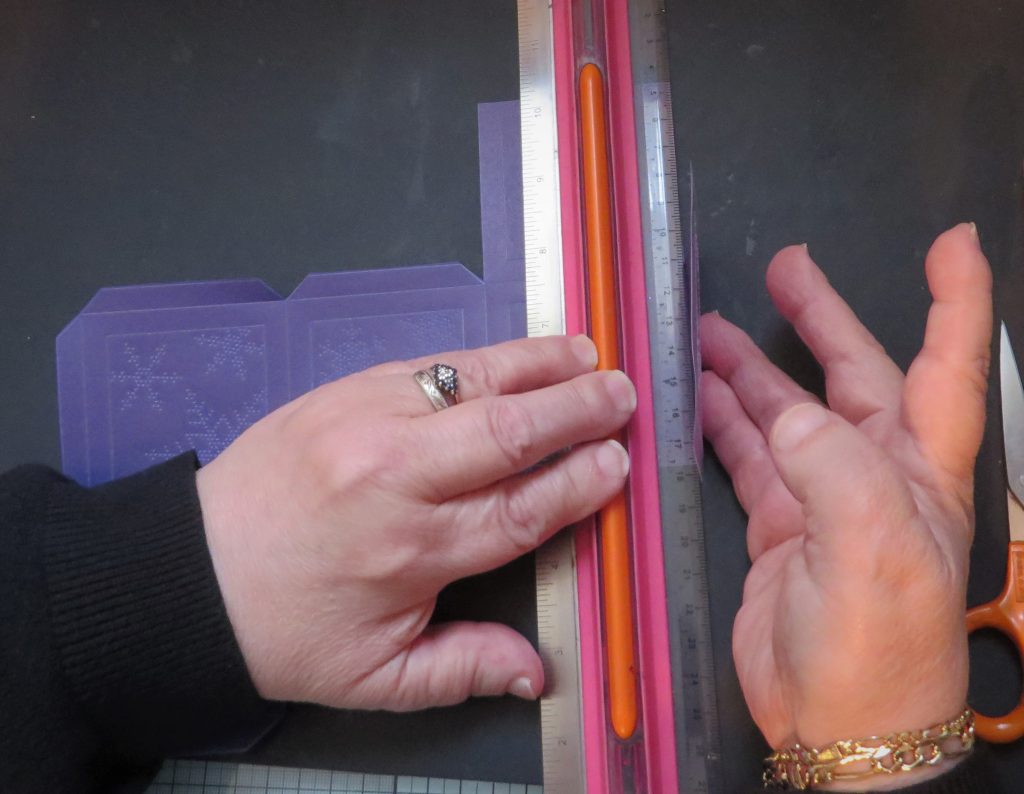
Step 7. Very gently bend along the lines between the panels to create a cube and then along the lines of the box flaps. Use the edge of a ruler to help you.
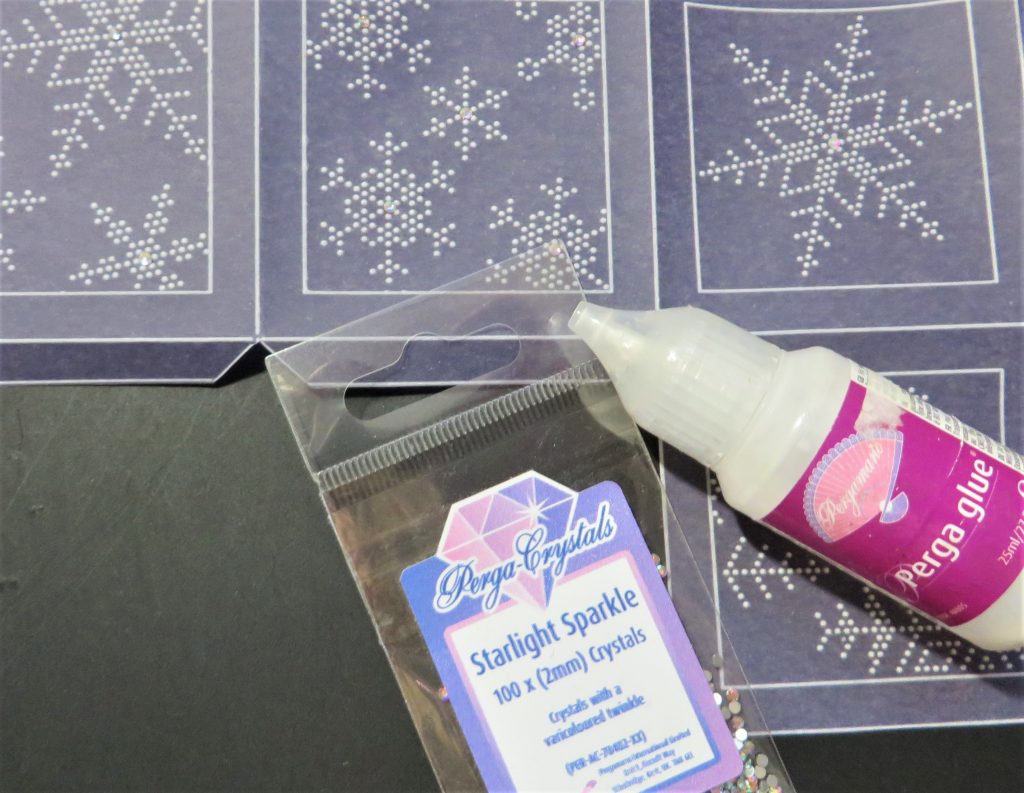
Step 8. Before you actually stick the box together, decide on whether you want to put any decorations onto the box, like glitter or gems. I am using Perga Glue and Pergamano Crystals.
Step 9. Put red liner tabs onto the flaps of the box – check the diagram on the plate. There is one side panel and three bottom panels that need tape on them and you need to be with the right side of the work upwards.
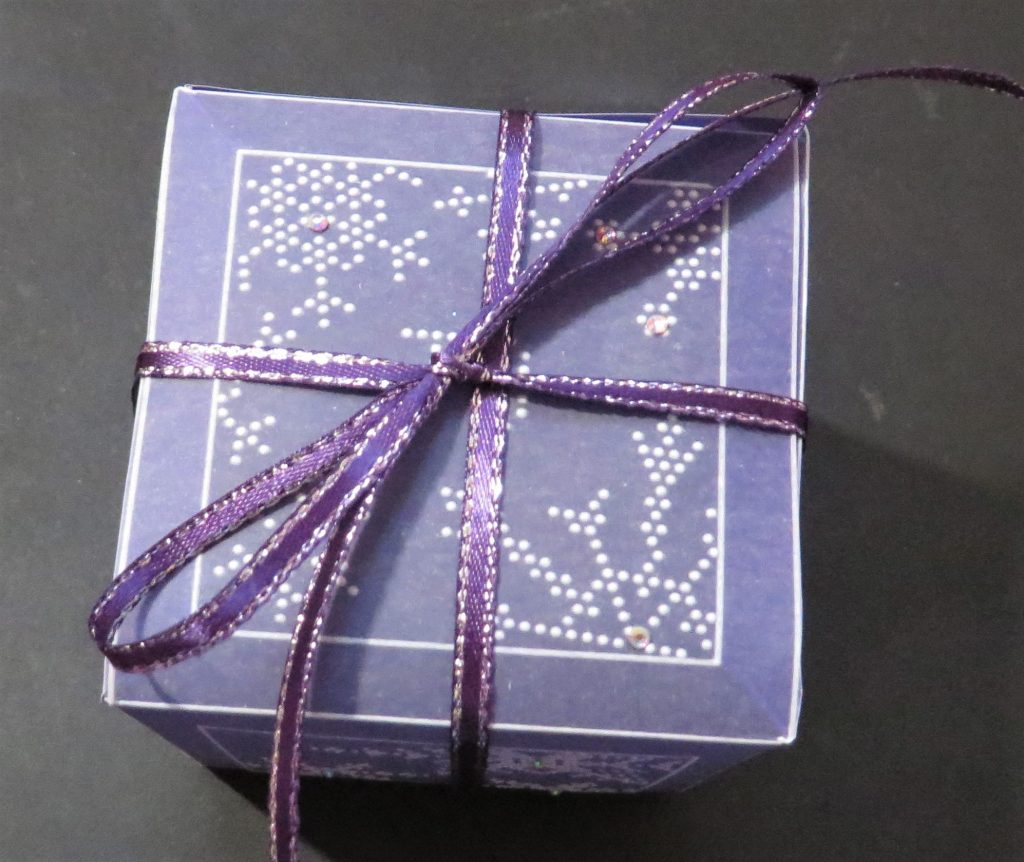
Step 10. Stick the box together, pressing the edges with an embossing tool, one side at a time and close the lid.
Step 11. Put a present of your choosing into the box and tie it with some ribbon! Voila!
Absolutely gorgeous! What a personal touch to add to your Christmas (or whatever occasion really). Thank you, Glynis!
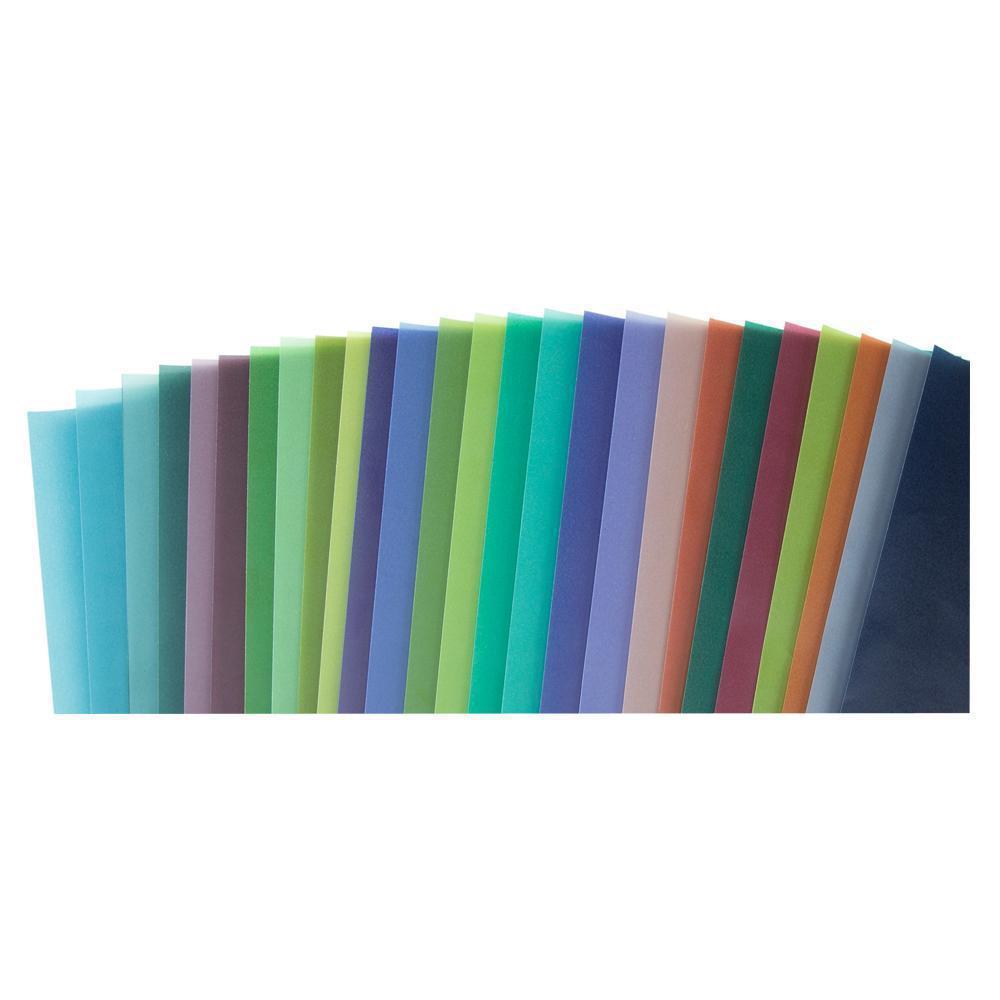
Once you start to make these boxes, they are very addictive and very quick to make. You could spend a couple of hours tracing out the boxes and then decorating them at a later date. We have a huge selection of A4 coloured parchment, with the recent addition of our Rainbow Parchment
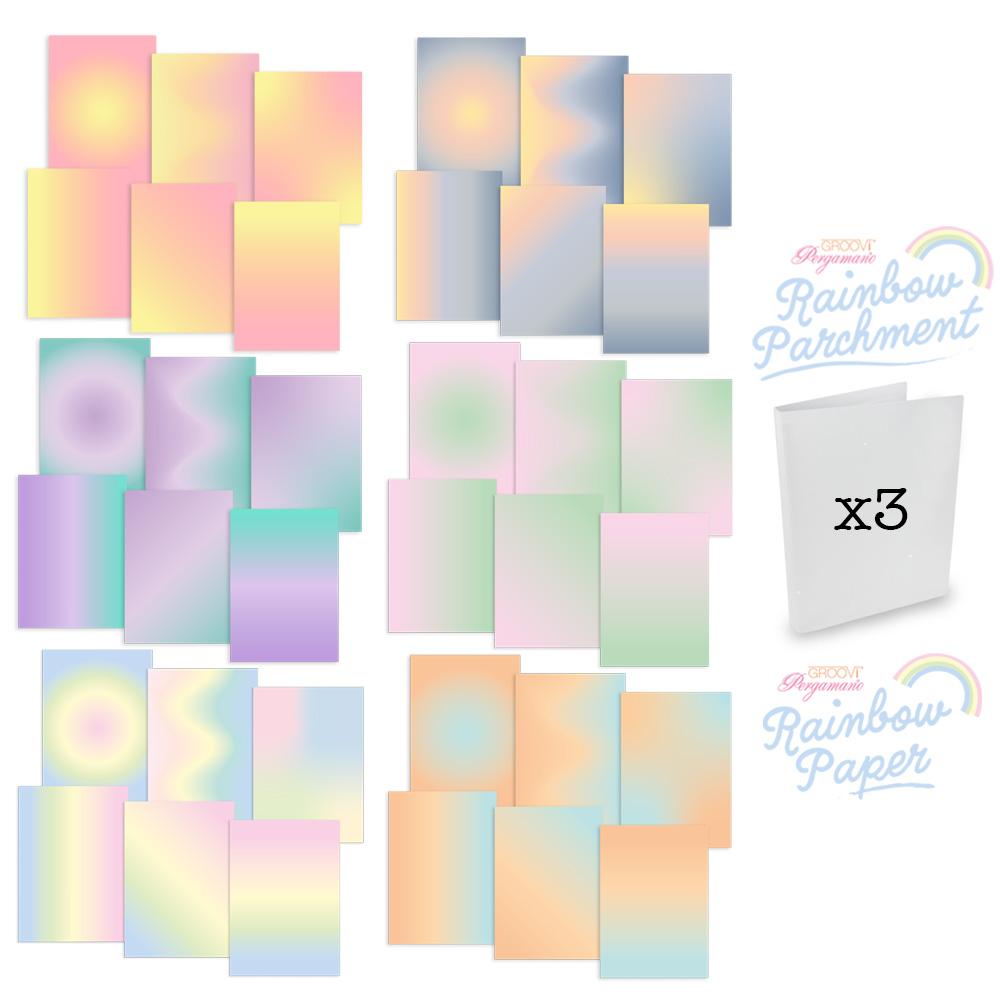
Available HERE
or you could try the sample pack
Available HERE
Everything that Glynis has used is available in one place over on the Clarity website HERE
If you have missed any of the previous Tutorials (this is episode 58!) then you can always check them out HERE
Lotsa love, Grace & Glynis xo
Clarity – The Home of Art, Craft and Well-Being.
Beautiful box. Thank you. Glynnis is a true gem and helped me so much at the retreat lots of love to her and of course for lovely Grace xx
I am busy making parchment trees at the moment, but I can see another addiction coming on! Thank you Glynis for a great tutorial. X
Thank you for some new ideas. Glynis helped me at the Retreat too, so many thanks.
Thanks for the reminder, Ive made a few boxes in my time and just might use the rainbow parchment for some more. I’m sure Emily would like one now and old enough to appreciate it. X
It’s a beautiful box and thank you Glynis for this one.
Love making boxes in all kind of size and form so after moving house,I hope I will find some time to make this box.
Lots of love and take care, Trijntje Huppel
Made these boxes a few years ago for the Christmas Table using the border plate to decorate them. The snowflakes look good against the blue parchment but the rainbow parchment would make pretty boxes for all occasions. Thanks Glynis & Grace for another Groovi Sunday project.
I made 50 of these boxes for wedding favours for my daughter’s wedding in 2017. Purple a4 parchment wasn’t available then so I had to colour plain sheets with an ink pad!
I also made some Christmas ones. They look lovely with (battery-operated) tea lights in. X
Hi Grace, Hi Glynis, Another fabulous tutorial from Glynis, thank you so much.
Lots of love from Patricia xx