Clarity’s Blog Tutorial: How to 4 NEEDLE TOOL (Part 1)
Hello hello! Grace here
Lesson 2 this week of The Pergamano Summer School Linda showed us the basics of the 4 Needle Tool. If you missed this weeks class, the you can either catch up HERE or watch below:
As part of the Pergamano Summer School, Linda will be showcasing the various Multi-Needle Tools from her Handbook for Multi-Needle Tools Volume 1 book, which will then be followed up by a step-by-step project created by Glynis using that particular tool.
So I will hand you over to the lovely Glynis for this weeks project using the 4 Needle Tool.

Summer School Blog 3: 4-needle tool.
Ingredients
Pergamano Handbook for Multi-Needle Tools Volume 1 by Linda Williams – (PER-BO-70291-XX)
Nested Arch Tags Groovi Plate A5 (GRO-PA-41465-04)
Gerbera and Butterfly Groovi Plate A5 square (GRO-FL-40753-03)
4-Needle fine Perforating tool (PER-TO-70036-XX)
2-Needle fine Perforating tool (PER-TO-70037-XX)
1mm Embossing Ball tool (PER-TO-70011-XX)
Heart Perforating tool (PER-TO-70022-XX)
1.5mm Embossing Ball tool (PER-TO-70004-XX)
3mm Embossing Ball tool (PER-TO-70005-XX)
Toscana Designer Parchment 8×8 (ACC-CA-30933-88)
Tools from the starter kit.
A4 Translucent Perforating mat (GRO-AC-40307-A4)
A4 Translucent White Super Foam (GRO-AC-40603-A4)
Pergamano Sticky Ink (PER-AC-70134-XX)
Pergamano Mapping Pen (PER-TO-70039-XX)
Perga-glitters (PER-AC-70252-XX)
Method
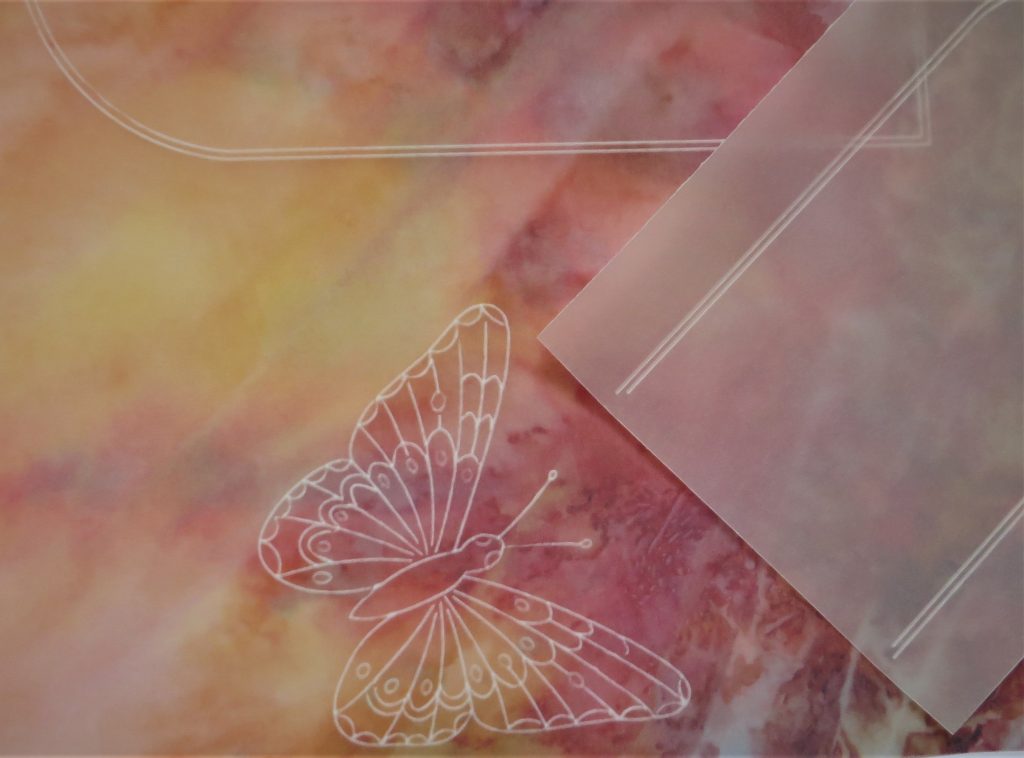
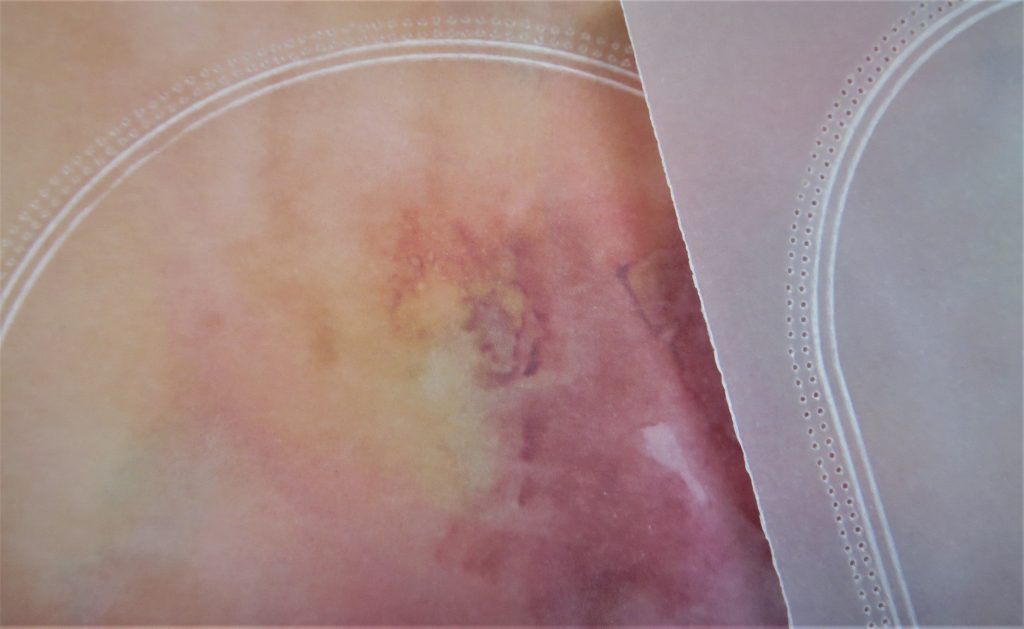
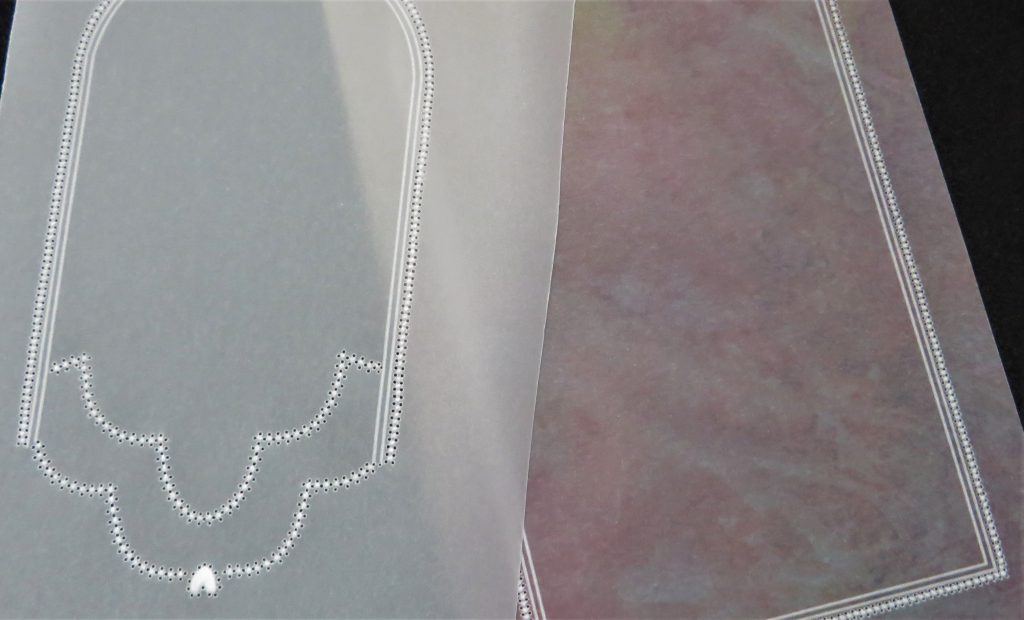
Step 1. Trace out just the outline of the largest tag from the plate onto the designer parchment. Trace out the butterfly from the Gerbera and Butterfly plate onto the same piece of parchment.
*Remember that the brightest side of the paper should be upper most if you want crisp white lines.
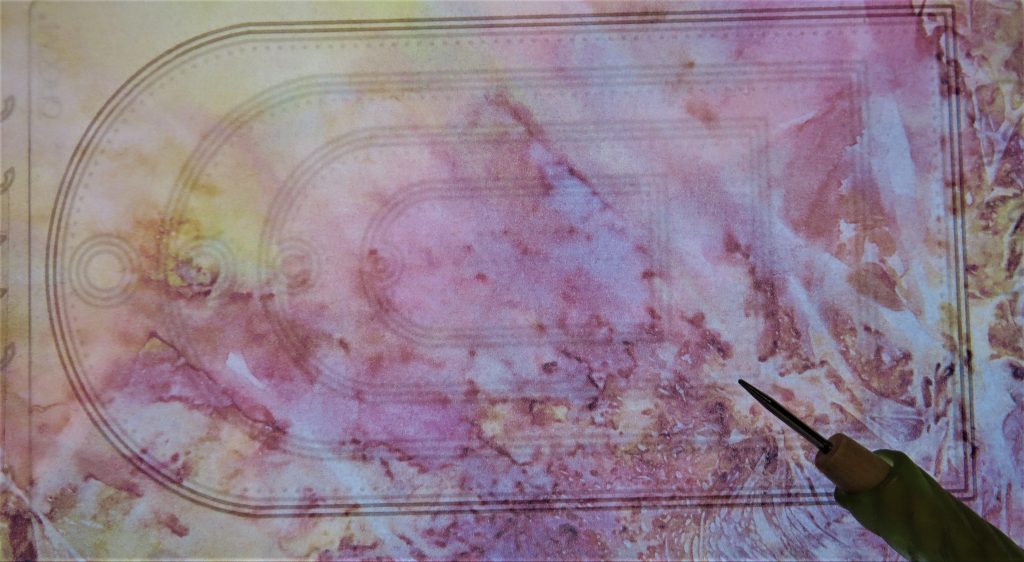
Step 2. On plain parchment, emboss the 2nd tag from the largest including a circle where the hole would be. I use this for a guide of where I want to add glue for a bow and attaching it to the backing paper. *Leave out the bottom line of the tag.

These are all the elements you should have now.
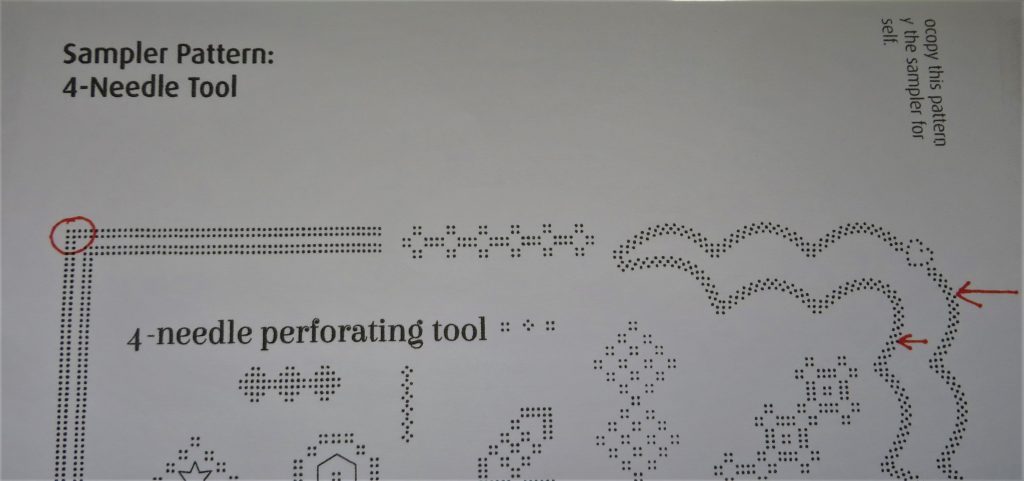
Step 3. Instructions and patterns for the 4-needle tool perforations are on pages 18-21 of Linda’s handbook and you need to photocopy the sampler from page 21. The patterns we are going to use for this tag are indicated in red.
Step 4. Line up the tag on the plain parchment with the pattern, being careful to keep the pattern straight. *Measure with the Gerbera and Butterfly plate so that you will leave enough space at the top of the tag for the butterfly and a bow.
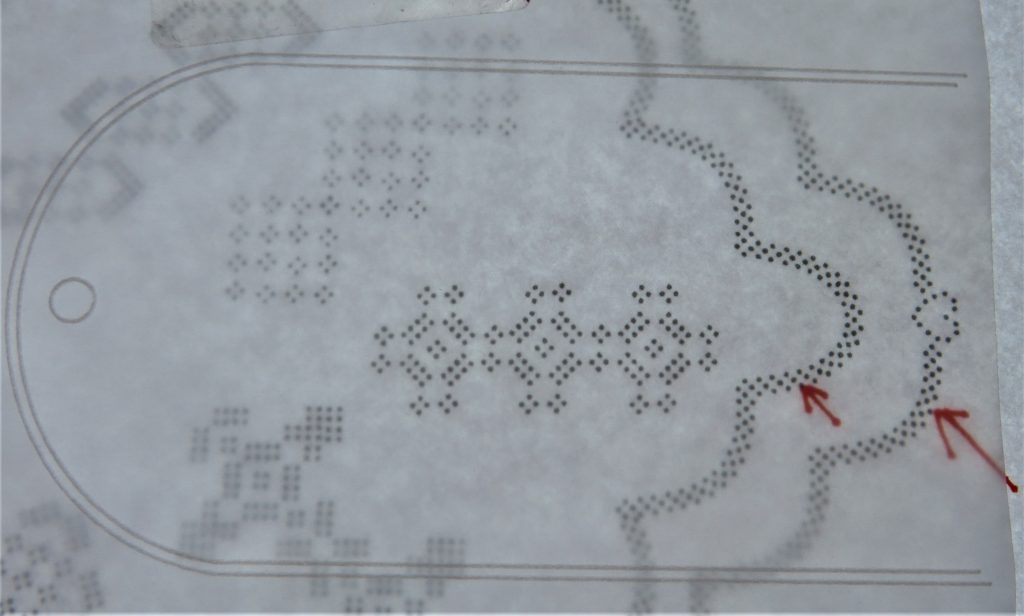
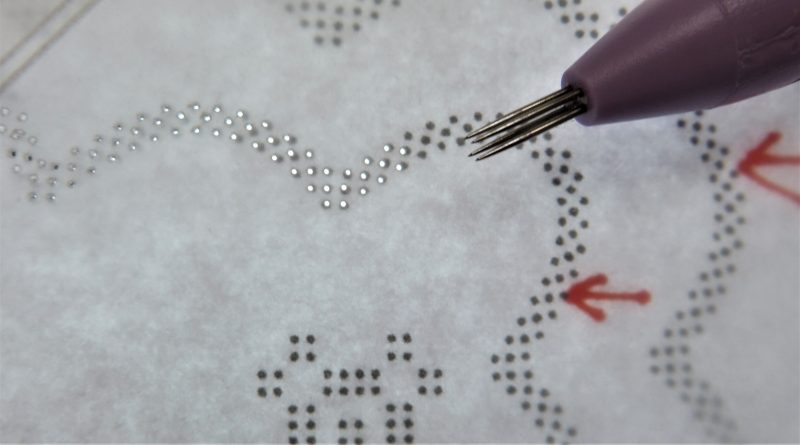
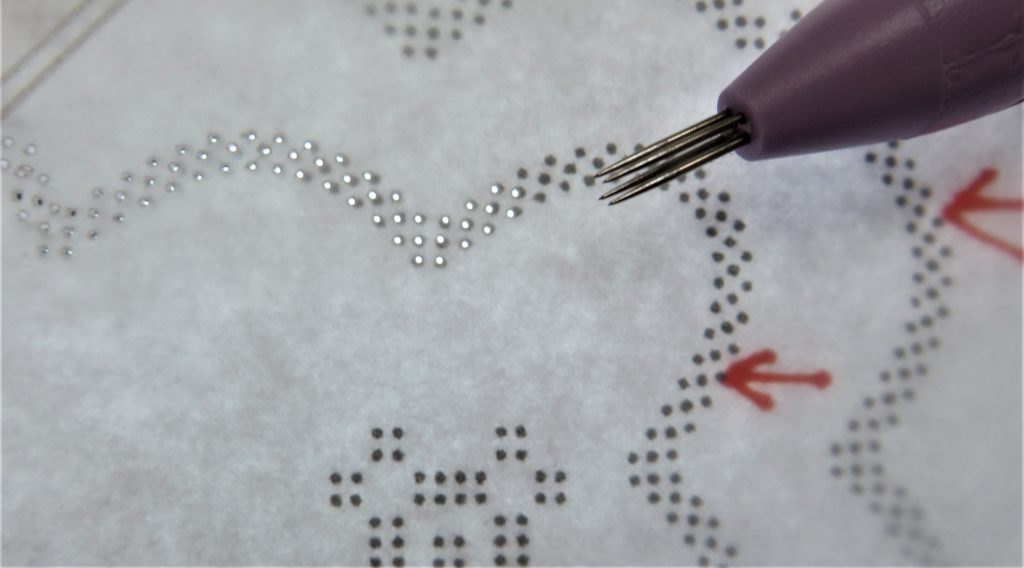
Step 5. Shallow perforate, matching up the needles of the 4-needle tool to the dots underneath. Take your time and hold the tool so that the dot on the handle faces you. Turn the work as you go. I am working so that the front, left-hand needle hooks into the hole of the previous 4-needle perforation and turning the work so that I do that every time.
Step 6. Perforate both rows of the 4-needle tool pattern, being careful to keep away from the outside lines of the tag. Perforate a heart in the centre of the second row *If you have not got a heart tool yet, then you can perforate each dot with a fine single needle tool.
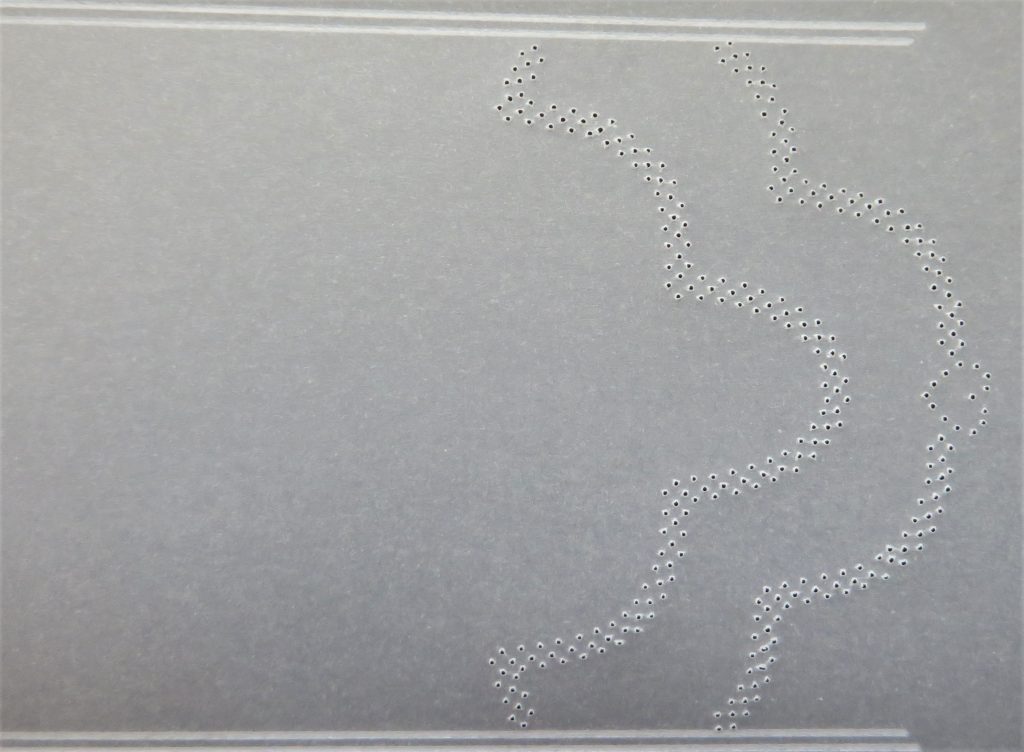
Step 7. Now go around the outside of both tags using the 4-needle tool over the other pattern marked with a red circle (top left on the pattern sheet). Just do one row of this.
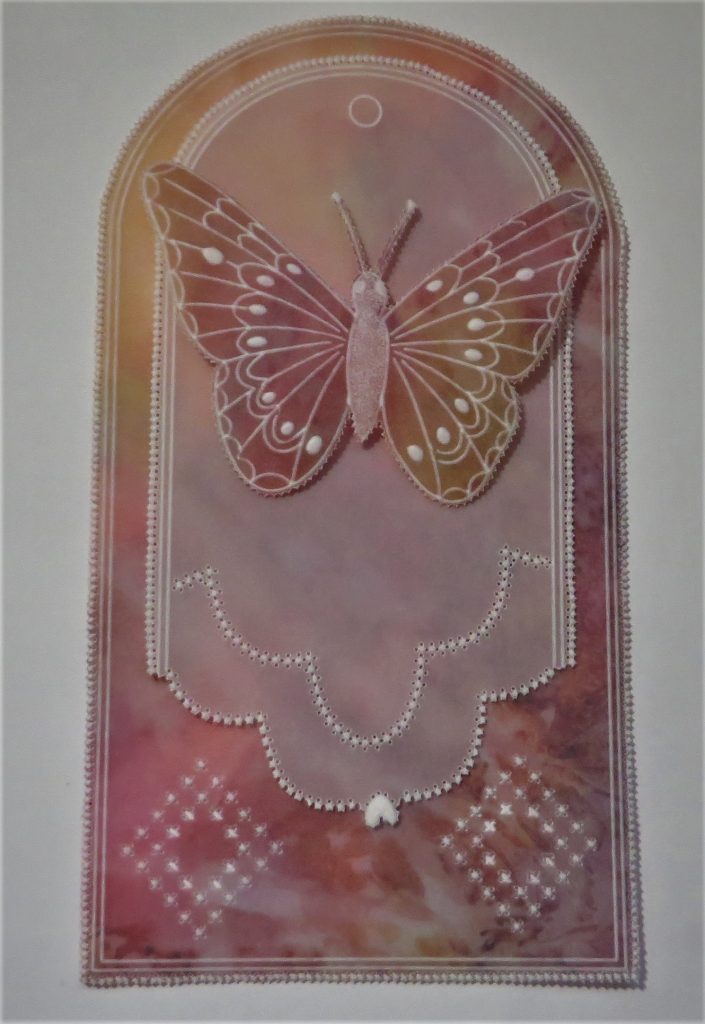
Step 8. Using the 1mm embossing ball tool, emboss tiny dots between all the perforations, following Linda’s pattern in the book. Use the 3mm ball tool for the heart and leave that to rest before embossing it again to make it white. Then turn the work over and work on the front, re-perforate (deep perforate) all the 4-needle perforations and the heart. It is a lot easier to do this with the 1 needle tool, rather than trying to line up the 4 needle tool.
Step 9. Emboss all the elements within the butterfly and do some stippling on the butterfly body with a single needle tool. The parchment needs to be worked on the back and rather than resting it on an embossing mat, put it down onto a piece of stout card. It helps if you rub out some of the colour from the designer parchment too. Once the embossing is complete, go around the outside of the butterfly with a two needle tool and picot cut it out.
Following Linda’s pattern, add some 4-needle embellishment to the corners of the larger tag. Again, shallow perforating over the pattern and embossing small dots with the 1mm ball tool. Re-perforate and cut the crosses as indicated on page 18 of the handbook. We are now ready to assemble it all.
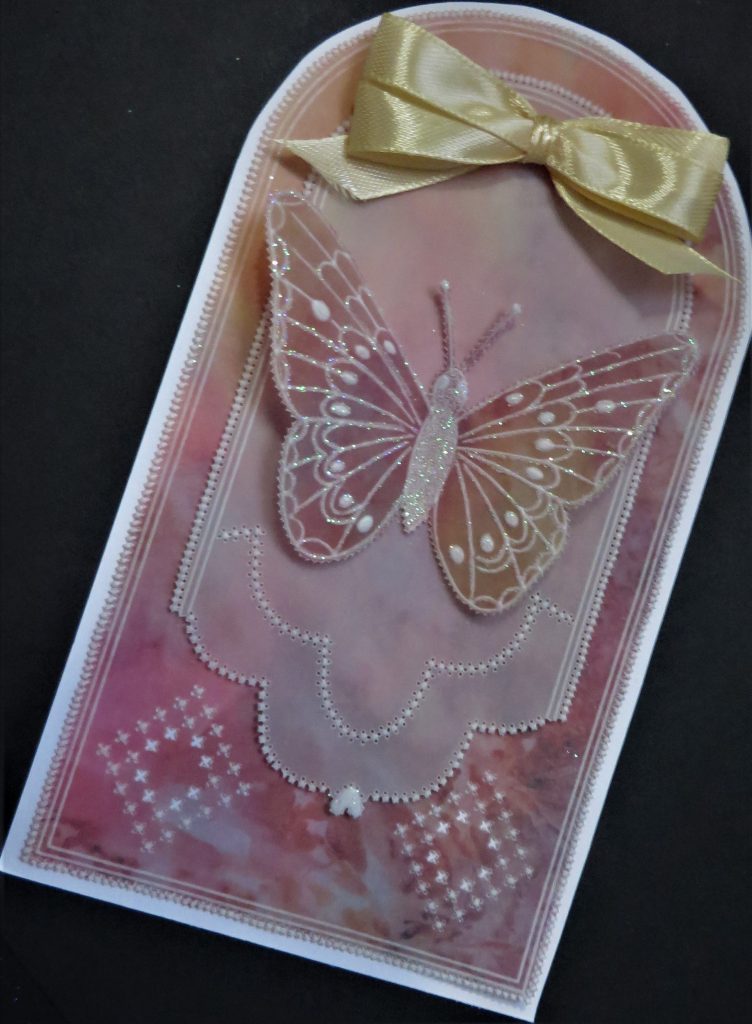
Step 10. Attach the large tag to a backing card first, using double sided tape where it will be covered by the butterfly and bow. Cut around the shape of the tag. Attach the small tag, again using D/S tape underneath the bow and butterfly. Add sticky ink and glitter to the butterfly and attach the bow.
Another stunning piece of artwork from Glynis. Everything that Glynis has used is in one place over on the Clarity website HERE and everything for the Pergamano Summer School is HERE
Lotsa love Grace & Glynis xo
Clarity – The Home of Art, Craft and Well-Being.
A beautiful piece of pergamano from Glynis!!
Thank you for this demo and have a peacefull Sunday Grace and Glynis!
Lots of love, Trijntje Huppel
Lovely tutorial, thank you. Hope you have enjoyed your time with family and friends and have a safe journey back.xx
Hi Grace, so sorry to hear about your Grandad sending hugs and prayers for a speedy recovery. Thanks for posting the lovely project and thanks Glynis for putting it together. Lots of love, Jackie x x
Hi Grace, So sorry to hear about your Grandad’s illness, here’s hoping he will have a speedy recovery and be back home with your Oma really soon, you are all in my thoughts and prayers.
Hi Glynis, As always a stunning tutorial creating an stunning and adorable tag, thank you for the step by step.
Take care all.
Lots of love from Patricia xx
What a petty project from Glynis, so clever.
Hope Grandad gets better soon.