Clarity’s Blog Tutorial: How to Create an Edge with the Angle Tool
Hello hello! Grace here
I hope this finds you safe, happy and healthy? Or at least coping with what’s on your plate. Not everyone can say they’re healthy, that’s for sure, but we can still aspire to be happy eh?

Thank you for joining us on a crafty Sunday to learn some tips, tricks and techniques.
Our lovely Glynis Whitehead is in our bloggy bubble this weekend, to help us learn how to create a pretty edge with the Pergamano Angle Perforating Tool.
I’ll hand you over to the teacher… (wouldn’t it have been a lovely school experience if Glynis had been one of our teachers?!)

Ingredients
Nested Squares A5 square (GRO-PA-40037-03)
Pergamano Angle Tool (PER-TO-70029-XX)
A4 Picot Foam Mat (GRO-AC-40625-XX)
1mm Pergamano Embossing Tool (PER-TO-70011-XX)
OR… Number 2 tool from Starter Kit (GRO-AC-40026-XX)
Pergamano Single Needle Tool (Fine) (PER-TO-70035-XX)
Perga-Cutter Curved (PER-TO-70042)
OR Pergamano Exclusive Scissors (PER-TO-70040)
OR Ringlock Scissors (PER-TO-70041-XX)
Method
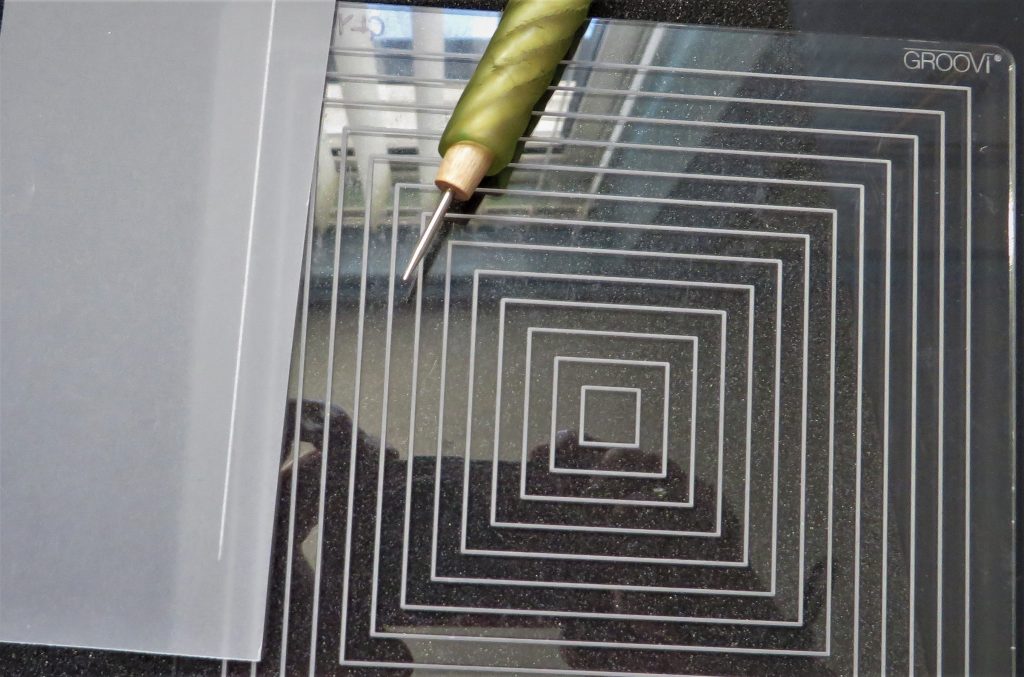
Step 1. Practice this on some scrap paper before you try it on your masterpiece. Emboss yourself a line from the nested square plate.
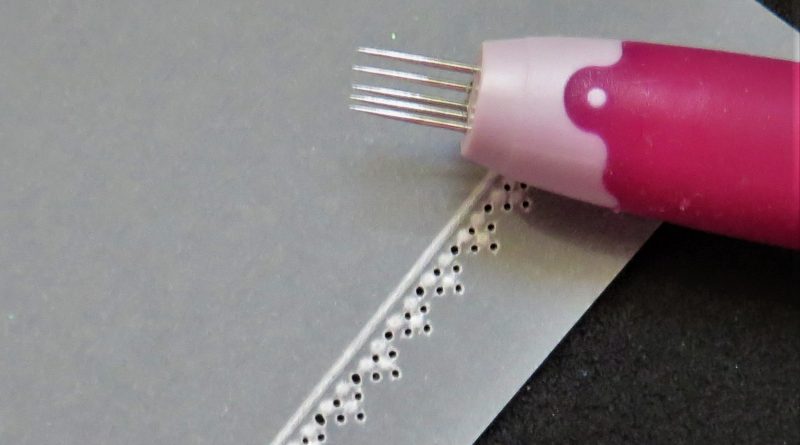
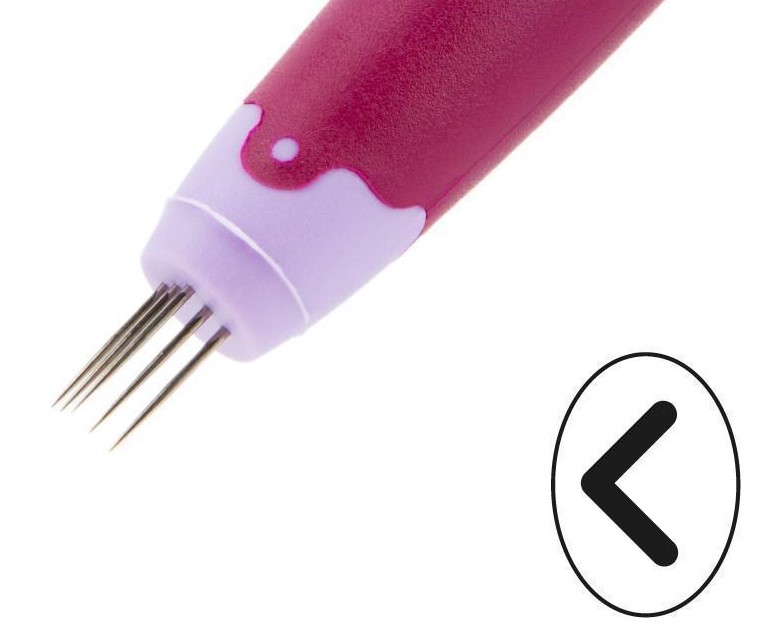
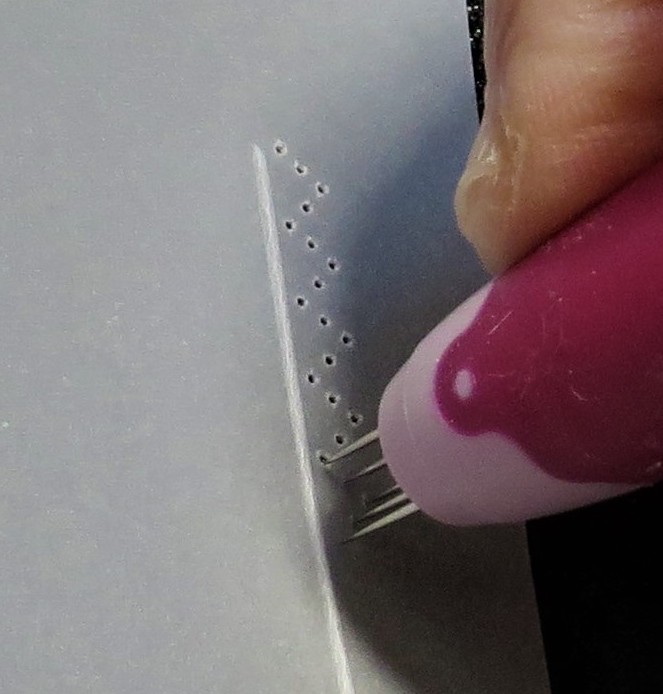
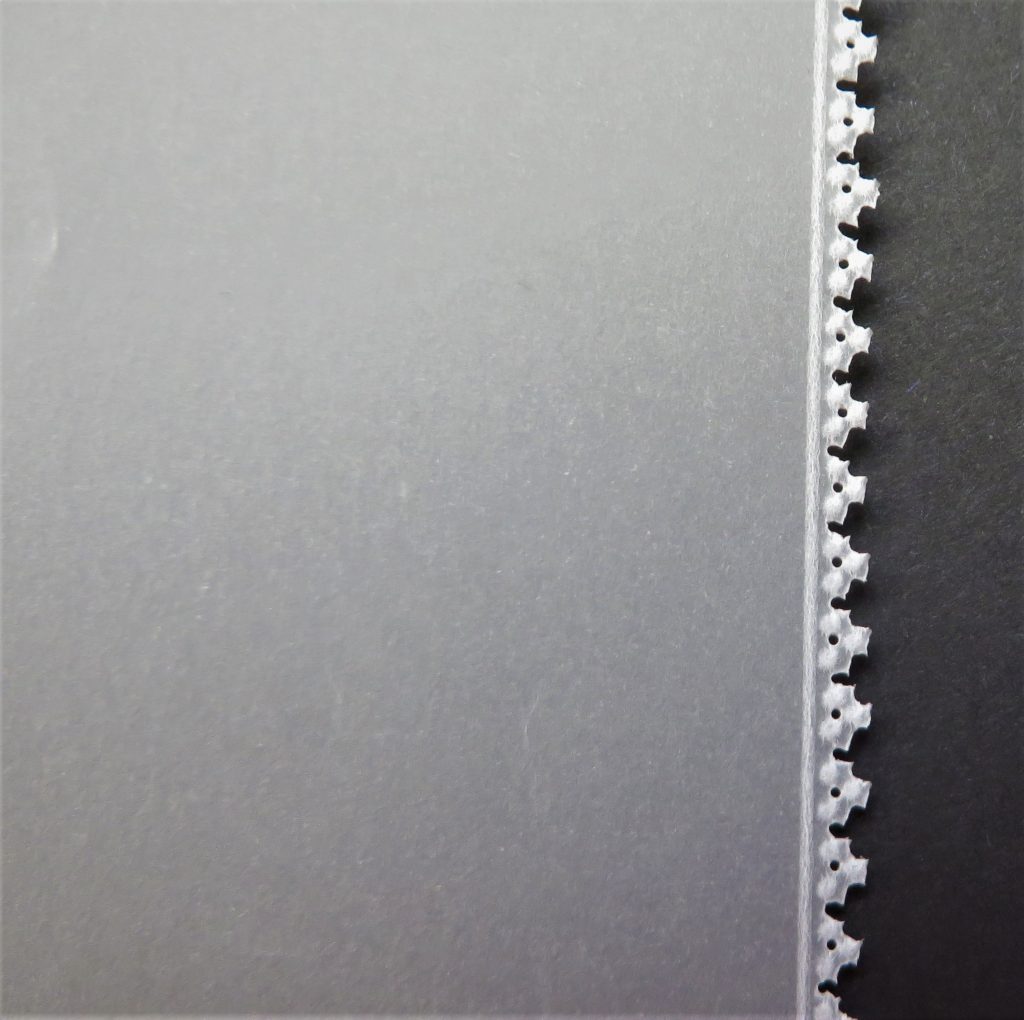
Step 2. Use the picot foam mat to shallow perforate with the Angle tool. Take a look at the tool and you will see that 5 needles set into a ‘V’ shape. There are dots on the handle where the needles are set in.
Step 3. We shallow perforate so that we can emboss into the space created, so that we prevent tearing the parchment along the perforations.
Once you have perforated the first ‘V’, put the last needle of the tool into the first hole of the perforations so that all the perforations are equally spaced. This needs to be done along the line.
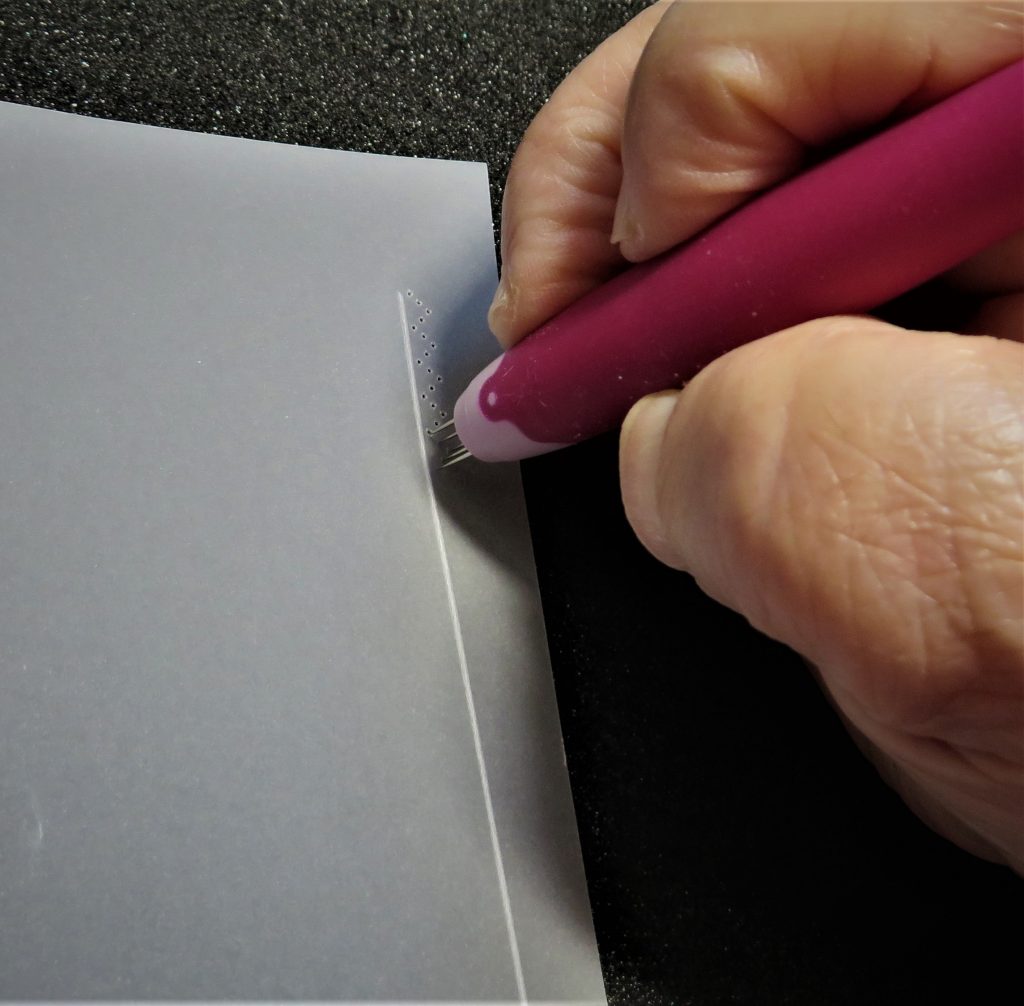
Step 4. Use the dots to help you point the tool in the right direct and try not to encroach on your embossed line. Always perforate from the front.
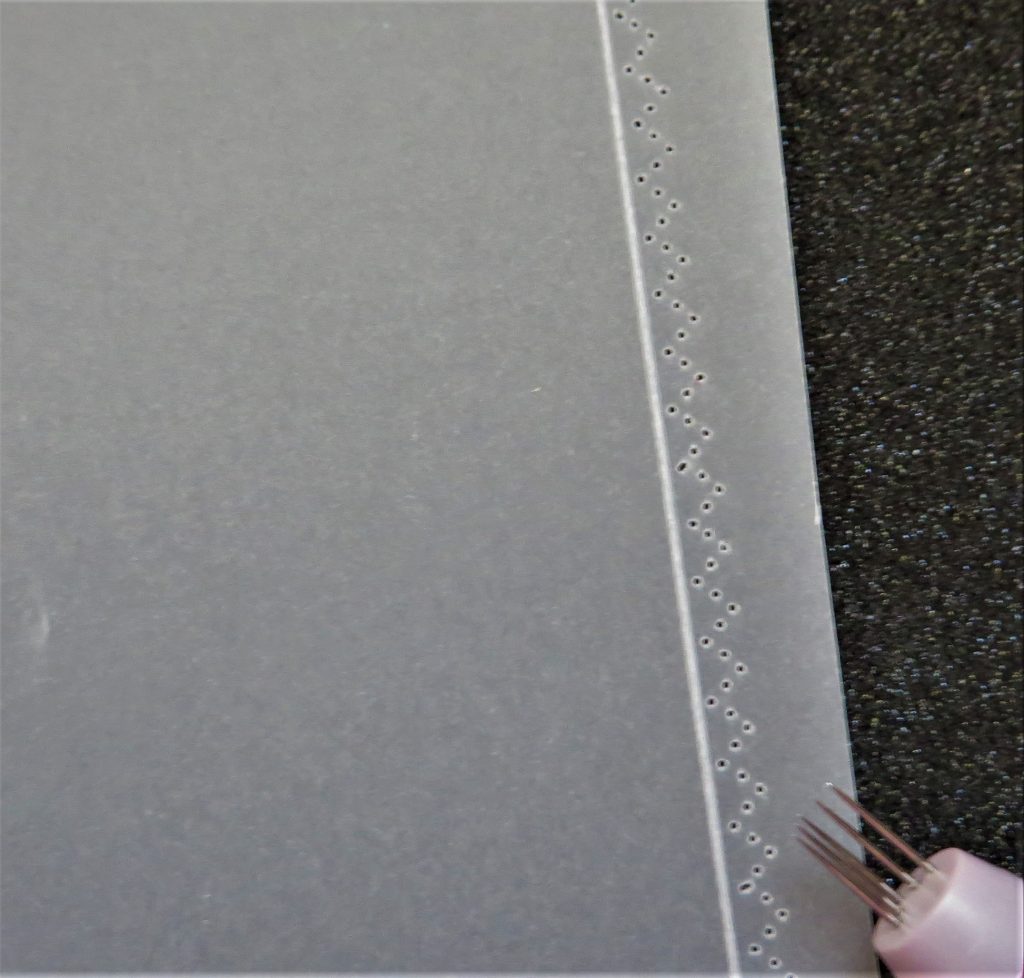
Step 4. Go along the line in this way until you have enough to make your edge.
*TOP TIP: If you are doing a square or rectangle, start your perforations at the corners and meet them up in the middle of the line – space them out a little bit if necessary and those spaces will not show too much.
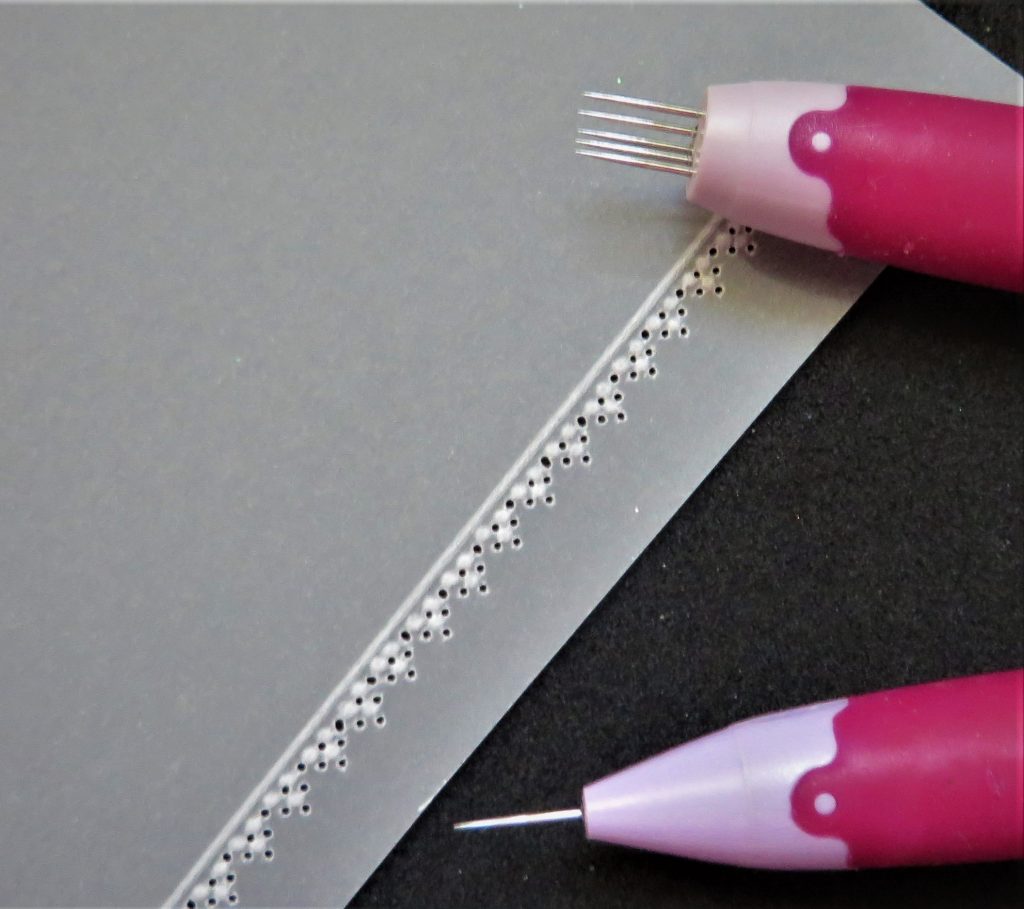
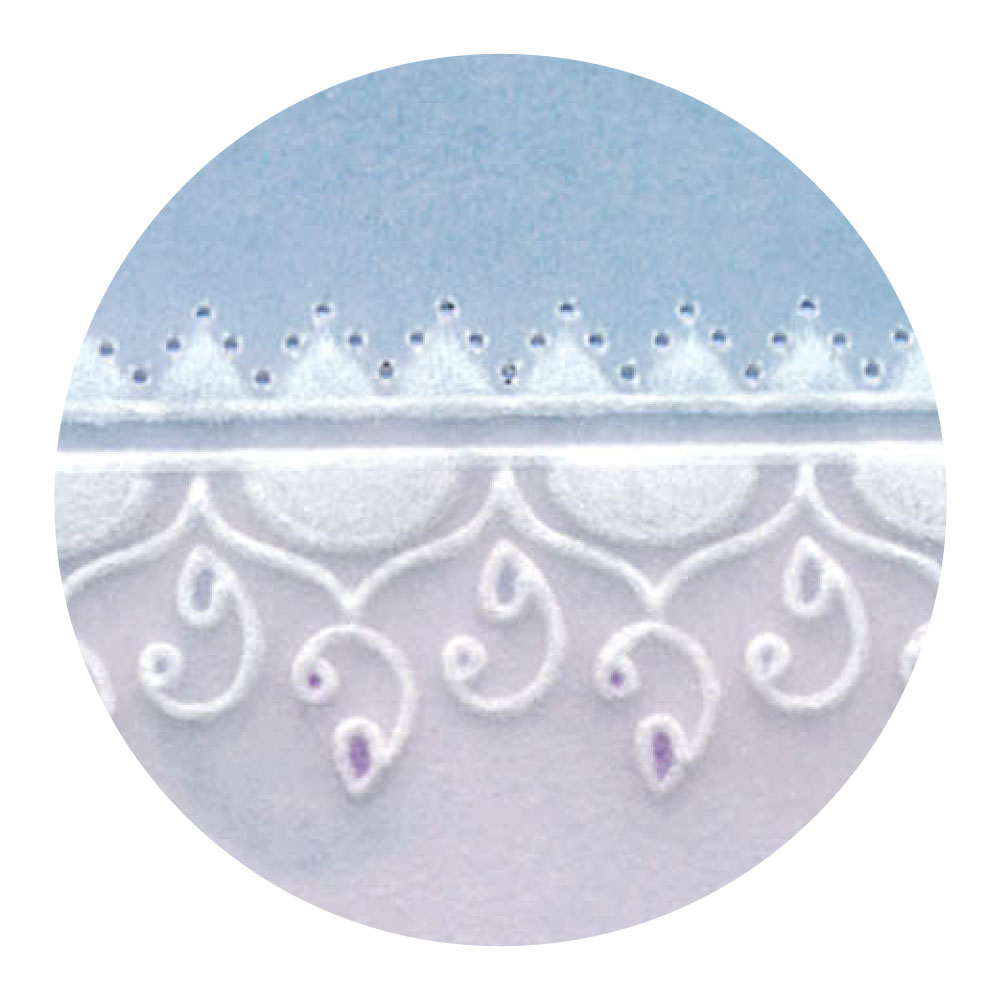
Step 5. Turn the work over and work on the back to emboss three dots into ‘V’s made by the Angle tool. Start with the dot at the very point of the ‘V’ and then put a dot either side near the line.

Step 6. Turn the work back over to the front, and using the single needle perforating tool, perforate right in the centre, between the dots. Take your time with it to make sure you get the hole central.
Step 7. Re-perforated the Angle tool edge. Use the fine one-needle tool to do this, especially if you have problems relocating the needles into the holes.
Step 8. Now snip along the edges. Do all of the snipping in one direction first, before turning the work to go in the other direction.
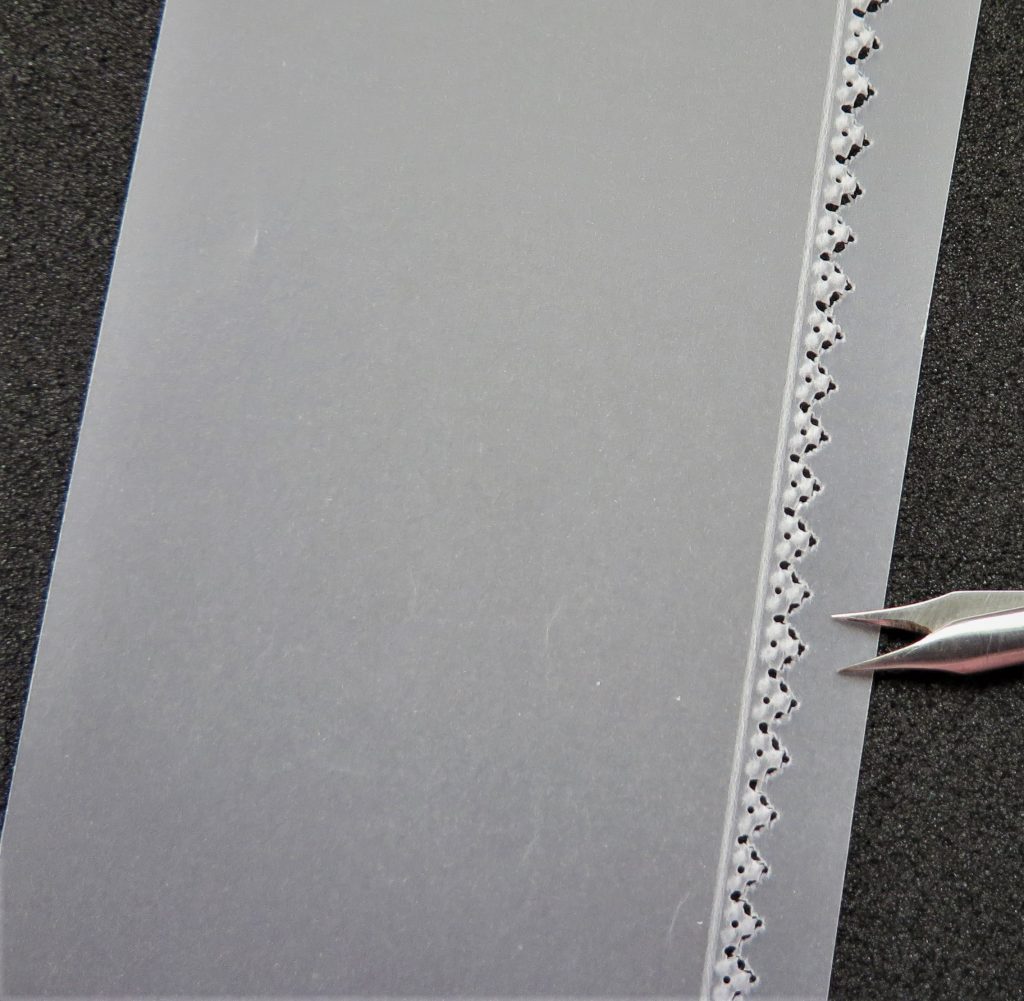
This is what you should end up with…
That is so helpful! Thank you, Glynis!!
If you need further techniques on snipping, you can find Glynis’s other tutorials here and here.
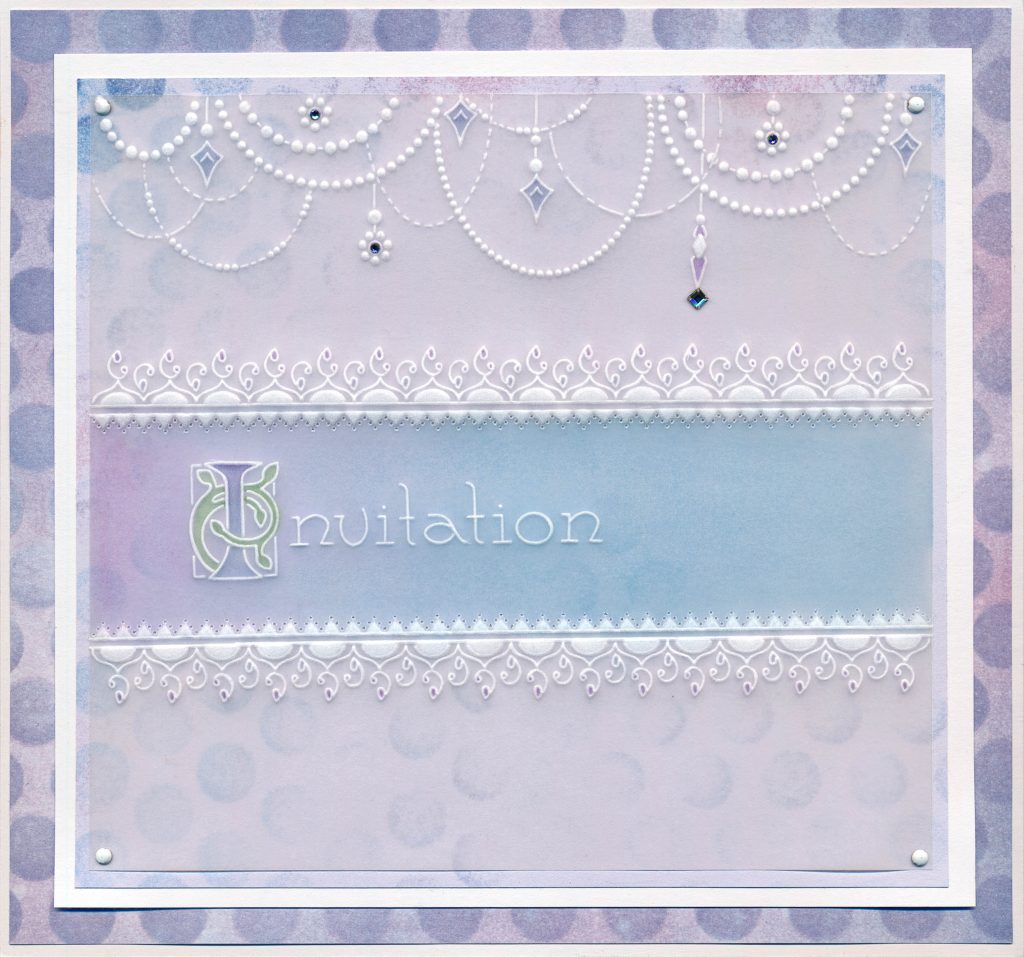
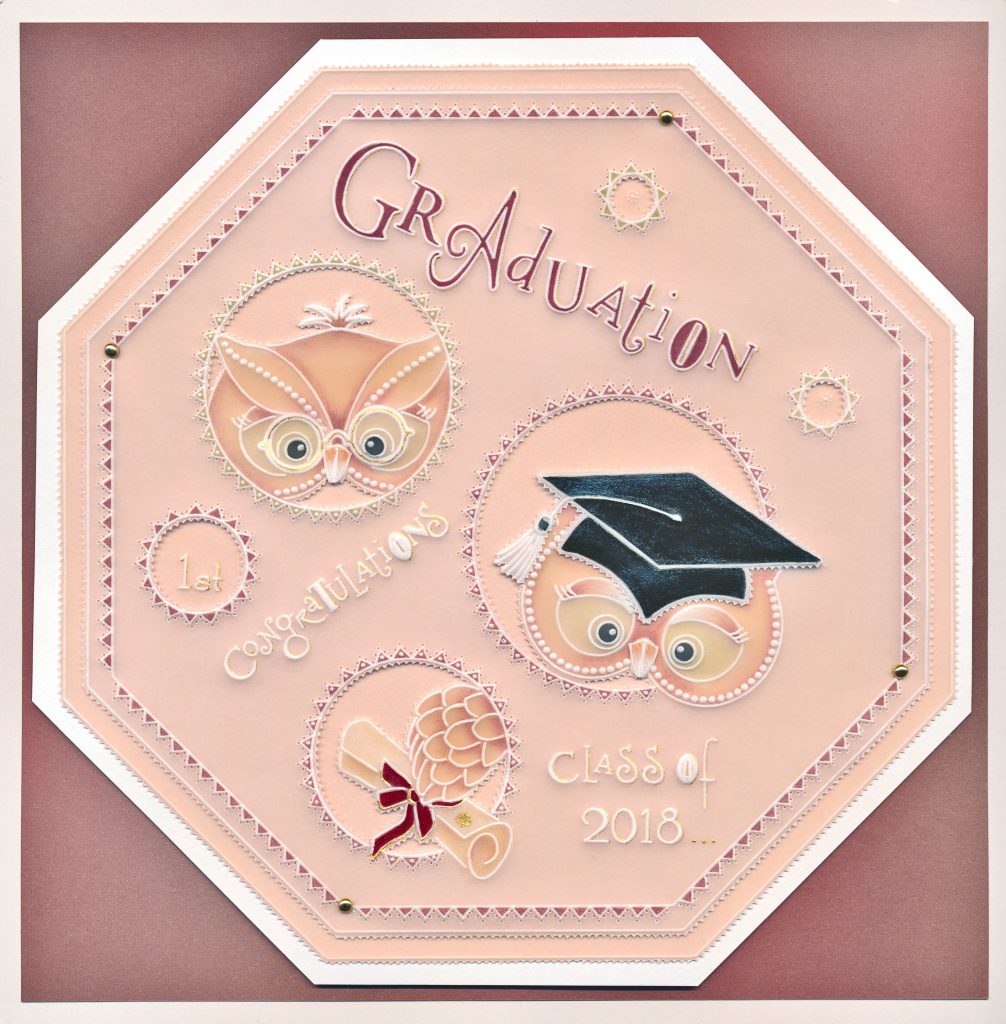
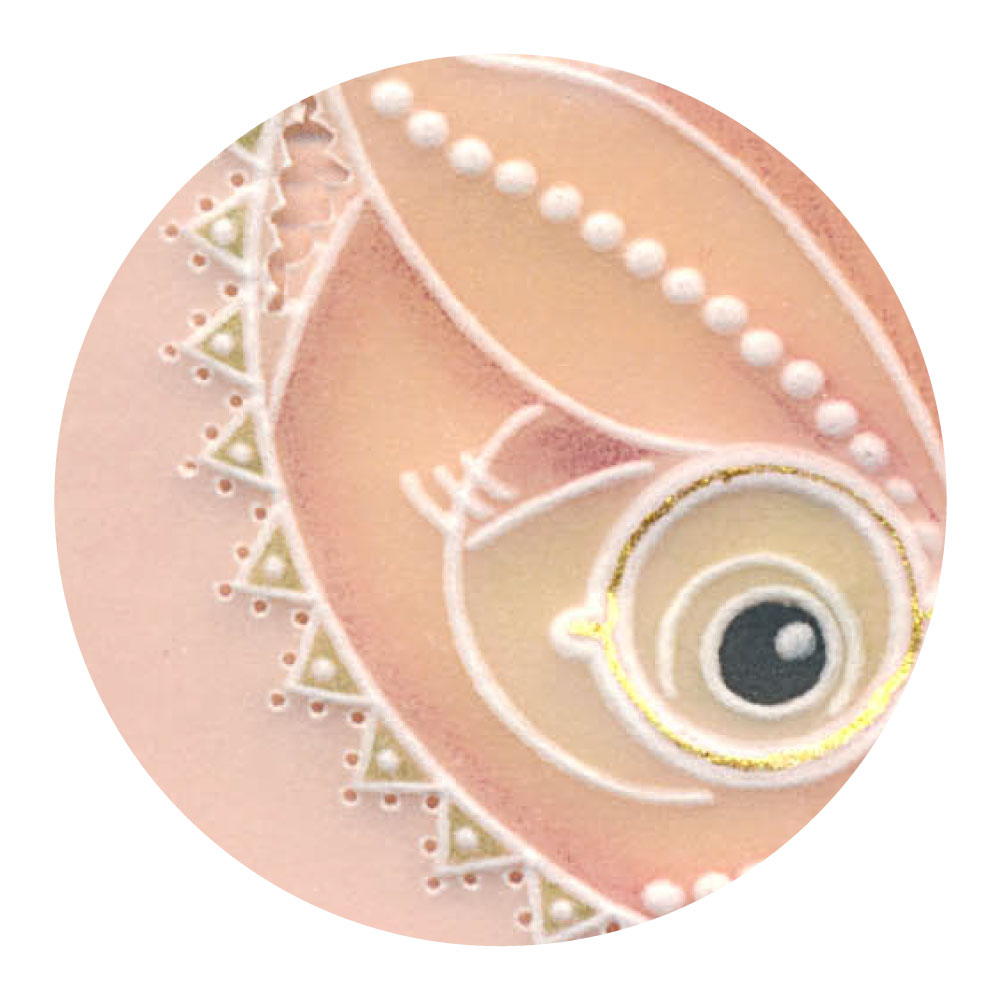
Here are some stunning cards created by Linda Williams using the Angle Tool
If you fancy giving this a go, or want to see what else you can do with the various Pergamano Multi-Needle Tools, then Linda has written 2 amazing books:
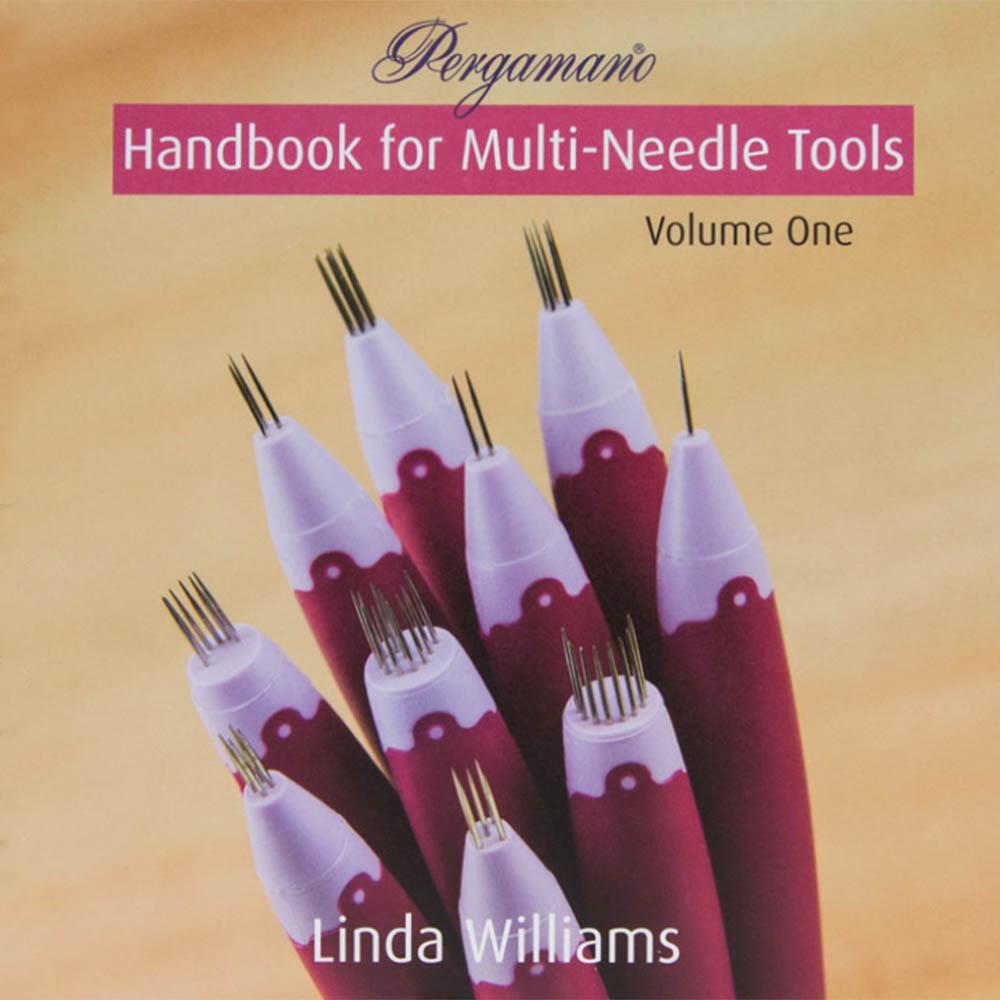
Volume One covers the following tools: 3 Needle, 5 Needle, Five in a Circle, Flower, Semi-Circle, Semi-Circle Mini & Swirl and is available HERE
Volume Two covers the following tools: Picot V Small, Picot V Medium, Picot V Large, Angle, Cross, Four in Four, Heart, Almond, Moon, Semi-Square & Star Point and is available HERE
This is an extract from the books:
Follow along with parchment craft expert Linda Williams, who will guide you through the versatile and wonderful possibilities of Pergamano Multi-Needle Tools. With tips, tricks, patterns, techniques and much more, you’ll learn the intricate art of perforation, from picot cutting to lacework.
These books are fantastic for beginners and experienced parchment crafters alike. With projects, step-by-step instructions, photographs, as well as detailed pattern maps for ideas and inspiration, everyone can explore the many designs made possible by Pergamano Multi-Needle Tools.
This is what Linda has to say about the Angle Tool:
A very easy tool for a beginner!
This uncomplicated tool has been around the block for some time now. It is a staple of your Pergamano tool bag. I see it used time and time again by parchment crafters. Giving a very neat corner, the space within is just the right size to accommodate a beautifully shaped triangle. Not too big and not too small.
As usual, everything is in one place over on the Clarity website HERE
Travel gently…
Lotsa love, Grace & Glynis xo
Clarity – The Home of Art, Craft and Well-Being.
Thank you Glynis and Grace for todays tutorial.
Take care an stay save-have a lovely Sunday!
Lots of love,Trijntje Huppel
Thank you Glynis for this tutorial and Grace for blogging them.
Wish I could find time for Sunday blog tutorials but shac shac and groovi Tuesday are about as much as I can manage just now. Hopefully one day I will be able to make a start. I love seeing all the techniques
Thank you Grace and Glynis, my two handbooks arrived yesterday, can’t wait to have a play xx
Thank you both. I’ve had both these books for ages and have found them very useful.
Stay safe.
Thanks Grace & Glynis for another great Sunday blog. Have the tools & the book so need to get my act together & have ago.
Thank you Grace and Glynis. Will give this a go. Another great blog !! Thank you.x
Thank you Glynis for this tutorial love the boarder. Thank you Grace hope you had a good weekend xx
Hi Grace, Thank you Glynis for this fantastic tutorial, this looks unbelievable, I love the finished edges. The samples that Linda has created with the angle tool are fabulous.
Lots of love from Patricia xx
That is one of my favourite tools, along with the Picot v tools. Hx
Hi Grace – very very late to this party 😱……..but better late than never – right !!
Hi Glynis – thank you so much for another wonderful tutorial
Love Seta Xx
I real love you blog and I see you spend so much of you time Glynis i have been learning so much from this, I don’t type because I am not a good speller so I get up set so I just watch. but I want to say thank you and I do appreciate it very much all your time you give
Ruth