Clarity’s Blog Tutorial: How to Overlay Designs
Hello hello! Grace here.
Happy Sunday! I hope this finds you feeling well and enjoying your day, no matter what you’re up to 🙂
We’re blessed to have the talented Linda Williams back in our Sunday bloggy bubble, so I’ll hand you straight over the lovely lady herself…
Barb’s Amazing Paisley – by Linda Williams
Ingredients
Barbara’s Paisley & Leaves A4 Sq Groovi Plate (GRO-TR-41761-15)
Nested Scallops Squares Extension A4 Sq Groovi Plate (GRO-WO-41168-15)
A4 Square Plate Mate (GRO-WO-40875-21)
Picot Foam (GRO-AC-40625-XX)
Super Foam (GRO-AC-40603-A4)
Pergamano Embossing Mat (PER-AC-70075-XX)
No 1 & 2 Groovi Embossing Tool (GRO-AC-40026-XX)
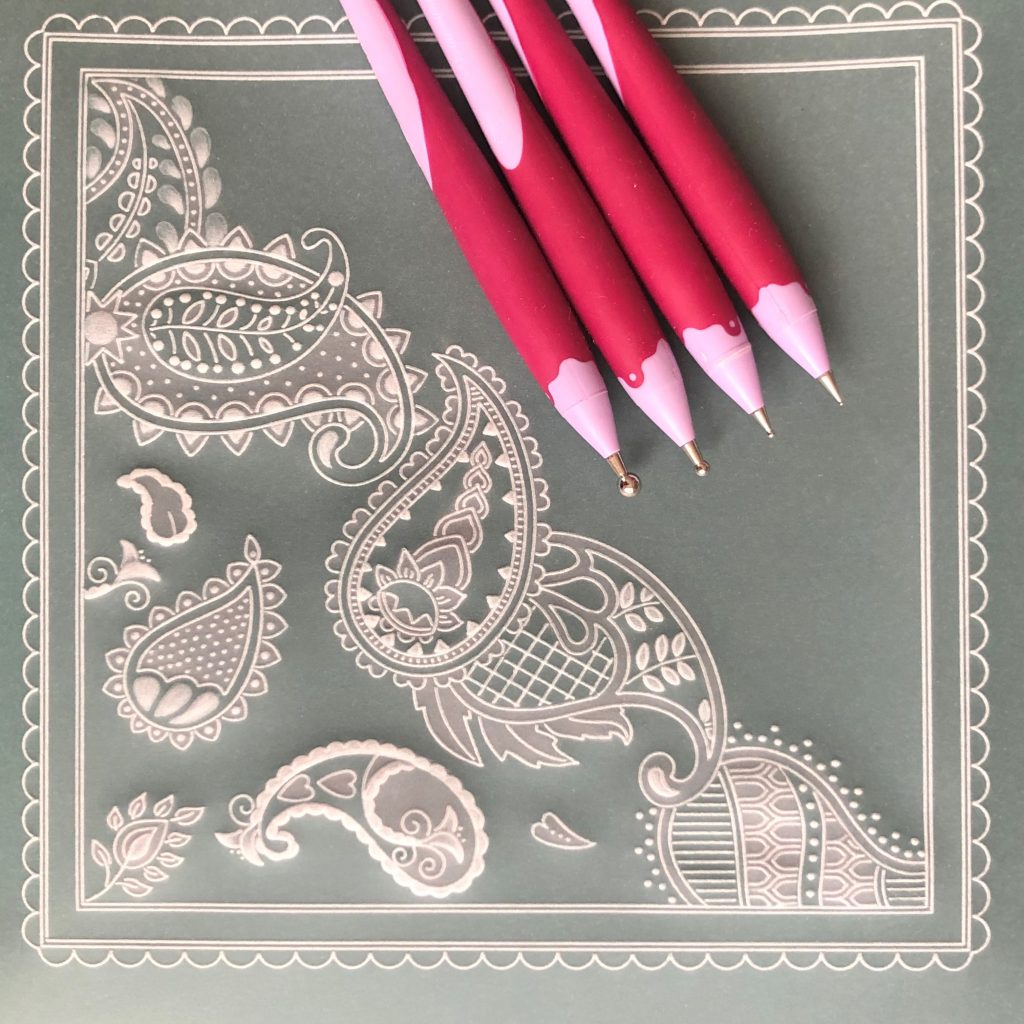
Pergamano Ball Embossing tools 4.5mm, 3mm, 1.5mm
Pergamano 1-needle Perforating Tool (PER-TO-70035-XX)
Pergamano 2-needle Perforating Tool (PER-TO-70037-XX)
Pergamano Five in a Circle Perforating Tool (PER-TO-70025-XX)
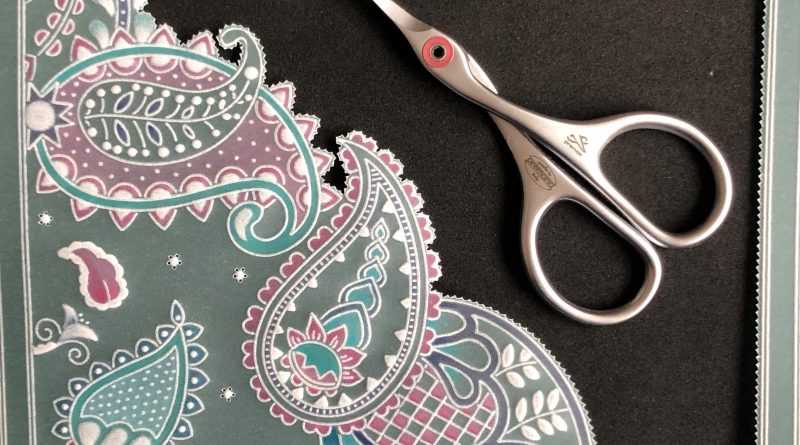
Pergamano Scissors or Snips
Pergamano Dorso Oil (PER-CO-70066-XX)
Pergamano Blending Pen & Nibs (PER-AC-70300-XX)
Groovi Guard (GRO-AC-40345-XX)
Groovi Tabs (GRO-AC-40437-XX)
Northern Lights Designer Paper (ACC-CA-30443-88)
Faber-Castell Polychromos Pencils (ACC-PE-30797-XX)
Faber-Castell Eraser (ACC-PE-30611-XX)
Regular Groovi Parchment Paper (GRO-AC-40024-XX)
Teal Groovi Parchment Paper (GRO-AC-41403-A4)
White Card Blank 8in x 8in (ACC-CA-30620-88)
Perga Glue (PER-AC-70133-XX)
Pergamano Ruler (PER-AC-70278-XX)
Pergamano Crystal Blossom Crystals (PER-AC-70401-XX)
4 White Pergamano Brads (PER-AC-70269-XX)
Clarity Tape Runner (ACC-MS-31065-XX)
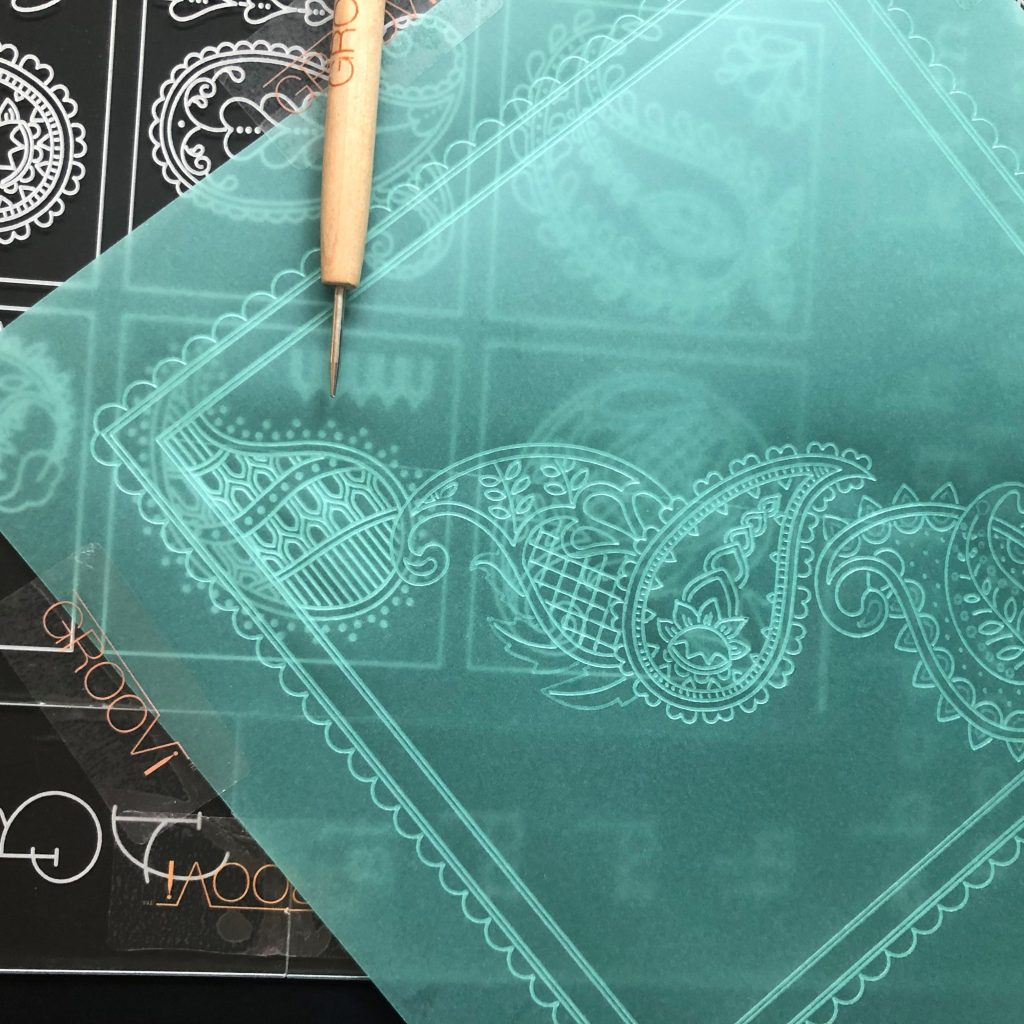
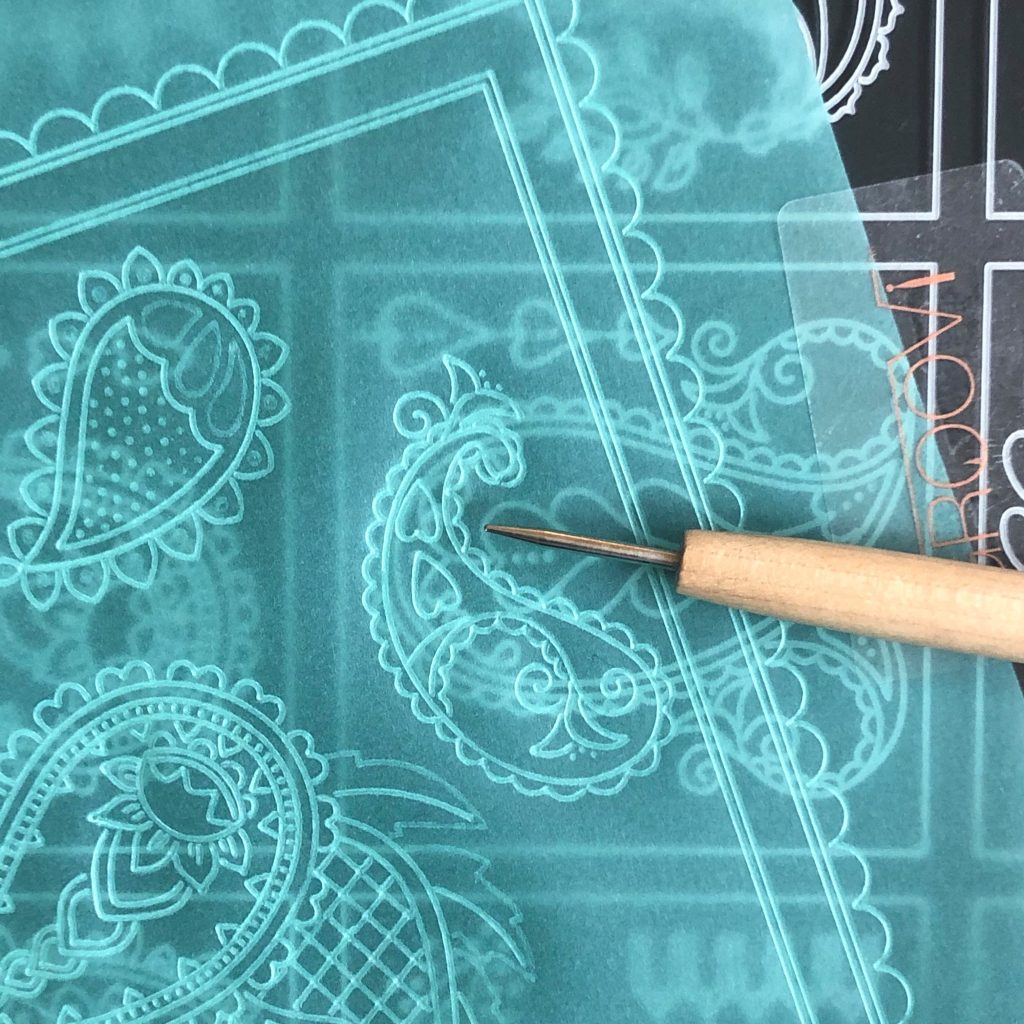
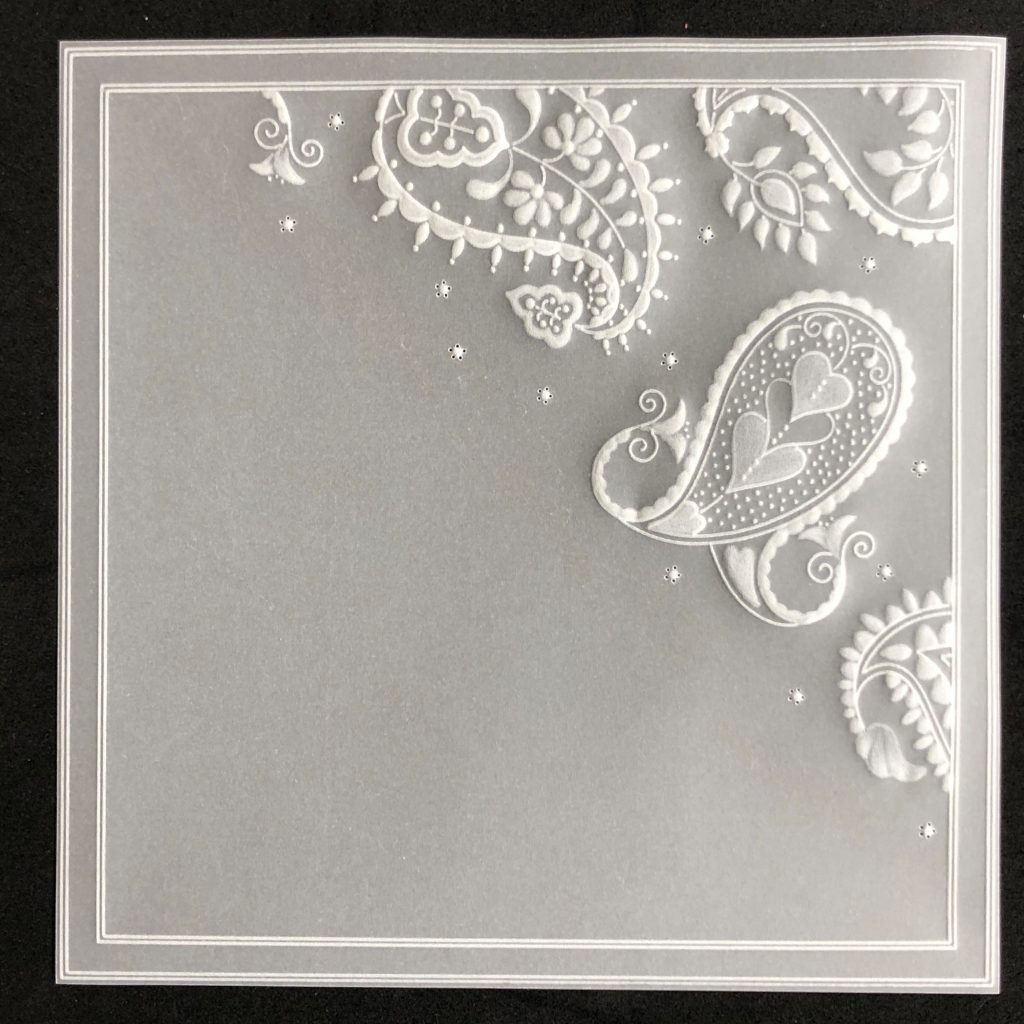
Step 1: Using light teal parchment paper and the number 1 Groovi tool, emboss the 3rd and 4th outermost double frames on the Nested Scallops Squares Extension A4 Square Groovi Plate. When working with coloured parchment, you need to make sure that the shiny side is uppermost. Add the scallops only to the outer square. Use the Groovi Guard to protect your parchment whilst you work.
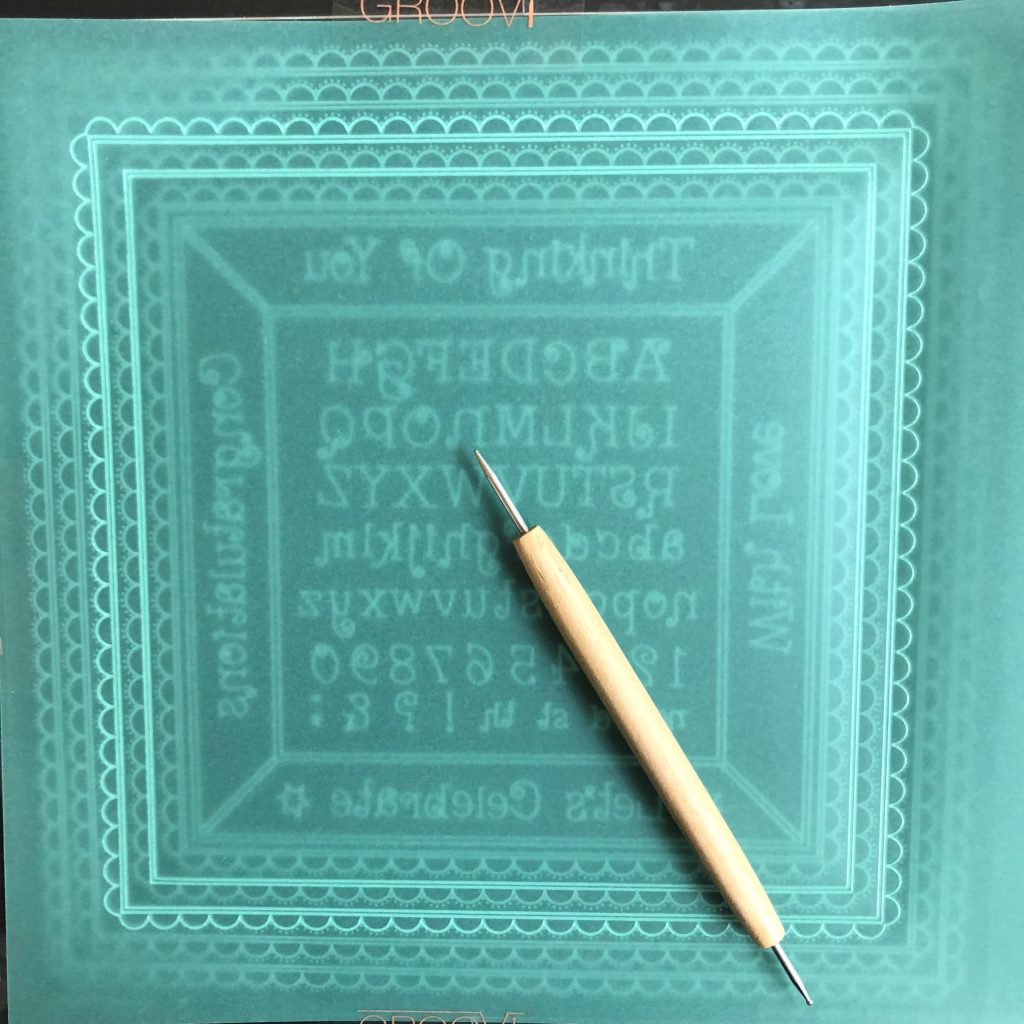
Step 2: On a piece of ordinary parchment repeat step 1, this time leaving out the scallops.

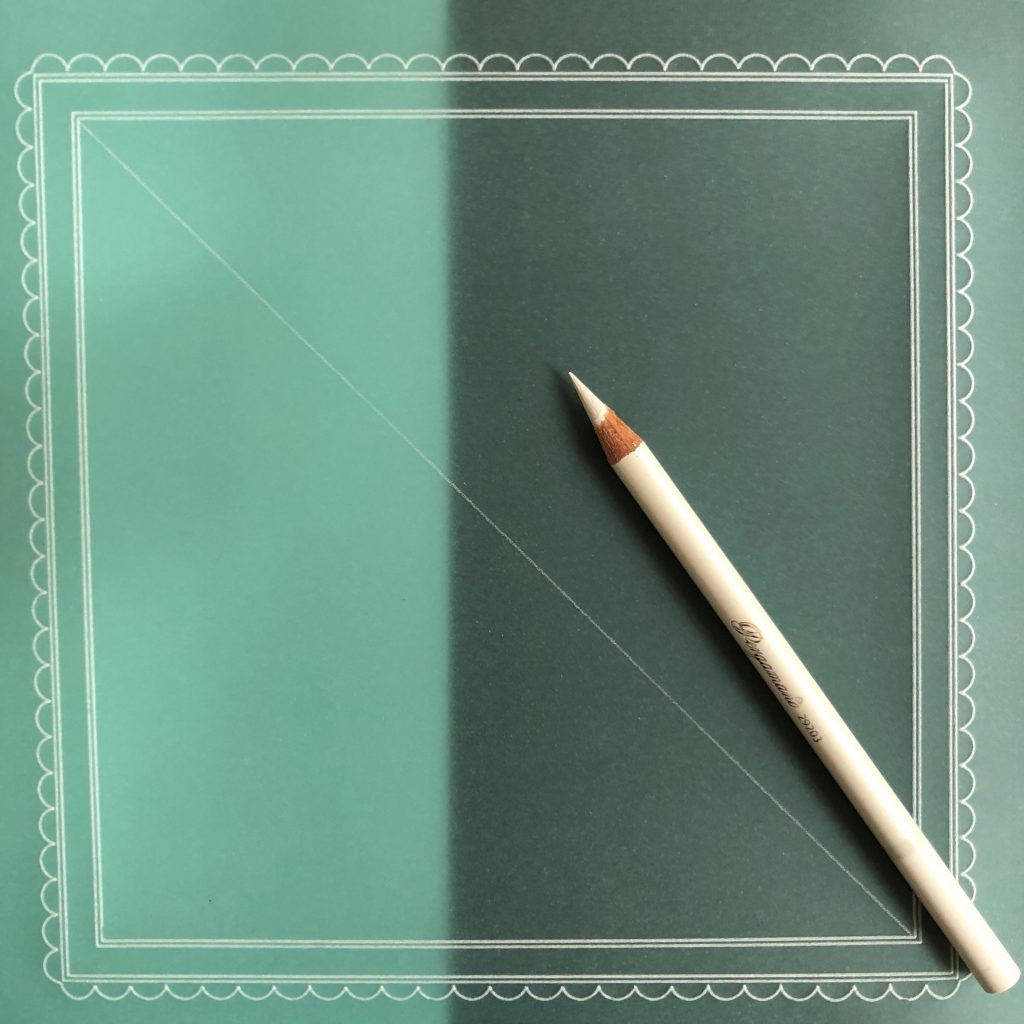
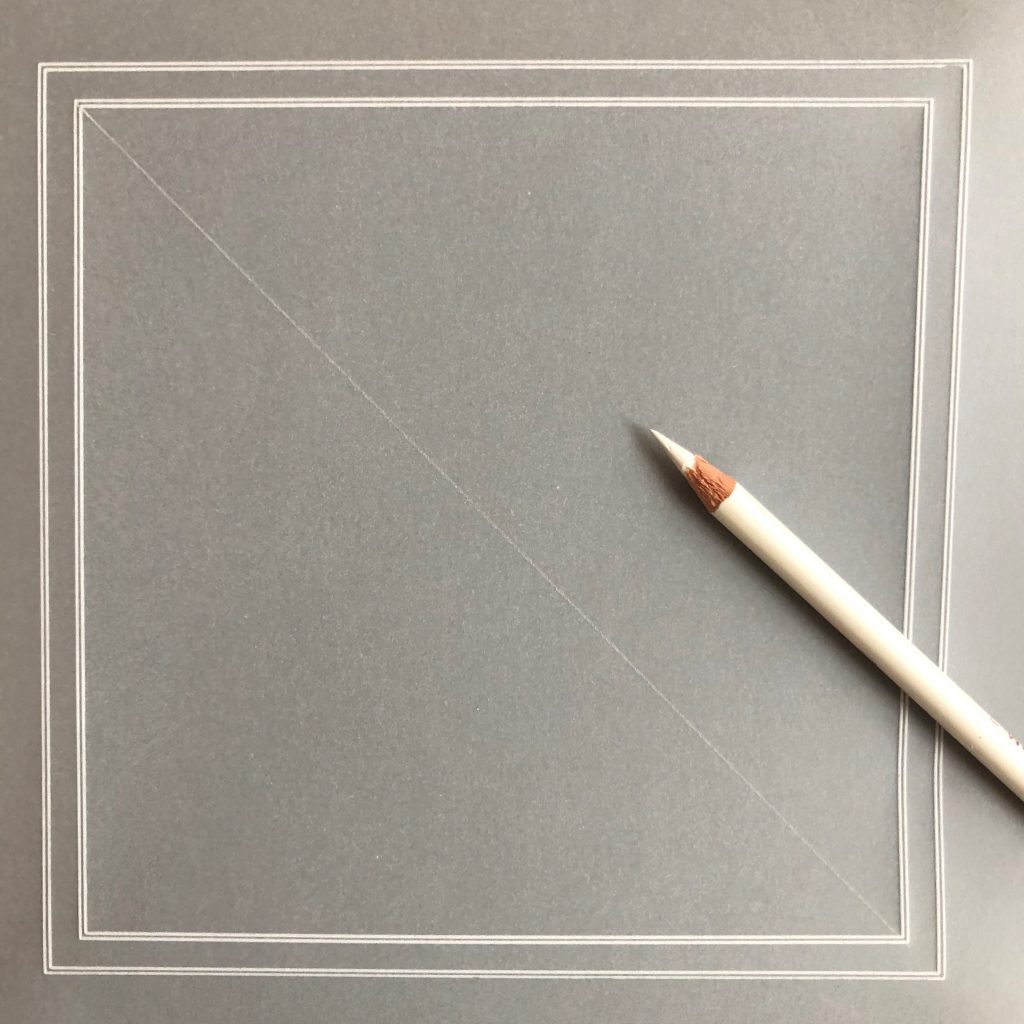
Step 3: On the front of both pieces of parchment draw in the diagonal using a white pencil and a Pergamano ruler.
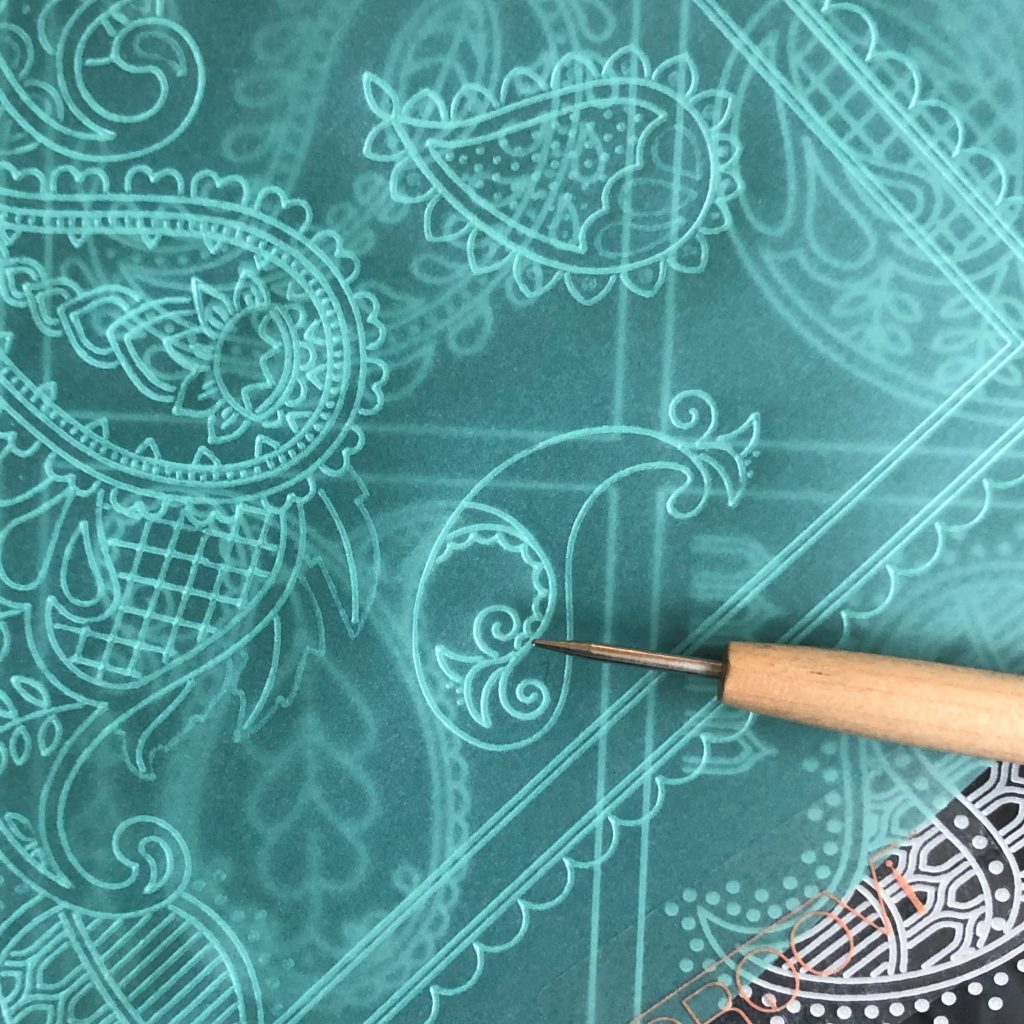
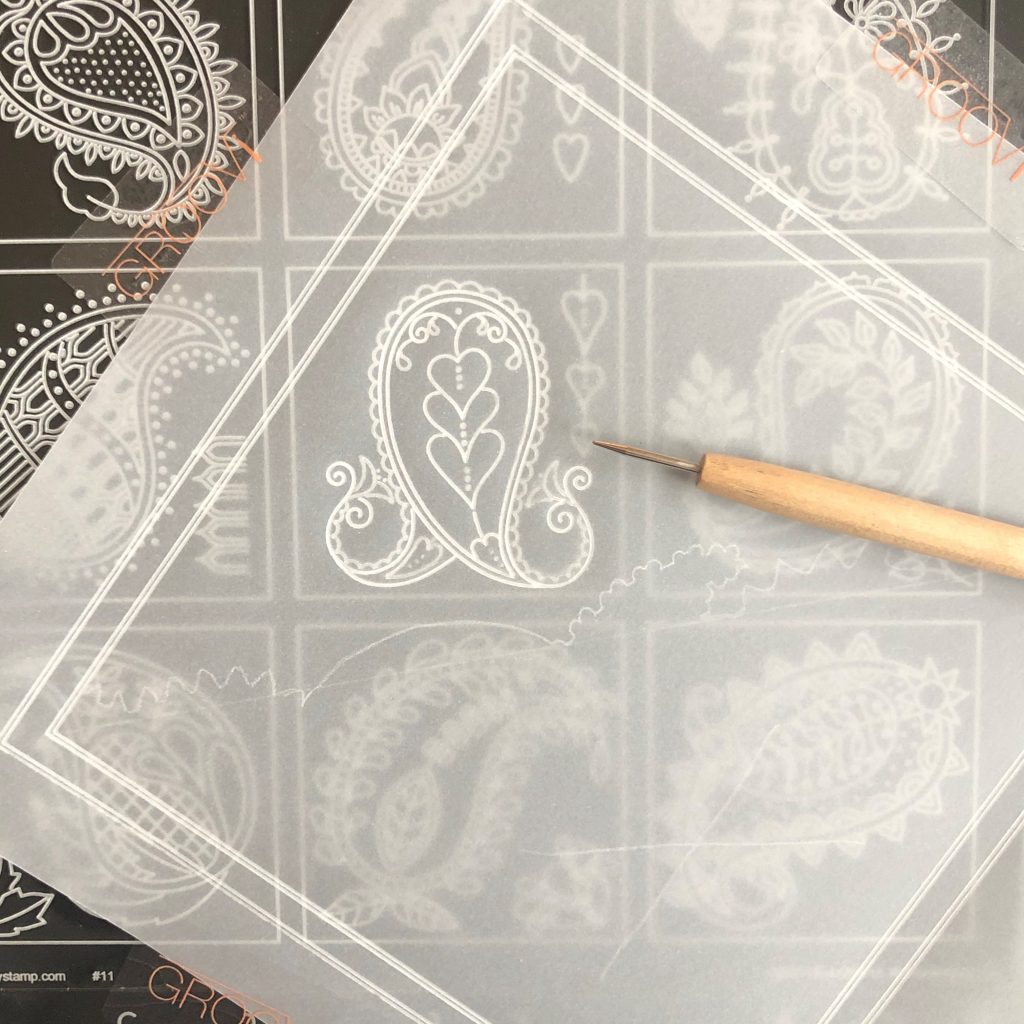
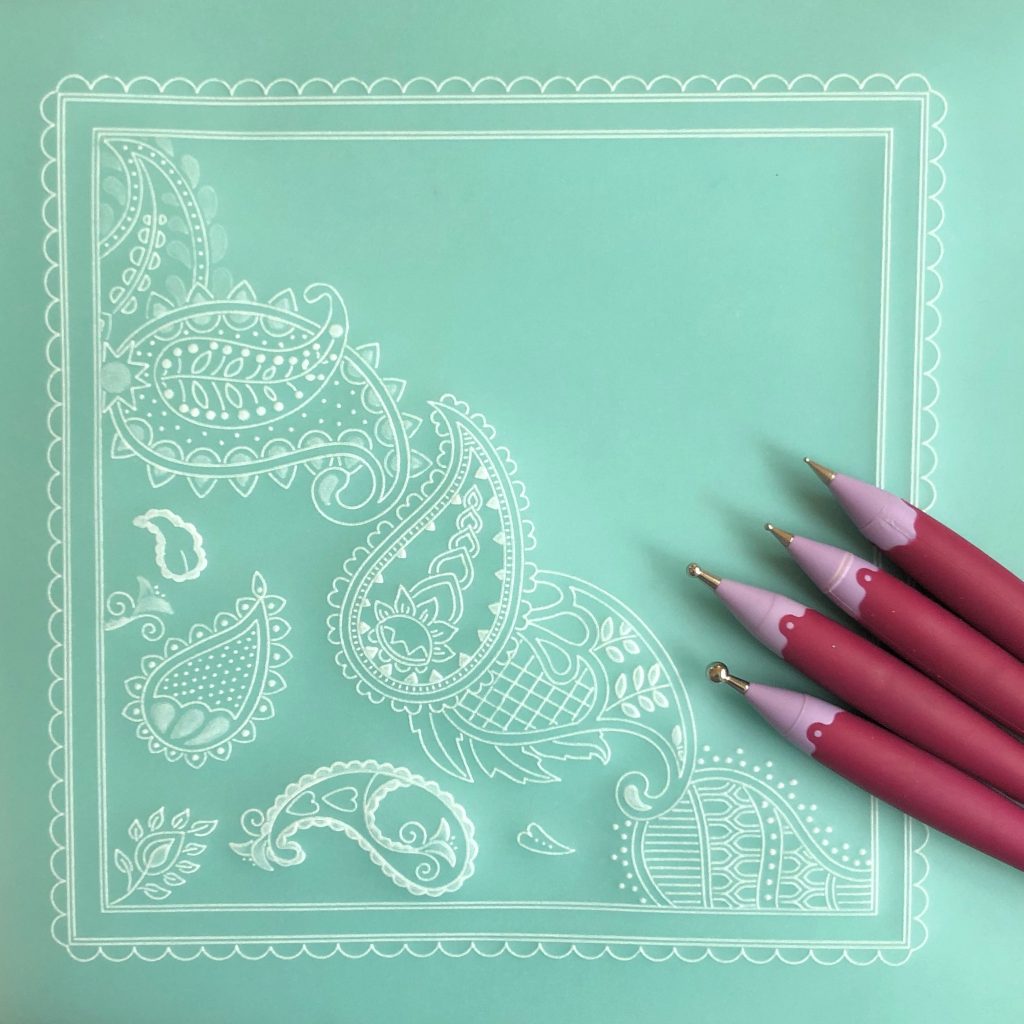
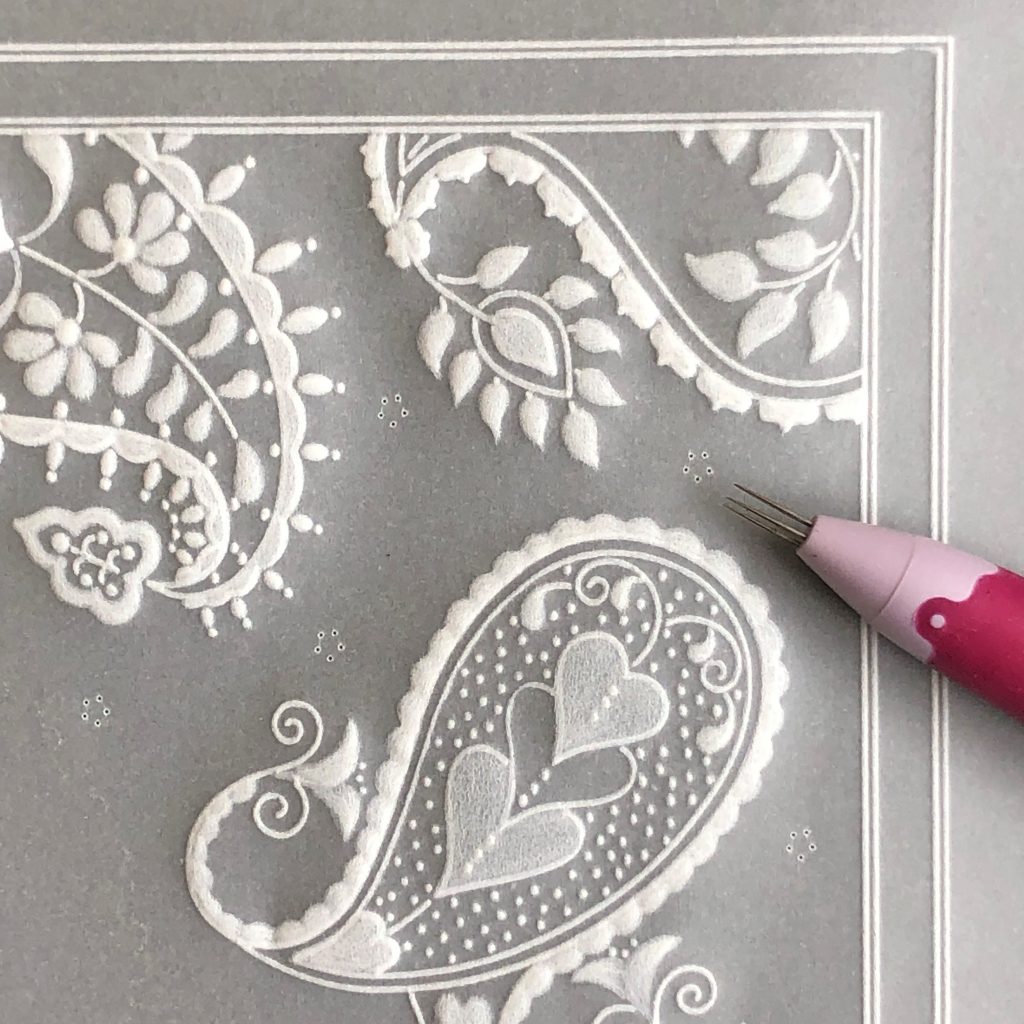
Step 4: Take your Teal parchment piece and working on the back, emboss your paisley design on half of the square only. You can overlap the pencil line a little in places to make the design more interesting. Try your own paisley combination or follow what I have done. Start with the first paisley design in the middle and then reposition your parchment and emboss in more shapes, overlapping in places. Find smaller paisley shapes within the larger paisley shapes. Use a 1mm ball tool if you want crisp white lines or you can use a 2mm ball tool on the parts that you want to emboss softly.
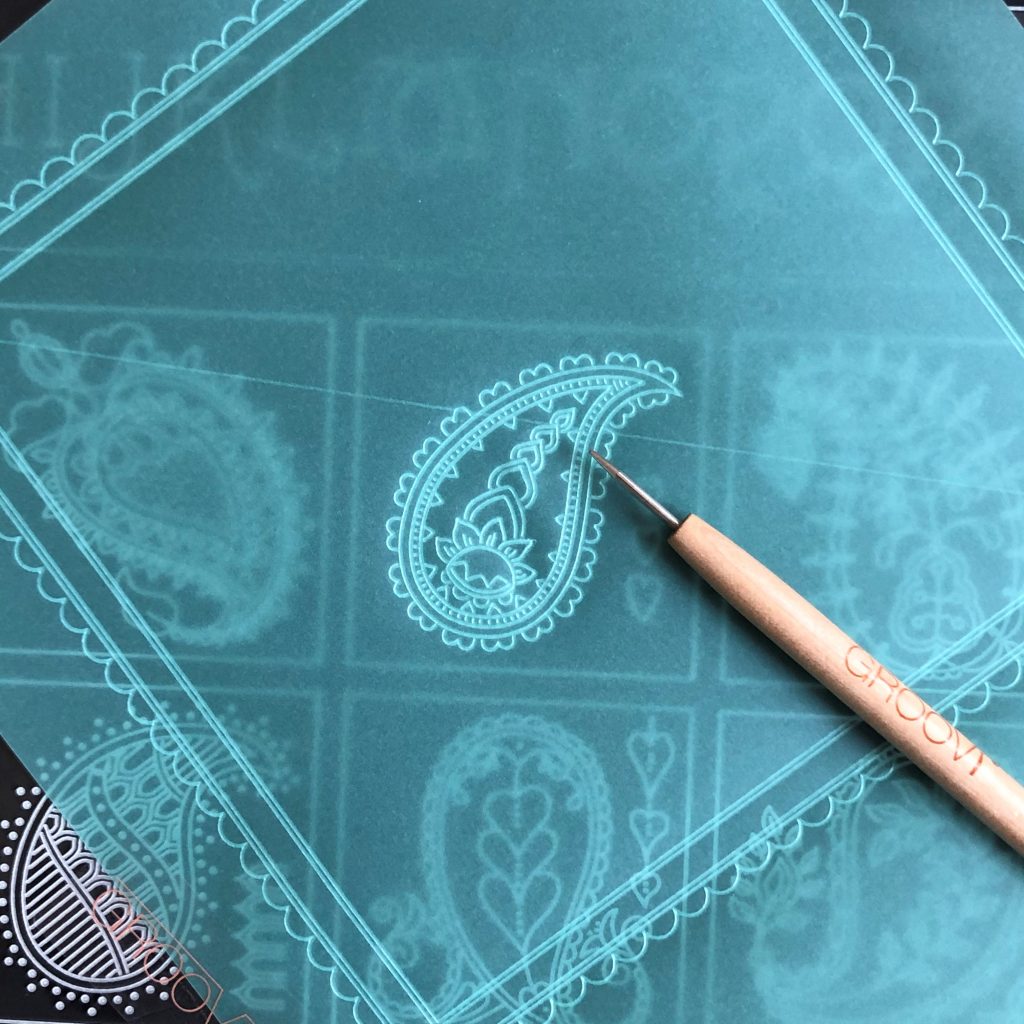
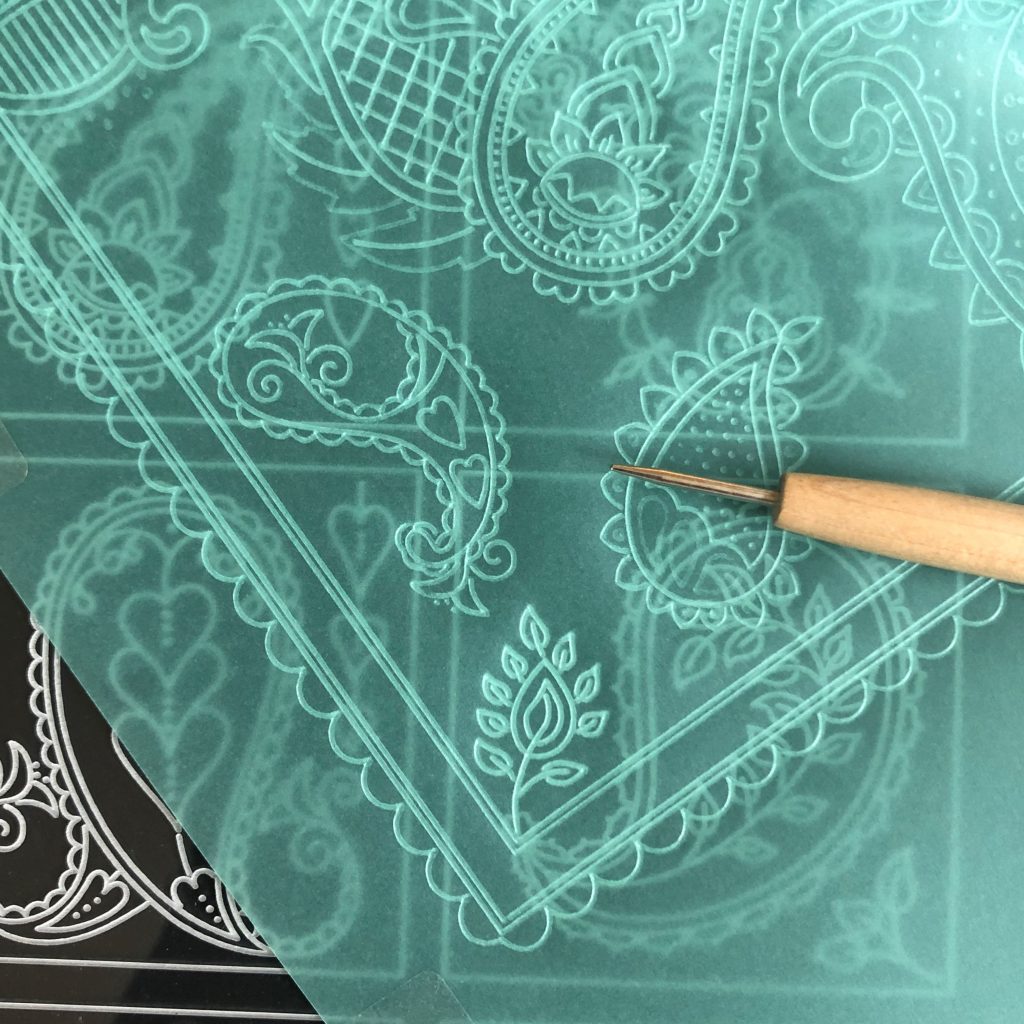
Step 5: Find smaller paisley shapes within the larger paisley shapes.
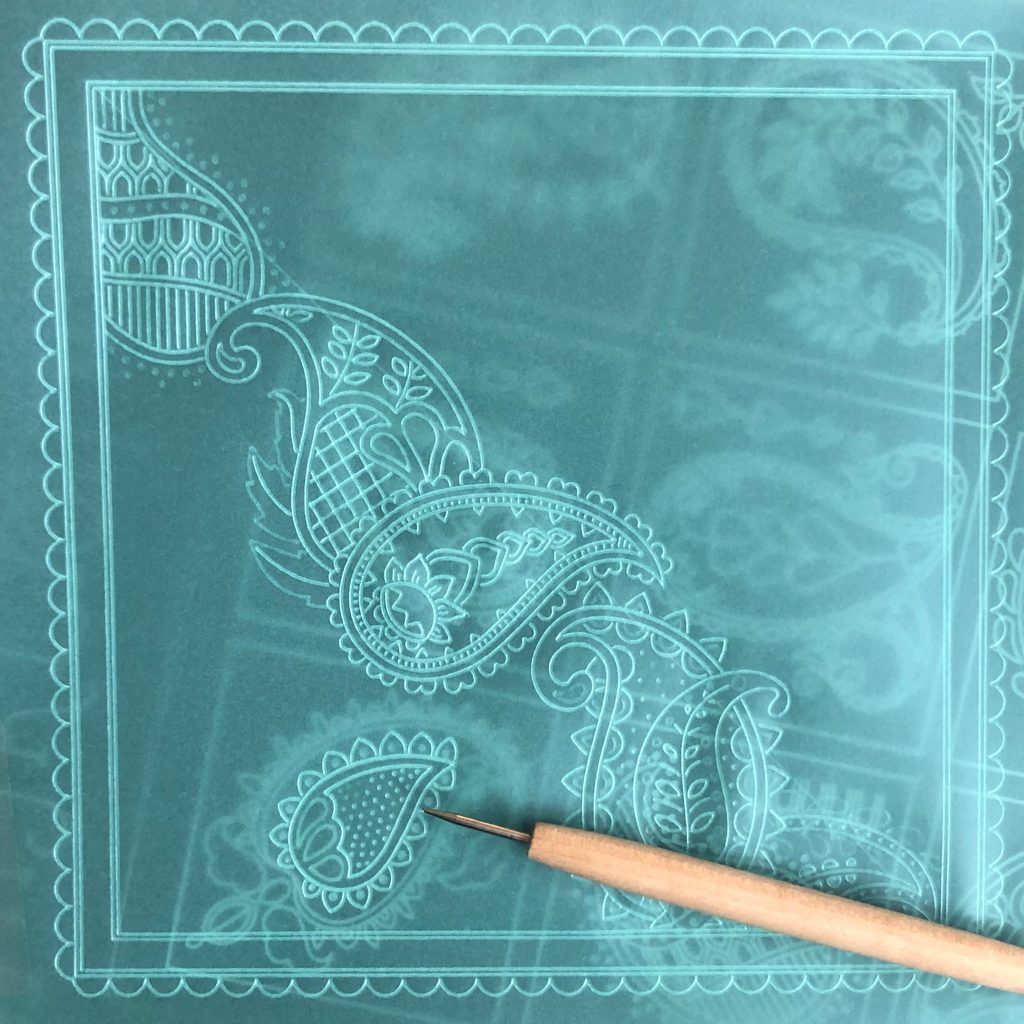
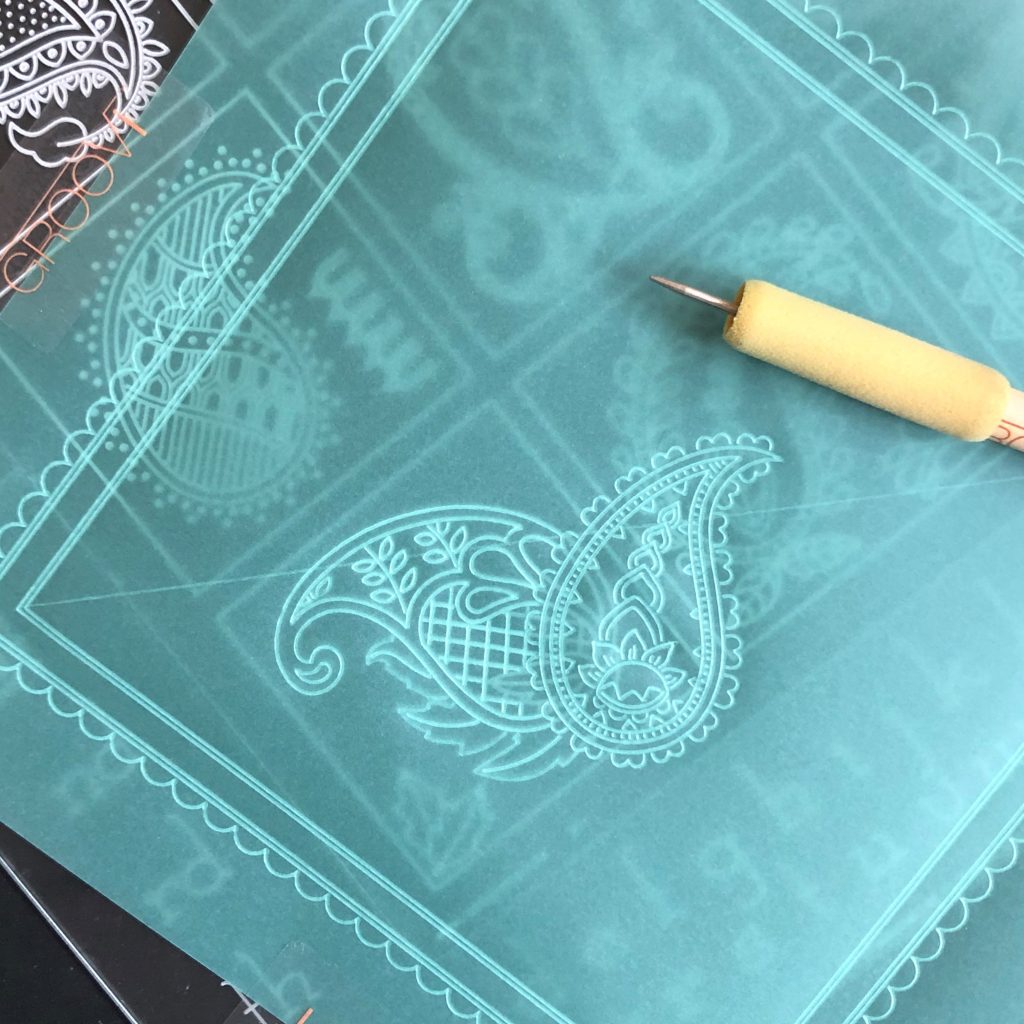
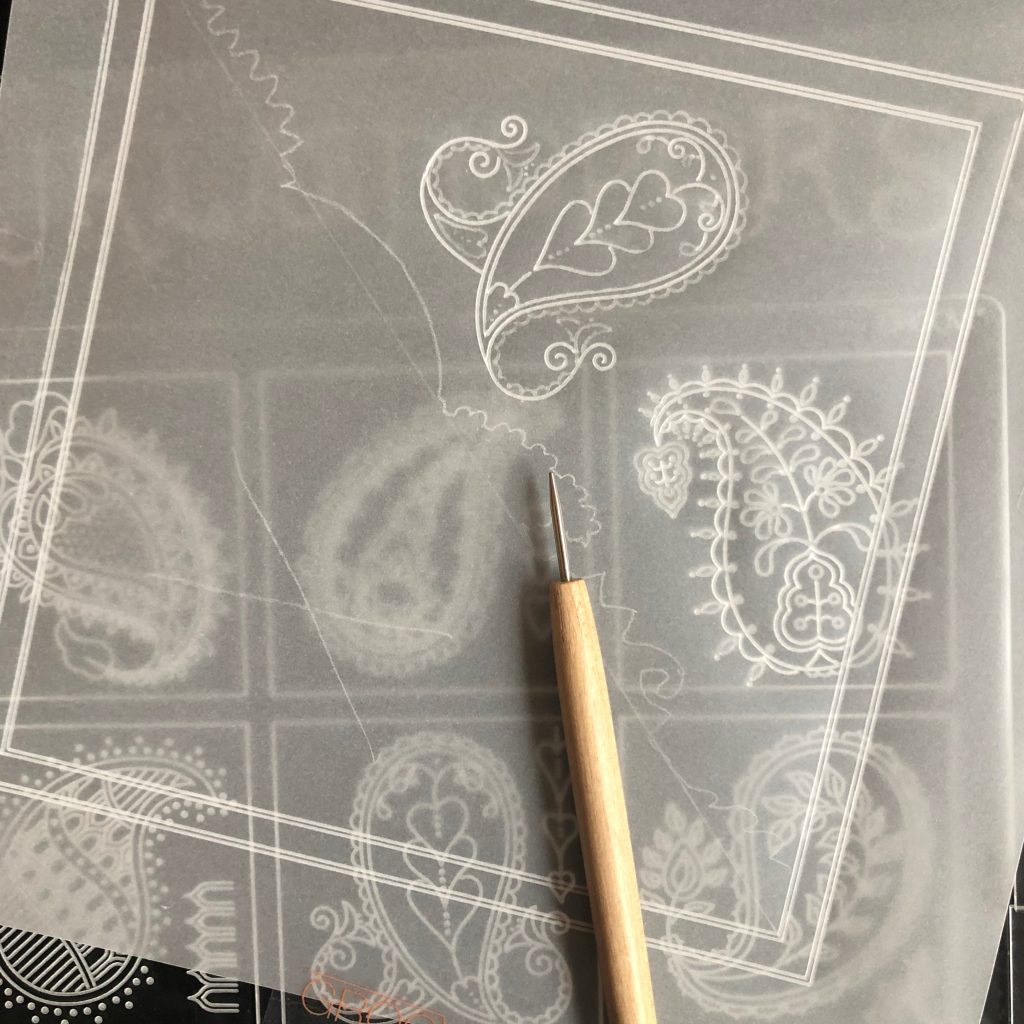
Step 6: You can take a basic paisley shape and decorate it with elements from the other paisley designs. You can also take a border and put it around the smaller shapes to build your own paisley design. Have a go, it’s good fun! You can always practice on a spare piece of parchment.
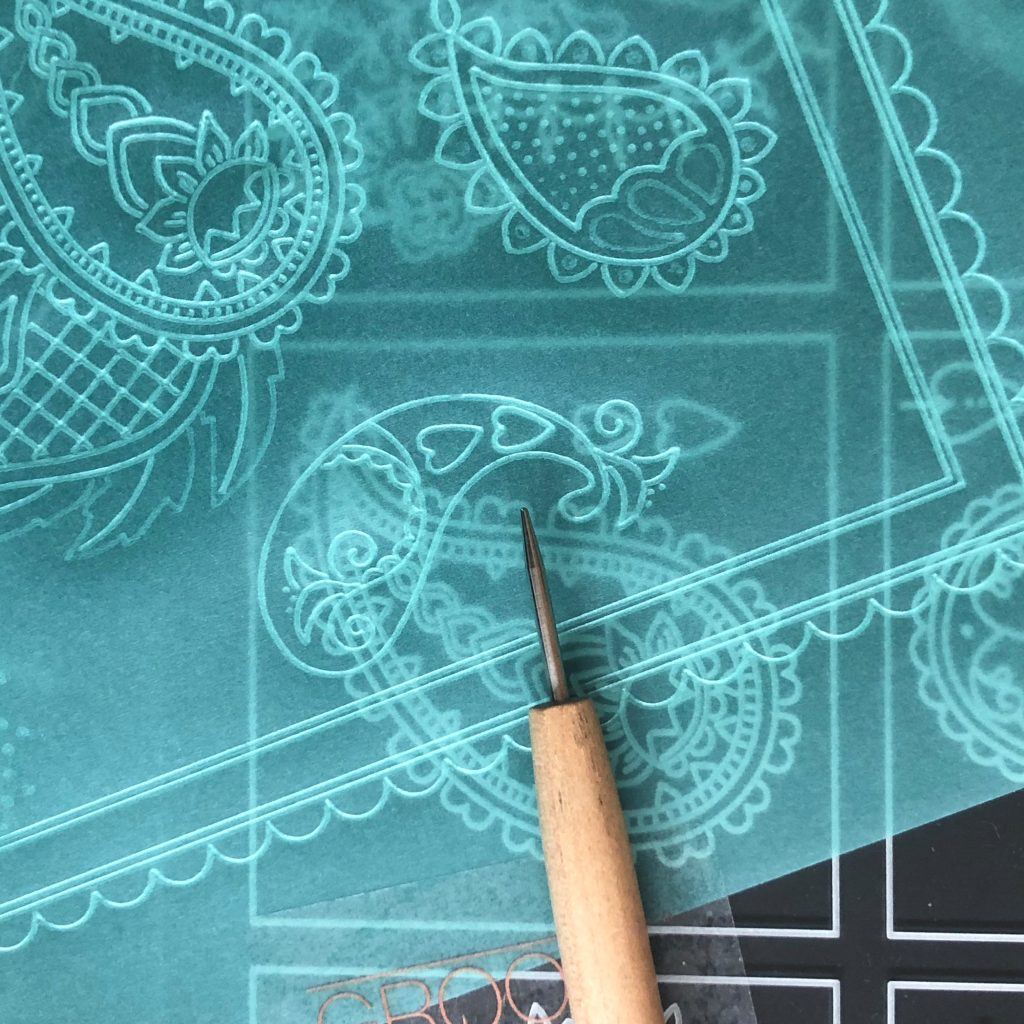
Step 7: Fill in with smaller elements from the plate; hearts, leaves etc, anything that you fancy.
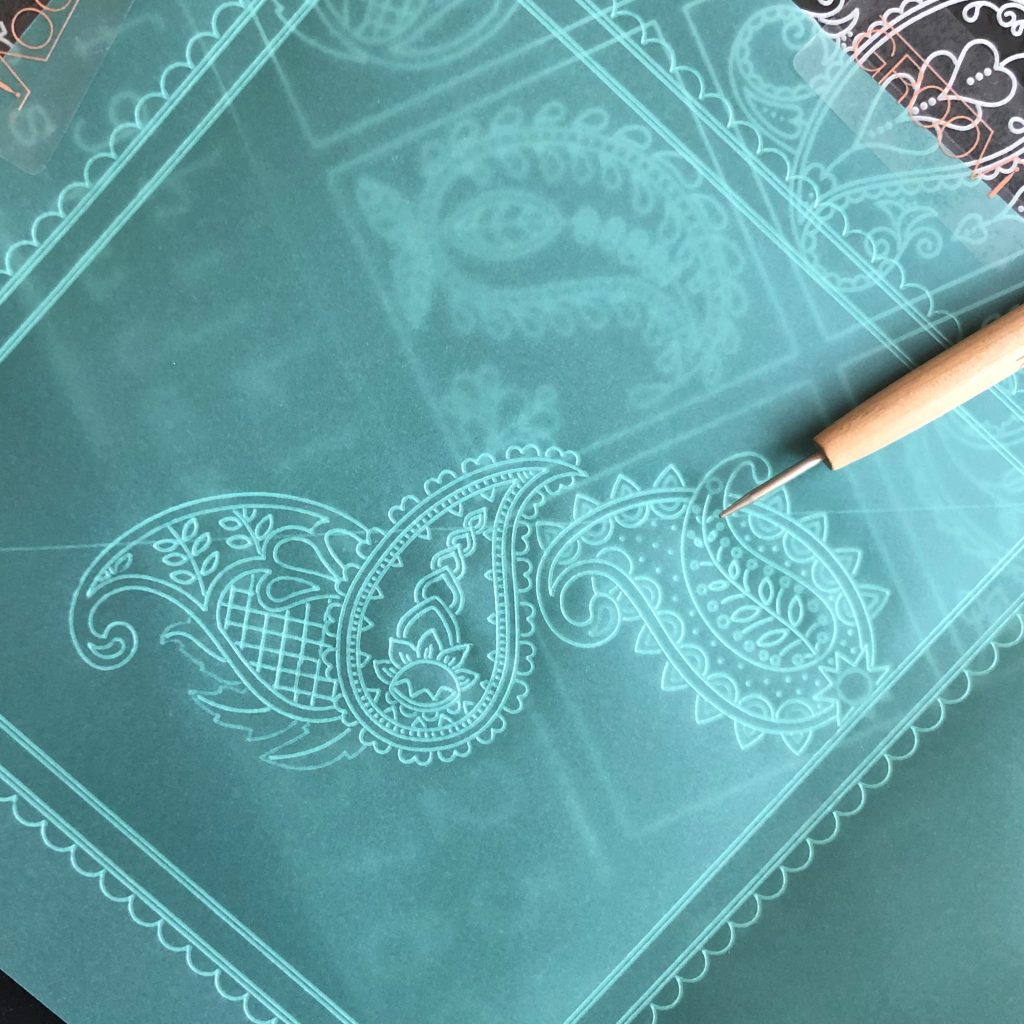
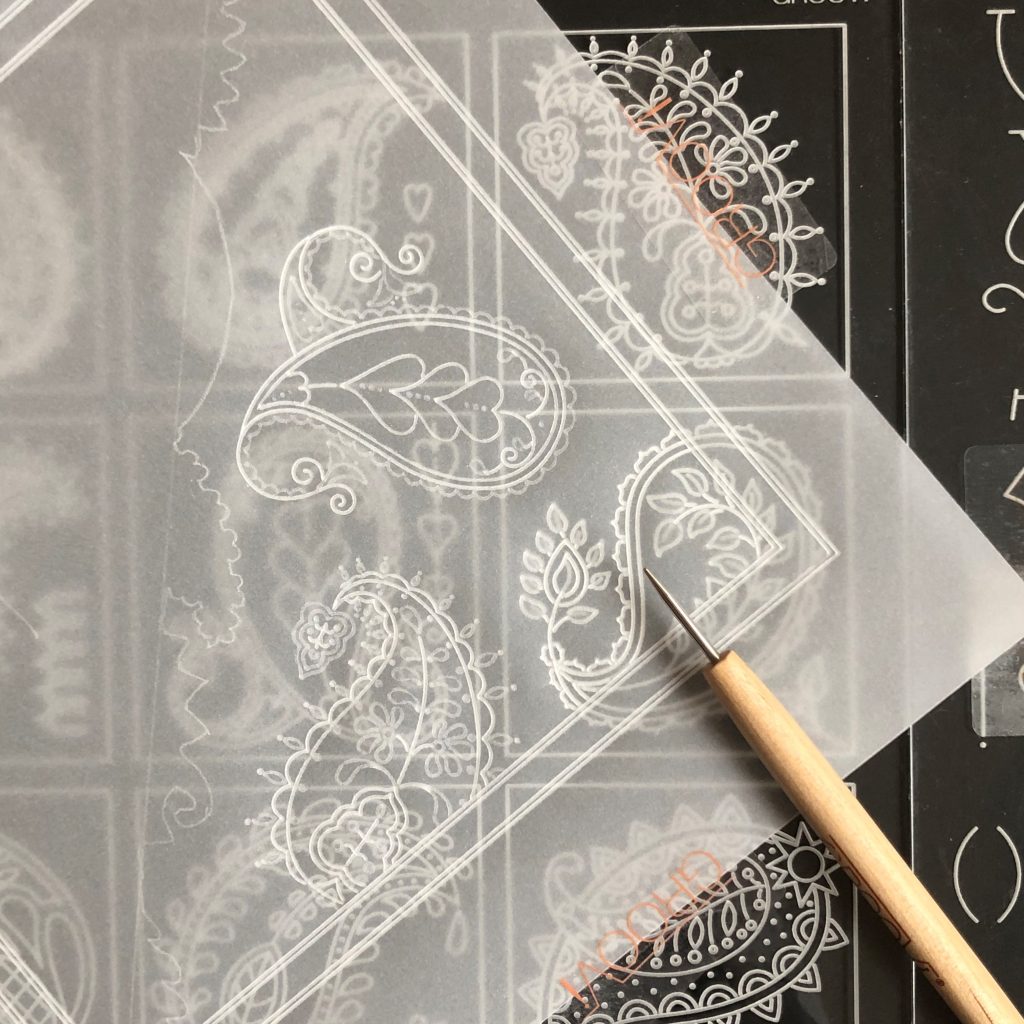
Step 8: Take your piece of teal parchment and lay it right side up on a hard surface. Place your piece of ordinary parchment on top, lining up the embossed squares and the pencil diagonals. Using a white pencil lightly mark out the edges of the paisley design. Put a white cross over the area that contains the paisley designs. Now you can decorate the remaining half of the square.
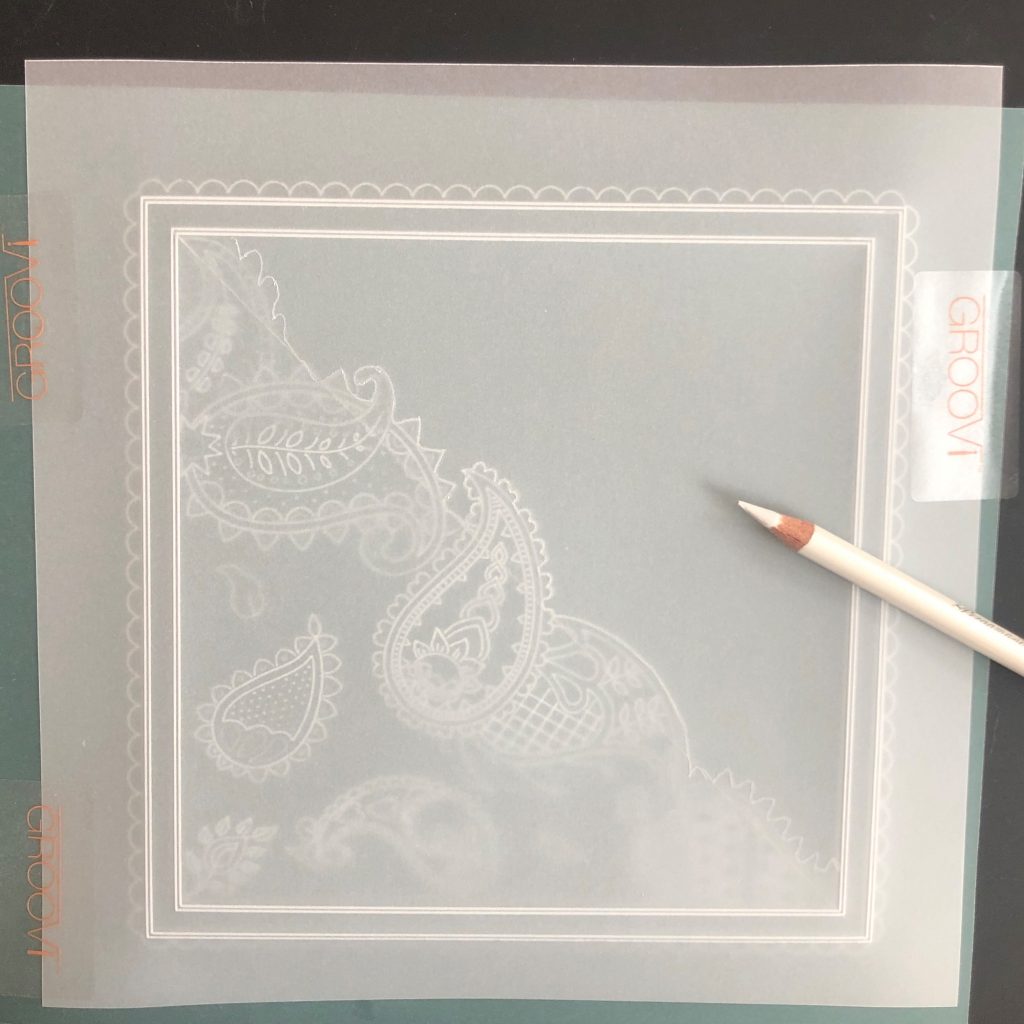
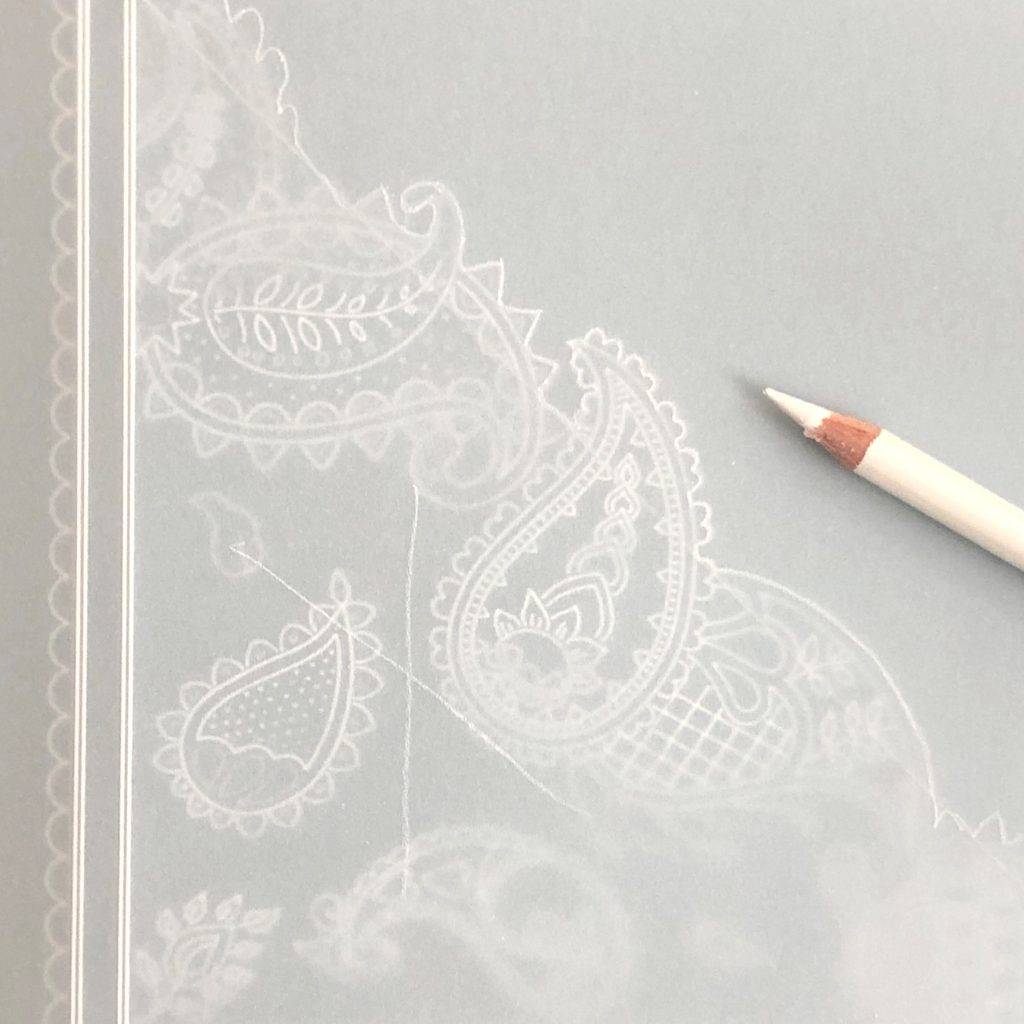
Step 9: Decorate with your paisley shapes as you did previously, but this time try not to go over the pencil line.
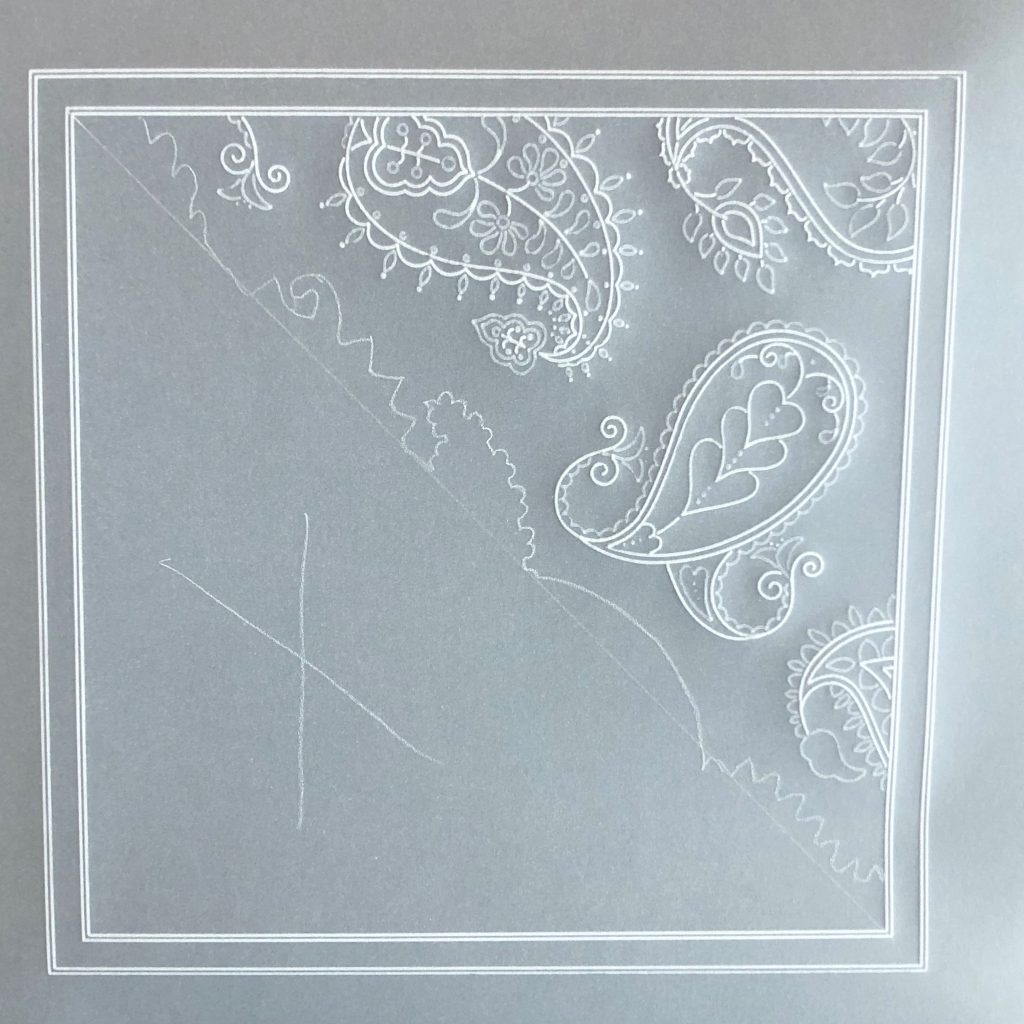
Don’t forget to rub out all of your pencil lines!
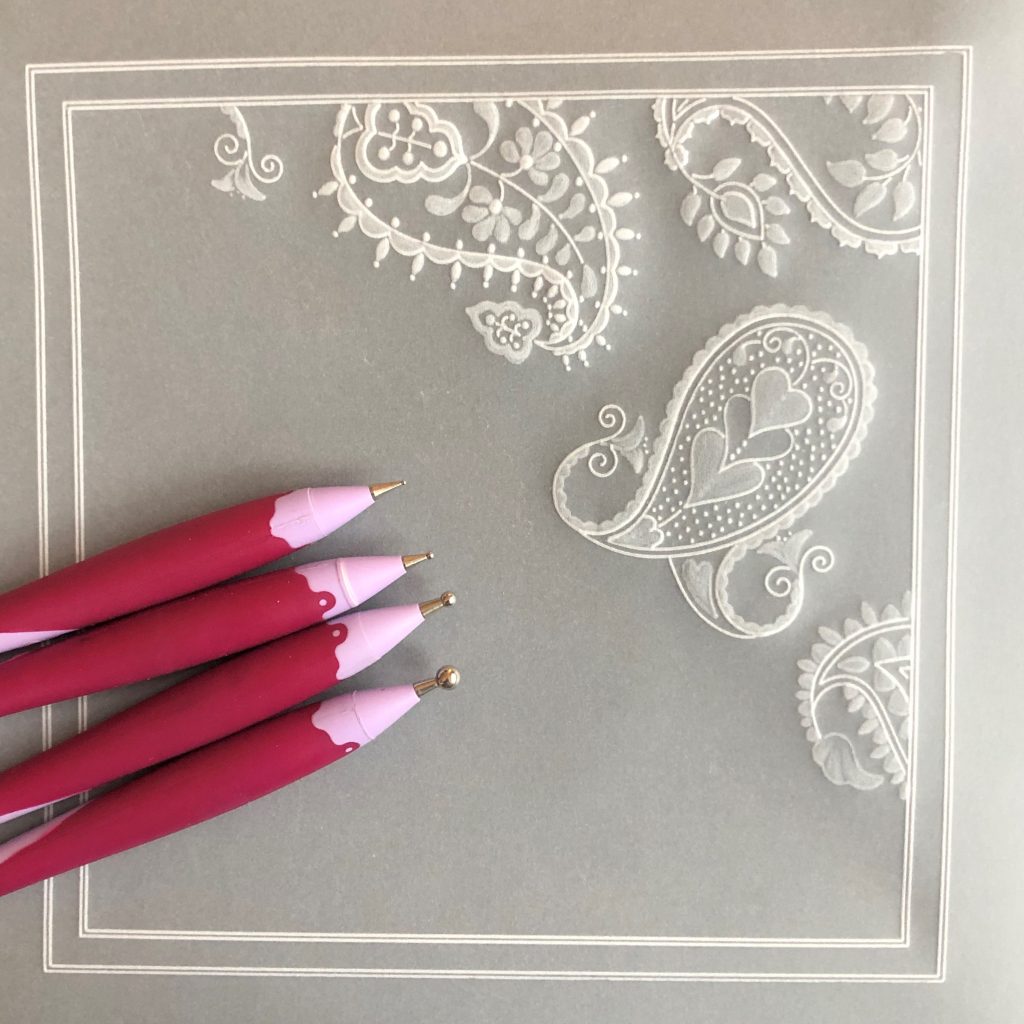
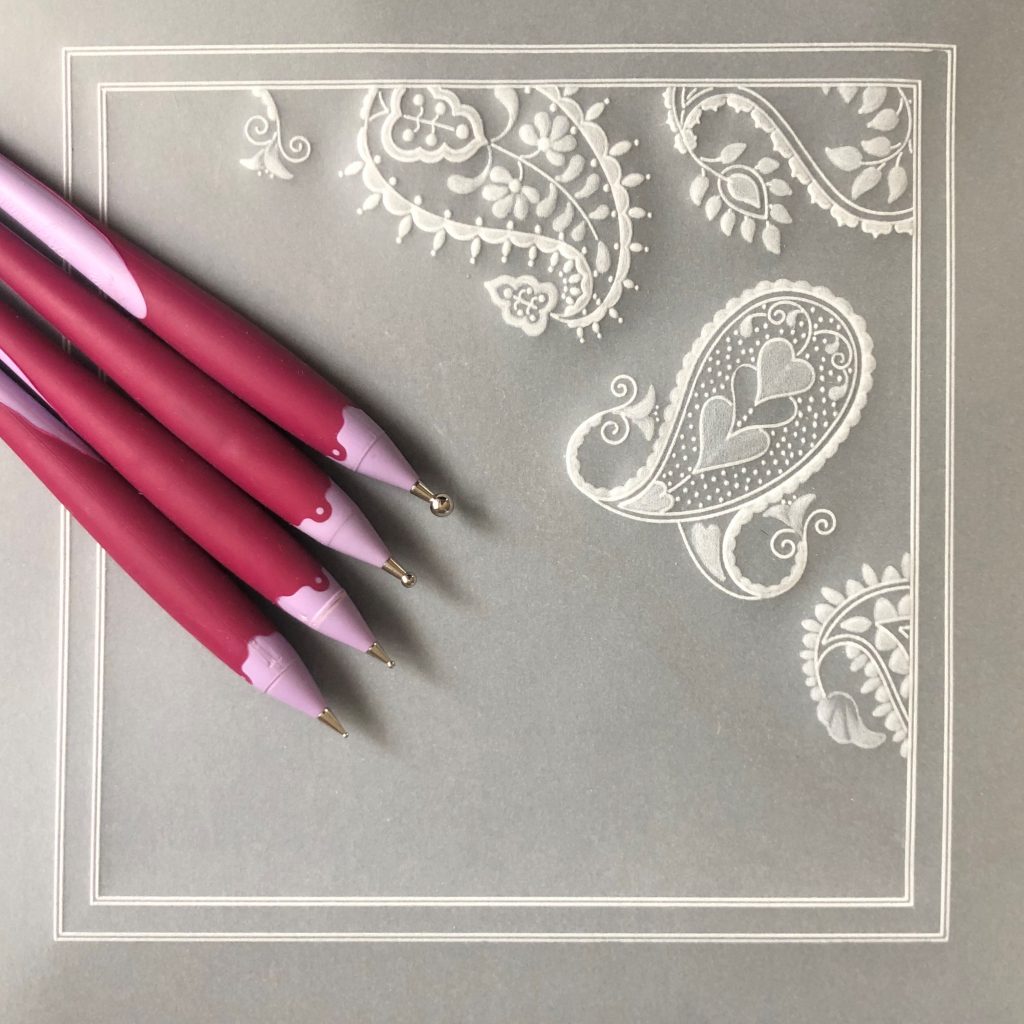
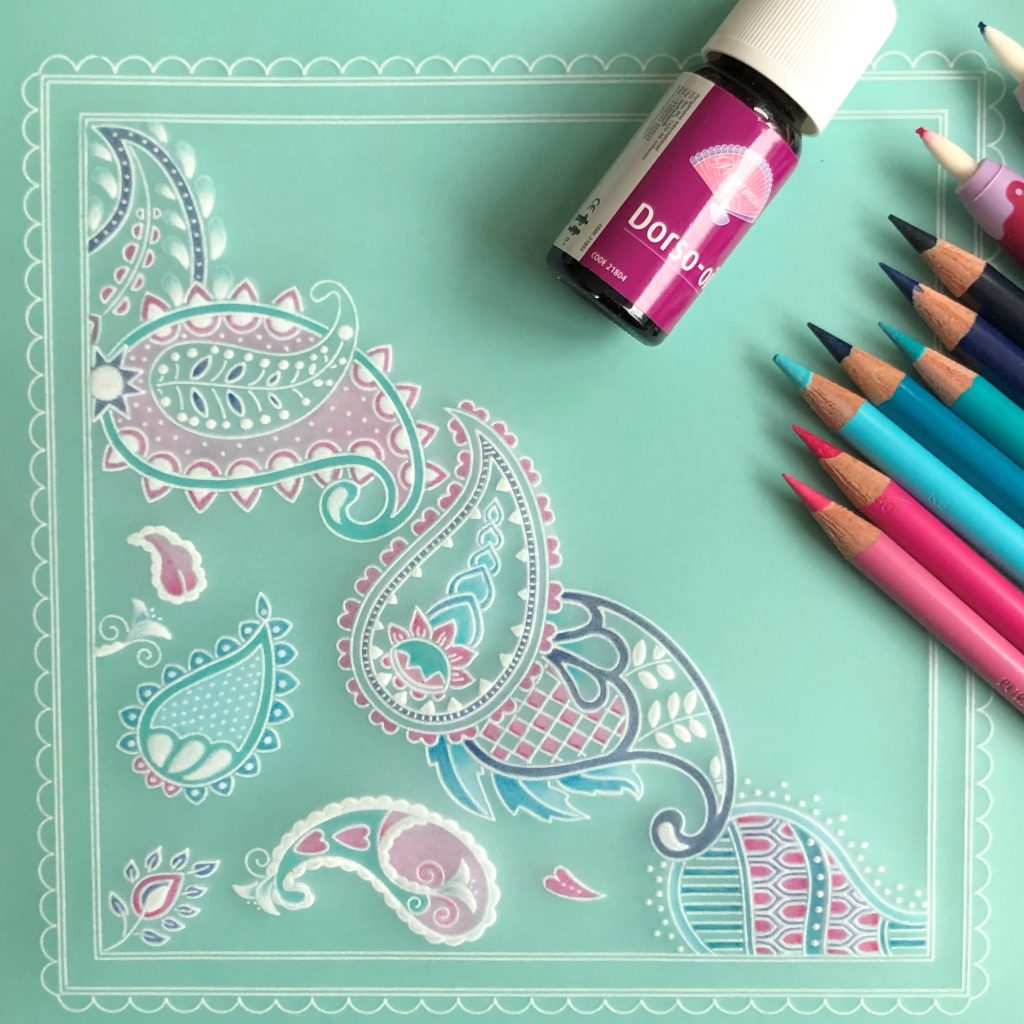
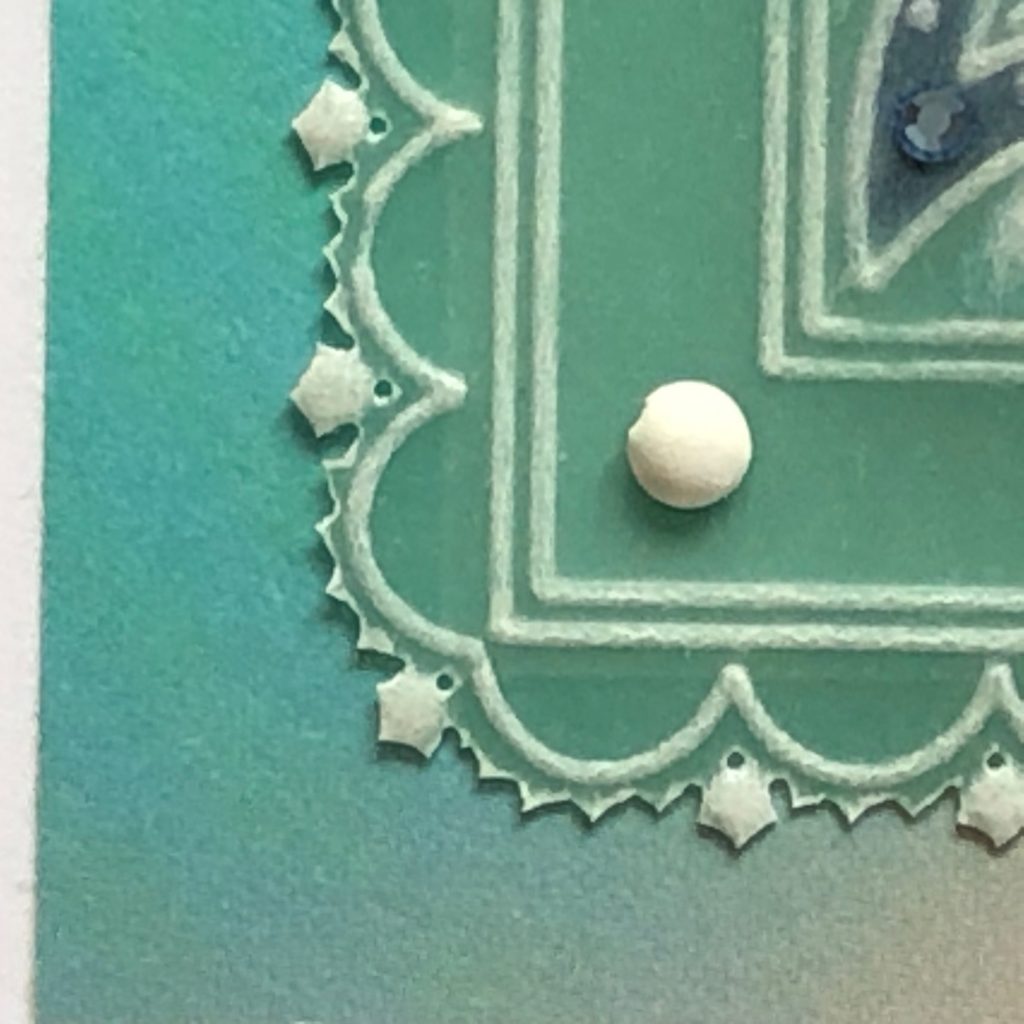
Step 10: Now for your embossing. Both pieces are embossed from the back. Place your parchment face down on your embossing mat. Emboss the white areas gently and in stages, leaving your parchment to rest in between layers. I used the 4.5mm, 3mm and 1.5mm ball tools. Always use the largest tool that you can fit in the area to start off your embossing. You can also do the colouring stage whilst you leave your parchment to rest.
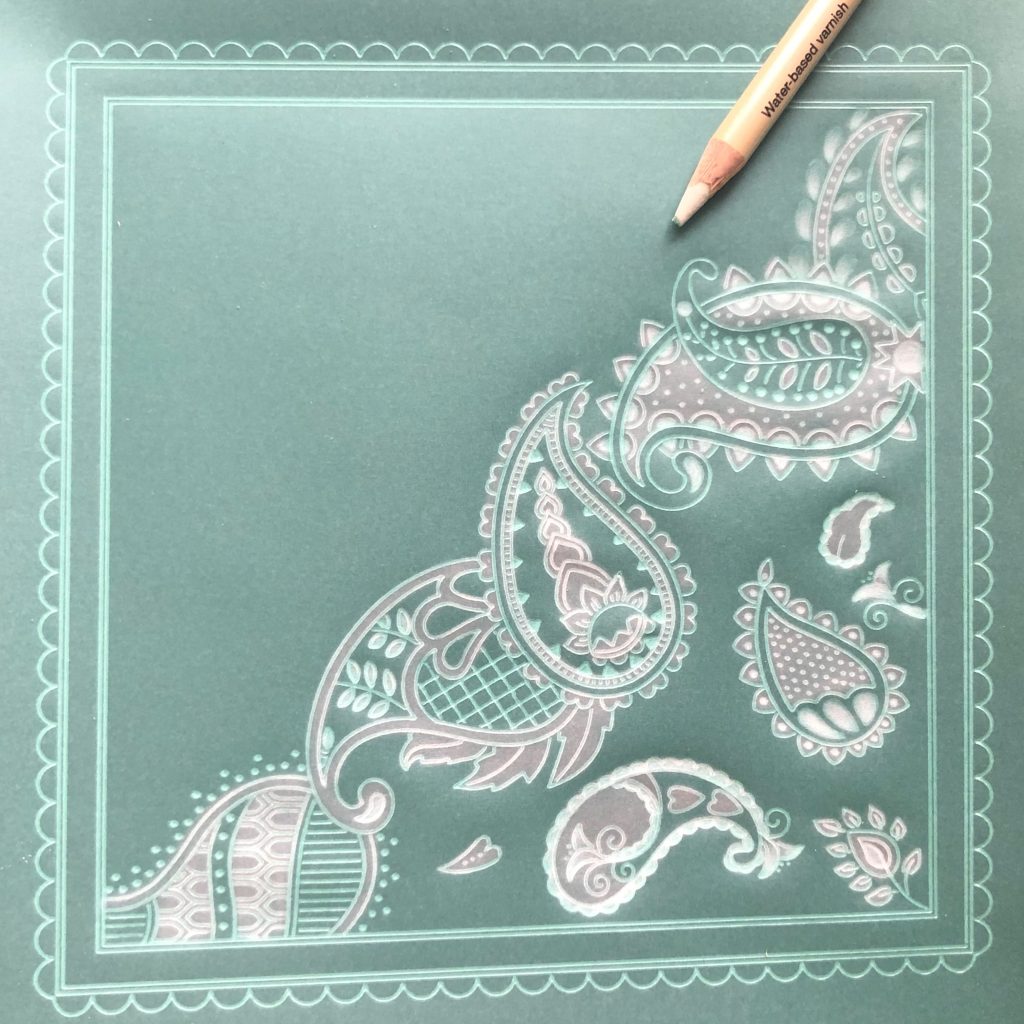
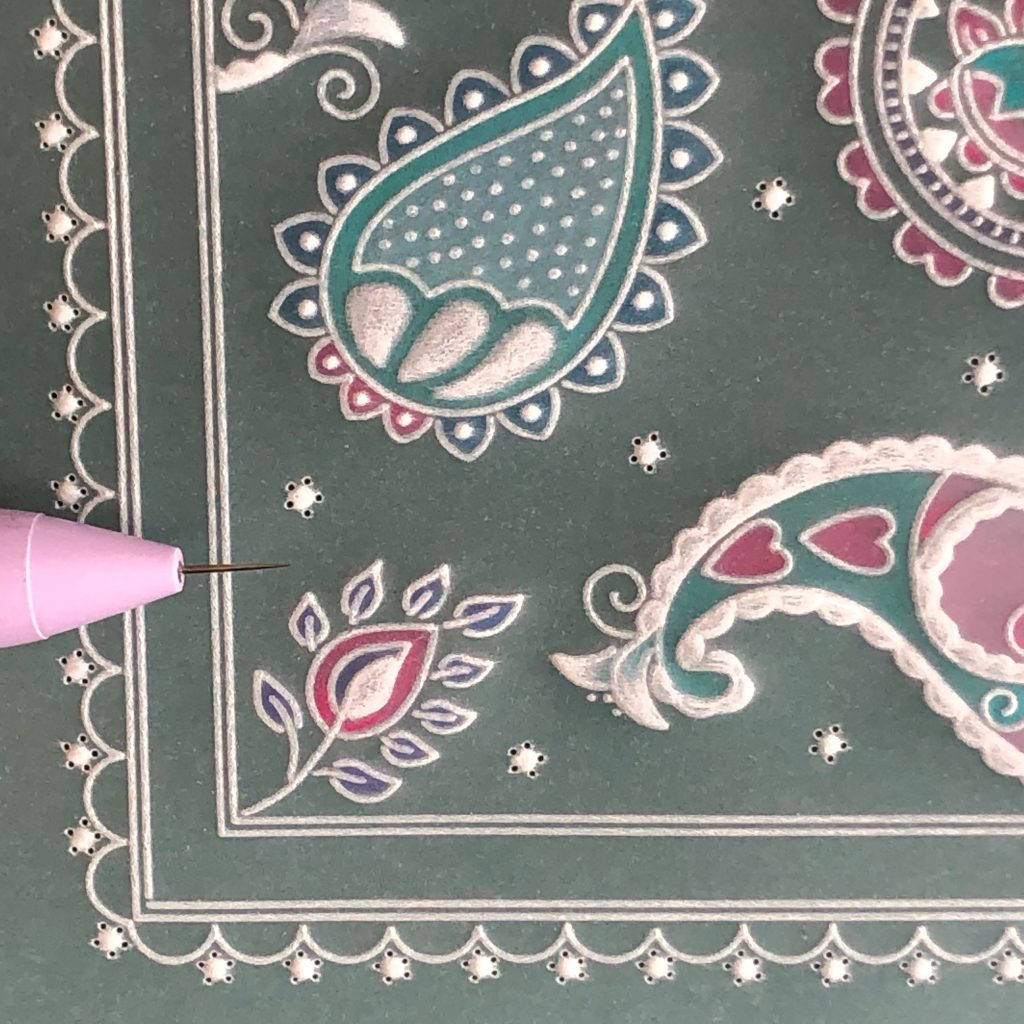
Step 11: Using the Faber Castell eraser, rub out the colour from the back of the teal parchment. Take out the colour only from the parts where you want to apply a contrast colour.
Step 12: Add more layers of embossing, using the smaller tools if you wish. Try and get a nice bright white but don’t rush this; it needs to be done gradually.
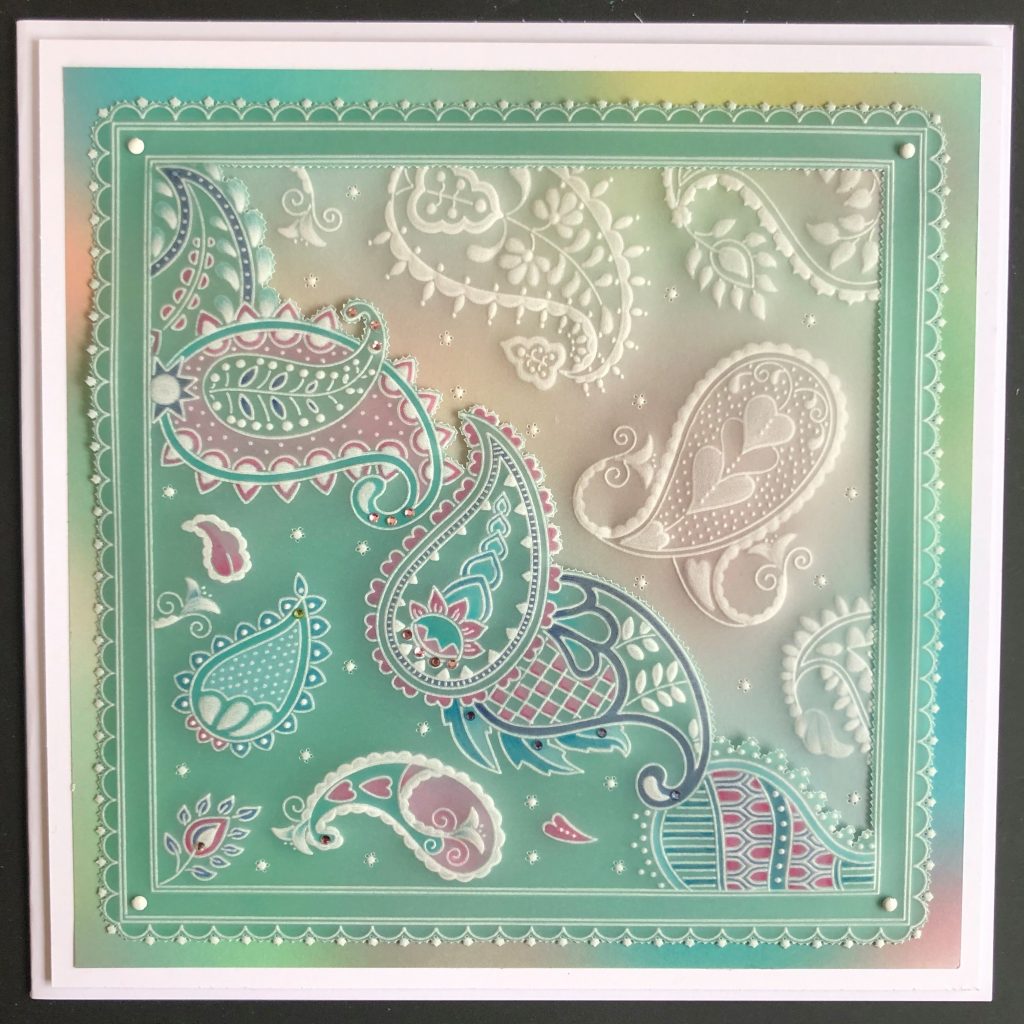
Step 13: Colour the rubbed out areas on the back of the parchment. Use blendable pencils and blend with the blending nibs and dorso oil. Always colour and blend on a hard surface. I used the following pencils:
Light Cobalt Turquoise 154
Cobalt Turquoise 153
Cobalt Green 156
Light Purple Pink 128
Fuchsia 123
Indanthrene Blue 247
Dark Indigo 157
When you have finished you can add a little shading on the front of your work if you wish, but make sure your pencils are really sharp and don’t overdo it.
Step 14: With the Five in a Circle needle tool perforate on the front of the parchment. Use the picot foam underneath your parchment and make sure your perforations are very shallow. Perforate around the scalloped border, placing one Five in a Circle perforation between each scallop. Try and get one of the needles to sit neatly into the V shape created where the scallops meet. Try not to perforate into the embossed line.
Also put some random perforations scattered between the paisley shapes on both pieces.
Step 15: Emboss a dot within each Five in a Circle perforation, using the 1.5mm ball tool, on the back of your parchment.

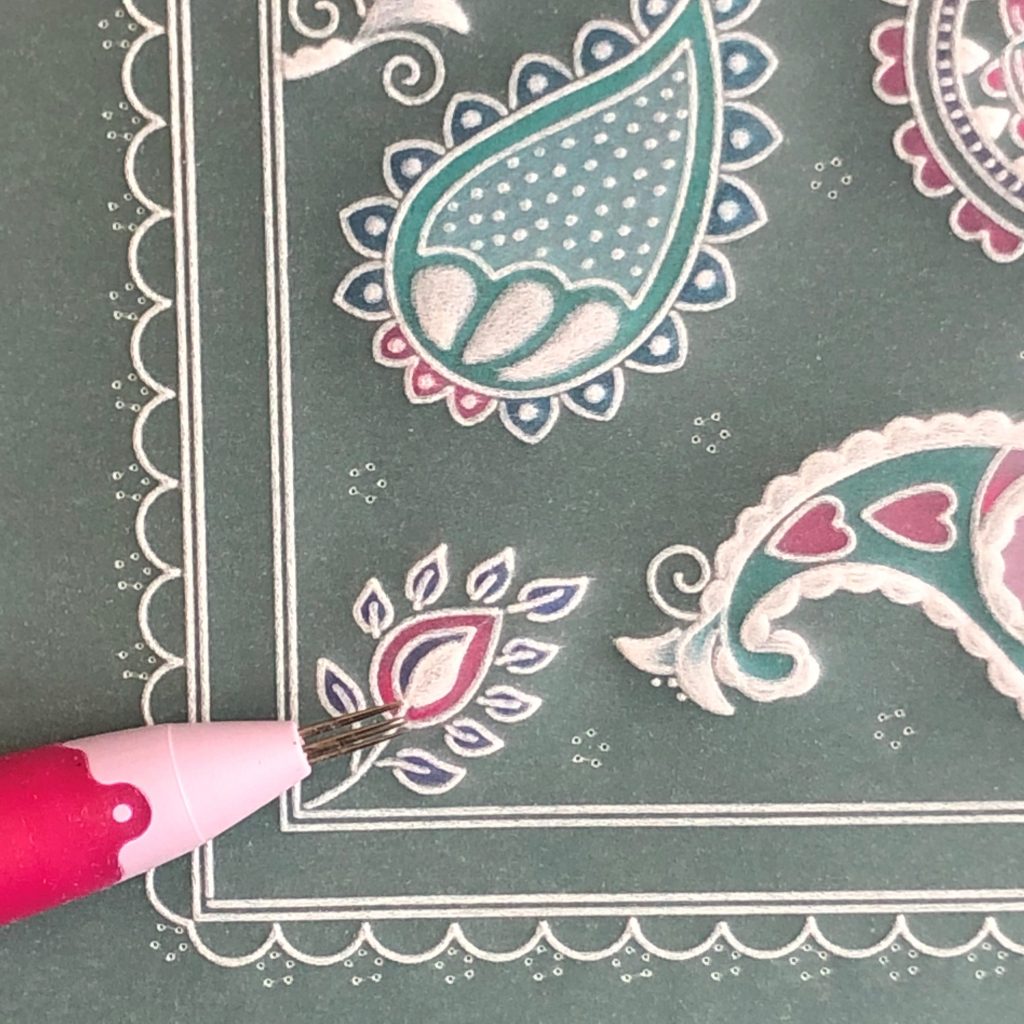
Step 16: Place your parchment right side up onto your thicker foam perforating mat. Now re-perforate each hole, more deeply this time, using the 1-needle perforating tool.
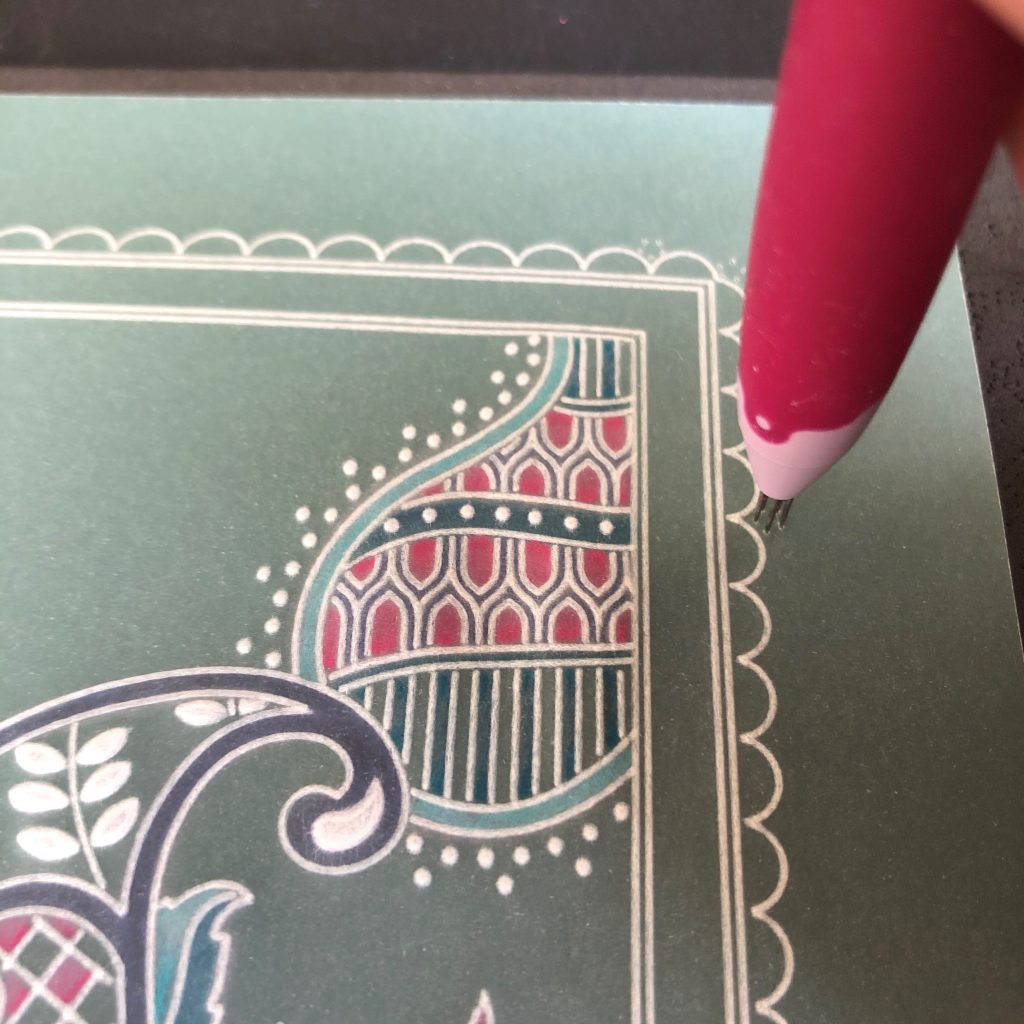
Step 17: Perforate using the 2-needle tool, around the outside of the design. Perforate between the Five in a Circle perforations to ensure a continuous cutting line. Also perforate inside the design around the undecorated corner of the inner square. This will be cut out in the next stage.

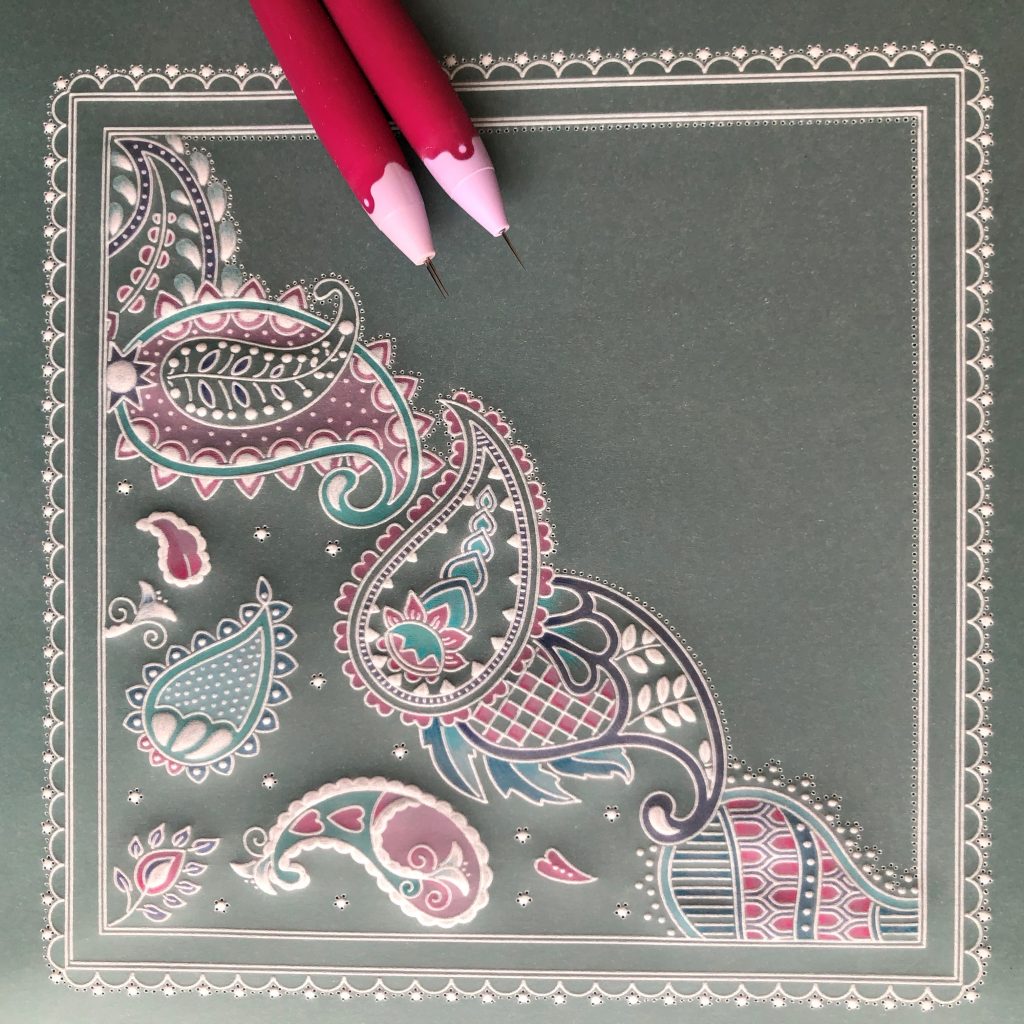
Step 18: Cut out the triangular shape within the design, using your Pergamano scissors. Then cut out around the outside border, making sure to be extra careful when cutting around the Five in a Circle perforations. Notice on the picture that they are only cut on four sides and have two sides that are left uncut to ensure the little dots can hold on for their dear lives!!!

Step 19: On your ordinary parchment piece, cut out around the outer border using a craft knife and Pergamano ruler.
Step 20: Cut a piece of the Northern Lights Designer Paper to measure 18.5cms x 18.5cms. Cut a piece of white card to measure 19.5cms x 19.5cms. Mat and layer all the pieces onto the card blank following the picture, and use the white brads and tape runner to secure. Add some of the Pergamano Crystal Blossom Crystals and stick them on using tiny dabs of Perga Glue.
Send only to someone who will appreciate all your hard work!!!
Linda Williams xxx
Absolutely beautiful, Linda, as ALWAYS! Thank you for sharing your techniques, tips and tricks with us! What a stunning piece of work.
I particularly love the Paisley plate. Don’t you love paisley? I remember my Mum doodling it a lot when I was a kid, so it doesn’t surprise me that she designed this plate. I also recall buying myself my first duvet at college that was, yep you guessed it, COVERED IN PAISLEY DESIGNS! These things rub off.
Fancy joining Linda and giving this one a go? We would love to see it! Don’t forget to send me your versions: Grace@claritystamp.com
As usual we have put everything that Linda has used for this project in one place over on the Clarity website HERE
On Tuesday, Linda will be joining Paul for our weekly Groovi Tuesday Facebook Live at 10am. You can catch up on all of the previous Groovi Tuesday Episodes over on our YouTube page HERE
Lotsa love, Grace & Linda xo
Clarity – The Home of Art, Craft and Well-Being.
Oh my word! What an amazing project. I think I will have to have a go when I get a bit of free time! Thank you Linda. You are always an inspiration and fountain of knowledge!
Thank you Grace for enabling this to be shared with us.
Love and hugs xxxx
This is gorgeous – love the colours!
Beautiful artwork Linda ! Thanks so much! xxx
Love the design. The plate is on order but not sure i would have time to make such a detailed card.
I could always aim to finish it before the end of the year!
Yep gotta try this 🥰
Sheer perfection!
Wow! Wondered where the design was taking me. Inspirational, now to have a go.
Absolutely stunning, I’ve put the plate onto my wish list. Thank you Linda 💖.
Looking forward to Tuesday x
Thanks Grace x
Thank you Linda for your explanation and looking forward to Tuesday.
Stay save Grace and Linda.
Lots of love, Trijntje Huppel
Hi Grace, Wow Linda, thank you for this tutorial, it is truly amazing, the paisley shape is one of my favourites and I absolutely love this creation.
Lots of love from Patricia xx
Wow! I don’t think I could bear to give this to anyone. I’d have to keep it for myself! I don’t have the paisley plate but I can see how you could adapt other plates to do this design.
Whew just finished it got to mount it and I’m done, lovely project indeed.