
Clarity’s Blog Tutorial: How To Use The Picot Oval Dies To Create A Handbag
Hello hello! Grace here 🙂
I hope you’re having a solid week. It’s been a busy one at Clarity Towers! As usual really…
We’re so happy that you’re enjoying the bloggy tutorials as much as we are! But not surprised. What a talented bunch of crafters we’re blessed with at Clarity. The artwork they create is out of this world! Speaking of out of this world, our next tutor is exactly that.
Linda Williams.
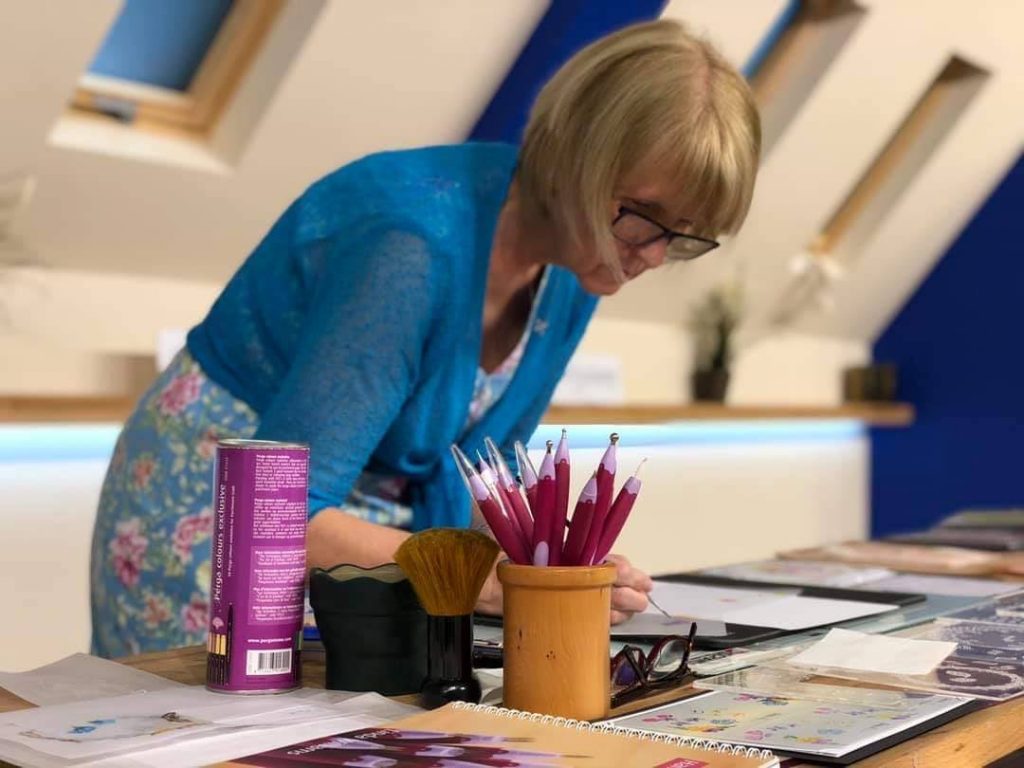
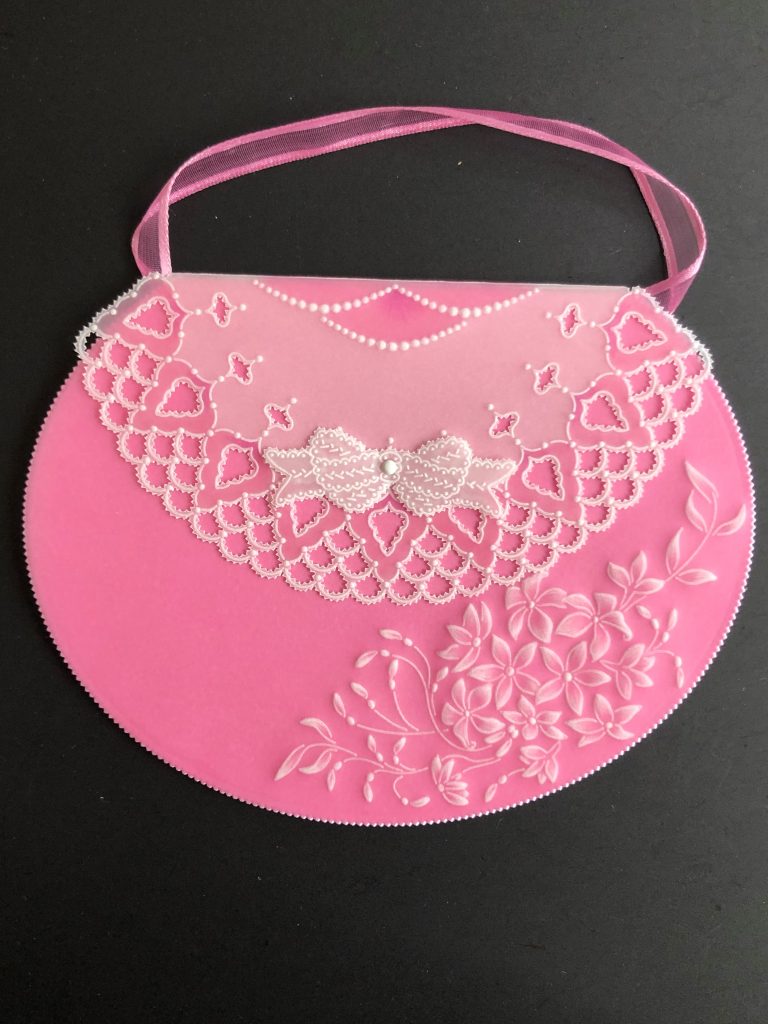
She’s incredible. Her and Mum are besties, so of course she wanted in on the fun too! And has been generous enough to gift us with this epic handbag tutorial. Check it out!
Ingredients
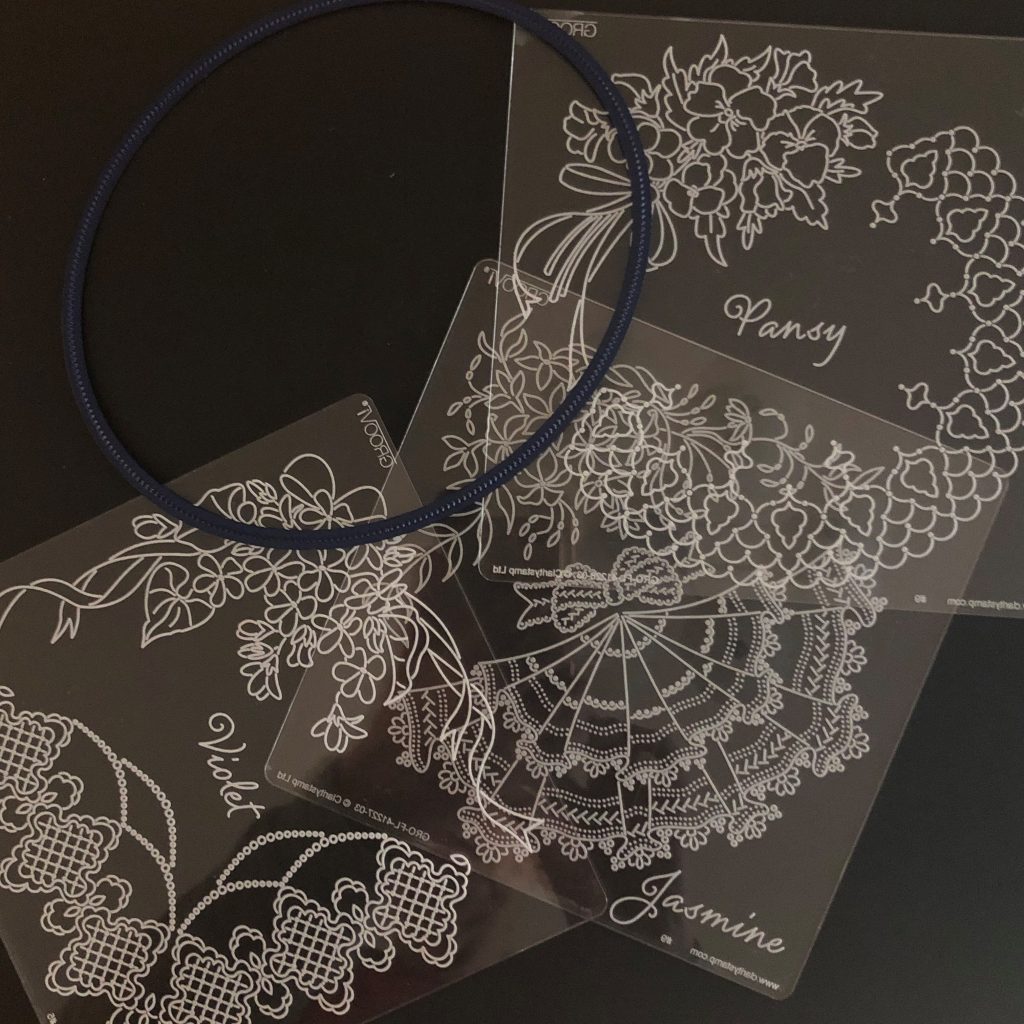
Linda’s Jasmine & Lace A5 Square Groovi Plate (GRO-FL-41227-03)
Linda’s Violet & Lace A5 Square Groovi Plate (GRO-FL-41230-03)
Linda’s Pansy & Lace A5 Square Groovi Plate (GRO-FL-41228-03)
A5 square plate mate (GRO-MA-40002-07)
Fresh Cut Nested Oval Picot Dies (ACC-DI-30681-56)
Pergamano Ruler & Groovi Grip (ACC-MS-30740-XX)
Picot Foam (GRO-AC-40625-XX)
Super Foam (GRO-AC-40603-A4)
Pergamano Embossing Mat (PER-AC-70075-XX)
No 1 and 2 Groovi Embossing Tool (GRO-AC-40026-XX)
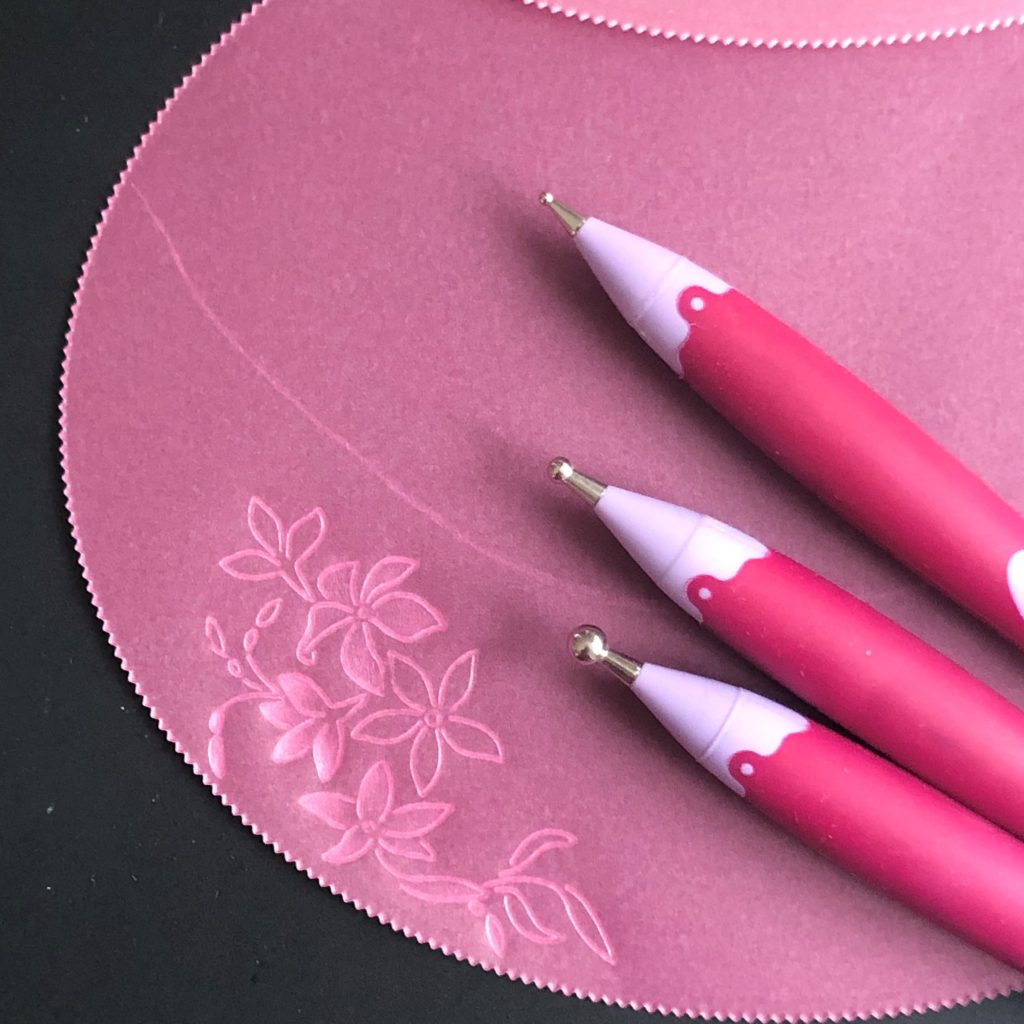
Embossing tools 4.5mm, 3mm, 1.5mm (PER-TO-70244-XX)
Pergamano 2-needle perforating tool (PER-TO-70245-XX)
Pergamano Scissors or Snips
Pergamano Dorso oil (PER-CO-70066-XX)
Pergamano Blending pen and nibs (PER-AC-70300-XX)
Groovi mix mat (PER-AC-70304-XX)
1 x white Pergamano Brads (PER-AC-70269-XX)
Groovi Guard (GRO-AC-40345-XX)
Groovi Tabs (GRO-AC-40437-XX)
Perga liner pencils (PER-CO-70063-XX)
Faber-Castell Eraser (ACC-PE-30611-XX)
Plain Groovi Parchment Paper (GRO-AC-40024-XX)
Rose Pink Groovi Parchment Paper (GRO-AC-40401-A4)
White Card stock (ACC-CA-30620-88)
Double Sided Tape (ACC-AD-30375-XX)
Masking tape (ACC-AD-30109-XX)
Ribbon (ACC-MS-31107-XX)
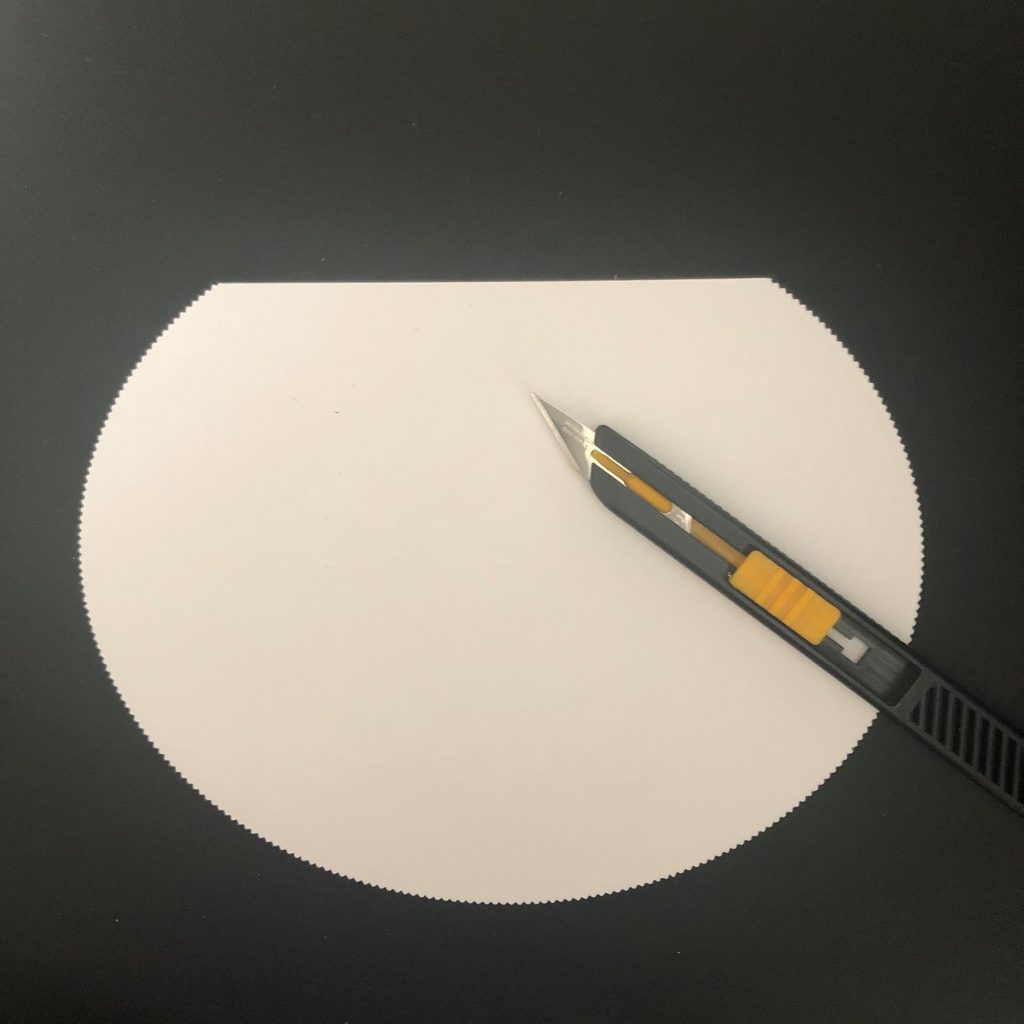
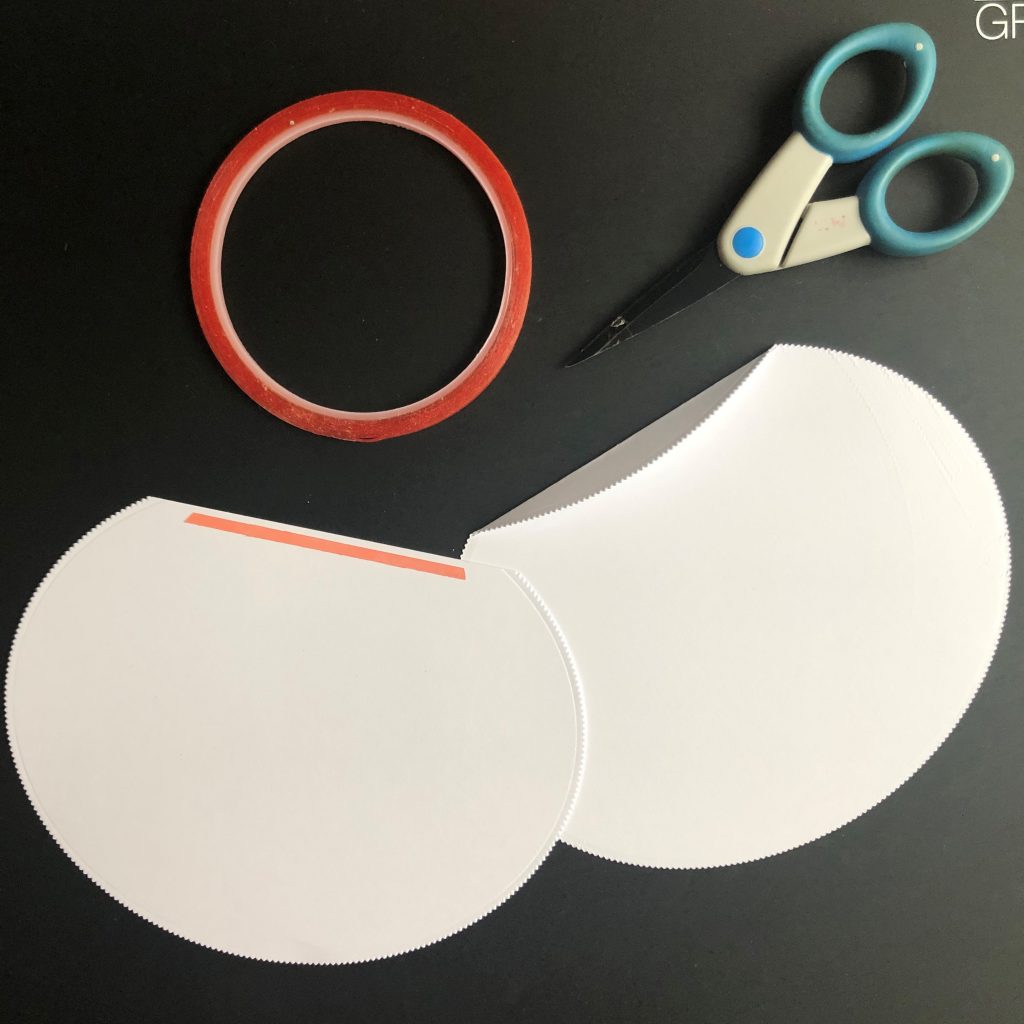
Step 1 –
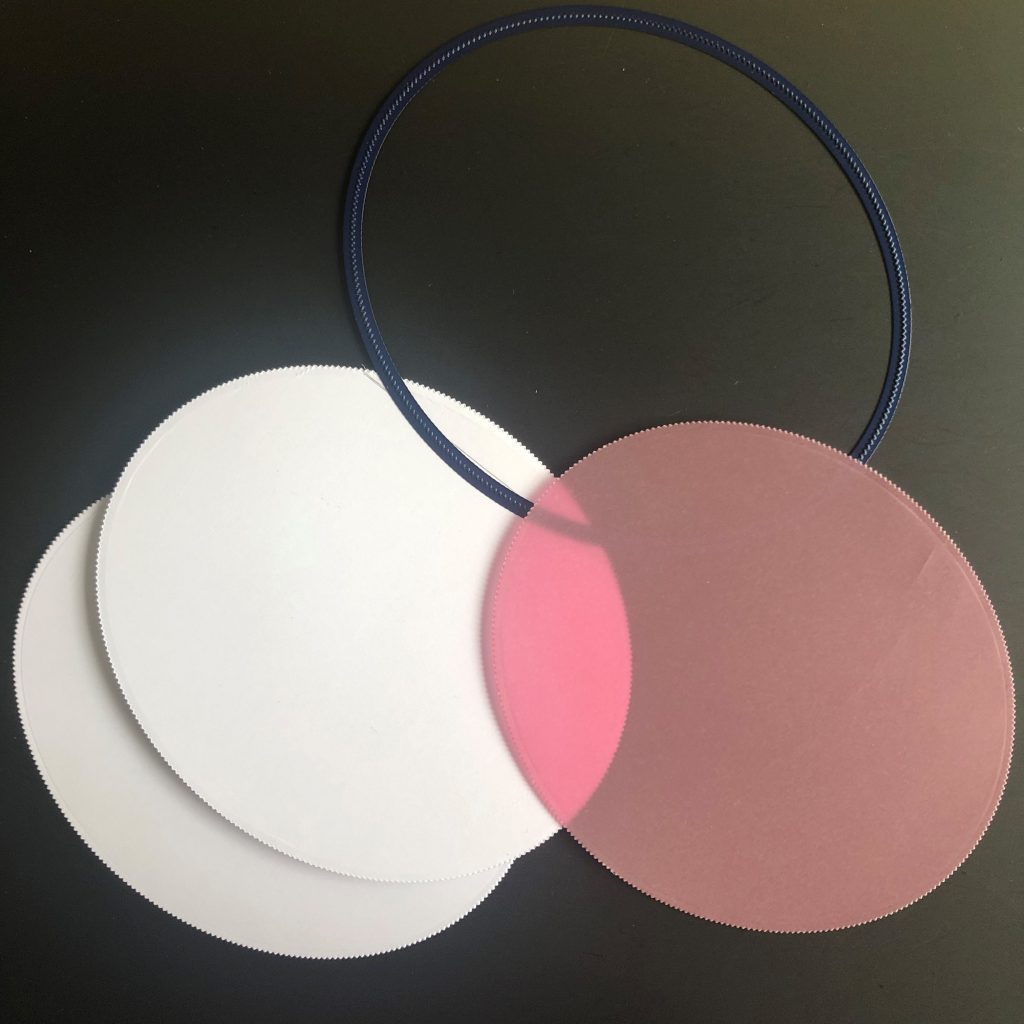
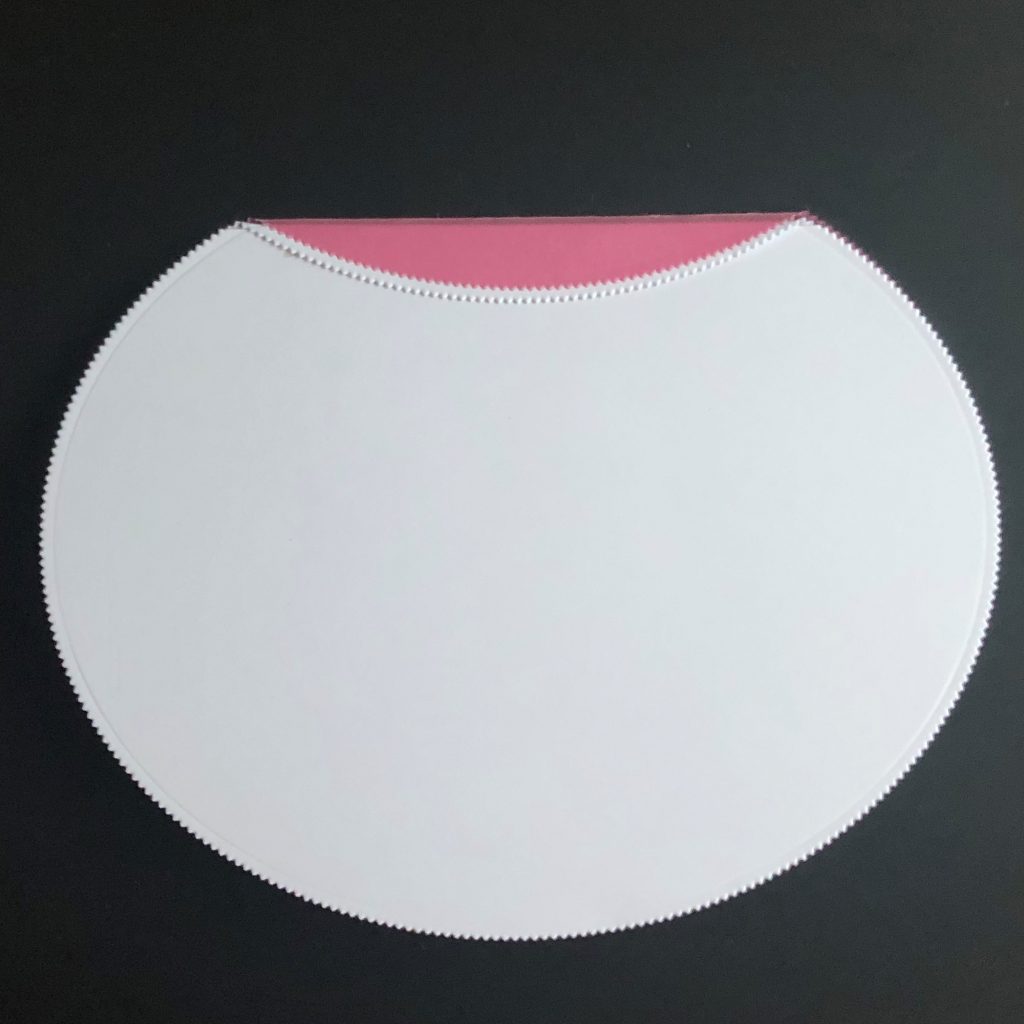
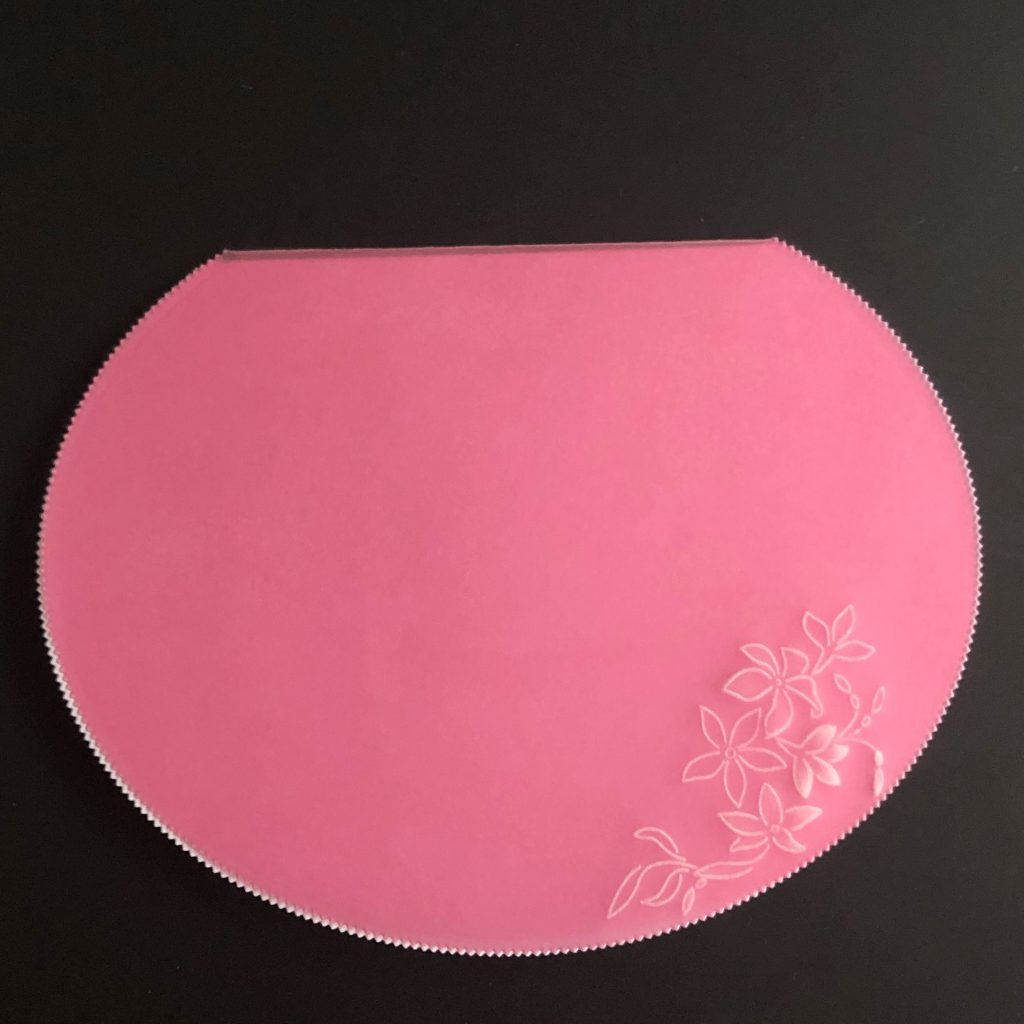
Using the largest of the oval picot dies cut out two from white card and one from Rose Pink parchment.
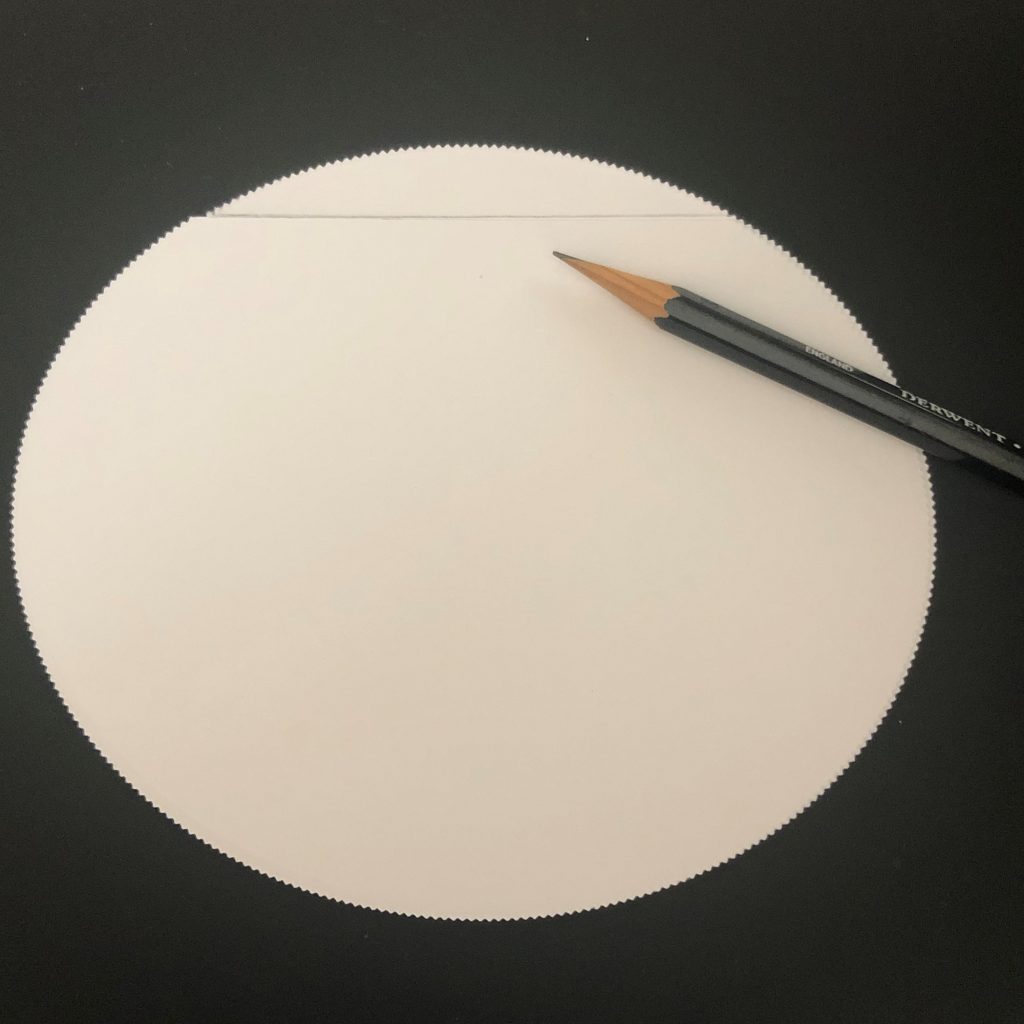
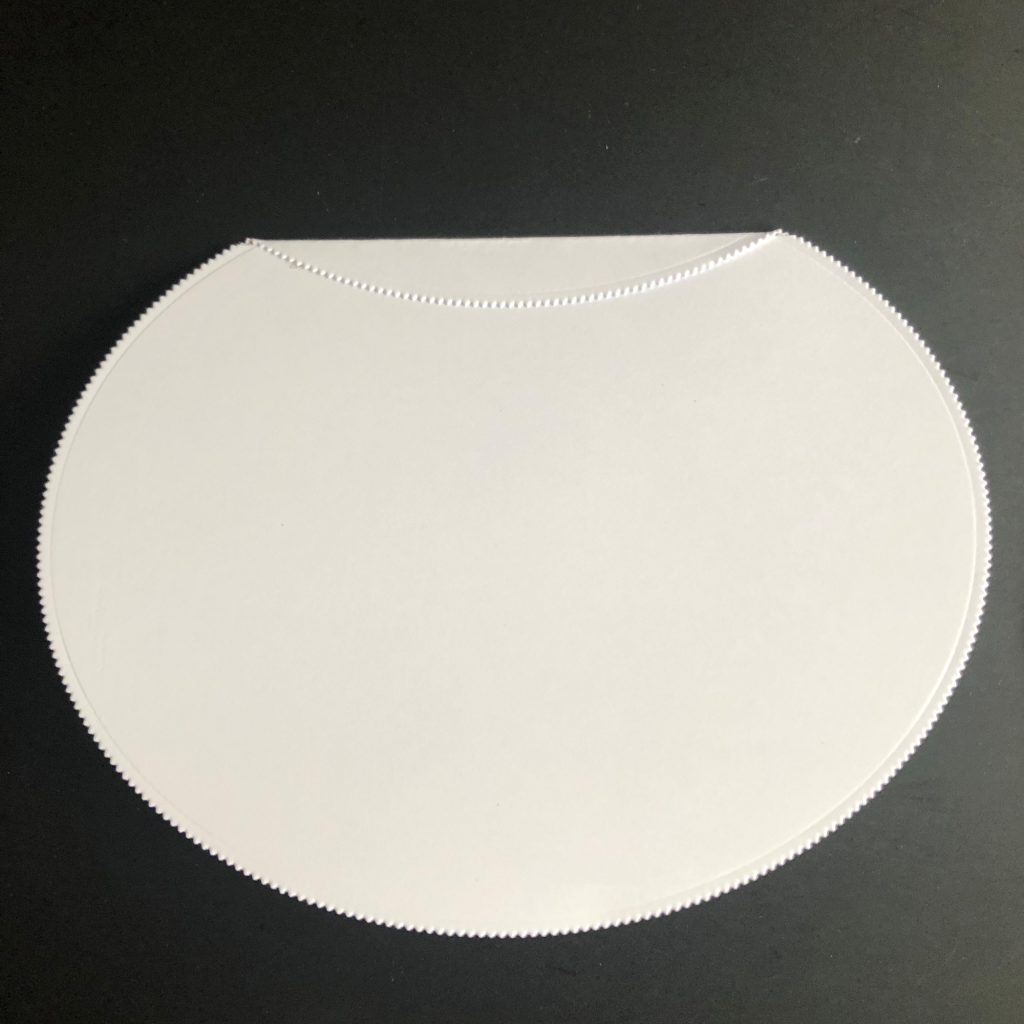
Step 2 –
Take one of the card ovals and using a pencil and a ruler draw a line about 1cm in from the longest edge (2a).
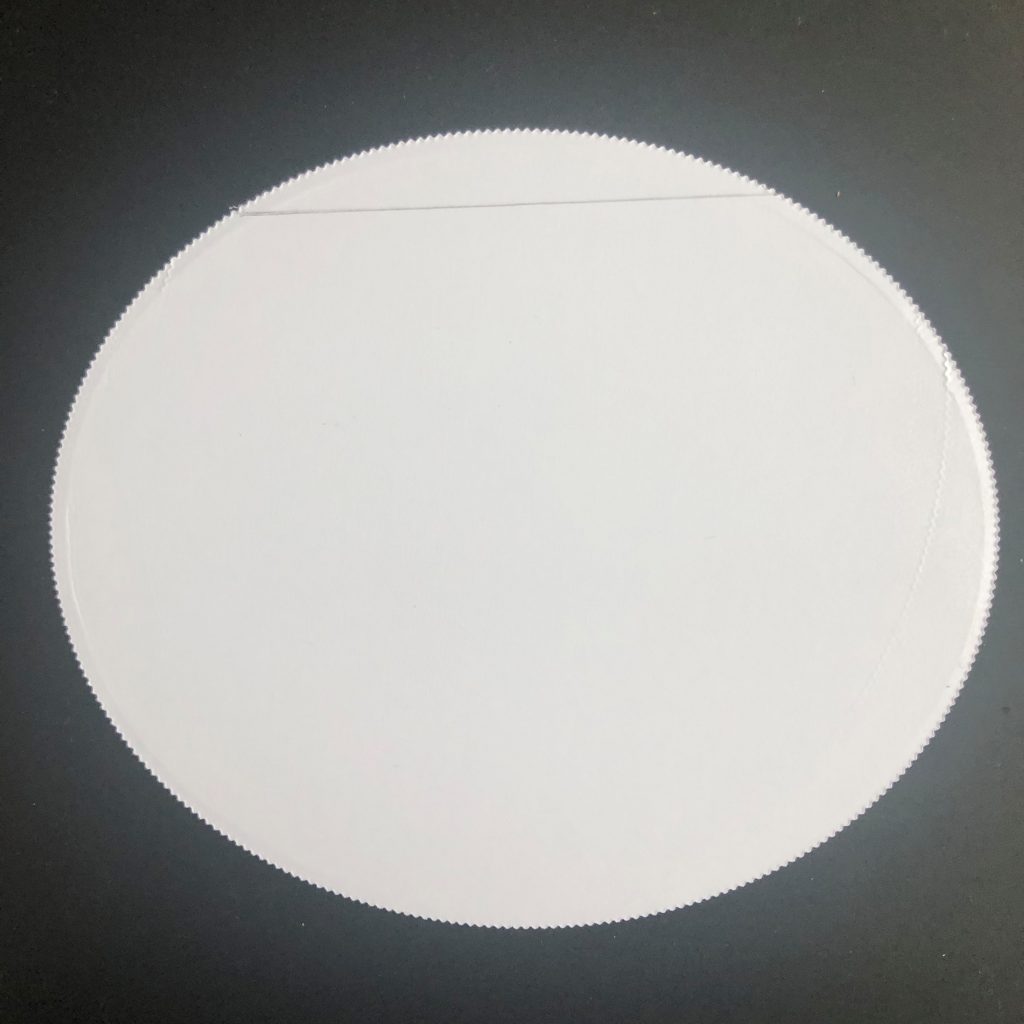
Use a craft knife or scissors to cut along this line (2b).
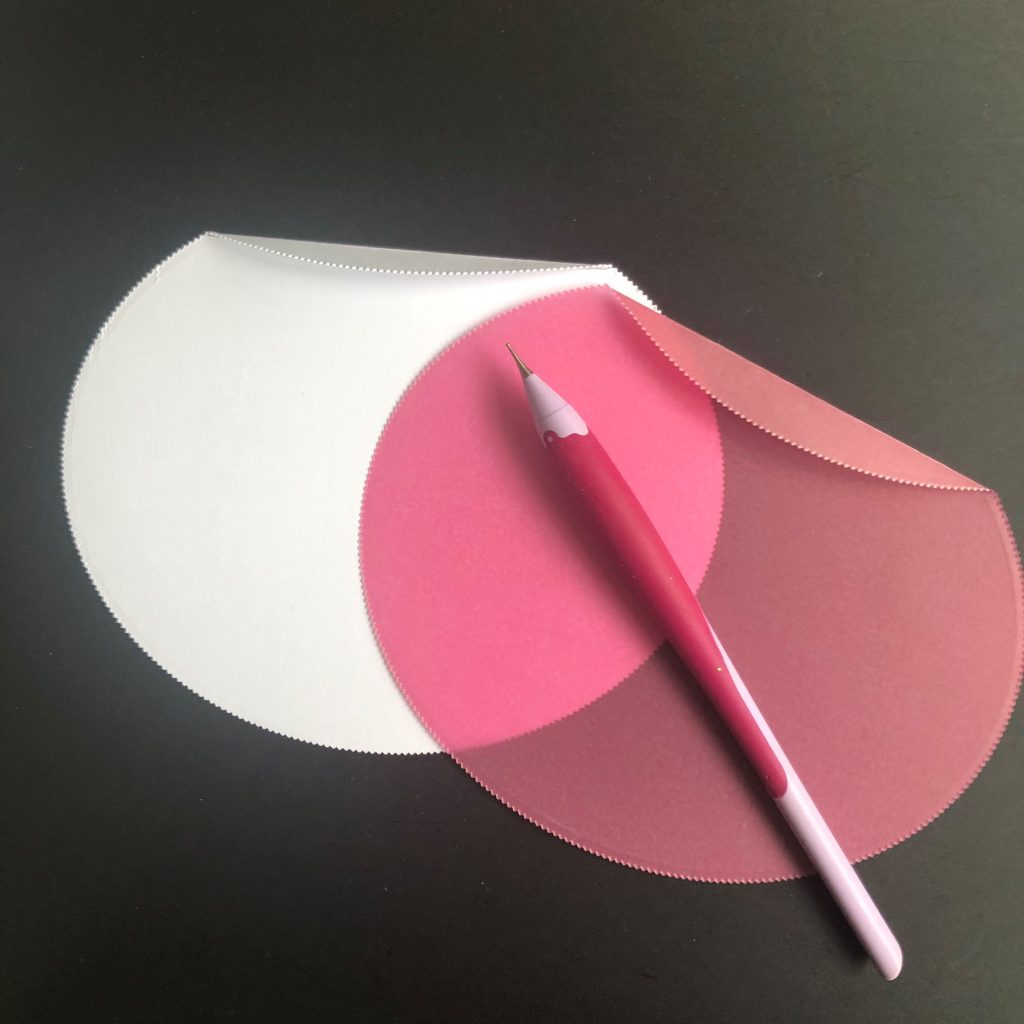
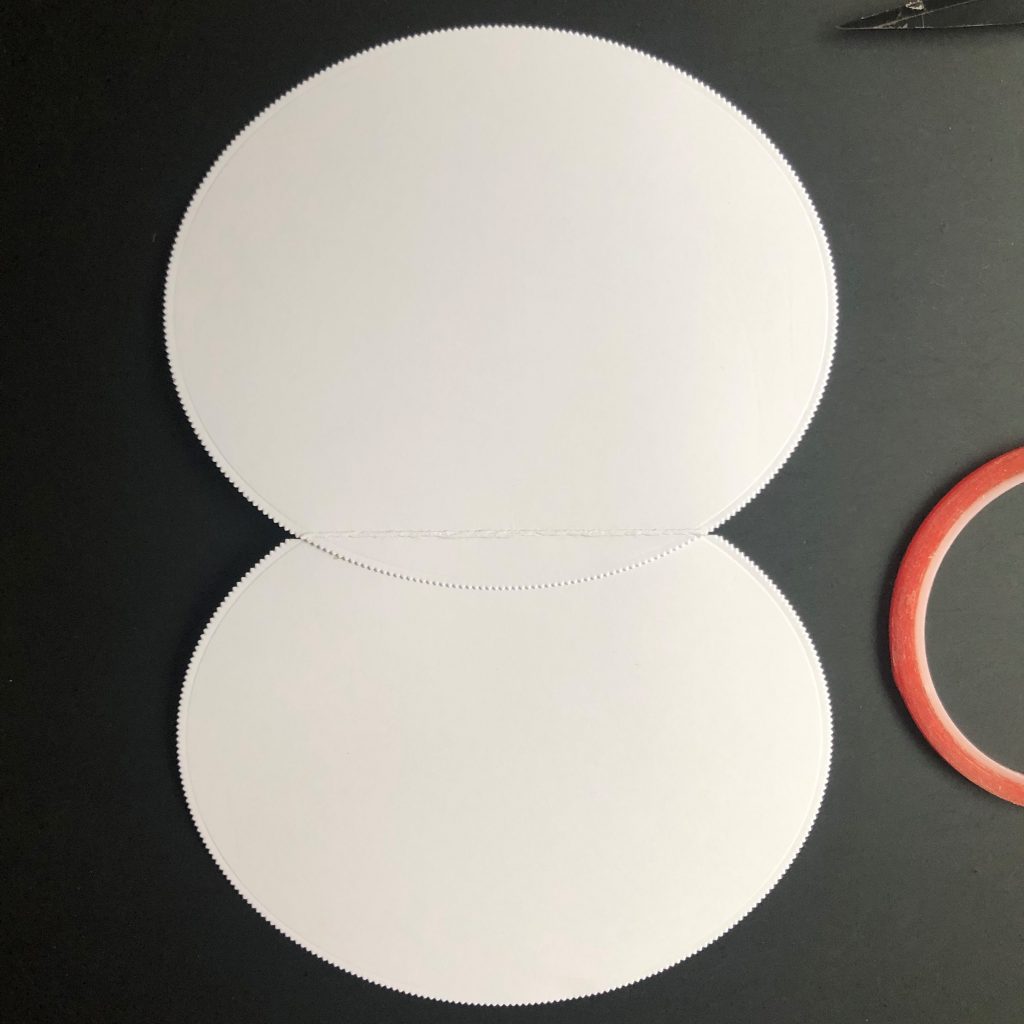
Step 3 –
Place this piece of card on top of the second oval and using the pencil mark the position of the straight edge. Do the same on the Pink parchment oval.
Step 4 –
Using a ruler and the 1mm ball tool emboss along these lines to form the fold lines. Fold and put these pieces to one side.
Step 5 –
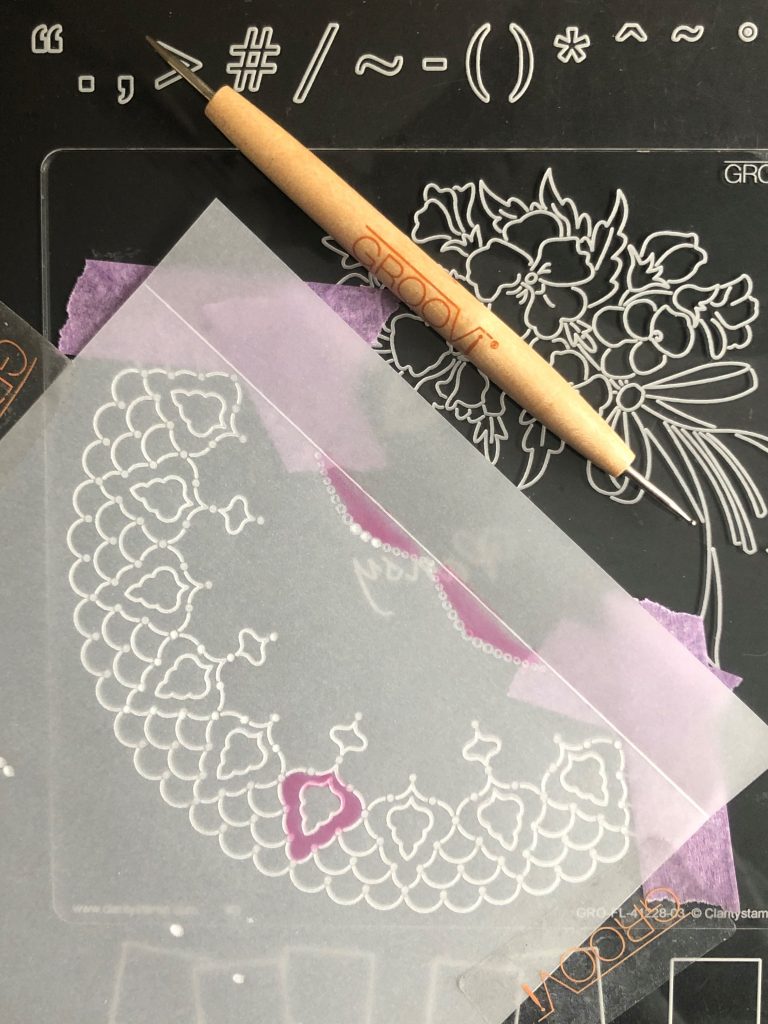
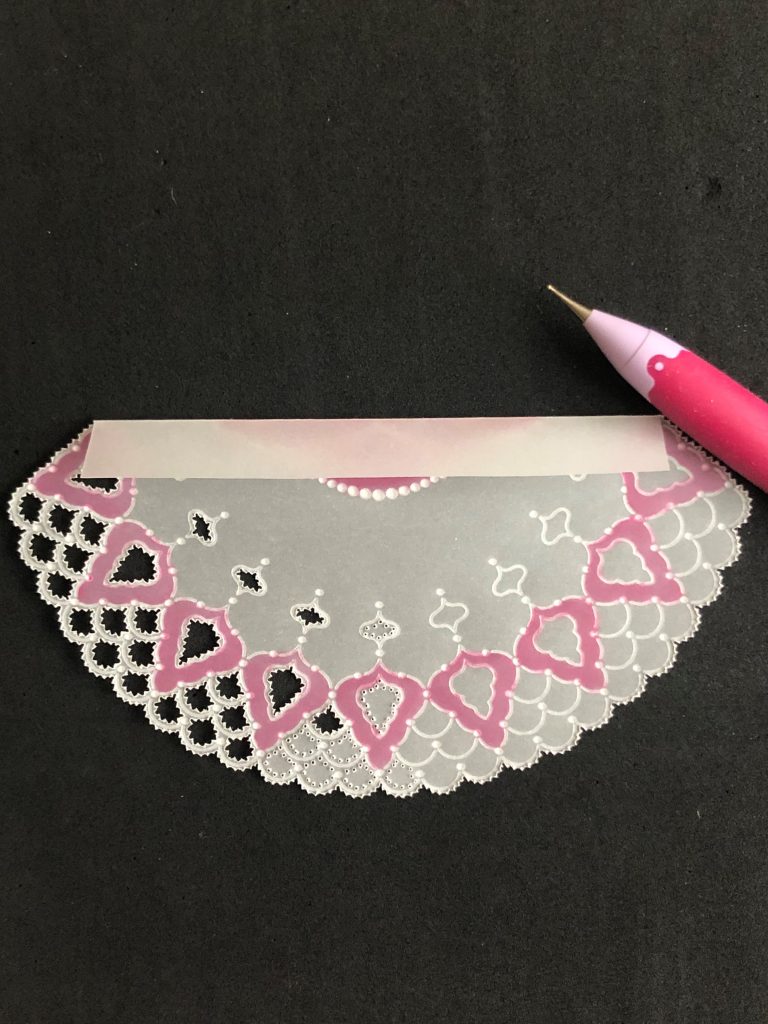
Make the flap of the handbag using the Pansy & Lace A5 Square Groovi Plate. Mask off the two end designs so that you know exactly which part of the plate to use (5a).
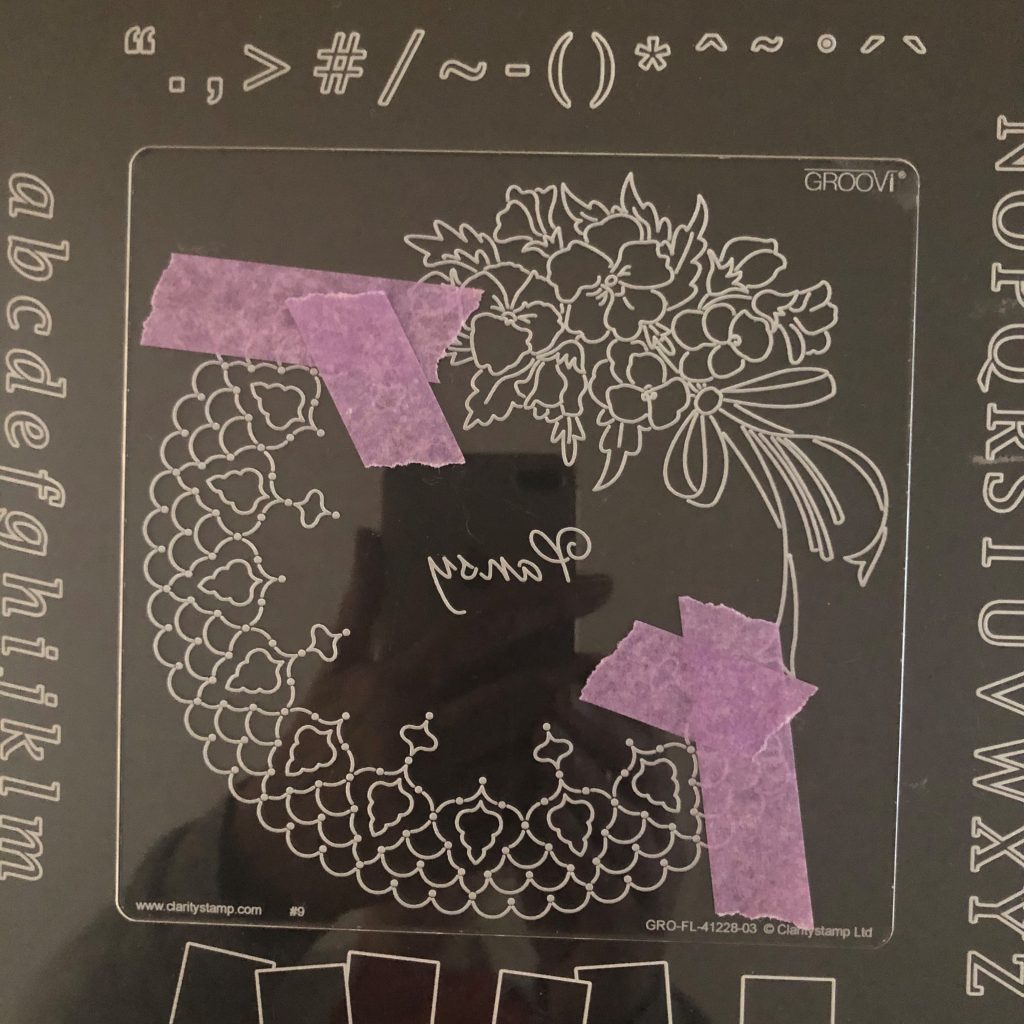
Take a piece of ordinary parchment paper and emboss a straight line using a ruler and the 1mm ball tool. This forms the fold line. Place the parchment on the Pansy plate so that the lace pattern is just below the fold line. Emboss the lace pattern using the number 1 tool for the lines and the number 2 tools for the dots. Add extra motifs if desired. (5b)
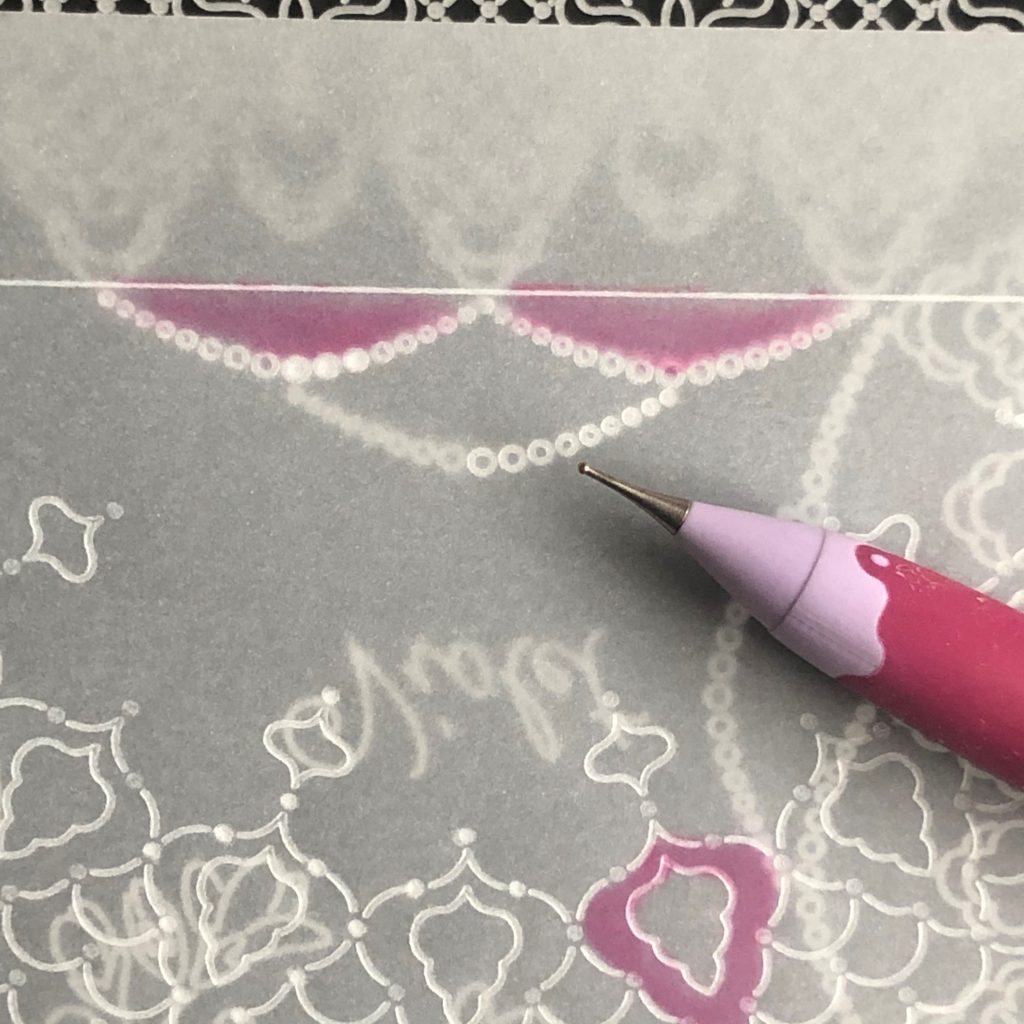
Step 6 –
Place the parchment on the Violet & Lace A5 Square Groovi Plate and emboss the strings of dots using the number 2 Groovi tool or the 1mm Pergamano tool. Remove the parchment from the plate, place face down on your embossing mat and then emboss all the dots using the 1.5mm ball tool.
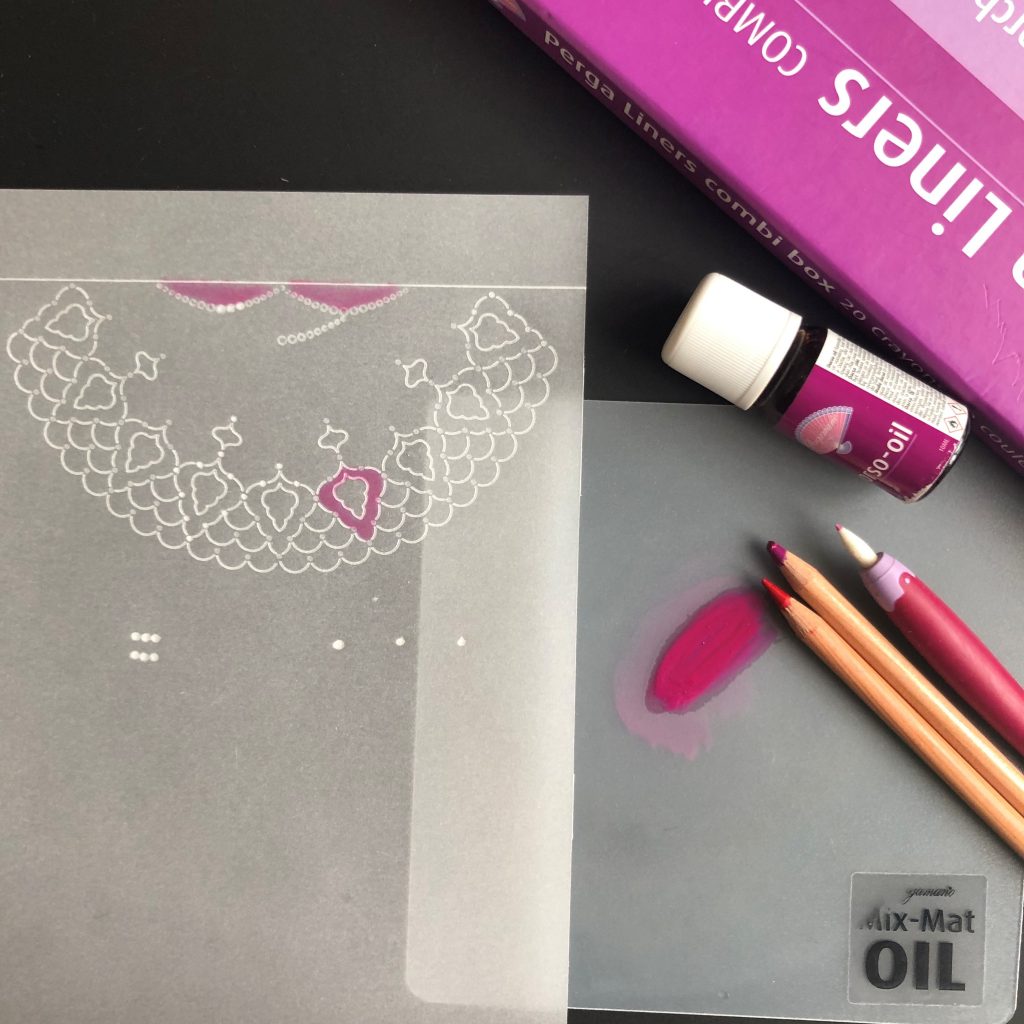
Step 7 –
Colour using the Perga Liners, Mix Mat, Dorso oil and blending nibs. Put a small drop of oil on your blending mat and rub in the pencils to form a coloured paste. I used B11 and B14 to give a nice pink colour. Apply this using the blending nibs, colouring the scallops and shapes as shown.
Step 8 –
On the other side of the straight line draw in a rectangle to create a narrow tab to fold over to the back of the card
Perforate the areas as shown using the 2-needle tool and picot cut. Always cut out the inner shapes first leaving the outer edges until last; this will help to maintain the shape of the piece. Cut out around the edges of the tab with an ordinary scissors(8a,8b and 8c).
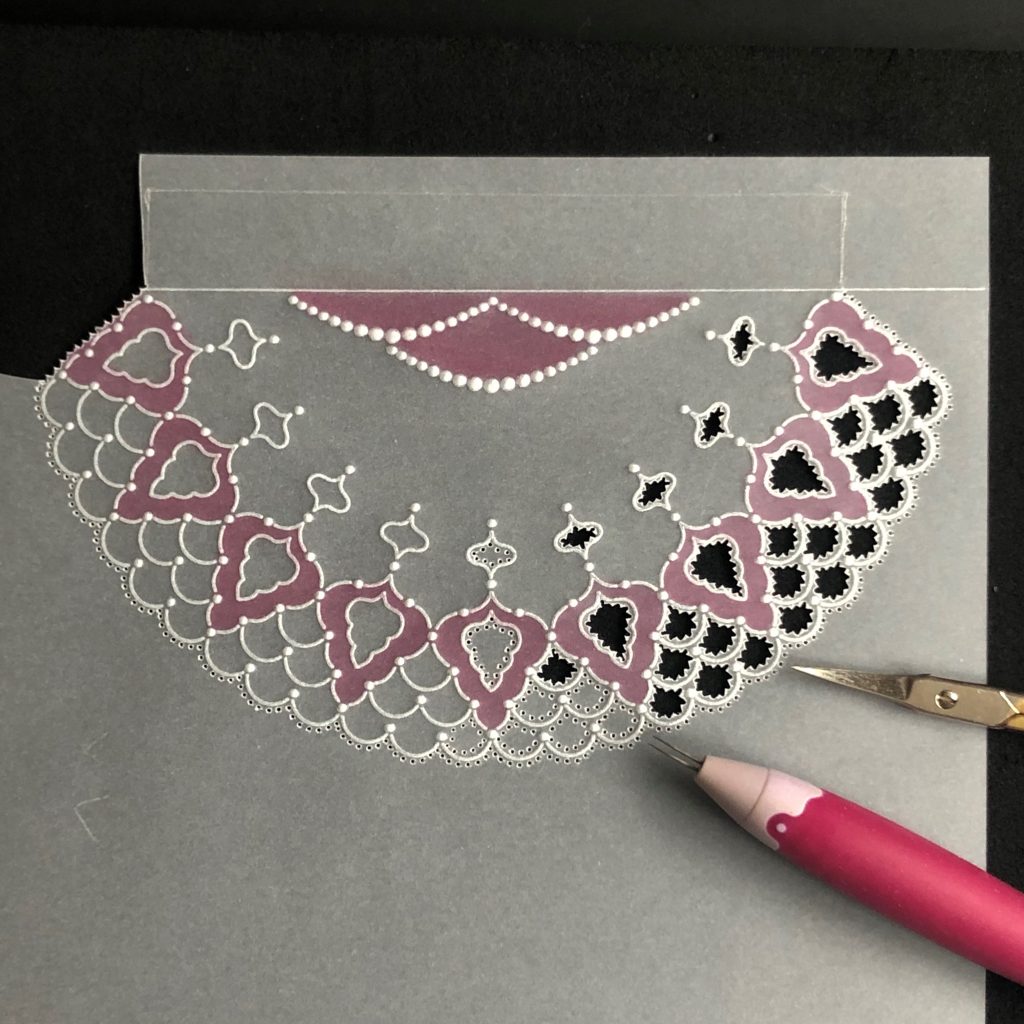
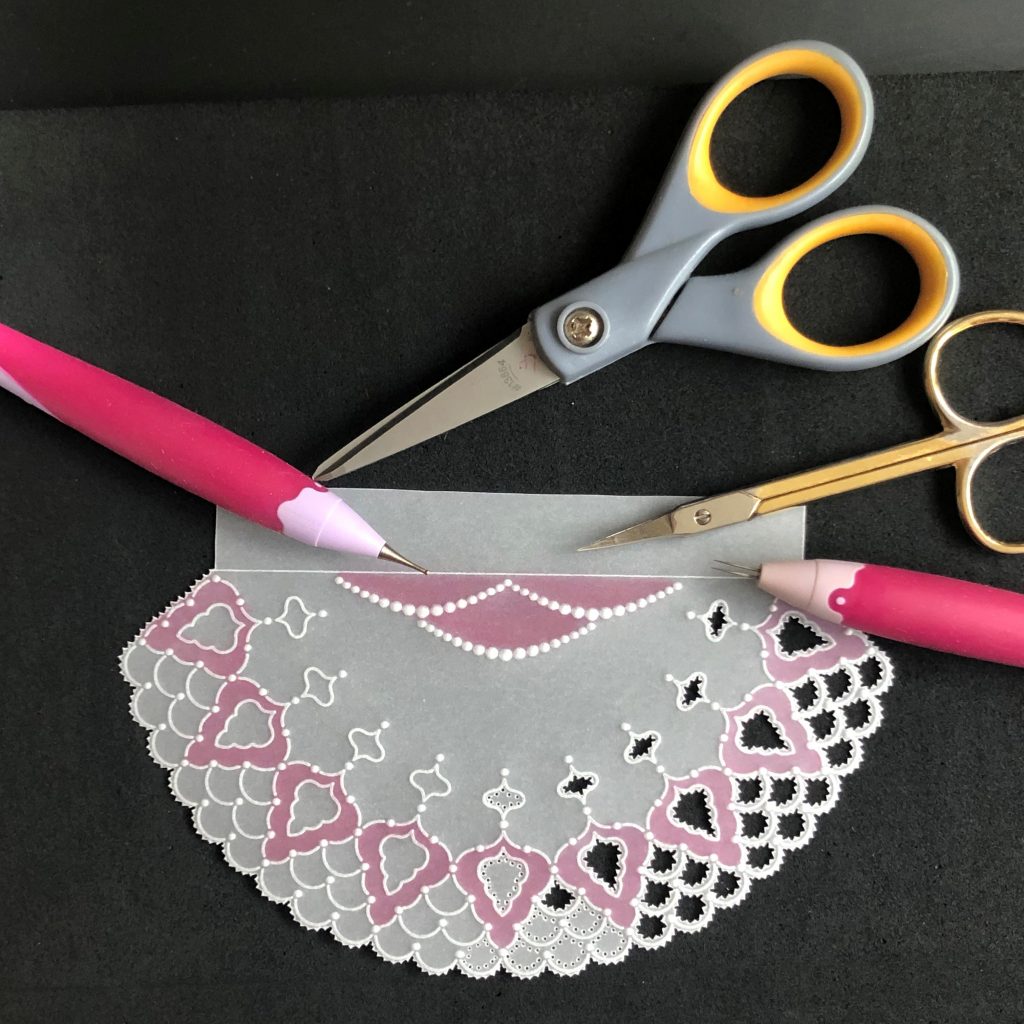
Emboss and fold the tab over at the fold line.
Alternatively, for an easier version, leave out the picot cutting and cut out around the outer edge with an ordinary scissors.
Step 9 –
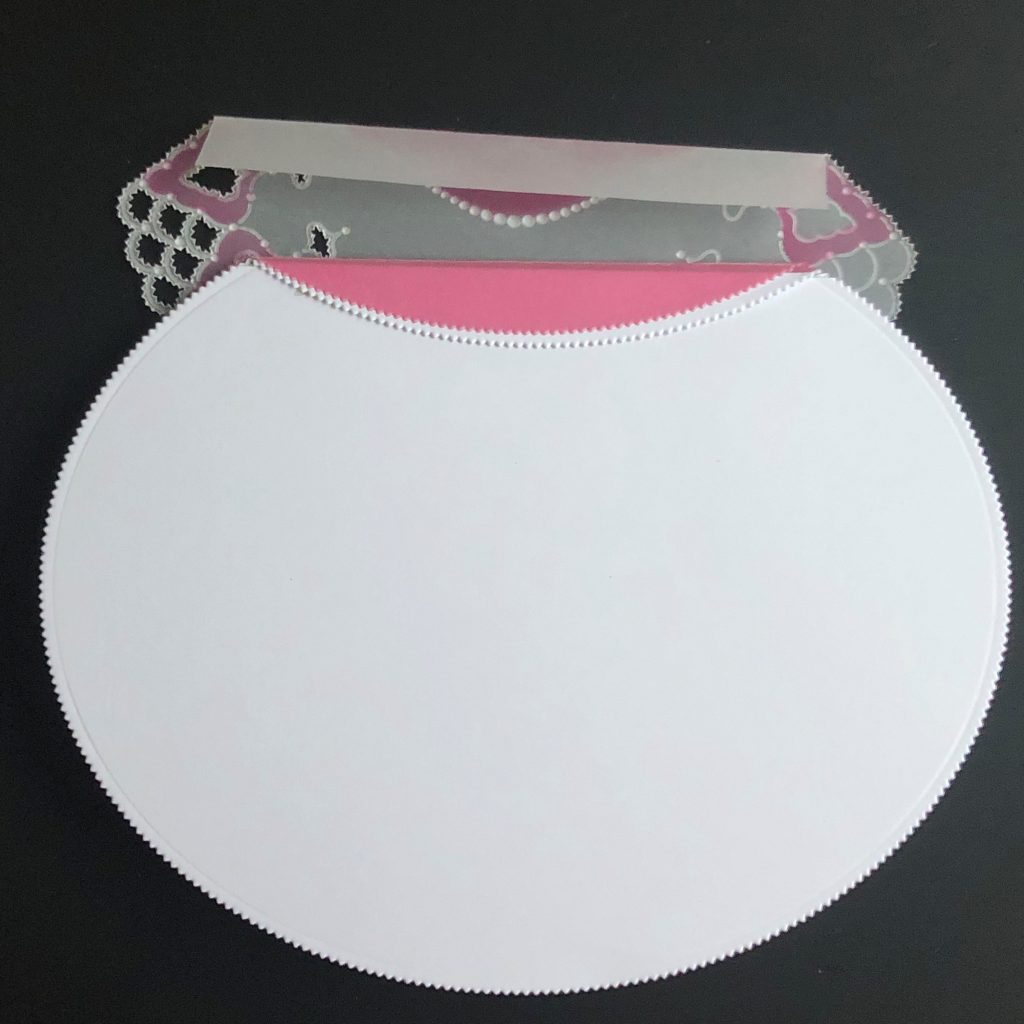
Take the folded Rose coloured oval and place the flap of the handbag on top with the fold lines together. Mark the edge of the flap using a white pencil so that you will know which area to decorate.

Step 10 –
Place the Rose coloured oval face down onto the Jasmine plate and using the No 1 Groovi tool, emboss a spray of Jasmine, moving your parchment to create a spray that will fit in the space.
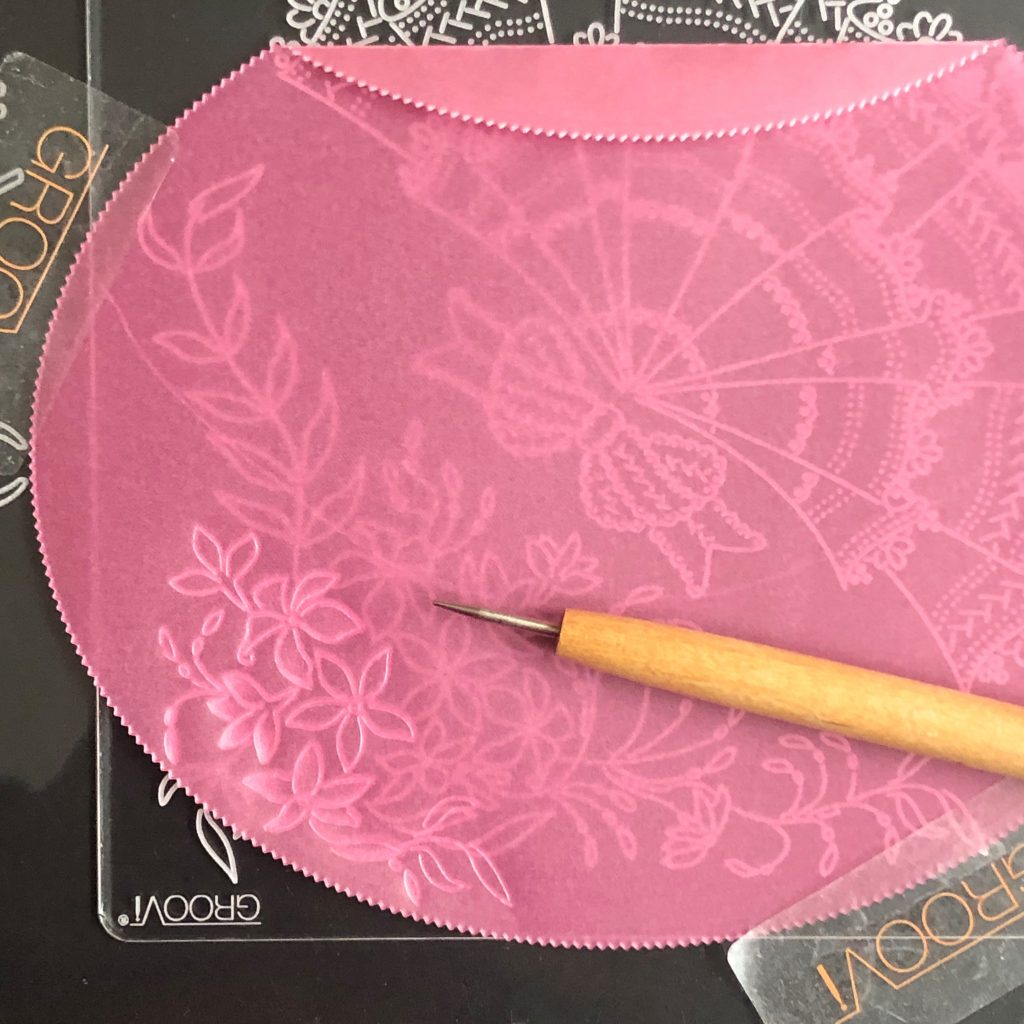
Step 11 –
Place the oval face down on your embossing mat and using the 4.5mm, 3mm and 1.5mm ball tools emboss the Jasmine flowers and leaves (11a back, 11b front).
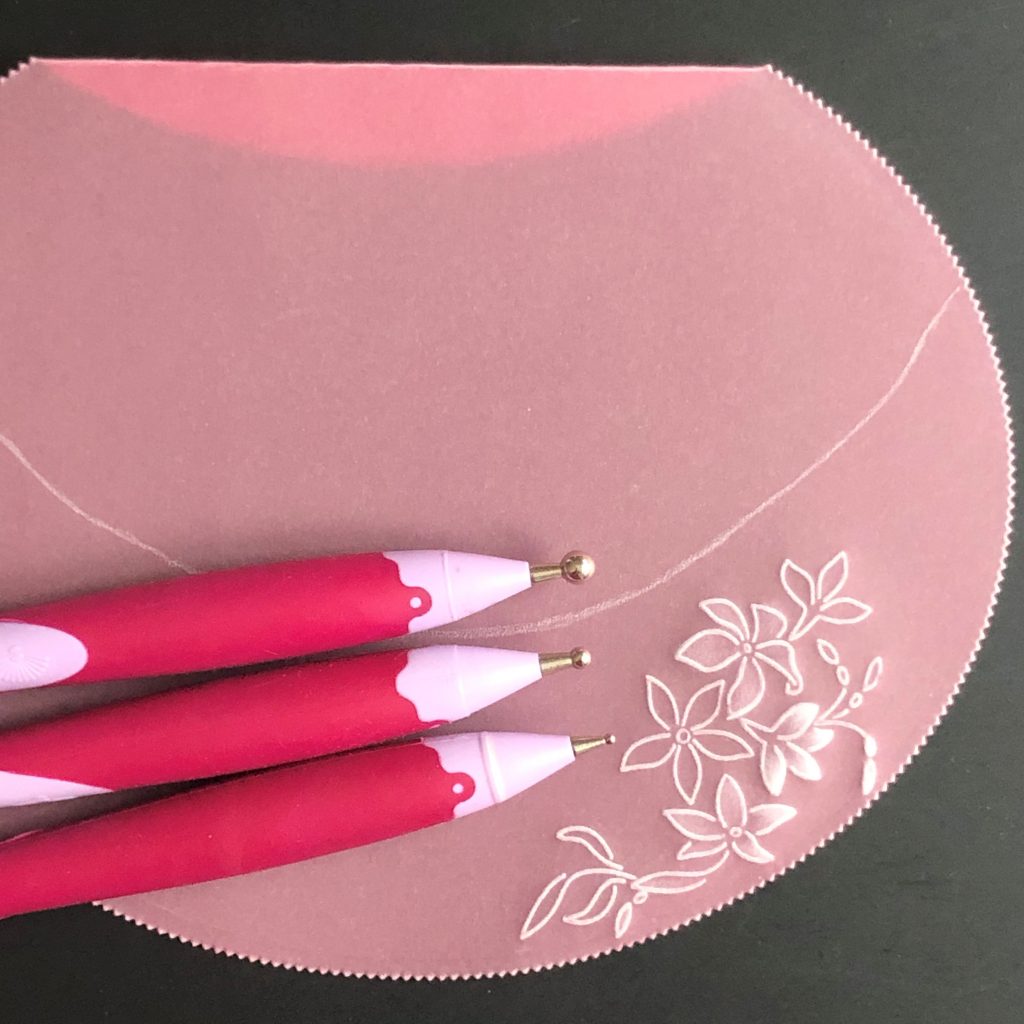
Rub out the white pencil marks.
Step 12 –
Following the pictures; make the card base ready for assembly. Stick the two layers of white card together using double sided tape (12a, 12b and 12c).
Step 13 –
Add the Rose coloured oval piece and stick in place with double sided tape (13a and 13b).
Step 14 –
Add the decorative flap and stick in place in the same way (14a and 14b).
Step 15 –
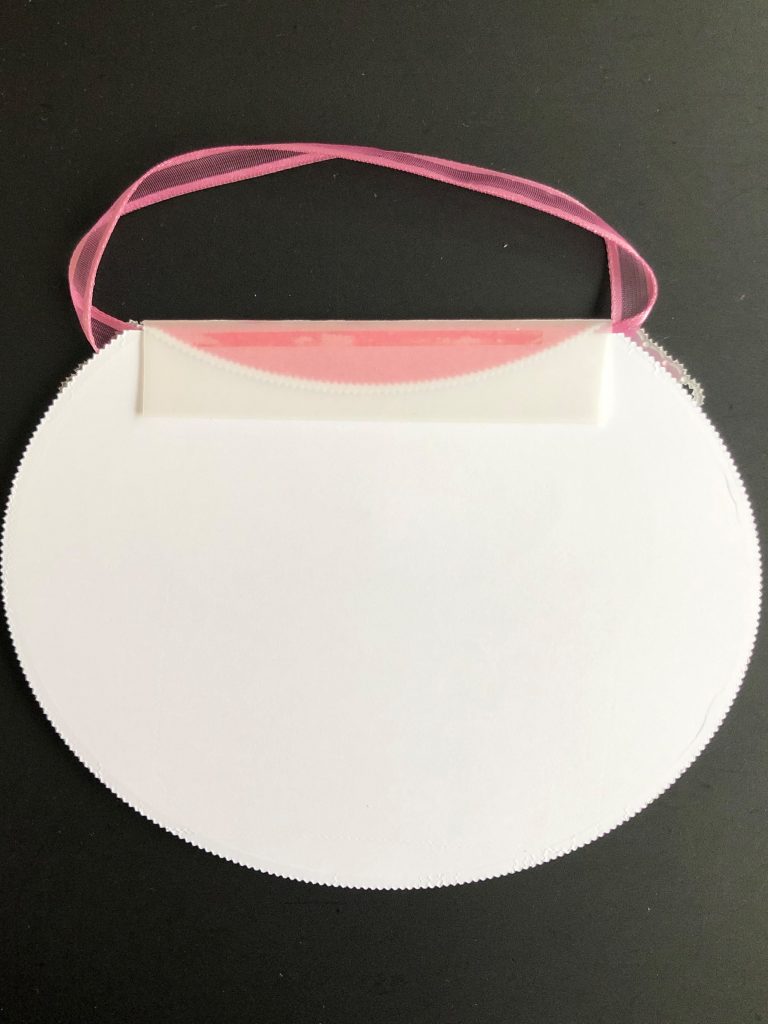
Add a decorative ribbon for a handle and a bow. Alternatively emboss a bow on ordinary parchment paper and using the bow from the Jasmine plate. Perforate and cut out and attach with a white Pergamano brad.
Voila! WOW!! Thank you Linda! That’s nicer than most of my real handbags 😉
If you fancy trying this out yourself, we’ve added some sales to items to help you on your way! You can find them all on this tutorial link. We’d love to see your artwork too! Grace@claritystamp.com or post them to Groovi Worldwide.
Thank goodness for this community!
Travel gently.
Lotsa love, Grace xo
Clarity – The Home of Art, Craft and Well-being.
How beautiful is that handbag Grace!, thank you Linda for your guidance, may have to try this one at some point!
Stay safe xx
Oh my, looks like I’m gonna have a busy weekend as I have all these lovely plates👍🏻 Thanks for the inspiration, Linda Williams♥️
Beautiful Linda, I will be trying this, thank you for the inspiration xx
What a stunning card.
What a beautiful project thank you grace and Linda
Wow, this is such a pretty project!. Thank you Linda x
Wow Linda this is exquisite
And gorgeous will be saving pennies for those items.
Love the blog more please🥰🥰🥰🥰🥰🥰
Wow Linda that’s exquisite and gorgeous
Wow! Absolutely stunning! Thanks, Linda! xoxo
Wow Grace the handbag is beautiful thank you Linda. So much homework to do now between Groovi and Gel press, stamping, doodling, colouring! Certainly the word bored is definitely not in my life. Thanks to Clarity where would we all be without this fantastic family. Xxx
WOW. That’s so beautiful. Thank you 😊
Hi Grace And Linda
Ohh my. What can I say about this handbag design it’s an absolutely stunning piece of work.
Mind you looking at the person designing it there was no way it was going to be anything less.
Thank you Linda And Grace And all the clarity family. Hugs 🤗
Absolutely beautiful!
Wow what an absolutely stunning card. It is so beautiful. Thank you for sharing your design with us.
Thank you Linda. That is beautiful.
Thank you for the tutorial. I will add an extra oval piece of card at the back so the back of the small folded parchment is hidden from view.
Wow that’s a fabulous project! I’d love a bag like that although Colin would ask me how I’d fit all my usual rubbish in it!
I will have to try and have a go at making this one. Xxx
beautiful. I can admire althugh its beyond my abilities as I can’t even hold the scissors
What a beautiful bag with a great step by step. Need to check my stash as I don’t think I have the jasmine plate but I am sure I can find a suitable substitute amongst the numerous plates that I do have !!
I daren’t count them !!
Thanks Grace for todays blog & Linda for the project
What an amazingly detailed tutorial from Linda and a stunning project. I have all the plates, but not the oval dies, but I am sure that I can come up with something. Definitely a project to put on my list, so thank you Linda.
The team at Clarity are so generous with their time and ideas.
Stay well and safe. Hugs. Annette. X
Wow, Linda That’s stunning. Thank you for your step by step. Hxxx
Thank you Grace and Linda for this beautiful handbag design!
It is so elegant and the lace is gorgeous!
Take care and stay save and healthy!
Lots of love, Trijntje Huppel
Such a talented lady. Beautiful project with great instructions. Thank-you Linda. X
Hi Grace, Thank you so much Linda for doing this tutorial, such a gorgeous handbag.
Lots of love from Patricia xx
How wonderful is Linda’s project being a newbe I will try this at some time when I am better at this lovely craft xx
Thank you Grace and Linda. A lovely project .Excellent explanation , step by step tutorial Linda. Parchers will love it. Wish I could join in but too exacting for my eyes at the moment.
Grace & Linda,
Thank you for the amazing project to try 🙂 the step by step information is just what I need, Ive never looked back since becoming Groovi 😉
Many thanks from Australia.
Fantastic handbag Linda your information makes it so easy xx