
Clarity’s Blog Tutorial: How To Use Linda’s Contour Rose Heart Frame
Hello hello! Grace here.
I hope this finds you well, safe & happy. Happy Father’s Day to all the Dad’s out there!
Back again! With a fantastic step-by-step project for you. This time we’re joined by our good friend and Design Team member, Glynis Whitehead. I’ll hand you right over!

Linda Williams’ Groovi Contours Rose Heart Frame.
Linda designed several of these lovely, elegant contour Groovi plates and I really wanted to show you what they can do. Let’s jump right in…
Ingredients
A4 Square Plate Mate for Grids (you will be using an A4 square plate so no need to use the extensions) (GRO-MA-41768-21)
Nested Squares Extension & Alphabet Frame (GRO-WO-40538-15)
Linda Williams’ Groovi Contours Rose Heart Frame (GRO-FL-41991-03)
Diagonal Pattern 1 Border Grid (GRO-GG-40354-14)
A5 square Plate Mate (GRO-CO-41706-08) (or the Starter Kit Plate Mate)
Tools:- Small Picot V perforating tool (PER-TO-70281-XX)
Two Needle Fine (PER-TO-70037-XX)
Pergaliner Pencils (PER-CO-70063-XX)
Dorso Oil (PER-CO-70066-XX)
Blending Nibs (PER-AC-70299-XX)
Plain Parchment (GRO-AC-40024-XX)
Method
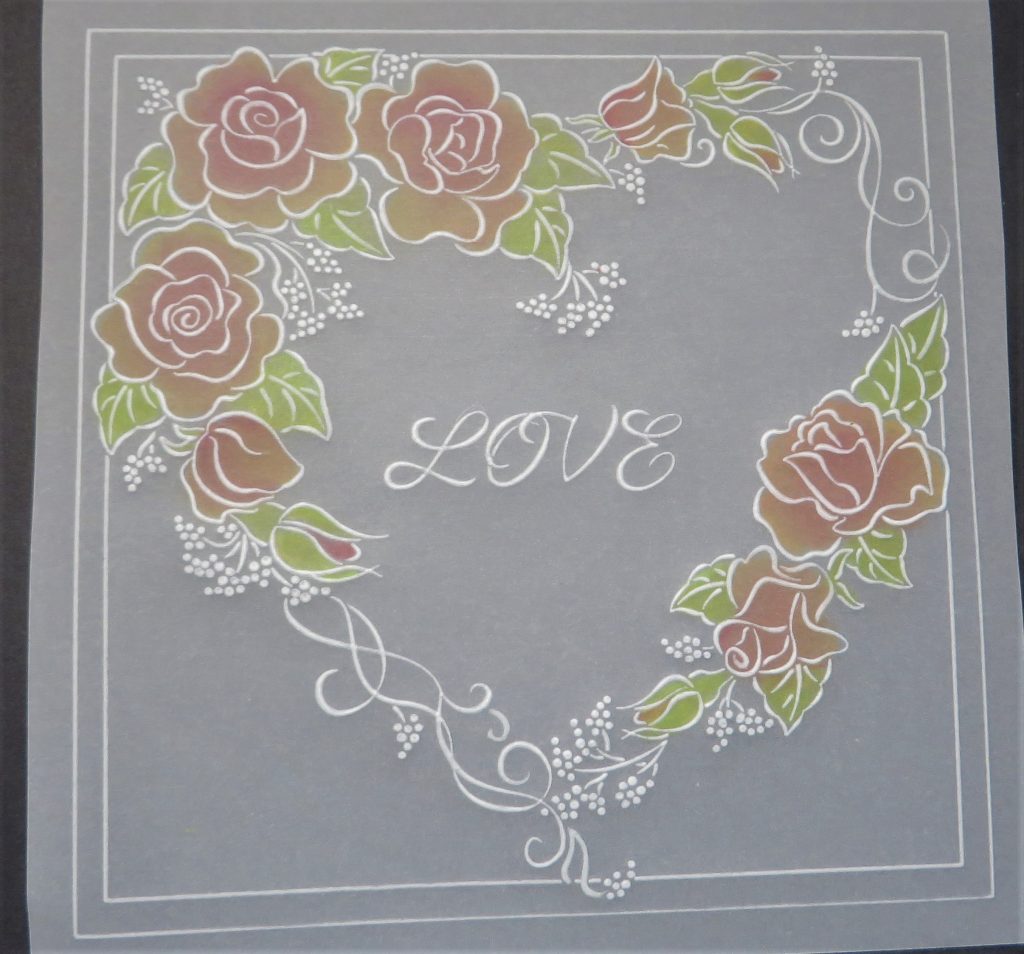
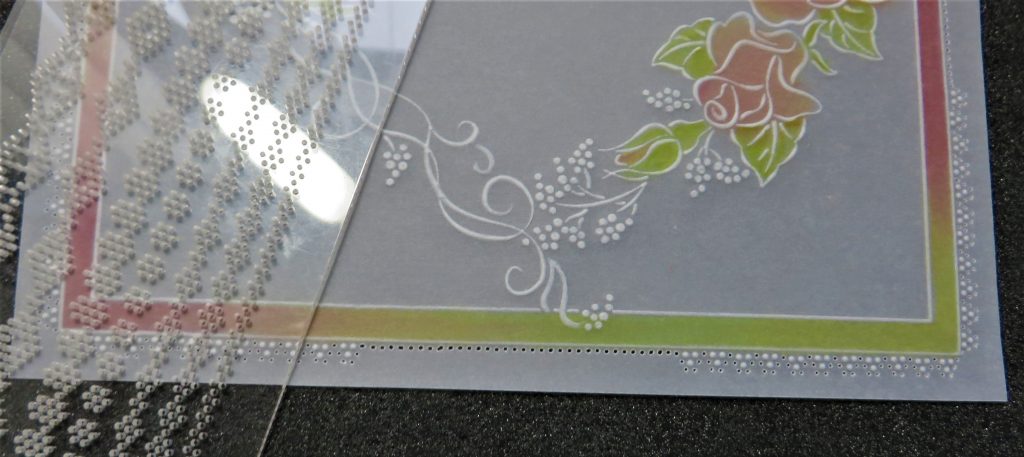
Step 1. We will be tracing the 7th square from the outside on the nested squares. With this Groovi plate set into the A4 plate mate, line up your parchment and wipe it over with a tumble dryer sheet.
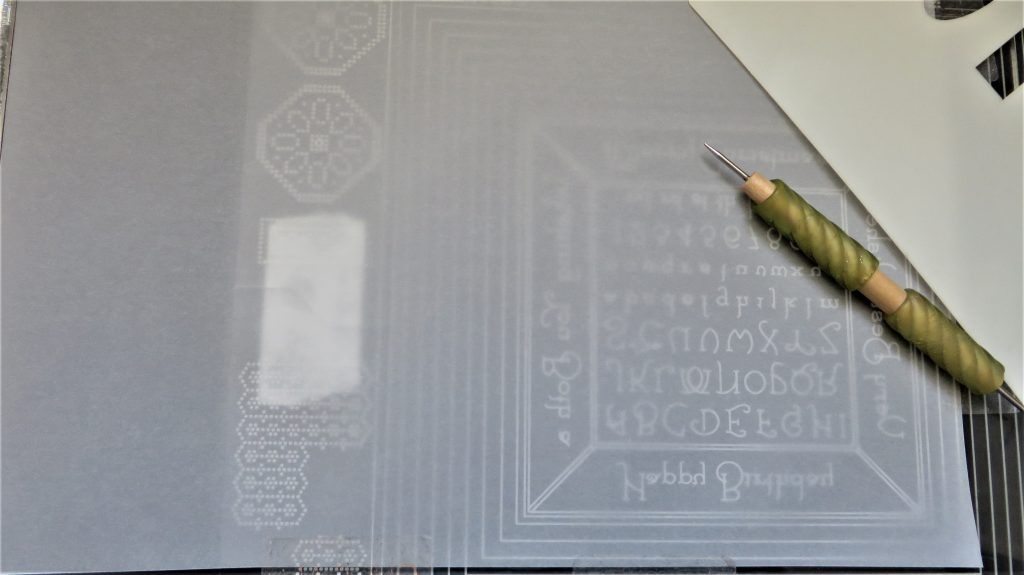
Step 2. Swap the A4 plate mate and bring your A5 square plate mate into play. Fit the Contour Groovi plate in place, then centralise your embossed square over it.

Step 3. The lines on the Contour plates are not just straight grooves – they undulate, going thick and thin, so we have to treat these a bit differently. This is how I do it… Slowly and taking one flower at a time, I go in with the number 2 tool from the starter kit, then turn the tool over and very gently go over all the thin bits, but flicking outwards towards the thicker line. Once you are happy with one flower, move on to the next and so on. A bit more time is needed with these plates, but you will see that is sooo worth it!
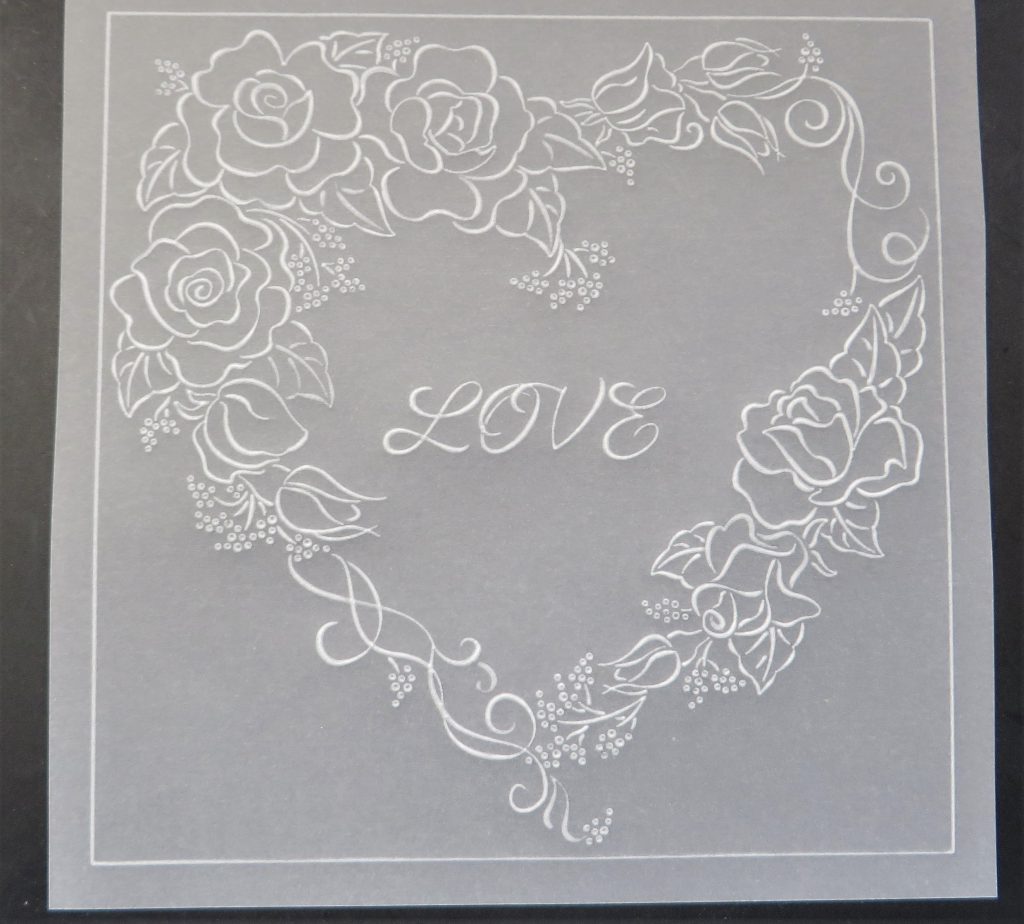
Step 4. Put the nested squares plate back into the A4 plate mate and line it back up with the square you already embossed. Then trace the next line in, avoiding all the other embossing of the flowers and leaves – this will allow some of the design to overlap into the frame.
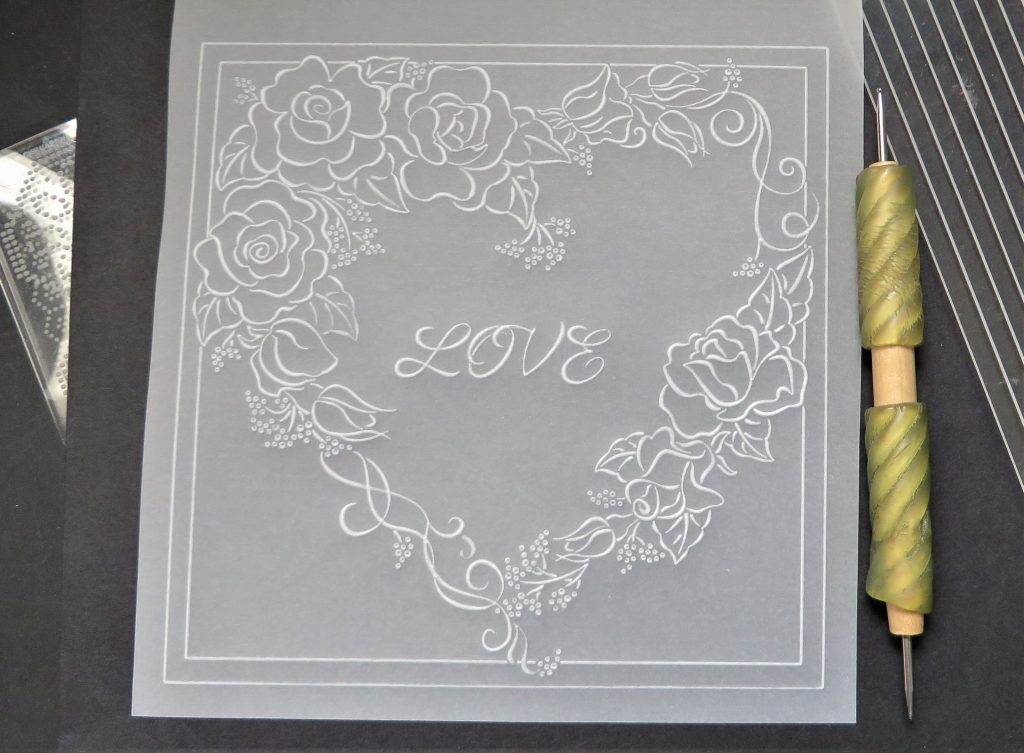
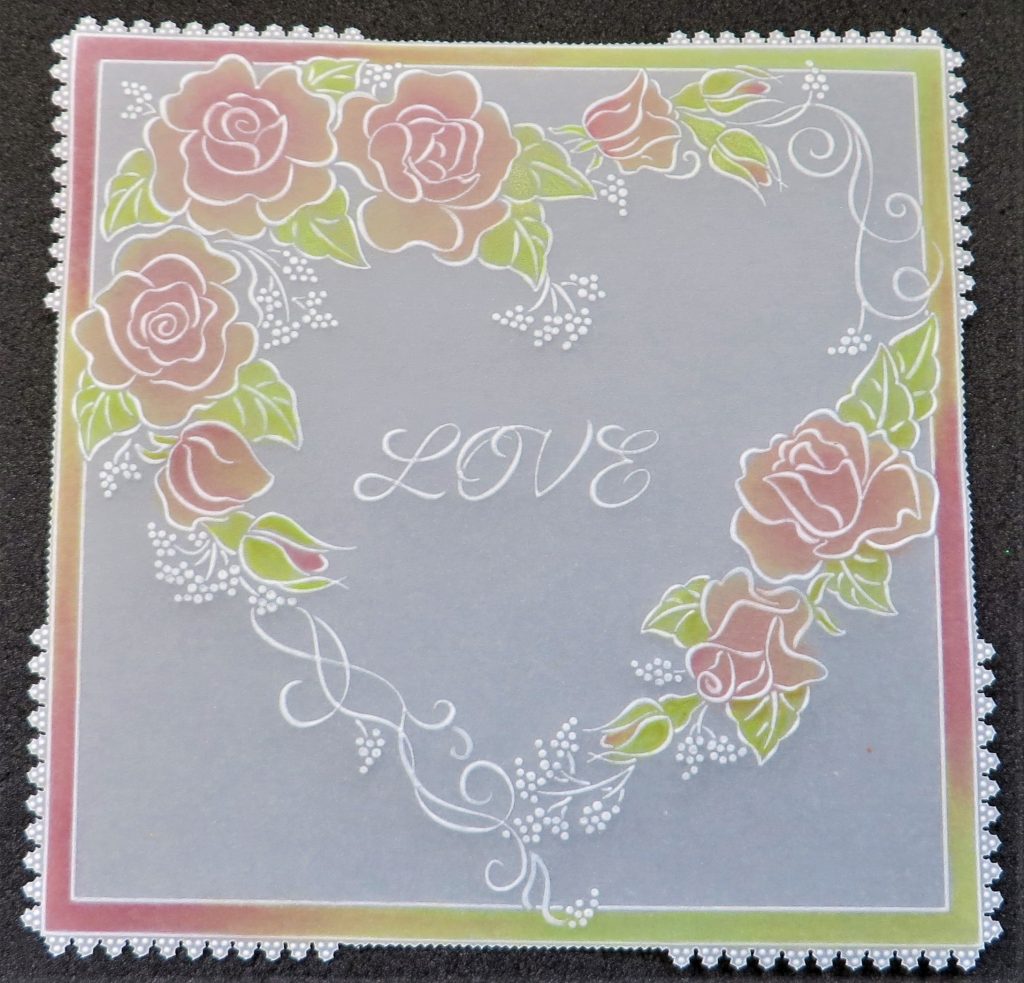
Step 5. Emboss all of the tiny dots (‘Baby’s Breath’ flowers) in the flower design. For this, use the number 2 tool from the starter kit and go very gently.
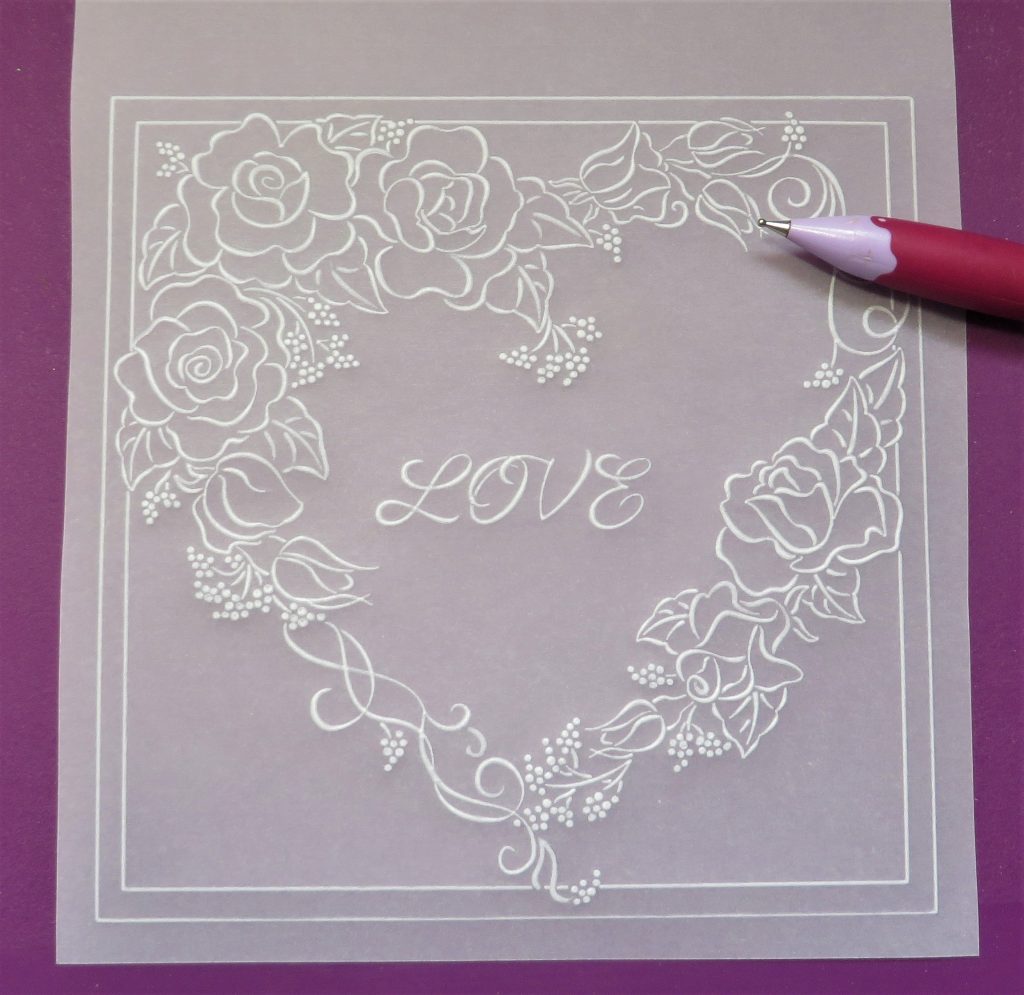
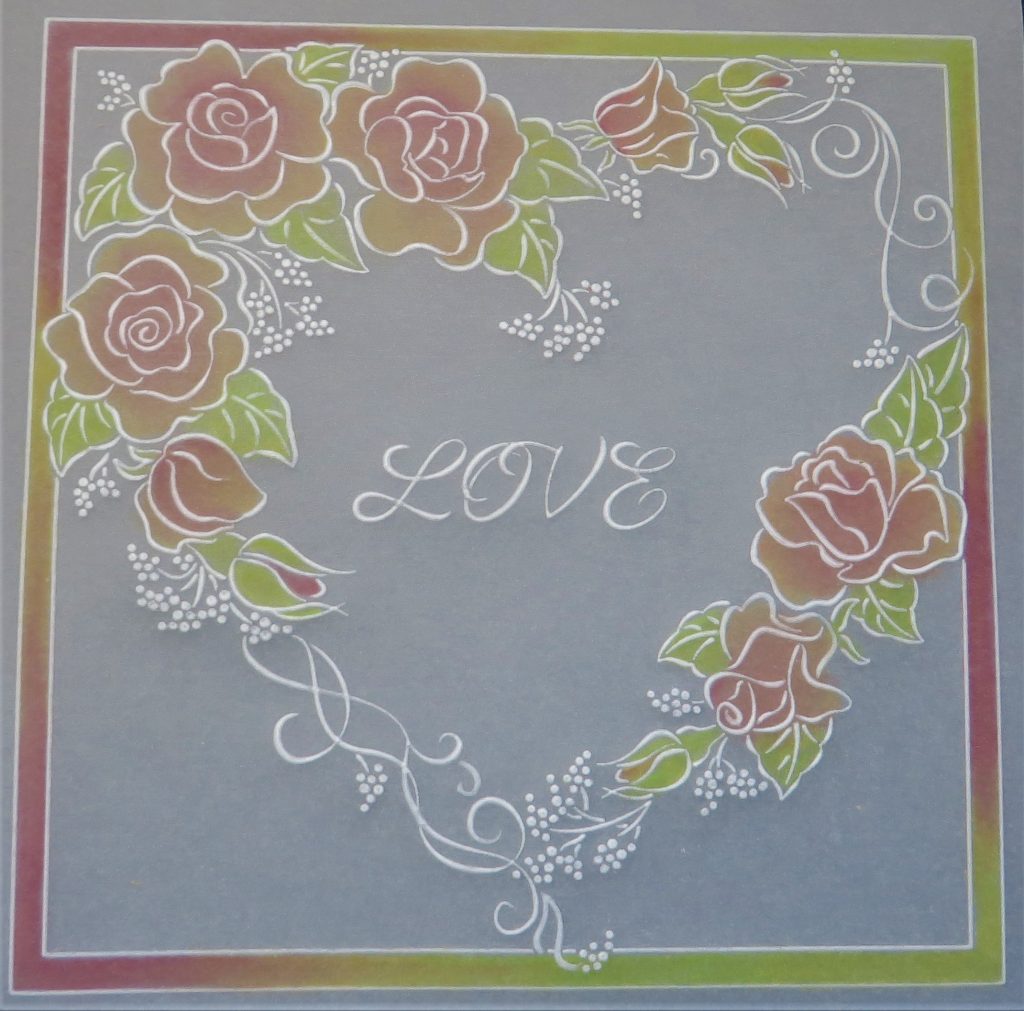
Step 6. Add colour, using a Pergaliner B pencil (B for blending). I have used B7, B8, B11 and B15. Apply some red to the centre of the roses and yellow to the edges – you do not have to be tidy about this, as you will be blending the colours together. Blend the red and then the yellow into the red.
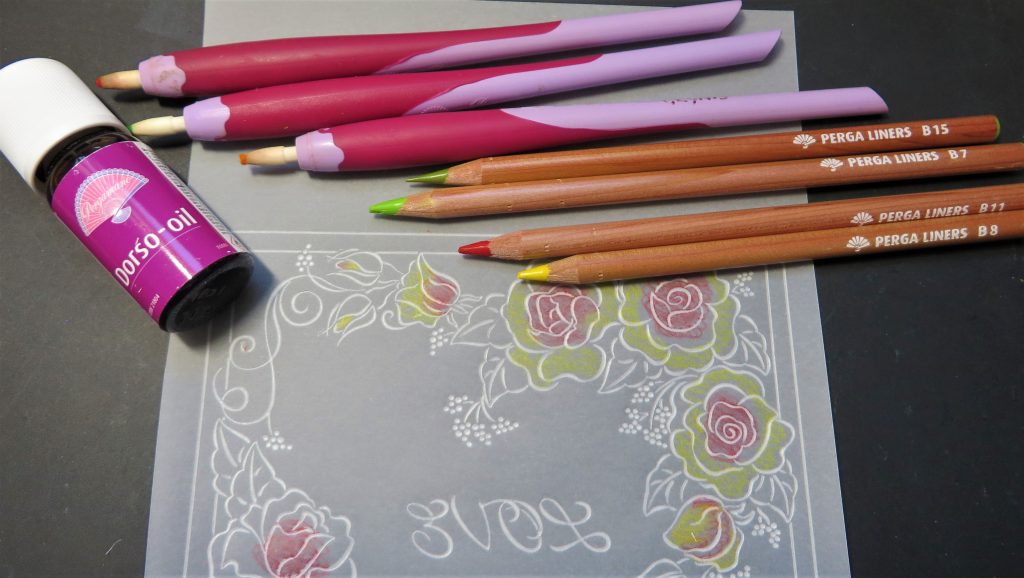
Step 7. For the leaves, use yellow, light green and darker green. Apply it in patches and then blend it all together – don’t put too much oil on the nib or you will lose any shading.
Step 8. Colour in the margins with red, yellow and green pencils – making sure not to blend the red next to the green or you will get a muddy colour.
Step 9. Shallow perforate the corners of the piece with the Small Picot V. I did 11 perforations at each corner in both directions. Then I went between the picot V’s with a two-needle tool.
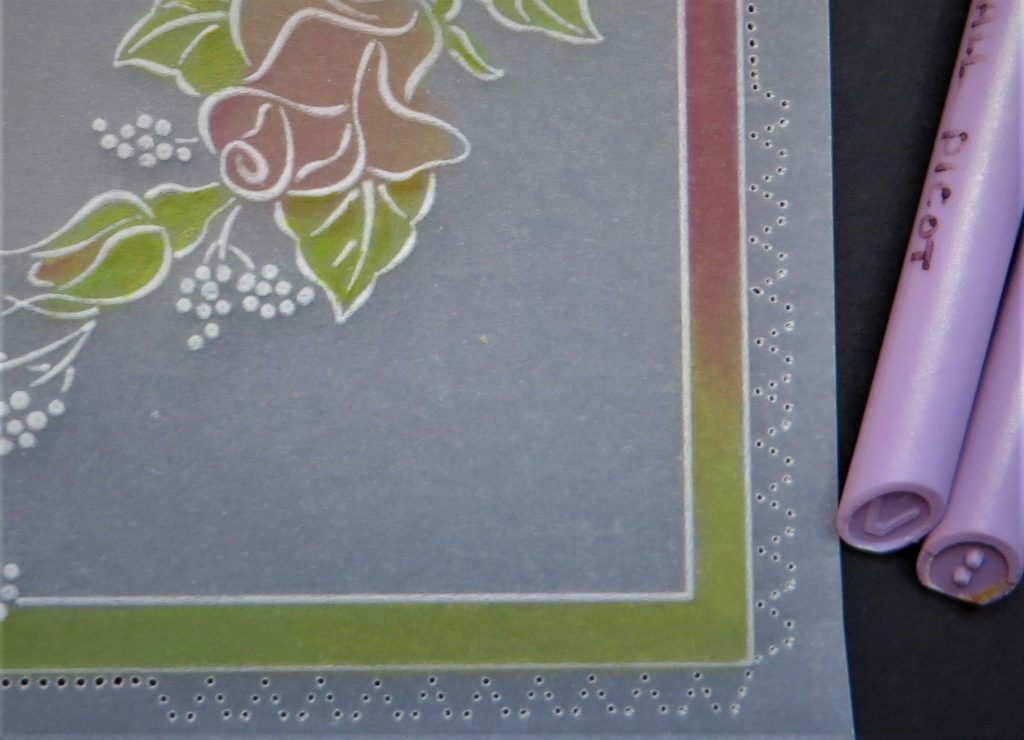
Step 10. Working on the back, use the border grid to emboss some little dots into the picot V’s. You will manage to fit 3 embossed dots in each.
Step 11. Now perforate deeply – use a single needle fine tool if you have problems with relocation of the needles into the holes. Then snip the piece out.
Step 12. Cut a background of your choice to 6 x 6 inches and fix the parchment with brads at each corner.
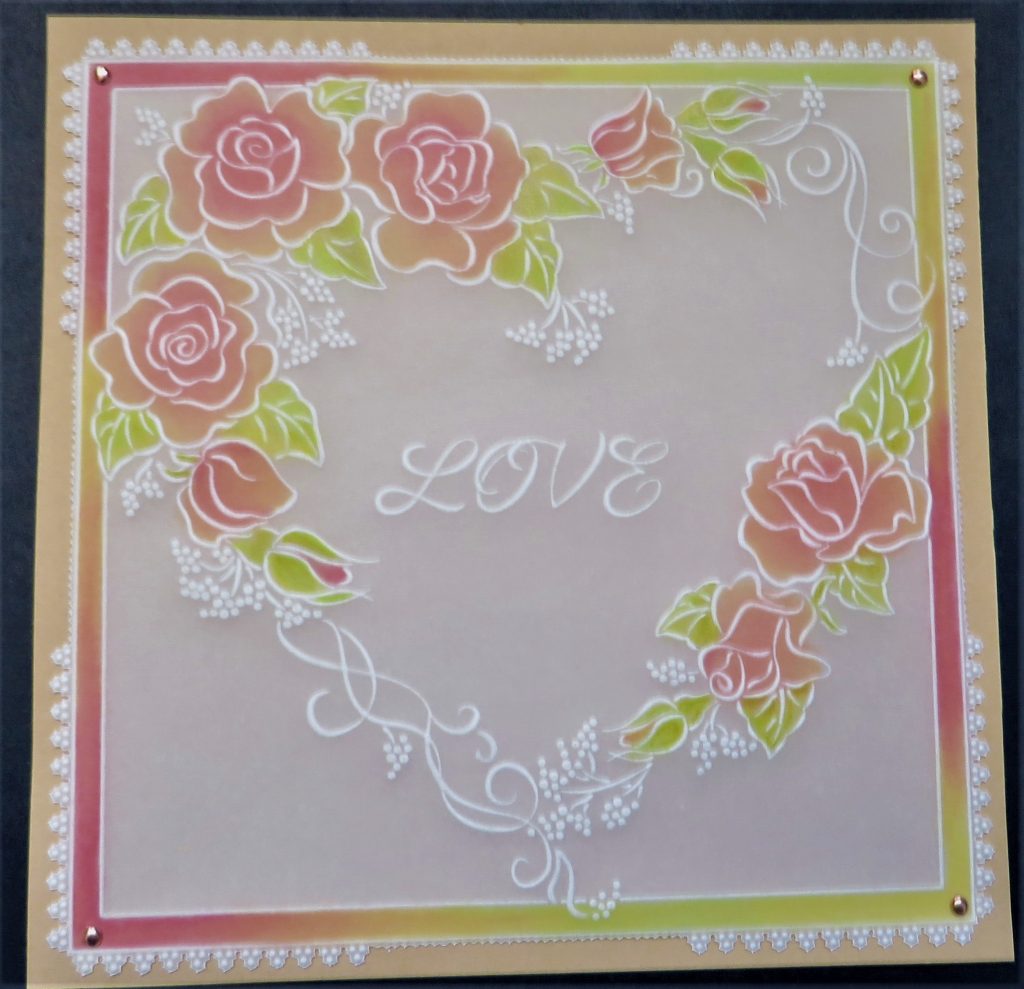
Step 13. Use double-sided tape to fix the piece to a 7 x 7 card blank. And you’re all done!
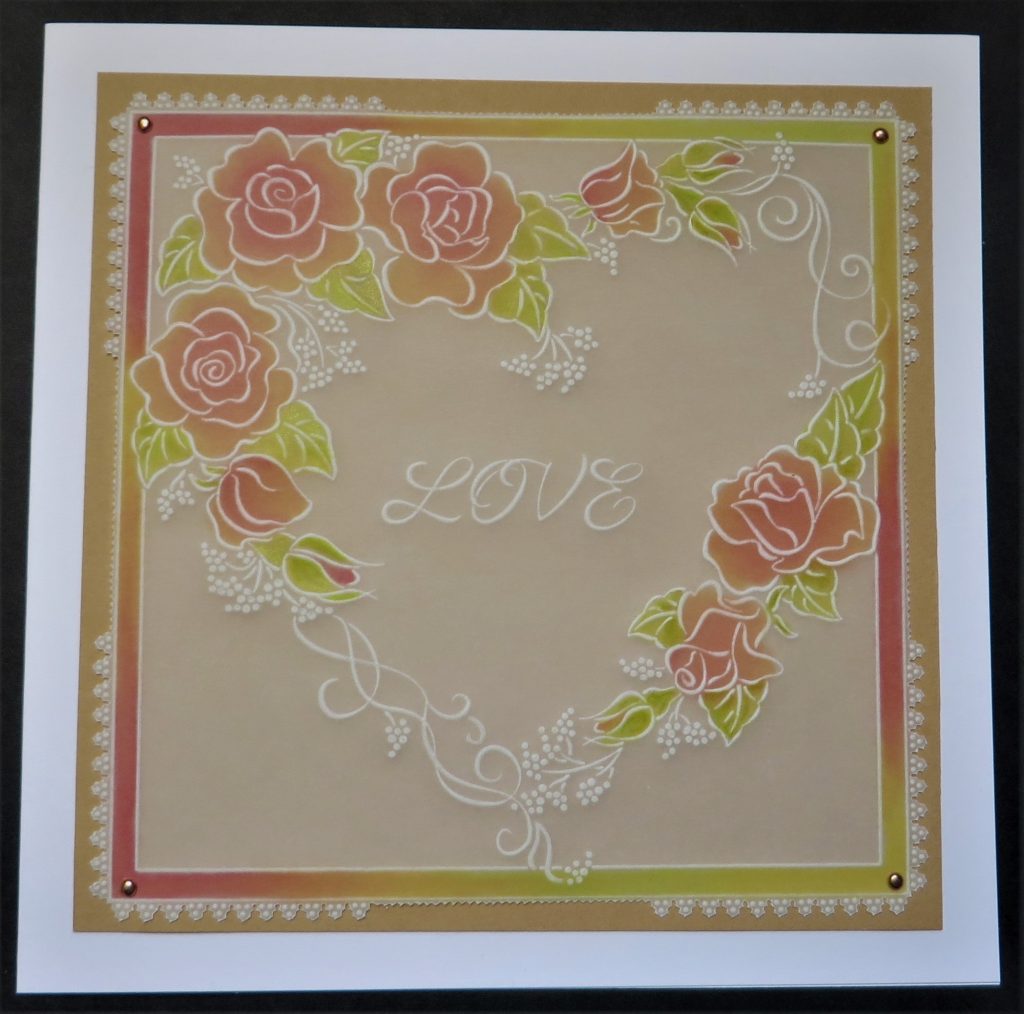
Cor!!! That’s stunning, Glynis. Thank you for sharing your guidance with us, as always.
To make it easy, everything that Glynis has used can be found over on the Clarity website HERE.
If you fancy giving this project a go yourself, please email your final results to me! We love to see your versions of the projects. Grace@claritystamp.com
A busy week ahead at Clarity Towers! Here’s the outline of the week…
Monday, June 20th:
SHAC Shack with Barb – Live at 10am on Facebook & YouTube
Tuesday, June 21st:
Groovi Tuesday with Paul – Live at 10am on Facebook & YouTube
Thursday, June 23rd:
SHAC Shack with Barb – Live at 10am on Facebook & YouTube
Thursday, June 23rd:
The Pergamano Show with Paul Church at 11am & 3pm on Create and Craft
Friday, June 24th:
Crafting with Clarity with Barbara at 9am & 1pm on Create and Craft
Friday, June 24th:
Clarity Weekender with Barbara & Paul at 8pm on Create and Craft
Saturday, June 25th:
Clarity Weekender with Barbara & Paul at 12pm & 4pm on Create and Craft
Sunday, June 26th:
Clarity Weekender with Barbara & Paul at 1pm & 5pm on Create and Craft
Clarity will be on Create and Craft a whole bunch next weekend, with some fantastic products! We hope that you’ll join us, so pencil those dates in your calendar (or phone!).
For now though, travel gently.
Lotsa love, Grace & Glynis xoxo
Clarity – The Home of Art, Craft and Well-Being.
Thank you Glynis. That’s lovely.
Thank you Glynis, the first thing I’ve attempted for some time. Lots of mistakes
But I enjoyed doing it x
Many thanks for this Glynis, you make look so easy to achieve xxx
Lovely project, an idea for an anniversary cards for my Sisters, thank you Glynis oxo
Beautiful project, thank you x
Beautiful. Thank you.
Just got my main computer up and running againat 11.05am
so I can properly see this lovely project. Roses are my favourite flower so I will give it try.
I have had another look at Saturday’s blog as the ancient I-pad scrunched all the art work into an overlapping mess. The submissins were all stunning and once again I say congratulations to all the contributors. They well deserve their vouchers.
Stay safe.
Thank you Glynis and Grace for the lovely project. Will give that a try and put with my stash.x
Beautiful thanks Glynis ,and Grace for your blog
Will give this a go
Another beautiful tutorial to inspire and try.
Another lovely project Glynis, thanks for the tips on how to emboss the plate. Doing one flower at a time makes much more sense, then you know which bit you have done with the No 2 tool before switching to the No 1. Rather than doing the whole plate with the No 2 first. Doing the picot V’s at each corner saves having to work out if they are going to fit in along your project as well.
Looks like a very busy spending week ahead !! no doubt something will fall in my basket as they were talking about launching C*******s next week on C&C. Lets hope they have sorted out the rewind button by then but just in case I will make a note to set them to record.
Thanks Grace for another Sunday blog, have a good week x
Hi Grace & Glynis
Another lovely project – will be having a go at this to……….the pile keeps growing !! 🙂
Thank you to you both
Xx
Another lovely project from Glynis. Not really a parcher but I do like to give it a go just bought myself some new plates so have been going back to look at some of the older projects. So much inspiration to be had from t fantastic design team. Thanks Grace for the tv schedule will set to record all shows then I can watch whenever I want to.💕