
Clarity Matters Blog Tutorial: How To Use The Multi-Needle Tools With Groovi Plates
Hello hello! Grace here.
I hope you are having an enjoyable weekend so far. Feeling crafty?!
We are joined this week by the very talented Jane Telford, our good friend and Clarity Crafts Design Team Member. I will hand you over to our teacher for today…

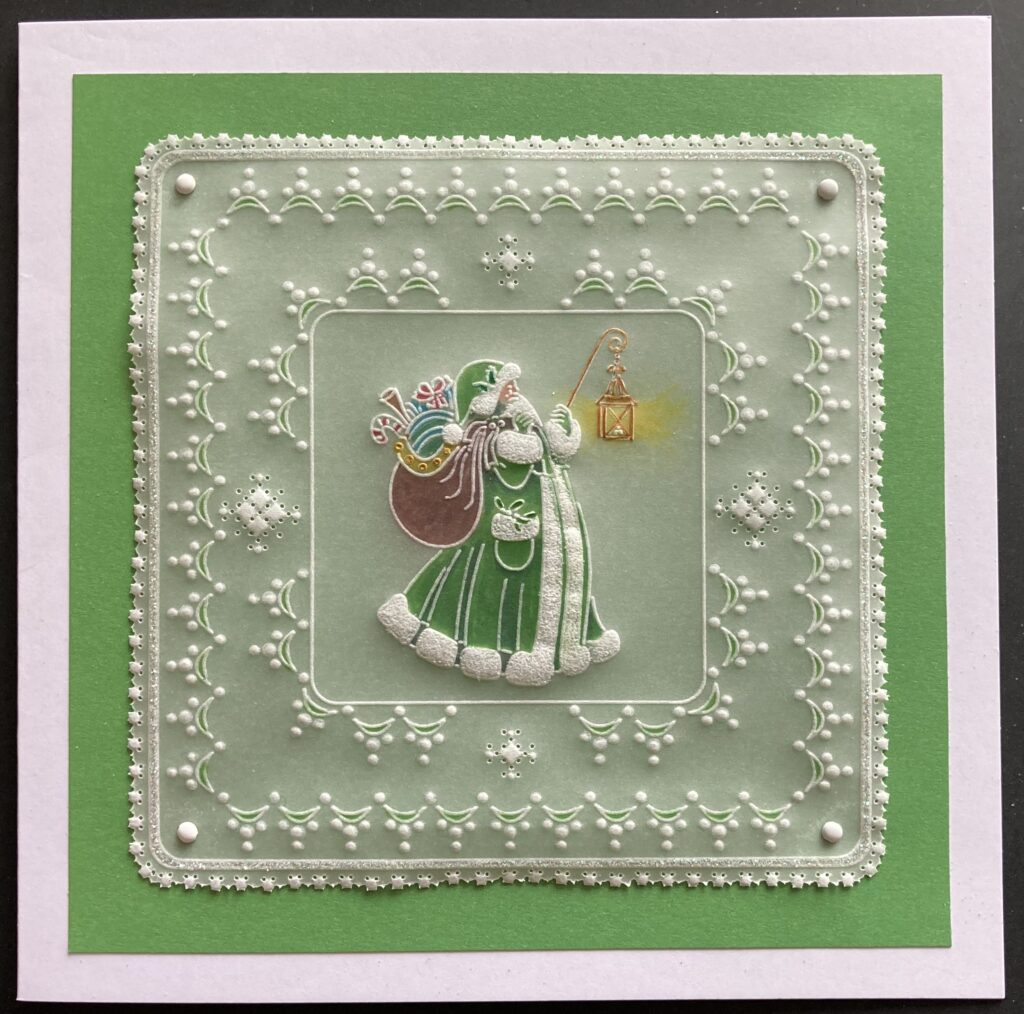
How To Use The Multi-Needle Tools With Groovi Plates – Green Santa
Multi-needle tools are something that used to terrify me but now I am enjoying using them and getting to grips with them. They can be used within a design and also to create a lacy edge.
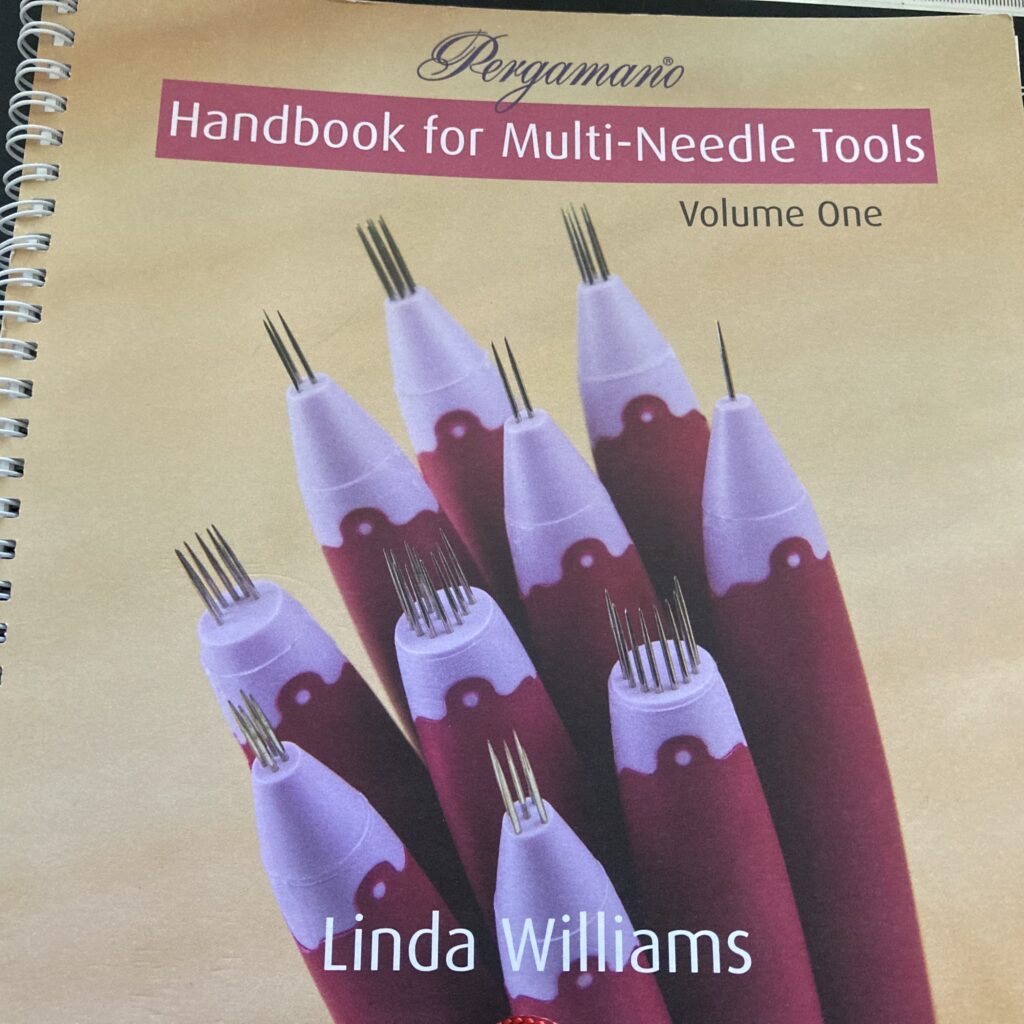
My main help in learning how to use these tools are the books by Linda Williams but for this project I am using tools from her Book 1.
I demonstrated this on the Pergamano show but thought you’d like a reminder of how to make it if you want to have a go. If you do, please share it with us all on Groovi Worldwide.
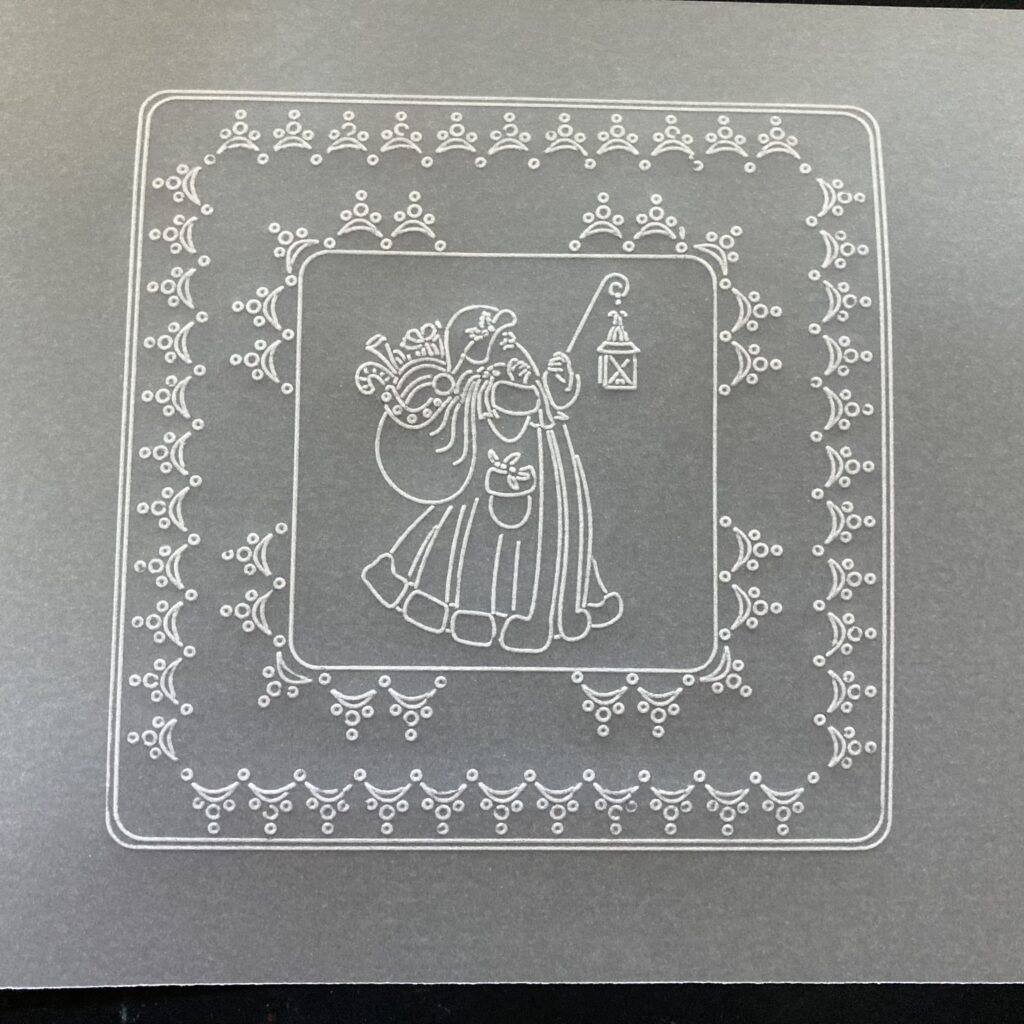
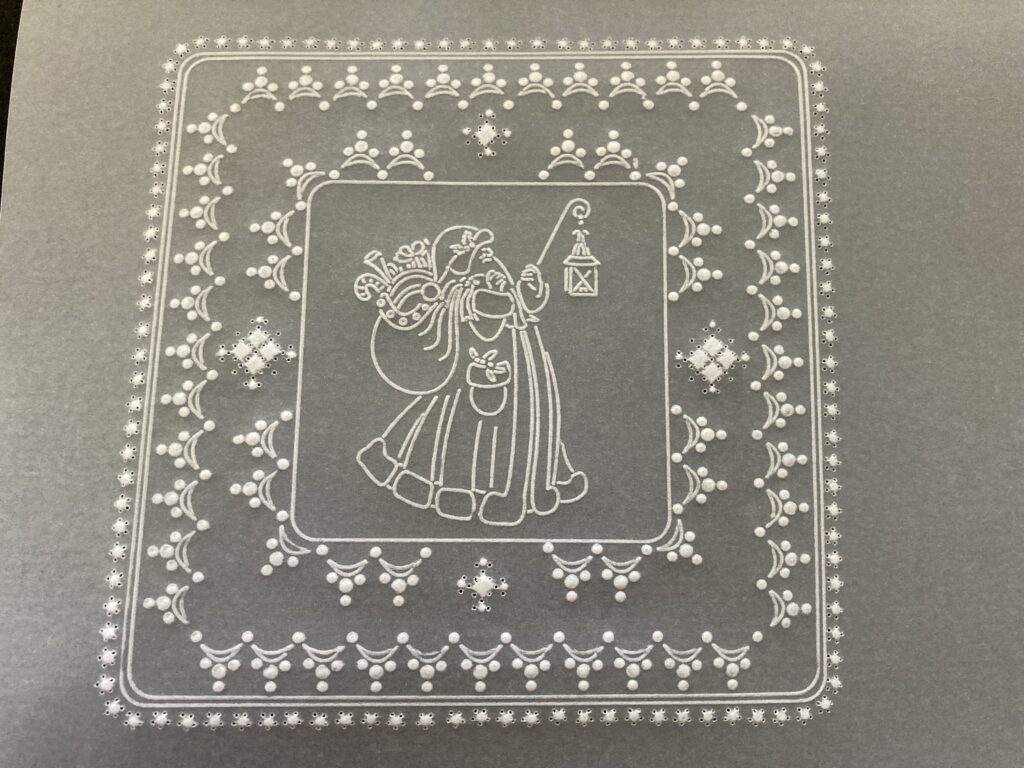
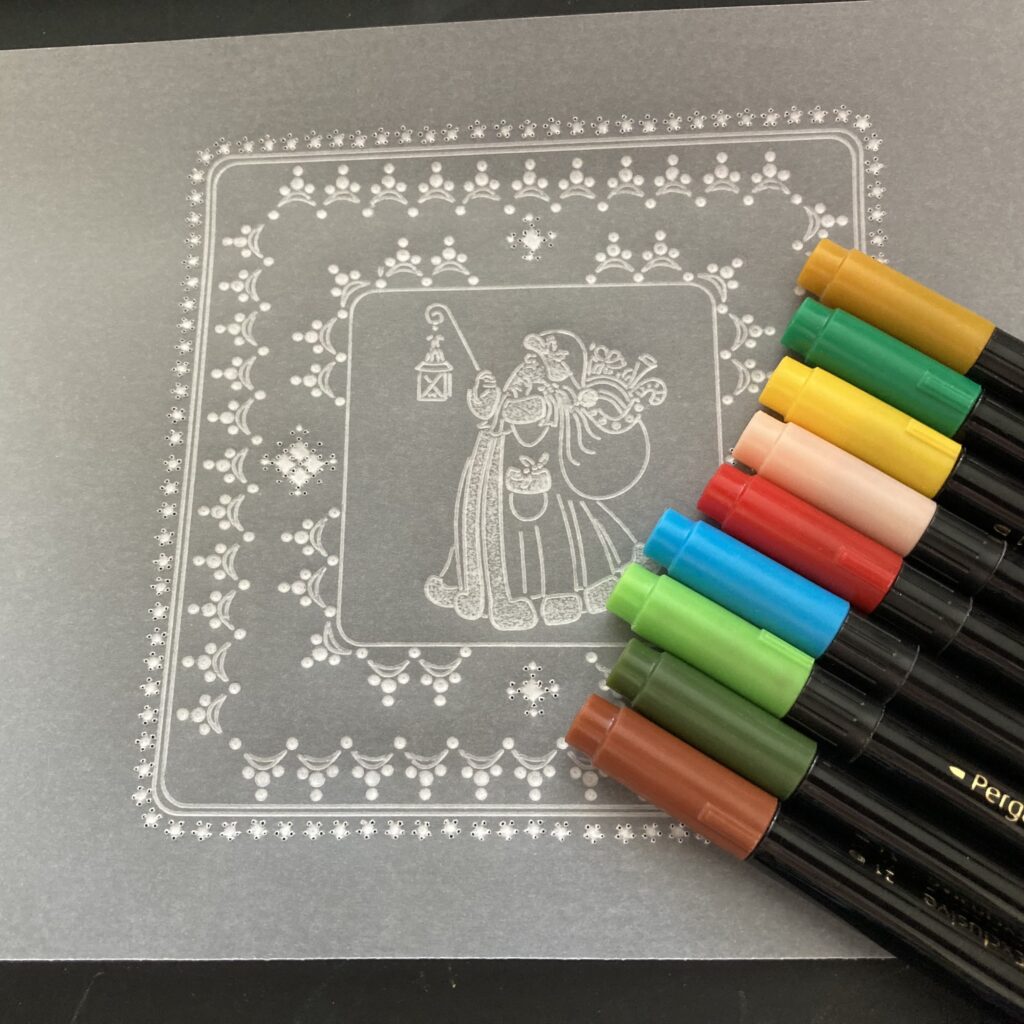
This is where we are headed…
Ingredients
Clear A5 Parchment (GRO-AC-40020-A5)
Linda Williams Christmas Treasures Deck the Halls (GRO-CH-41887-03)
Linda Williams Christmas Treasures Father Christmas (GRO-CH-42049-03)
Deluxe Starter Kit 2024 (GRO-SK-42144-XX)
Groovi Tabs (GRO-AC-40437-XX)
Groovi Guard (GRO-AC-40345-XX)
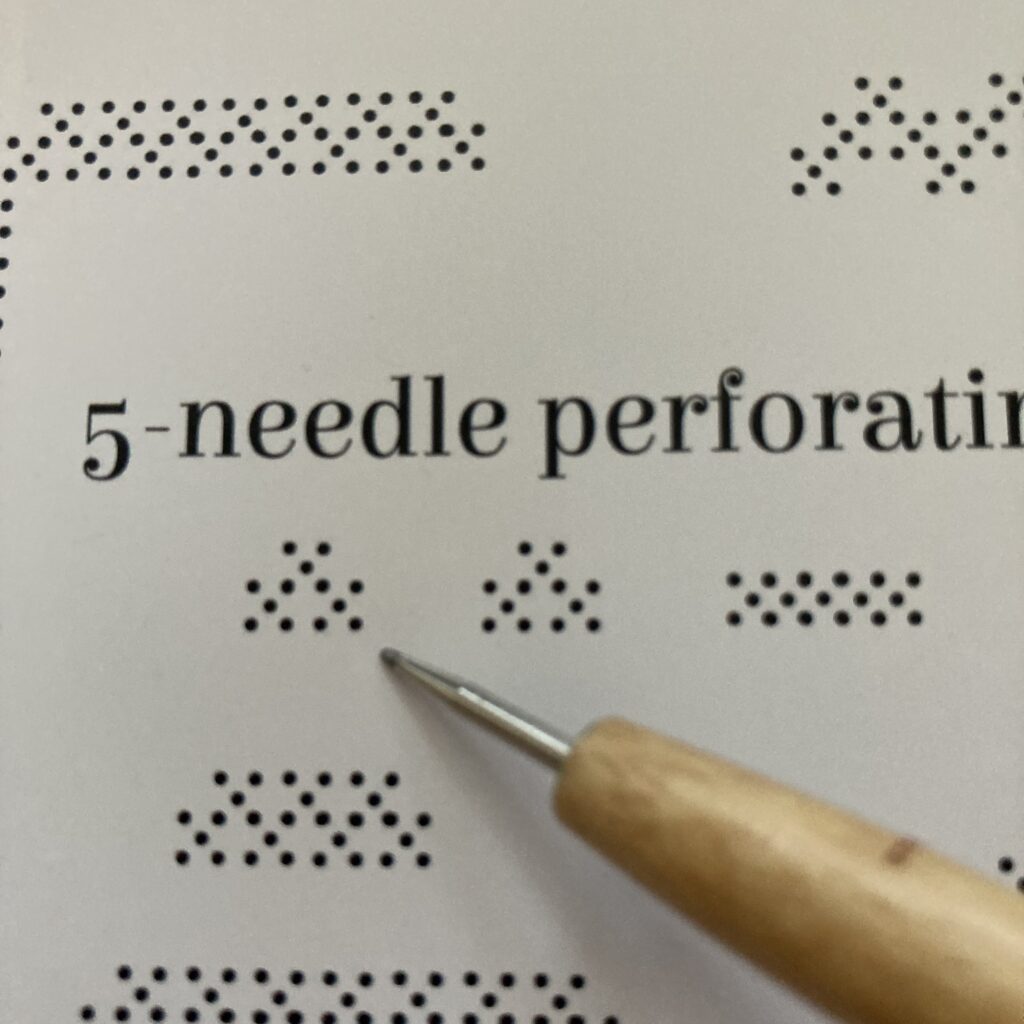
5-Needle Perforating Tool (PER-TO-70019-XX)
5-In-A-Circle Perforating Tool (PER-TO-70025-XX)
Lindas Handbook for Multi-Needle Tools – Book 1 (PER-BO-70291-XX)
1-Needle Bold Perforating Tool (PER-TO-70028-XX)
Shader 1.0mm Embossing Tool (PER-TO-70002-XX)
Perga Colour Exclusive (PER-CO-70060-XX)
Shenandoah Companion Paper 8×8 (ACC-CA-31666-88)
Tape Runner (ACC-MS-31065-XX)
Lightwave Led Light Panel & Cover Bundle + Free A4 Translucent Piercing Mat (ACC-LP-30566-XX)
A4 Translucent Perforating Mat (GRO-AC-40307-A4)
Picot Foam (GRO-AC-40625-XX)
Pergamano Excellent – Embossing Mat (PER-AC-70075-XX)
4 White Brads (PER-AC-70269-XX)
Ringlock Scissors (PER-TO-70041-XX)
Pergamano Set Of 7 Metallic Gel Pens (Bronze) (PER-CO-70449-XX)
Perga-Glitter Bundle (PER-AC-70305-XX)
White Card Blanks 6×6 (ACC-CA-31671-66)
Method
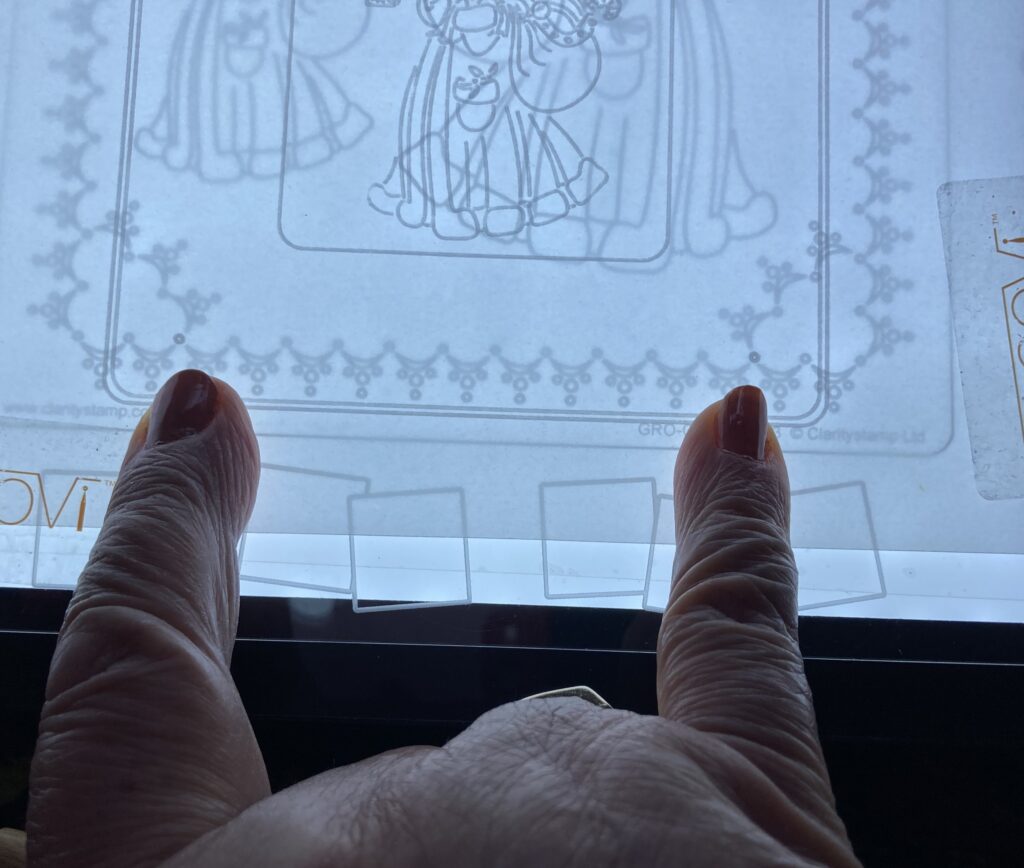
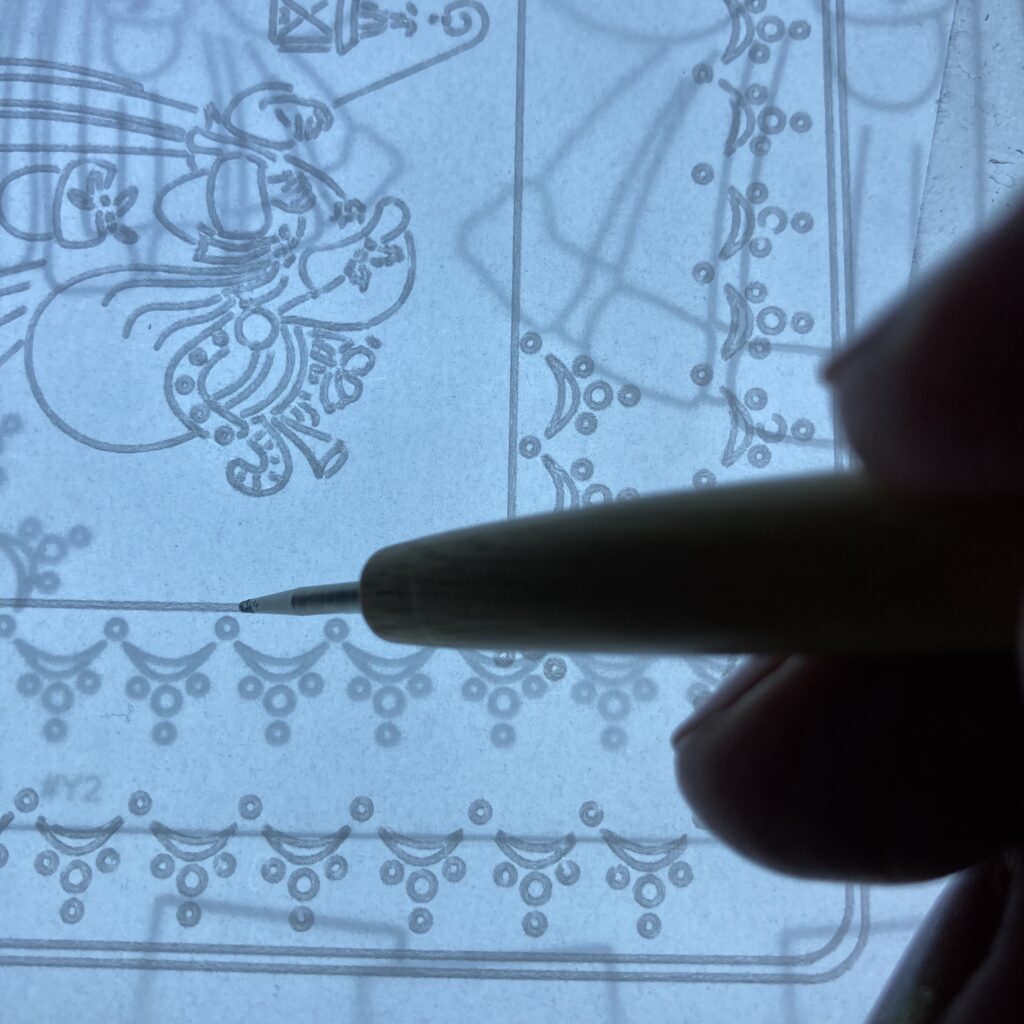
Step 1. Take a piece of A5 clear parchment and emboss the lines off the frame plate as shown.
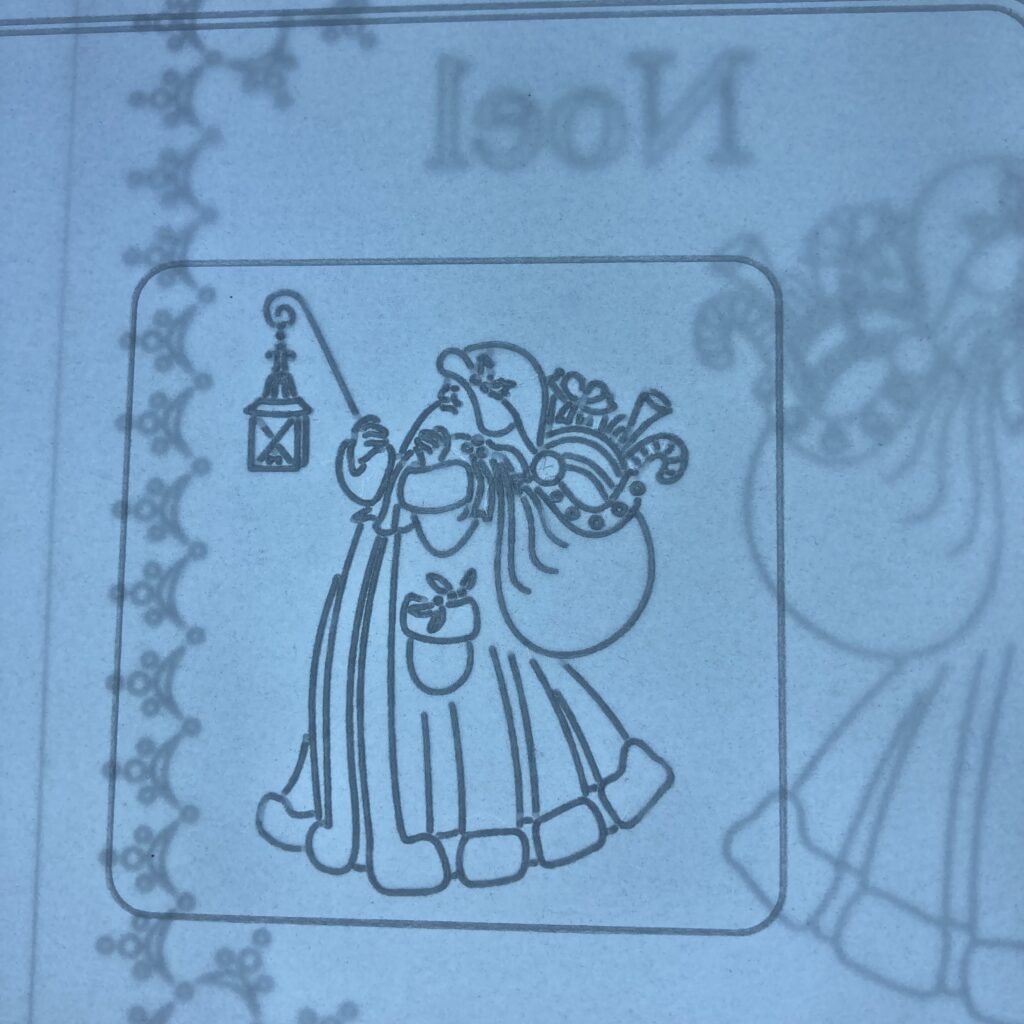
Step 2. Swap the plate to the Santa Plate and position the small inner square over the small Santa. Emboss his completely.

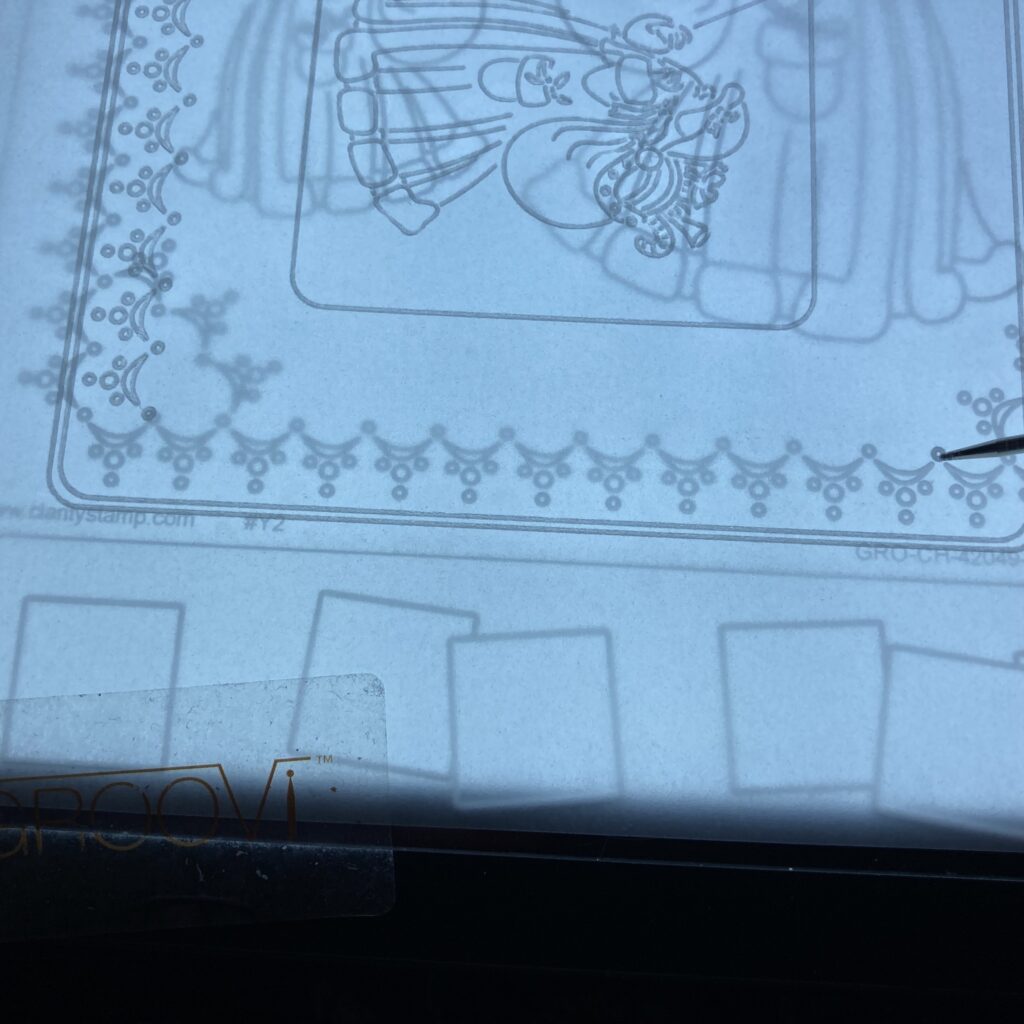
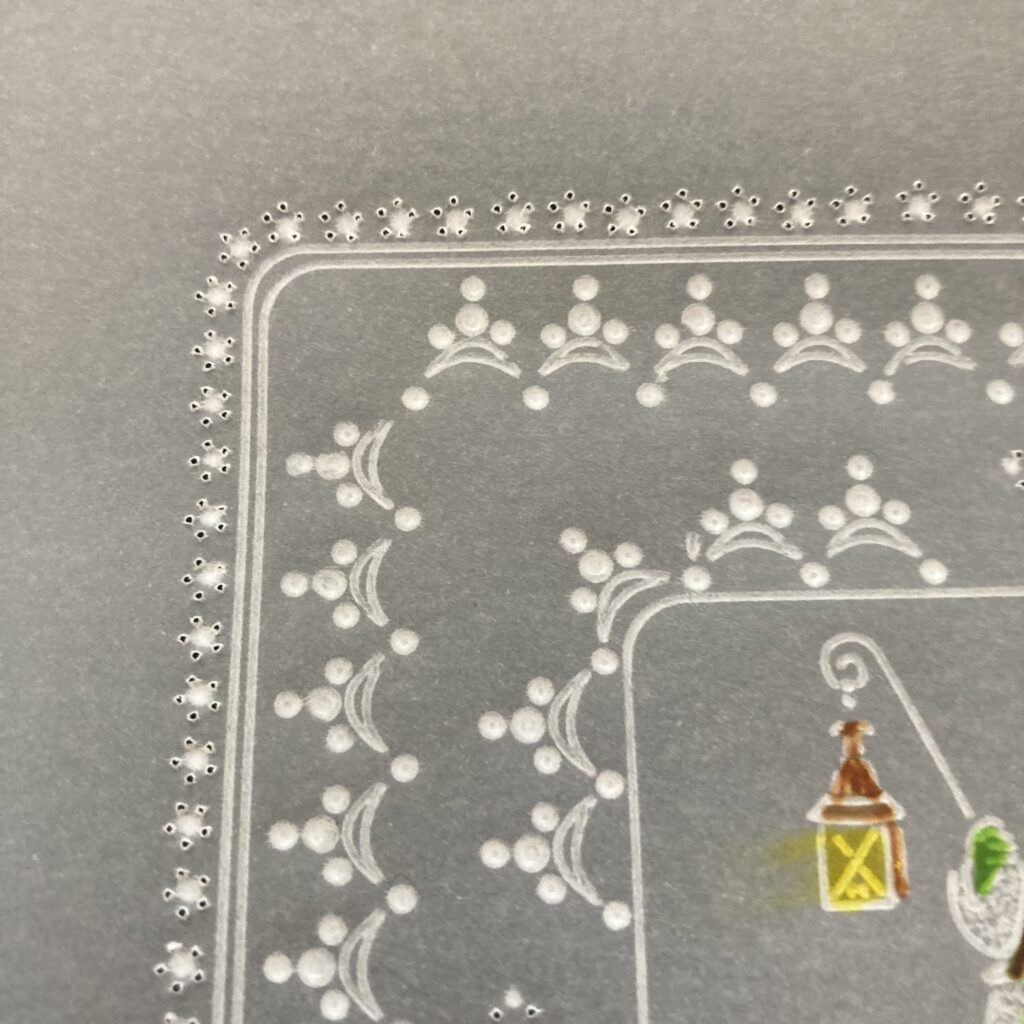
Step 3. Line up the border round the Santa so it is even within the frame and emboss the two outer dots and fill in the detail from these two as shown in the picture.
Step 4. Turn the parchment and repeat the process of lining up the dots so that it is even. Continue round all 4 sides of the square.
Step 5. Now line up on of the shapes in the border with the rounded corner of the inner square and emboss.
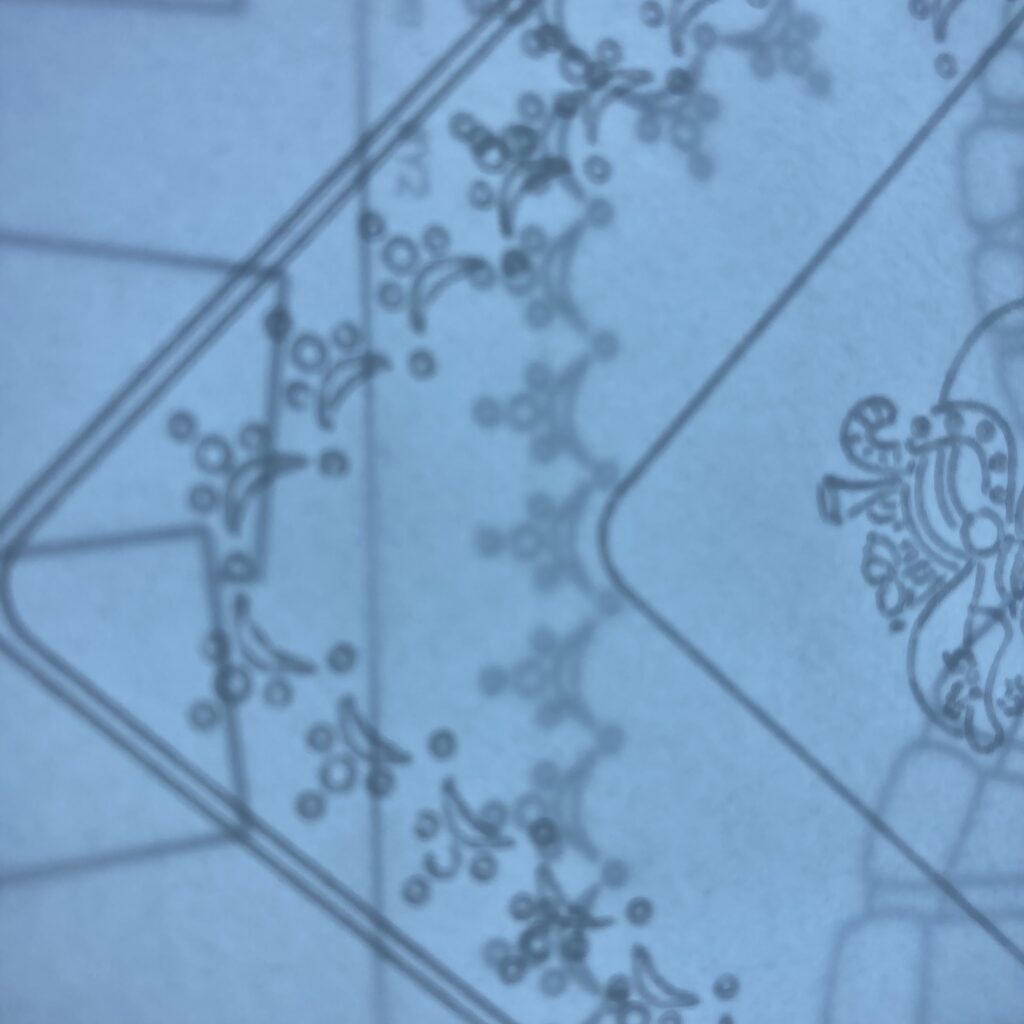
Step 6. Turn the parchment and line up the dot on the plate with the one you have embossed but keeping it against the line of the square. Emboss two shapes along the line.
Step 7. Turn the parchment and repeat this on the other side of the corner. Repeat on all 4 corners of the inner square.
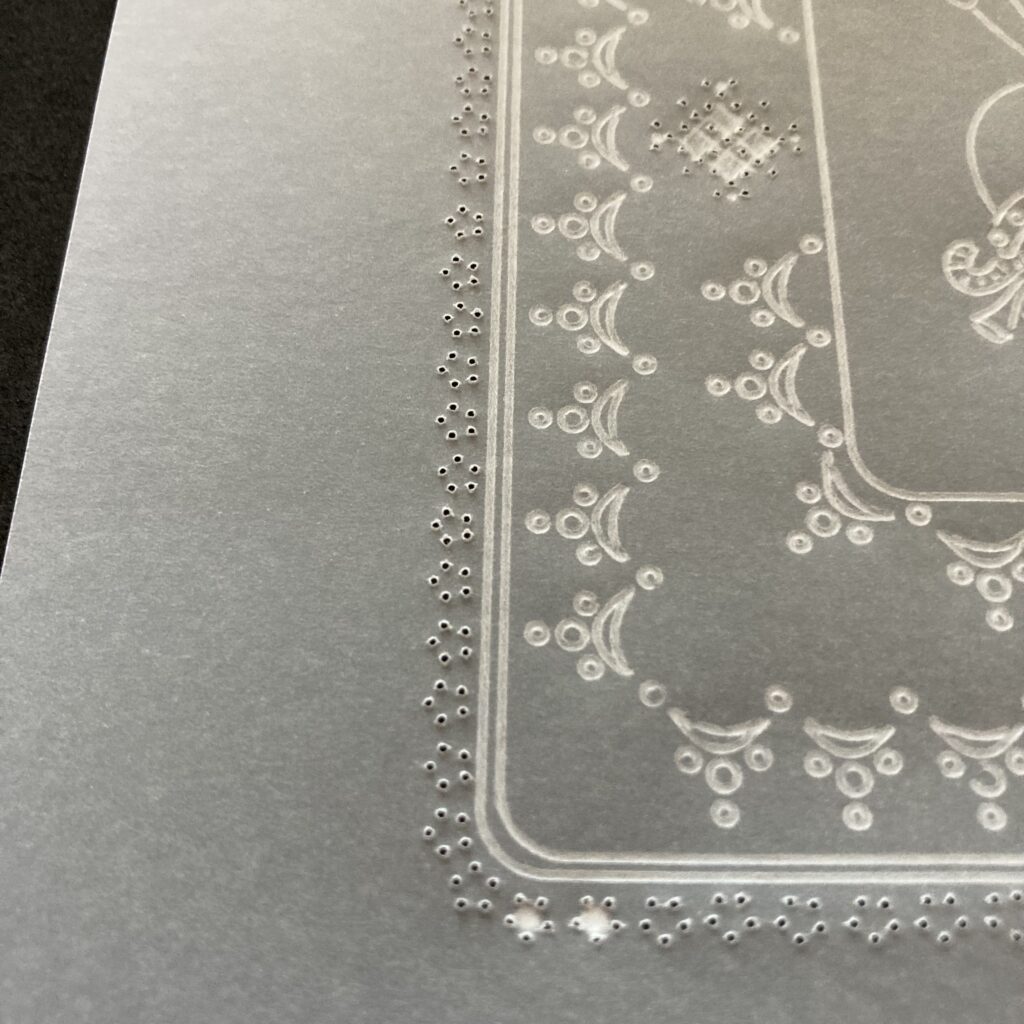
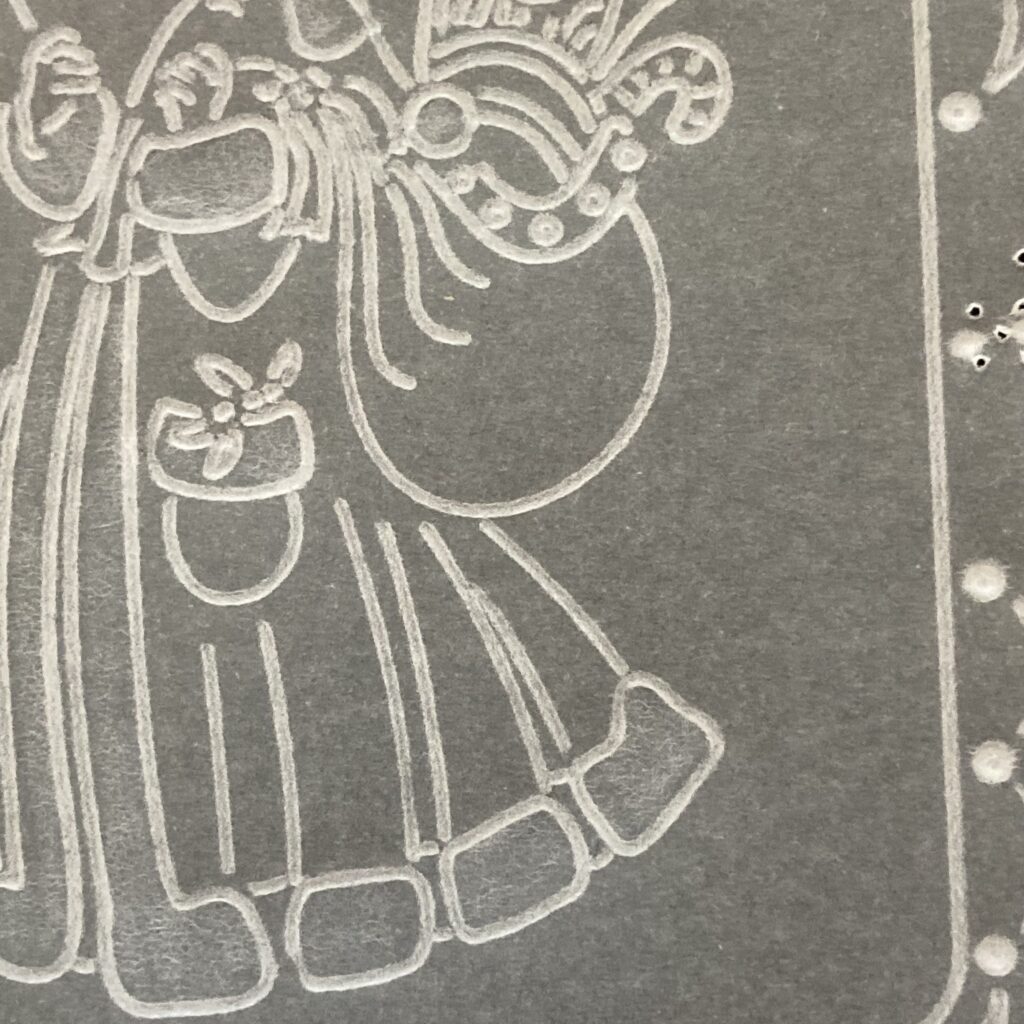
Step 8. Your design should look like this at this stage.
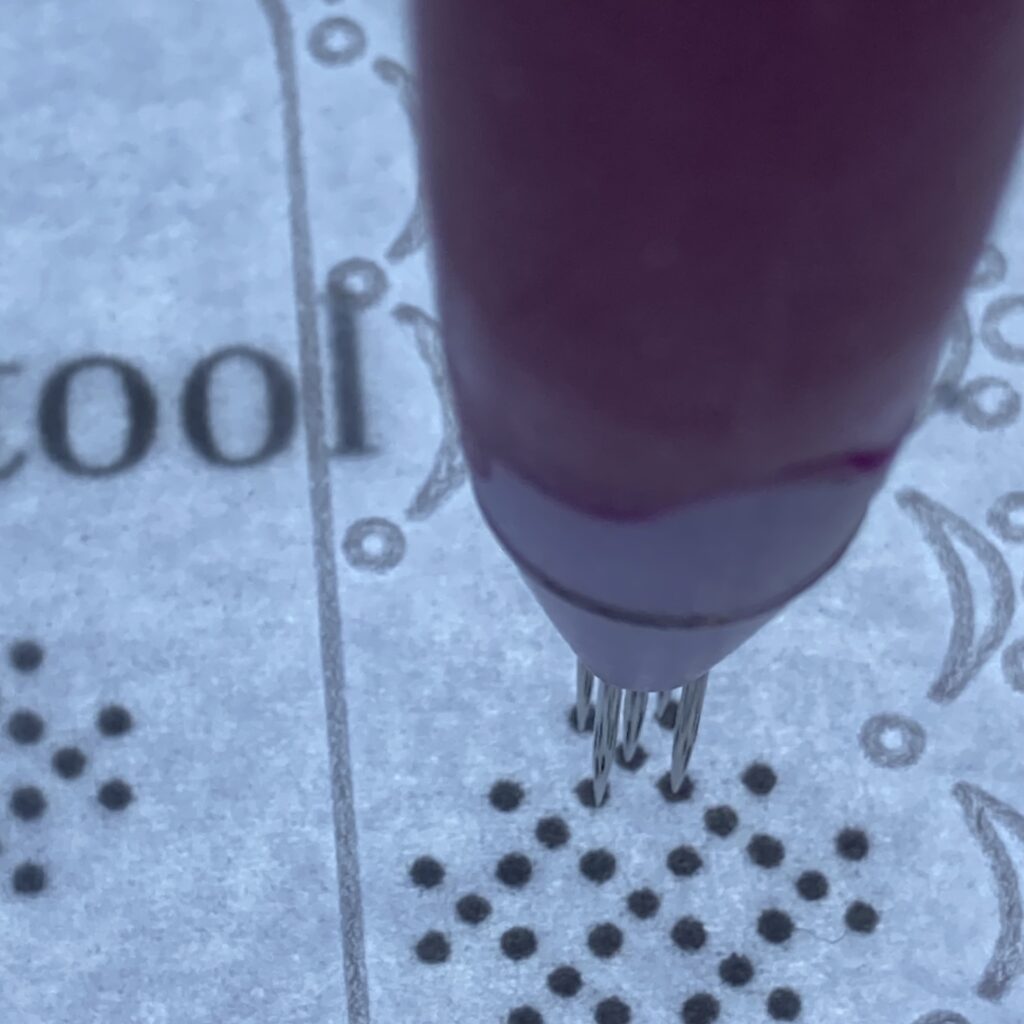
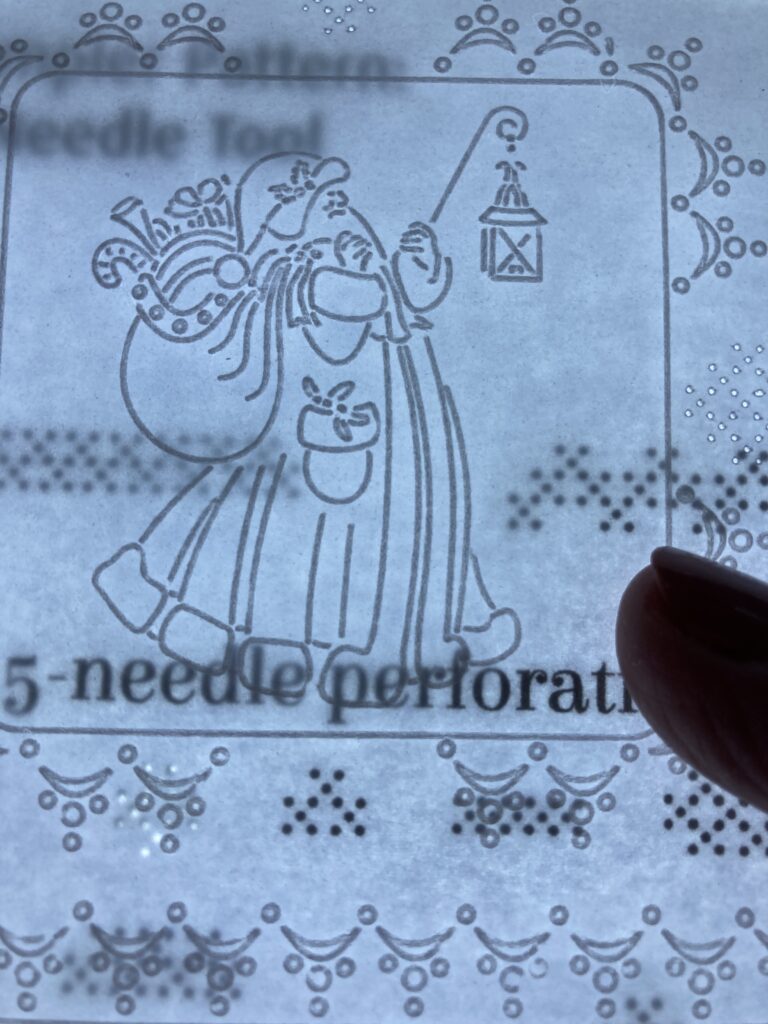
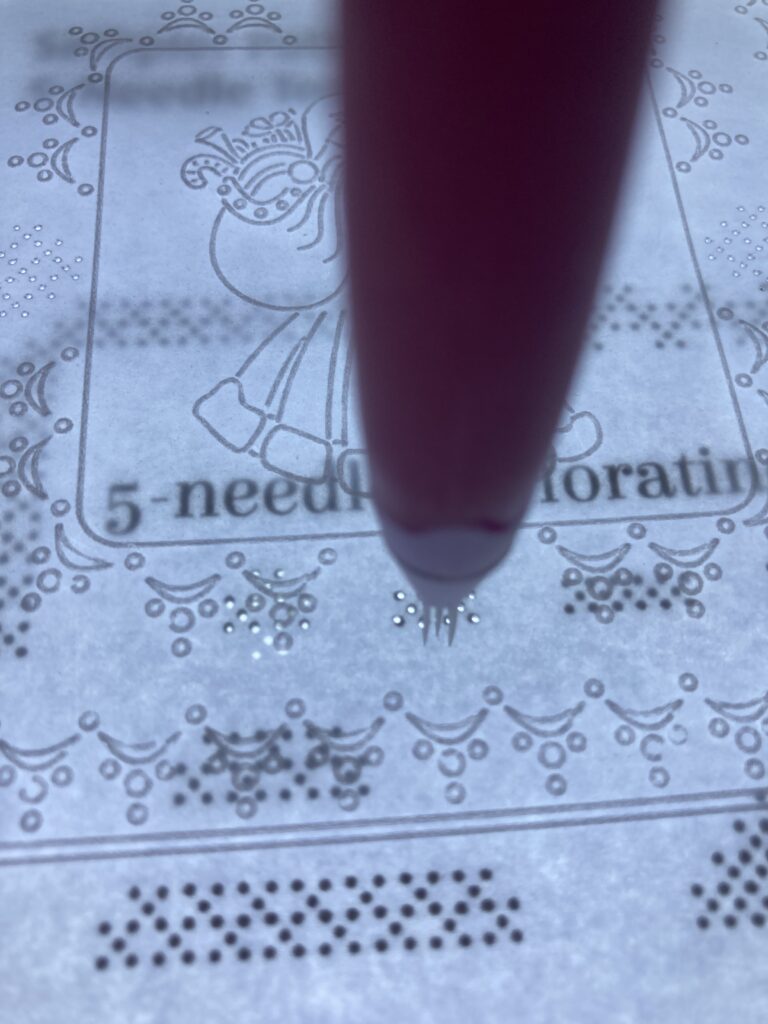
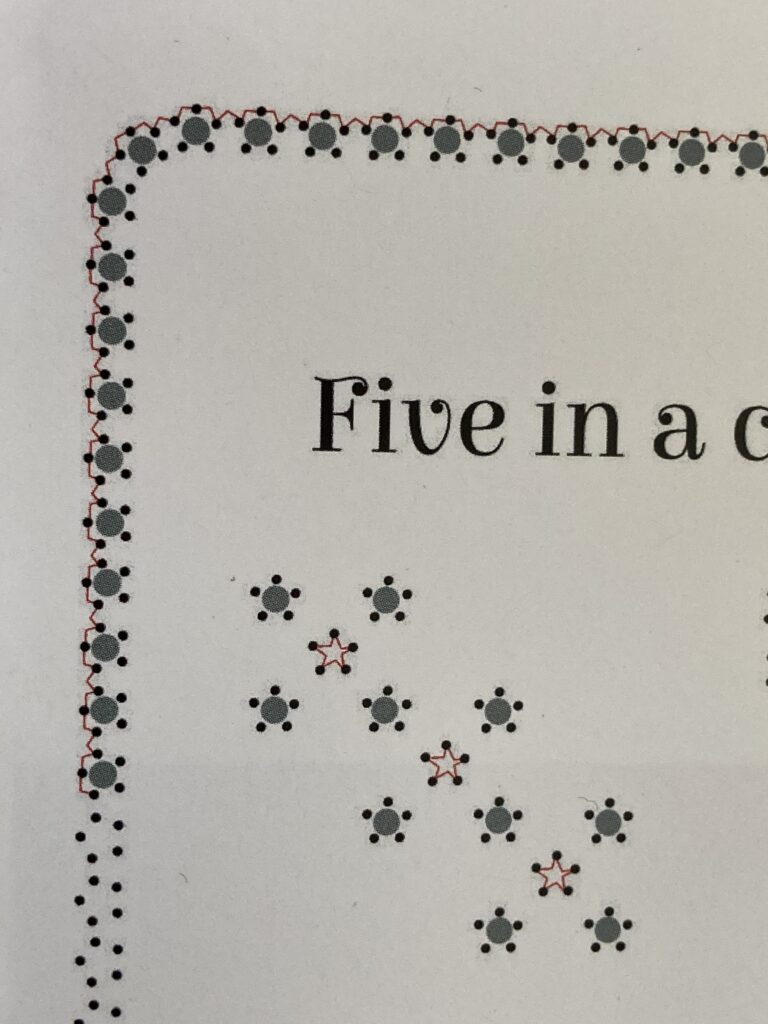
Step 9. Photocopy the sampler pattern for the 5-needle tool Pg. 25, onto thin copy paper. Find the relevant pattern as shown and place your design front side up over it so the pattern fills the gap at the side of the design.
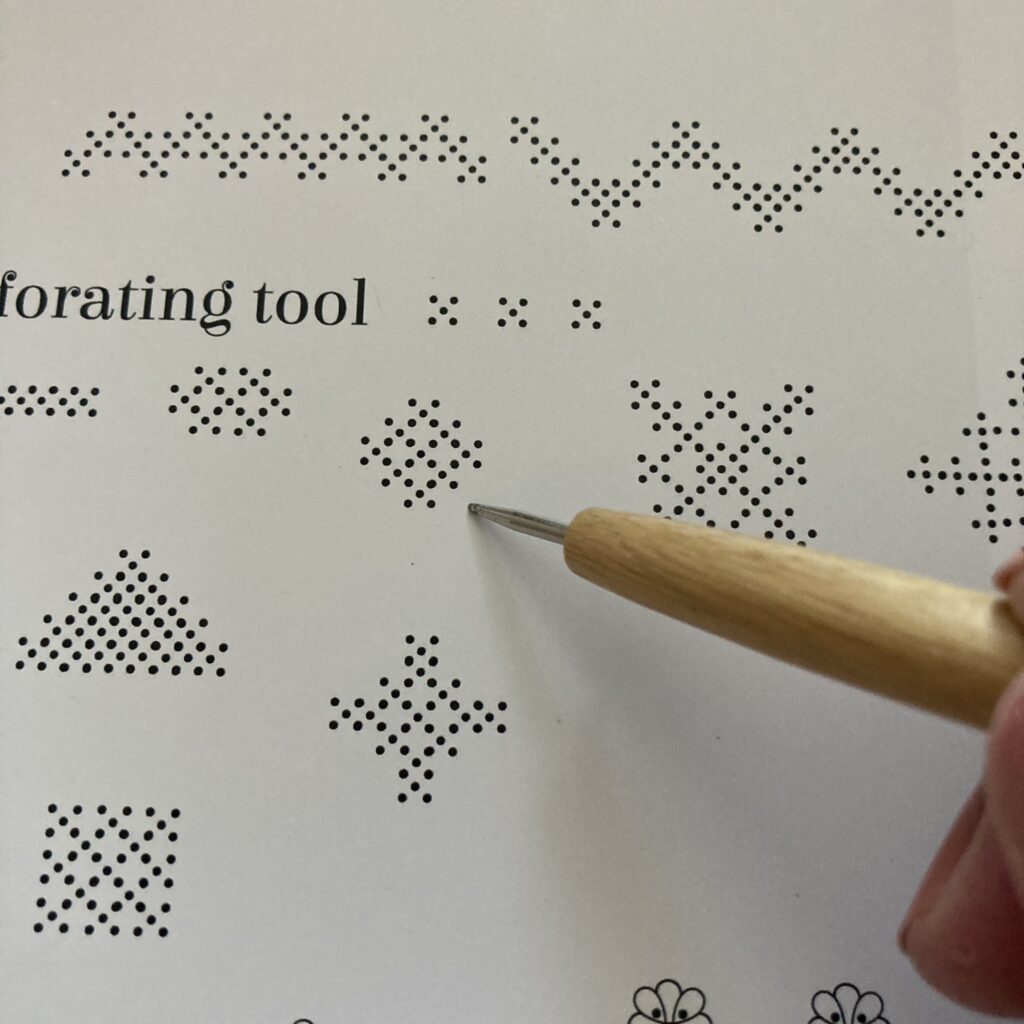
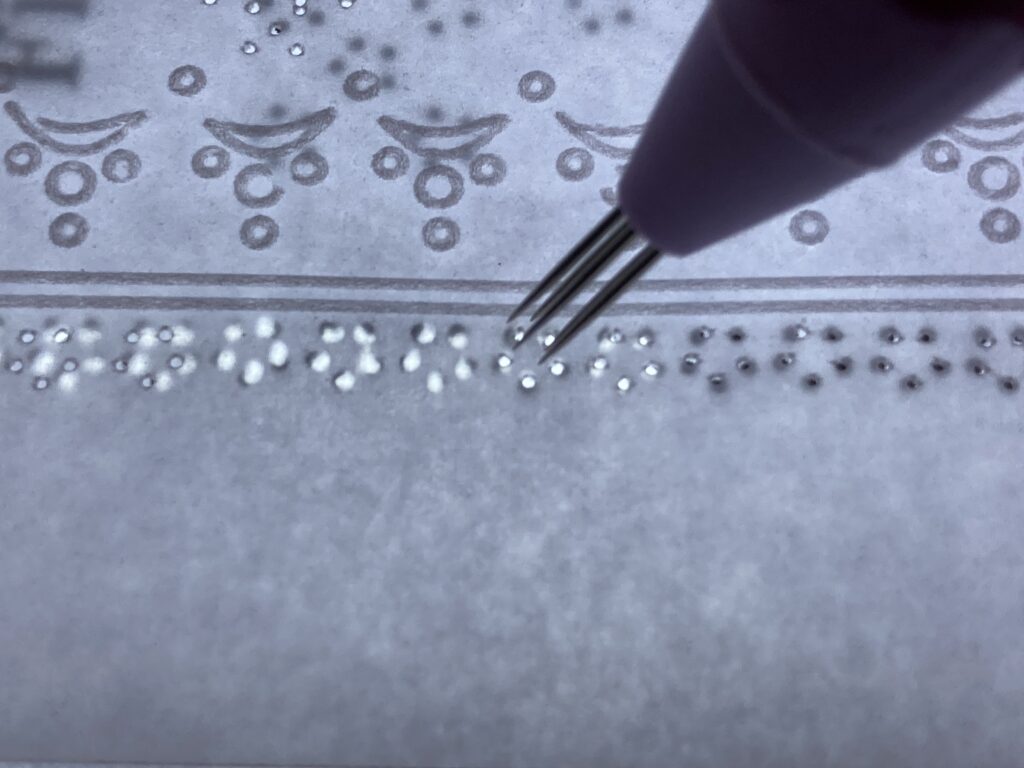
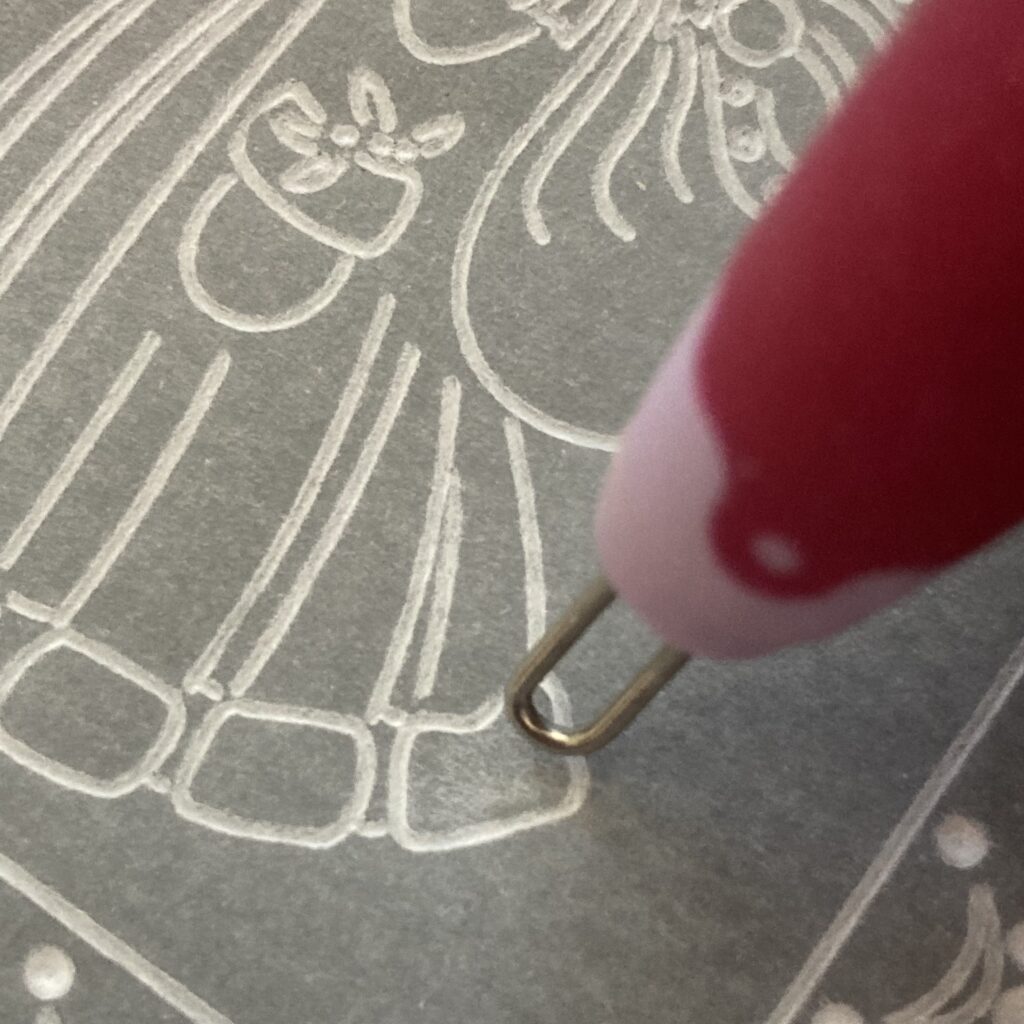
Step 10. Using the 5-needle tool line up the needles with the dots on the pattern and making sure that your tool is upright perforate about a third of the needle length. Complete the little pattern then repeat this at the other side of the design.
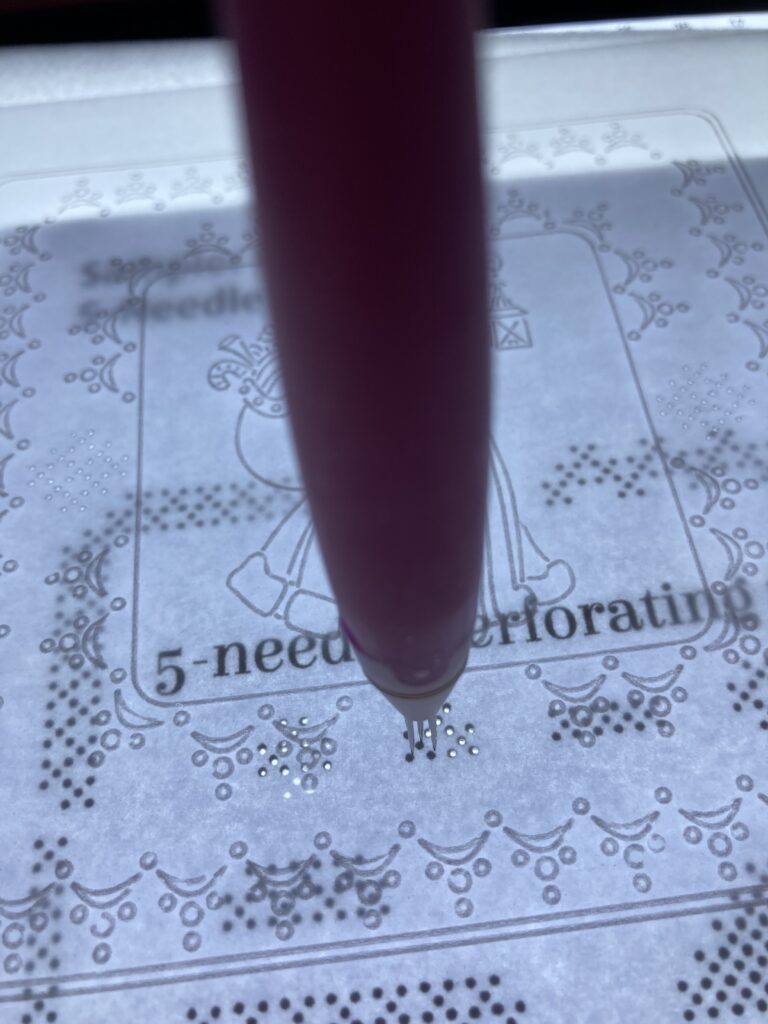
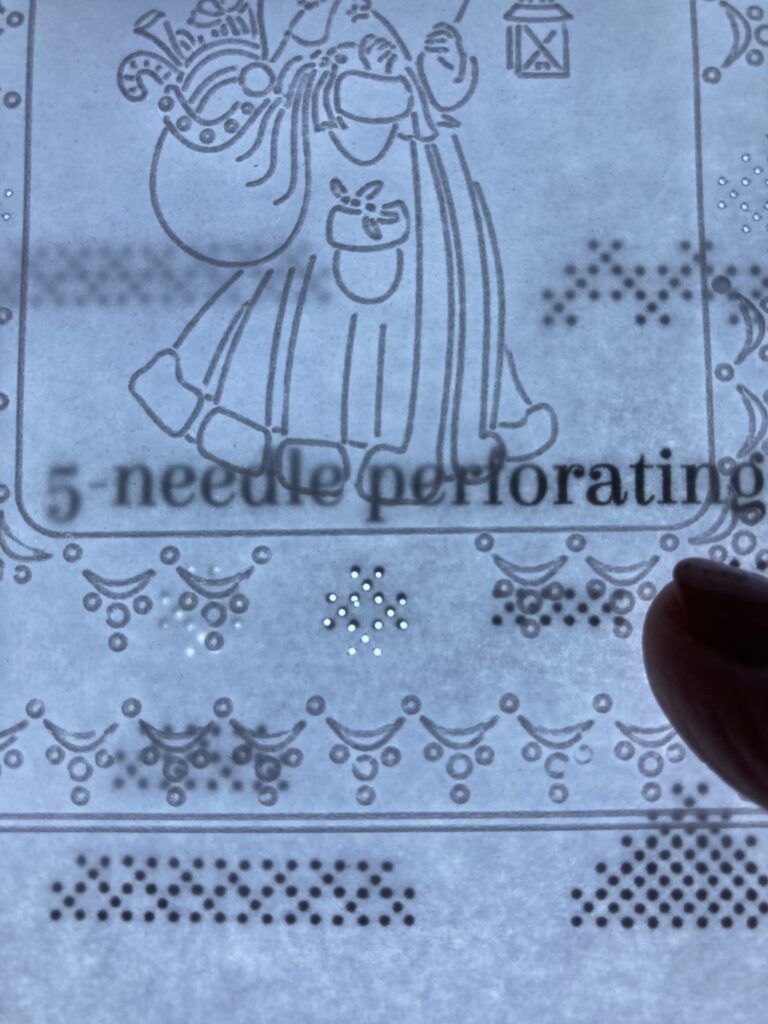
Step 11. Now locate the next pattern on the sheet. Stick the parchment over the pattern so that the pattern is in the gaps at the bottom of your design. Use the 5-needle tool to shallow perforate the holes. Add another one under the holes so that it forms a cross shape.
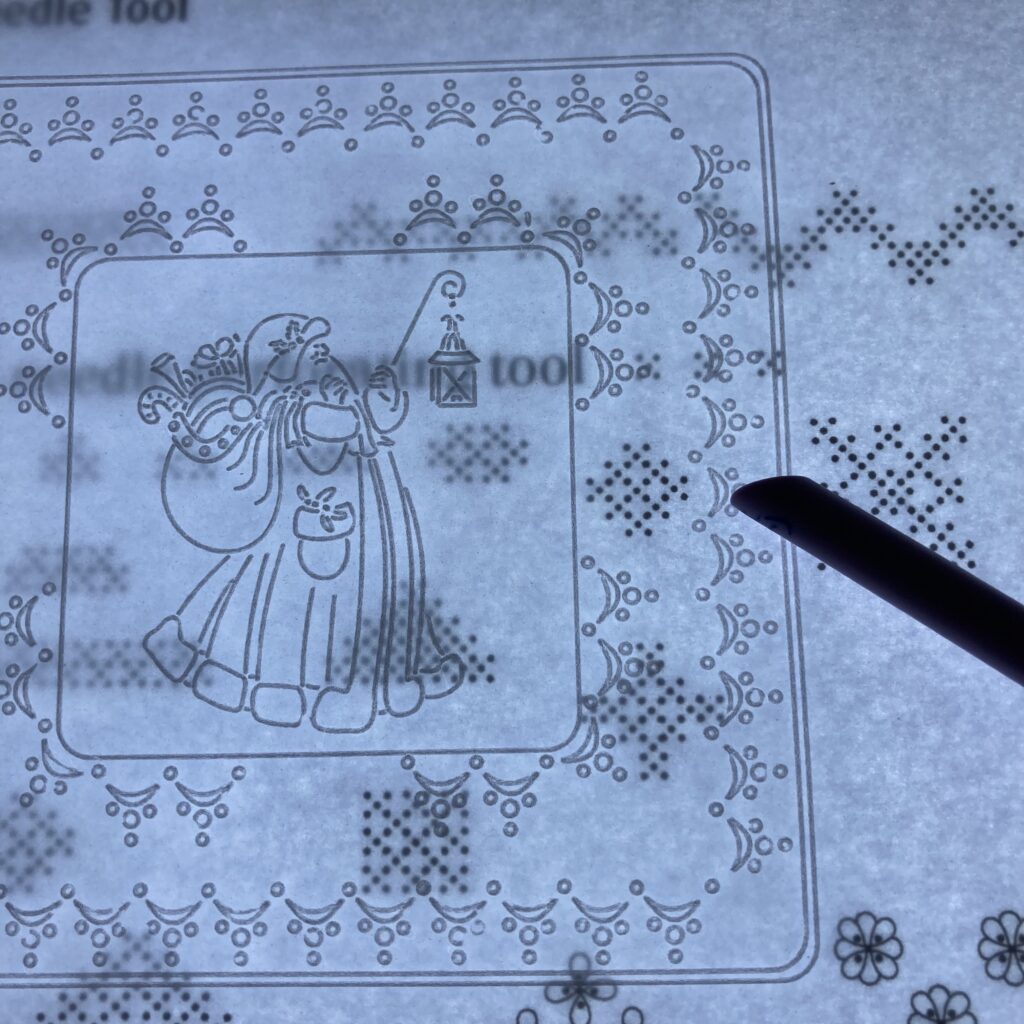
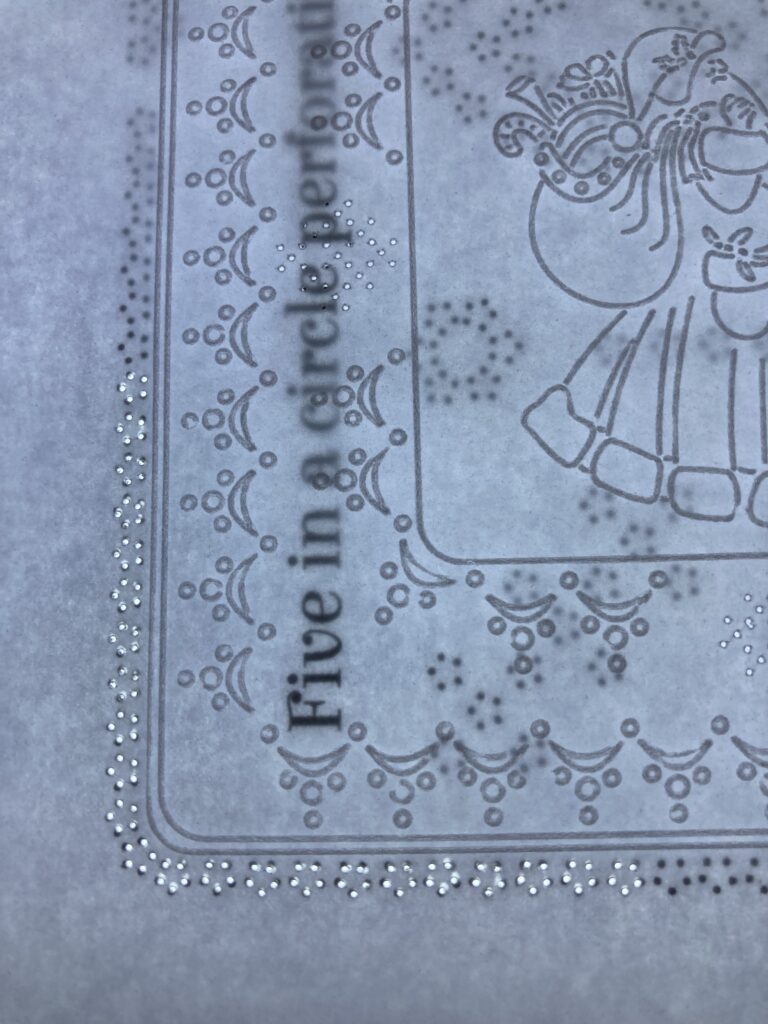
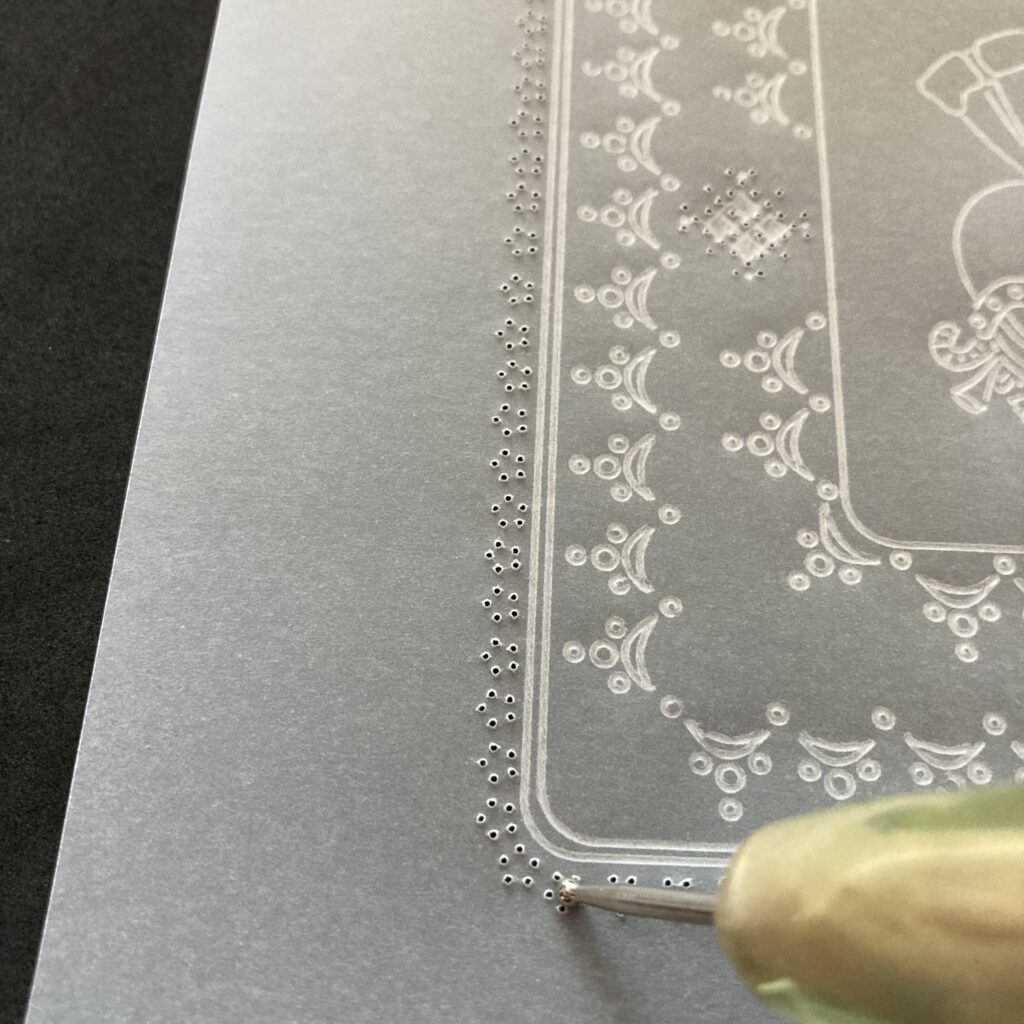
Step 12. Now photocopy the pattern for the 5 in a circle tool Pg. 29. Locate the pattern you need to use and stick your parchment to the paper with groovi tabs so that the line is as close to the pattern as possible without touching it. Again, your parchment should be front side up. Now use the 5 in a circle tool to shallow perforate the pattern but do not do all the dots. Stop when there are still 7 sets of dots to go on each side. Repeat on each corner of your outer square. The sides should have a gap where the perforations stop and start again.

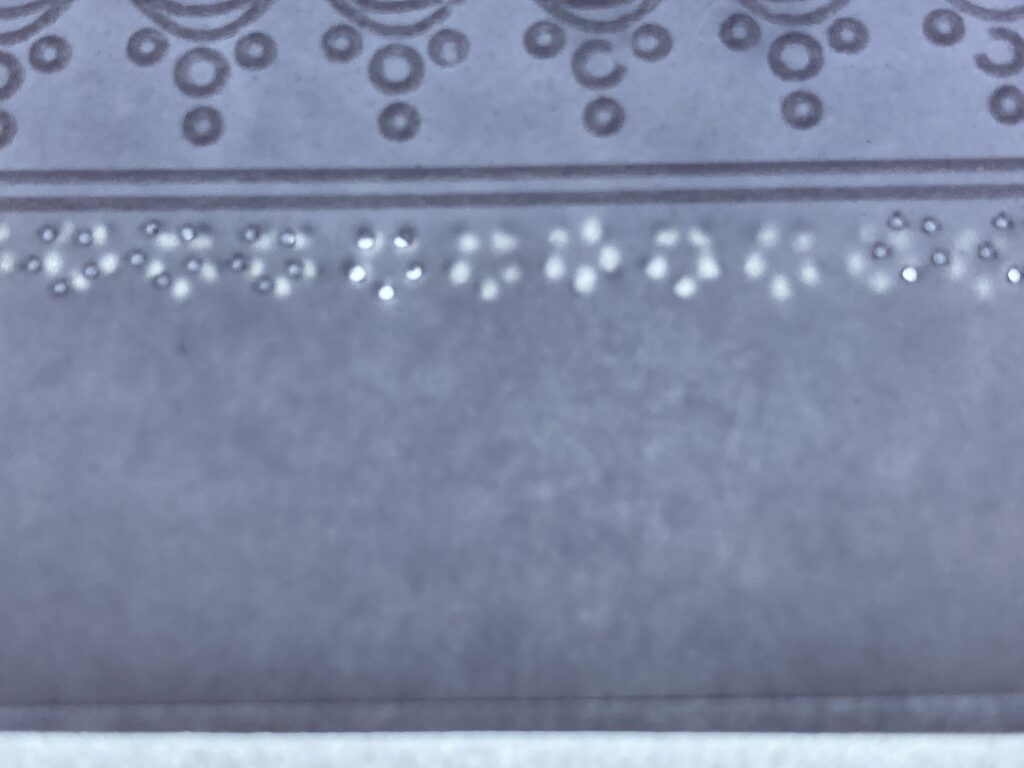
Step 13. To fill in the gaps on each side place the gap over the pattern and then nudge the parchment over slightly to make a slightly larger gap and perforate one 5 in a circle. Continue to move and perforate until the gap is filled. Once it is cut you won’t notice the tiny changes in the size of the gaps.
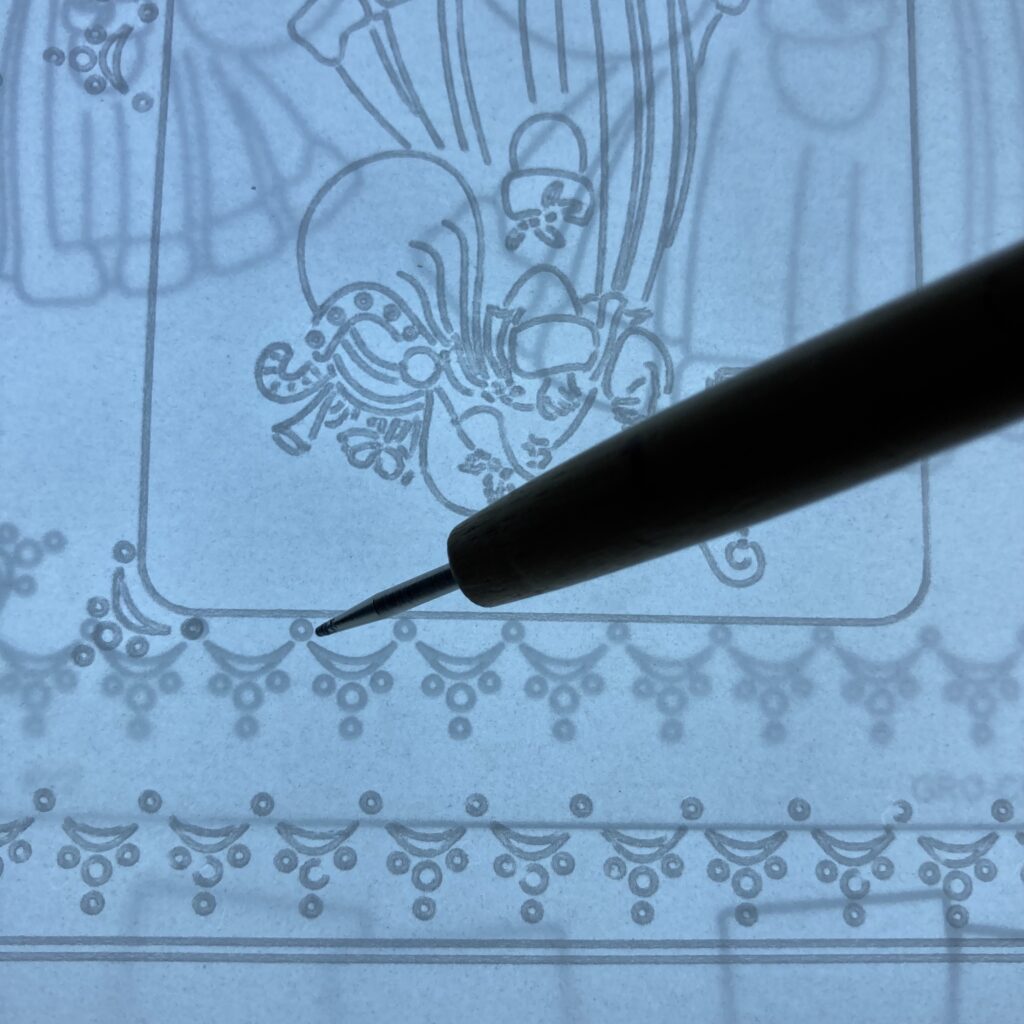
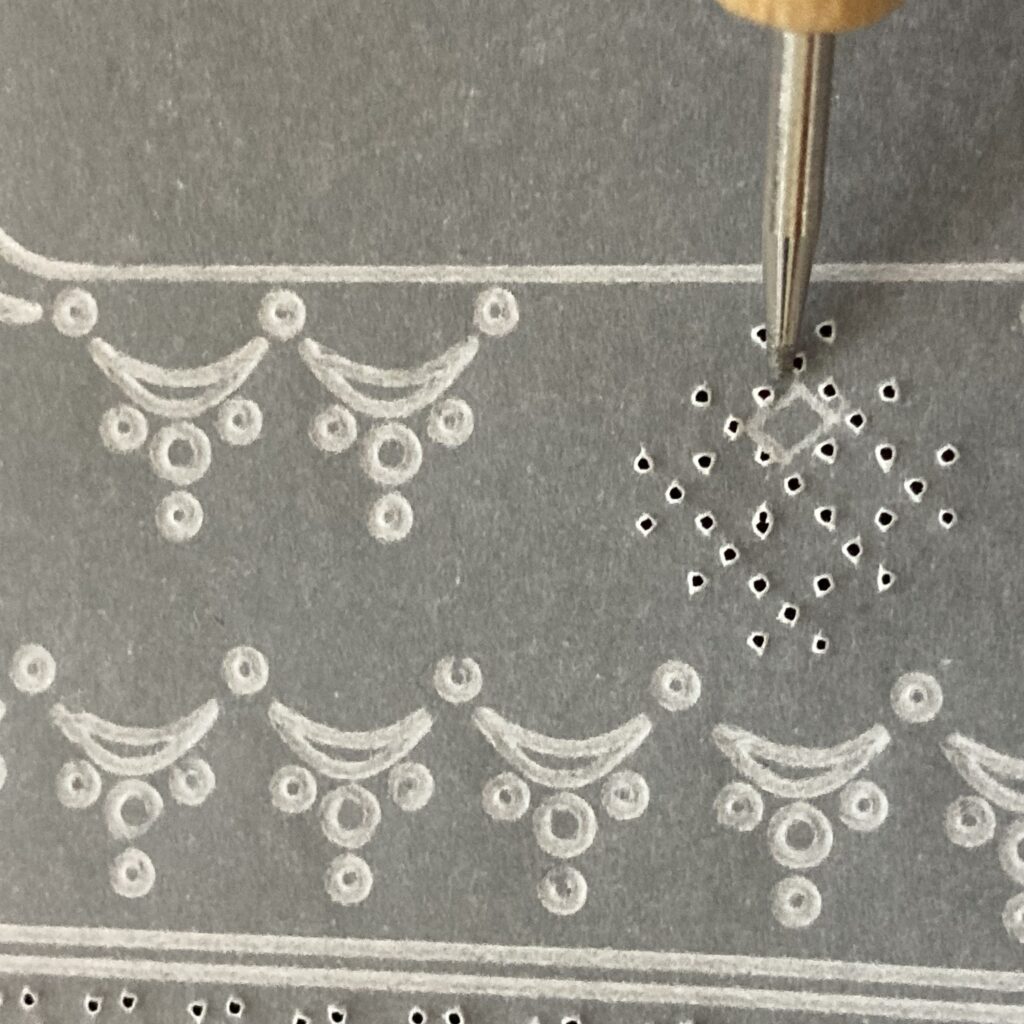
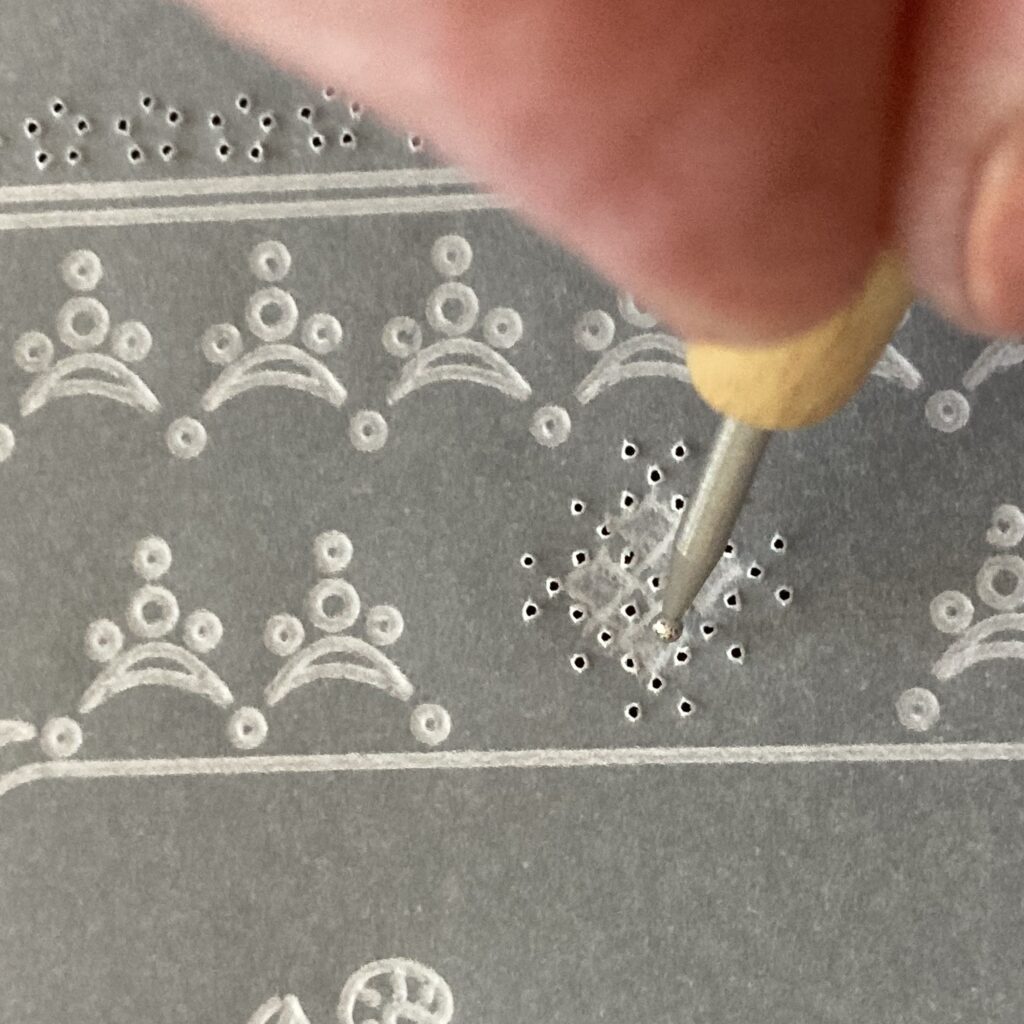
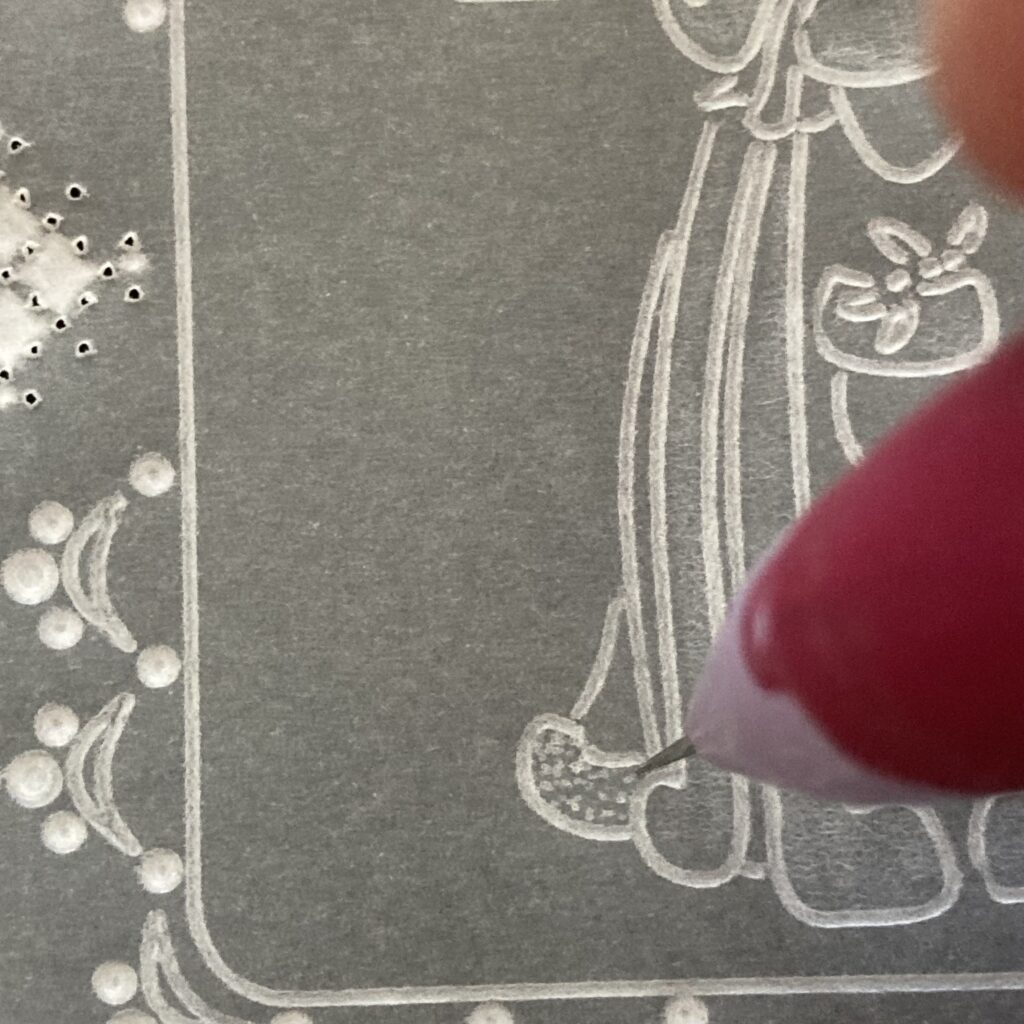
Step 14. Turn the parchment over so the back is facing up. Now emboss whitework in to the little designs in the frame. Draw a square with the no. 1 tool then use the number 3 tool to emboss lightly. Add some tiny free hand dots as shown in the picture. Leave it to rest and repeat until the whitework is done. You’ll need at least 3 layers.

Step 15. Around the outer frame emboss a generous dot in the circles of perforations.
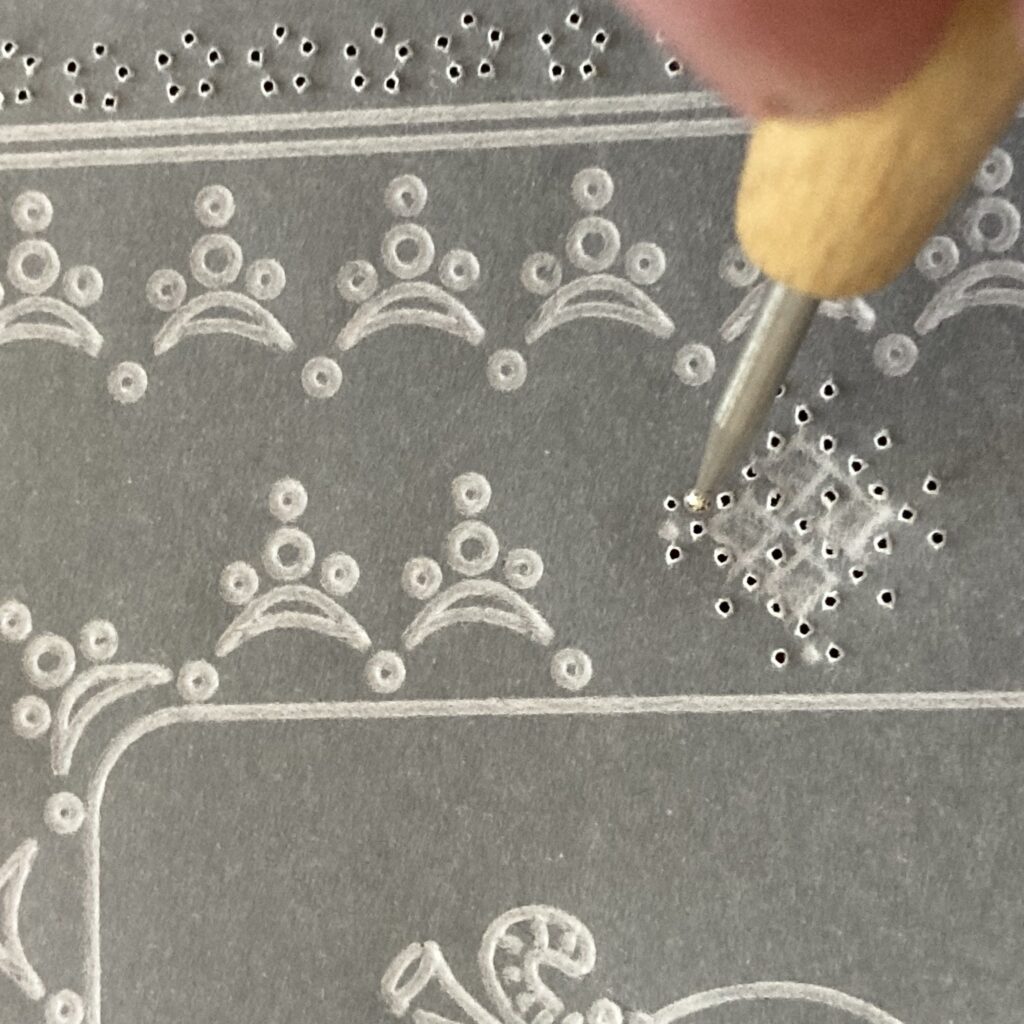
Step 16. Now do whitework in all of the dots in the frame using the No. 3 tool.
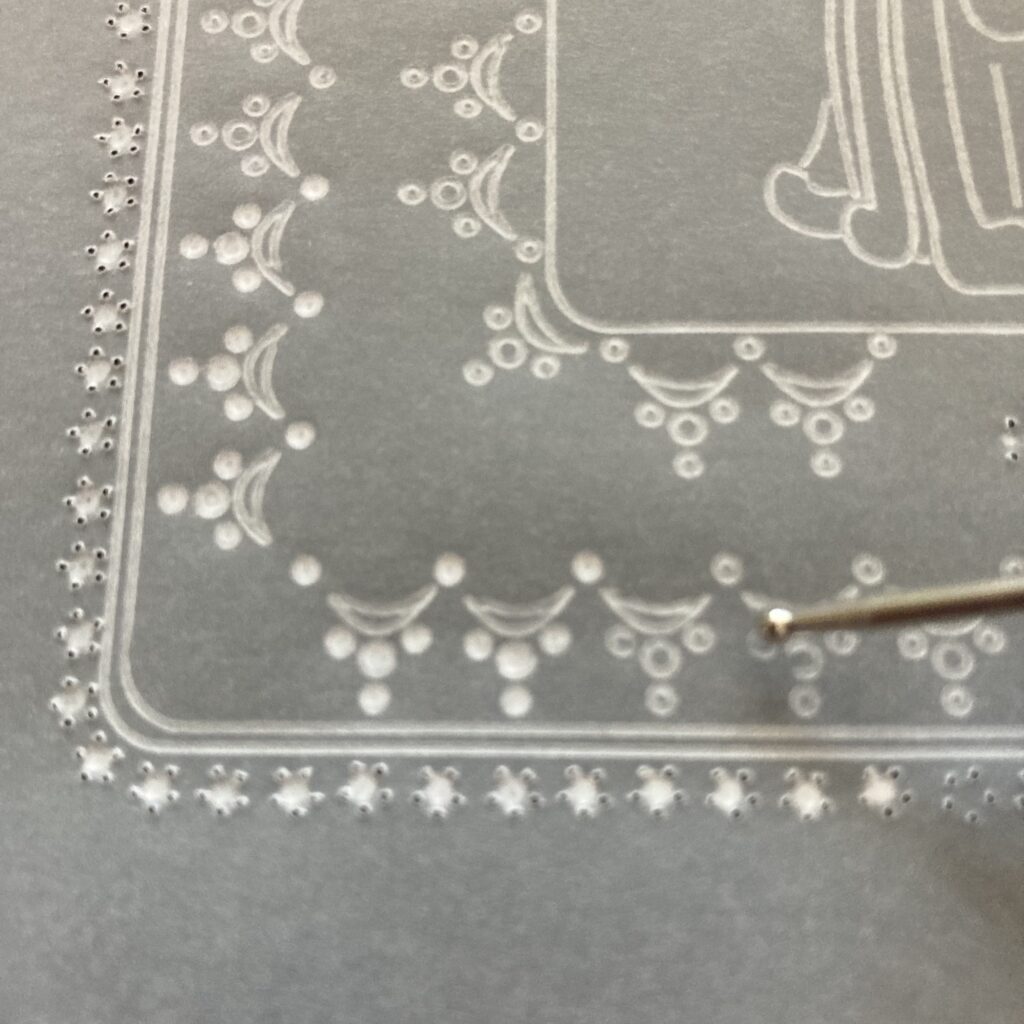
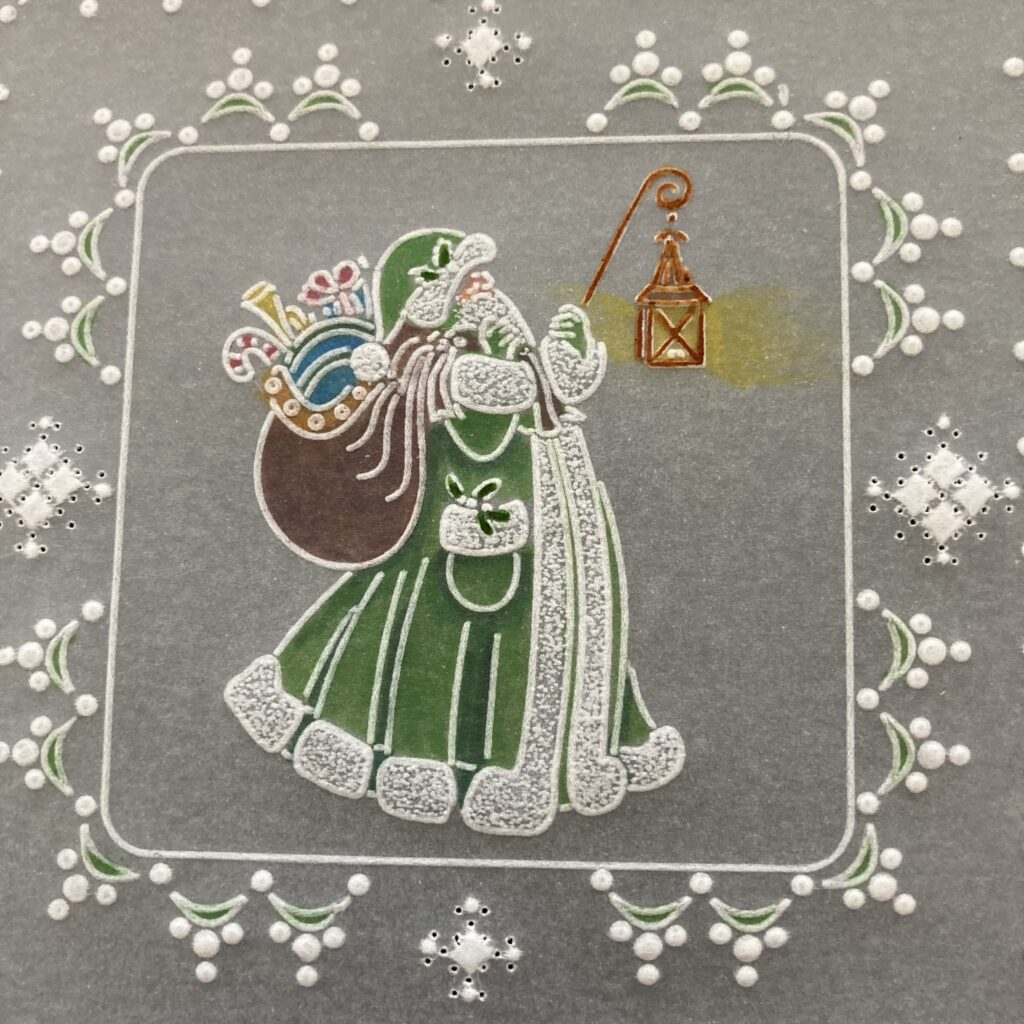
Step 17. You project should now look like this.
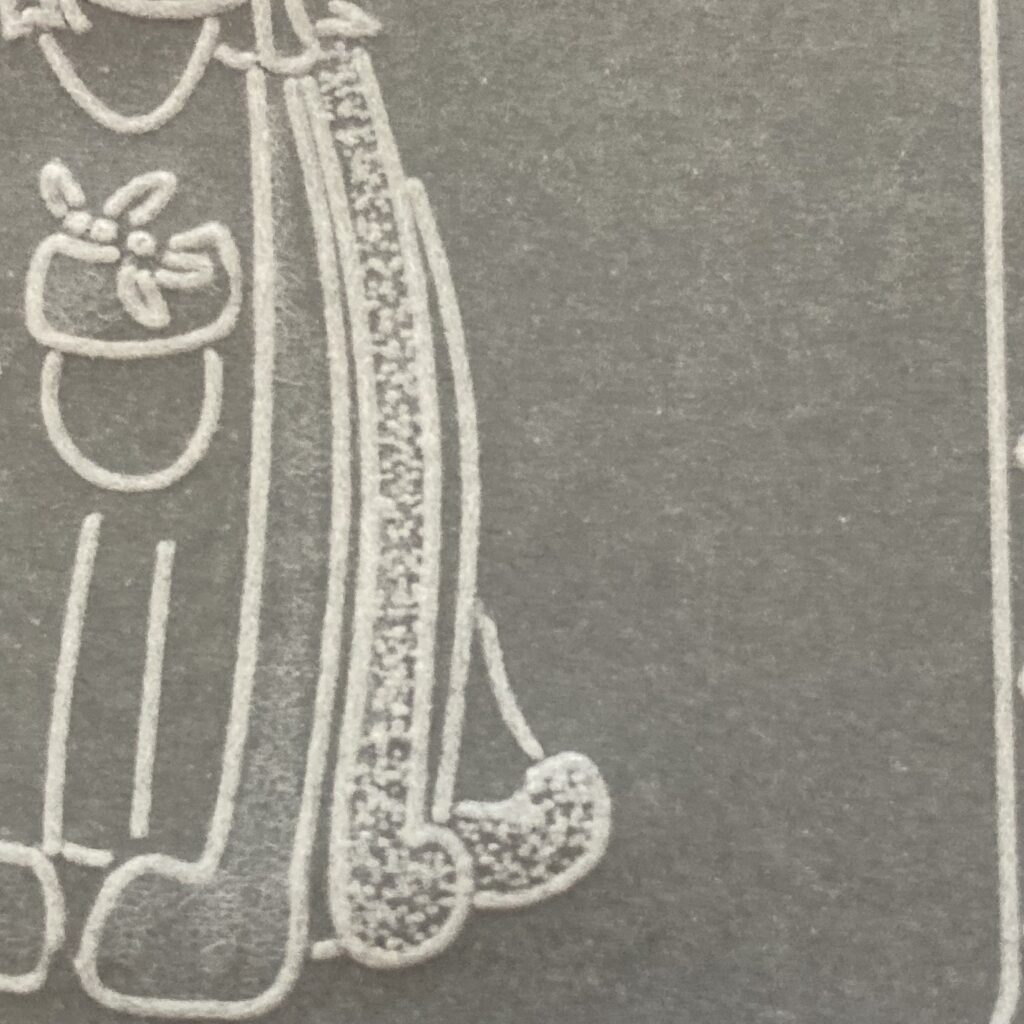
Step 18. Using the 1mm shading tool (the middle sized one) add some gentle shading the fur on Santa’s coat.
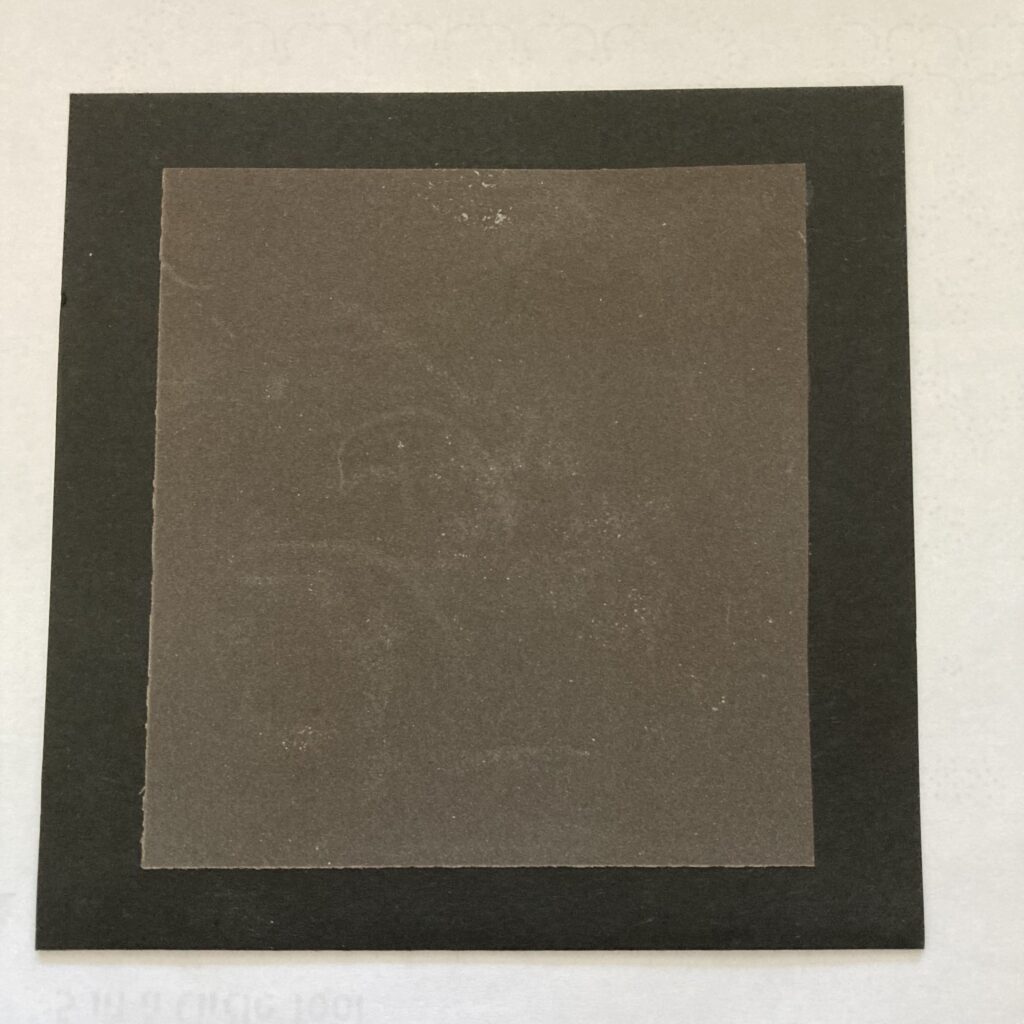
Step 19. Get a piece of stiff black card (I stuck a 6 x 6 card blank together) and then stick a piece of sandpaper to it. Put this on the hard side of your black mat. (Pic 32)
Step 20. Place your image over the sandpaper and using a 1 needle bold tool gently tap the parchment keeping in the lines of the area you are working on. Keep the tool upright as you tap. You should see little white dots appearing. Continue until you have an even amount of dots over the area and then move on to the next area to do moving the parchment to keep the working area over the sandpaper.
Step 21. From the front this is what your stippling should start to look like.
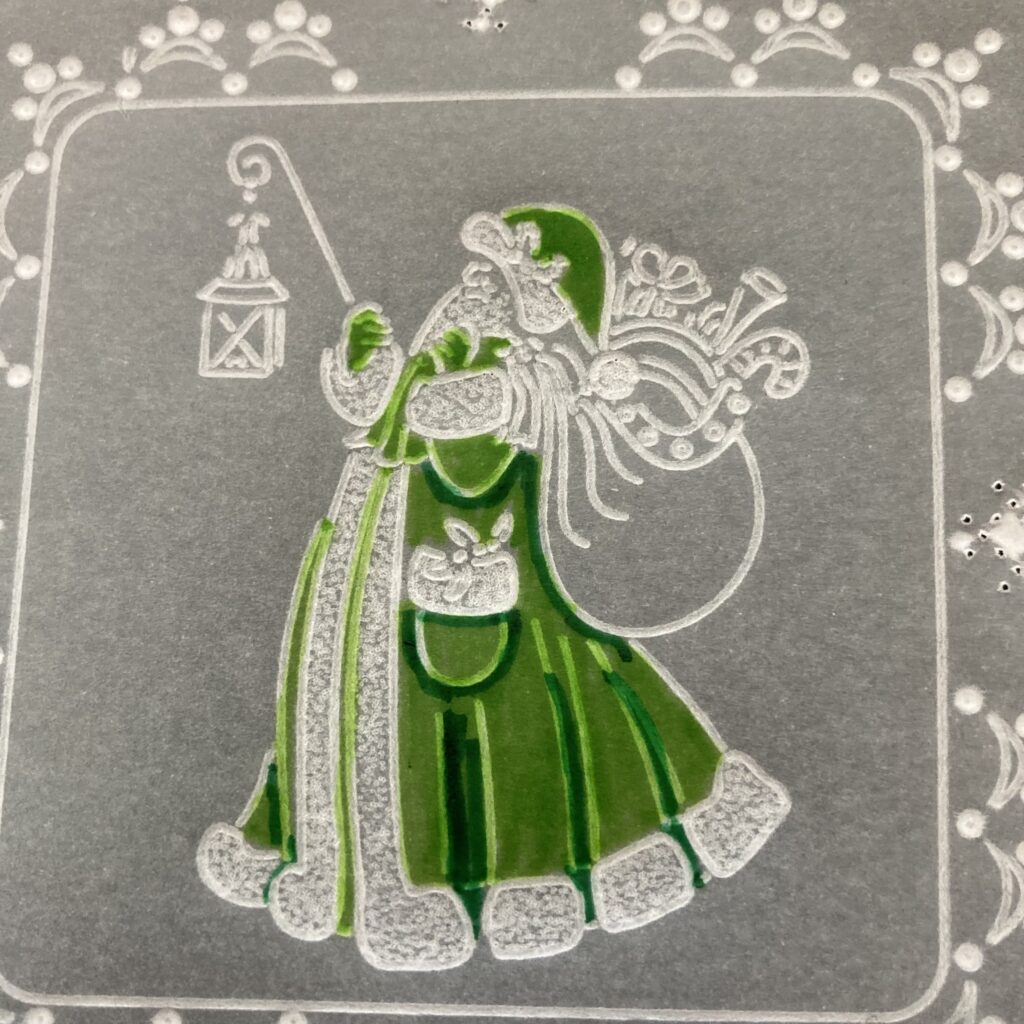
Step 22. Once you have completed all the fur add colour to the Santa using the Perga colour pens. Most of the colour is added on the back but some of the smaller details can be done on the front avoiding touching the white lines with the pen.
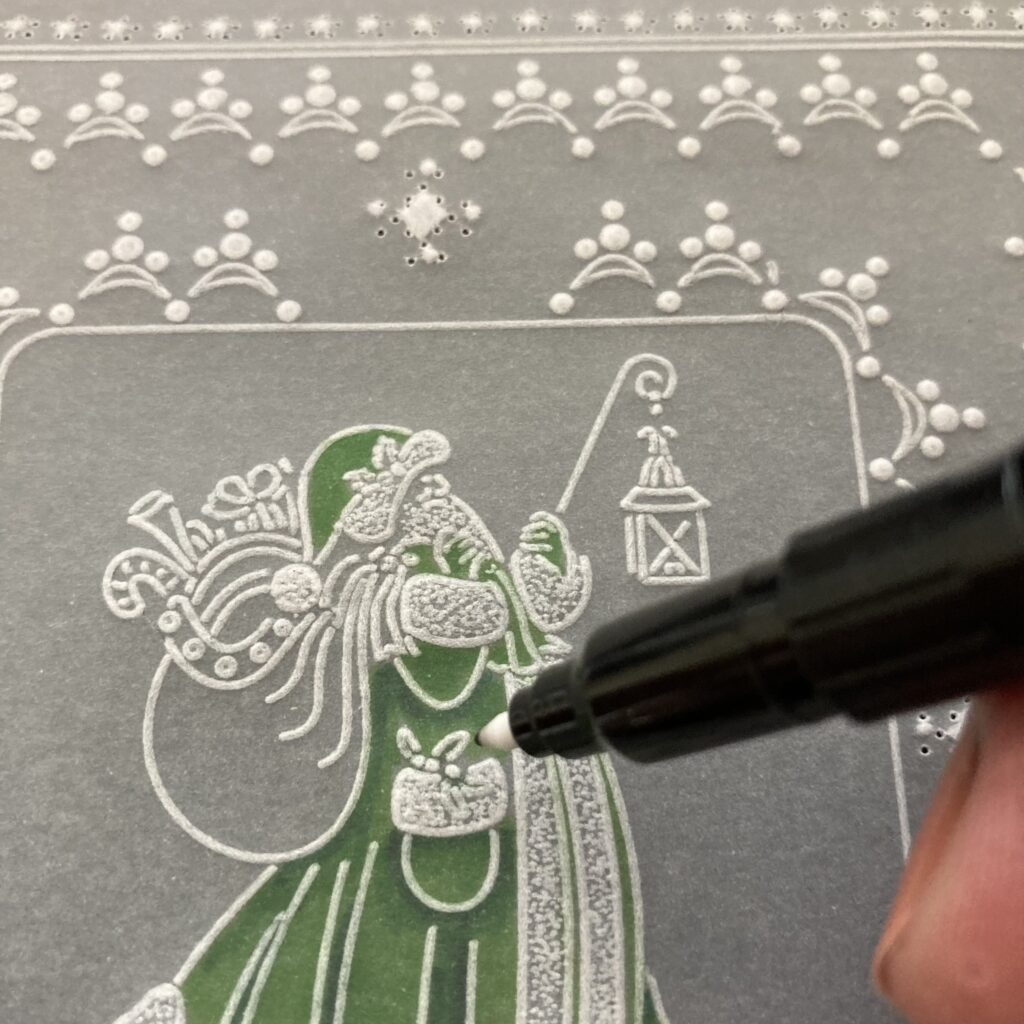
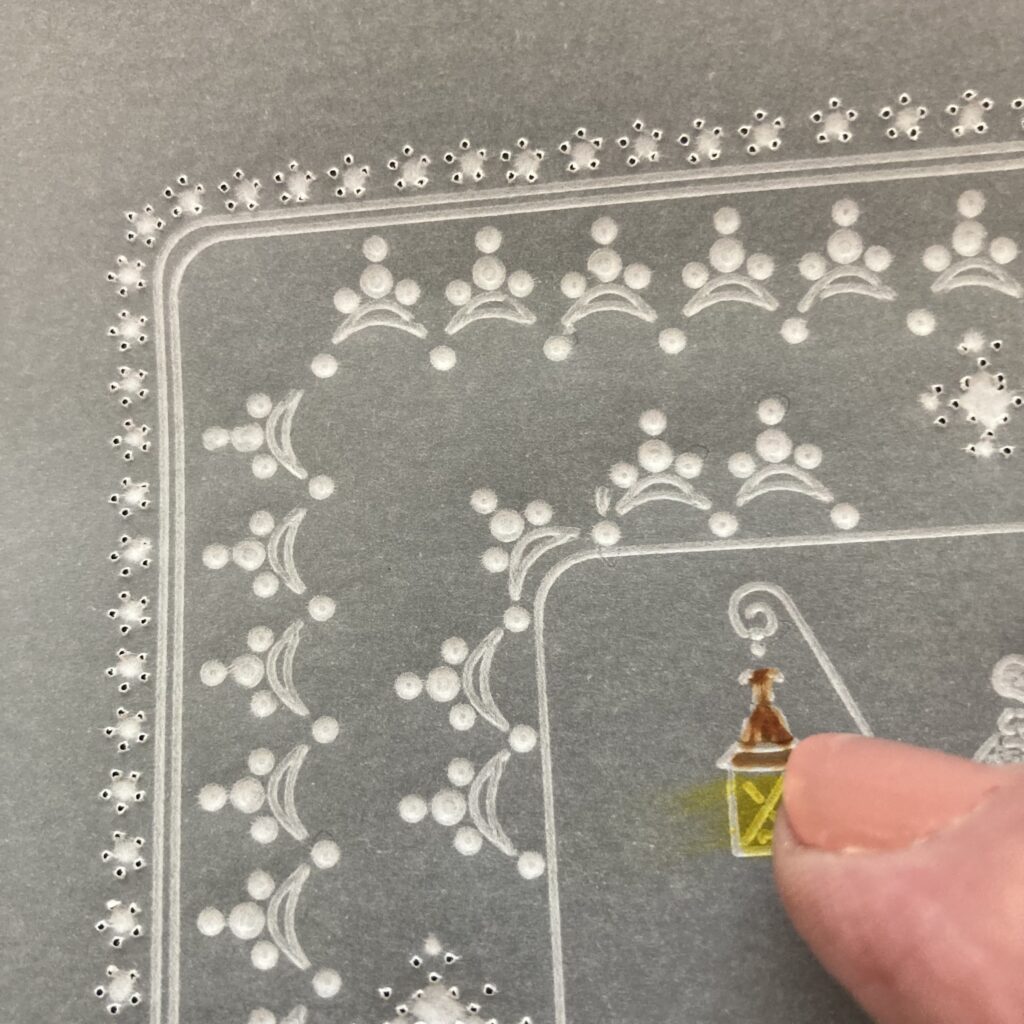
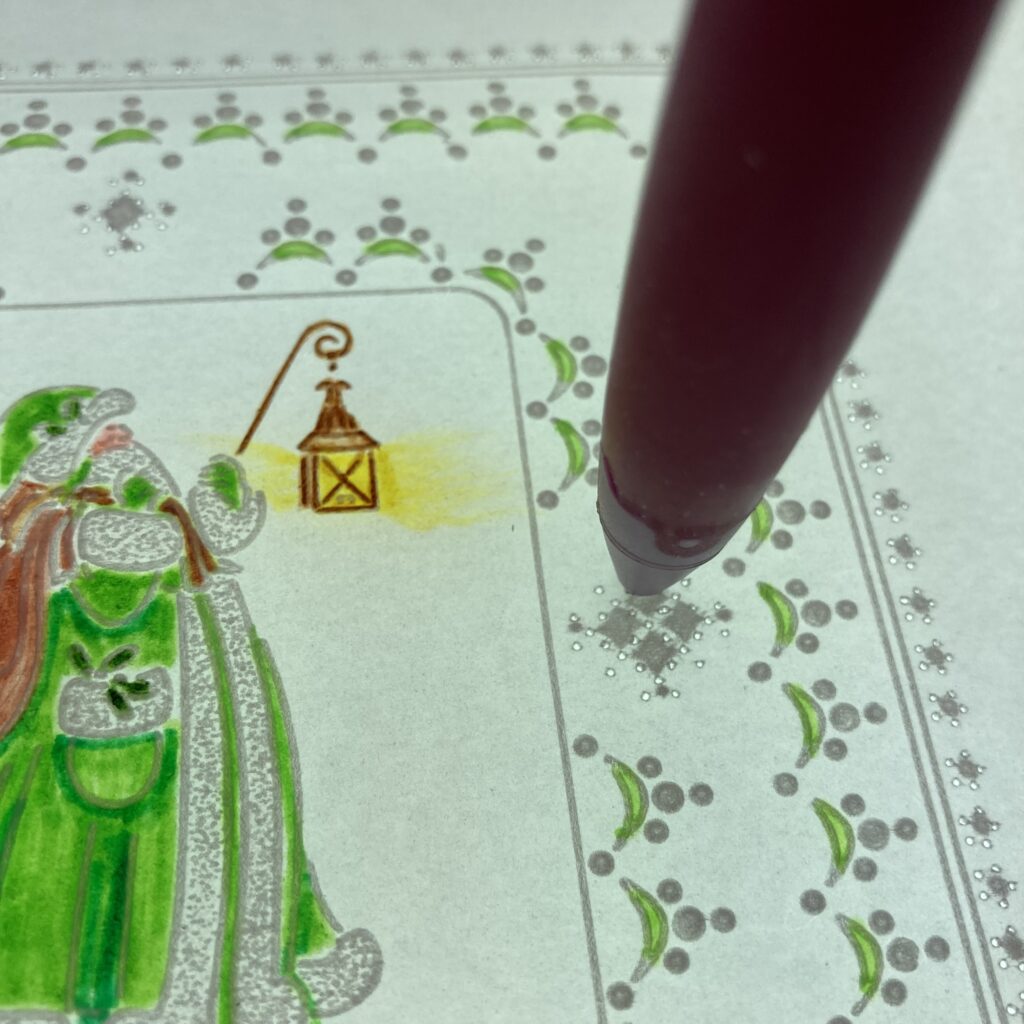
Step 23. Working on the back add yellow to the lamp and then before the ink dries use your finger to smudge it outside of the lines so it creates the glow of the lamp. (pic 38 & 39)
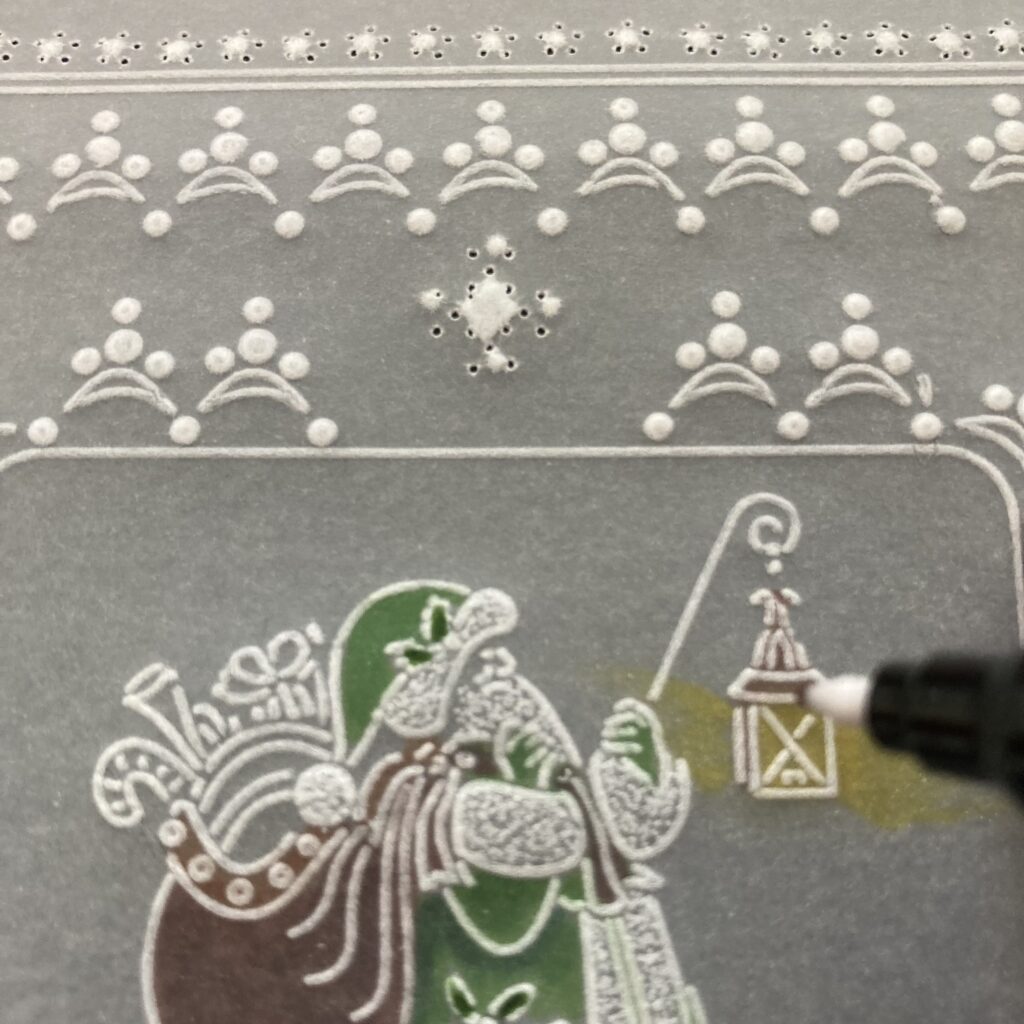
Step 24. Working on the front use the fine end of pen no 3 and trace over the lines that make the lamp and the lamp holder.
Step 25. Working on the front re-perforate all the perforations using a thick super foam mat pushing the needled fully in. you can do this with either the original tools or with a 1 needle fine tool.
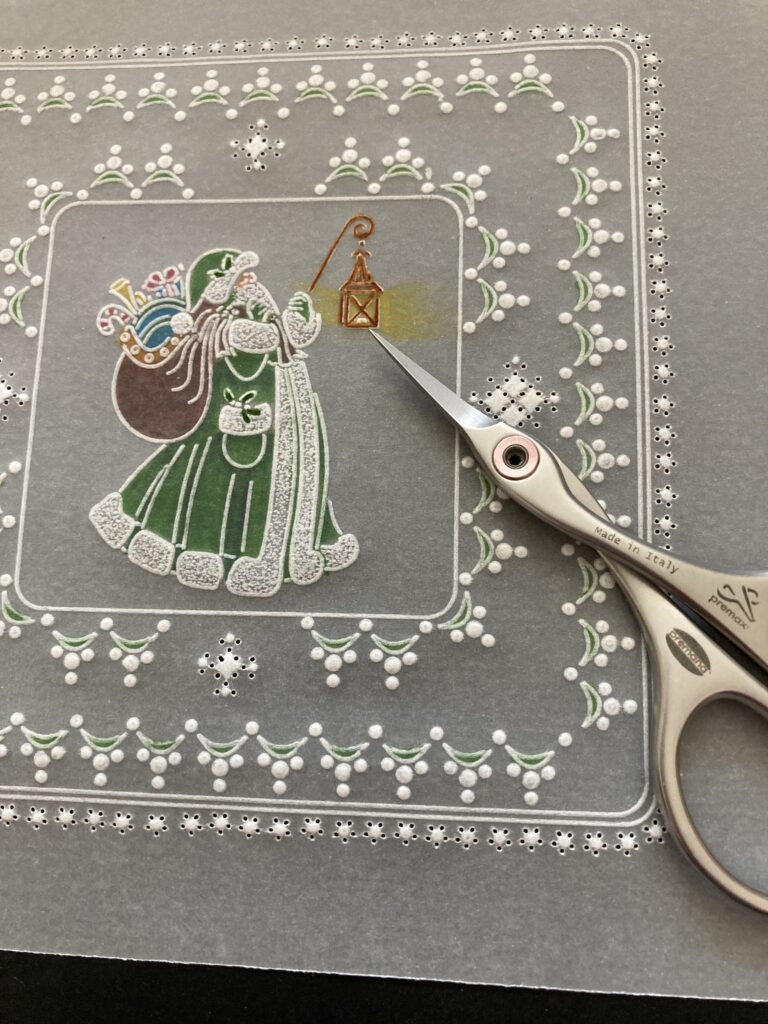
Step 26. Using the cutting guide on page 27 use your scissors or snips to cut the picots round the outer edge. Linda’s book gives you some great tips about cutting.
Step 27. Cut a piece of companion paper to measure 13½cm x 13½cm. Attach the parchment to it with 4 brads and adhere this to the front of a 6×6 card blank.
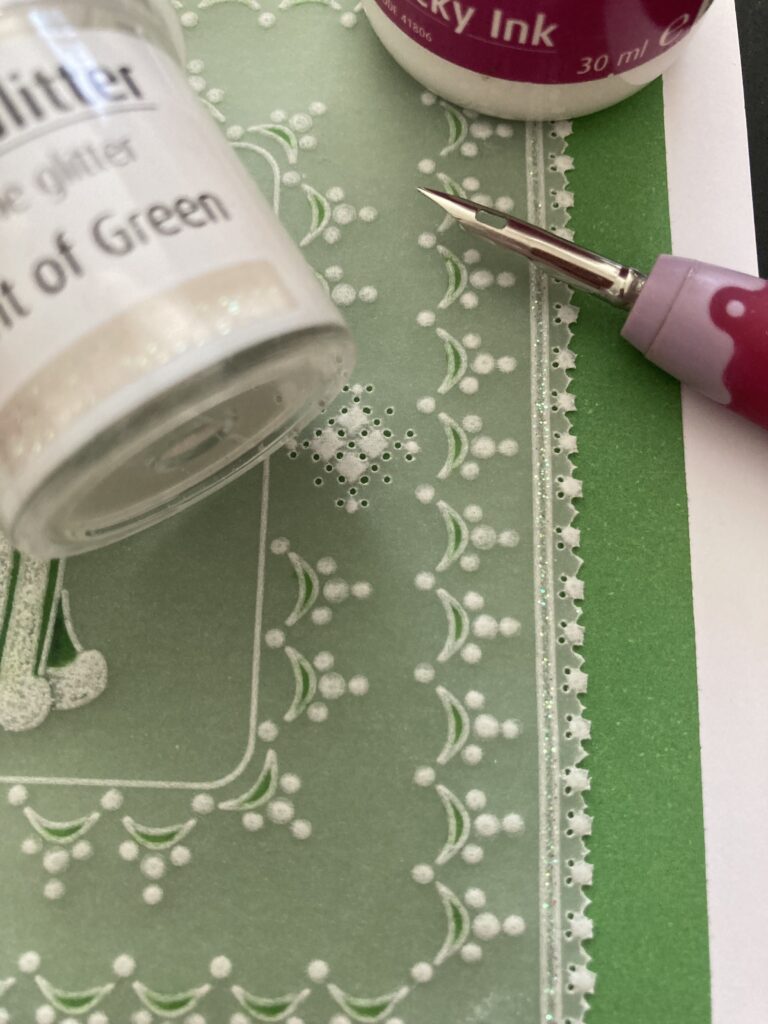
Step 28. Using a mapping pen and sticky ink add glitter to your project in the double lines round the frame.
Step 29. You have now completed your project!

What an amazing project!
Thank you so much, Jane, for sharing this in depth and fantastically helpful bloggy tutorial with us. Don’t forget to share your versions on Groovi Worldwide.
Everything that Jane has used in this particular project is available in a shopping list, HERE.
Okay, so please pay extra attention to this week’s schedule… and please just stay tuned, as things develop and change 🙂 Make sure to join us this afternoon from 3pm – 5pm, on Facebook LIVE and YouTube LIVE.

As many of you now know, C&C has gone off air until Tuesday, so you will find the demonstrations HERE & HERE.
Sunday 6th October:
Clarity TV show with Barb & Paul – Live on Facebook & YouTube – 3pm – 5pm
Monday 7th October:
In the SHAC with Barbara – 10am Live on Facebook & YouTube
Tuesday 8th October:
Groovi Tuesday with Paul – 10am live on Facebook and YouTube
Thursday 10th October:
Craft Along with Barbara – 7pm Live on Facebook & YouTube
More information about the Craft Along HERE
See you there!
Travel gently, friends.
Lotsa love, Grace & Jane xoxo
Clarity – The Home of Art, Craft, and Well-Being.
I love this Santa and am about to do it as my next Christmas card- so the timing for this tutorial couldn’t be better for me !! Thank you, Jane!
Wow! Love it. I will definitely be giving this a go. Thanks Jane. X x
Thanks Grace & Jane for another great Sunday blog – full of hints, tips & information.
See you at 3 for the first live show & then back to the SHAC tomorrow. Then I need to sort out my bits & bobs for Thursday’s craft along once the ingredients list is up on the website although I expect most of it will be the usual stash.
Have a good week everyone x
Wow I’ve got the Santa plate will definitely be giving a go.
Great detailed step by step for a fabulous card, thank you Jane and Grace. xx
Absolutely stunning! Not sure if we’ve got all the plates needed for this, but I’m sure I’ll be able to use what we’ve got to give this a go. Love it, thank you Jane.
Great project, thank you.
Tans Grace, for your swift reply to my enquiry.
Will be there at 3pm.
That should read “ thanks”
Lovely project, thank you ! X