Clarity Matters Blog Tutorial: How To Overlap Your Design
Hello hello! Grace here.
I hope this finds you well, safe and starting your Sunday with a smile.
We are joined by the crazy talented Jane Telford. She’s a valued and loved member of our Clarity Design Team… for almost 10 years! 10 years in June. Impressive eh? Her artwork speaks for itself.
She’s also a wealth of craft knowledge. When I don’t know the answer to a customer question, guess who I message?! It’s often Jane.
I’ll hand you over to our fabulous teacher!

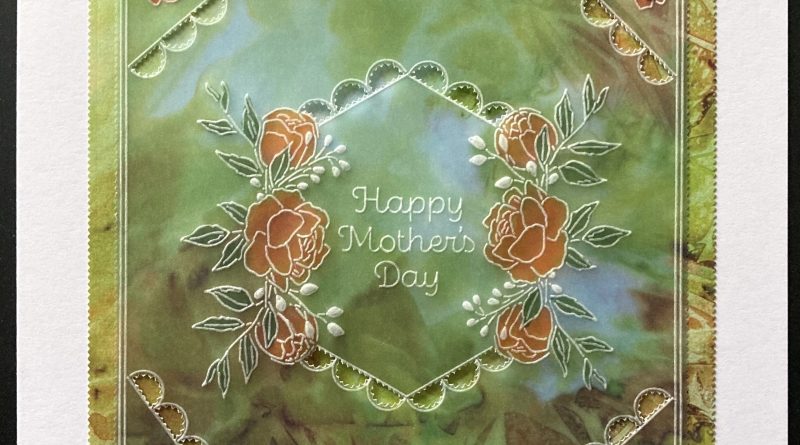
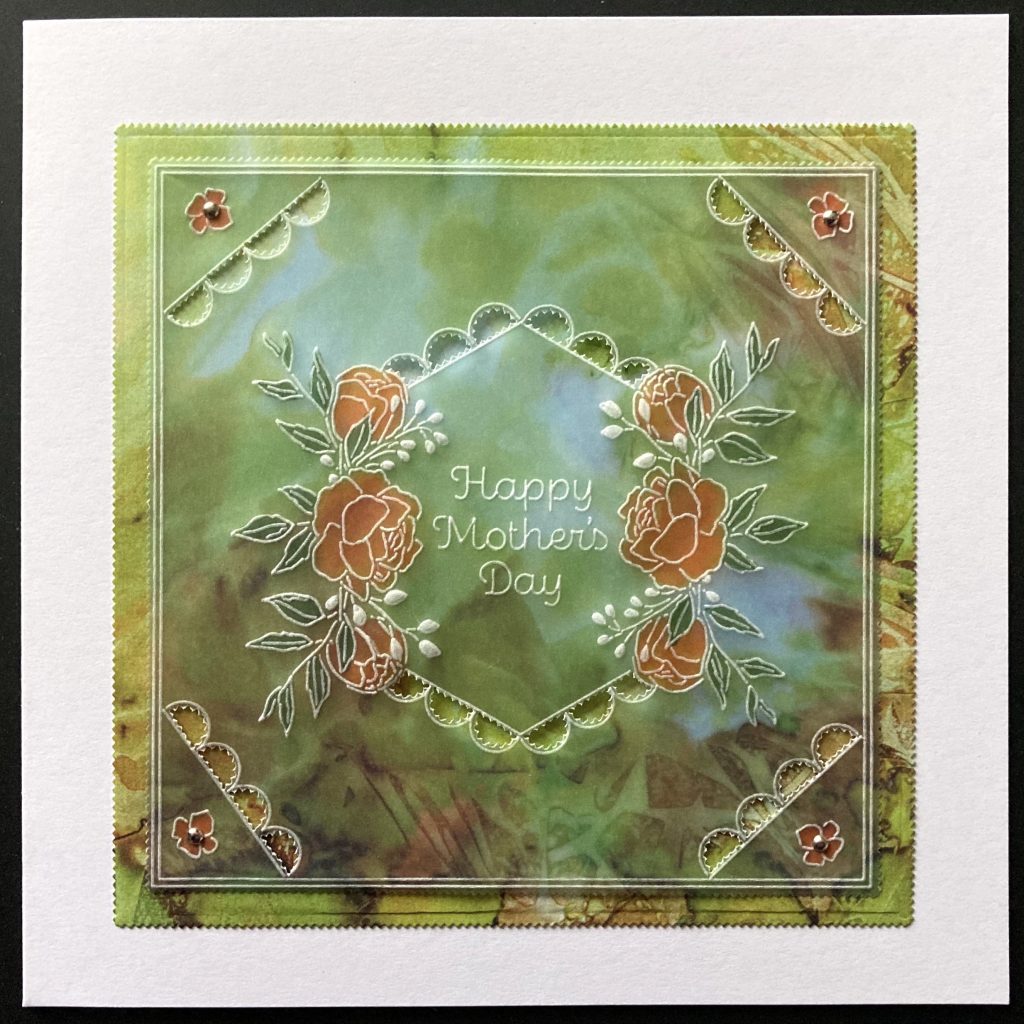
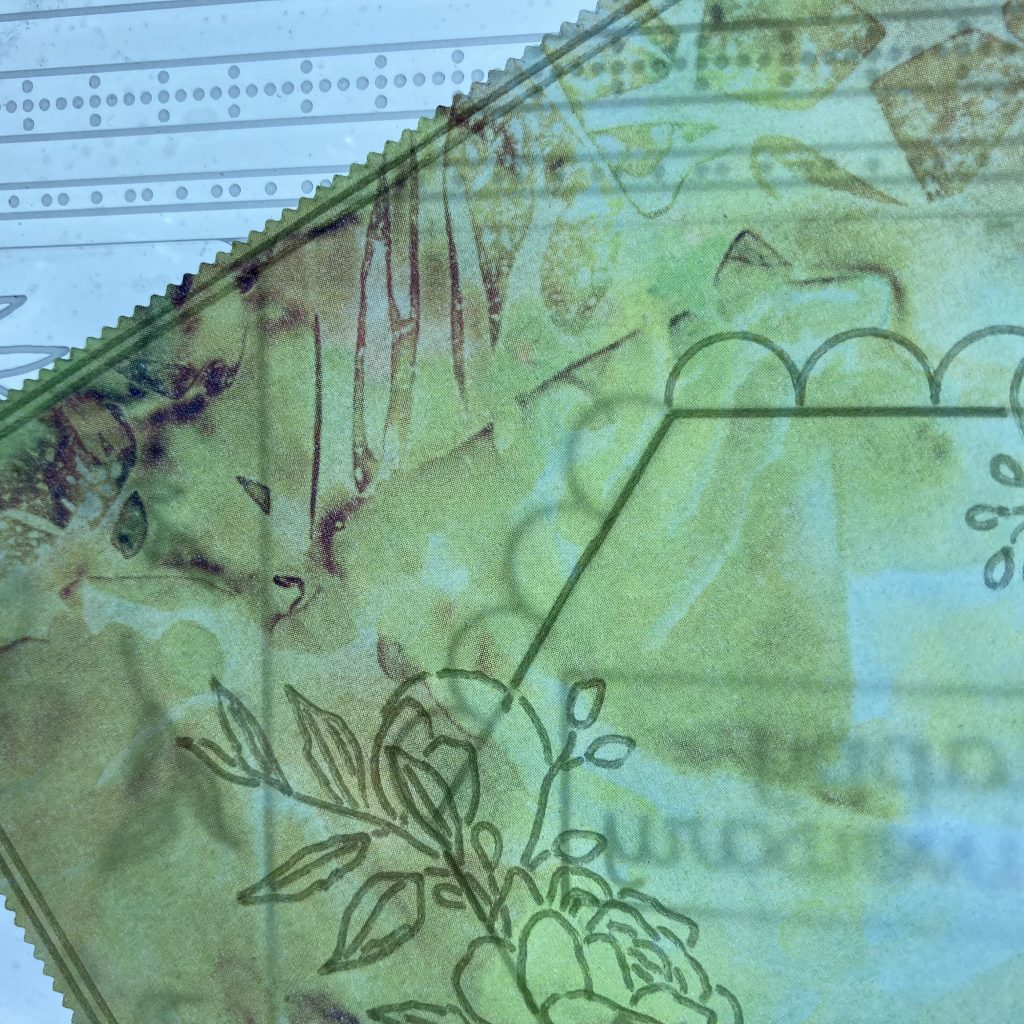
These new Hanging Wreath plates have so many possibilities. When I saw them, I immediately thought I’d be able to create a shape with the flowers on each side rather than just on one, and with the Groovi Plates it is so easy to achieve especially with the hexagon.
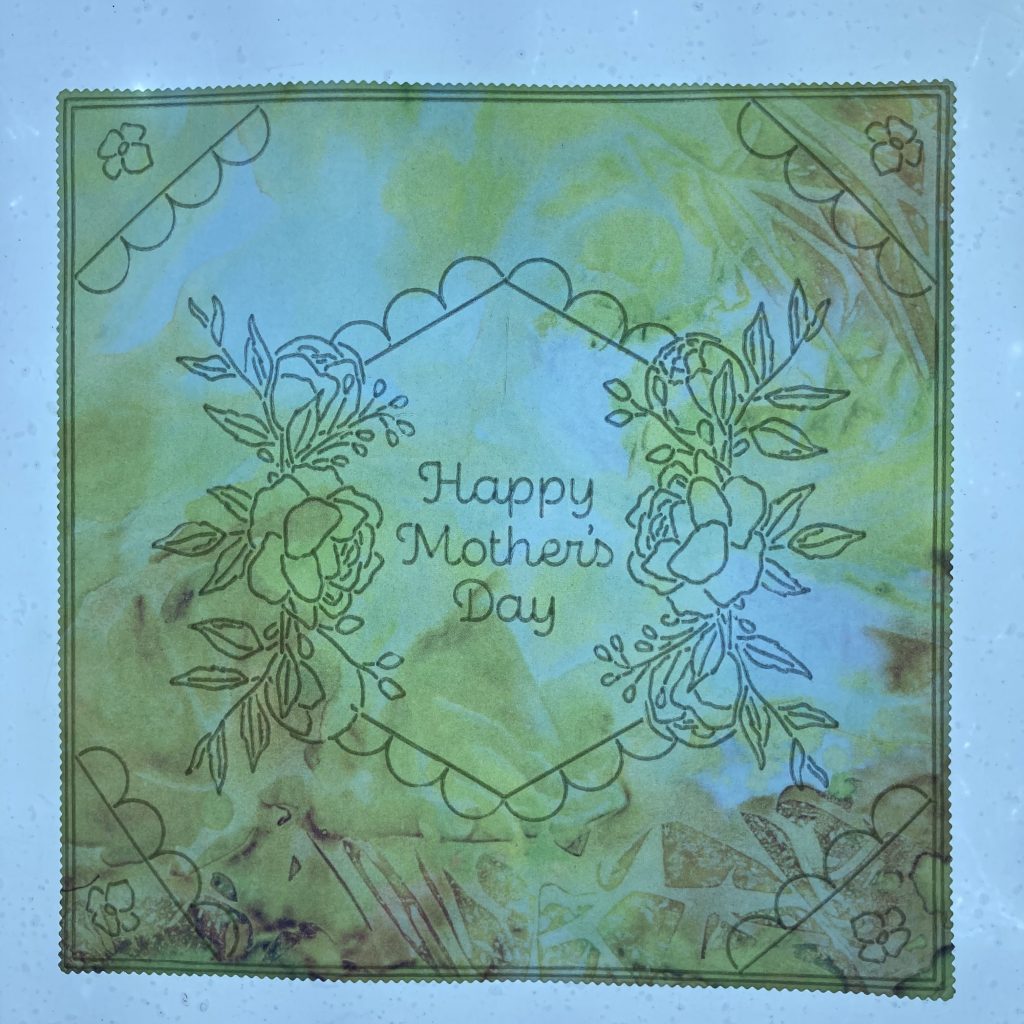
This is where we are headed…
Ingredients
Hanging Wreath Plate – Happy Anniversary (GRO-FL-41940-02)
Mother’s Day Spacer Plate (GRO-WO-41950-06)
Nested Squares Picot Cut Die Set & Groovi Plate (ACC-DI-30698-66)
Groovi Plate Mate for A5 Square Grids (GRO-CO-41706-08)
Black Dual-Purpose Groovi Mat A4 (GRO-AC-40194-A4)
LightWave (ACC-LP-30352-A4)
Groovi® Embossing Tool 0.8mm – 1.3mm (GRO-AC-40026-XX)
Groovi® Embossing Tool 2.0mm – 2.8mm (GRO-AC-40027-XX)
2-Needle Bold Perforating Tool (PER-TO-70279-XX)
White Eraser Pencil (ACC-PE-30670-XX)
Perga Colours Exclusive (PER-CO-70060-XX)
4 Silver Brads (PER-AC-70275-XX)
Ringlock Scissors (PER-TO-70041-XX)
Toscana Designer Paper Pack 8″ x 8″ (ACC-CA-30891-88)
Toscana Designer Parchment Pack 8″ x 8″ (ACC-CA-30933-88)
7×7 Card Blank (ACC-CA-30619-77)
Method
Step 1. Cut a piece of Parchment using the 3rd largest square picot die.
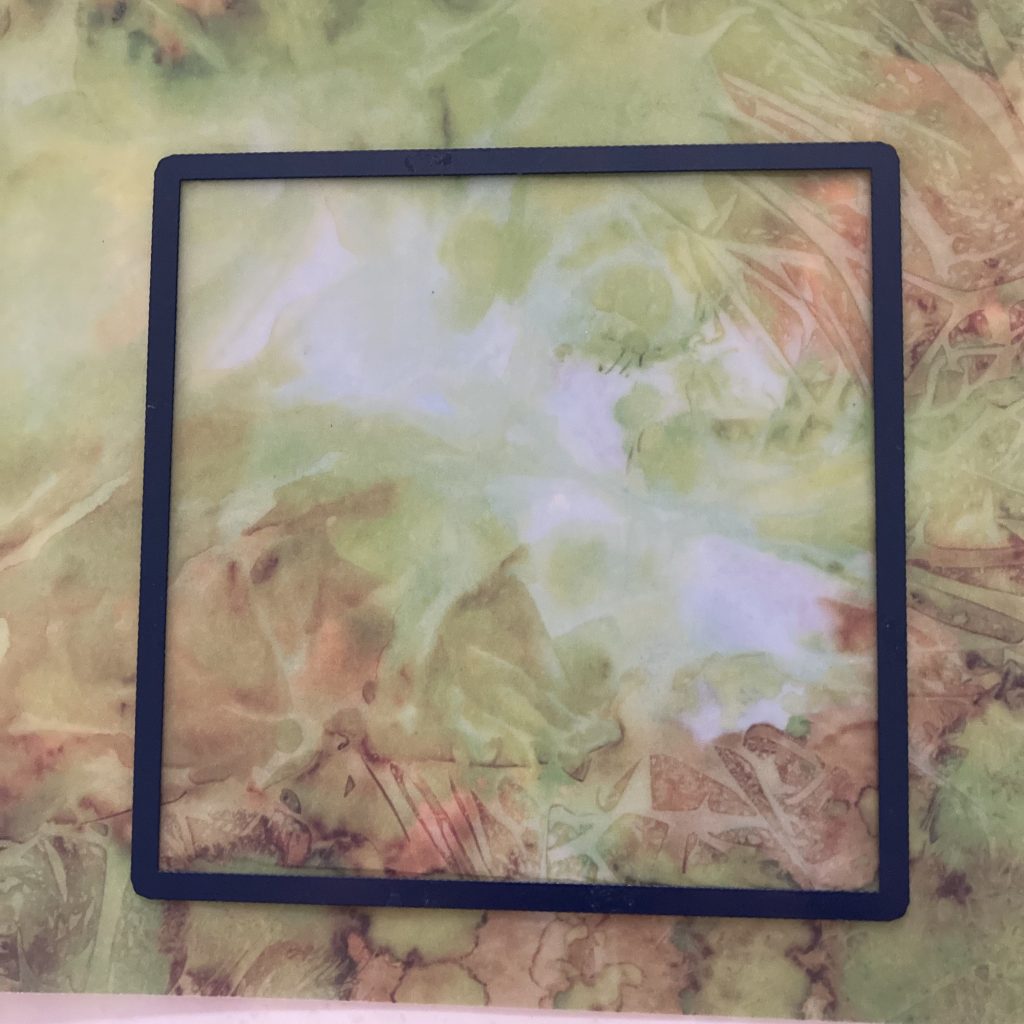
Step 2. Turn the parchment so the brightest side (which is the back) is upwards. Attach to the Picot Square plate and emboss the lines around the very edge.
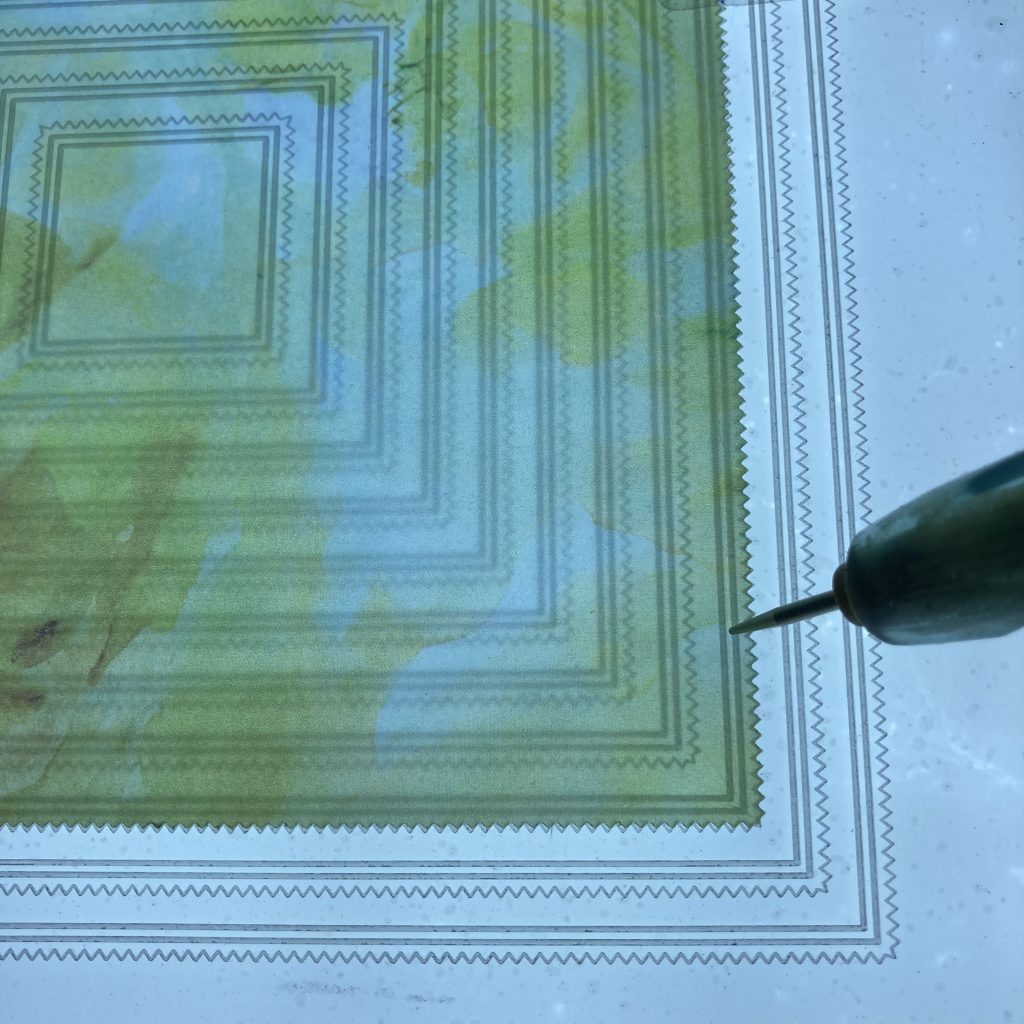
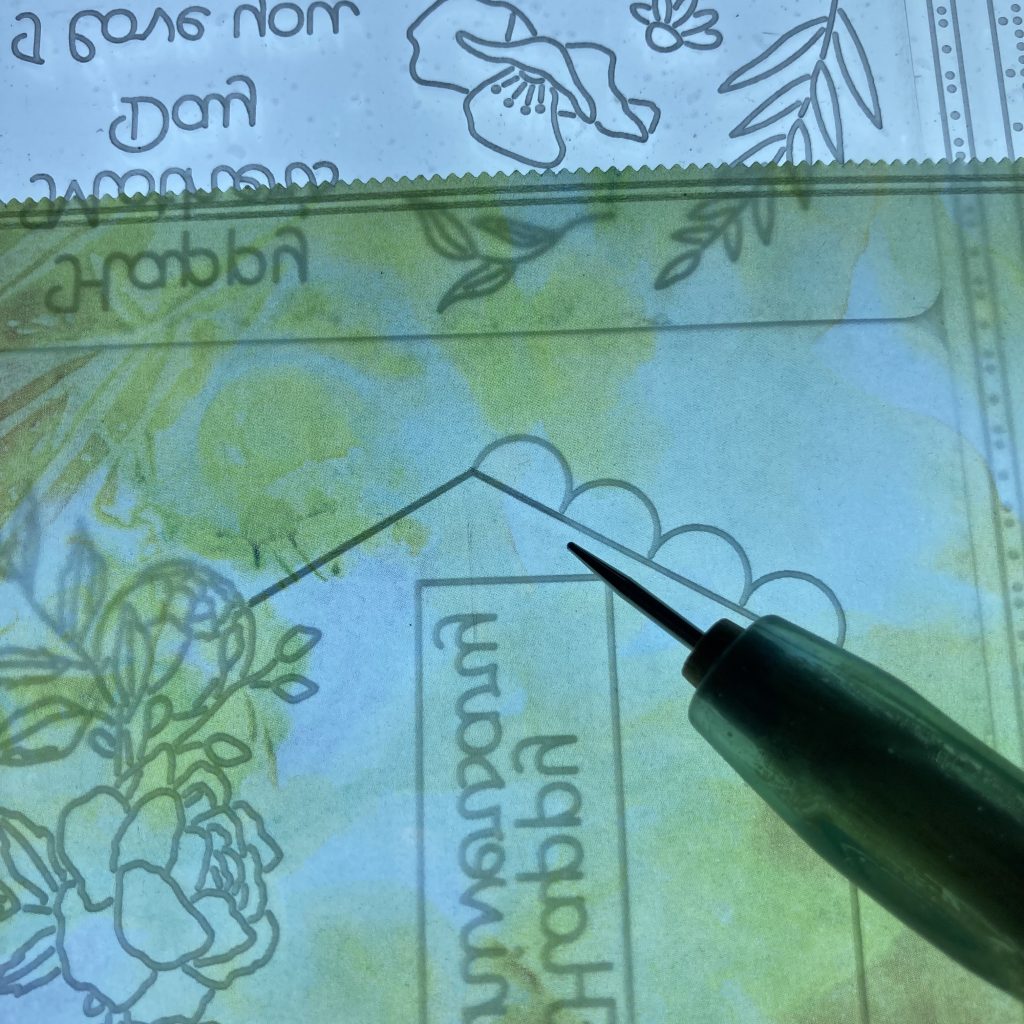
Step 3. Put the Hanging Wreath plate into the plate mate and secure it with the spacer plate. Attach the parchment square so it is centered at the highest point on the hexagon.
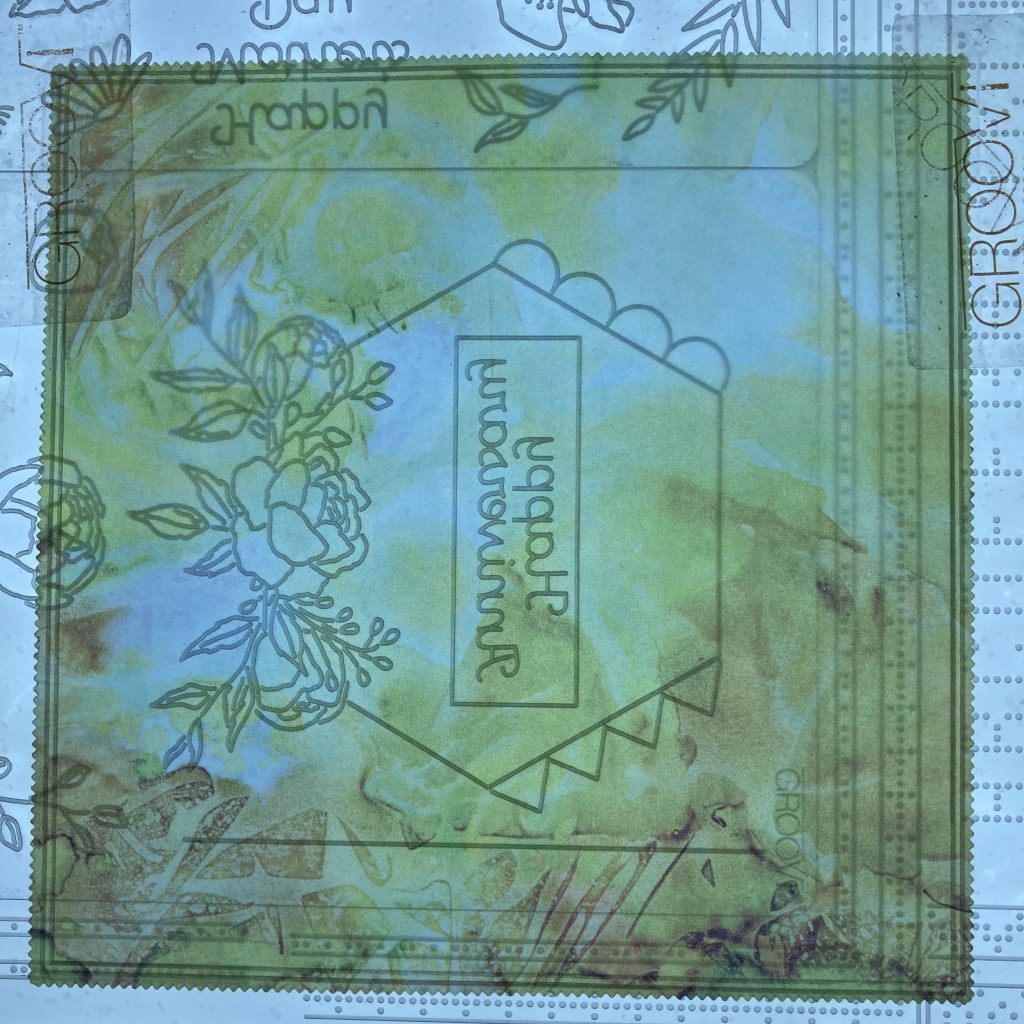
Step 4. Emboss the flowers and lines of the hexagon but only go 1cm into the other half. This helps with positioning.
Step 5. Turn the parchment round and line up the hexagon shape so the flowers are on the opposite side of the others. Emboss the lines and flowers.
Step 6. Now emboss the scallops. Avoid going into the flowers. Move the parchment until all 4 lines have scallops along them.
Step 7. Move the parchment, position it over the spacer, and emboss the sentiment in the middle.
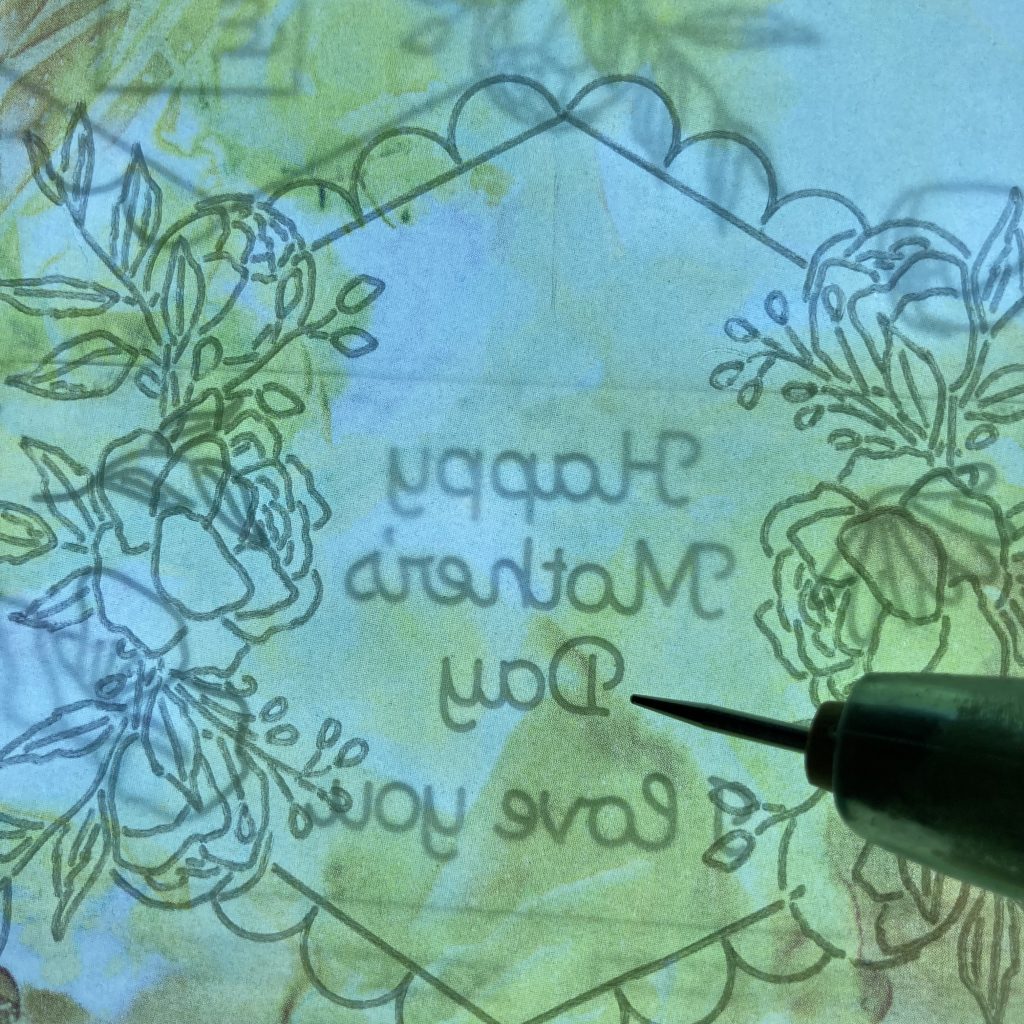
Step 8. Emboss the line and scallops in each corner.
Step 9. From the spacer plate, emboss the little flower in each corner.
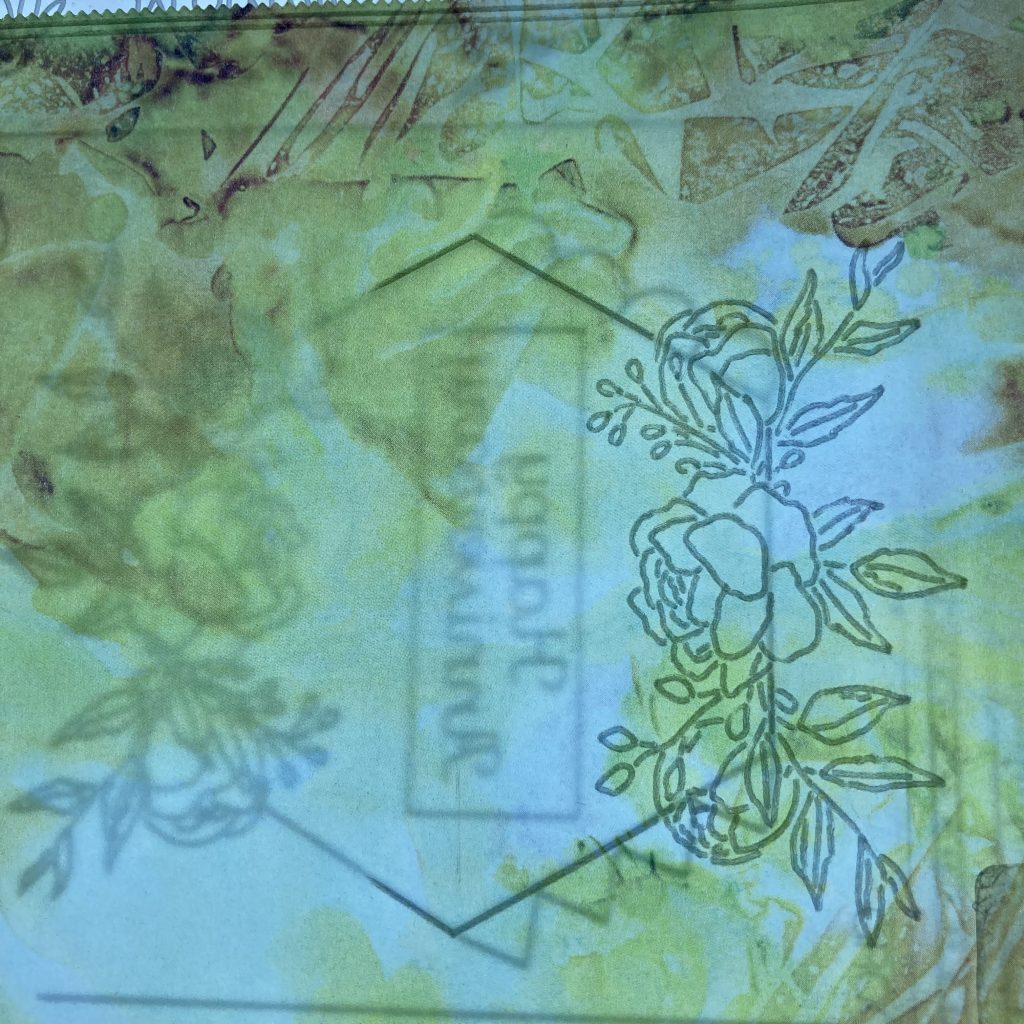
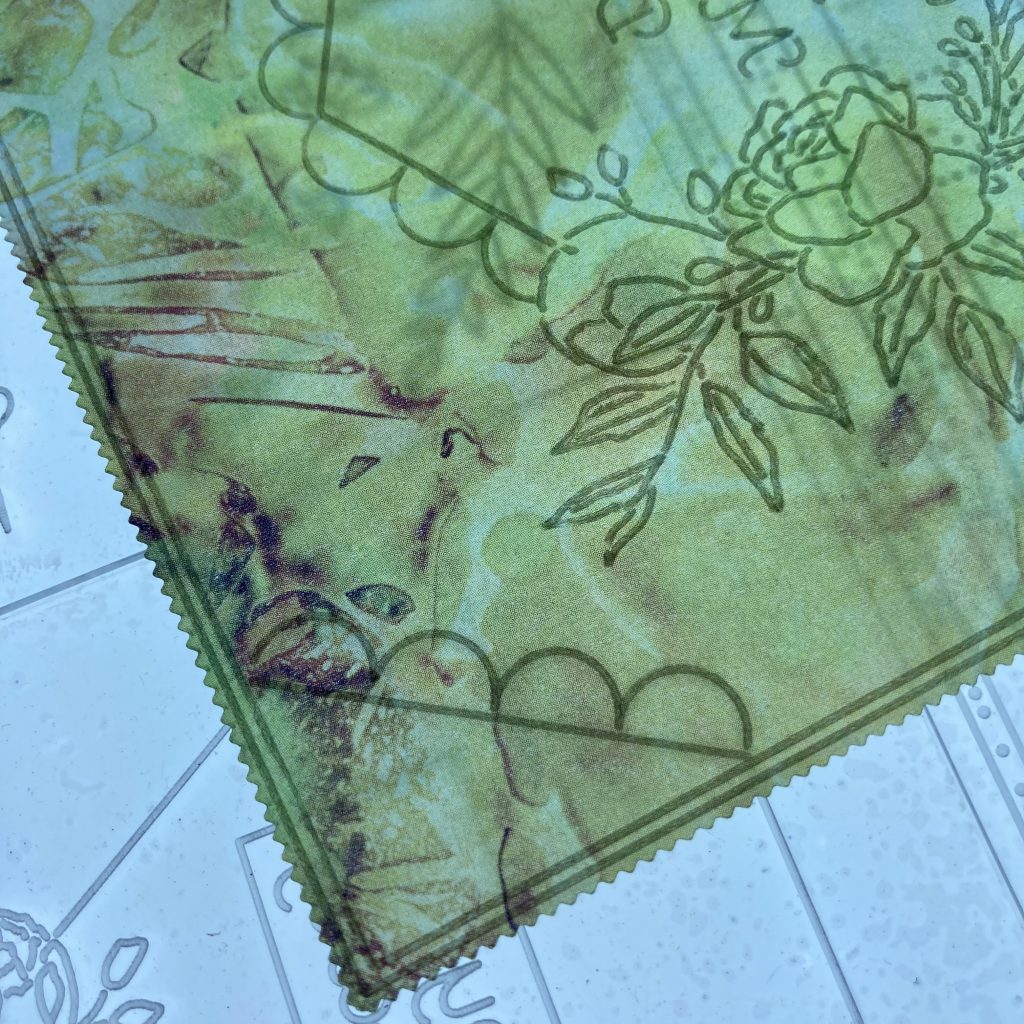
Step 10. Your line art is now complete and it should look something like this.
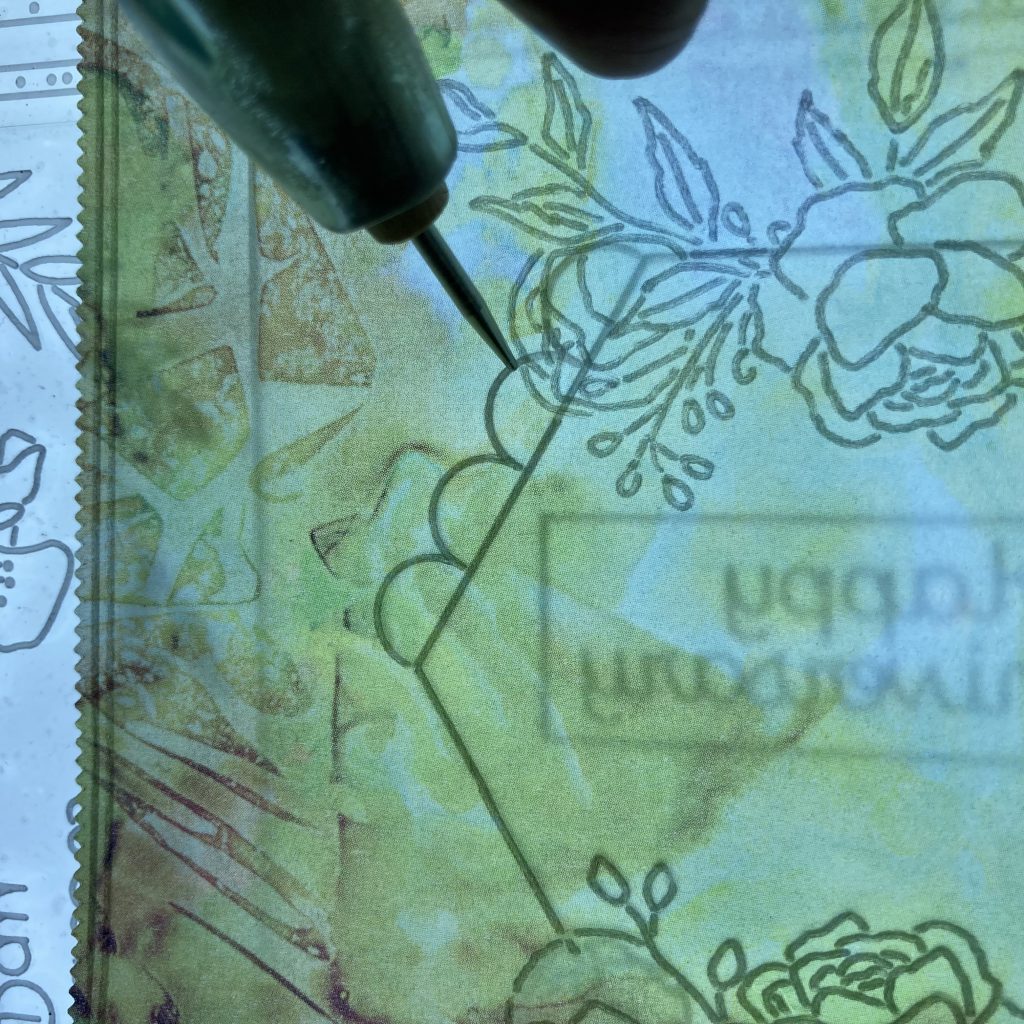
Step 11. Do some white work in the small buds on both sides of the hexagon.
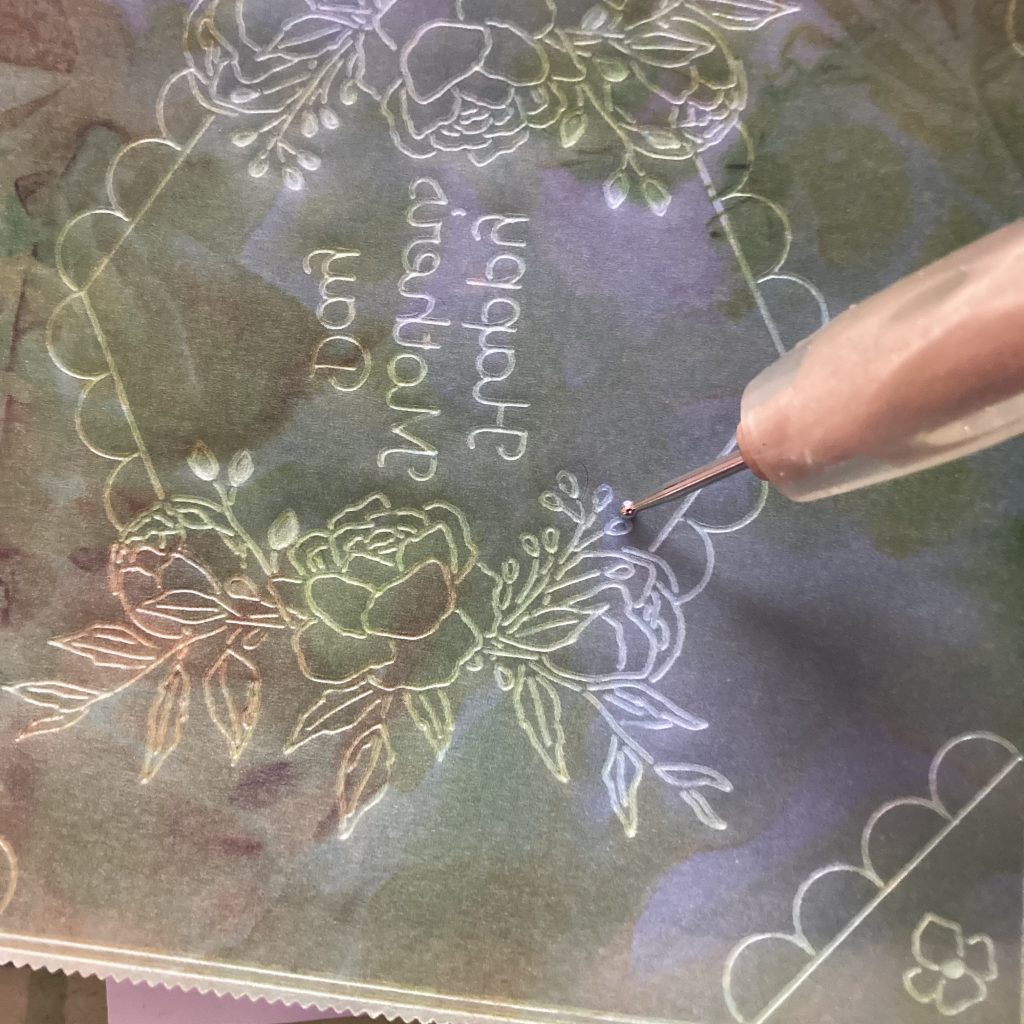
Step 12. Using the white pencil eraser, remove the colour from the back of the flowers and leaves.

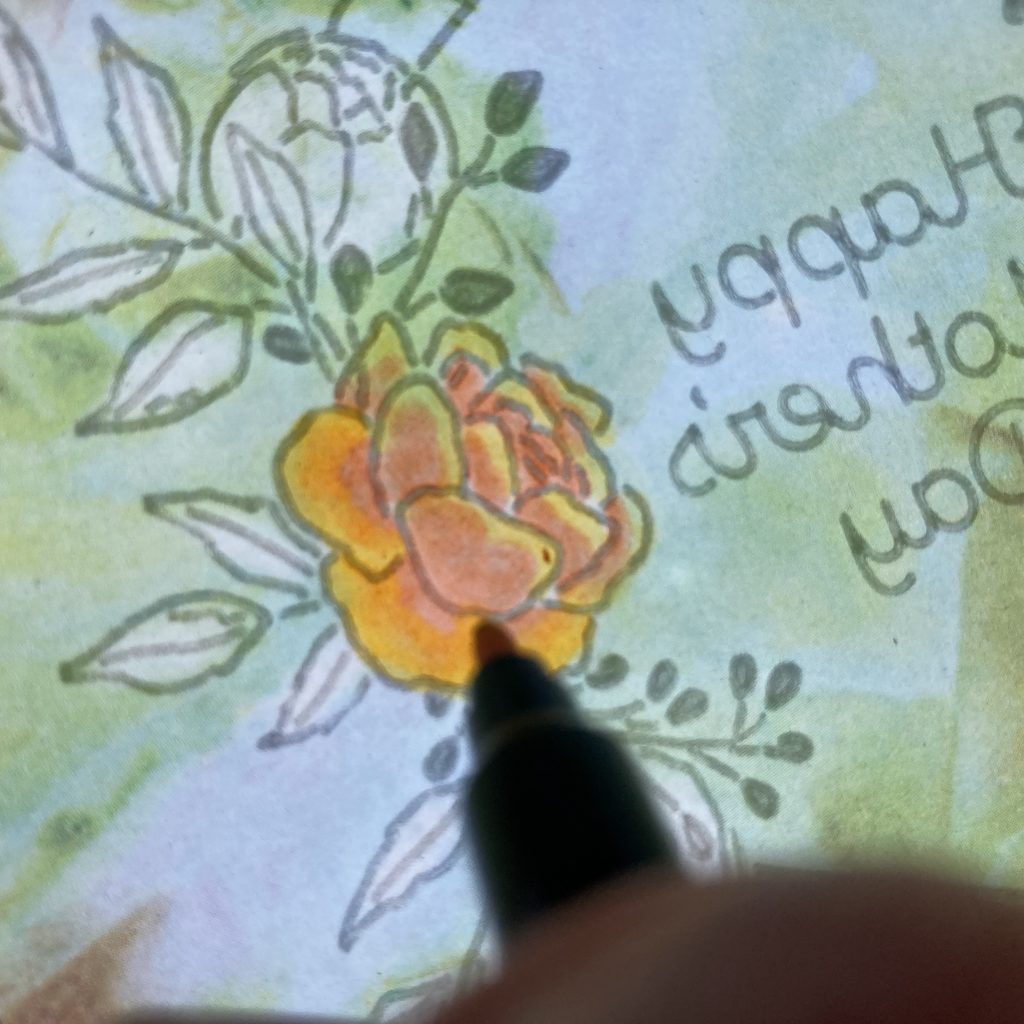
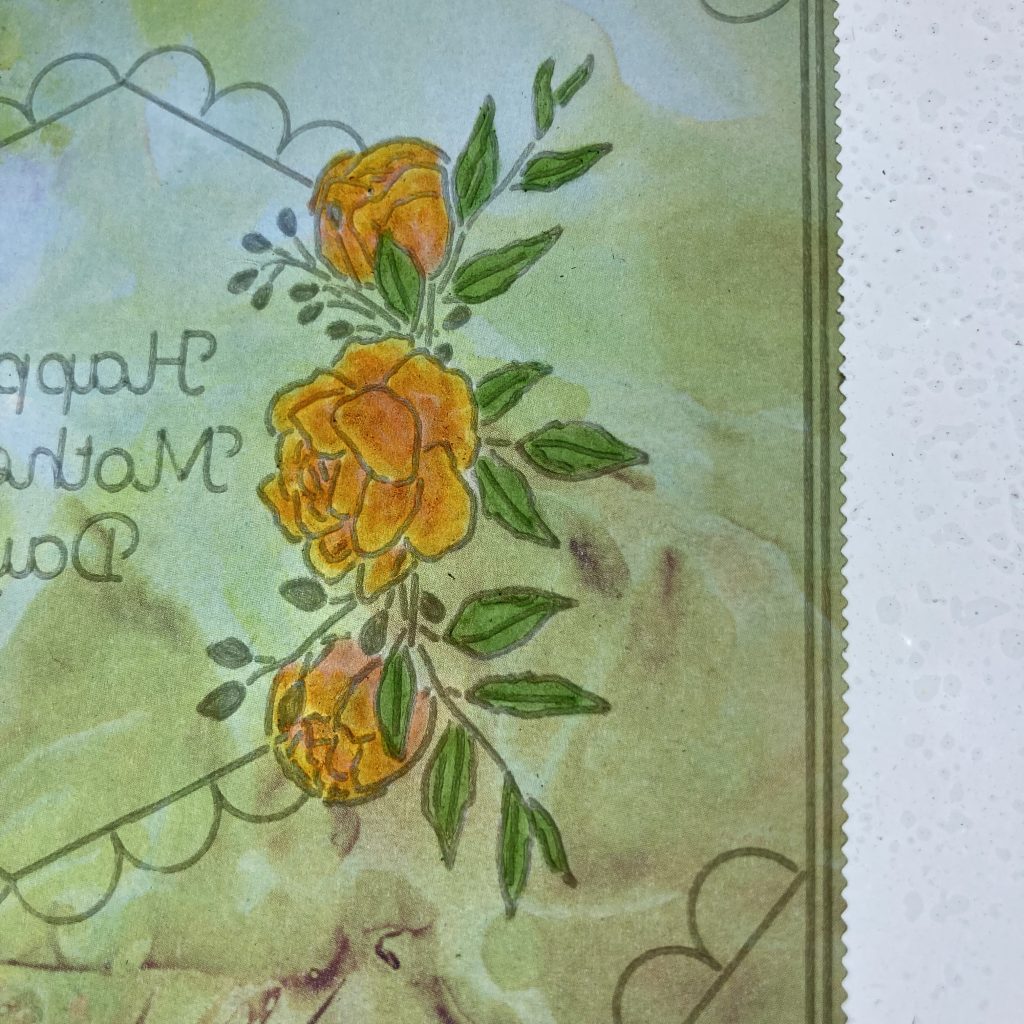
Step 13. Now add colour to the flowers using the yellow and orange pens. I put yellow on the edges and then added orange. Then I blended over the two colours with the yellow.
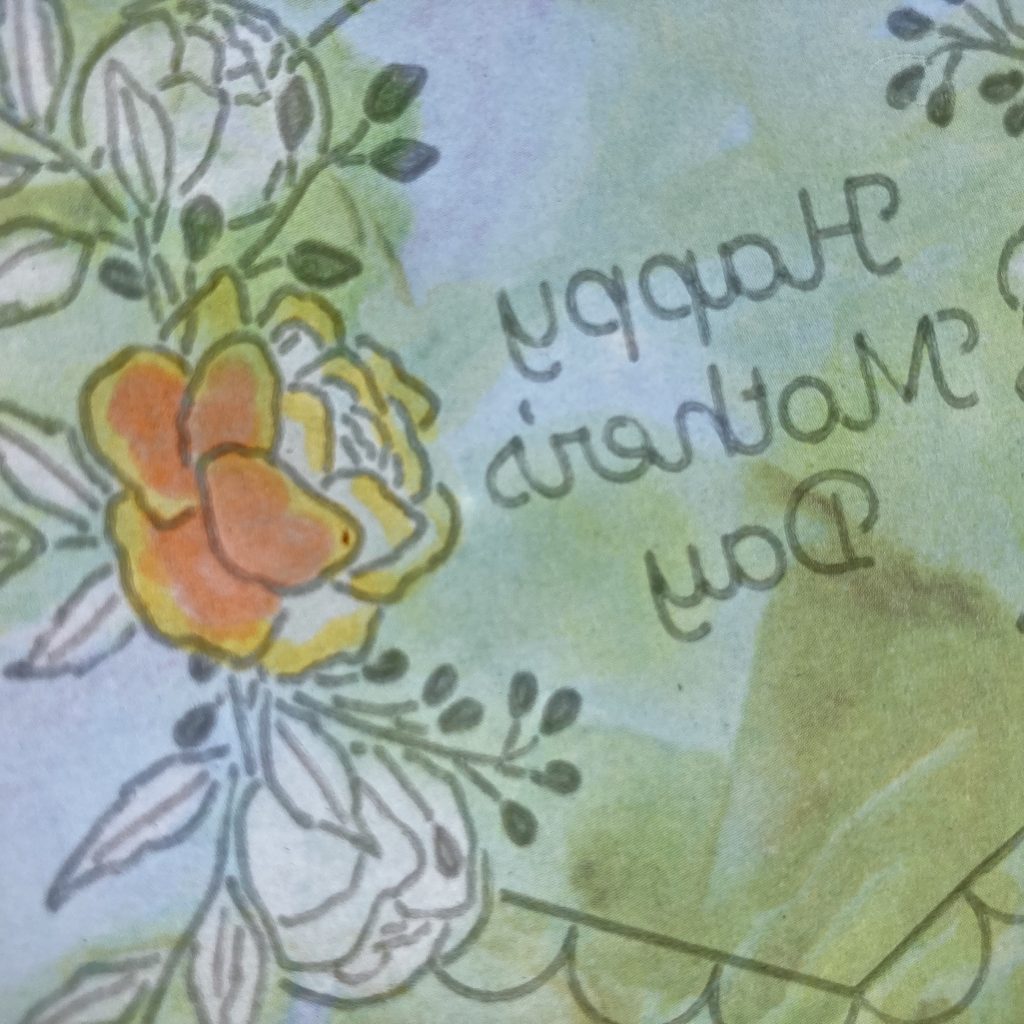
Step 14. Add green to the leaves.
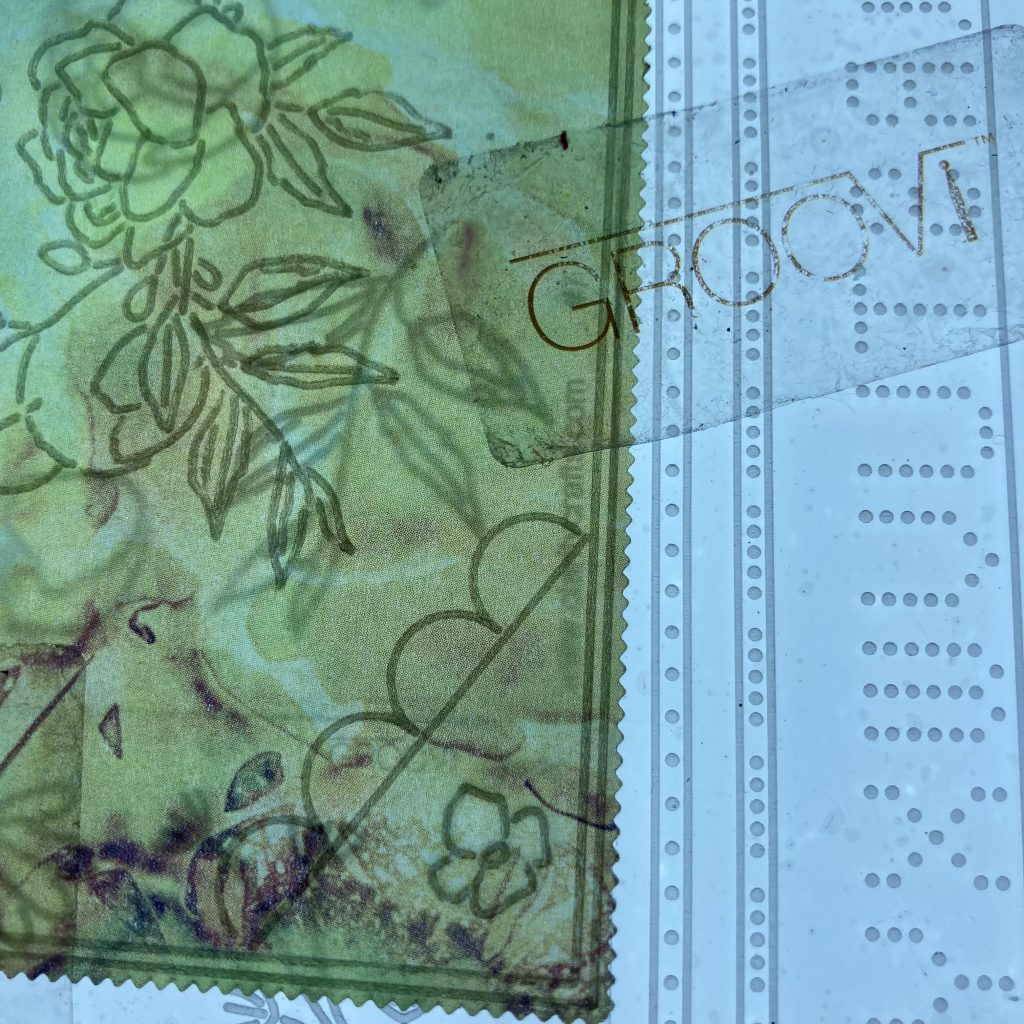
Step 15. Turn the parchment to the front and using a 2-needle bold tool perforate inside all the scallops.
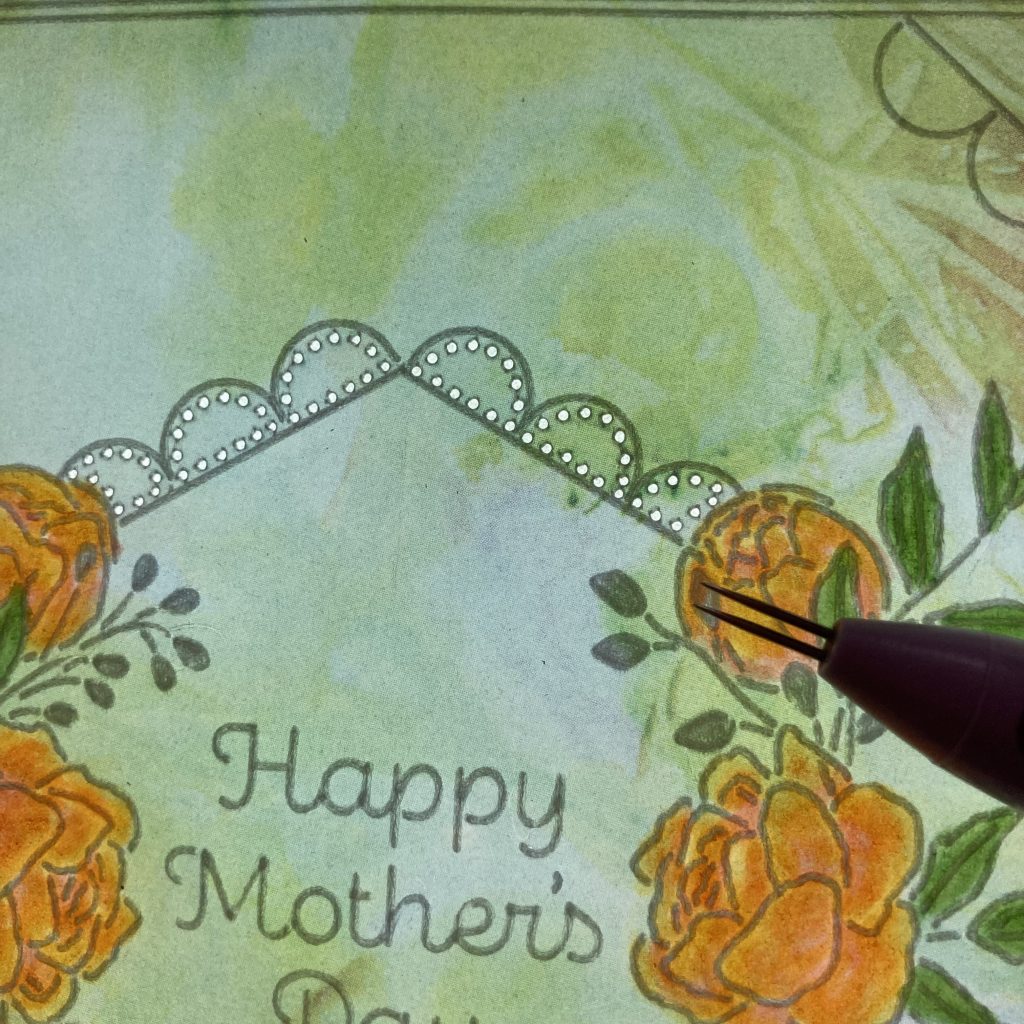
Step 16. Snip the waste from inside the scallops.
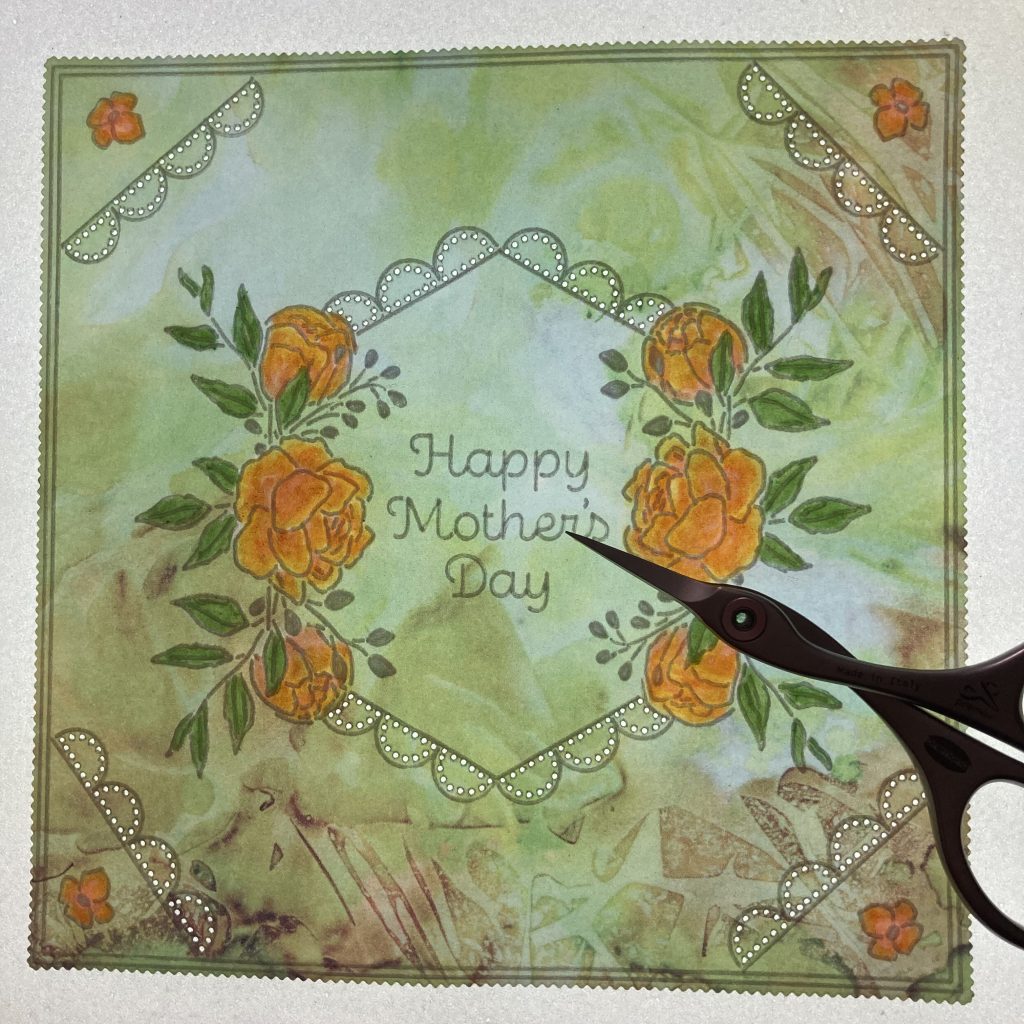
Step 17. Cut a piece of matching designer paper using the 2nd largest square picot die. Attach the parchment to the paper using brads in the corner flowers. Adhere to the front of a 7 x 7 card blank.

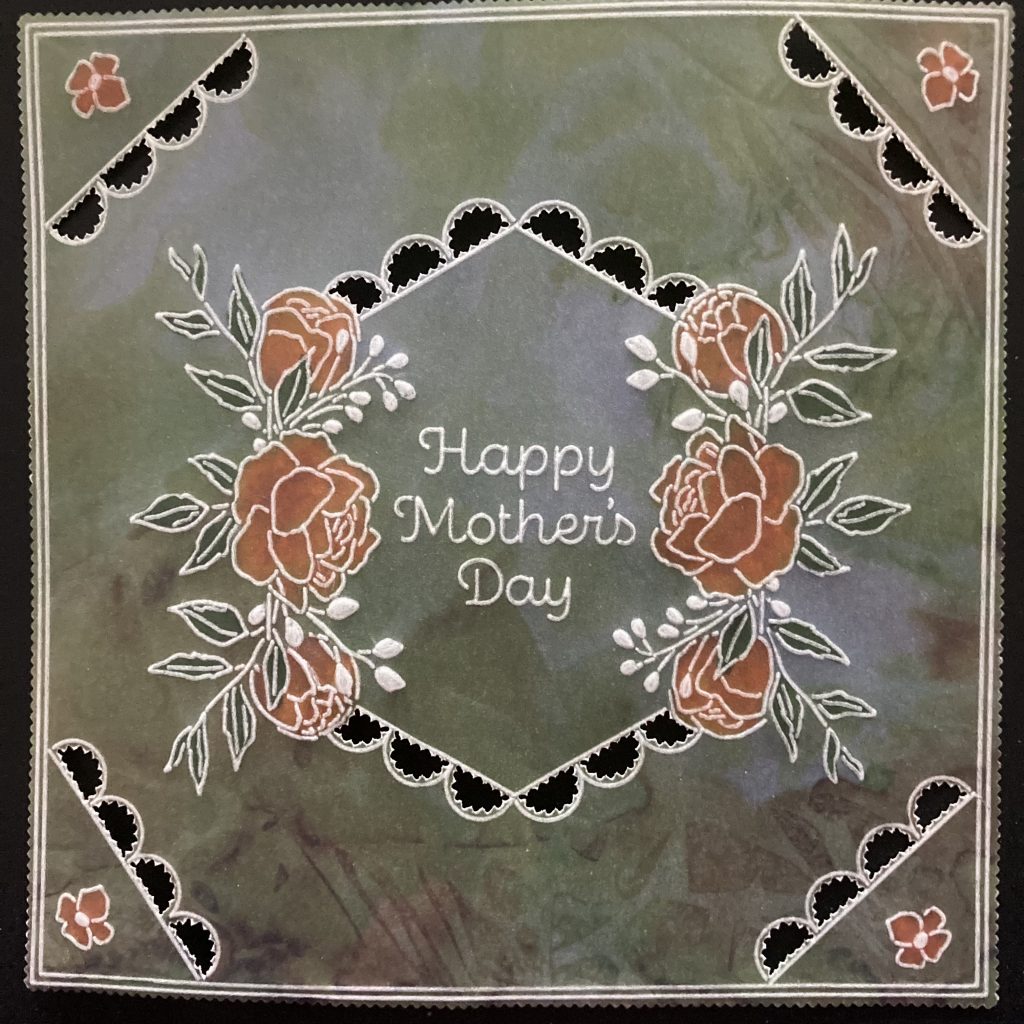
You have now completed your project.
GORGEOUS! What a stunning project. And simple when broken down into steps! Thanks, Jane, for sharing your tips and tricks with us.
Everything that Jane has used in this particular project can be found over on the Clarity website HERE.
On the horizon… there are a few Clarity things to look forward to this week, as always. Here is our schedule for the week ahead:
Monday 24th April:
SHAC Shack with Barbara – 10am Live on Facebook and YouTube
Tuesday 25th April:
Groovi Tuesday with Paul – 10am Live on Facebook and YouTube
Thursday 27th April:
In the SHAC with Clarity with Barbara on Create & Craft – 5pm
Friday 28th April:
Crafting with Clarity with Barbara on Create & Craft – 9am & 1pm
Things are starting to feel normal again aren’t they?
Right, I’m off! Enjoy the rest of your weekend.
Lotsa love, Grace & Jane xoxo
Clarity – The Home of Art, Craft, and Well-Being.
I don’t have any of the Groovi items but looking through the pictures I’m sure I can make something similar, thank you for the ideas.
The card is gorgeous, many thanks
Jo
Beautiful work Jane. Love the designer parchment. Have a great weekend Grace.
Thank you Jane that’s beautiful xx
Thanks Jane, great step by step.
Grace, I missed yesterday’s blog but this has got to be among the best selections, I don’t know how you do it.
I am pleased to hear you are dancing again. A few months before my dad died he said to me “ when I’m gone don’t cry and mourn, I’ve had a good life and the best thing you can do for me is to live your life the best you can” I always remember his scruffy white beard and his twinkling eyes when I think of him and even now 30 years later it still gives me great comfort.
Stay safe 🍒
Another great project from Jayne & another reason to put the plates on my shopping list for the open days. It is surprising when you break down the elements on the plates how many different options you have & suitable for all occasions.
Thanks Grace for another Sunday blog, keep dancing & have a good week xx
Beautiful project, love the colours and glad I bought Toscana in my last order ! Thank you Jane and Grace xx