Clarity Matters Blog Tutorial: How To Use Dies to Attach Parchment
Hello hello! Grace here.
I hope this finds you well and feeling crafty on this Sunday morning.
We are joined by the super-talented Clarity Design Team Member, Glynis Whitehead. She has kindly put together a step-by-step tutorial for us to learn from.
I’ll hand you right over to our teacher!

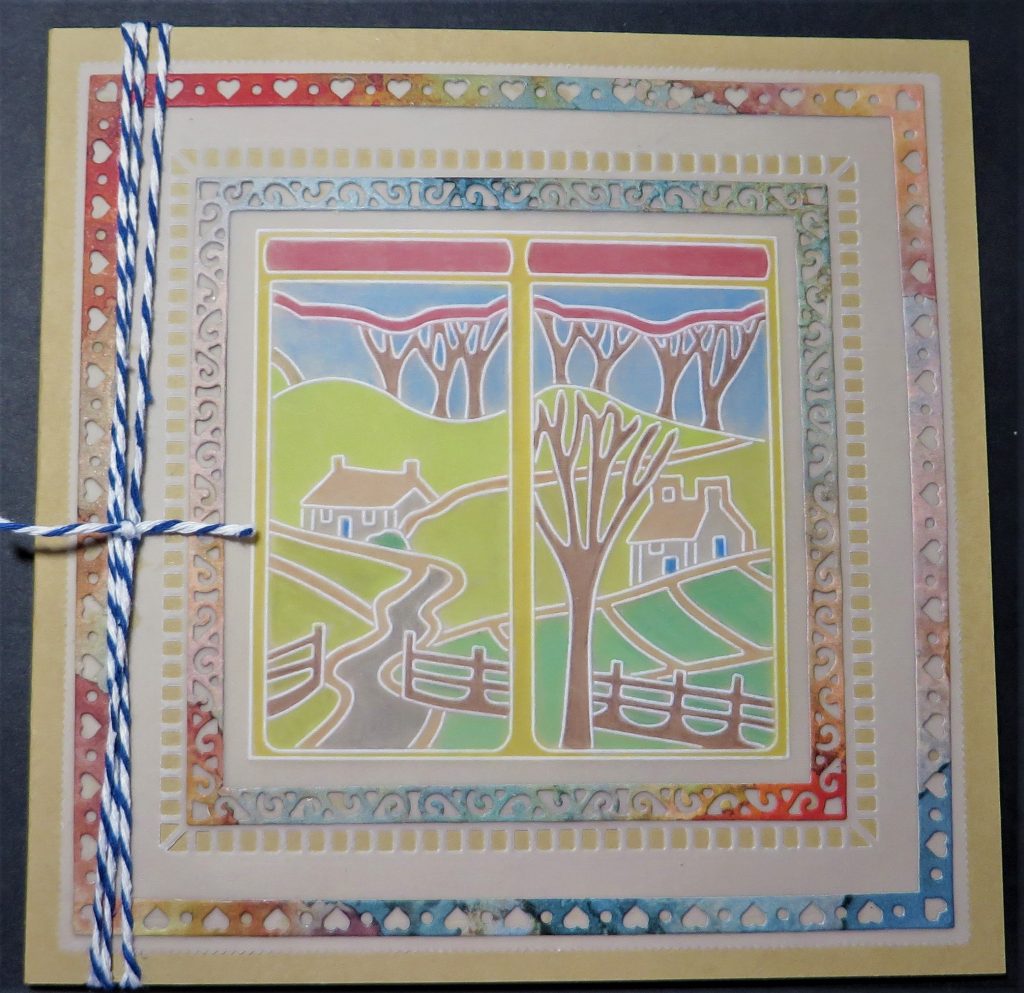
Doodle Dies Meet Parchment Project
A lot of people ask about ways to stick their parchment down onto their card blanks. It’s difficult because parchment is translucent and so glue often shows through. Here is a really cool way to stick your parchment down and decorate your masterpiece at the same time.
Ingredients
Nested Squares Picot Cut Dies (ACC-DI-30666-66)
Nested Squares Doodle Frame-Its Die Set (ACC-DI-31157-66)
Nested Square Heart Doodle Aperture Frame Its Die (ACC-DI-31158-66)
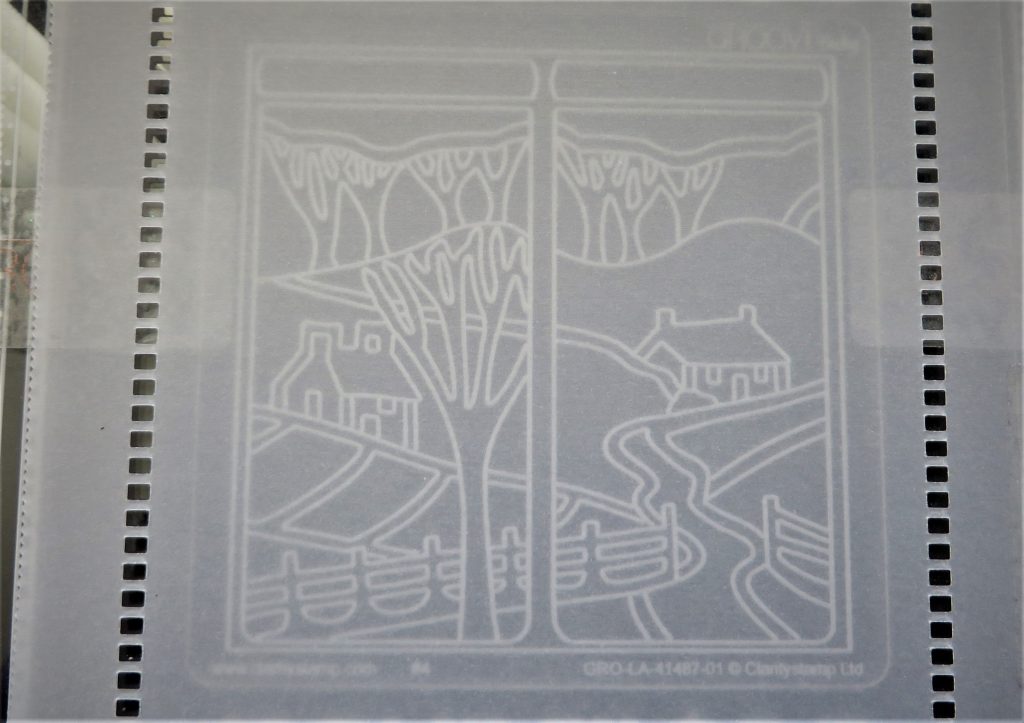
Room with a View 3 Country Cottages A6 Square (GRO-LA-41487-01)
Nested Squares A5 Square (GRO-PA-40037-03)
Plate Mate for A5 square plates + the insert (GRO-WO-40133-11)
Northern Lights Designer Paper 8×8 (ACC-CA-30443-88)
Plain Parchment (GRO-AC-40024-A4)
Perga Glue (PER-AC-70133-XX)
Method
Step 1. TOP TIP – Before you start die cutting (especially if the die is new), wipe the cutting side of all the dies with a fresh tumble dryer sheet. I do this and all of the cut pieces just drop out of the dies.
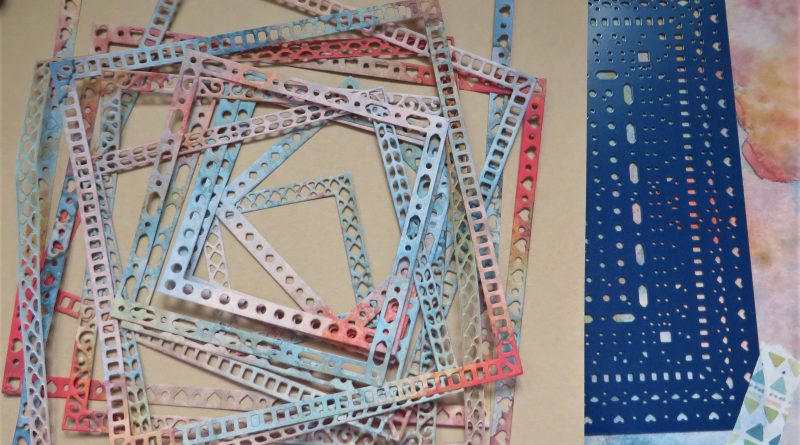
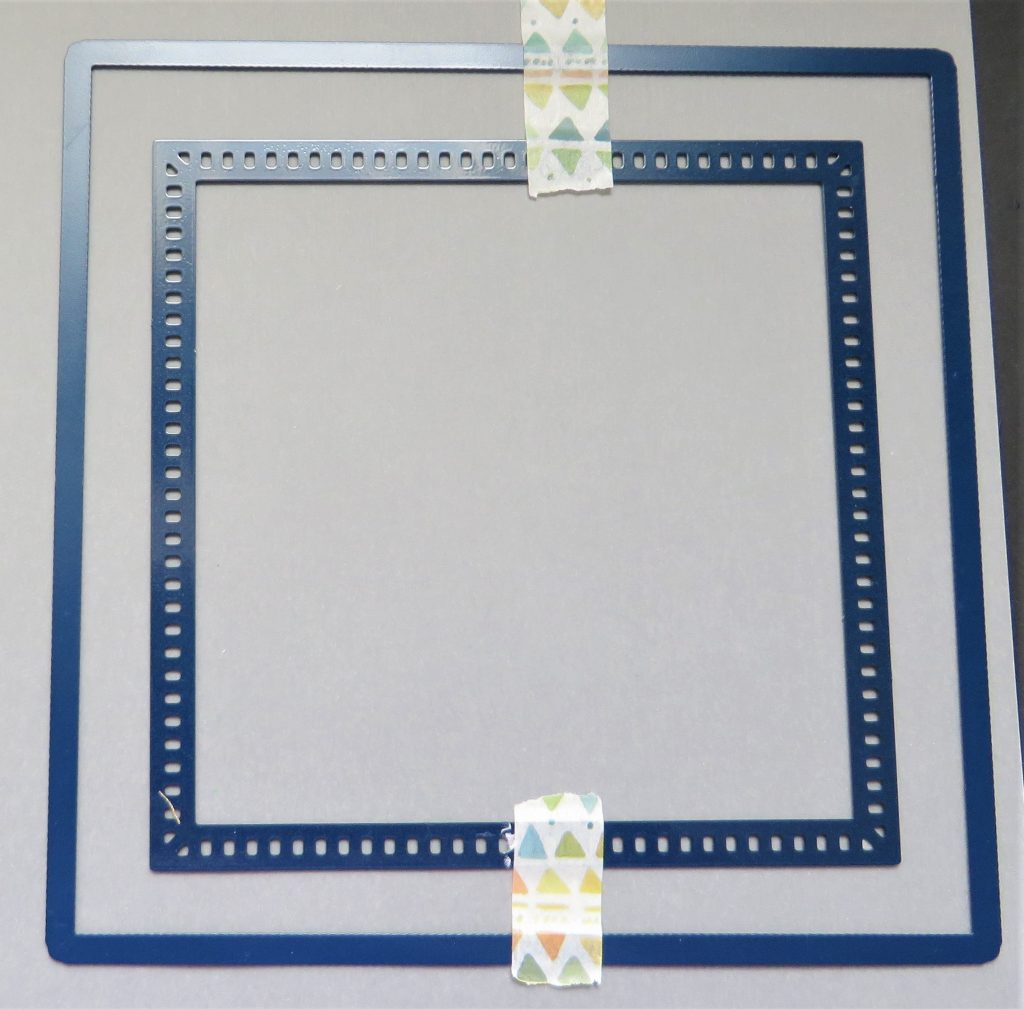
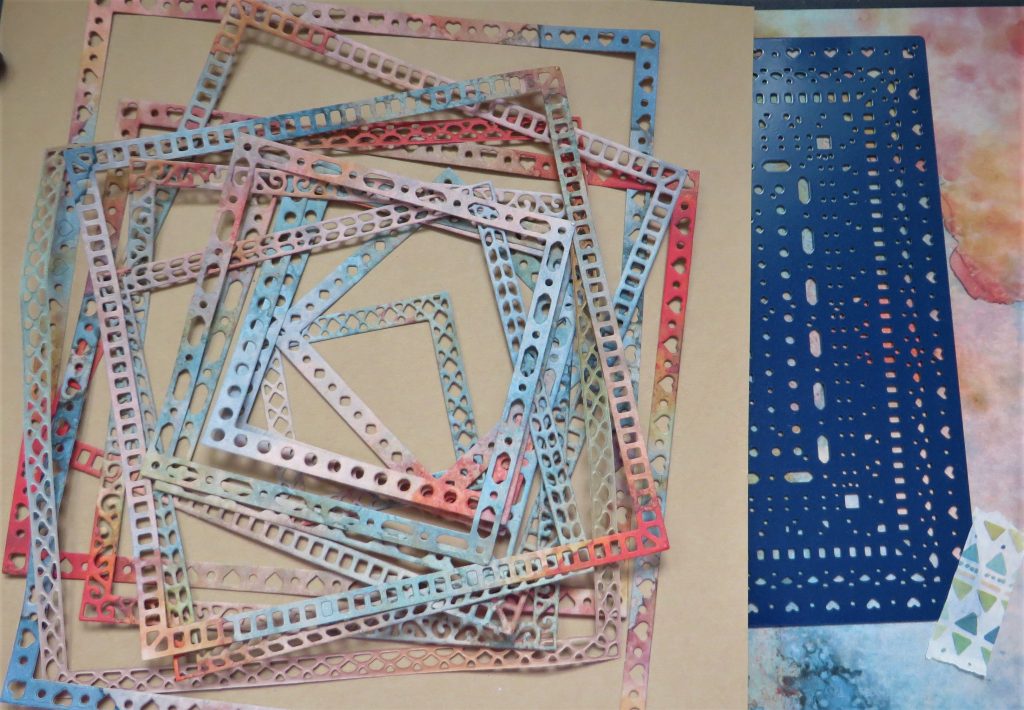
Set up for your first paper cut. On a plain piece of parchment, lay down the largest die from the nested picot square dies, then take the 2nd largest die from the nested squares Doodle Frame its. Put them with the cutting side down onto the parchment and space them out to make a frame. Once you are happy with their position, fix them down with a little low-tack tape.
Step 2. Take the square heart Doodle aperture die and place that cut side down onto your sheet of designer paper. Hold it in place with a bit of low tack tape and run this through your machine.
The sandwich you use for this job really does depend on your own, individual machine. You will end up with lots of frames to use on this and many other projects, which is cool.
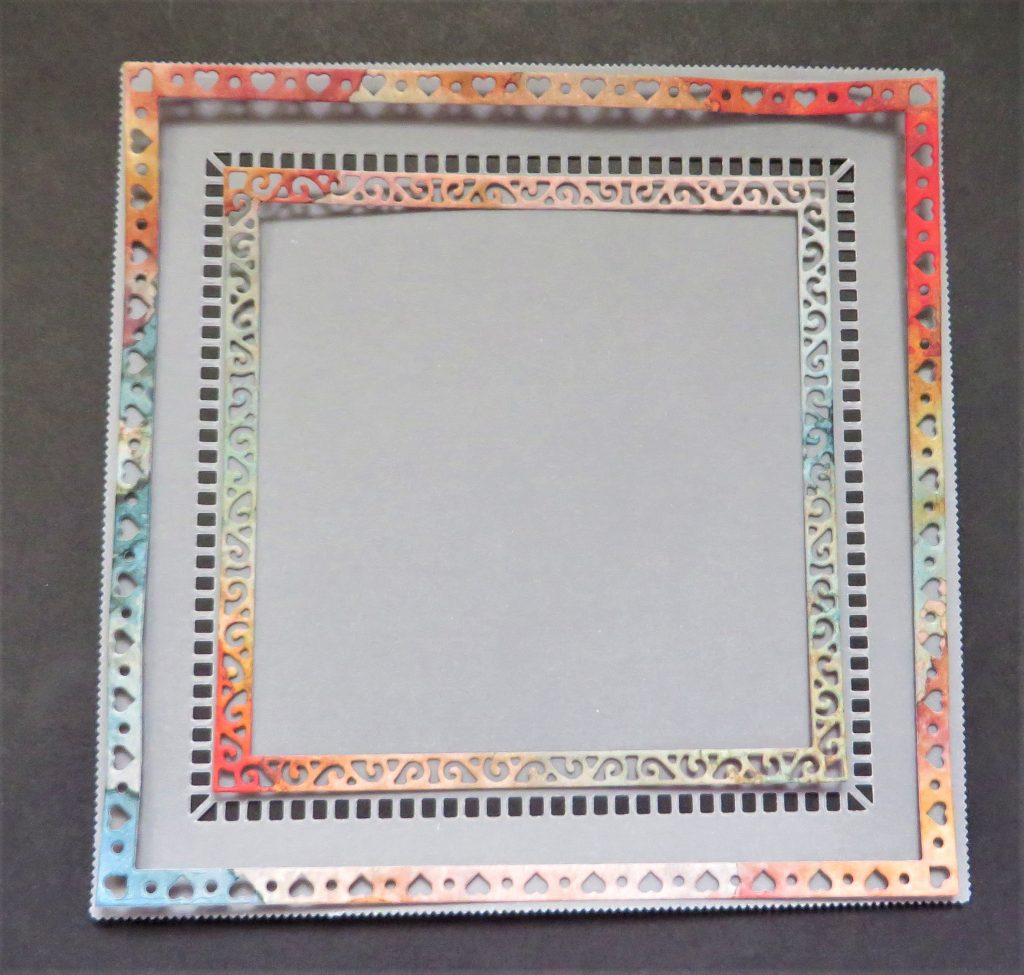
Step 3. Now we can have some fun making up the composition of our piece. I found the heart frame fits really well around just inside the picot edge of my parchment and the swirl design frame fits very well inside the slotted aperture that I cut into the parchment. Whilst I am working on the parchment, I will put these frames under a heavy book to flatten them down.
Step 4. Place the inset into the plate mate with the country cottages plate inside that – then fix them with a Groovi Tab, in case there is any movement between plates. Centralise your design and then attach your parchment face down and wipe with a tumble dryer sheet.
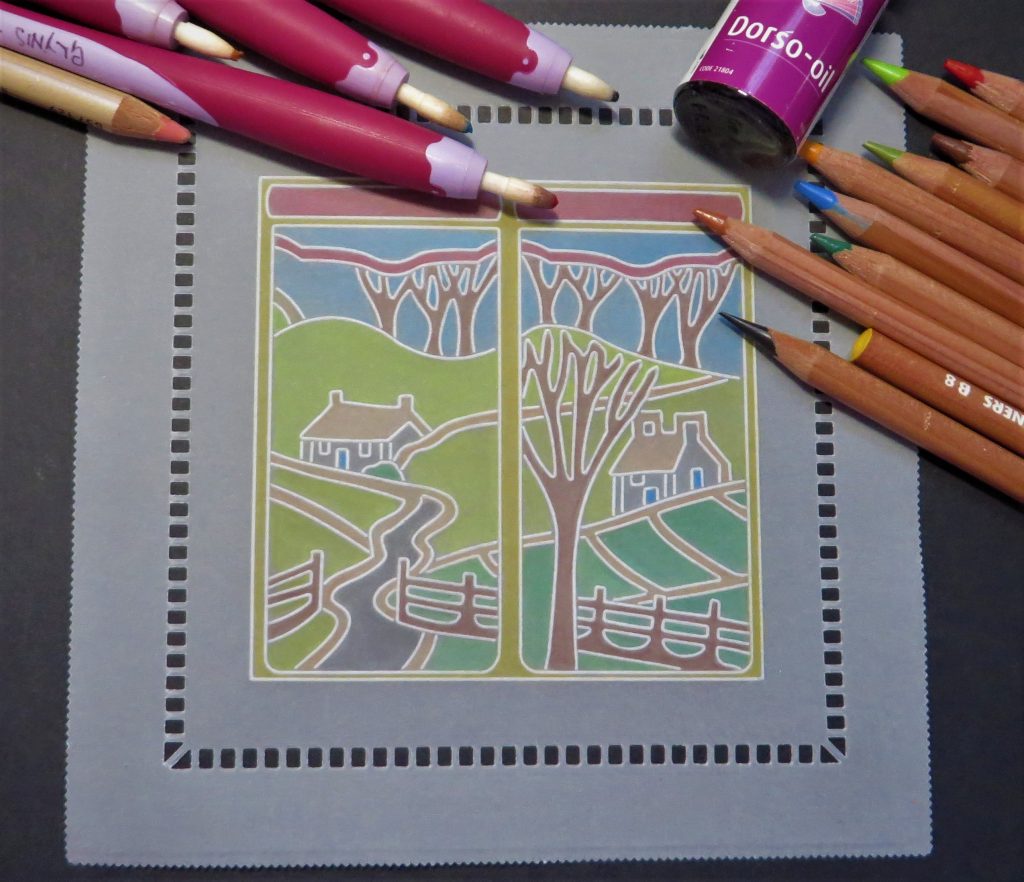
Step 5. When you have traced your design, remove it from the Groovi plates and we can add some colour. I used a range of green, brown, red, blue, and orange. I used some black diluted with Dorso Oil to make grey for the road and houses.
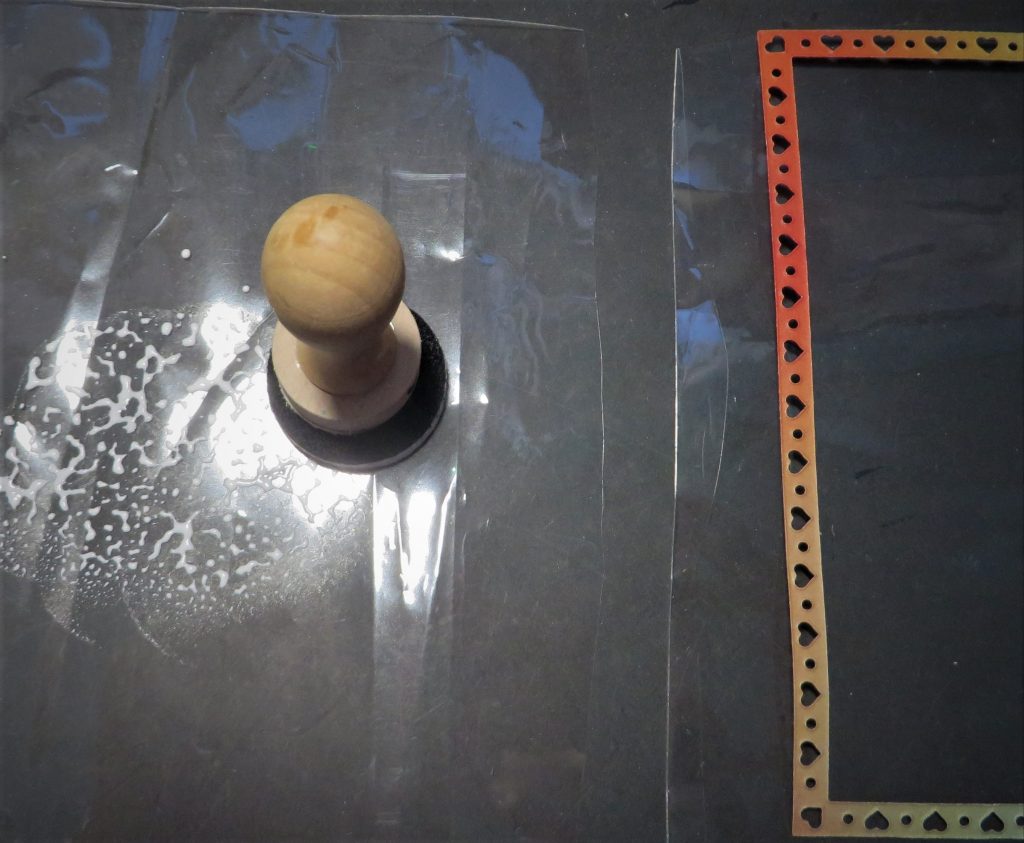
Step 6. This is how I put glue onto the doodle frames…
Cut up a cello bag – I keep all the bags that my plates and stamps come in as they always come in handy later. Put a pea-sized drop of glue onto one half and dab it out with an ink applicator. (Keep this, wash it, and use it again another time). Pick up some glue and dab this onto the back of the frame. Then stick it down onto the parchment. Do both pieces in the same way.
Step 7. Use some Pergaglue on the back. With the fine tip, it is easy to just add small amounts to where the frames are.
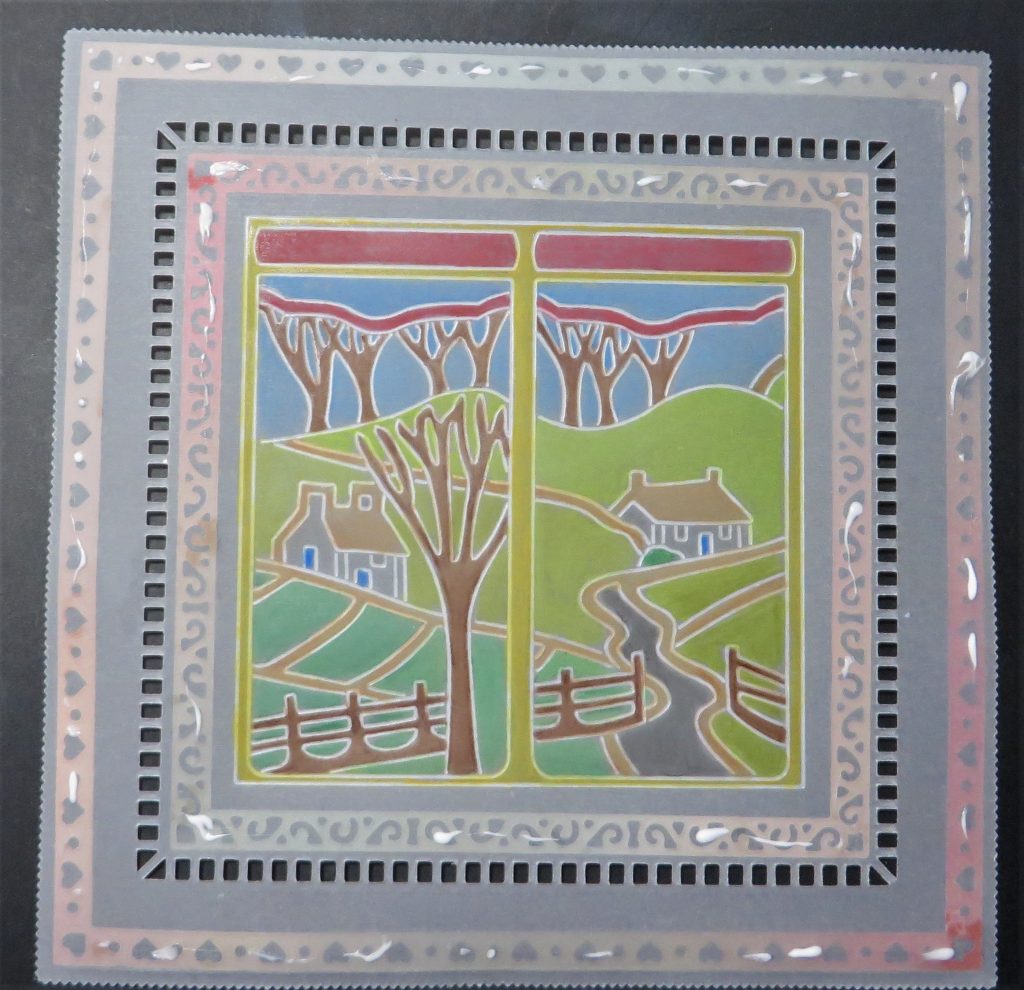
Step 8. Before you apply the glue, get a card blank ready, as Pergaglue dries very quickly. Stick the work to your card blank. And you’re all set!
How wonderful! We’re always looking for tips and tricks on how to attach parchment without the pesky tape or glue showing through. Thank you, Glynis!
Everything that Glynis has used can be found over on the Clarity website HERE

Don’t forget the Half Price Craft Club Members Sale is in full swing and ends at midnight on the 28th – Click HERE
Looking at the week ahead at Clarity Towers
Tuesday 28th Feb:
Groovi Tuesday with Paul – 10am Live on Facebook and YouTube
Sunday 5th Mar:
Clarity Classics with Paul on Create & Craft – 3pm-5pm – 2 hours
Travel gently, friends.
Lotsa love, Grace & Glynis xoxo
Clarity – The Home of Art, Craft, and Well-Being.
Brilliant post Glynis, love the way you have mixed the die cut frames. Thank you so much for sharing xxx
Very useful tips Glynis, thanks for sharing.
A great tutorial Glynis thank you xx
Great tips Glynis. I’m sure you’ll recall that the whole parchment was originally the size of the card blank and you used to pierce through and attach with thread on the seam like book binding, sometimes then covered by the addition of ribbon.
A great step by step Glynis, love the doodle dies & this is a good way of hiding the glue rather than using brads to complete our work.
Another month coming to an end already, time seems to be flying even though we are all trying to travel gently, one day at a time !!
Hope everyone manages to stay safe, warm & well this week, will catch up with you on Saturday Grace x
Love this, thank you x
Thank you very much for such a helpful method of attachment, I’ll definitely use this way next time. xx
Thank you Glynis, a great demo. x