Clarity’s Blog Tutorial: How To Use The Flower Tool – Part 2
Hello hello! Grace here.
I hope this finds you safe, well and enjoying your weekend.
We had some brilliants shows this weekend, between the SHAC SHAC, Groovi Tuesday & Paul’s TV shows (you can catch up on rewind. The shows were on Wednesday and Thursday).
But for now, we’re closing out the week with another beautiful and incredibly helpful step-by-step project by Clarity’s super talent Glynis Whitehead. It is the final project from Linda’s Pergamano Multi-Needle Tool Vol 1 Handbook. Without further ado, I shall pass you over to the lovely Glynis…..

Flower Tool – Part 2
Ingredients
Pergamano Handbook for Multi-Needle Tools Volume 1 by Linda Williams (PER-BO-70291-XX)
Hats 2 Groovi Border Plate (GRO-FA-40500-09)
Straight Border Grid 1 (GRO-GG-40350)
Basic Piercing Grid Straight (GRO-GG-40384-14)
Nested Arch Tags Groovi Plate A5 (GRO-PA-41465-04)
Flower Perforating tool (PER-TO-70018-XX)
Single Needle Perforating Tool (PER-TO-70035-XX)
Single Needle Bold (for grid work) (PER-TO-70028-XX)
1mm Embossing Ball tool (PER-TO-70011-XX)
1.5mm Embossing Ball tool (PER-TO-70004-XX)
6mm Embossing Ball tool (PER-TO-70016-XX)
Tools from the starter kit.
Faber-Castell Polychromos Pencils (ACC-PE-30797-XX) or Perga-Liner Pencil
(B) (PER-CO-70063-XX)
Blending nibs (PER-AC-70300-XX)
Dorso Oil (PER-CO-70066-XX)
Perga Glue (PER-AC-70133-XX)
Perga Crystals (Starlight) (PER-AC-70402-XX)
Method
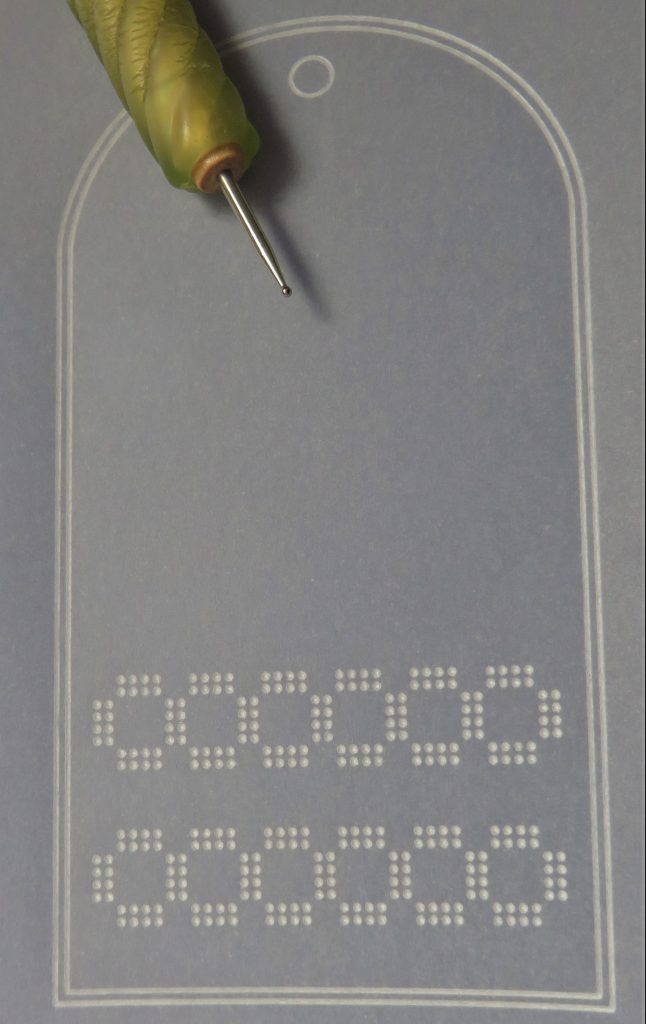
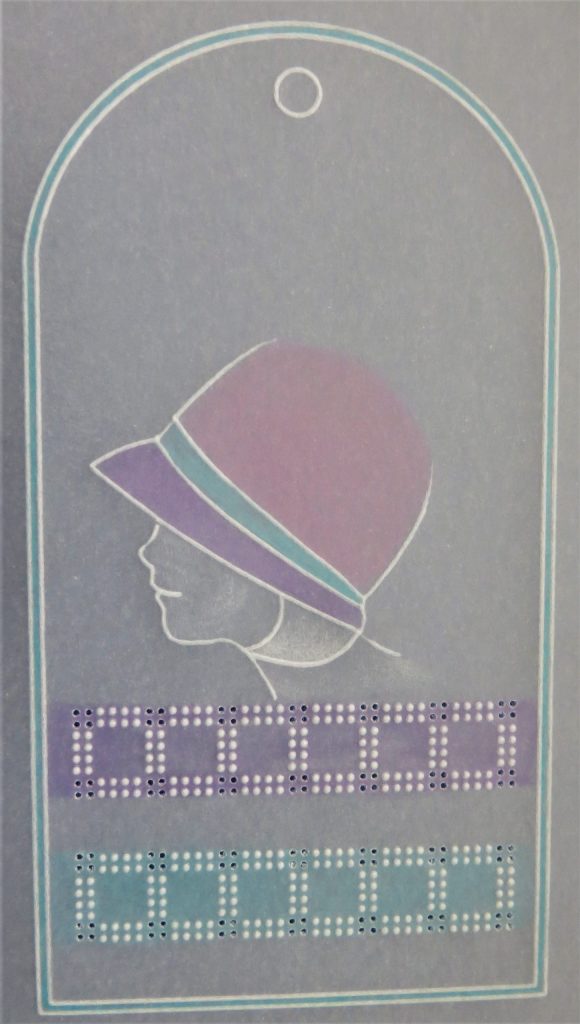
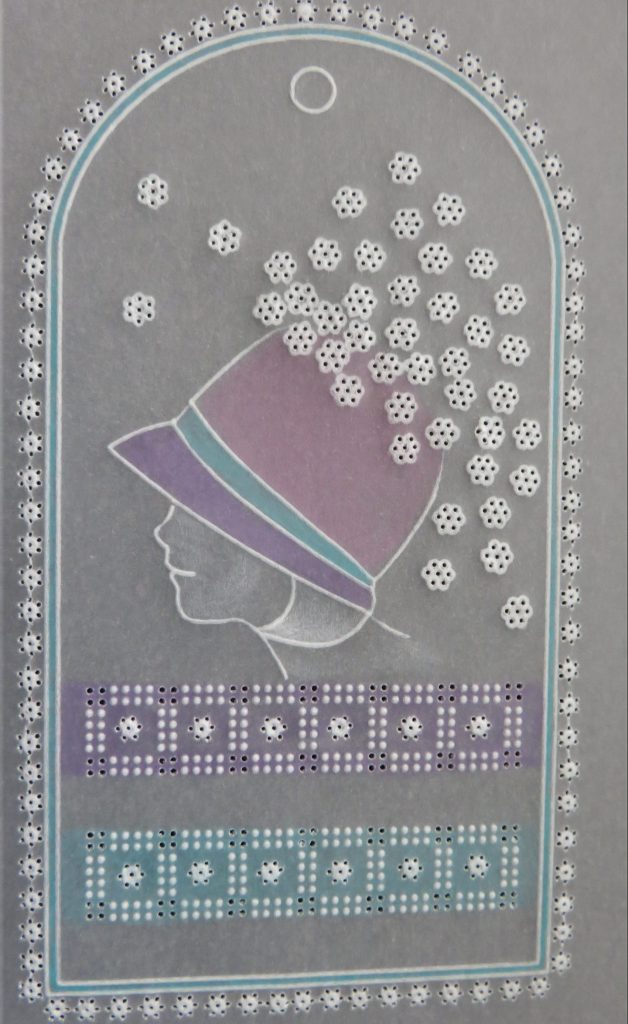
Step 1. Trace out the 2nd largest tag from the nested Arch Tag Groovi Plate.

Step 2. Emboss the dots from the Straight Border Grid plate, working on the back of the tag. Make sure to centralise the grid pattern along the bottom of the tag. Leave out the four central dots as this will be space for a flower tool perforation. When the grid is the right way up and ‘Groovi’ can be read in the top right-hand corner of your plate, the pattern you need is the second one up from the bottom. Repeat the pattern a little further up the tag.
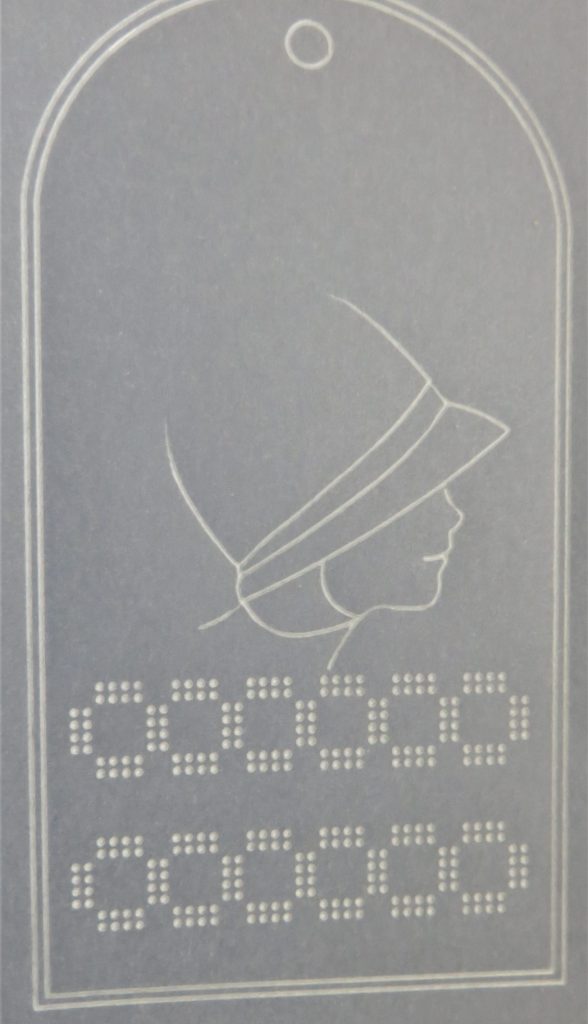
Step 3. Emboss the hat from the Hats 2 Border Groovi Plate and leave the top of the hat open for flowers (made with the flower tool).
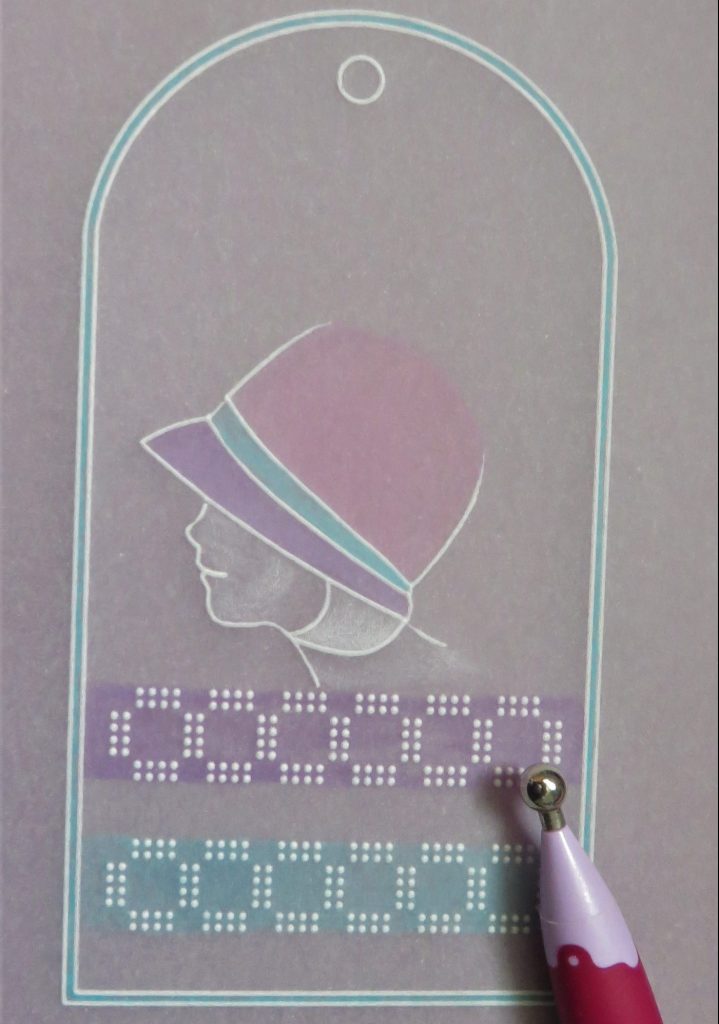
Step 4. Add some colour on the back of the tag and blend it out with some Dorso oil and a blending nib.

Step 5. Use the 6mm embossing ball tool to add some highlights and shape to the face and hair.
Step 6. Working on the front, line up the embossed dots onto the Basic Straight piercing grid. Perforate 4 holes into the gaps at the top and bottom of the squares. Remember to leave the middle of the squares blank, for the flower tool perforations.
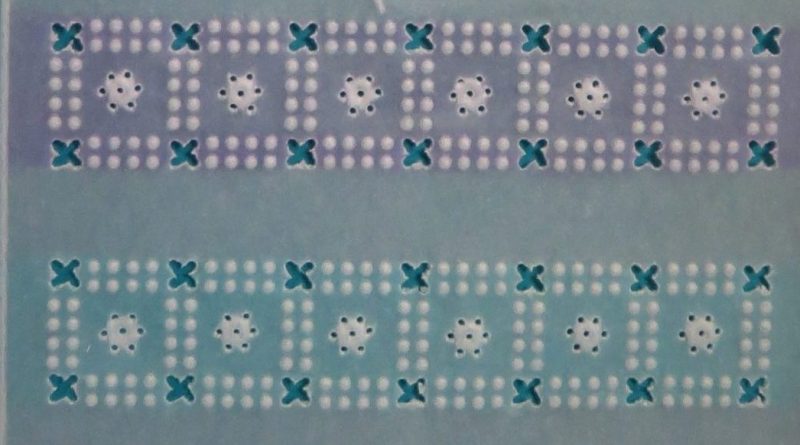
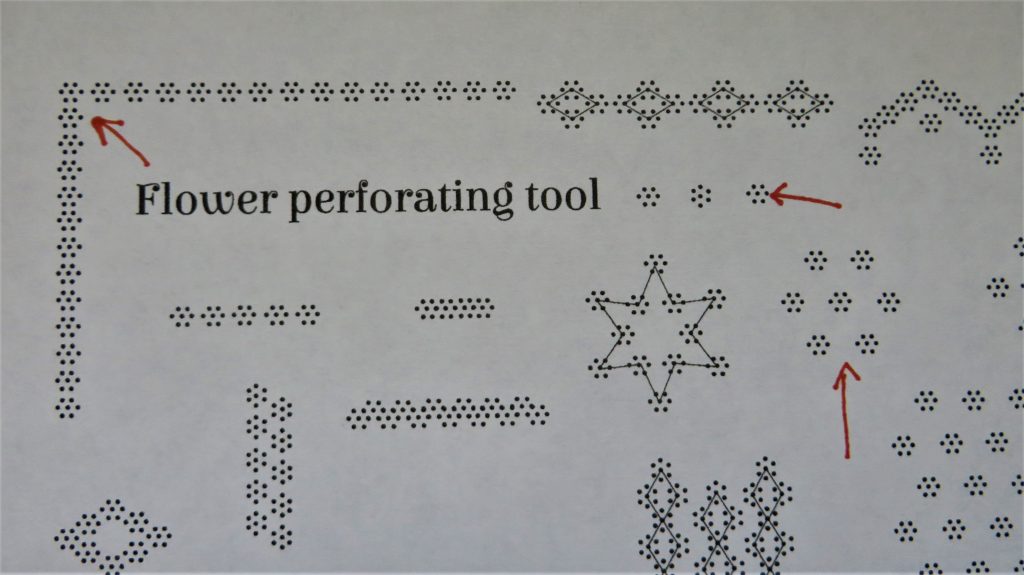
Step 7. The instructions for this tool are on pages 38-41 of the Pergamano Handbook for Multi-Needle Tools Volume 1. The sampler on page 41 is the one you need to photocopy. I have marked the patterns I will be using with red arrows.
Place the paper pattern on a shallow perforating mat and put the parchment on top. Match every dot up to the dots underneath and then perforate through both layers.
TOP TIP: The dots on the handle will help you with orientation.
Step 8. Add flower tool shallow perforations into each of the embossed dot squares, and all around the top of the hat. Emboss the flowers in the grid work with a 1.5mm ball tool and fill the area. The flower perforations in the hat need to be done with a 1mm ball tool and emboss around each hole to make a flower.
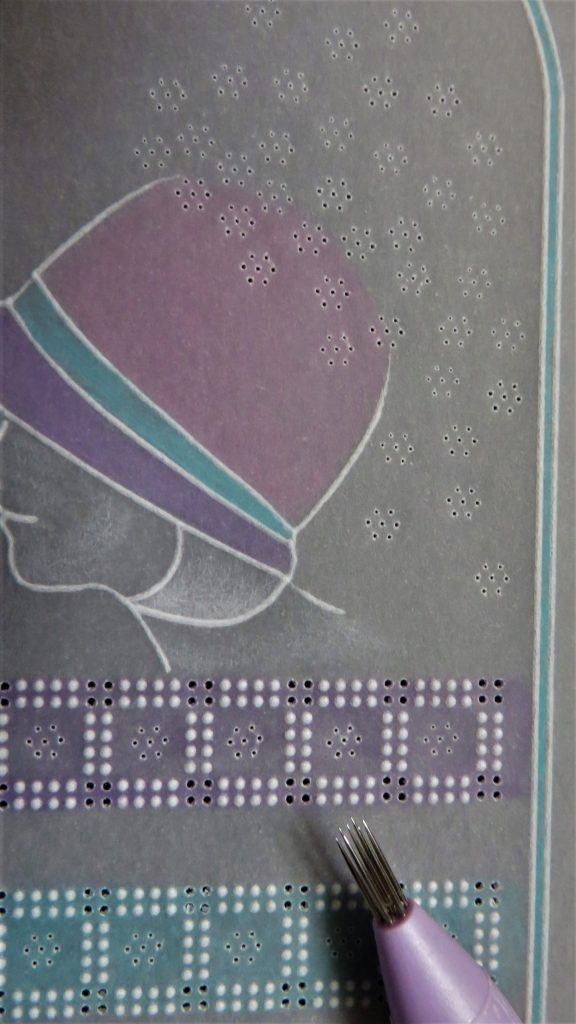
Step 9. Following the pattern indicated by the red arrow in step 7, go around the outside of the tag and emboss a dot within the flower using the 1.5mm ball tool.
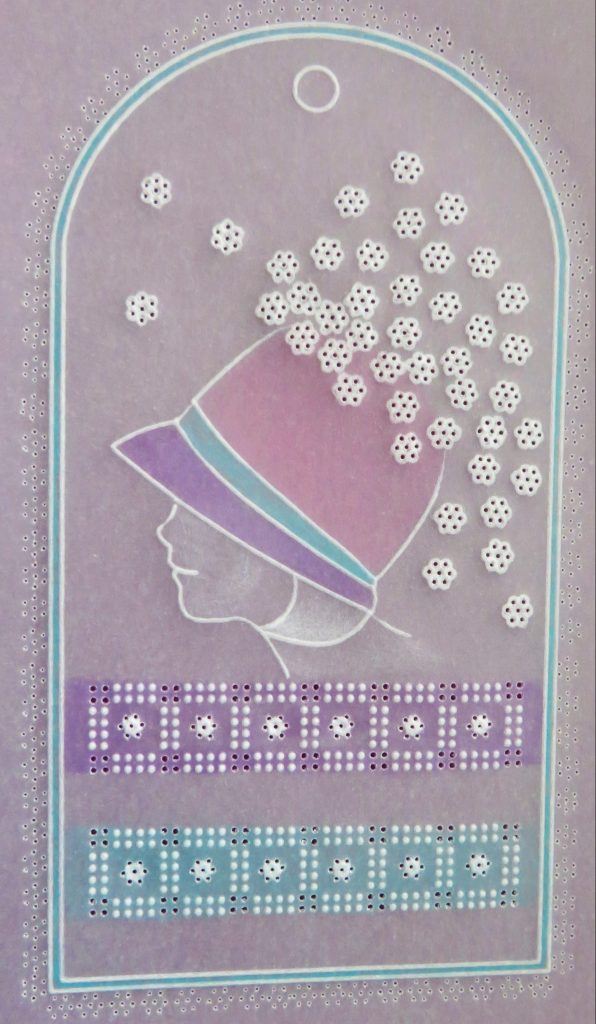
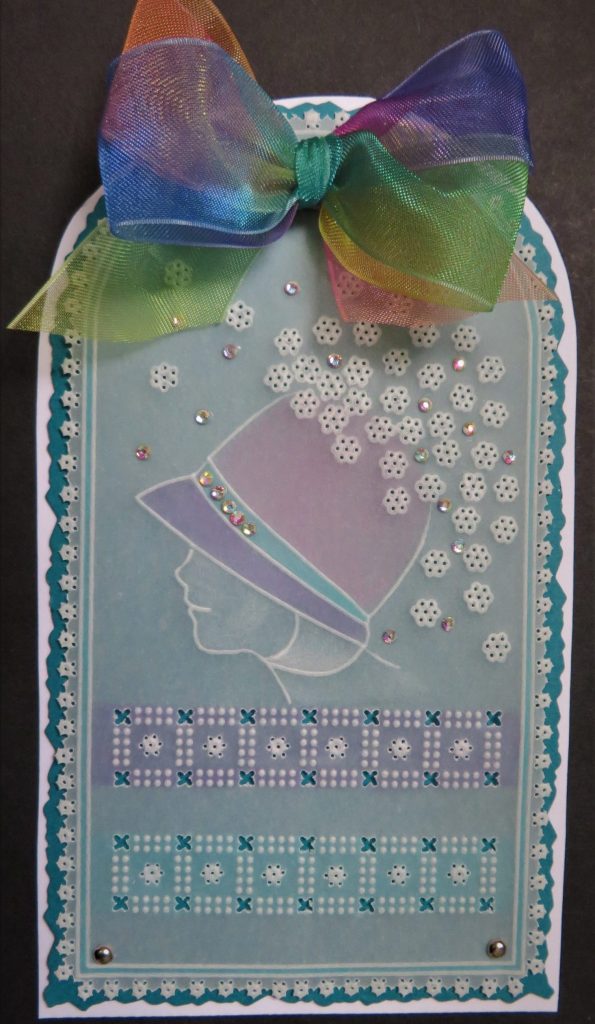
Step 10. Re-perforate all the holes using a fine 1 needle tool and then snip the tag out, following Linda’s cutting guide on page 39 of the Handbook. Also cut the crosses within the grid work.

Step 11. Mat and layer the tag onto your choice of backing card and add a lovely bow. Use Perga-glue to add some crystals between the flowers coming out of the hat and onto the hat band. And you’re all done!
What a beautiful project from Glynis. As usual, we have put everything in one place over on the Clarity website HERE
It is looking like another busy week at Clarity Towers:
Monday 14th – SHAC Shack with Mum at 10am – Facebook & YouTube Live
Tuesday 15th – Groovi Tuesday/Pergamano School with Linda & Paul at 10am – Facebook & YouTube Live
Thursday 17th – SHAC Shack with Mum at 10am – Facebook & YouTube Live
Thursday 17th – The Pergamano Show with Paul at 11am & 3pm on TheCraftStore.com
Saturday 19th – Crafting with Clarity with Paul at 11am & 3pm on TheCraftStore.com
Lotsa love, Grace & Glynis xo
Clarity – The Home of Art, Craft and Well-Being.
Love this project and will definitely give it a go.
Another lovely project from Glynis using the tools that Linda has shown us in the Groovi Tuesday sessions. Look forward to giving this ago in a few weeks time when I get my new glasses.
Thanks Grace & Glynis for todays blog
Thank you Glynis this is lovely xx