Clarity’s Blog Tutorial: How To Create a Sampler Using the Multi-Needle Tools
Hello hello! Grace here.
I hope this finds you well, safe and enjoying your weekend!
This week, Paul Church and Linda Williams wrapped up the Pergamano School… and started on a new series of lessons using the Christmas Rose Frosted Floral Overlay.
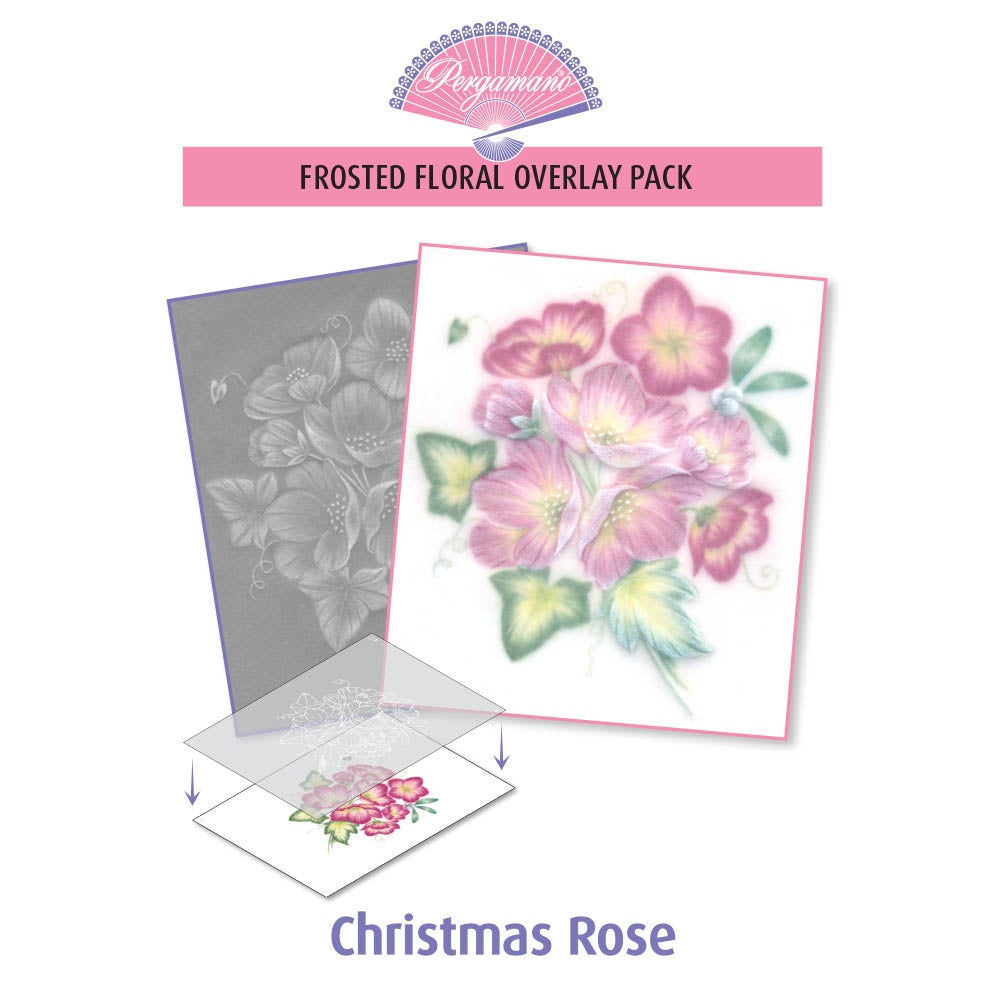
If you missed lesson 1, you can watch below:
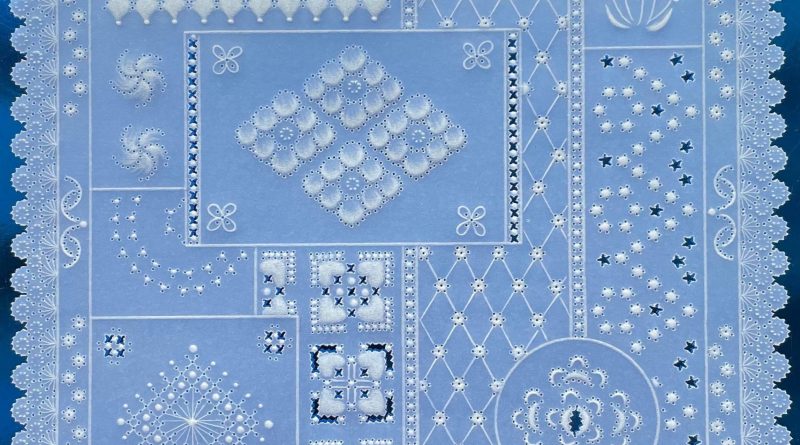
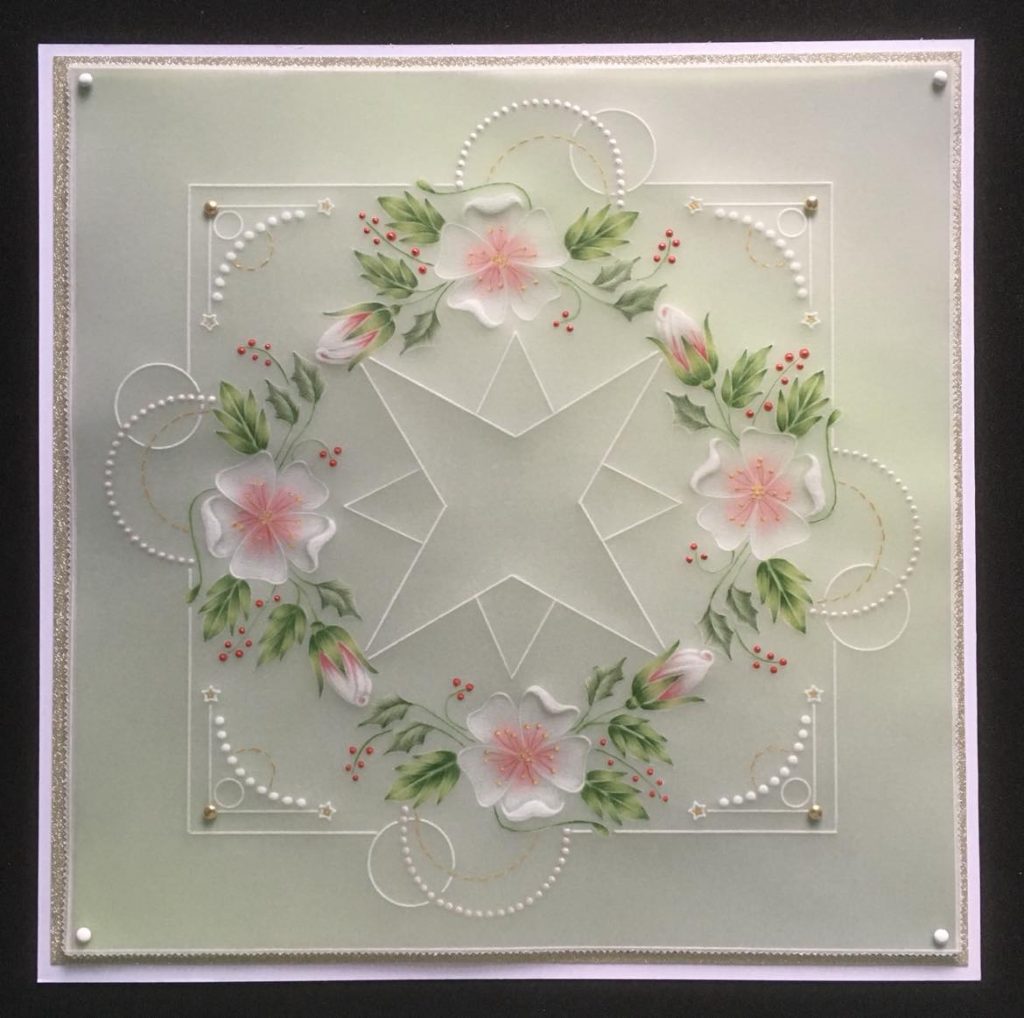
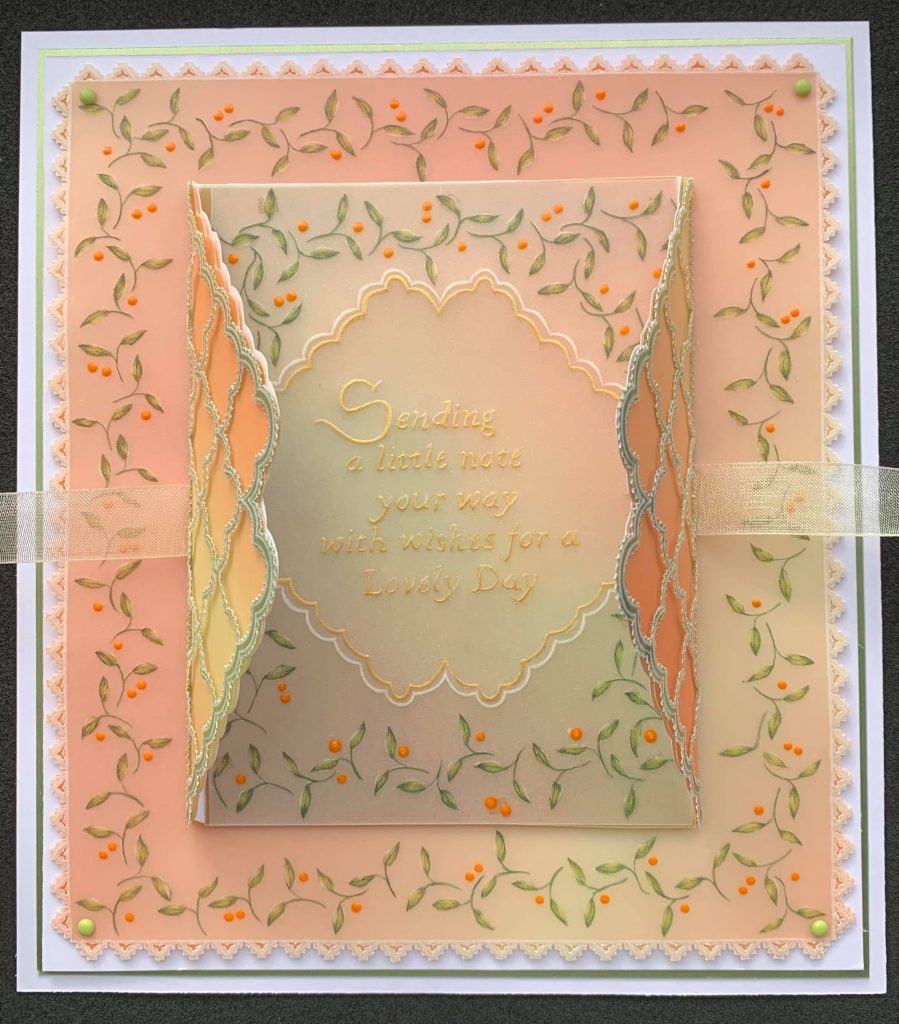
During the lesson, Linda showcased a beautiful sampler that Frances Knott created using the tools from Linda’s Vol 1 Book.
Linda thought that it would be a great project to share for this week’s Clarity Matters Blog – putting into practice everything we have learnt over the previous 12 lessons. If you need a recap on any of the tools, then you can find all the lessons in one place over on the Clarity website HERE.
So, this week we’re blessed to have the brilliant Frances Knott in our bloggy bubble. Frances is a valued member of the Clarity Design Team (since May 2019) and ohhhh-so-talented. She has created a stunning step-by-step project for us to teach you how to achieve the sampler that was shared in this week’s lesson.
I’ll hand you right over to the pro herself!
Multi-Needle Tool Project using Book 1
In this project I tried to bring together all of the needle tool techniques that Linda has taught us in the Pergamano Summer School. My aim was to try to use as many of the tools as possible in one sampler. Let’s jump right in!
Ingredients
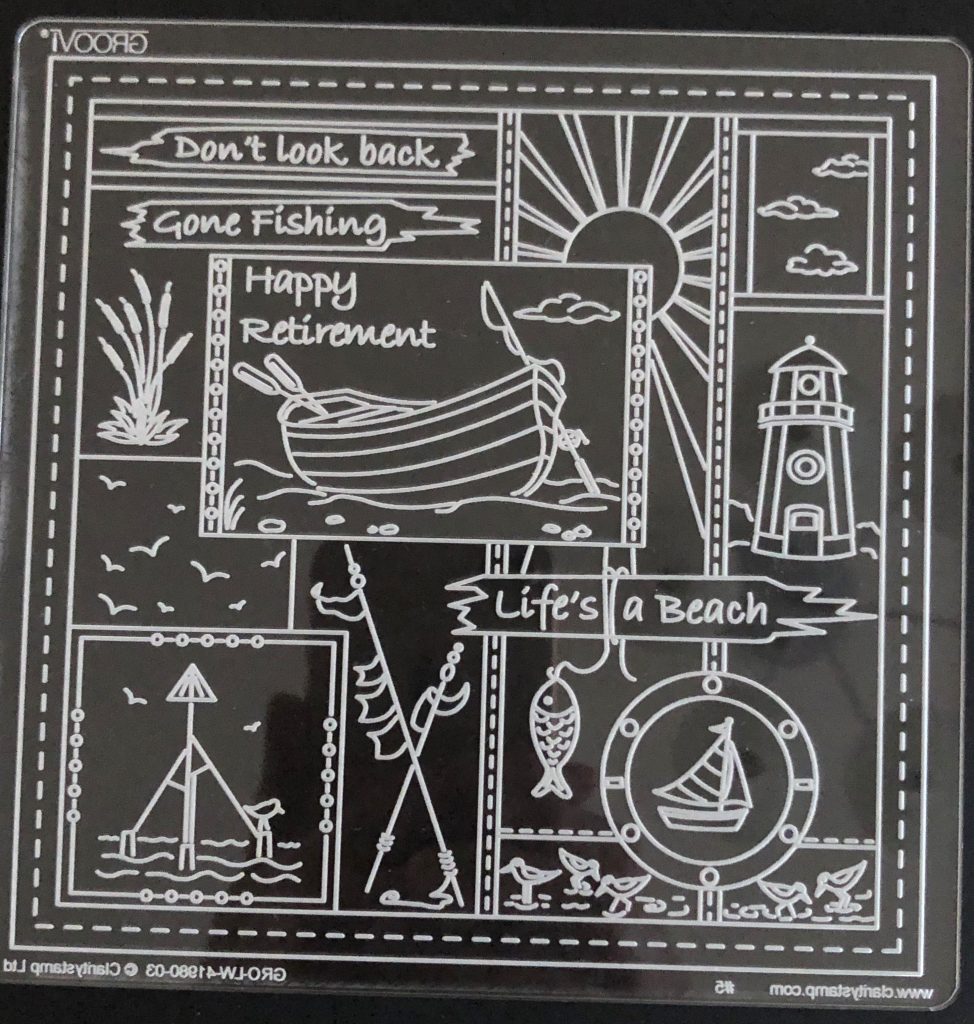
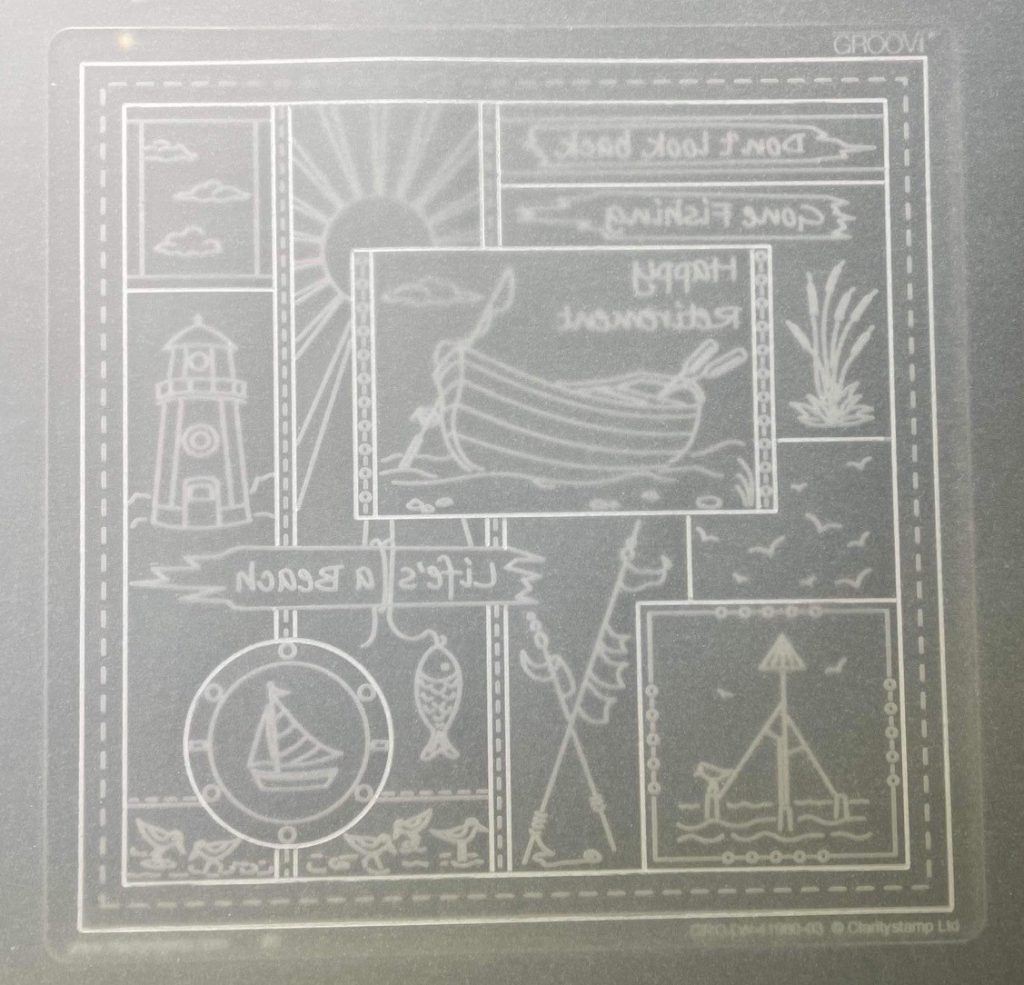
Linda’s Happy Retirement Groovi Plate (GRO-LW-41980-03)
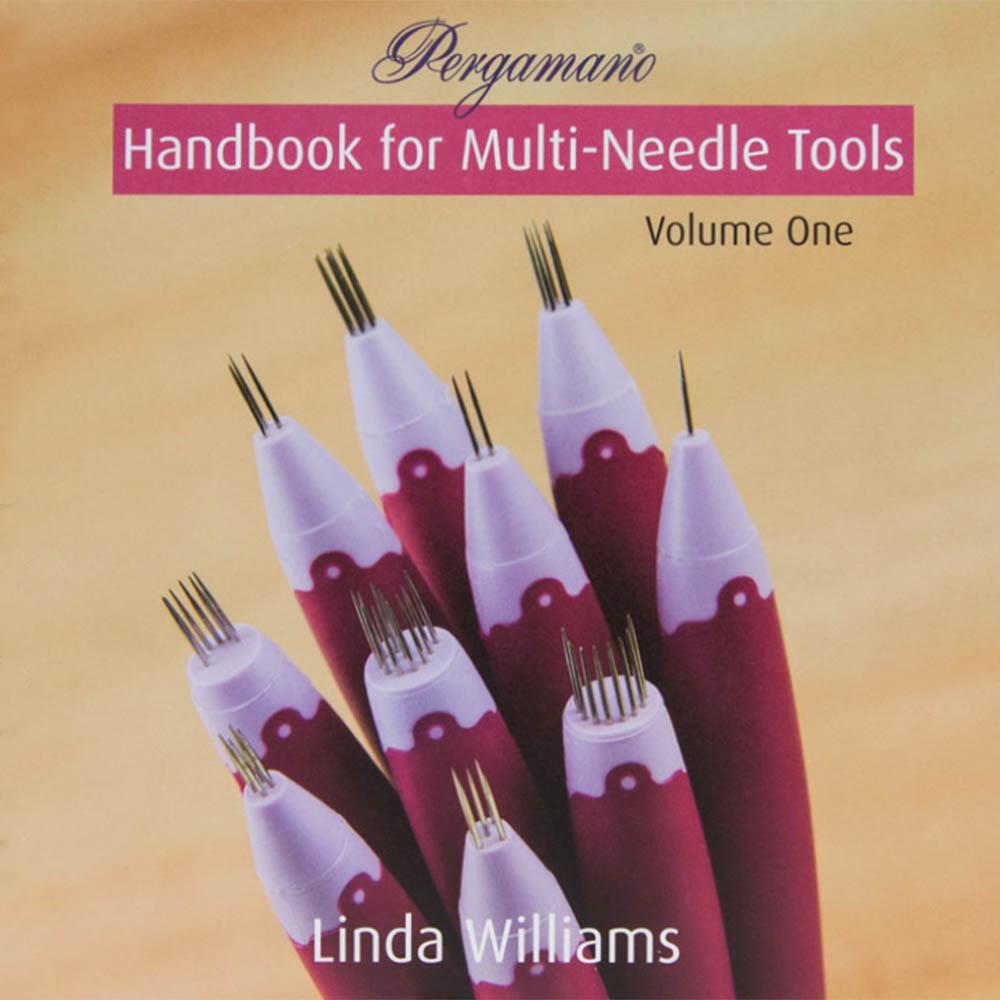
Handbook for Multi-Needle Tools Vol 1 (PER-BO-70291-XX)
1 Needle Perforating Tool (PER-TO-70035-XX)
2 Needle Perforating Tool (PER-TO-70037-XX)
3 Needle Perforating Tool (PER-TO-70038-XX)
4 Needle Perforating Tool (PER-TO-70036-XX)
5 Needle Perforating Tool (PER-TO-70019-XX)
5 in a Circle Perforating Tool (PER-TO-70025-XX)
Semi Circle Perforating Tool (PER-TO-70017-XX)
Semi Circle Mini Perforating Tool (PER-TO-70034-XX)
Swirl Perforating Tool (PER-TO-70032-XX)
Flower Perforating Tool (PER-TO-70018-XX)
1mm Embossing Tool (PER-TO-70011-XX)
1.5mm Embossing Tool (PER-TO-70004-XX)
3mm Embossing Tool (PER-TO-70005-XX)
Method
Step 1 – Outline.
Trace out your chosen outline from the Easy Layout plate. You can use any of them but I used the ‘Happy Retirement’ plate for my sampler.
Step 2 – Shallow Perforation.
Now for the fun bit… deciding which pattern to put where! Obviously it can be completely up to you, depending on how many tools you have or how you envision your design.
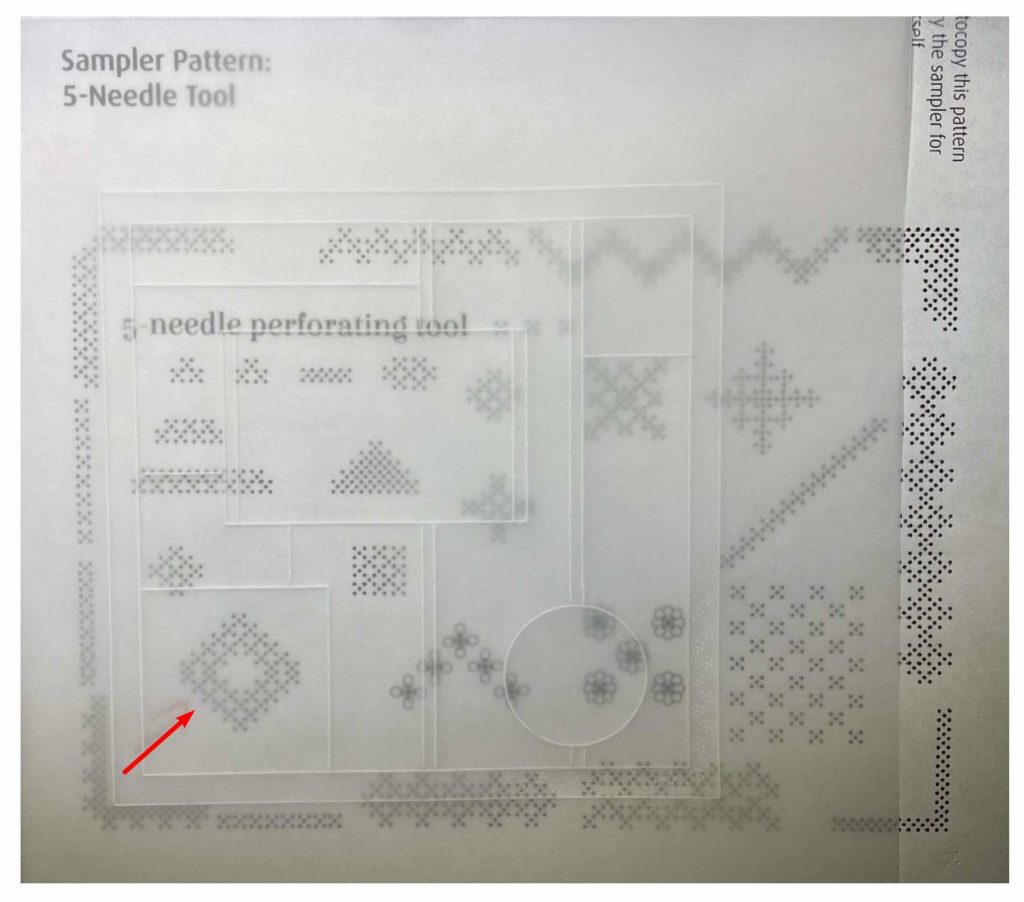
If you want a quick and easy option, then Linda has created a pattern for you to use which you can download HERE. Or visit Lesson 12 of The Pergamano School section of the Clarity website HERE and you will see a link called Sampler Download.
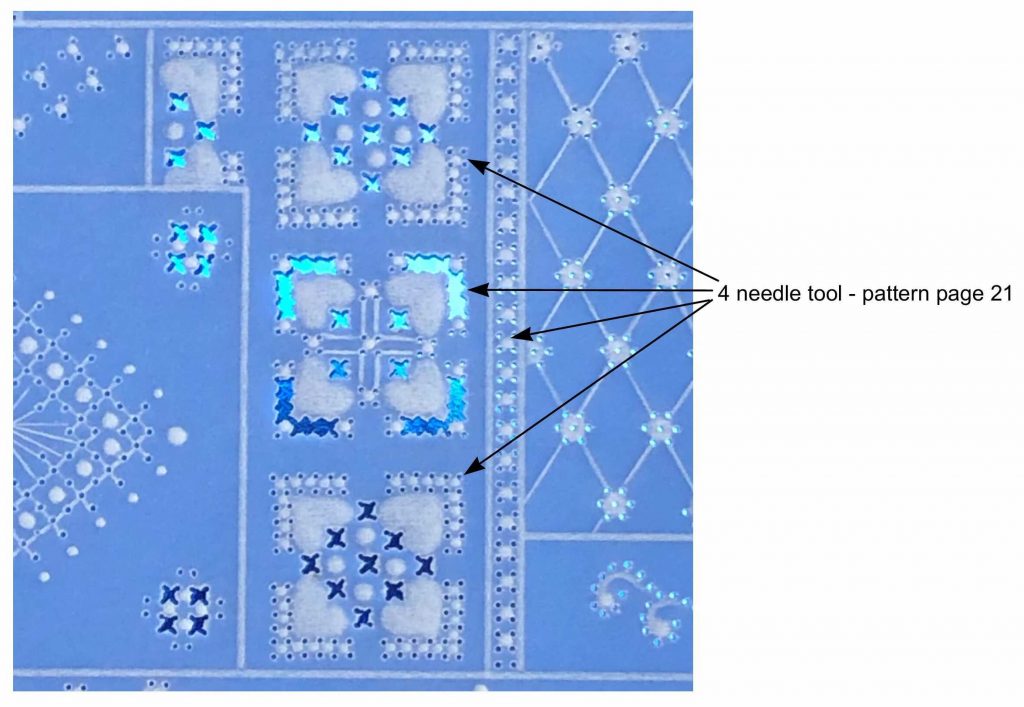
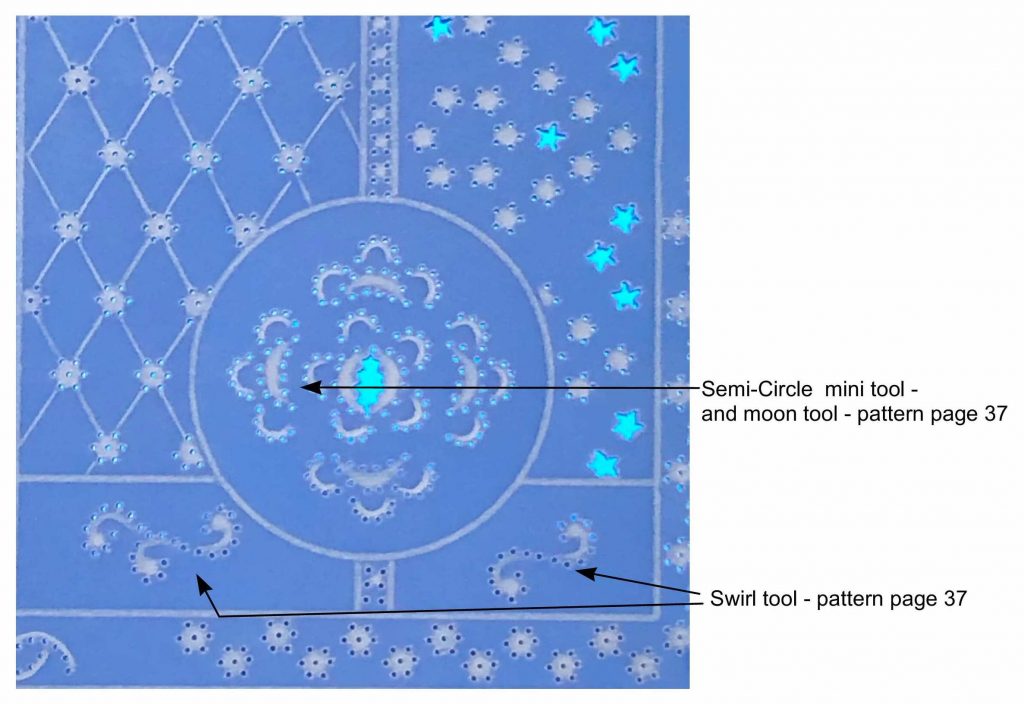
If you want to get creative, then photocopy all of the needle tool patterns you need from Book 1 (pages 17, 21, 25, 29, 33, 37 and 41). All of the patterns were shallow perforated before any embossing was done.
First I tackled the ‘whole’ shapes. I put the parchment over my chosen pattern and shallow perforated.
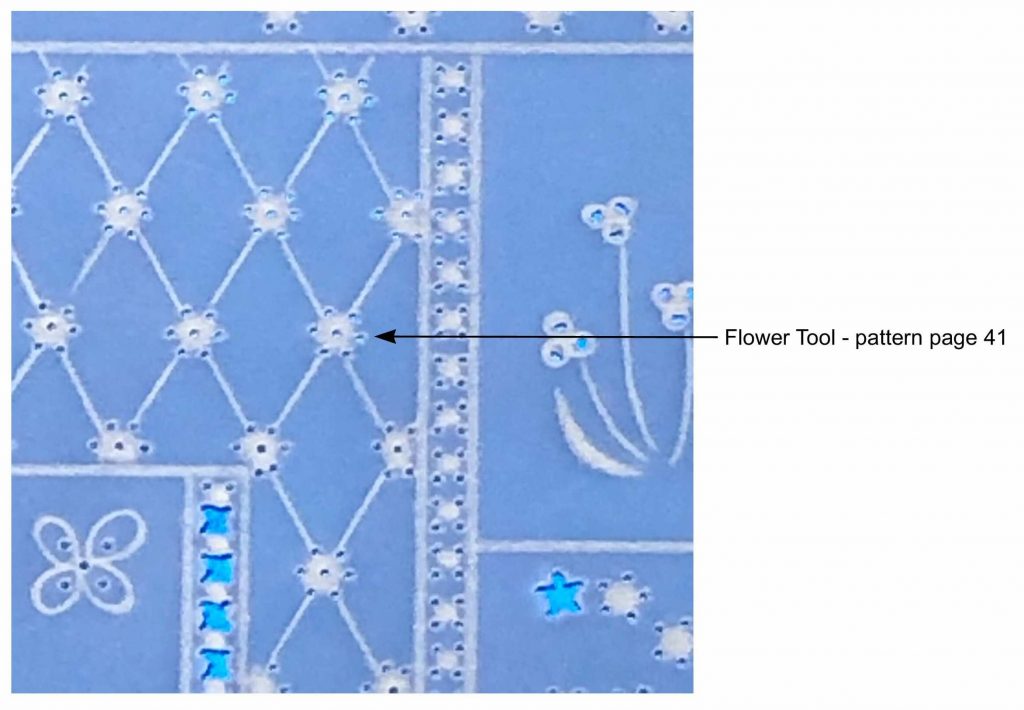
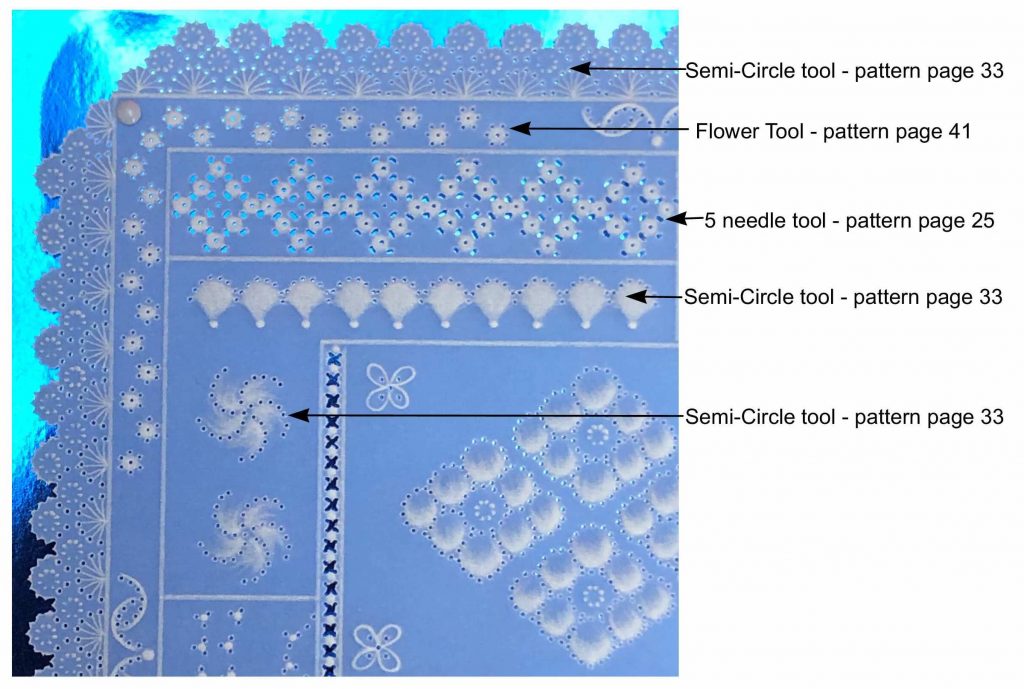
The outer border was done by using the flower tool border (Page 41 bottom right) and moving the parchment around to make all four corners.
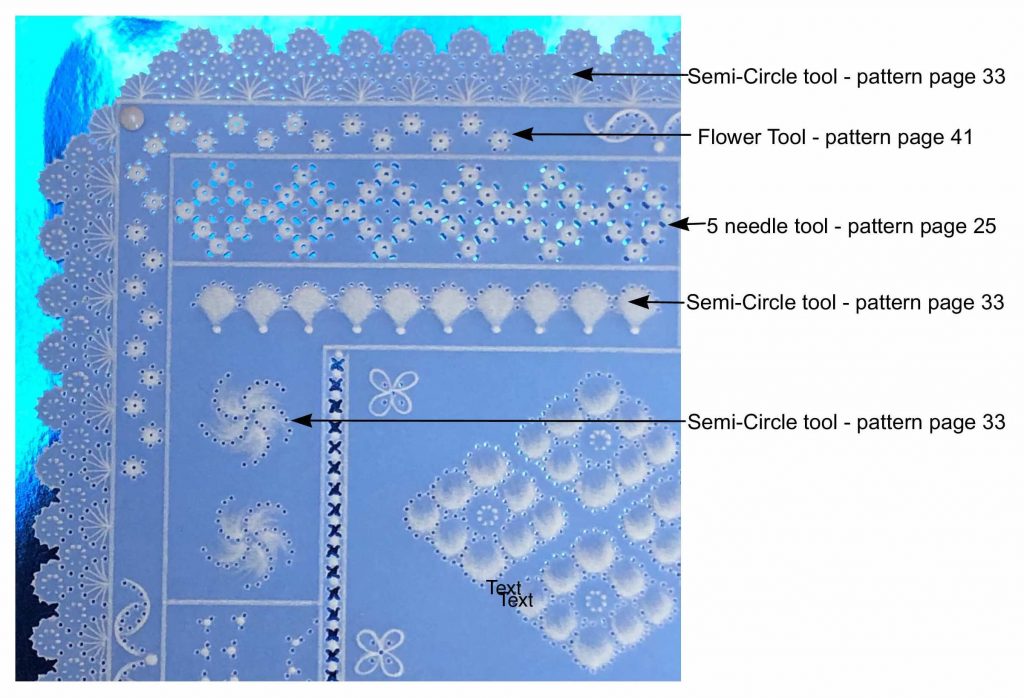
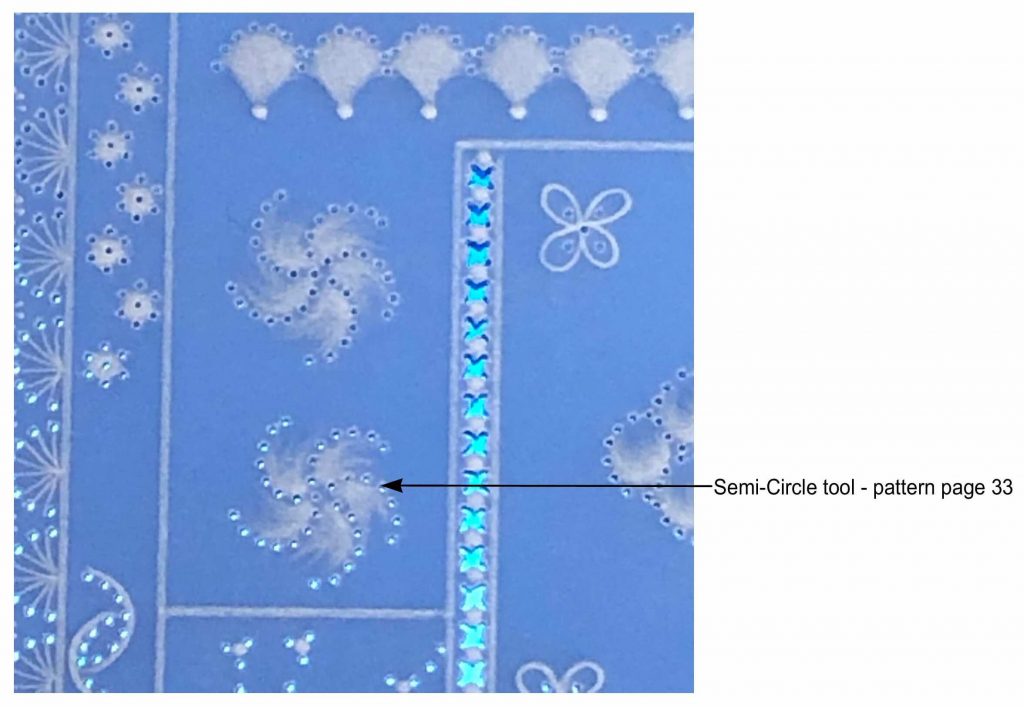
The little motif in the centre of each border came from Page 33 and using the semi-circle tool.
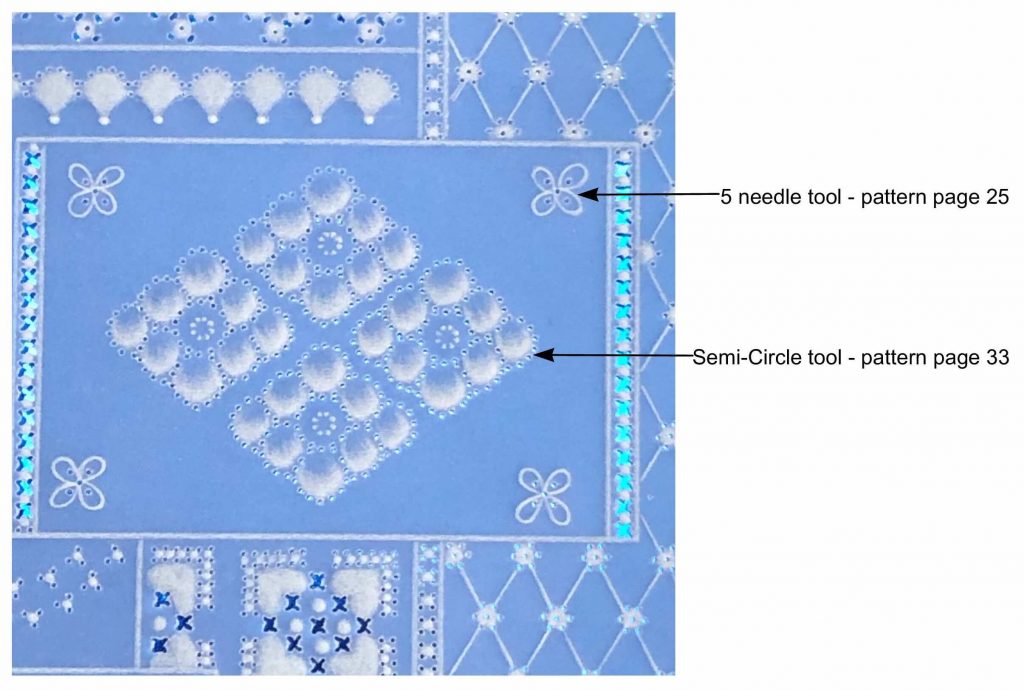
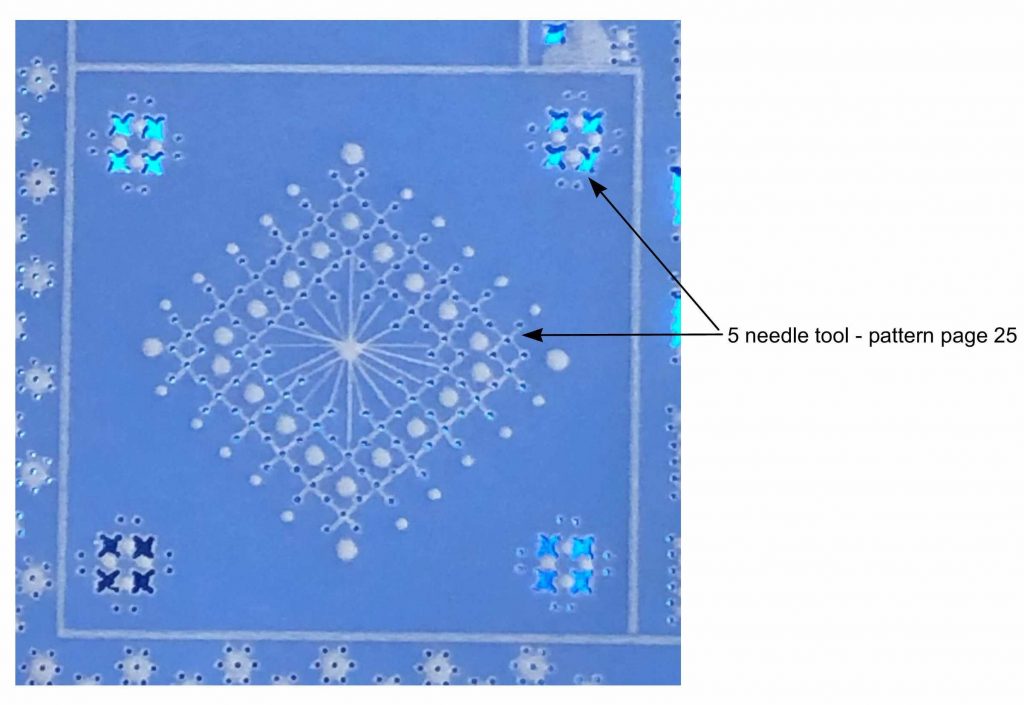
For the large central rectangle, I used the semi-circle pattern on Page 33, turning the paper sideways to accommodate it. The small motifs in the corners came from Page 25, and using the 5 needle tool.
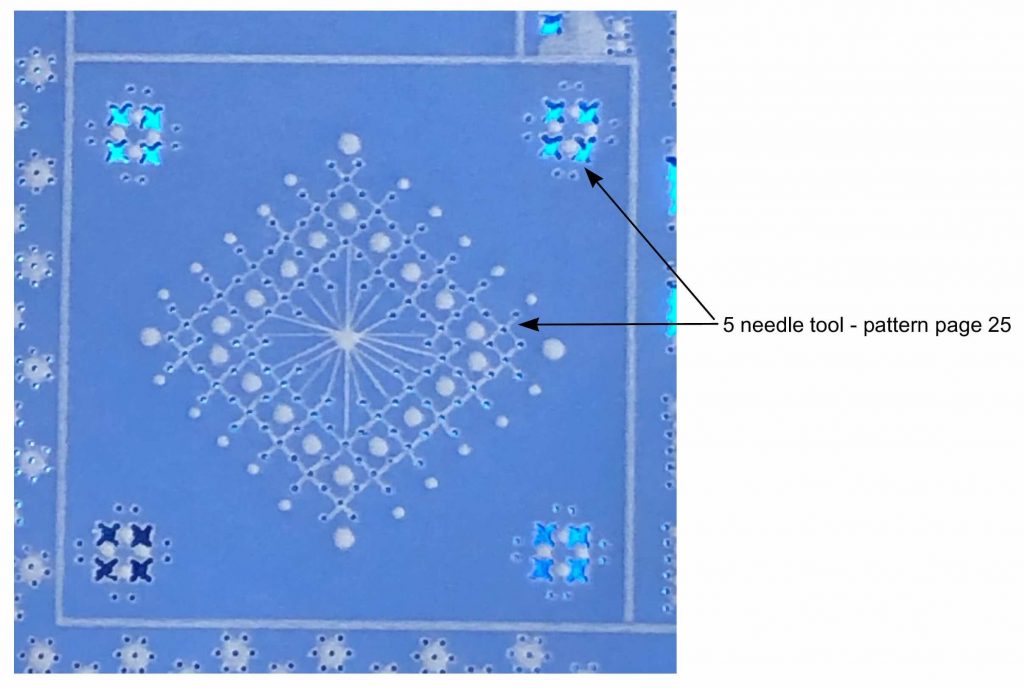
I wanted another ‘stand alone’ pattern in the bottom left square and so I used the 5 needle pattern on Page 25.
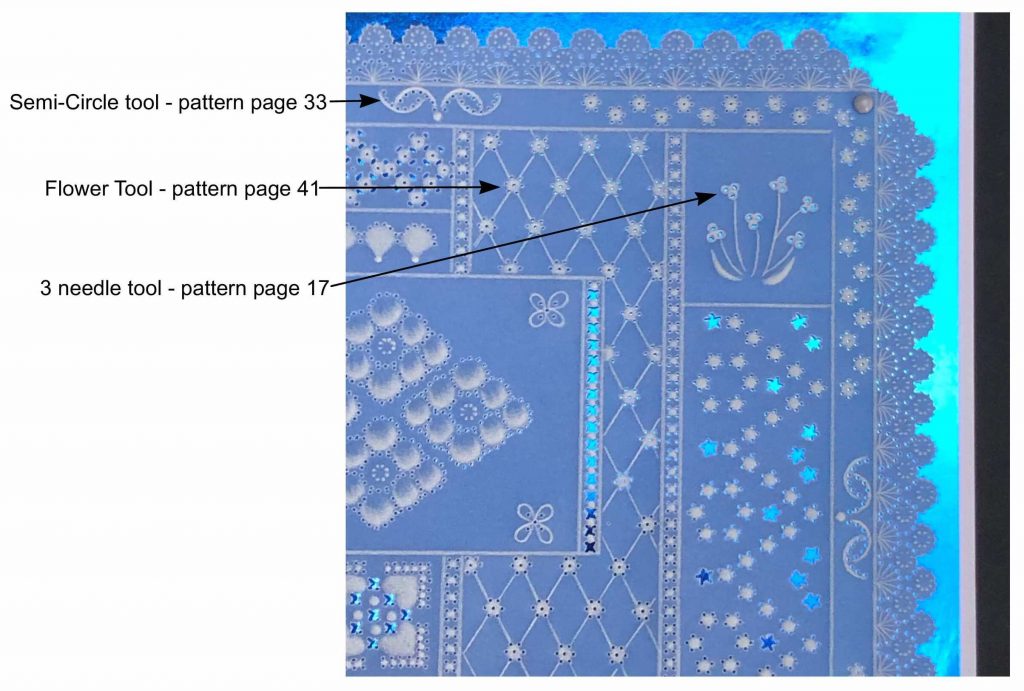
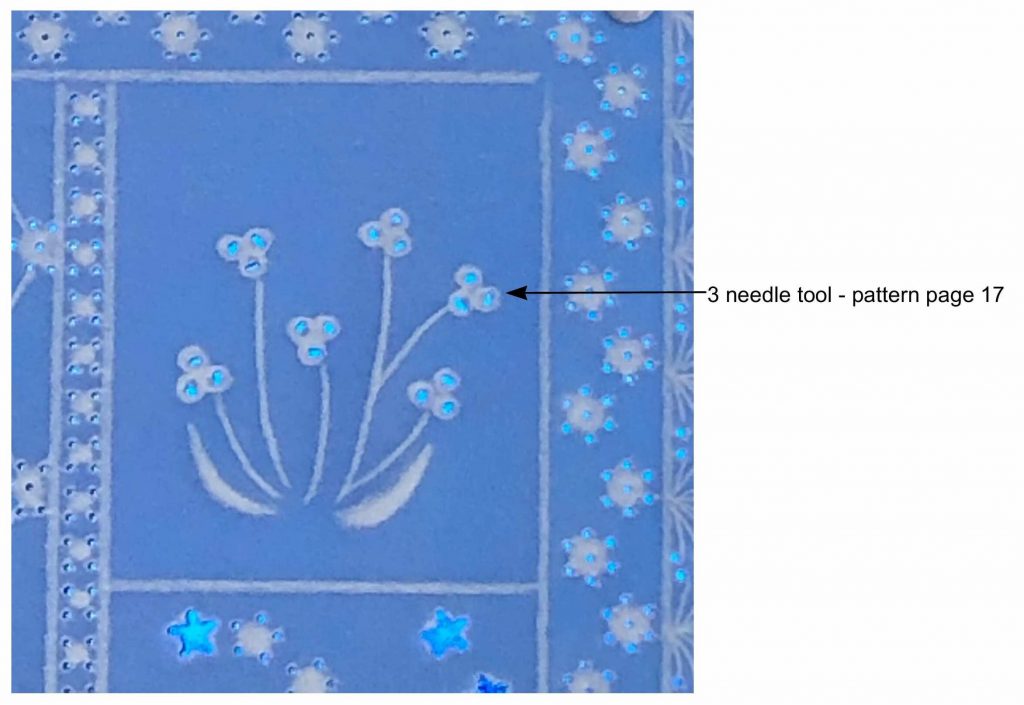
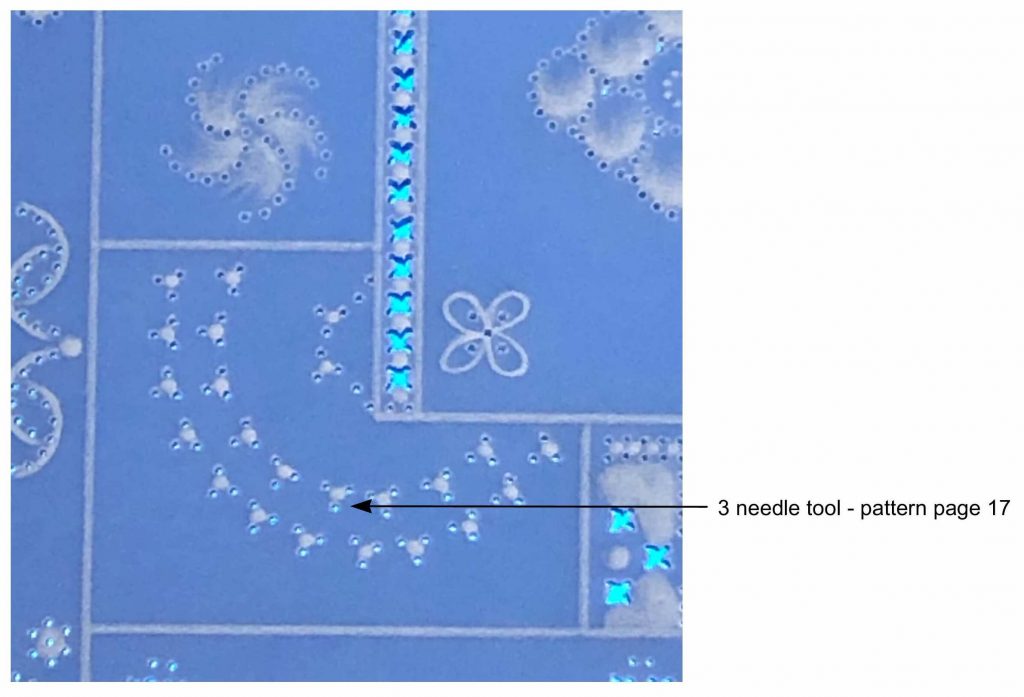
Likewise, I decided to go with the 3 needle flower motif on Page 17 in the top right square.
Once the whole shapes were done it was a question of fitting other patterns into the other remaining shapes, like borders or repeating designs.
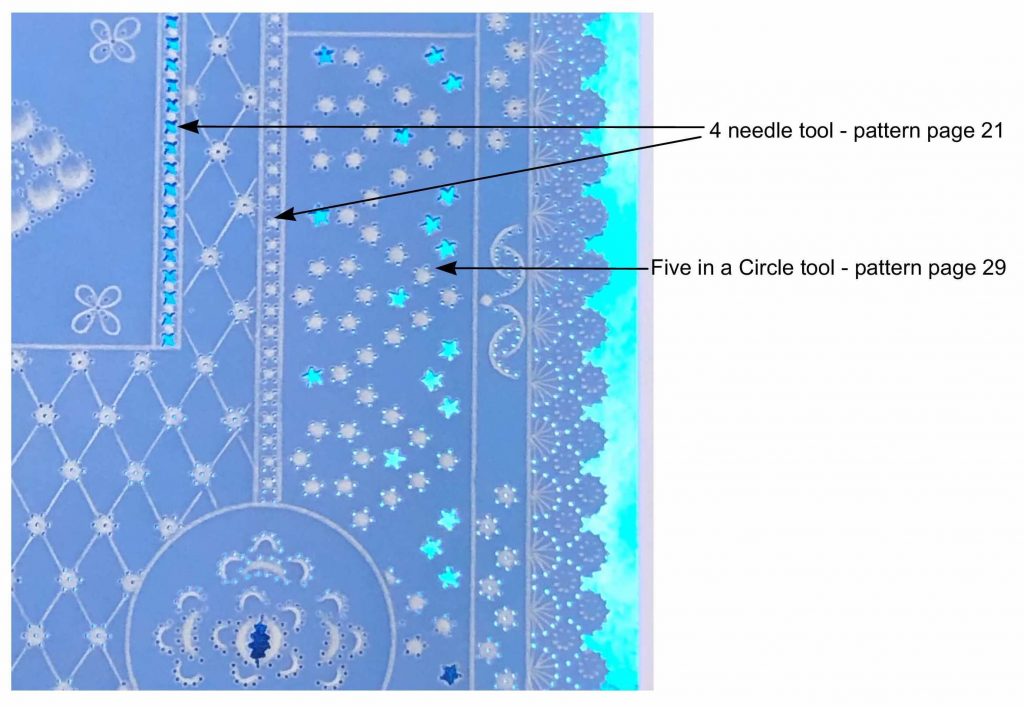
Finally I used the semi-circle tool to perforate a 3 layer border around the whole piece.
Step 3: Embossing.
I followed Linda’s instructions in the handbook to emboss each little section lightly, going over each for a second time after letting the parchment rest. For some of the larger white areas (e.g. inside the squares, and the main rectangle pattern) I did a few extra layers of embossing. The only design I changed was the bottom left square; because I didn’t want to cut out the central part of the design, so I added my own lines and dots.
Step 4: Deep Perforation and Cutting.
Deep perforate the whole piece using a 1-needle perforating tool. Use the book to follow the cutting pattern for each design if you want. It looks equally nice if left without.
Step 5: Finishing.
Picot cut around the outside border and mount your work onto a complimentary backing paper.
Take a step back and give yourself a big pat on the back!! You’re all done.
WOW!!! What an exquisite piece of art. Thank you, Frances, for sharing your astounding skills with us and sharing your tips and techniques. Sharing is certainly caring when you’re THAT good. I’m rather mind blown by this piece of artwork, aren’t you?
Everything that Frances has used is in one place over on the Clarity website HERE.
Please email me any work you create in relation to this sampler project, and I will share them (if you give me permission) in a future blog. There are discount codes and vouchers to be had if you do 😉
(grace@claritystamp.com)
I thought it would be a nice idea to share more of Frances’ stunning pieces with you. Exquisite, each and every one. Check out this Frances Knott Gallery…


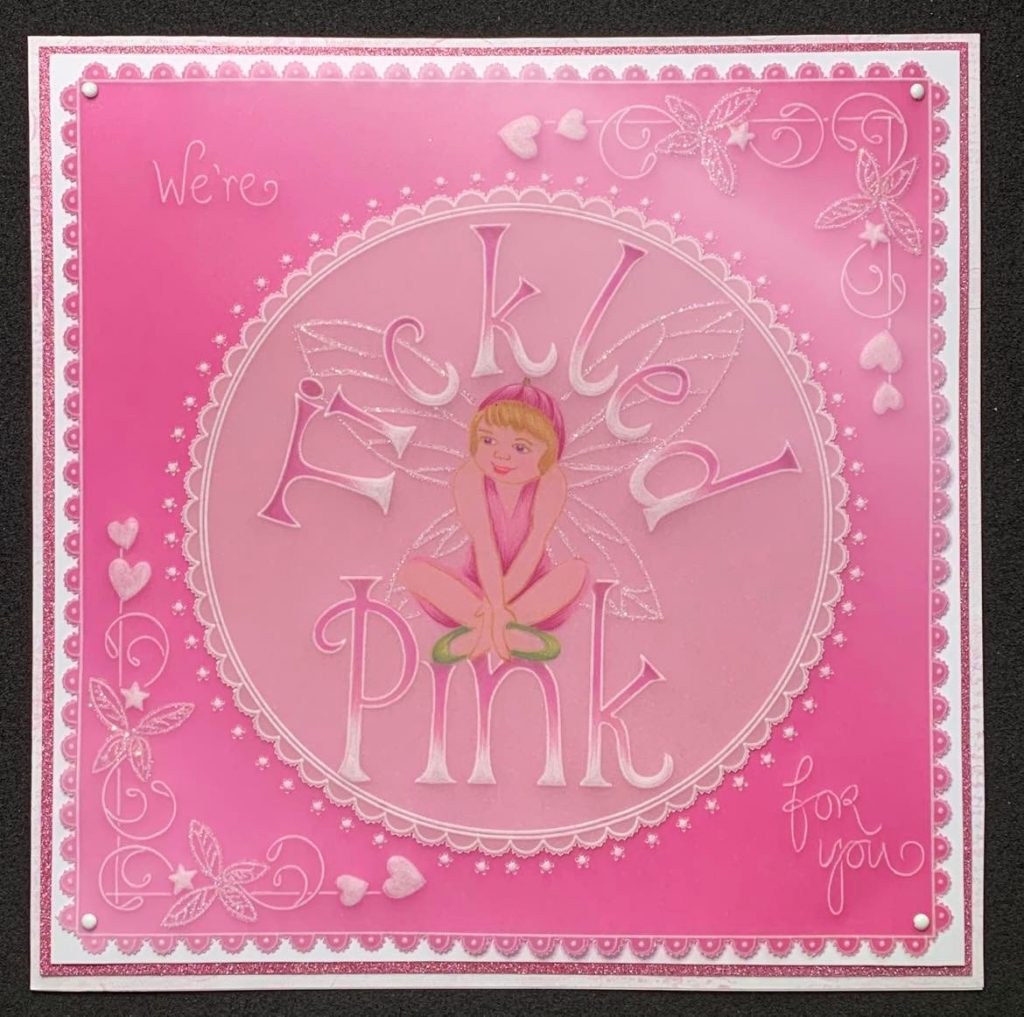
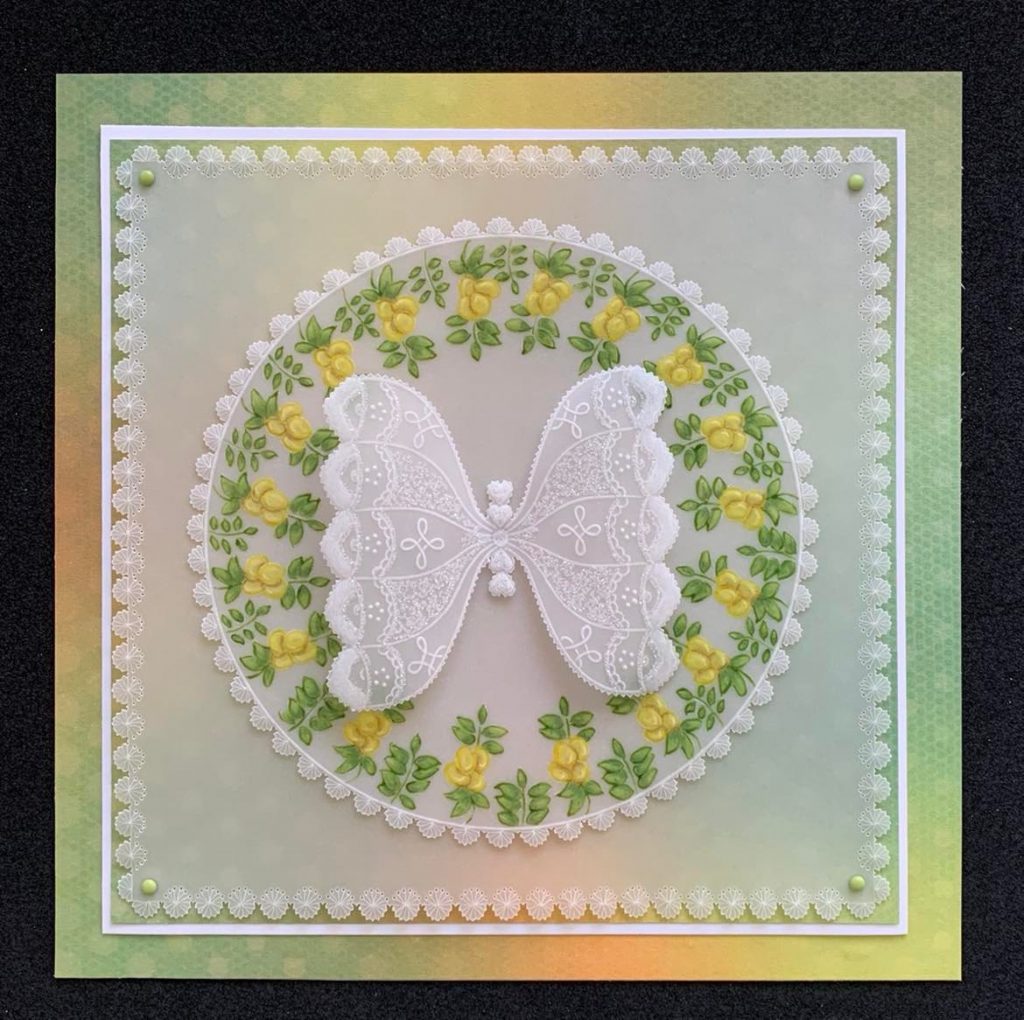
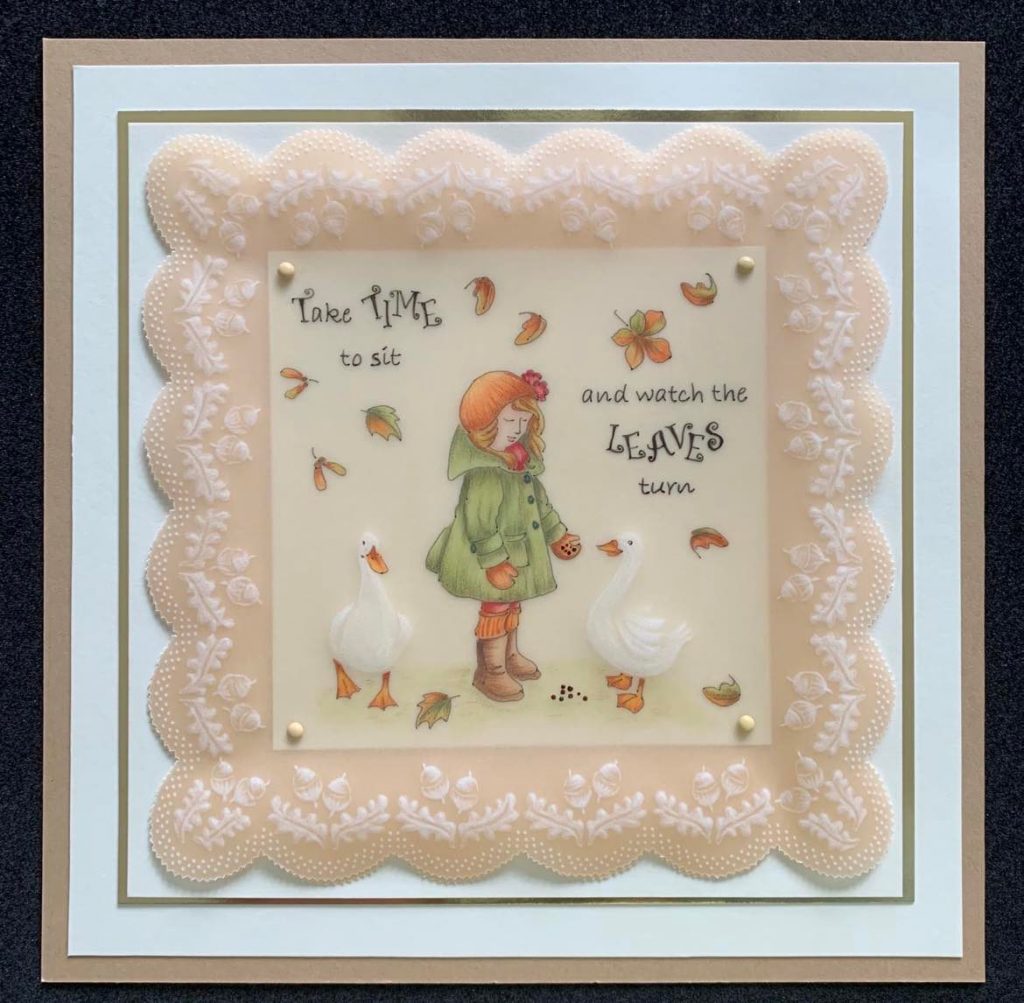
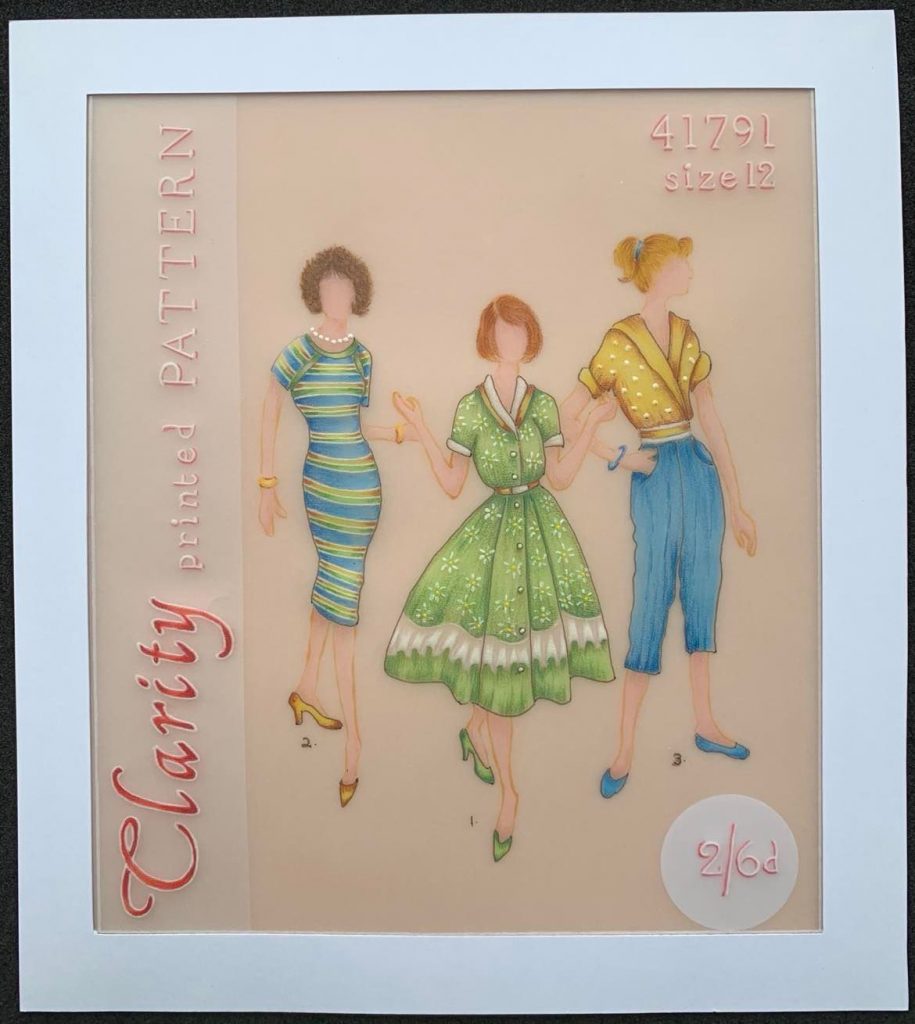

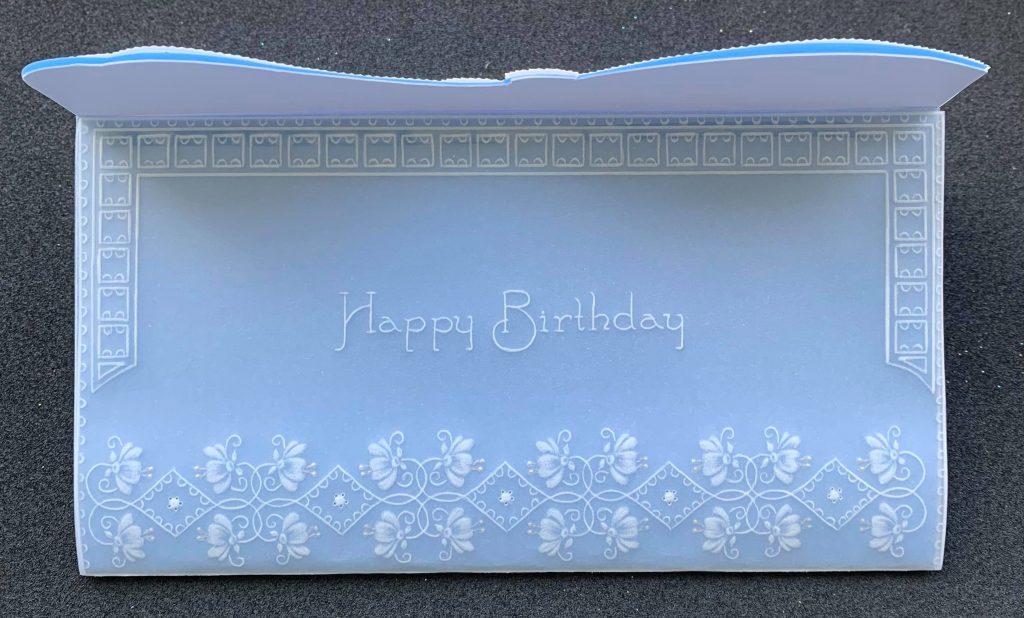

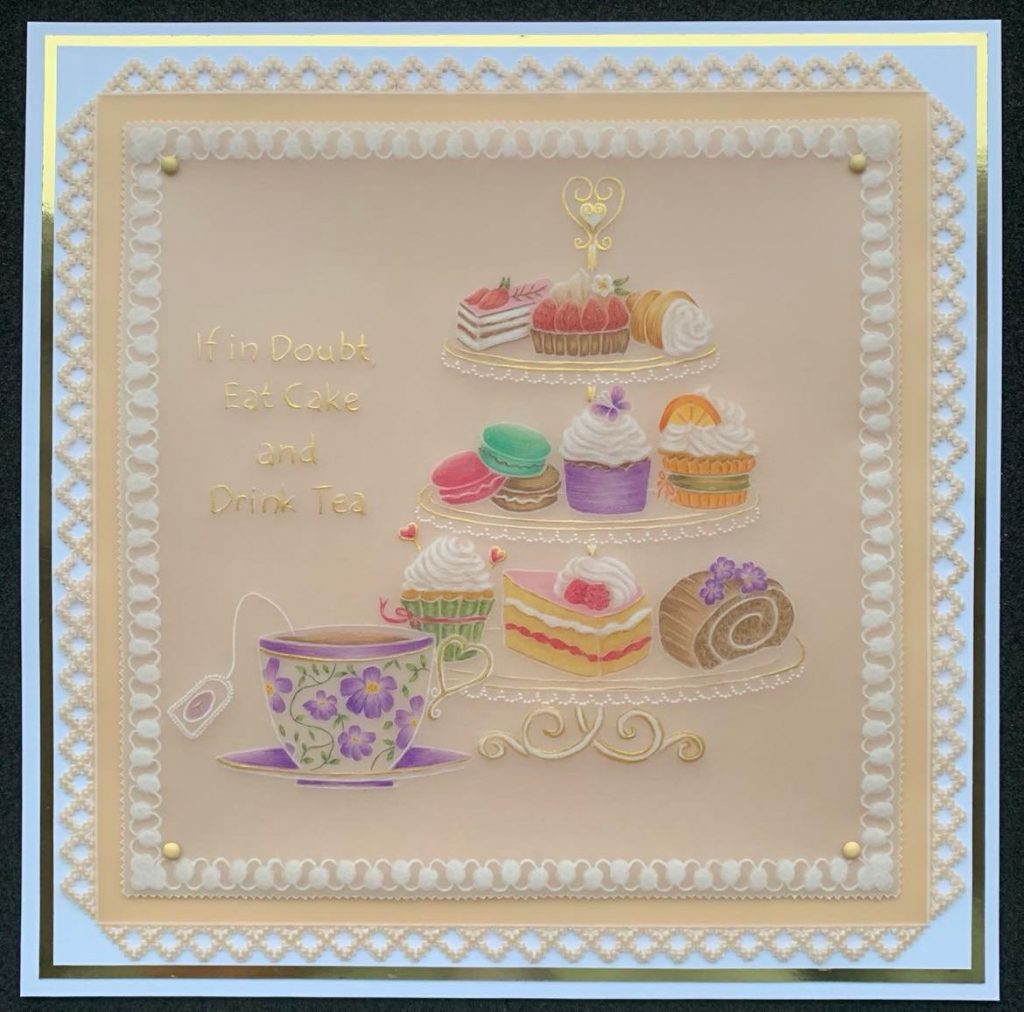
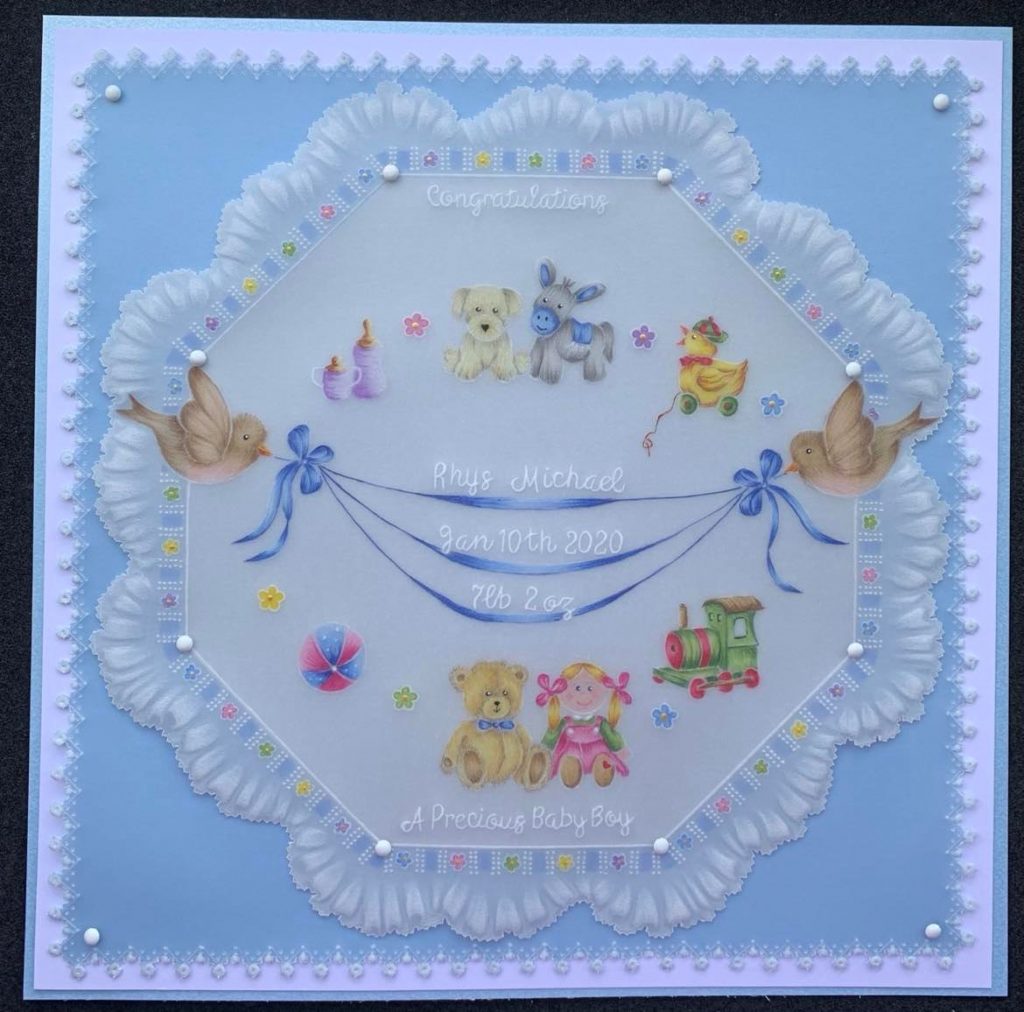

And there’s HUNDREDS more samples where that came from. Frances is a talented force, and we’re very lucky to have her as a part of the Clarity family <3
Don’t forget the Clarity Craft Club Half Price Members Sale is still on until midnight Monday, so if you are missing any bits and pieces that Frances has used, you may pick up a bargain or two!
And more brilliant news! Mum is on The Craft Store today between 2pm-4pm with a bit of a fashion show! Click HERE to explore further. I hope you’ll join her 🙂
Travel gently and enjoy the rest of your weekend.
Lotsa love, Grace & Frances xo
Clarity – The Home of Art, Craft and Well-Being.
Wow, I had downloaded the sampler pattern ready but seeing it in all its glory is fantastic. I like the fact that they are in small sections so just a small amount of each pattern is required. Now added to my to do pile.
Thanks for sharing some of Frances other projects – her colouring/painting is so delicate – perhaps another step by step project for another day ?
It is extremely windy here again with some rain & sun mixed in – hope your ice is going in New York.
Thank you Grace & Frances for this Sundays Groovi blog x
Oh my goodness what a talented lady. This sampler is mind blowing and I’m full of admiration for those on the groovi journey who are ready to roll up their sleeves and give it go. Looking forward to seeing others sampler projects. Have a great week everyone xx
Hello Grace
Thank you so much for this as I have already printed it off but need my big girl’s pants to tackle the project. Having the step by step from Frances makes it look so much more ‘doable’.
Love
Roz.xxx
Wow what an amazing project. Thank you to Frances for sharing this with us. Xx
Oh my gosh! I love Frances work, it’s always immaculate!
I am going to challenge myself to have a go at the needle tool sampler…. because I love it!
Thank you so much for sharing. Xx
What fabulous work ! I’ve just sent for Linda’s retirement plate – added it to my sale order, I’ve got the others and can’t wait around for the others! I’ve done some of the ‘tool’ tutorials and must catch up with the others and then apply them to a sampler. What fabulous work Frances has done – I hadn’t seen all of these! Sale order sent off today, great time to order the essentials plus other stuff ! p.s. don’t tell hubby about the other stuff though ! Have a good week xx
Fantastic sampler piece. Great way to practice all the diffrent tools and at the same time create a nice piece of work. Weel done Frances.
Am I allowed to use this in one of my classes to teach my students.
Oh My, what absolutely beautiful work. Such a talent and patience ..