Clarity’s Blog Tutorial: How To Make A Coaster
Hello hello! Grace here. Happy Boxing Day!
I hope this finds you safe, well and Happy!
This week I am writing to you from England, back on home soil. I am joined by the lovely Glynis Whitehead in the bloggy bubble this week, with another easy to follow step-by-step coaster project.
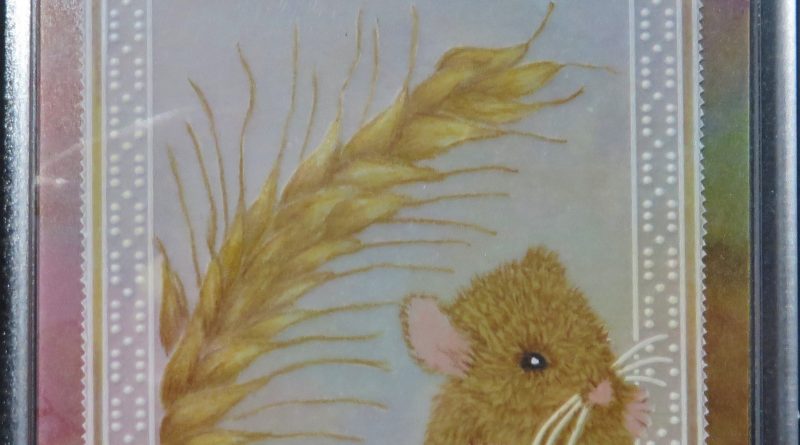
How to Make an Easy and Useful Coaster
Ingredients
Plain parchment paper (GRO-AC-40024-XX)
Pergamano Coaster (PER-AC-70132-XX)
Linda’s 123 Dandelion A4 Square Groovi Plate (GRO-FL-41237-15)
Groovi Plate Mate for A5 square Grids (GRO-CO-41706-08)
Groovi Plate for A4 square Grids (GRO-MA-41768-21)
Pergamano Blending Nibs (PER-AC-70299-XX)
Dorso Oil (PER-CO-70066-XX)
Faber Castell Polychromos Pencils (ACC-PE-30797-XX)
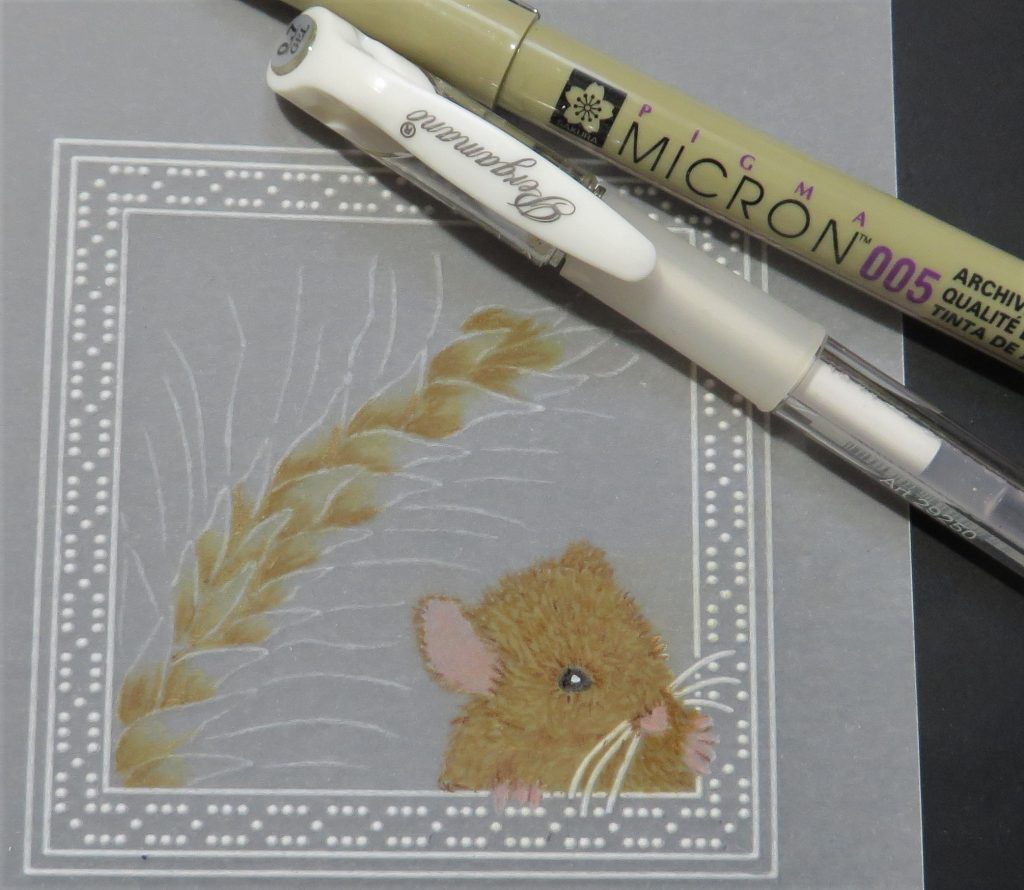
005 Micron Pen from the set of 7 (ACC-PE-30778-XX)
Pergamano White Gel Pen (PER-CO-70069-XX)
Number 1, 2 and 4 tool from the starter kit.
Step 1
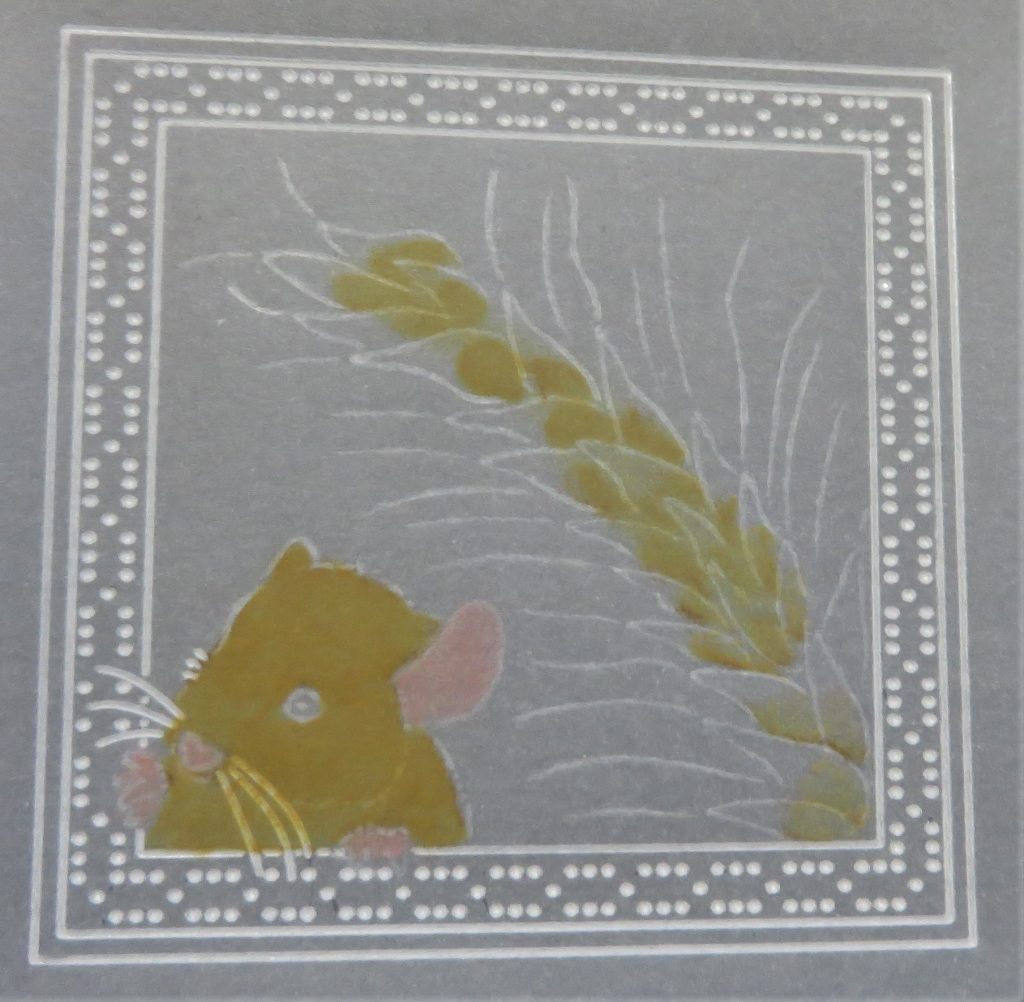
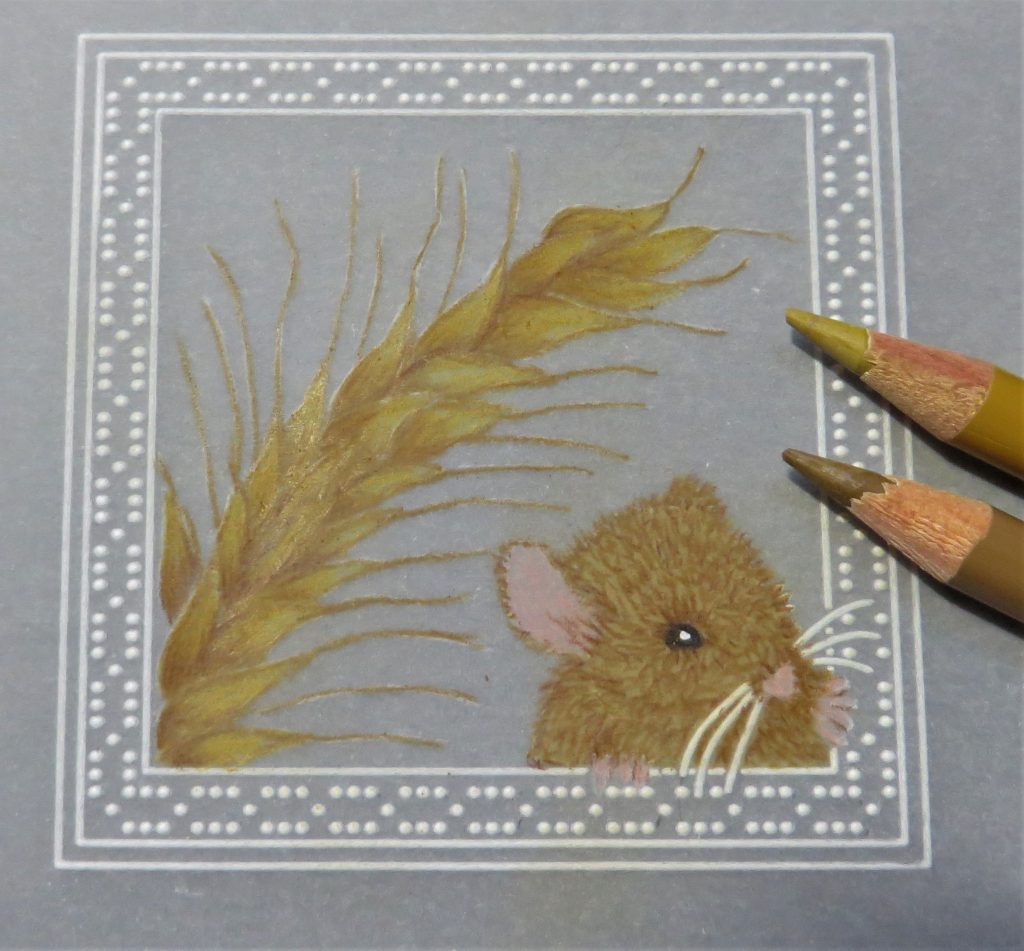
Fix your parchment over the image of the mouse and corn on the 123 Dandelion plate. Rather than using the number 1 tool to emboss the image, use the number 2 tool and very, very lightly emboss the image so that you can just see it. * Use the number 1 tool to emboss the square frame around it and the mouse’s whiskers.
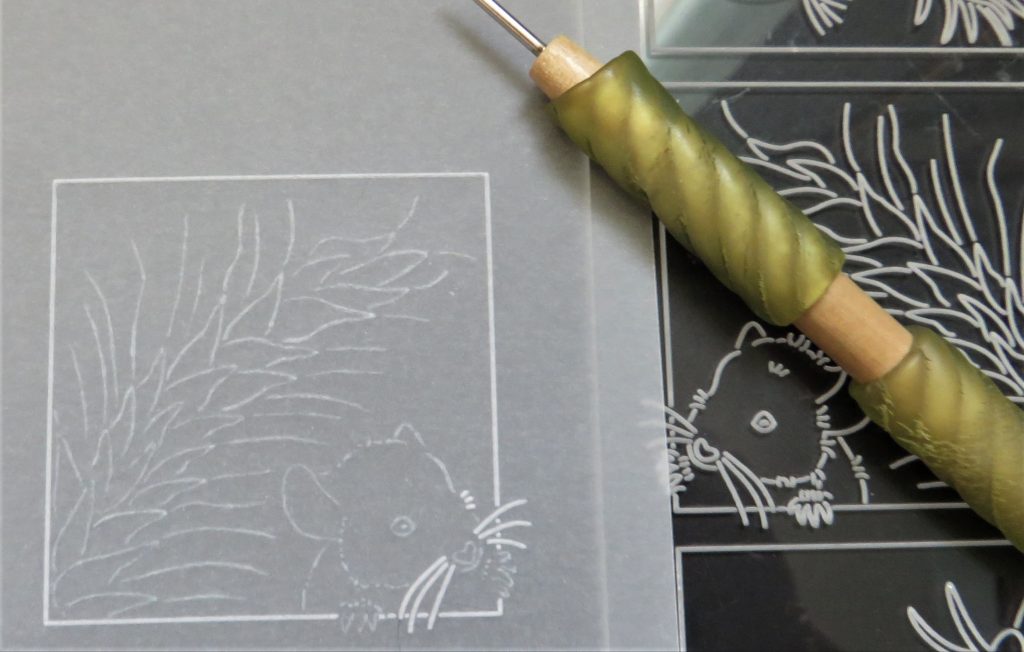
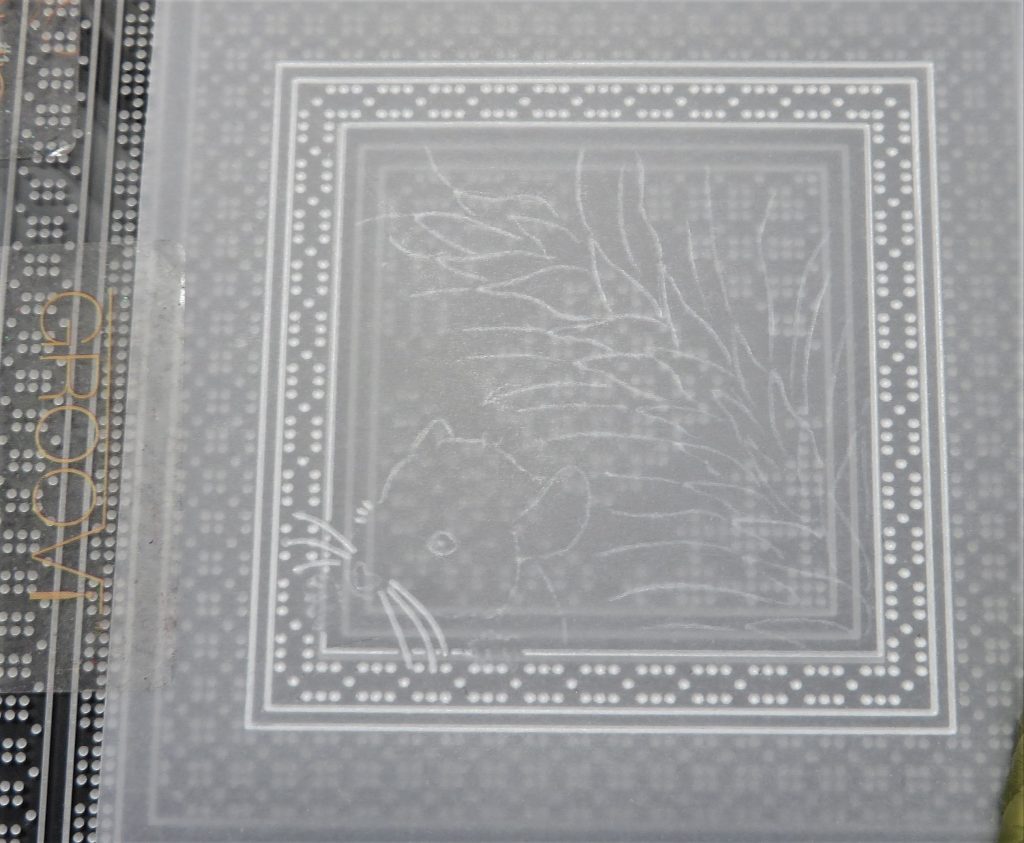
Step 2
Go to the Plate Mate for A5 square Grids and its insert. The square around the mouse image lines up nicely with 3rd line out from the centre of the plate. Emboss the next two lines with the number 1 tool and emboss the dots in between. * Use the number 2 tool for dots, as you will puncture your parchment with the 1 tool.
Step 3
Work on the back and use a light, medium and dark brown to colour the fur. Avoiding the nose, eye, paws and insides of the ears, use the lightest brown and blend the pencil to cover the body. Use the same light brown for the base of the wheat kernels. I have also used a pink for the ears, nose and paws.
Step 4
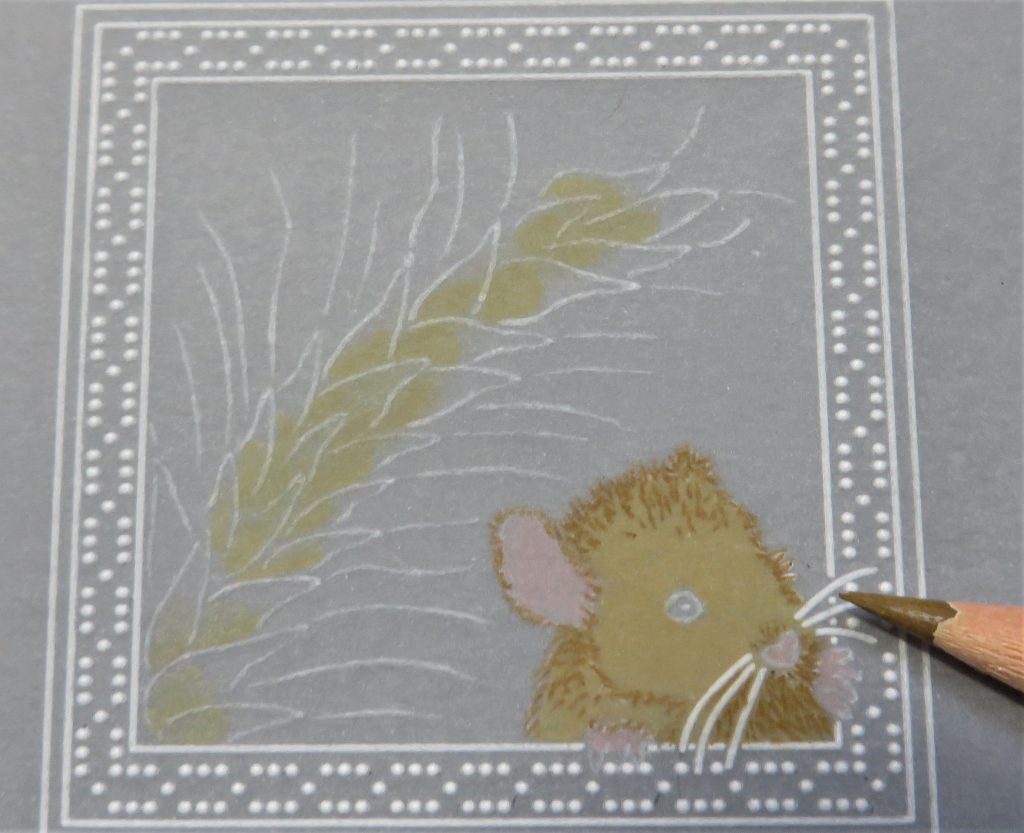
Turn the work over to colour on the front. This needs very sharp pencils. Start by adding the lightest brown pencil in very short, fine lines – go over the lines of the embossing.
Step 5
Continue until you have covered the fur with light brown and then change to the medium colour and add some shadow. Under the chin, around the eyes, edges of the ears and paws. Keep the pencils sharp, and keep turning them so that you always have a good point. Also, still on the front, add some of the medium brown into the bottom of all the wheat kernels.
Step 6
Add a little of the dark brown to the fur – just a few strands around the eye and at the bottom of the ear.

Step 7
We will bring him to life now, by working on the eye. Use the 005 black Micron pen to colour in the oval of the eye and allow it to dry before applying a dot of white gel pen for a highlight. Allow this time to dry too.
Step 8
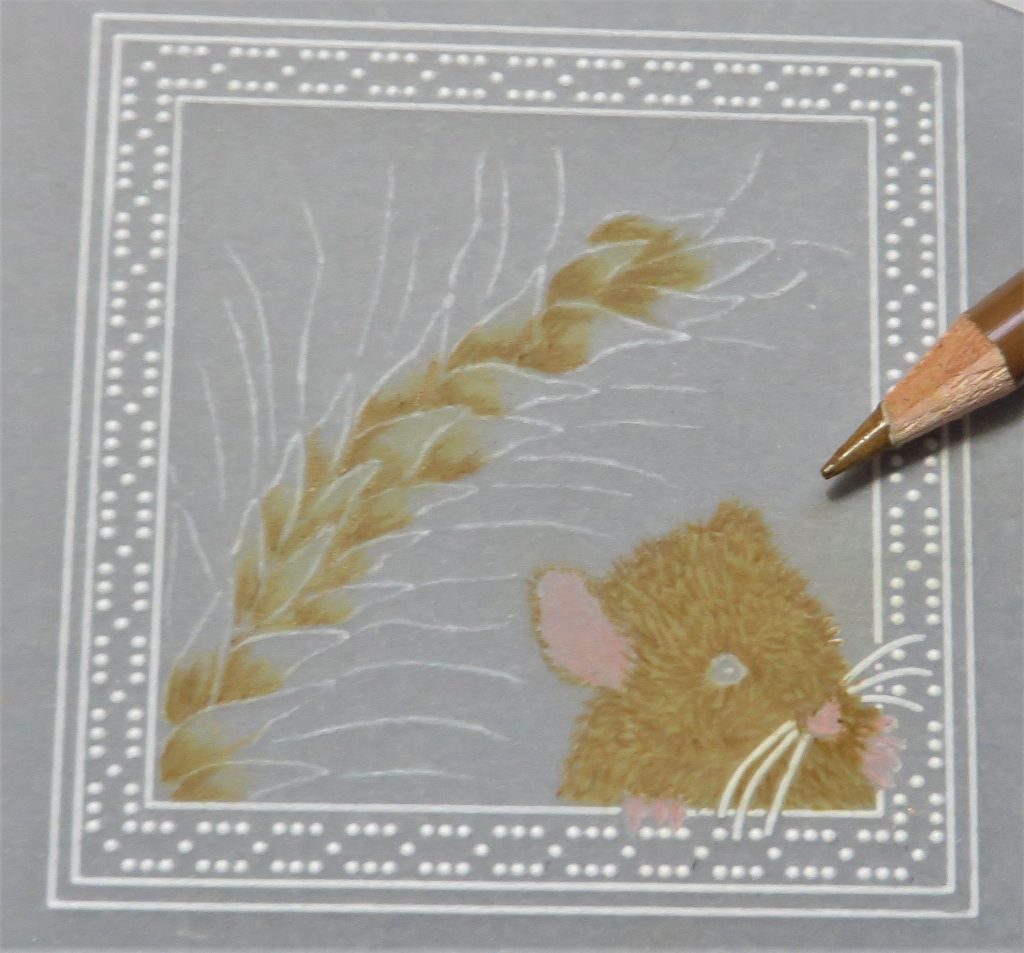
Still on the front, add some Naples yellow to the wheat kernels, then go back in and add a few more lowlights at their base with the medium browns. Still using the medium brown outline the kernels and draw them out to cover the fronds. Don’t worry if a tiny bit of white shows – this adds to the light effects. Once you have got the browns in place, go over the whole lot using the yellow pencil to blend all the colours into each other.
Step 9
Go around the frame with the dark yellow and medium brown, working on the back and blending one colour into another.

Step 10
Still working on the back, use number 4 ball tool from the starter kit to very lightly emboss all the kernels of the wheat to add shape and more highlights.
Step 11
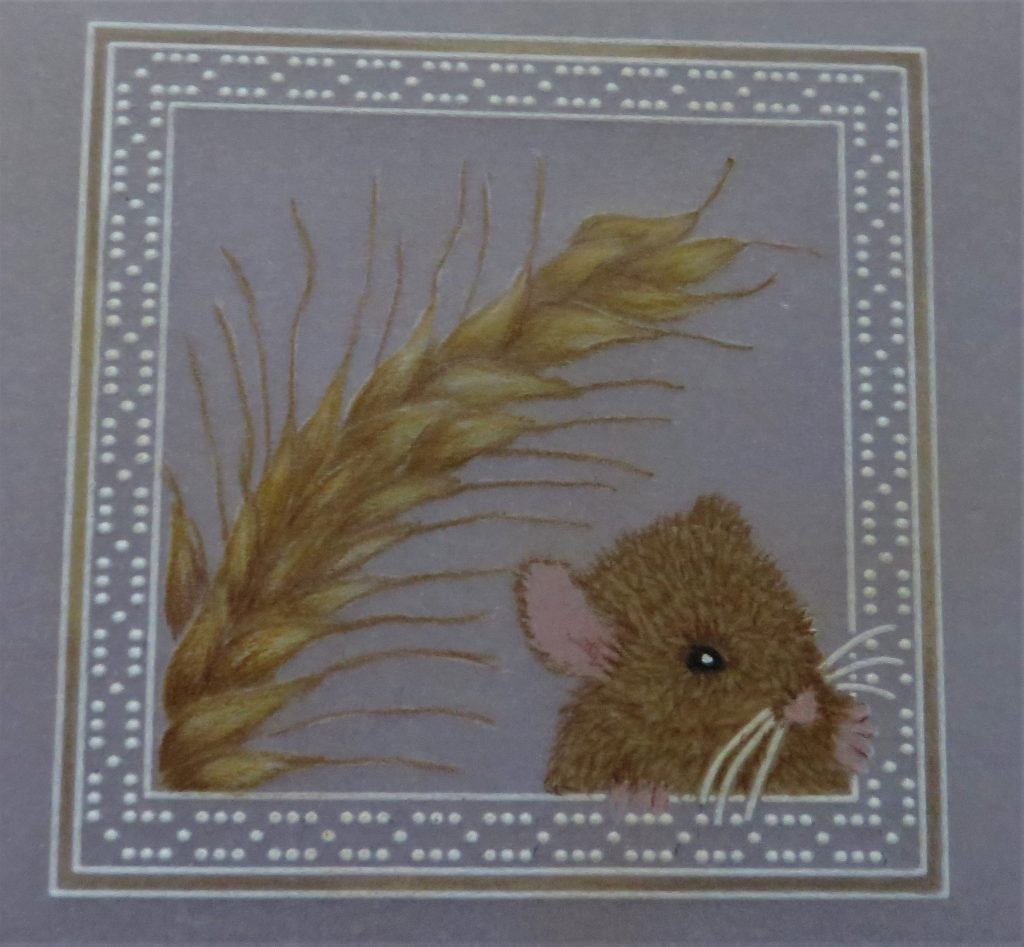
Picot cut around the edge of the piece or straight cut it if you prefer.
Step 12
Cut a backing paper to 9 x 9cm and fit them together, face downs into the front of the coaster. Then add a little red liner tape to the edge of the coaster blank and whilst it is still laying on the table, put the back in place. Press them together and allow the tape to ‘grab’.
Another masterpiece from the lovely Glynis – Thank You!
As usual everything can be found in one place over on the Clarity website, HERE.
Right, time for another turkey sandwich with aaaaaall the trimmings! The diet has officially been parked 😉
Lotsa love, Grace & Glynis xo
Clarity – The Home of Art, Craft and Well-Being.
Such a lovely tutorial and I love this mouse design! Thank you Glanis!
I wish I could craft again,but my stuff is still in boxes from moving house.
Happy to hear you are on home soil Grace!
Have a great time with the family.
Lots of love, Trijntje Huppel
Love this, thanks, not sure I have the plate with the mouse on – off to look and, if not, order it ! I do have some coasters that need filling though ! X
Another lovely project Glynis, thank you for giving so much inspiration during the last year. Here’s to another great crafting year in 2022
Hard to realise that next Sunday will be the new year
Thank you Glynis for sharing this it’s beautiful xxx
Another lovely tutorial,I’m not a parcher but dabble now and then with little projects. Hope you have a great time with your daily over the festive period.xxx
Hi Grace, Hi Glynis, Woweee !! I love this.
Lots of love from Patricia xx
Excellent tutorial, as usual Glynis.
Beautiful picture, I love this little mouse.
xxxx