Clarity’s Blog Tutorial: How To Make Embroidered Corners
Hello hello! Grace here.
I hope this finds you well. Thank you for joining us on a Sunday! Any excuses to get crafty 🙂
We are joined by the absolutely phenomenal Glynis Whitehead this week. And she’s going to share a step-by-step tutorial on how to add embroidered corners to your artwork. Brilliant! I’ll hand you over to the pro…

Embroidered Corners
A lot of people ask about different ways to attach their projects to a backing card. There are various ways, and one of them is sewing. Here I will make a project to show you how a Groovi Embroidery plate can help you with attaching your work, whilst being part of the project too.
Ingredients
Lucy’s Folk Art Octagon (GRO-FL-41424-03)
Tina’s Teardrop Embroidery Plate (GRO-PA-41742-03)
Diagonal Border Grid 1 (GRO-GG-40354-14)
Number 1 Tool from Starter Kit (GRO-AC-40026-XX)
Pergamano Five in a Circle Perforating Tool (PER-TO-70025-XX)
Pergamano Drop Perforating Tool (PER-TO-70345-XX)
Pergamano Medium Picot Perforating Tool (PER-TO-70282-XX)
Pergamano Single-needle Perforating Tool (PER-TO-70035-XX)
1.5mm Pergamano Embossing Tool (PER-TO-70004-XX)
3mm Pergamano Embossing Tool (PER-TO-70005-XX)
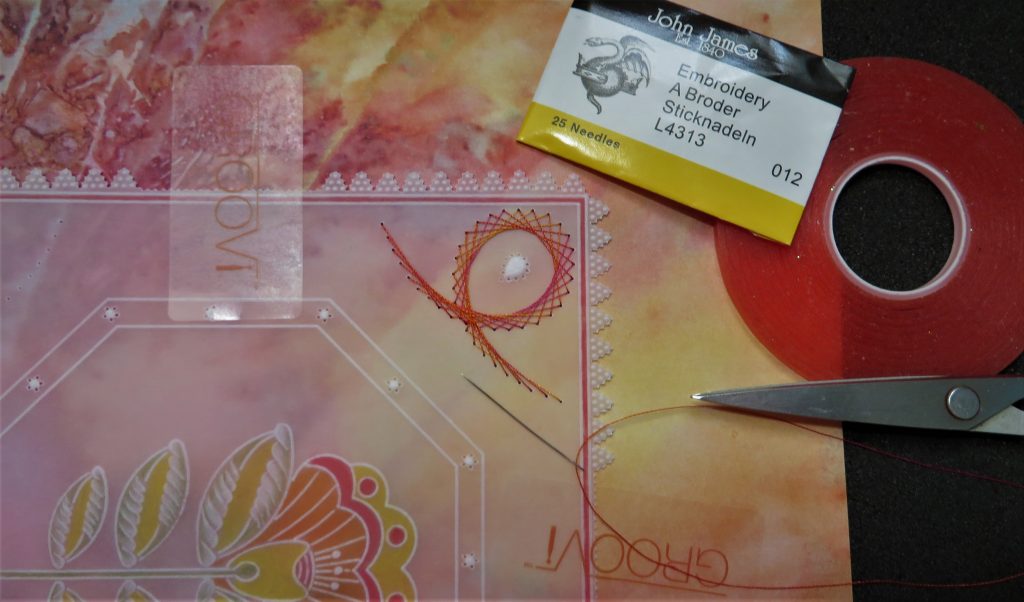
Embroidery Threads & Needles (ACC-MS-31047-XX)
Size 12 Embroidery Needles (ACC-MS-30804-XX)
Toscana Designer Paper (ACC-CA-30891-88)
Method
Step 1. Line up some parchment over the Folk Art Octagon plate – you can use any image in the centre, but you will need to measure to make sure your embroidery is going to fit nicely in the corners, before embossing the central design.
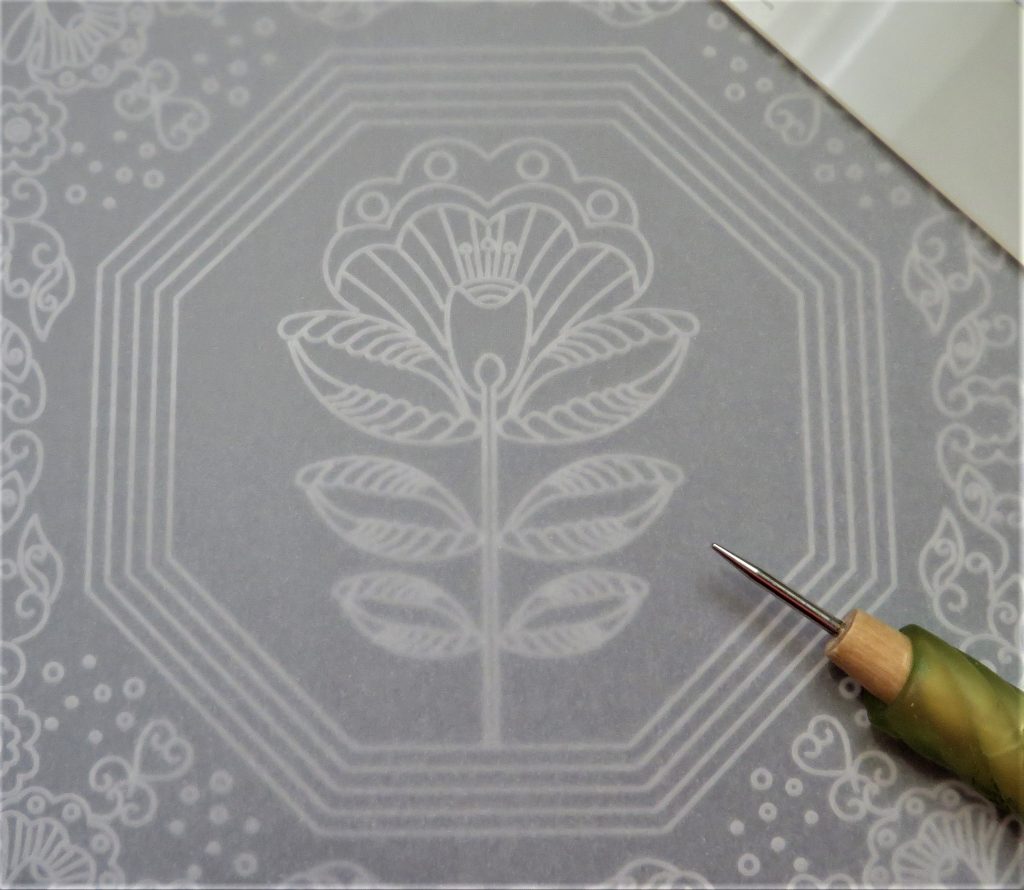
Step 2. Switch out the plate for the embroidery plate. I used an A5sq plate within my A5sq Plate Mate, so I didn’t have to detach the parchment, I just put the new plate in and it was automatically aligned. If you choose to go with another sized plate for the central design, be careful as you detach and reattach the parchment.
Choose the design you want to embroider in the corners and use the number 1 embossing tool to mark the dots.
TOP TIP: When you embroider a piece to your choice of backing paper, you need to decide how you want the finished card to look ahead of time and do all of the work, as once it’s sewn down there is no going back.
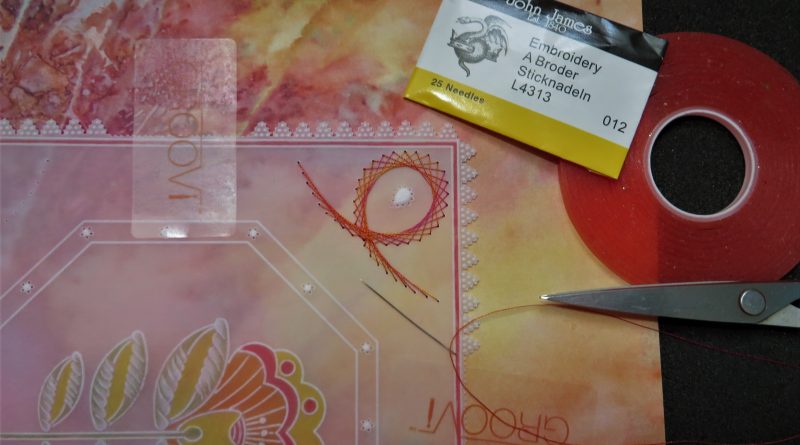
Step 3. Before colouring the work, emboss any elements you wish to be white within the design. I have also added a little multi-tool work to add interest into my octagon border and in the centre of the corner spirals.
Step 4. When doing multi-needle tool work (if you are going to emboss within the perforations) use a 3mm picot foam mat and only shallow perforate, otherwise you will split the parchment when you come to emboss. Always use the largest embossing tool that will fit into the space. TOP TIP: Always perforated from the front and emboss on the back.

Step 5. Working on the back, colour the centre image and the outer border of the piece. Then deeply re-perforate the multi-needle tool elements. If you have problems relocating the needles, use a fine single needle tool to do this task.
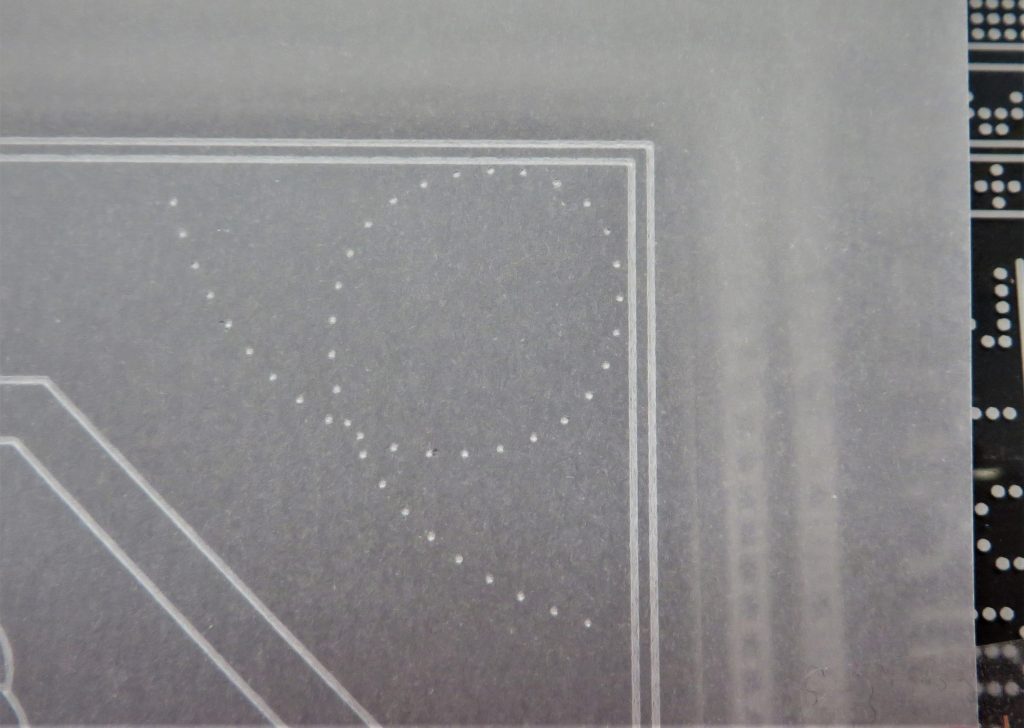
Step 6. Decide on what edge you would like to put around the border of the piece – this has to be ready before you can start the embroidery. I went with the medium picot perforating tool. Again, I shallow perforated so that the dots from the diagonal border grid can be embossed into each one. I did 10 perforations at each corner.
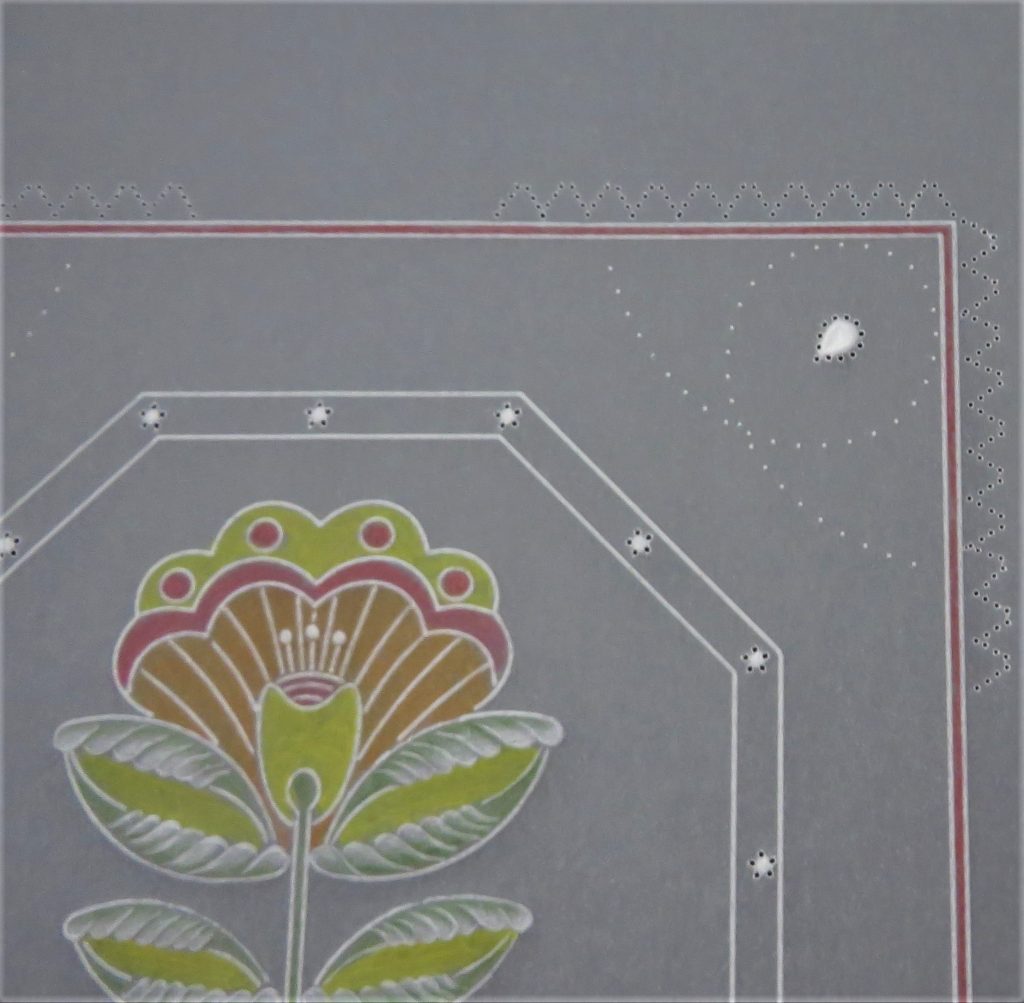
Step 7. Use the diagonal border grid to emboss some dots into each picot shape.

Step 8. Re-perforate the picots. Use a two needle tool along the straight bits and cut the piece out. Select a piece of backing paper and stick the piece (front upwards) to the backing paper with Groovi tabs.
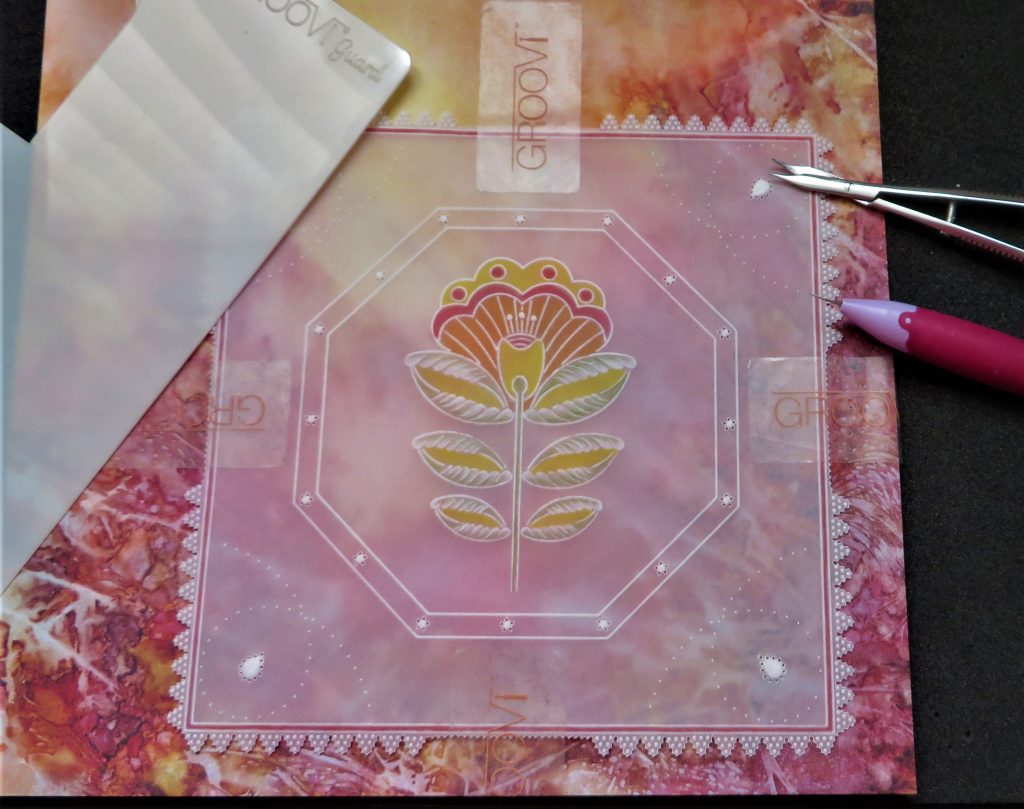
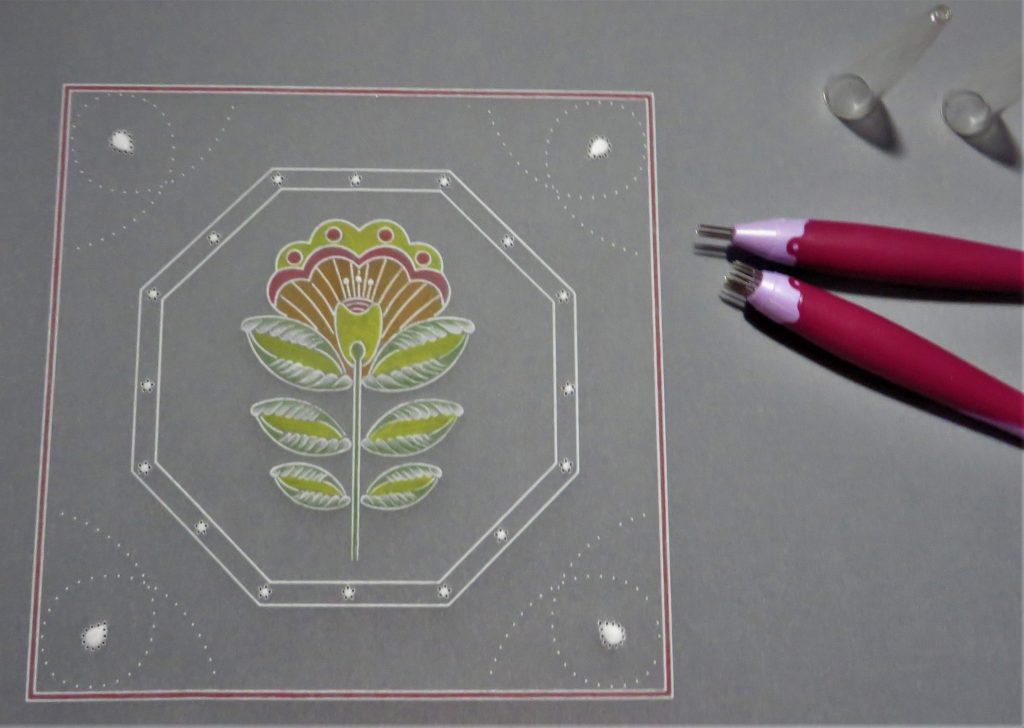
Step 9. Stitch the parchment to the backing paper before you trim it to size – you might get a distressed edge with handling. Lay the work on your foam mat and pierce each dot with the single needle tool. Perforate right through to the foam. When you bought/buy your plate, there is a great instruction sheet that comes with it, make sure to keep that safe as it shows you exactly where to sew.
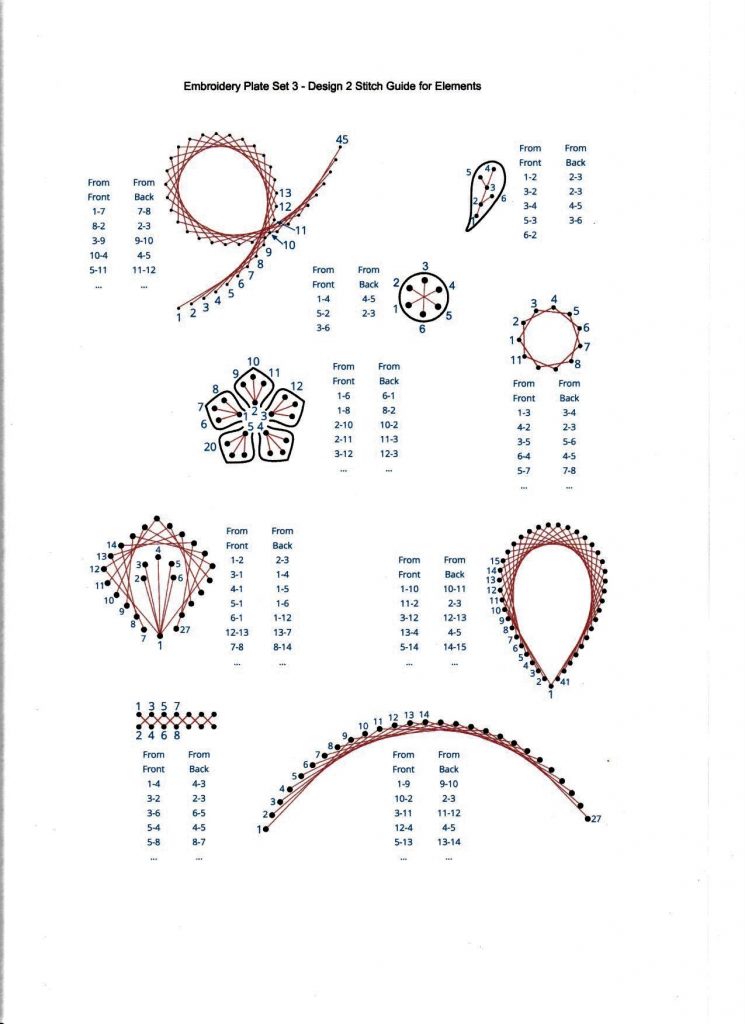
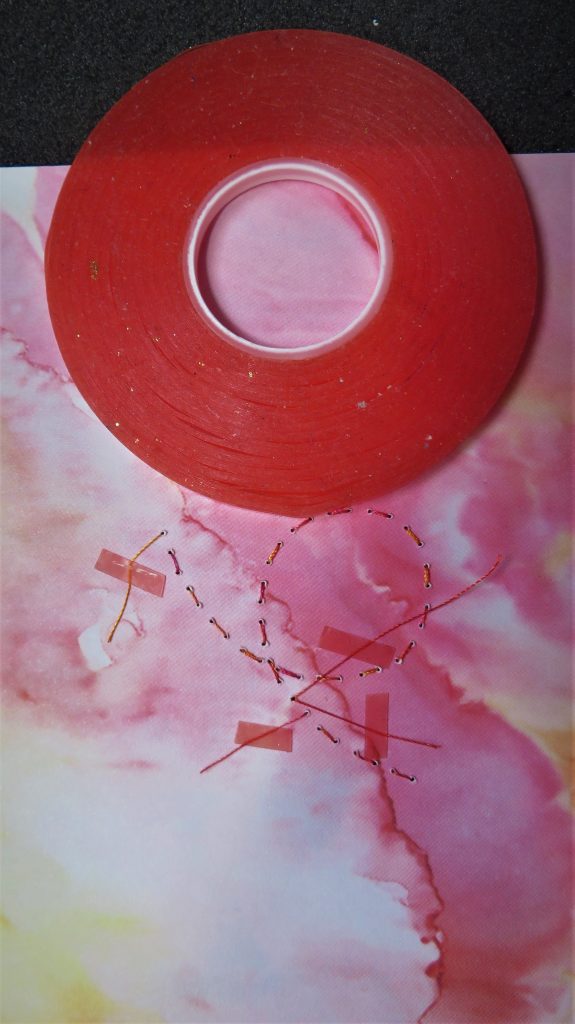
Step 10. With this particular design, we start by coming up from the back at the number 1 hole. Secure the thread to the back of the work with some tape. Come up at 1 – down at 7, up at 8 – down at 2, up at 3 – down at 9 and so on, following the guide provided.
TOP TIP: Keep the thread short to avoid tangles.
Step 11. Once all the corners are done, trim the piece down and attach it to a card blank.
TOP TIP: Do not discard the designer paper trimmings – they can make ribbons for threading through the lace grids, paper weaving and much more.
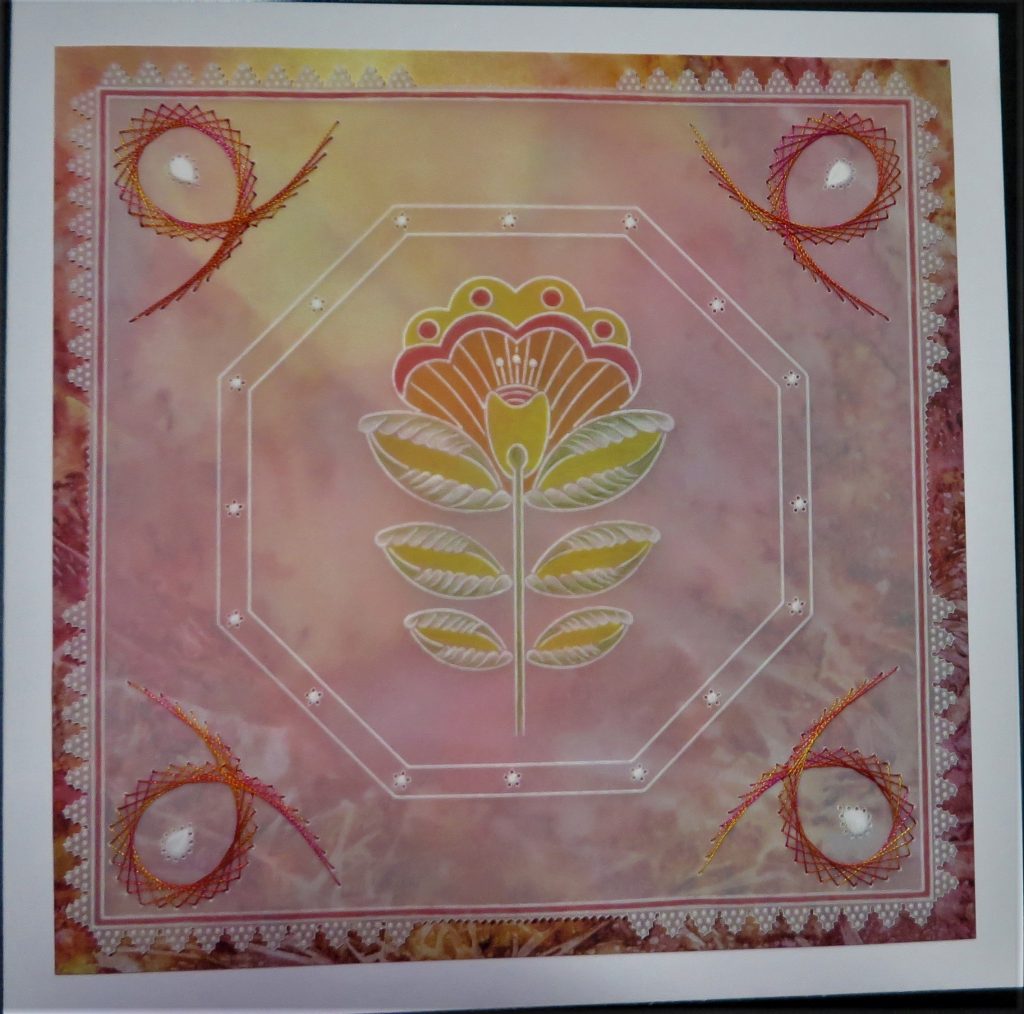
And voila! How effective!
Thank you, Glynis, for your expertise, tips & tricks. Your step-by-step makes it so achievable! This has always looked so much harder to do than it actually is. I’ll have to give it a go myself! How about you?
As ever, if you fancy sending me your artwork, you can do so to Grace@claritystamp.com – I’d love to see it!
Don’t forget that we have everything in one place over on the Clarity website HERE
Whilst over on the Clarity website, you might want to check out the half price Designer Parchment Offer HERE and also the Fresh Cut Die Sale which runs until midnight Monday (Picot dies included!) HERE
Lotsa love, Grace & Glynis xo
Clarity – The Home of Art, Craft and Well-Being.
Lovely project, thanks Glynis 💕
Thanks Grace for bringing us another project & thanks Glynis for sharing this way of attaching the parchment to the backing paper, another project to add to my to do list.
Have a good week everyone x
Hi Grace, Hi Glynis, Stunning !! I am ‘in awe’ at this stunning creation. Thank you for the tutorial.
Lots of love from Patricia xx
This looks awesome thanknyou xxx
Hi Grace & Glynis,
Thank you for all that wonderful information. I love stitching on paper, and it is so useful for securing your parchment work.
Stunning
Thank you
Xxxx