Clarity’s Blog Tutorial: How to Create a Frilly Frame
Hello hello! Grace here.
Happy Sunday! I hope this finds you safe, happy and creative! 🙂
Welcome to our bloggy tutorial Sunday space! The perfect place to pick up some fantastic (and free!) tips, tricks and techniques. Now trying saying that fast 3 times in a row! WHY CAN’T I SAY IT?! Tips, tricks & techniques.
We do this every Sunday, so make sure to go check out previous bloggy tutorials for all the brilliant tutoring we have to offer. You can find them all in one brilliant inspiration page on our website, HERE.
We have the best of the best at Clarity (in my opinion) and our wonderful design team members are kind enough to share their skills with us.
Speaking of kind… and skills! Glynis Whitehead is in the building with us today. I’ll pass you over to my talented pal…

Hi! Glynis here.
I received some messages asking me how I did my frilly frames as they had seen some of my projects on Pinterest, hence this blog demo!
There are a few Groovi plates available with frilly frames on them, some circular, and a square. I chose to show you the square one, as people often get confused as to what they need to do at the corners. Once you have mastered doing a square one, you will find it a breeze to do a circular one!
Let’s get going…
Ingredients
A5 Piece of Plain Parchment (GRO-AC-40020-XX)
Frilly Square (GRO-FL-40760-03)
*Other Frilly Frames Available: Frilly Circle (GRO-FL-40077-03) and Nested Circles & Frilly Frames (GRO-PA-40554-15)
Pergamano Excellent Embossing Mat (PER-AC-70075-XX)
Pergamano Embossing Balls: 6mm (PER-TO-70016-XX)
4.5mm (PER-TO-70015-XX)
3mm (PER-TO-70005-XX)
1.5mm (PER-TO-70004-XX)
Pergamano Two-Needle Perforating Tool (PER-TO-70037-XX)
Pergamano Exclusive Pointed Scissors: (PER-TO-70040-XX)
Ringlock Scissors (PER-TO-70041-XX)
Perga Cutter Curved (PER-TO-70042-XX)
Parchment Poppets – Flower Collection A4 (PER-PA-70392-A4)
4 Pink Brads from the Pastel Collection (PER-AC-70270)
8.9cm x 8.9cm White Card or Copy Paper
13.5 x 13.5cm Coloured Card for Matting & Layering
Method
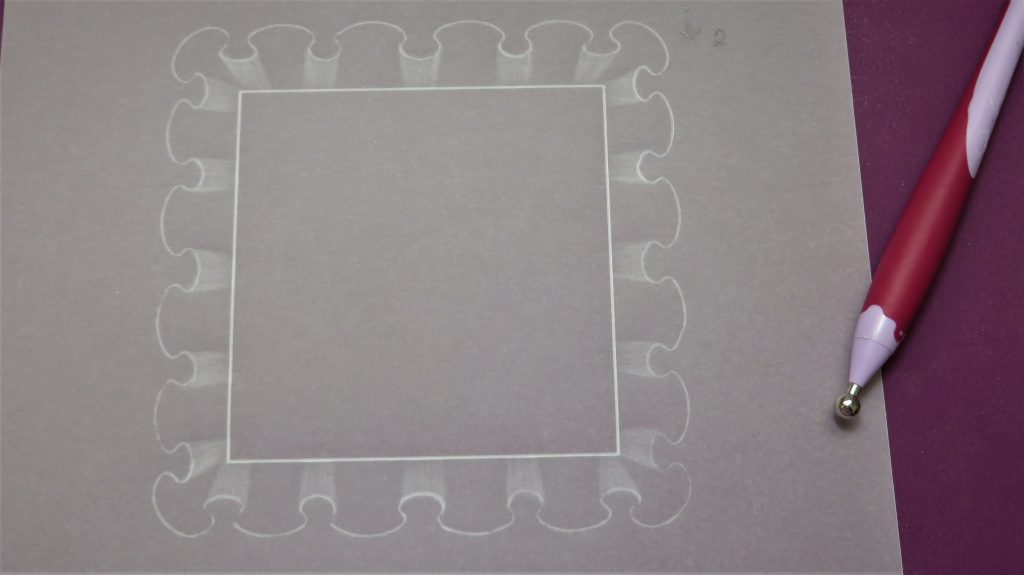
Step 1. Trace out the frilly part of the frame using the number 2 end of the Groovi embossing tool (that comes with the Starter Kit).
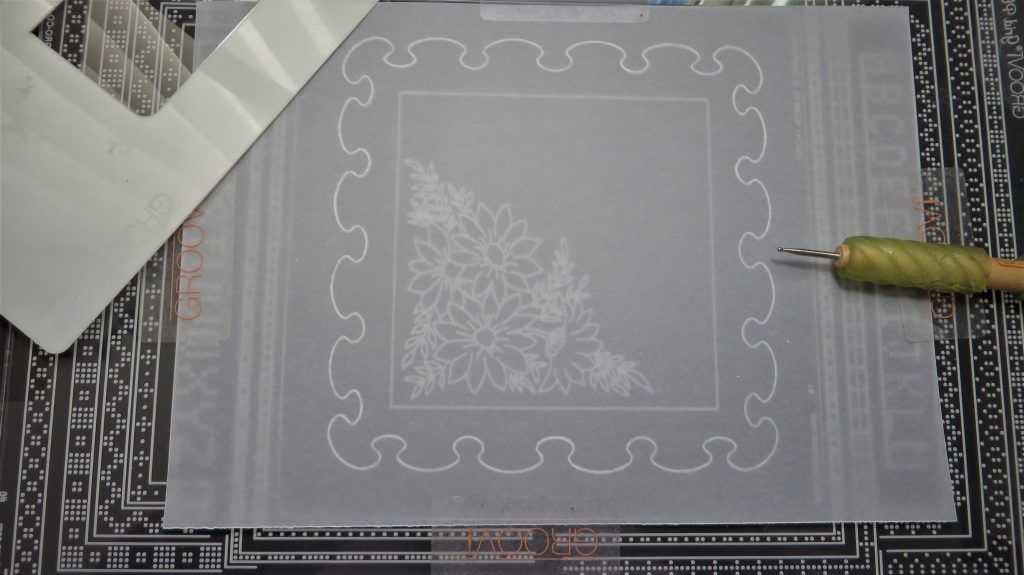
Step 2. Trace out the central square with the number 1 tool. *We use the number 2 ball when we want to have a softer line, which will make embossing the white work easier. This will become apparent as you progress through the stages.
Step 3. Working on the back, use a pencil to make a dot and an arrow to show where you started and in which direction you are working. This will help a lot with finding where to start again when you have rested the parchment in between layers of embossing.
Step 4. With the 6mm embossing tool, emboss the folds of the frill. Press lightly on the outer edge, stroke towards the centre square, lifting the tool just before going over the line – a bit like striking a match. Go lightly, as this is only the first layer of embossing. We often refer to this stage as grey work. Give the parchment 20-30 minutes to rest. You need to go slowly and gently break down the fibres of the paper. If you go too quickly the parchment will buckle and look like cotton wool.
Step 5. Go round a few times, using the 6mm ball tool, resting the parchment in between layers of embossing. As you can see from my picture, I have gone around twice now, and it still is not very white, so gently, gently does it.
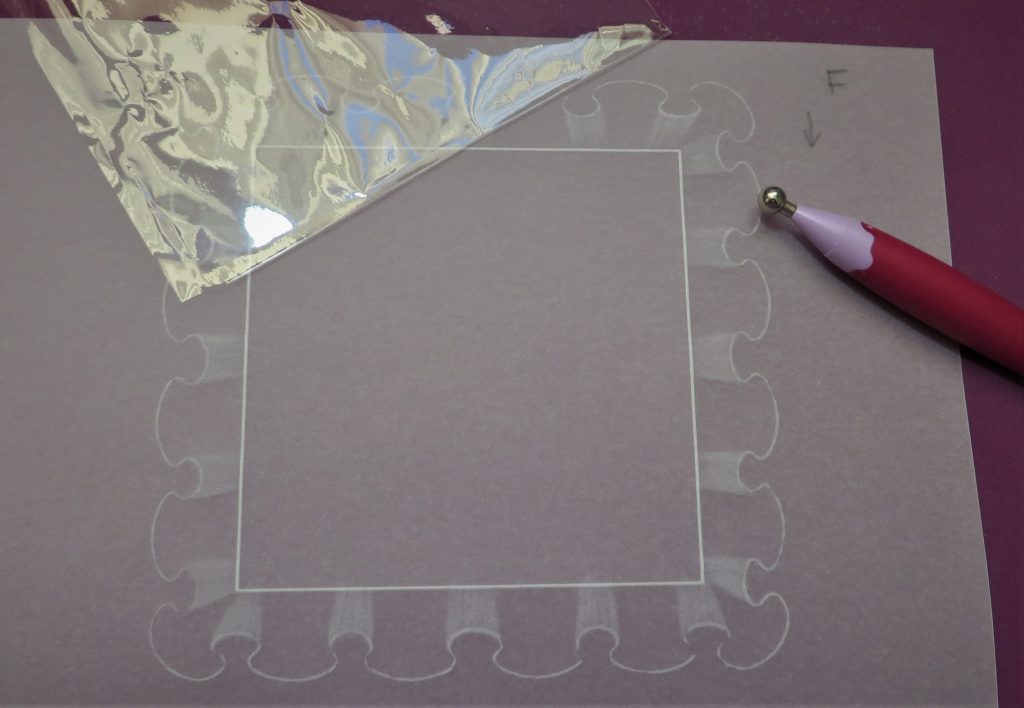
Step 6. Whilst you are letting the embossing on the back rest, turn the work over and work on the front. For this part, you will need a very special bit of kit – a piece of cello bag! Save the bags your groovi plates come in, to cut up for this! We use this when we emboss on the front of the parchment as it prevents the parchment becoming shiny. Also write ‘F’ and an arrow at your starting point – it really helps to remind you when you are work both on front and back of the work.
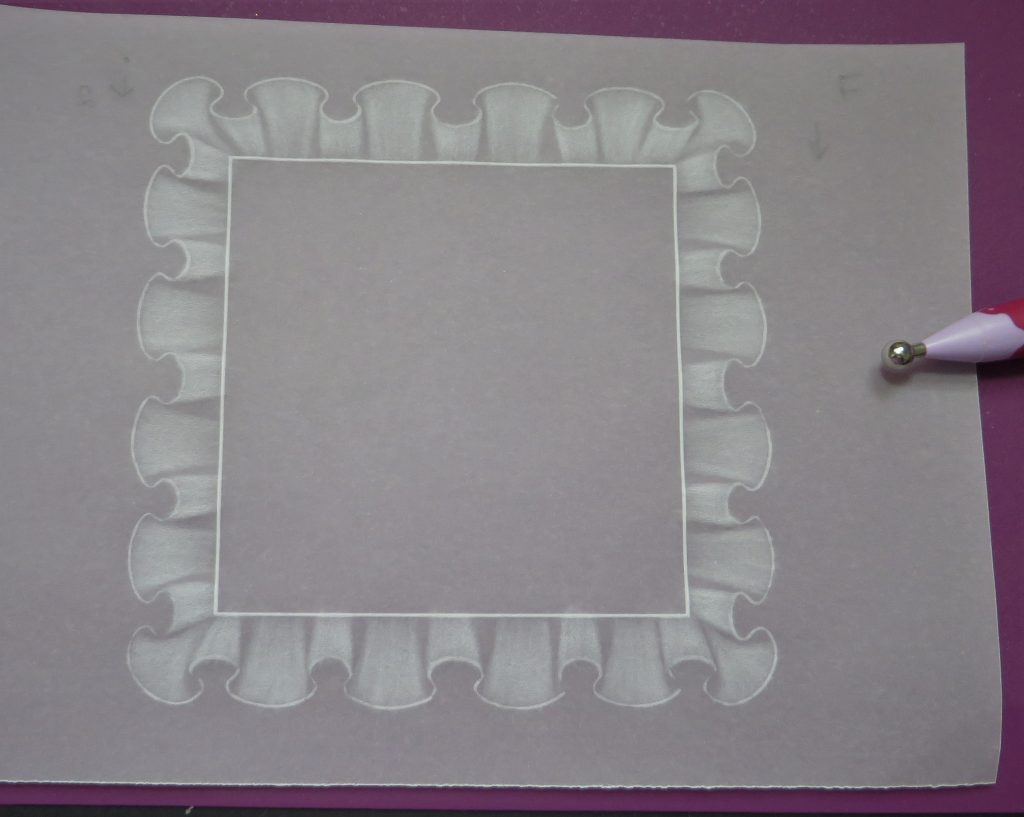
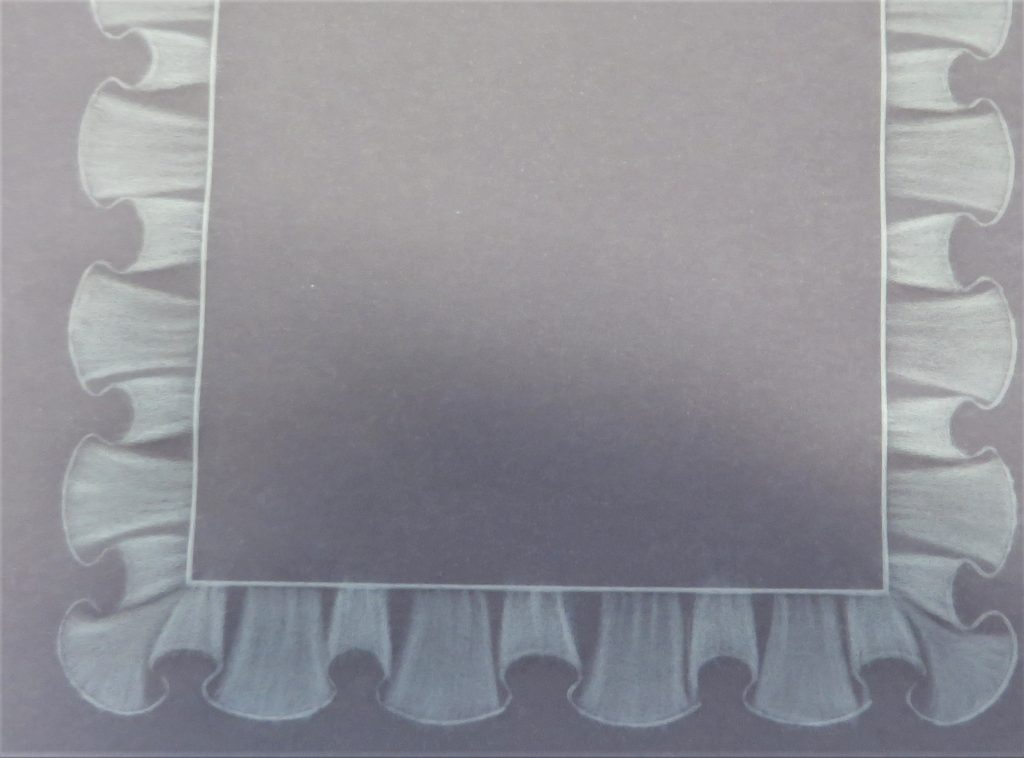
Step 7. Alternate between embossing on the back, then front, letting the parchment rest in between layers. The large ‘pleats’ are embossed on the front and the small ones on the back. Also note how the corners are done. You need to leave some gaps where the folds of fabric would be, this will provide natural shadows. Do not worry if it is darker towards the central square – this too would be darker where fabric is gathered into a seam. Check the photo. This has had two layers of embossing on front and back. Continue laying up the embossing (and resting) with the 6mm tool. This is 5 layers of embossing on both sides.
Step 8. Move down to the 4.5mm tool and continue with 1 layer of embossing on both sides. When embossing the front (still protecting the parchment with the cello square) do a few light strokes upwards from the line of the centre square – this provides the look of folds.
Step 9. Just continue on the back now. One more layer of embossing with the 4.5mm tool – let the parchment rest, then move down to the 3mm tool. Do two more layers of embossing, but don’t forget to allow the parchment to rest between layers.
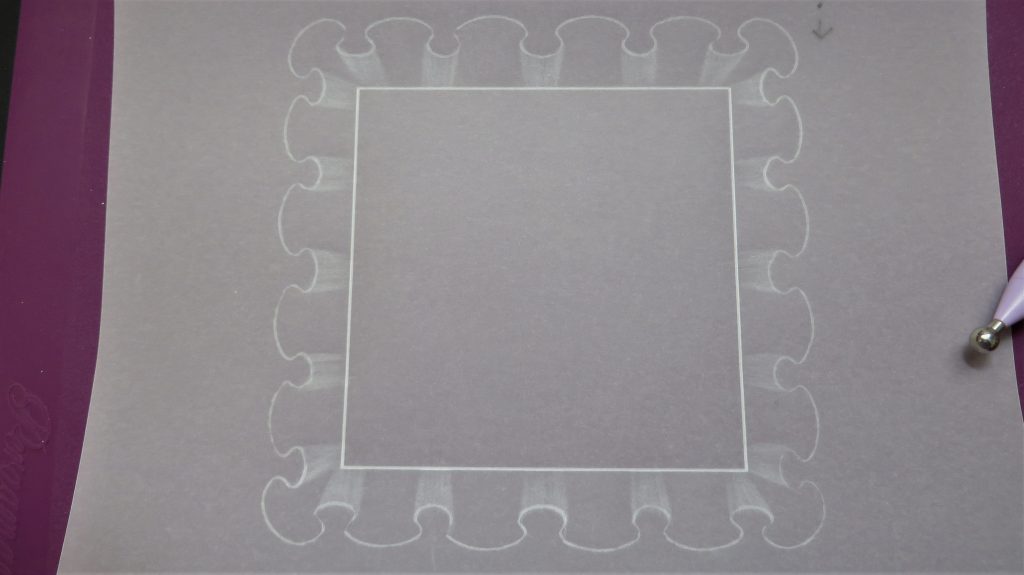
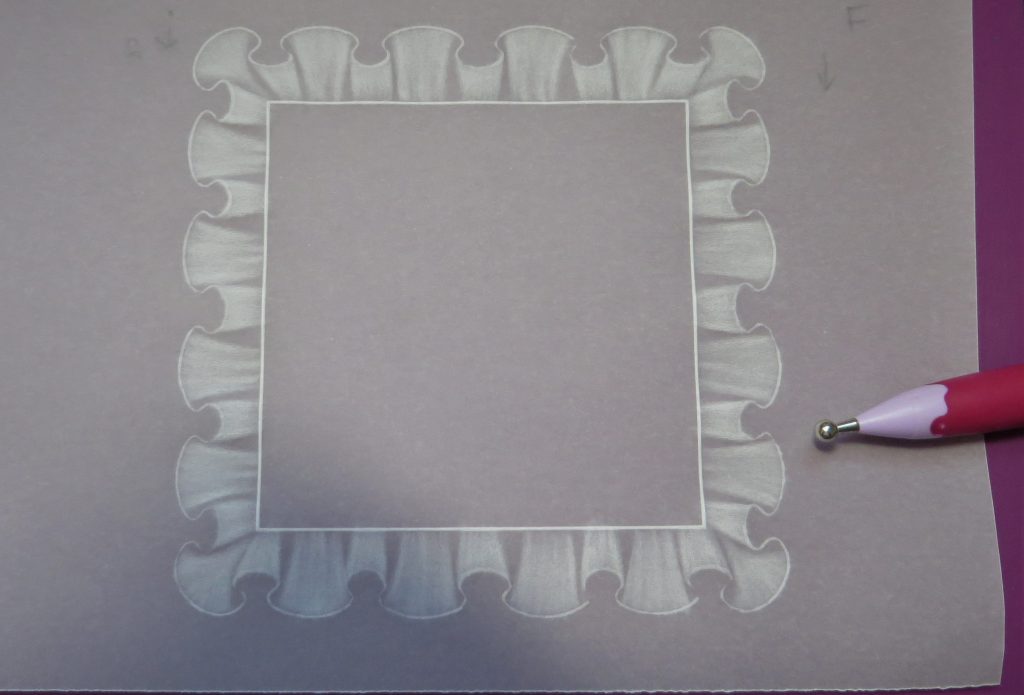
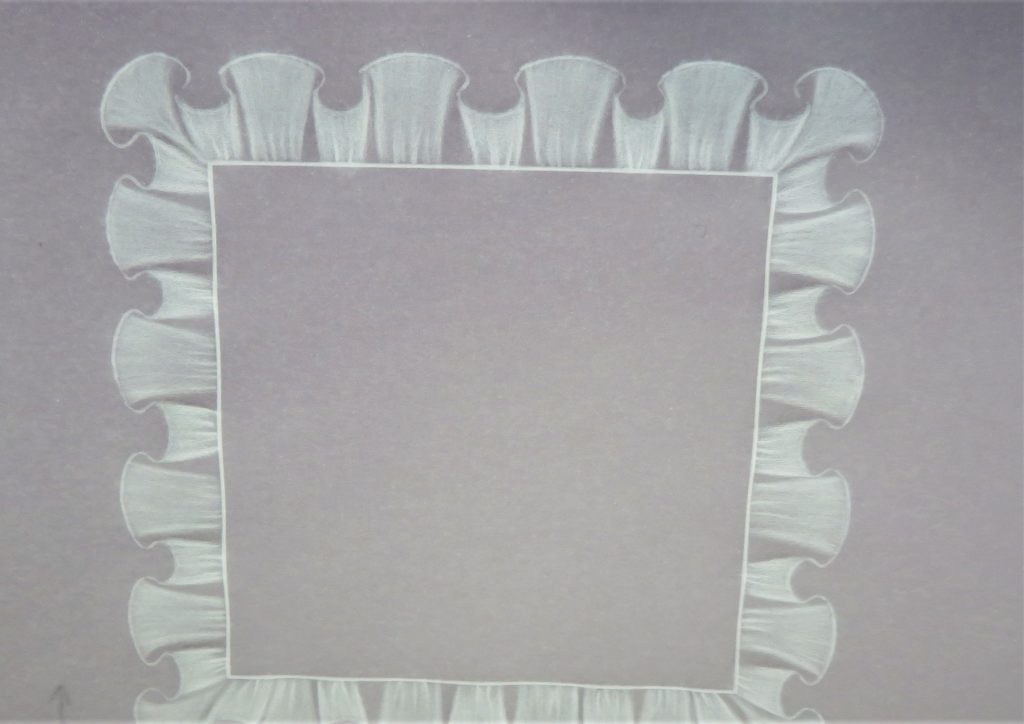
Step 10. You will see that the back is now whiter than the embossing on the front – this is done on purpose. The folds on the front are going back into the fabric and so will be darker than the ones on the back which will be more prominent from the front view. This has now had two layers of embossing on the narrower back pleats.
Step 11. Switch to the 1.5mm tool. This is just to sharpen up the edges of the folds and add some more ‘gather’ lines into them.
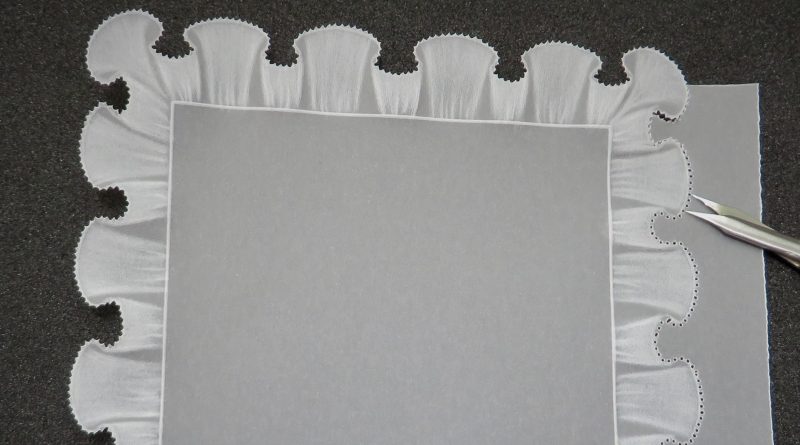
Step 12. Use the fine two-needle perforating tool to go around the outside edge of the frilly frame. Make sure you keep the tool as upright as possible, put the work onto a deep perforating mat. Make the first two holes, then place the first needle into last hole before perforating fully. This will ensure that you get nice round, evenly spaced holes… which is half the battle when it comes to picot cutting.
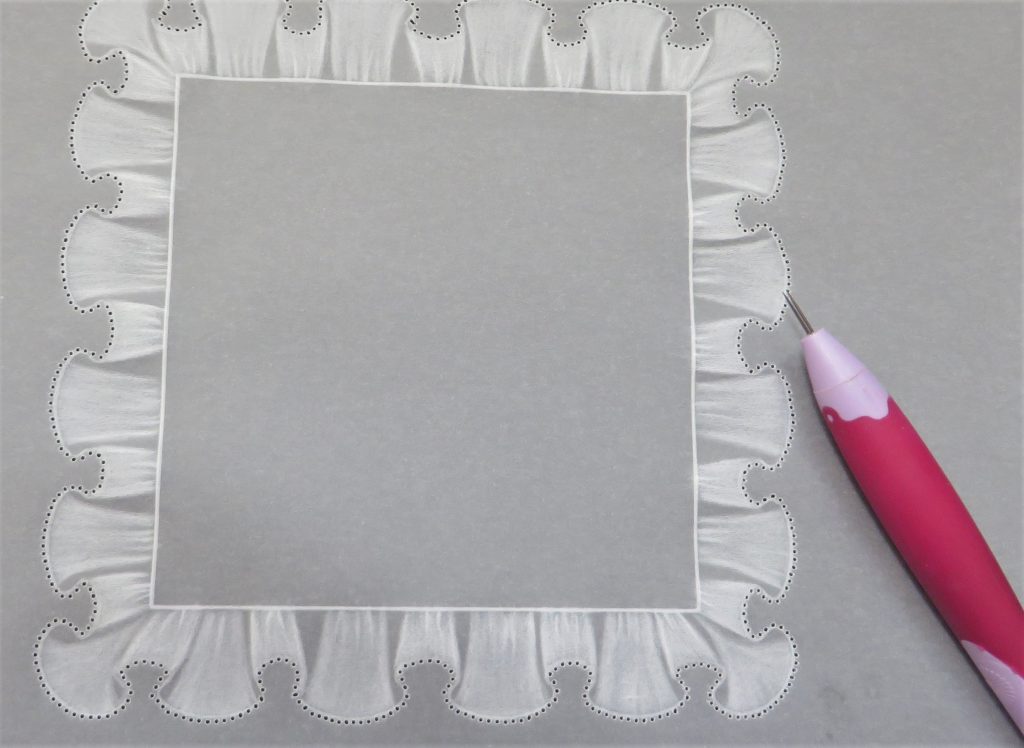
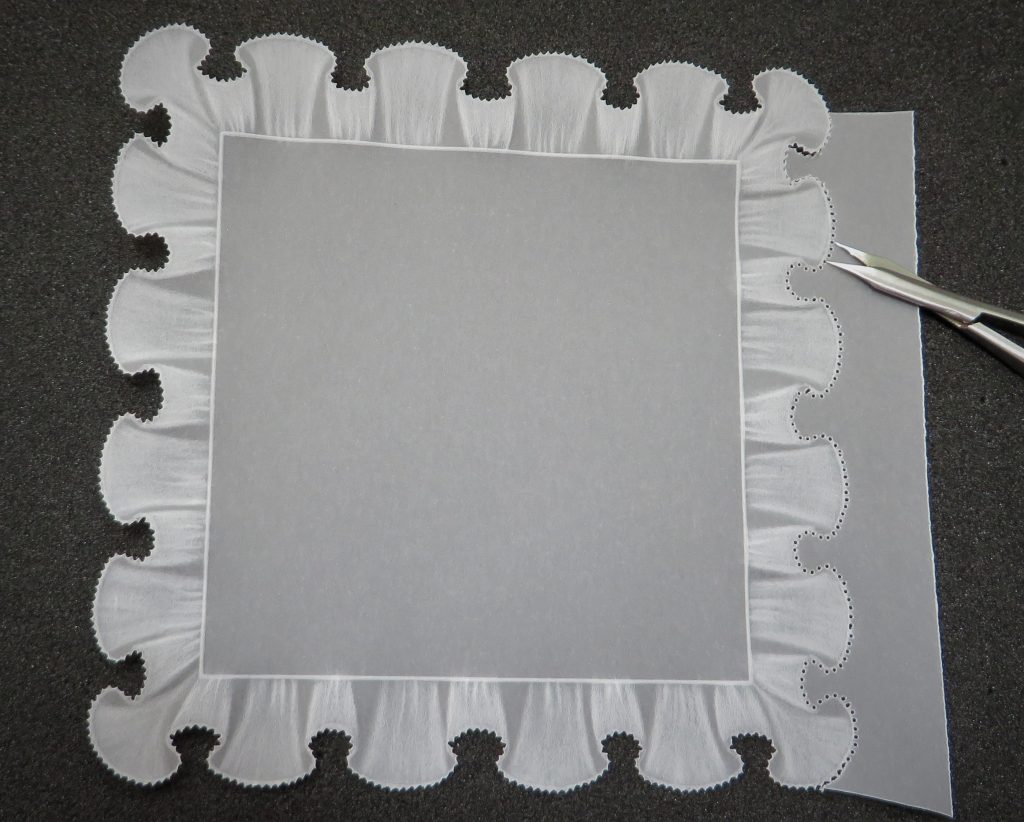
Step 13. Get your hand into a comfortable position and rather than move your hand around the piece of work, move the work and make the artwork come to you. Place only the very tips of the scissors into the first two holes – the blades will be pointing towards the work. Squeeze the scissors or snips until you see the ‘V’ appear – that is the picot and once you see this, just snip. Practice on some scrap first to get your eye in.
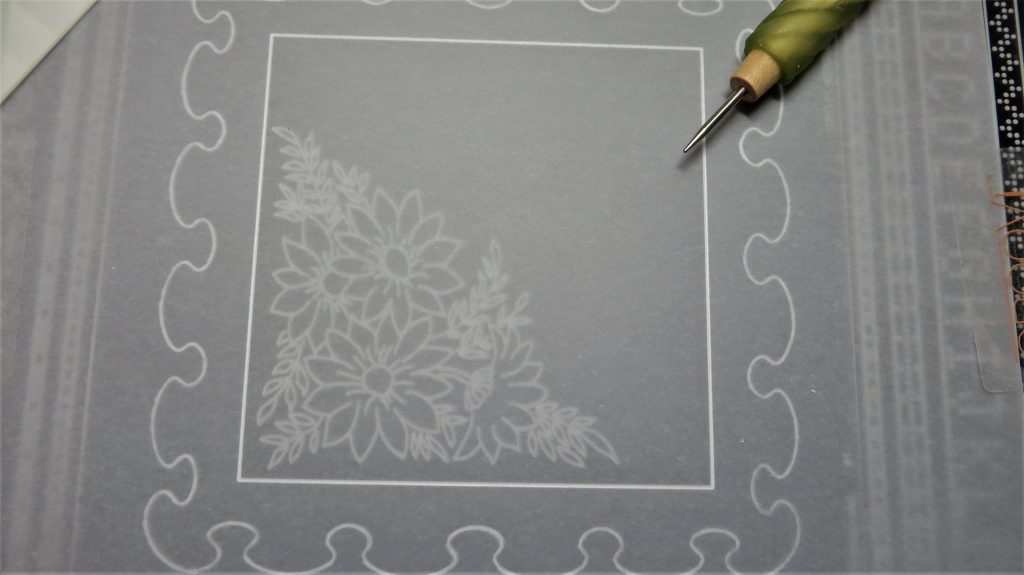
Step 14. I have used a Parchment Poppet for my centrepiece. They come in A4 sheets with three sizes of images on the page. The middle size fits perfectly into the 9x9cm square of the plate. Place the Poppet bright side downwards onto the plate, centralizing it in the square. Emboss the line with the number 1 Groovi tool.
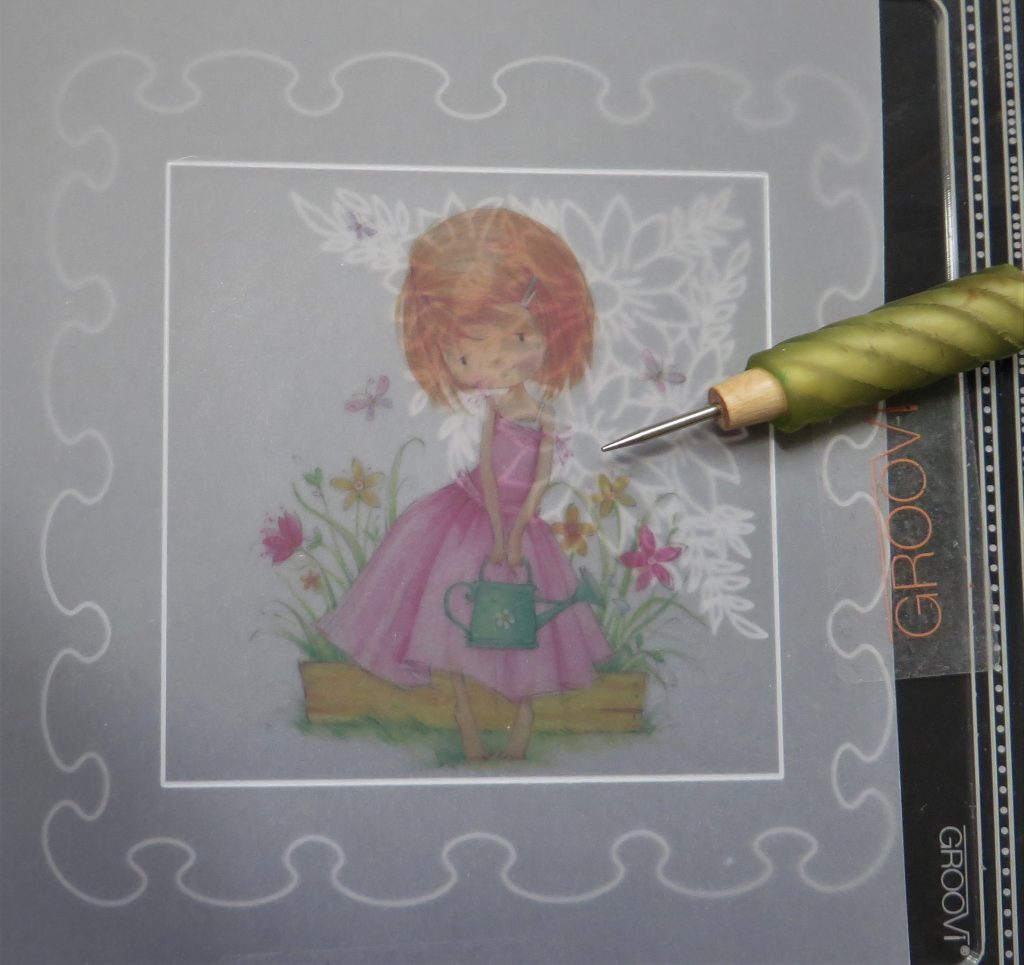
Step 15. Using the 6mm ball tool, gently emboss the hair and folds of the little girl’s dress – not too hard as we want the artwork to speak for itself for the most part.
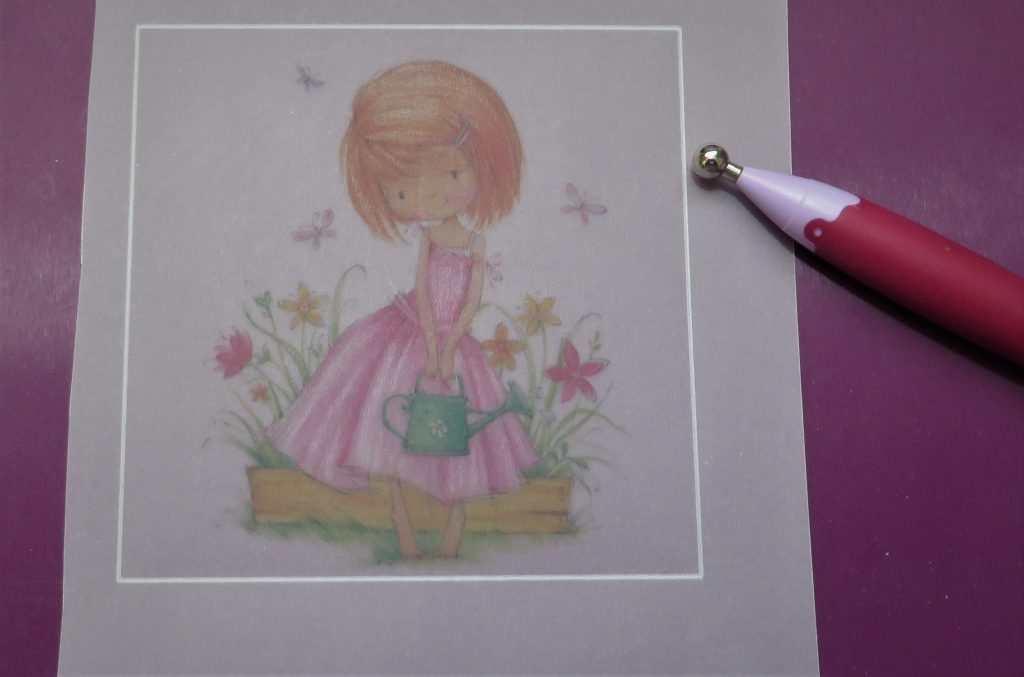
Step 16. Go around the outside with the two-needle tool and picot cut the piece out – follow the instructions in step 12.

See how the white square of paper/card behind the image makes it pop?
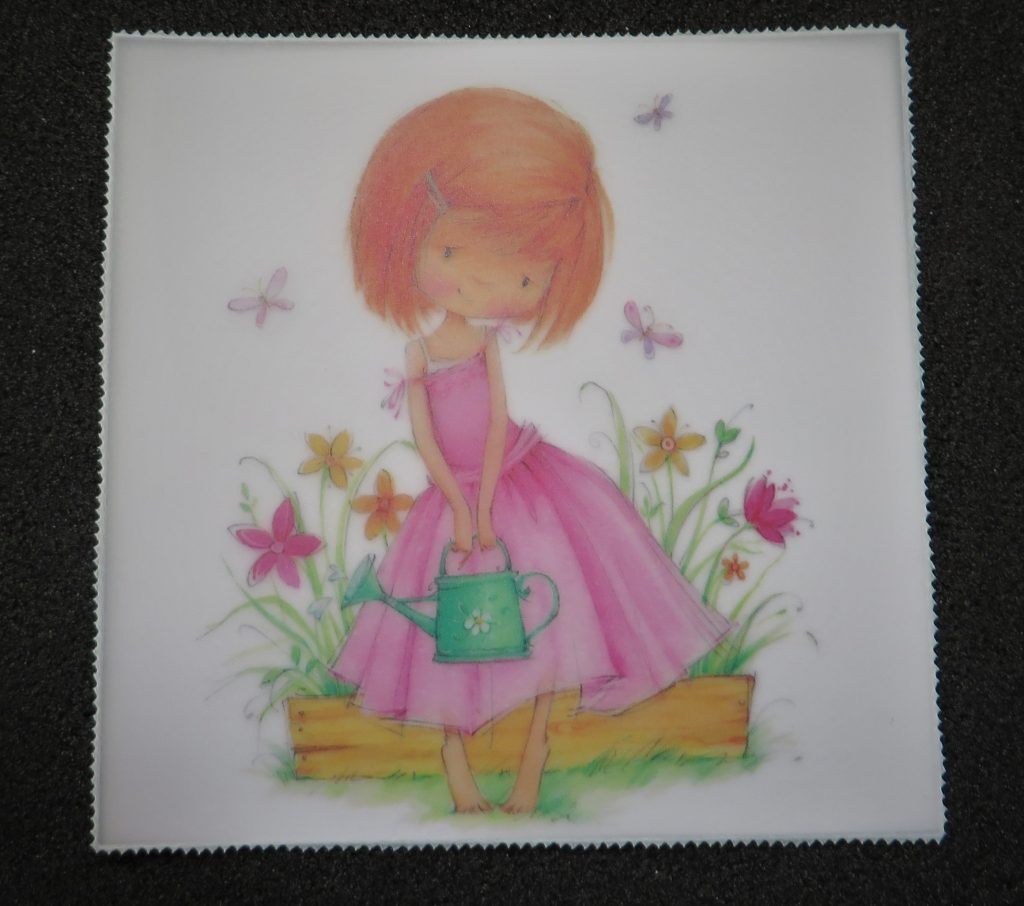
Step 17. Place the Parchment Poppet onto the white square, layer those two pieces together onto the frilly square and fix them with brads at each corner. Layer the frilly topper onto your choice of backing card and attach to a card blank. I added a little bow to match the Poppet’s dress and… voila!

Thank you so much, Glynis!
Wow, how effective is that? It does look 3D and I’m a tad blown away by how easily that was achieved. Well, Glynis makes it look easy anyway. What d’ya reckon? Could you do that? I think you might surprise yourself, if you’re the one sat there shaking your head at me.
I’d love to see your versions! It’s all about to trying new things, or honing in on the skills that we’re collecting. If you fancy sharing your work and attempts with me, please send it to Grace@claritystamp.com
As usual, everything used is on one place over on the Clarity website HERE
For now though, thanks for joining us on our bloggy Sunday! And enjoy the rest of your weekend! Travel gently…
Lotsa love, Grace & Glynis xo
Clarity – The Home of Art, Craft and Well-Being.
Thanks Grace for another great blog and Glynis for a brilliant project , I’ve got the plates but never been very successful , will have another go following these excellent instructions
Enjoy your Sunday off finish an embroidery plate , then have a go at this one xx
Just lovely. I have been wanting to use this plate but was unsure how . Thanks for the instructions! I will have to challenge myself . I enjoy ” Clarity’s Groovi Sunday” and please keep it going it is a big help!
Thank you Grace and Glynis for this Sunday tutorial!!
It’s beautiful and It’s a long time ago I did some parchment, but still have all my stuff!
Even bought some Groovi plates to try. It’s very different of how I was used to do, so I learn a lot of Paul on Tuesday.
Take care and stay save and a lovely Sunday
Lots of love,Trijntje Huppel
Thank you Grace and Glynis. The only thing left out of the ingredients list is PATIENCE. So often crafters try to rush the embossing and spoil their work. I find it very therapeutic and have several embossing projects on the go so they get plenty of rest between sessions.
Enjoy the rest of your weekend.
Stay safe.
Thank you Glynis. I have the round frilly plate and it has looked a mess when i did it but i didnt know to do the back and front. I will try again using your tutorial x
Thank you for that excellent lesson on embossing frills. No excuse now, just need to add some patience and all will be well. Thank you too Grace and of course Clarity without whom none of this would be possible.
What a wonderful detailed blog. Big thank to Glynnis. I wish she was next door. Best wishes to you and Gracie x
Really enjoyed that tutorial. Thank you so much Glynis . I have had that frill since I first started groovi at the beginning. But haven’t managed to do it very well. Will now try again. Xx
Thanks Grace and Glynis – such a useful tutorial. I don’t use that plate enough so will look it out again. X
Hi Grace, Wow Glynis !! this frill white embossing is positively stunning, culminating in a pretty and amazing card. Thank you so much for this tutorial, it is awesome !!
Lots of love from Patricia xx
Love how the frill looks 3D when completed – thanks for reminding us how to do it Glynis.
Hope everyone has had a good Sunday & managed to dodge the rain which has been heavy again at times.
Well explained Glynis for those who didn,t know how to do it and a great reminder for the rest of us. Thank you Grace for putting it on the blog.
Hi Grace & thank you for your blogs – always enjoy reading them and hearing what your week has been like over the water😃
Glynis – what a beautiful tutorial – thank you so much – the way the frills pop out -amazing – will be giving this a go.
Take care & have a good week
Xx
Thank you Glynis. I have the circular frilly plate and look forward to following your instructions and trying it out. Looks like a beautiful piece of lace and not parchment. You are so clever.