Clarity’s Blog Tutorial: How to Pattern Build with Groovi Corners
Hello hello! Grace here.
Happy Sunday! I hope this finds you Safe, Happy and Crafting! 😉
We have a special guest in bloggy tutorial land today! Our much loved Paul Church! I’ll hand you over to the pro… but not before sharing these old epic photos of Paul and Mum. I couldn’t help myself!
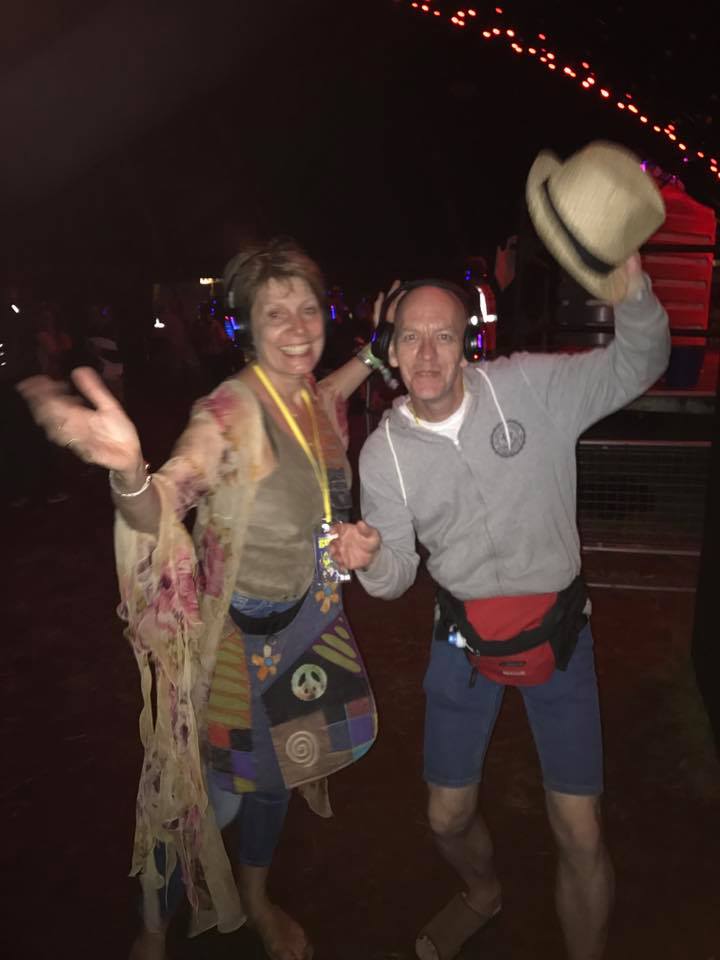

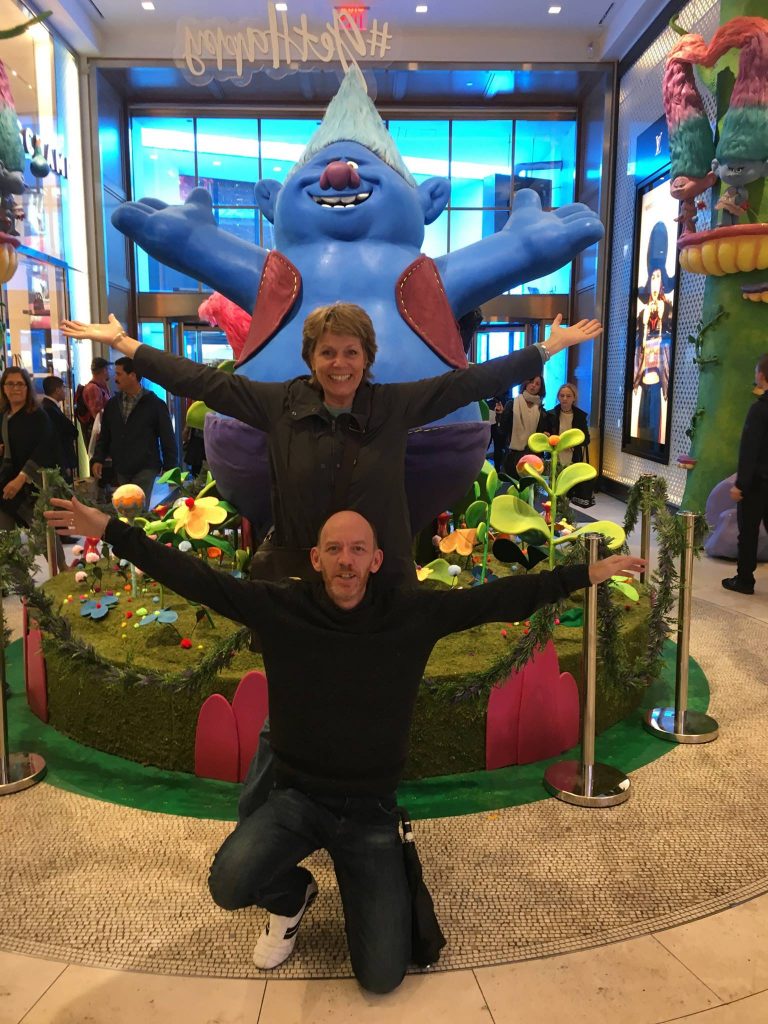

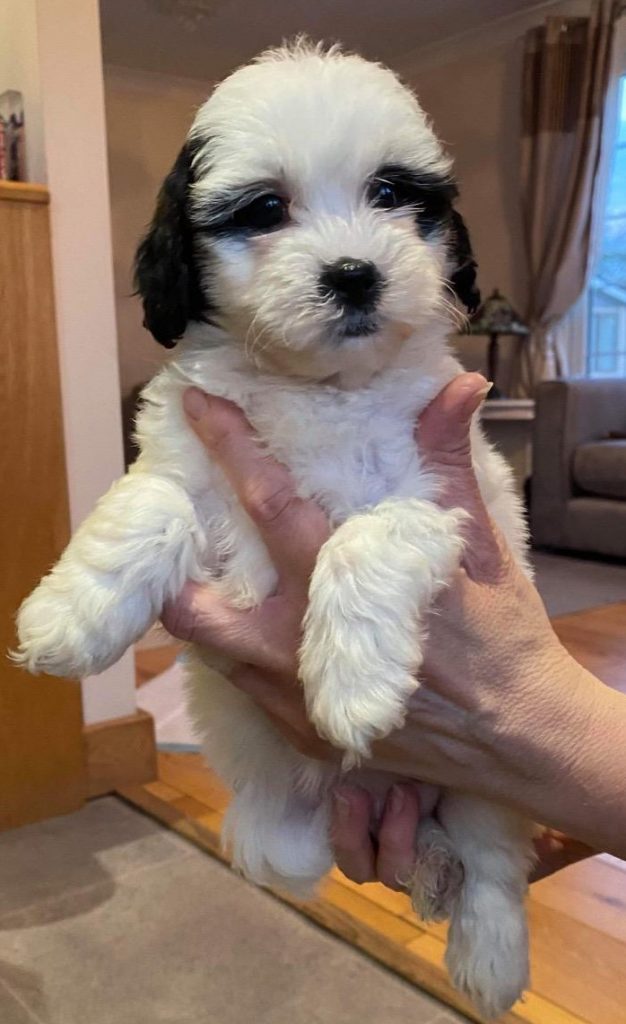
Not only do they work together, but they are also very good friends! I love them both dearly and look forward to seeing them soon. Our Paul just got a puppy. And now I know what kind of puppy I want, thanks Paul! 😉 Anyway, enough rambling from me! I’ll hand you over to Mr Church! But before I do, I have just seen this pic of his new fur baby on his Facebook page!
Hi! Happy Sunday. Paul here. Let’s get started…
Ingredients
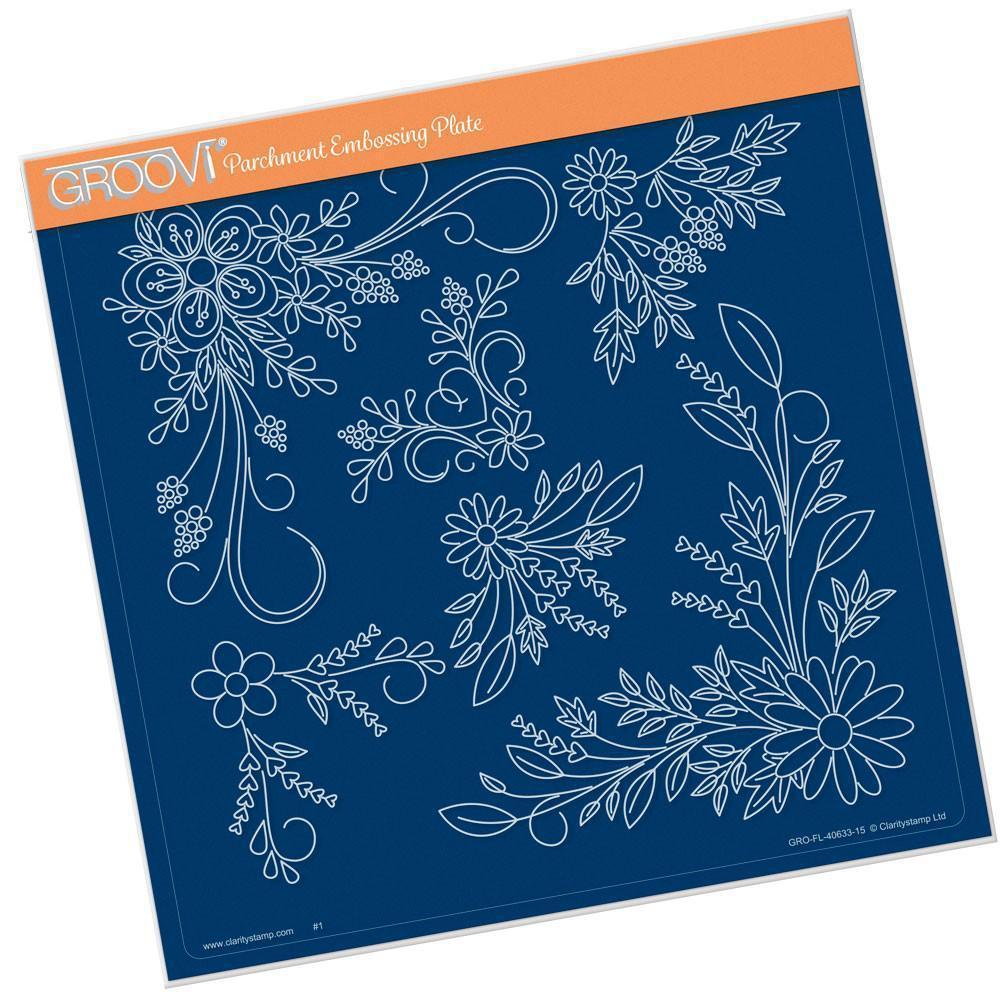
Tina’s Floral Swirls & Corners 2 A4sq Groovi Plate (GRO-FL-40633-15)
Picot Square A4sq Groovi Plate (GRO-PA-41035-15)
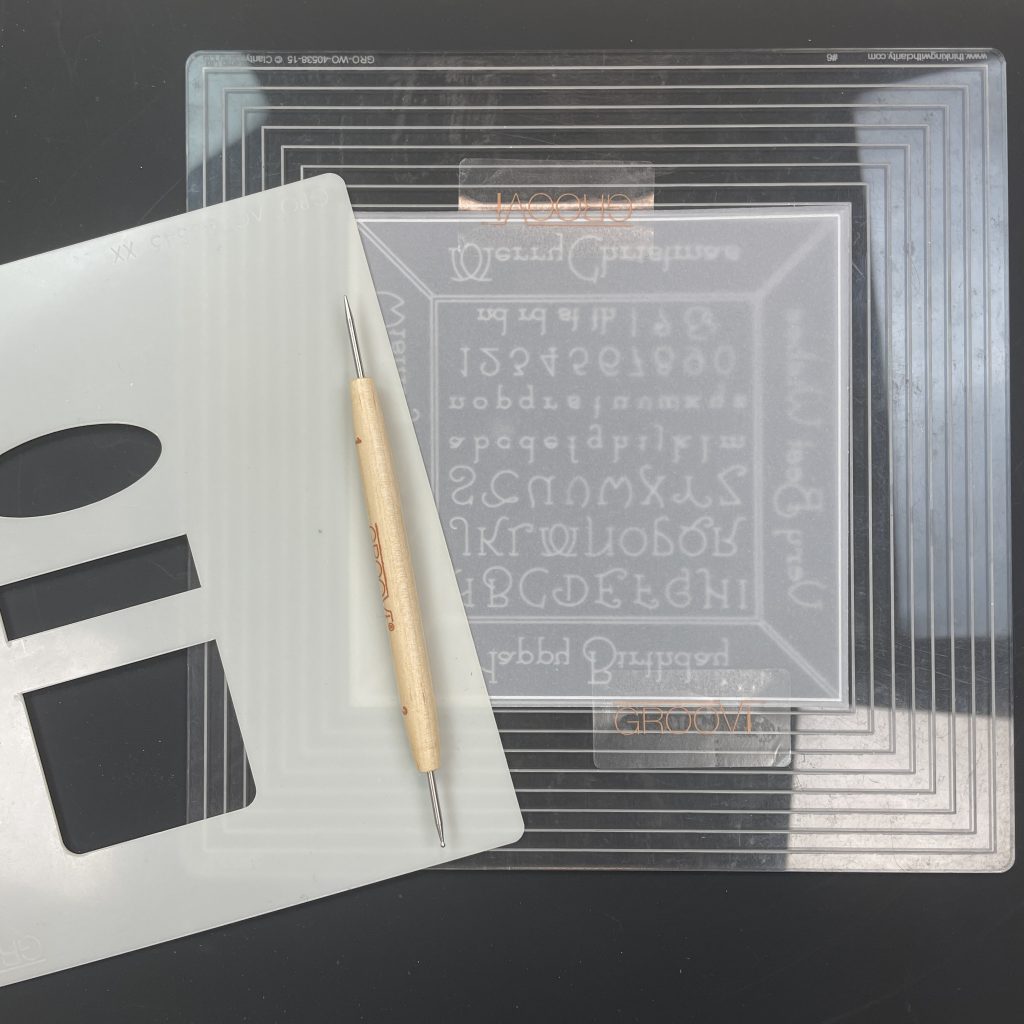
Nested Square Extension A4sq Groovi Plate (GRO-WO-40538-15)
Fresh Cut Nested Squares Die Set (ACC-DI-30603-66)
A5 Clear Parchment (GRO-AC-40020-XX)
Groovi 1 & 2 Tool (GRO-AC-40026-XX)
Groovi 3 & 4 Tool (GRO-AC-40027-XX)
Groovi Guard (GRO-AC-40345-XX)
Groovi Tabs (GRO-AC-40437-XX)
Pergamano Embossing Mat Excellent (PER-AC-70075-XX)
Perga Liner Pencils (PER-CO-70063-XX)
Blending Pen & Nibs (PER-AC-XXXXX-XX)
Dorso Oil (PER-CO-70066-XX)
1 Needle Bold (PER-TO-70028-XX)
Super Foam (GRO-AC-40603-A4)
White Brads (PER-AC-70287-XXX)
Indian Summer 8×8 Designer Paper (ACC-CA-30524-88)
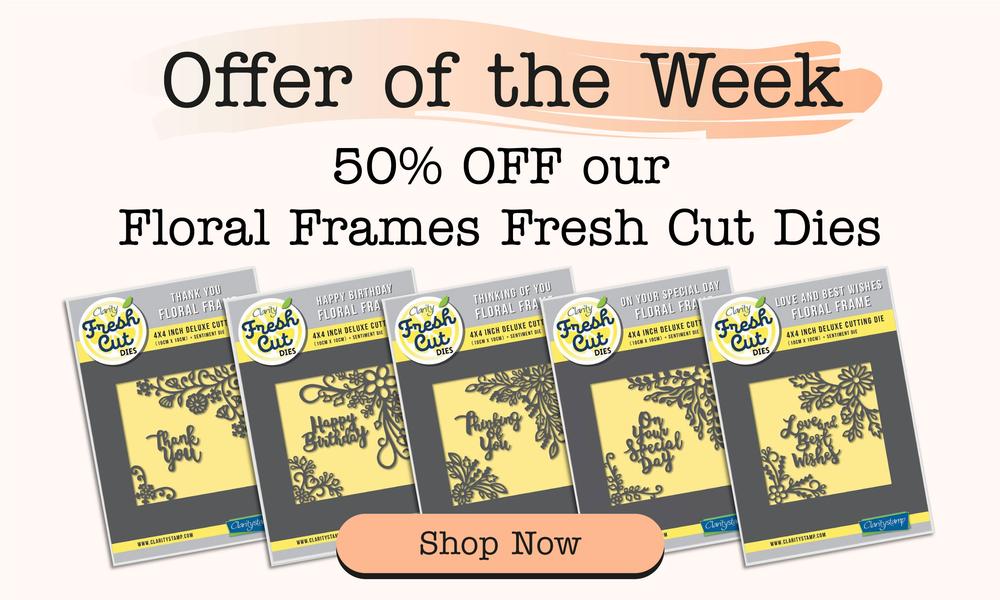
Offer of the Week HERE
6×6 White Card Blanks (ACC-CA-30618-66)
Roll-a-Tape Glue Runners (ACC-AD-31146-XX)
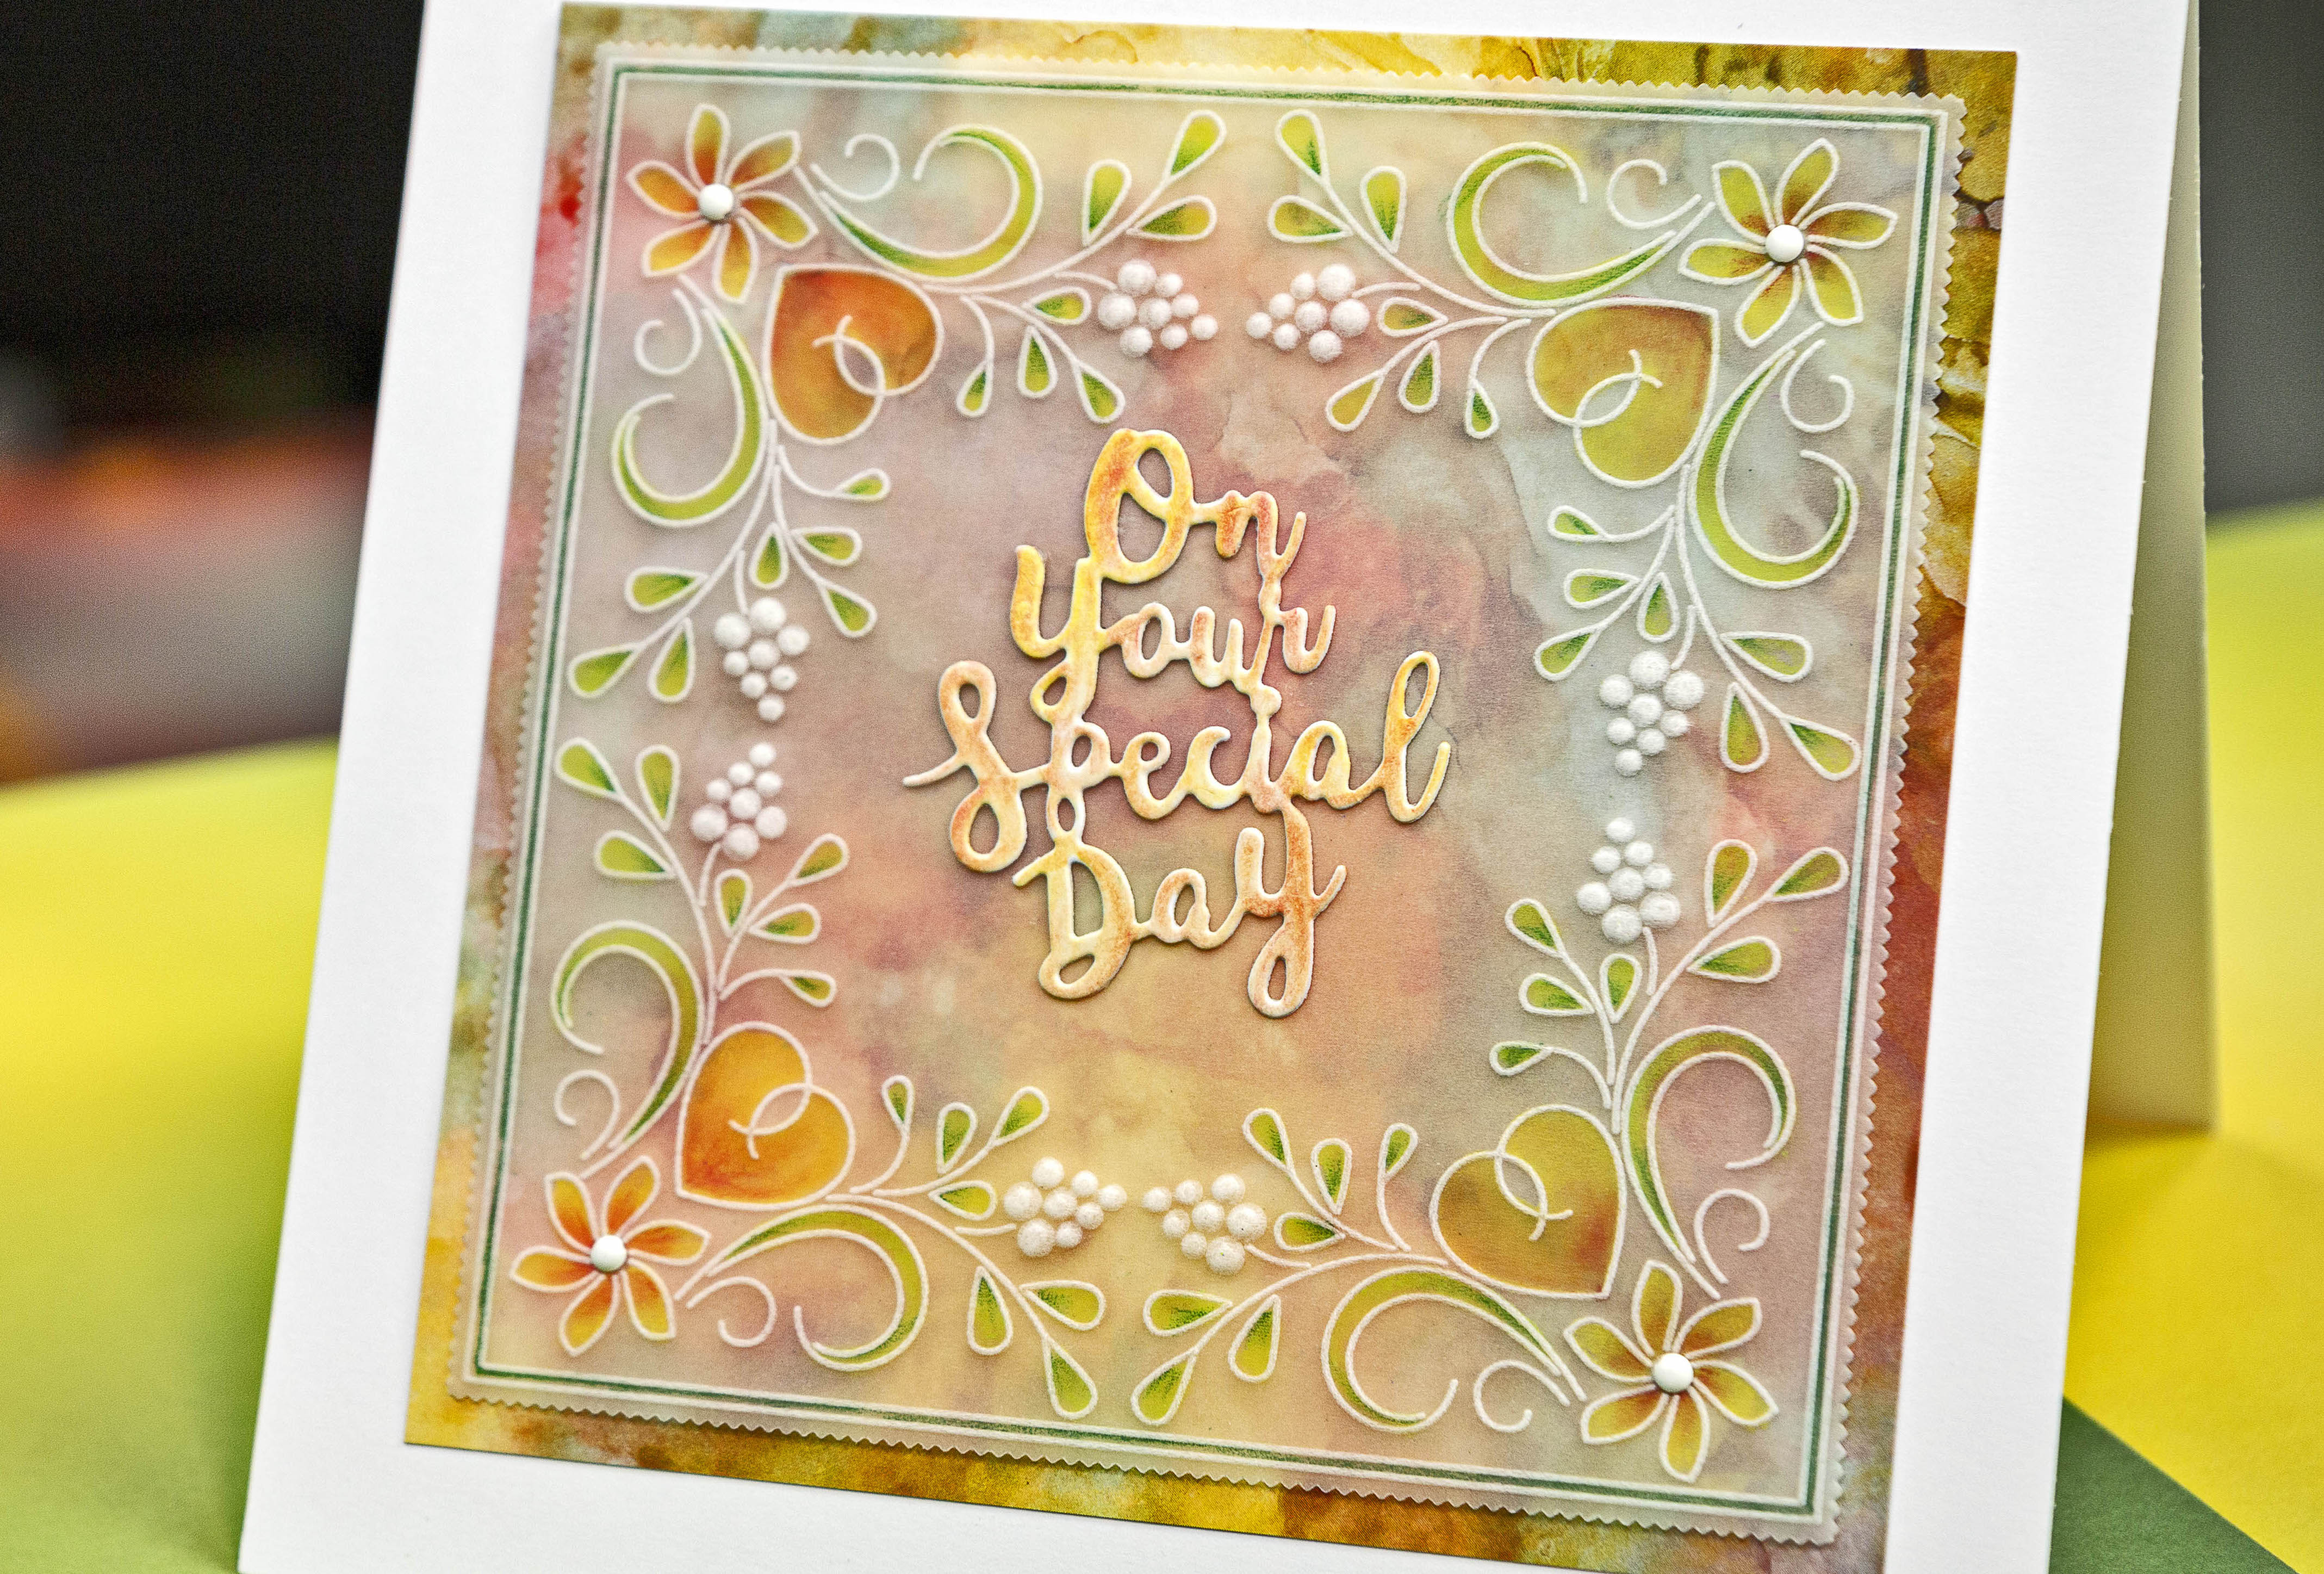
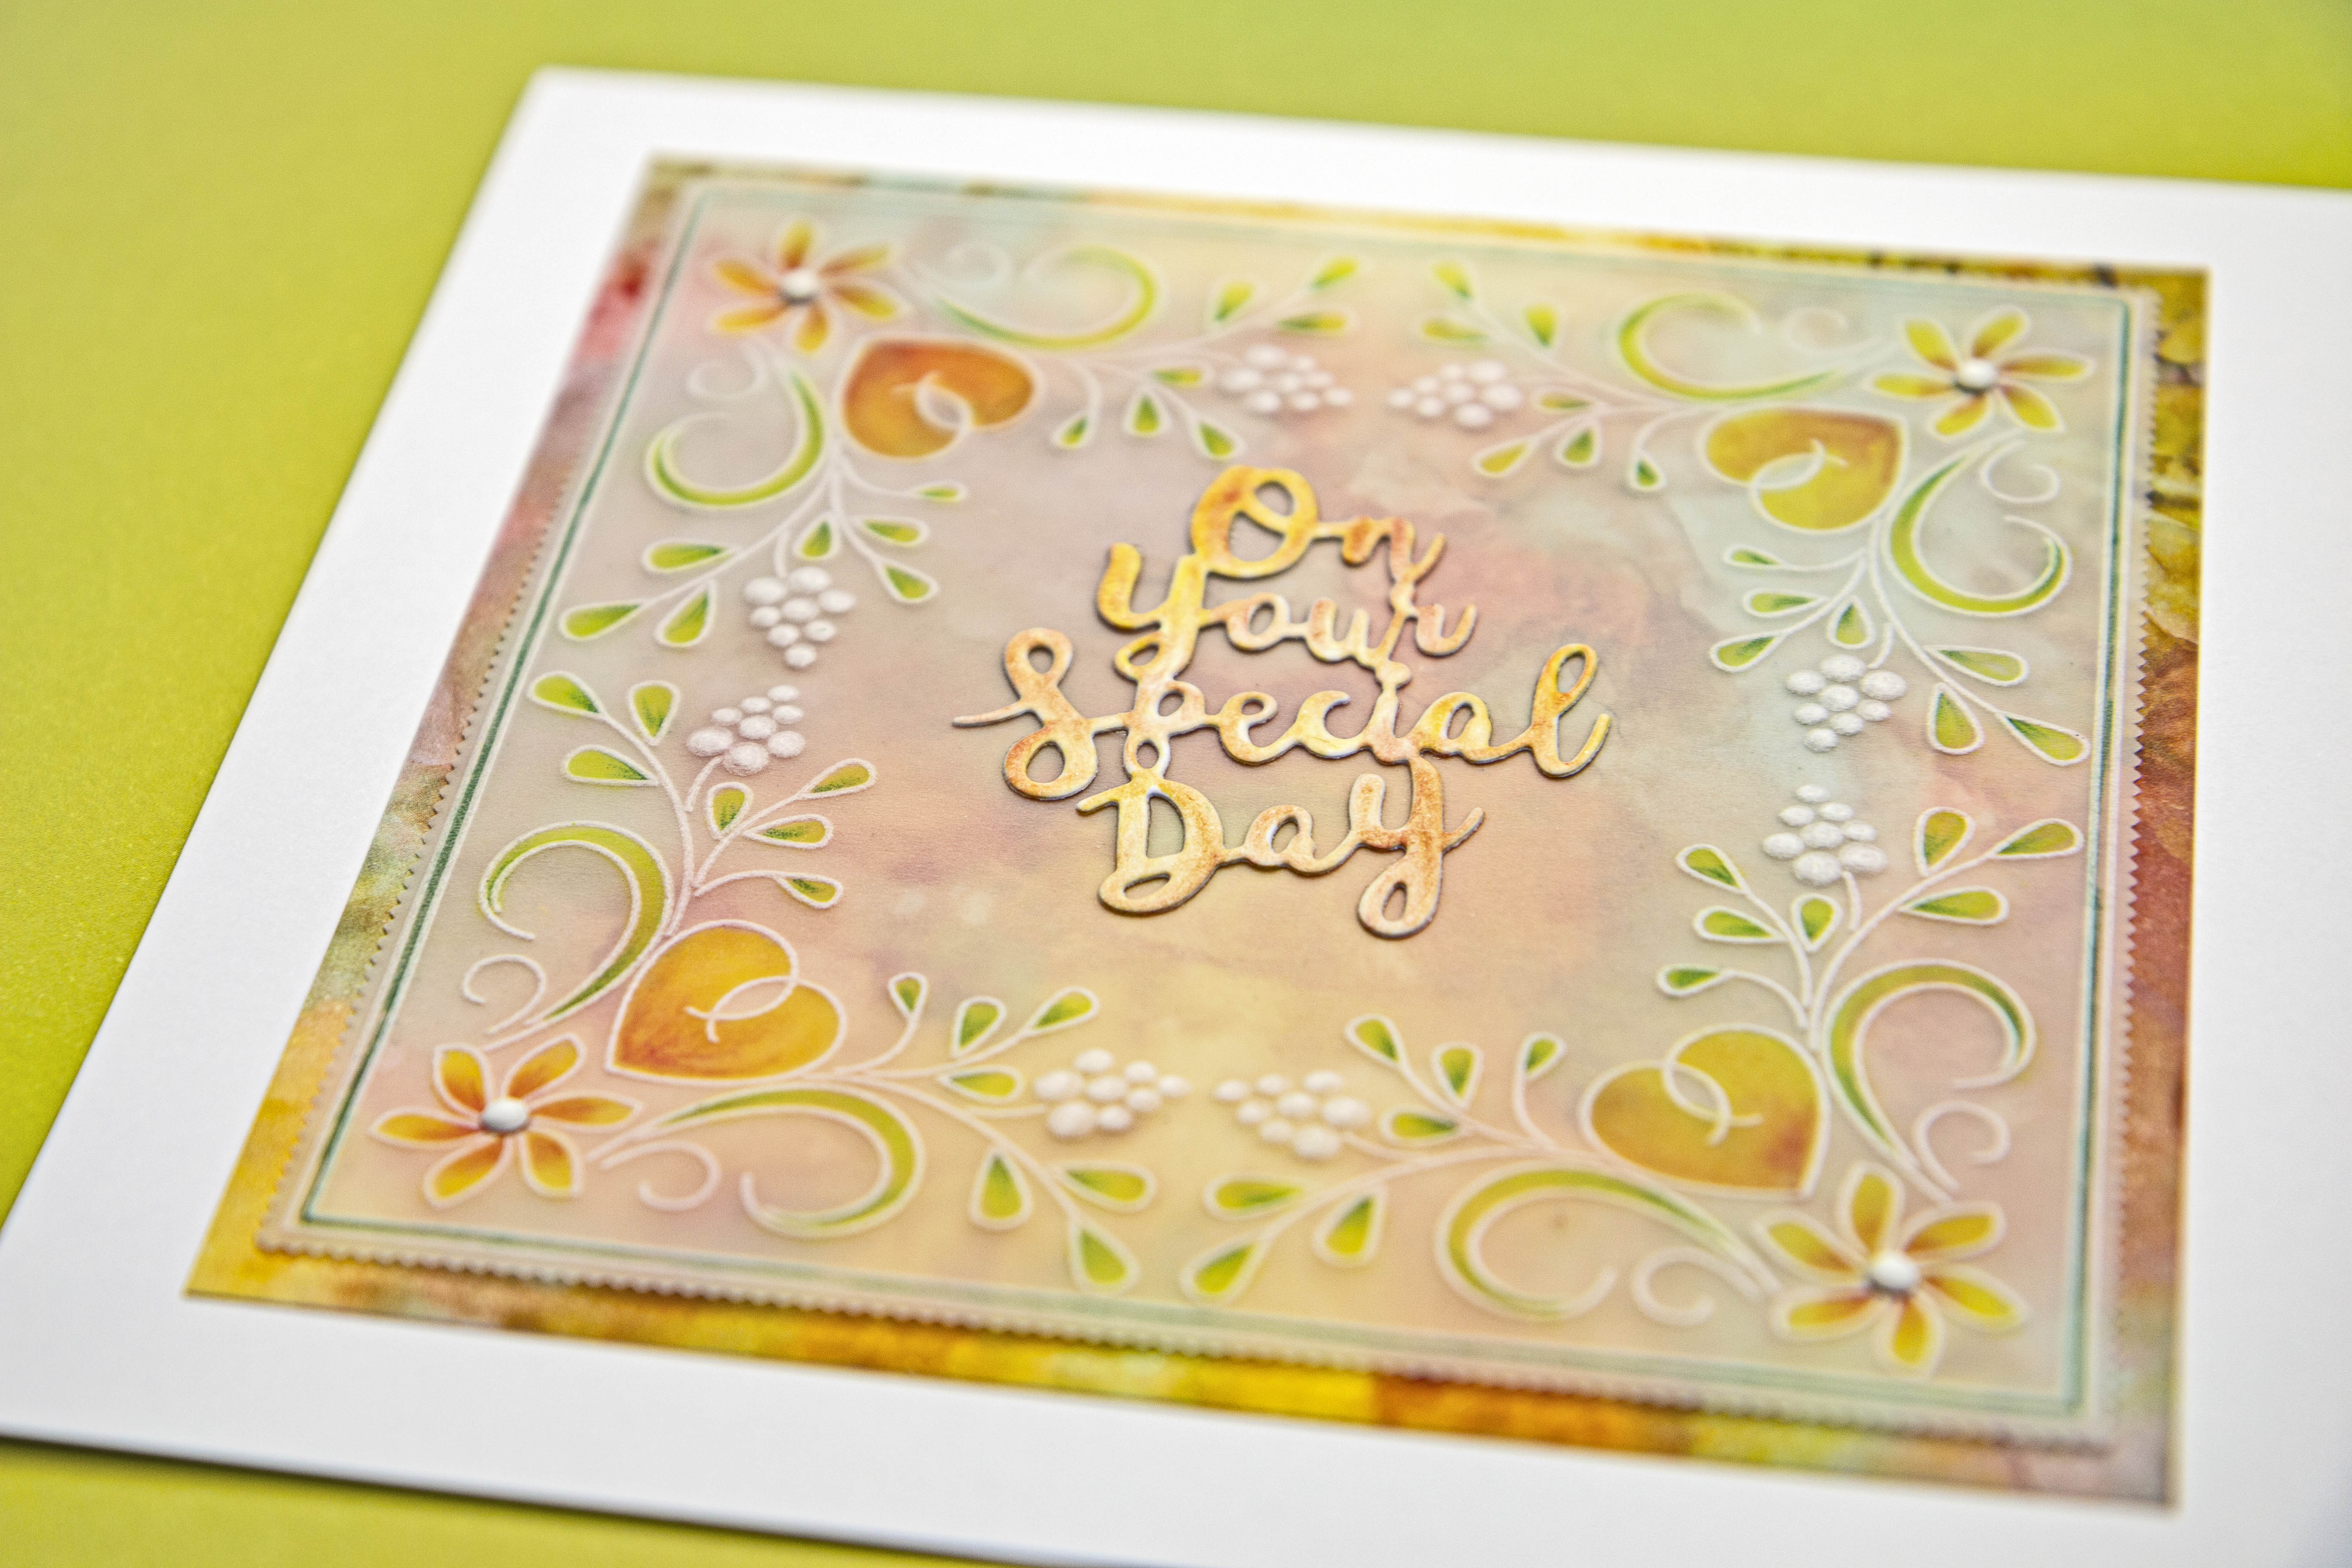
When you have a really good look at Tina’s Floral Swirls & Corners No.2 A4sq Groovi plate, you will find that it contains so many different elements. They can used exactly as they are, or broken down.
I have always loved to pattern build when working with stamps and trying to think outside the box when creating cards – this takes me back many, many years when I used to watch Barbara create her magic with the Clever Corner Stamps – amazing!

Available HERE
So I thought I would give it a go with Tina’s designs…
Method
To start with, we need to create a frame in order to contain our artwork.
If you have the Nested Picot Square Dies & Groovi Plate – die cut a piece of parchment using the 4th die from the outside. Then position on the plate and trace out the double frame using the Groovi No.1 Tool.
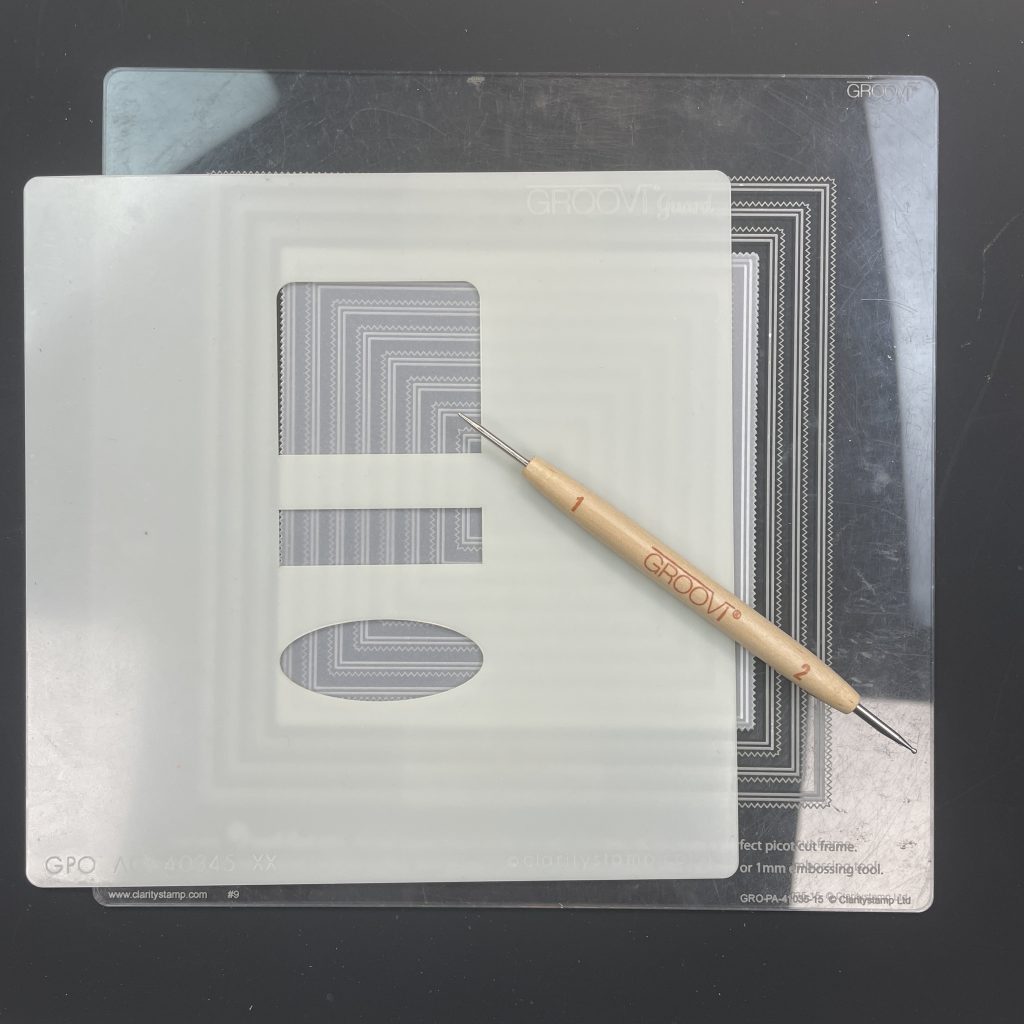
If you have the Nested Square Dies set – die cut a piece of parchment using the 3rd die from the outside. Then position on the Nested Square Extension plate and trace out the single frame using the Groovi No.1 Tool.
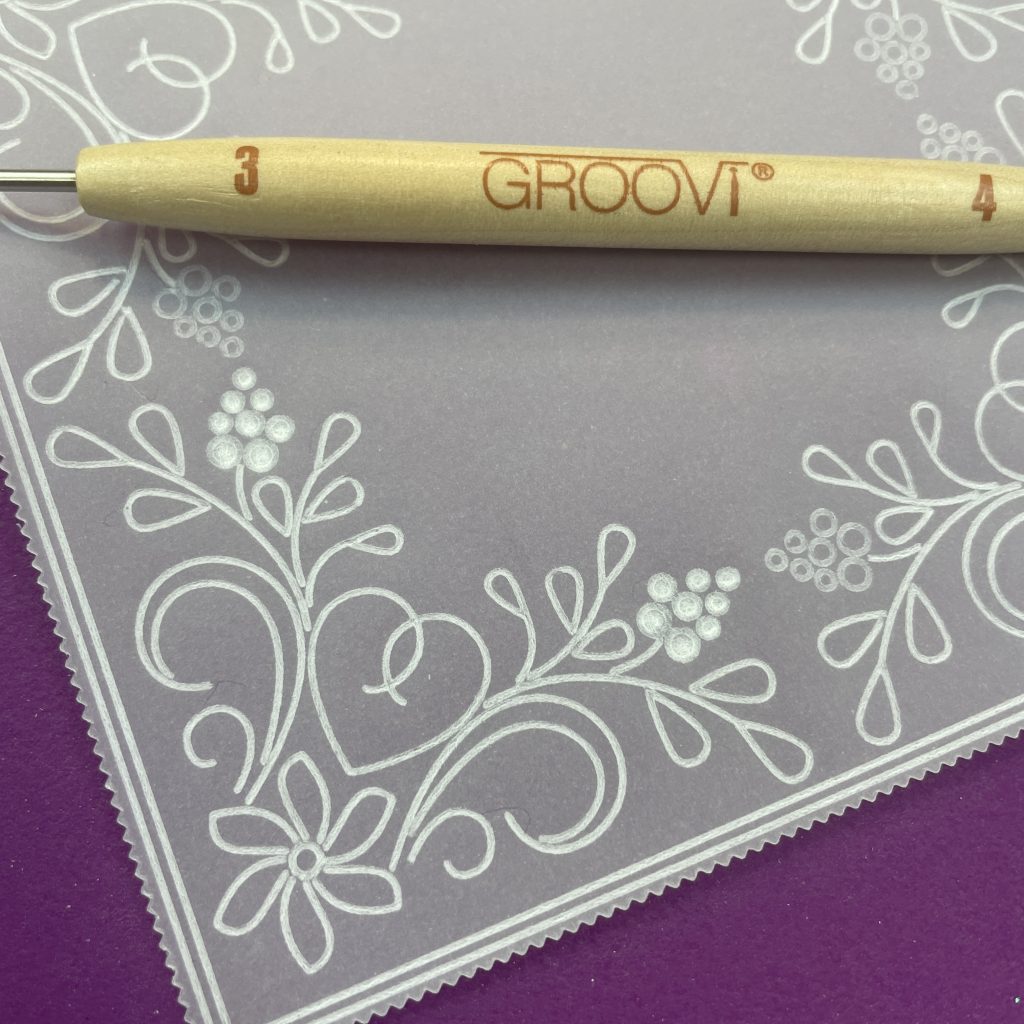
There are several corners for you to choose on Tina’s Floral Swirls and Corners No.2 Groovi Plate. Decide which one you want to use and trace out the design using the Groovi No.1 Tool. I want to do some white work on the flowers, so I have traced them out using the Groovi No.2 Tool.

Repeat the process until you have completed all four corners.

You can see from this image the difference of the brightness of the lines – the brighter lines, using the No.1 Tool.
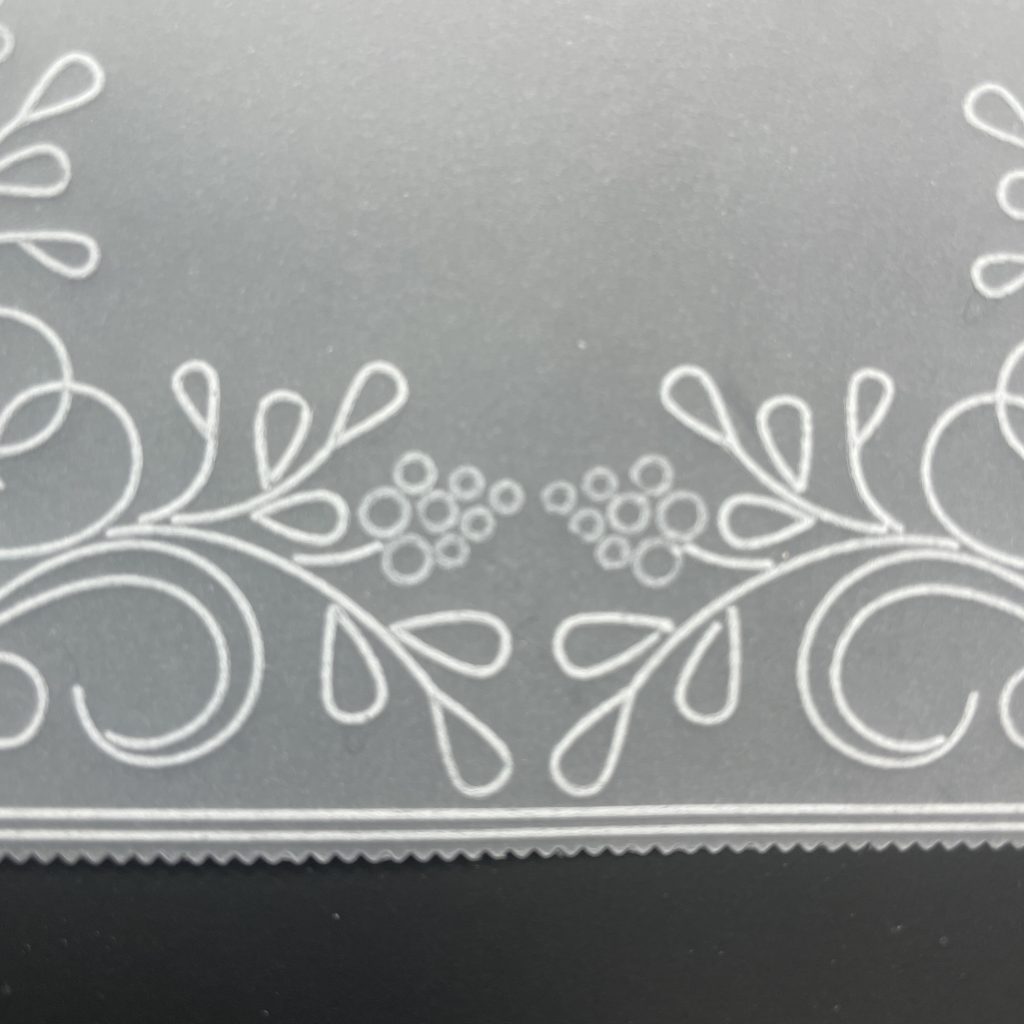
When you want to do white work in circles, you would automatically think that you just go round and round and it will fill the circle – wrong!
If you were to do it this way, then the way in which the parchment stretches to turn white, it would never reach the middle of the circle and end up with a dot. Soooooooooo, when doing a circle, you need to go up, down and then round.
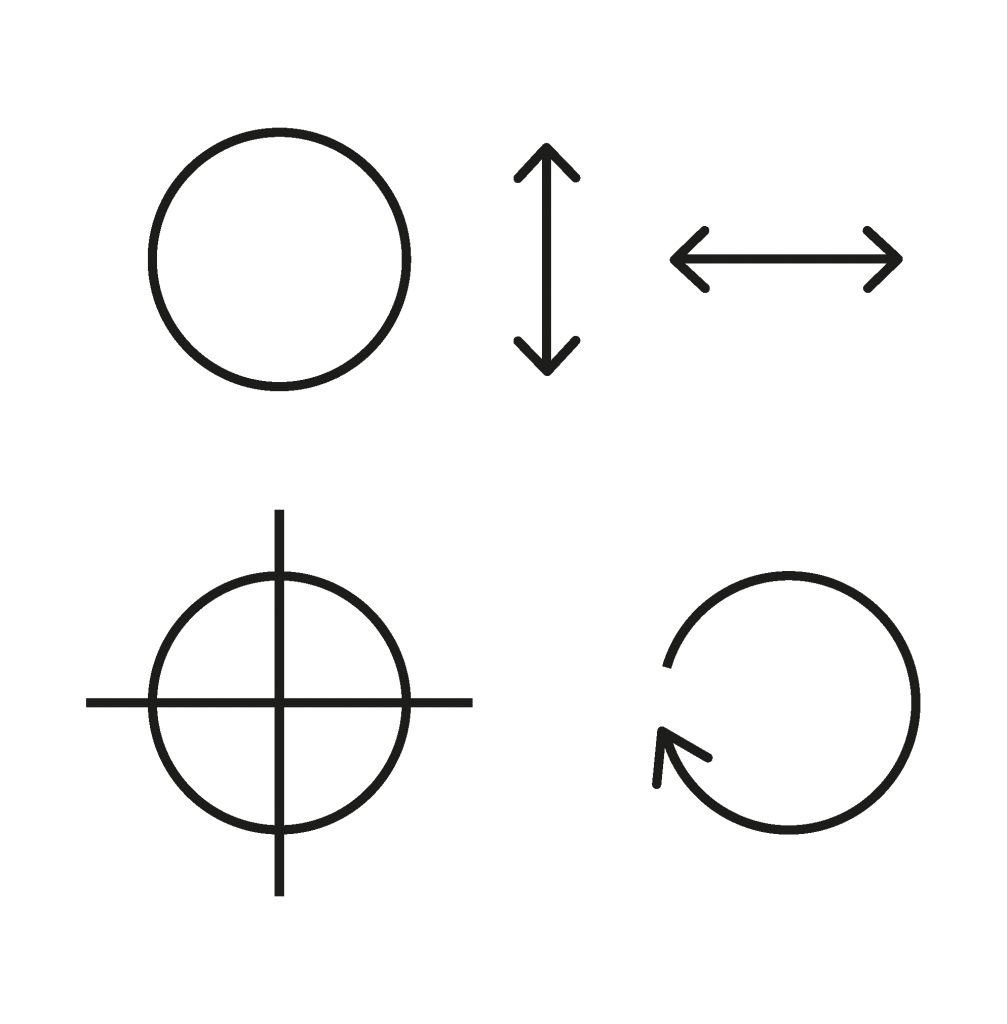
To build up the whiteness, start with the No.4 Groovi Tool – let it rest (at least half an hour – preferably overnight), then go back in with the No.3 Groovi Tool – let it rest and then finally the No.2 Groovi Tool. Another option is to do the colouring whilst you wait if you are impatient like me! Talking of being impatient and heavy handed – for me the pink mat has really helped with my white work, but the soft side of the black mat will do the job just the same – just less pressure.
Now to add some colour – I have used 4 of the Perga Liner B pencils – B = Basic or Blending – they are a wax based pencil – just like the Faber-Castell Polychromos.
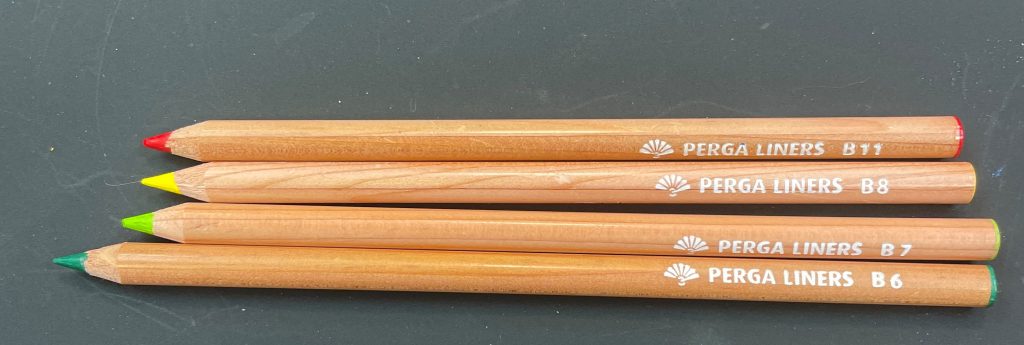
For me, one of the benefits of the pencils is that if I make a mistake (go over the lines or don’t like the colour) then I can use the white eraser pencil to remove it.
Apply a light cover of the green in the leaves and yellow in the heart and flowers – don’t go in heavy, otherwise the wax will create a seal and make it harder to blend.
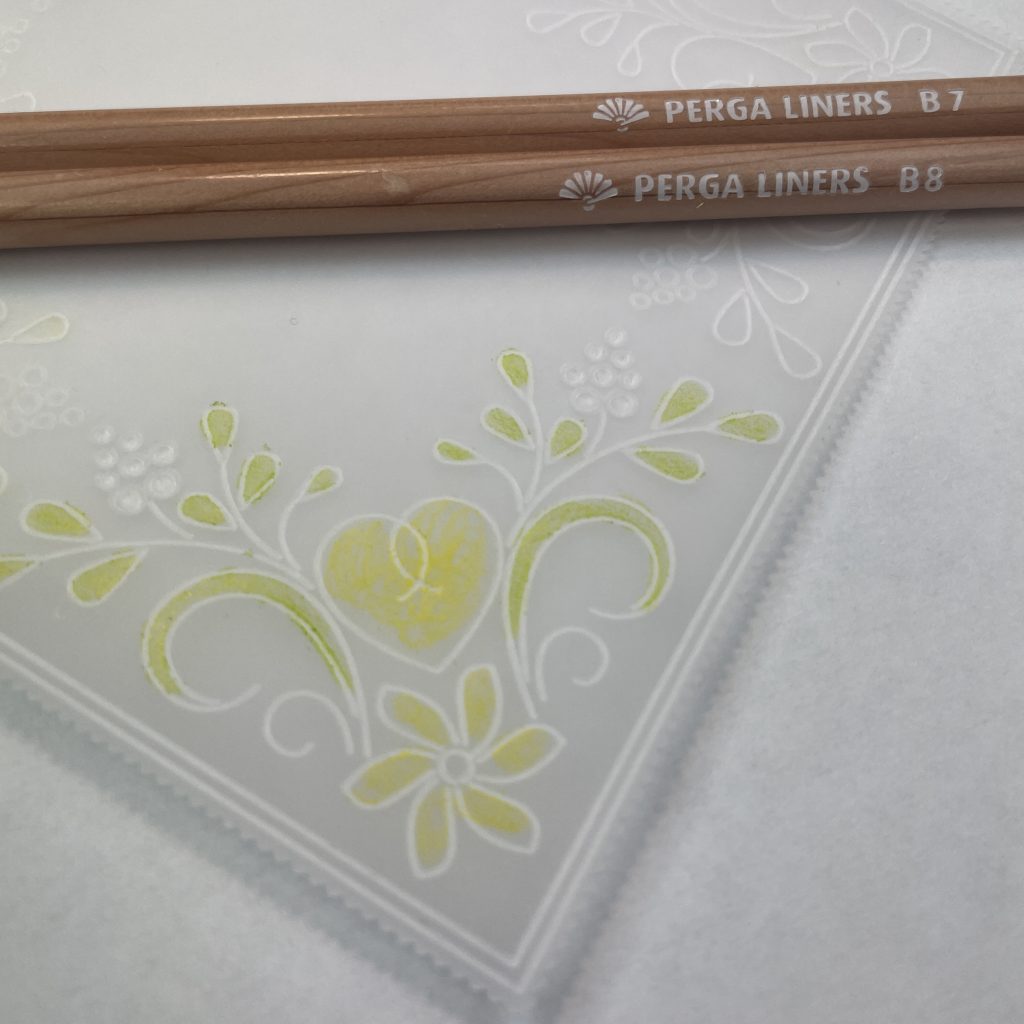
Using the Dorso Oil and Blending Pen – smooth over the colour – use a new nib for each colour.
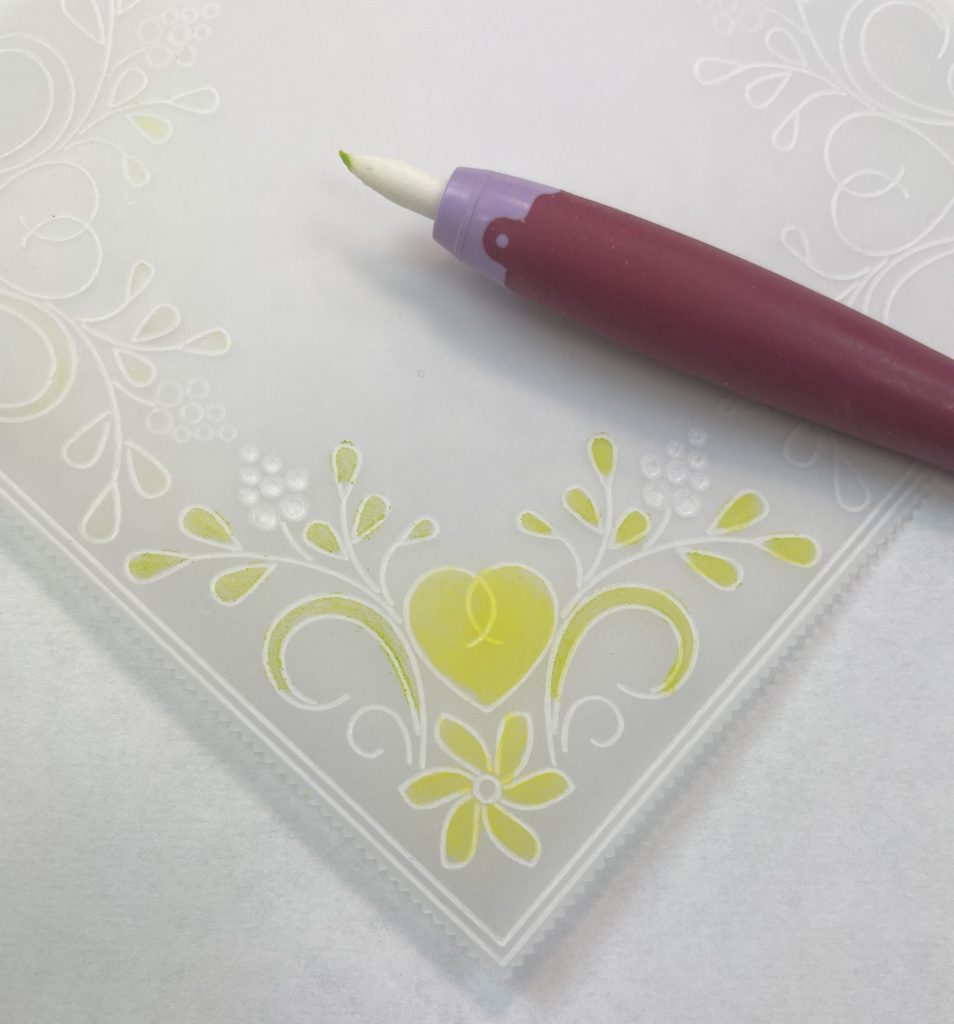
Now take the dark green and add to the base of the leaves and swirls. Take the red to the base and top of the heart and the base of the petals – the darker colour will always dominate the light colour, so you only need a small amount.
Take a dry nib and blend the colour outwards into the light colour.
Take a piece of Indian Summer Designer Paper and trim down so that it is slightly larger than your piece of parchment. Place on the Super Foam and use a 1 Needle Bold tool to perforate the centre, insert the brad. Leave this in place and repeat in all four corners. Leaving it in the foam will stop your parchment and paper moving whilst you complete the other corners.
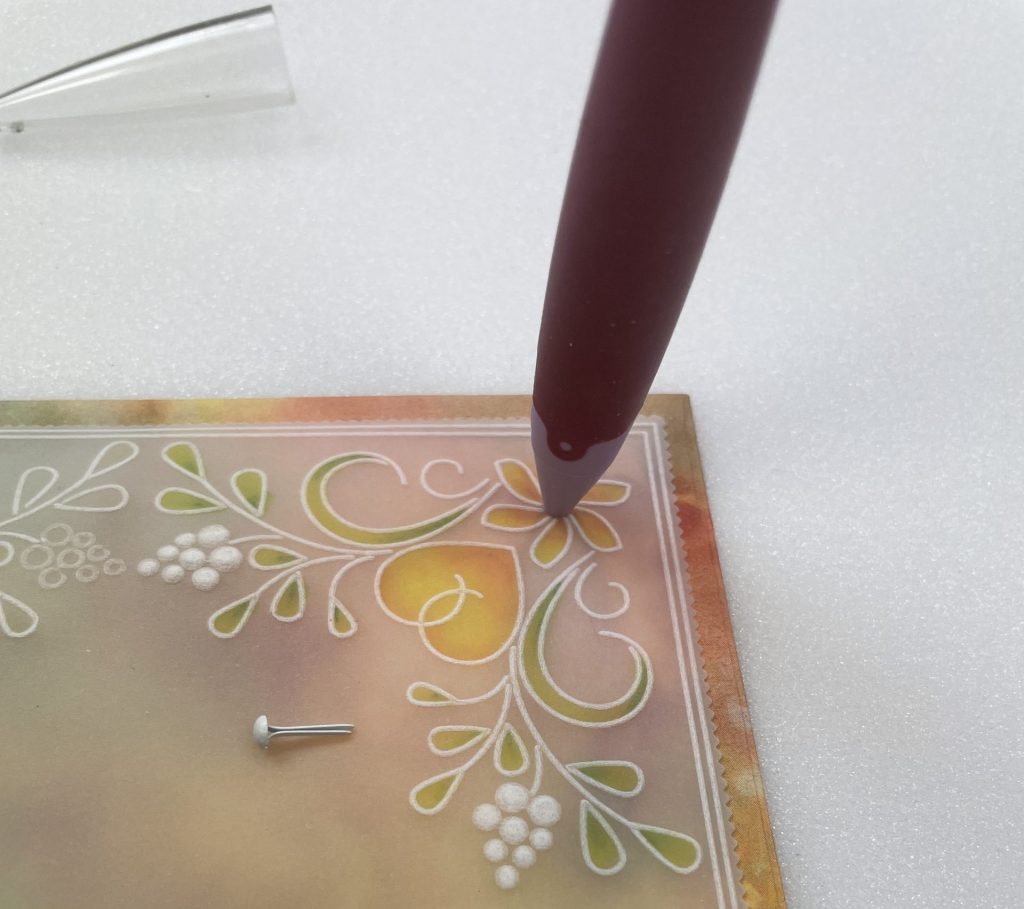
The brads are perfect for the centre of the flowers!
Die cut a sentiment of your choice from one of the Floral Frame dies (currently half price in the offer of the week!) on another piece of Indian Summer Paper and then use the Perga Glue attach
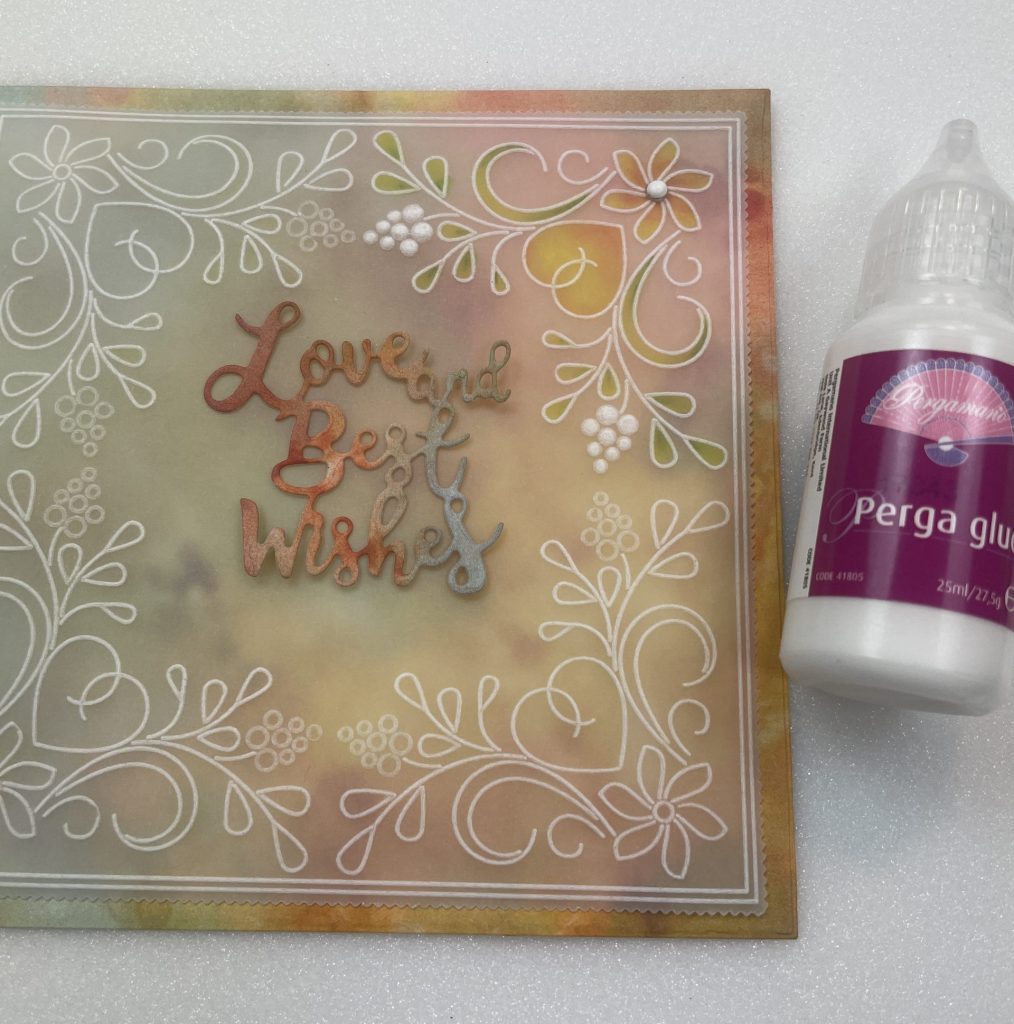
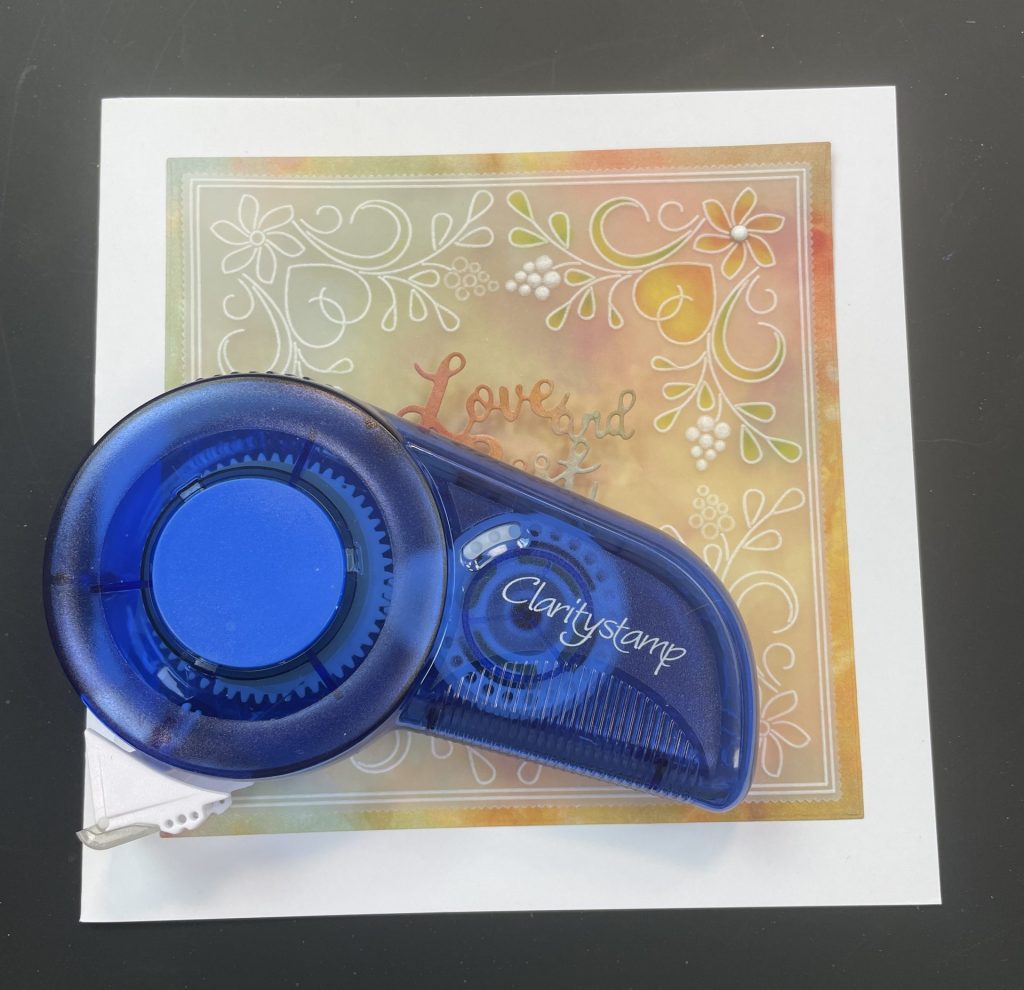
To finish off, attach to a 6×6 White Card Blank using our Roll-a-Tape Glue Runners.
Clever Corners and Pattern Building made easy!
If you like the look of the designs on Tina’s plate, then you might want to take advantage of our current Offer of the Week – the Floral Frames Fresh Cut dies, inspired by Tina’s plates – the offer runs until 8am Monday morning
As usual we have put everything in one place over on the Clarity website HERE
Enjoy your Saturday! Travel gently…
Lotsa love, Grace & Paul xo
Clarity – The Home of Art, Craft and Well-Being.
Thanks Paul and Grace. Love Tinas plate. Adore Gola, you’ll have such fun together.
Re above: Great project from Paul, super photos of the friends in New York, and a very cute little puppy.
Re yesterday; I have only just read your blog and was blown away by the artwork. It boggles belief that all this creativity comes from just a few tools. Just goes to show the quality of both the products and the talent of the design team. Thank you for show casing these worksof art.
Enjoy your visit with Mark’s parents.
Stay safe.🍒
Loving the project , rhanks for the tutorial. The photos are great of your.mum and Paul ,great memories and the puppy is amazing sooooo blinking cute 😍
Thanks for the inspiration on a not so sunny Sunday Paul. I have the stamps so might give them a go. Love your little furry friend, gorgeous.
Keep forgetting to look on Saturday, sorry Grace. I love that plate, I think it’s one of my favorites, but never used it that way, looks good..
.I love your little dog Paul. Will it grow to be a big dog. Xx
I sadly haven’t got this plate (yet!) so will save this project for a later date but looking forward to having a go. Thanks for the blogs Grace and hoping you’re enjoying the weekend. Love the puppy Paul (even though I’m a cat person) and look forward to seeing more photos as he grows up.
Definitely going to try this one.
That’s lovely Paul, honestly you sometimes forget the plates you have, must look for that one I know I have it. So pretty.xx
The fur baby is just gorgeous. Saw her on FB. Everybody needs one of those! Hxx
Another great Groovi Sunday project. Must mount last weeks piece of parchment on to some backing paper & a card blank & then I will give this one a go. Thanks Grace & Paul x
Hi Grace, Thank you so much, Paul, for your tutorial on your very beautiful card, it is stunning !!
Wow Gola is so so cute, your fur baby is gorgeous, Paul.
Love from Patricia xx
Hi Grace – just a little late to the party ! what fun pics of Paul & your mum 😊
Thank you Paul for your wonderful tutorial – I too have not got this plate yet – but will be borrowing from my dear friend Helen – can’t wait to have a go at this card 😃
Awwwwwhhhhhh………your little fur baby Gola is ADORABLE – trying not to show to my “adult daughter” …..ooppss to late – she has now seen pic – ohhh dear – wants to carry her around in her HANDBAG !!!! 😆
Have a good week
Love Seta Xx