Clarity’s Blog Tutorial: How To Get Colourful On Coloured Parchment
Hello hello! Grace here.
Fancy seeing you here… in our virtual January craft bubble! As you may know, through January we are focusing in some bloggy tutorials and attaching some brilliant offers to them too! We have so much incredible work and inspiration coming your way this month. A little (a lot) of something for everyone! Whether you’re super new to crafting, intermediate or a true expert, we’ve got you covered!
Speaking of a true expert… Josie Davidson. I’m sure you’ve heard of her. She’s oh-so-special!

Well, she has designed a beautiful card to share with us… along with step by step instructions on how to recreate it yourself!
It’s a PTC… a Parchment trading card. Now let me tell you about something cool actually! Every month LOADS of you create and share your wonderful artwork with each other via the PTC Swap! Josie organizes this each month.
If you’re already a member of our parchment Facebook group Groovi Worldwide, you already have access to the PTC Swap Rules. If you’re not, and you’d like to join in… email me (Grace@claritystamp.com) and I will gladly send them to you and tell you more.
The PTC Swap is essentially a community of crafters that make a 2 1/2 inch x 3 1/2 inch (or a 2 1/2 inch circle card) using parchment and Groovi plates. You’re matched with someone monthly to mail your PTC card to, and they will send you theirs. Pretty cool. People post them online too, once received!
“I love doing the PTC swap that Josie organises. I’ve made some lovely friends doing it.”
– Jane Telford
There has never been a better time to craft with purpose. There has never been a better time to be a part of a community. There has never been a better time to get involved in the PTC swap. So, again… if you’re interested in making some pen pals and sending and receiving artwork, email me… grace@claritystamp.com
I’ll point you in the right direction 🙂
Now… on to Josie’s PTC tutorial!
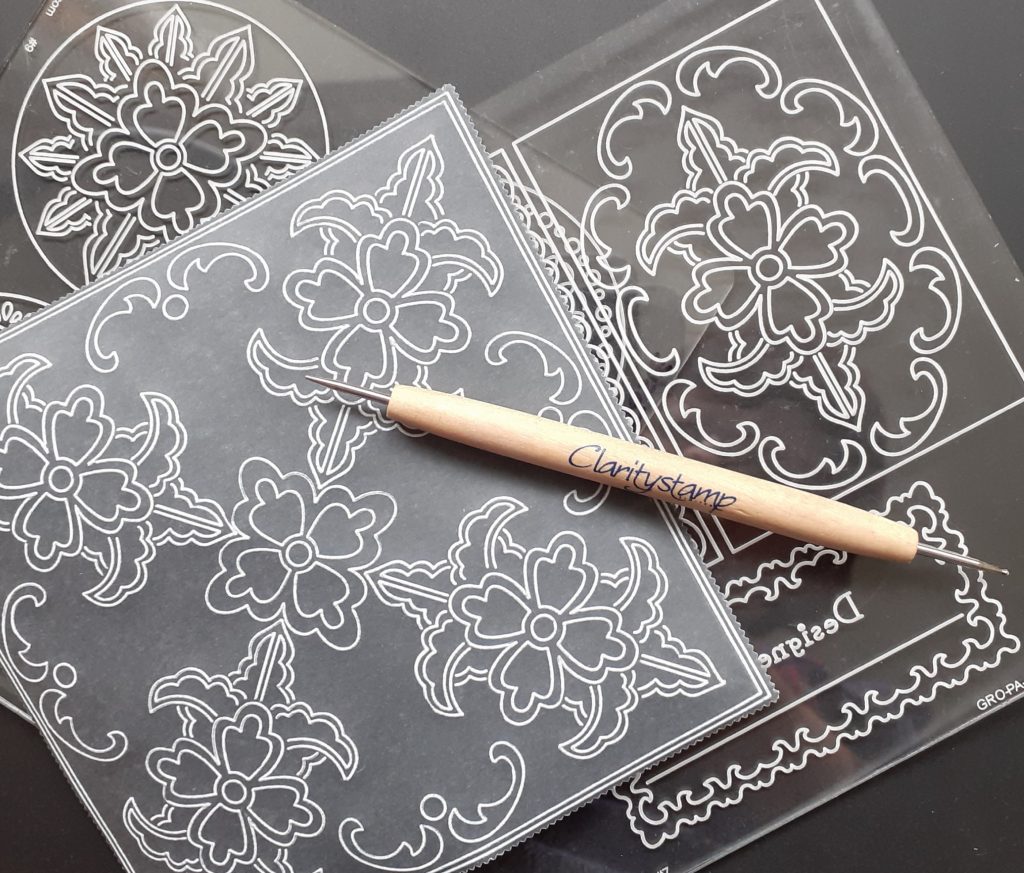
List of ingredients:
Deluxe Groovi Starter Kit (GRO-SK-41709-XX)
Josie’s PTC Designed By Groovi Plate (GRO-PA-41112-03)
Josie’s PTC Butterflies & Hearts Groovi Plate (GRO-FL-41120-03)
Nested Picot Square Groovi Plate (GRO-PA-41035-15)
Nested Picot Square Die Set (Back in stock soon!)
Diagonal Bold A5sq Basic Grid (GRO-GG-40201-12)
A4 Black Parchment (GRO-AC-40681-A4)
Pergamano Perga Colour Pens (PER-CO-70060-XX)
Pergamano Ruler with Groovi Grip (ACC-MS-30740-XX)
Eraser Pencil (ACC-PE-30611-XX)
Pergamano Perga Glitter – Copper (PER-AC-70252-XX)
Pergamano Black Brads (PER-AC-70271-XX)
Pergamano Sticky Ink (PER-AC-70134-XX)
Pergamano Mapping Pen (PER-TO-70039-XX)
Waimea Falls 8×8 Designer Paper (ACC-CA-30892-88)
White 6×6 Card Blanks (ACC-CA-30618-66)
Black Sharpie Pen (not sold at Clarity)
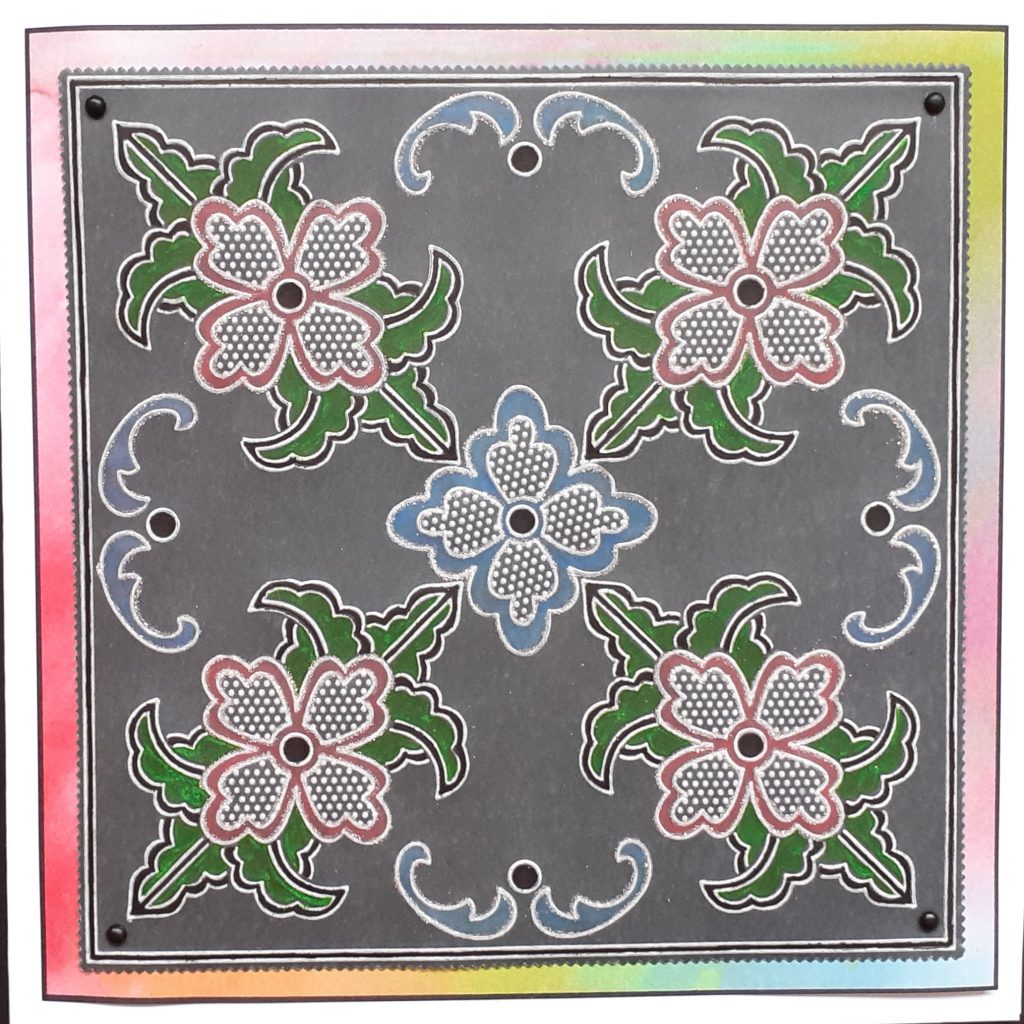
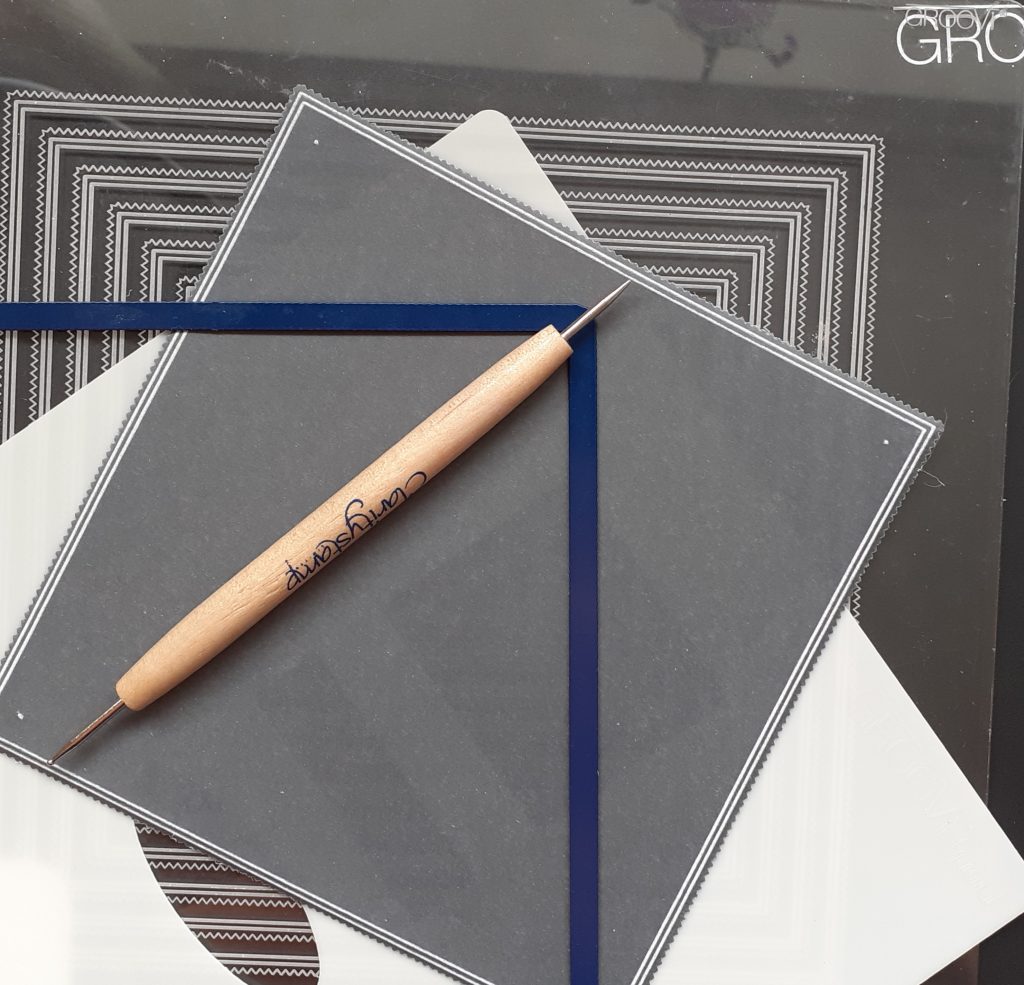
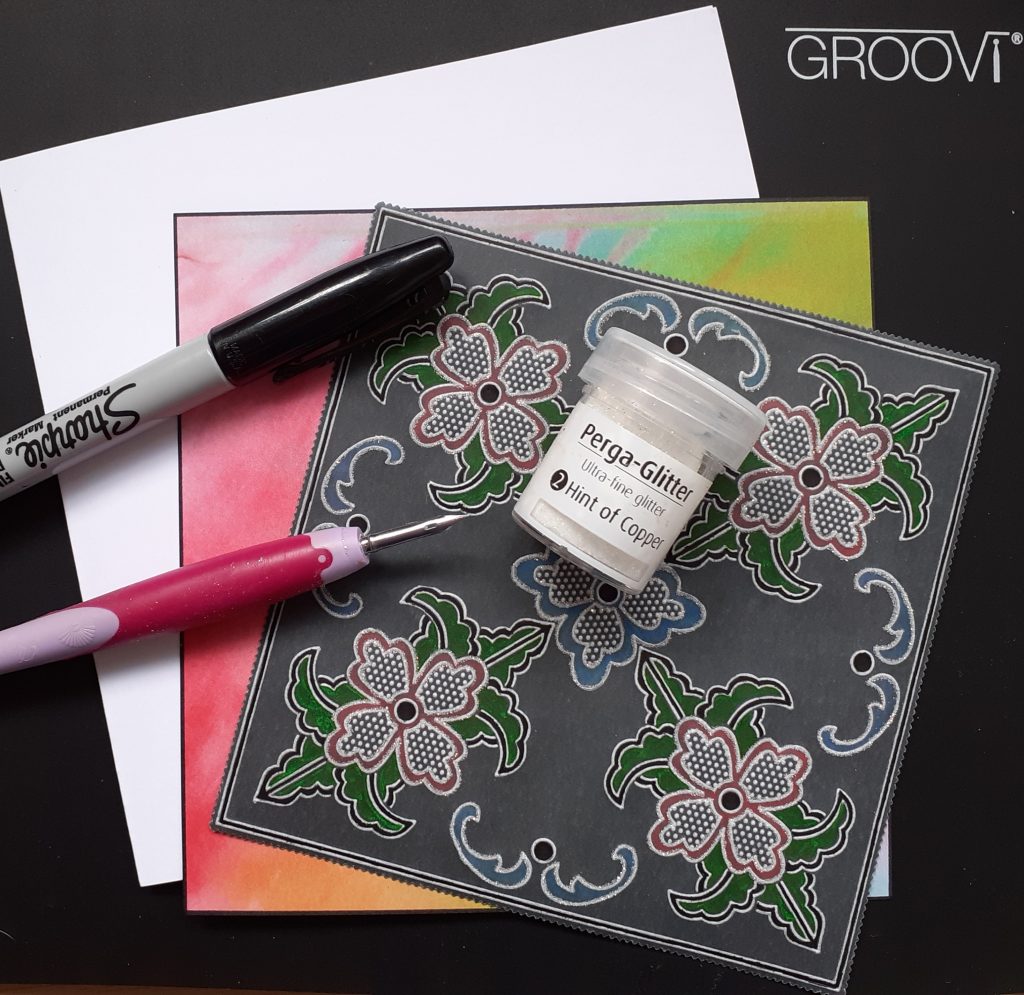
Step 1
With the glossy side of the black parchment facing you, place the 3rd die from the outside face down and cut. Using the No 1 Groovi tool and with the glossy side facing up on the plate, emboss the 5th and 6th straight lines from the outer edge of the matching Nested Picot plate. Mark the corners of the 7th straight line with a dot.
Step 2
Still working with the glossy side of the parchment facing you, emboss the diagonal flower/leaf design using the No 1 tool. To get these symmetrical, place your ruler across from corner to corner and place the tip of the end leaf on one of the dots making sure the ruler goes across the centre of the pattern on the plate and emboss. Repeat for all four corners.
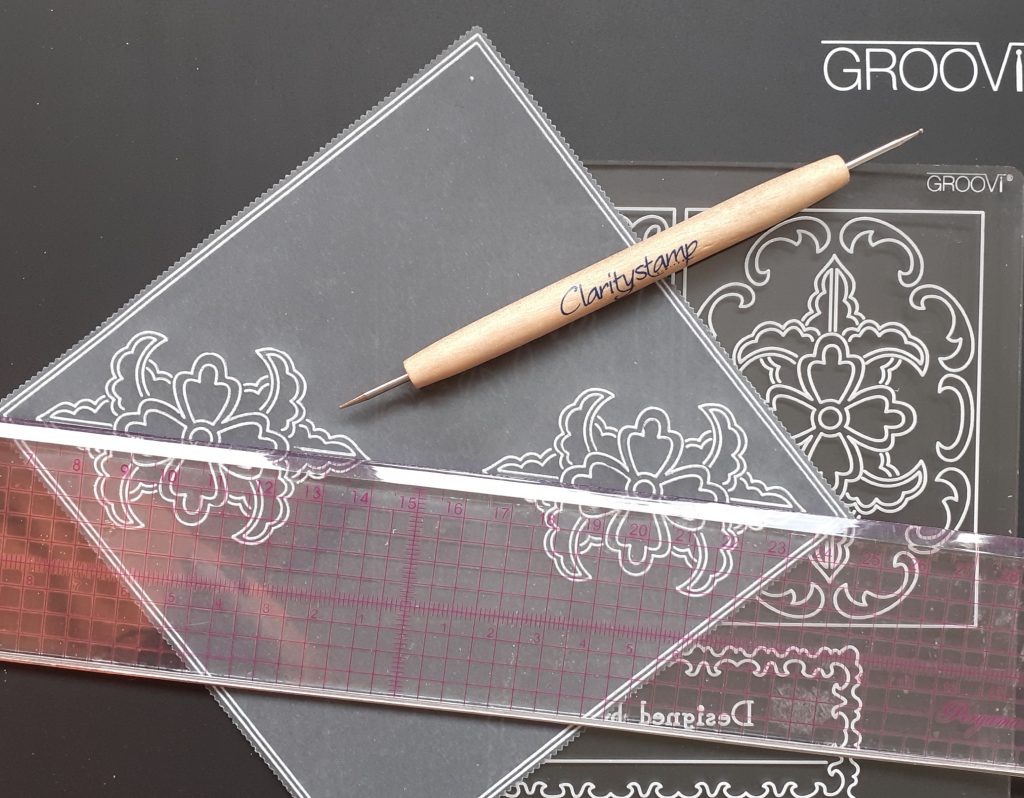
Step 3
Using the matching design on the butterflies/leaves plate emboss the centre flower using No 1 tool. Emboss the design from the end of the pattern on the flower/leaves plate along each side and add the dot from the flower centre.
Step 4
Emboss dots inside the flowers using the No 2 Groovi tool on the diagonal grid plate.
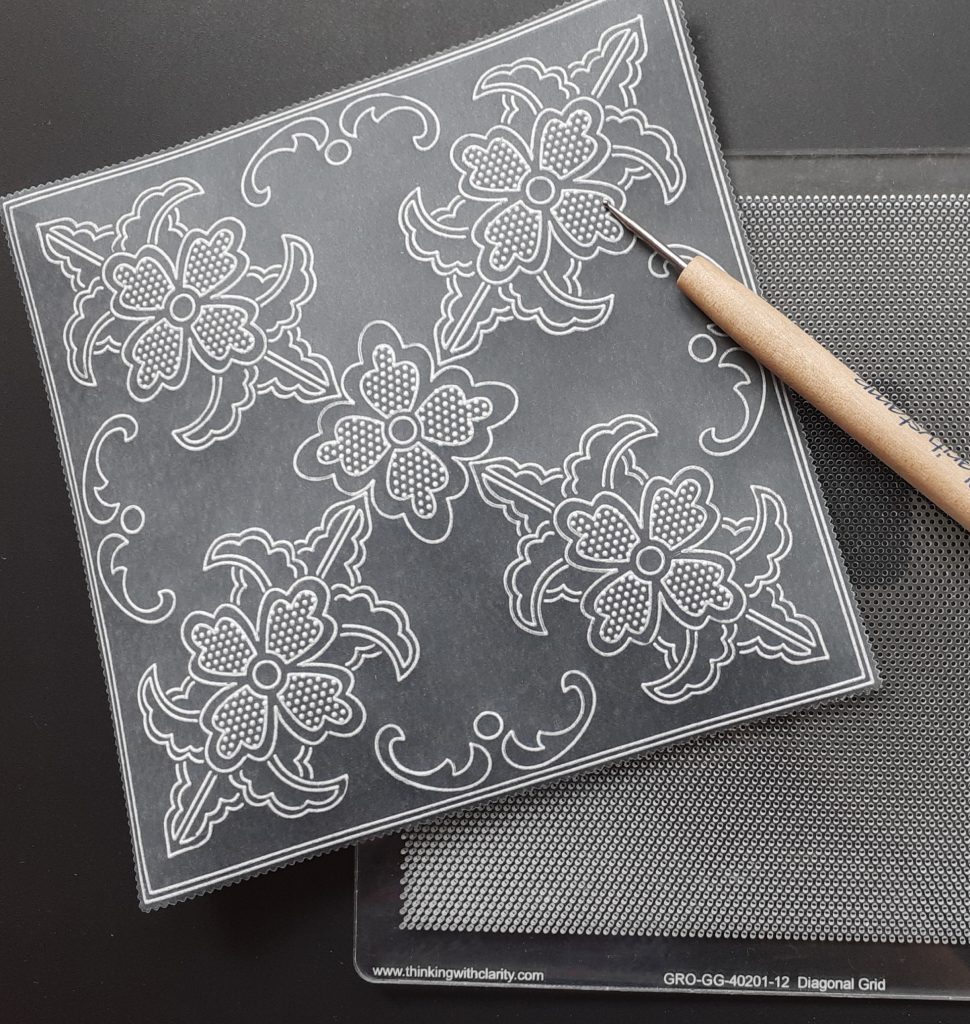
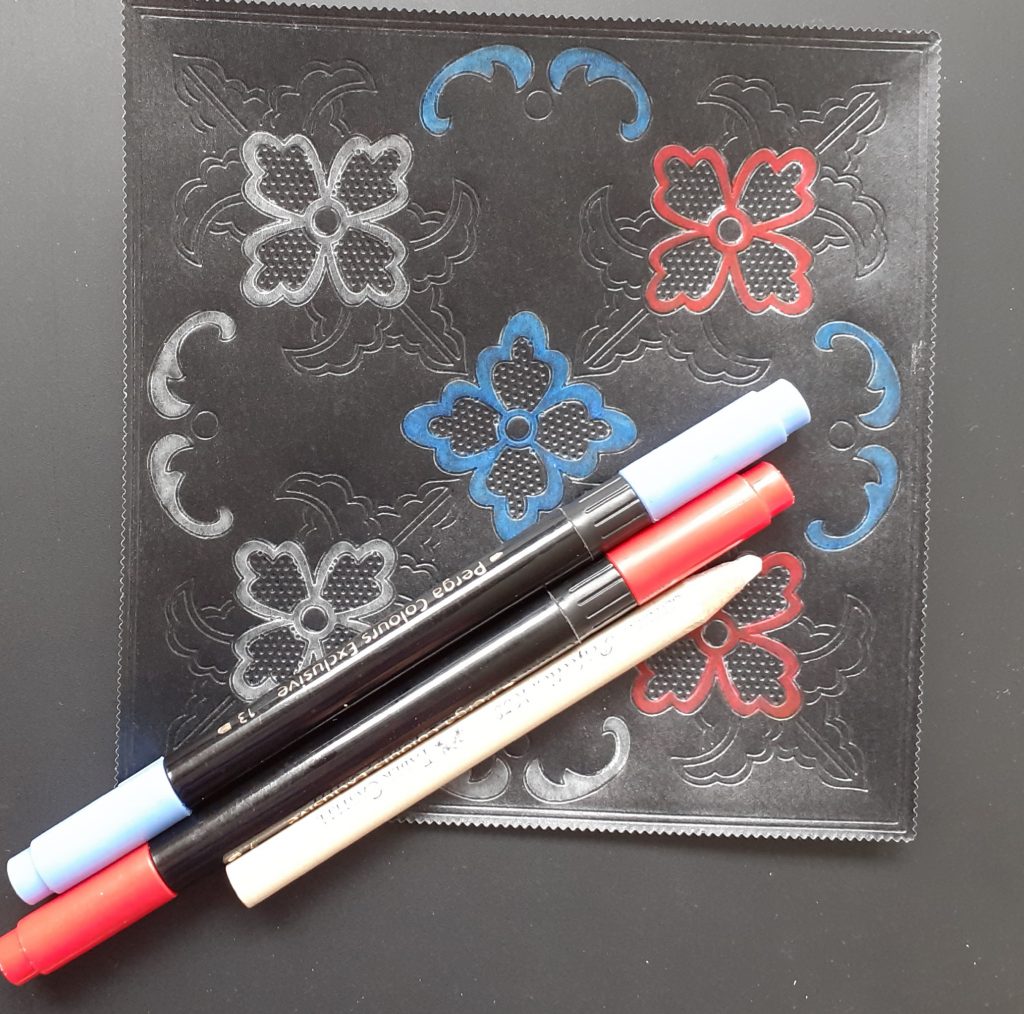
Step 5
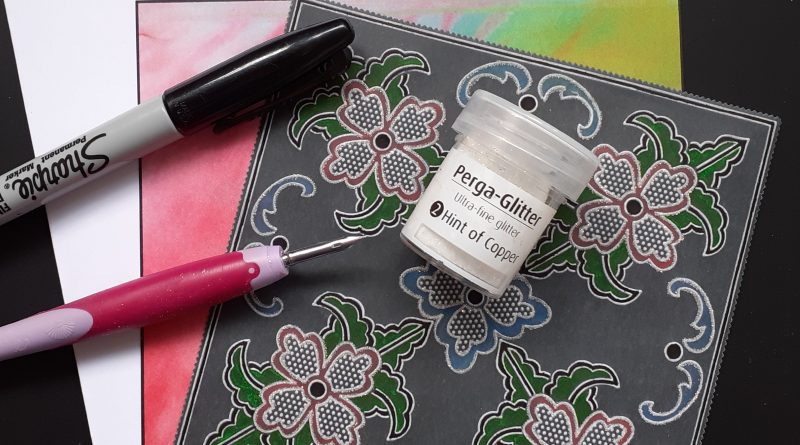
Working on the back of the parchment, erase the colour from between the double outlines around the flowers and inside the design along each side using the eraser pencil. Using Perga Colours No 7 Red and 13 Blue colour these areas directly onto the parchment.
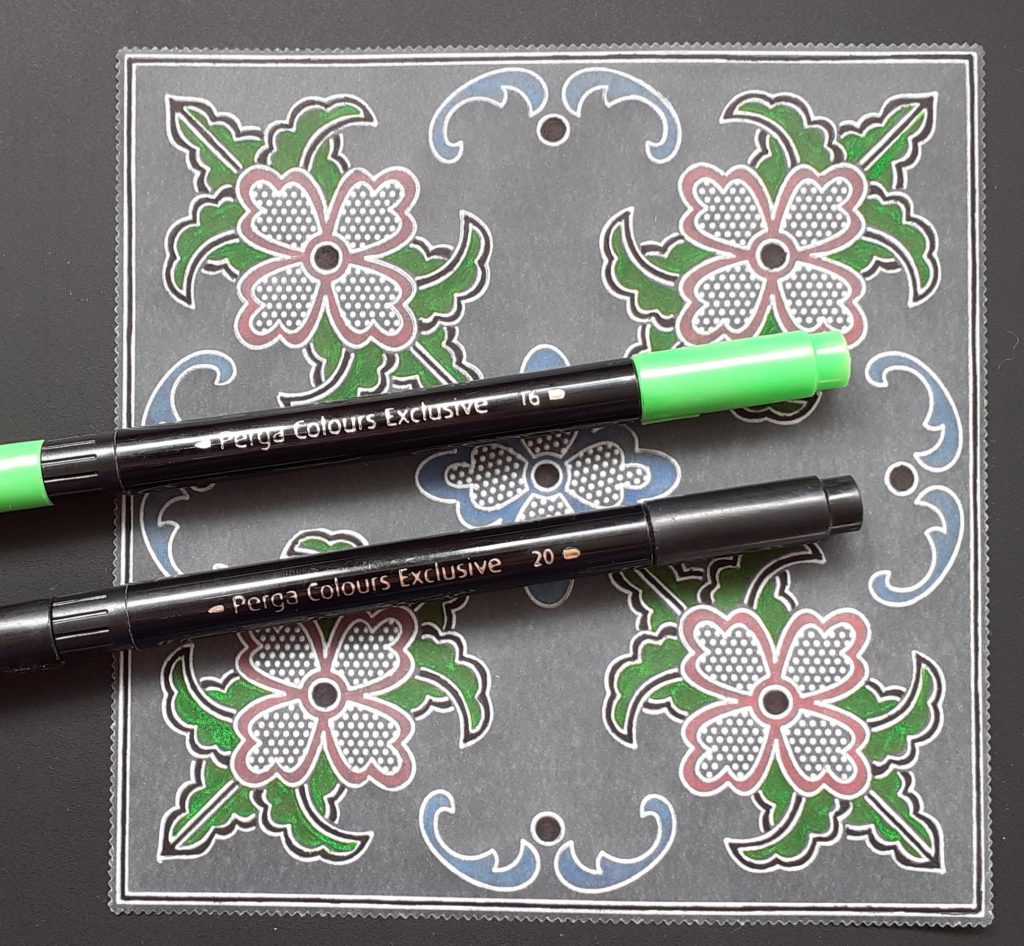
Step 6
Working on the front of the parchment colour between the double outlines of the leaves and the dots using Perga Colour No 20 Black. Use Perga Colour No 16 Green to colour in the leaves.
Step 7
Using Sticky ink and a mapping pen trace around the flowers and the design along each edge and sprinkle with glitter. Cut out the Waimea Falls paper to fit your card blank and draw a line along each edge using the Sharpie pen. Attach the parchment to your paper using brads and attach to the card blank.
Voila!
Absolutely BEAUTIFUL, Josie! Thank you so much for sharing your skills with us. Now maybe I should make a PTC too… so that I can get Josie as my swap partner and get my hands on this card 😉
Aaaaaaall of the tutorials and bloggy offers will gather in one place as we add more to the library… You can find them all HERE.
I don’t know about you, but I LOVE these step by step tutorials. They’re so easy to follow. Oh! More good news! We’ve decided to continue on with the Groovi SHAC downloads too. Since we’re back in lockdown, we figure that we may as well continue! The next download will be in Friday’s blog, as usual 🙂 Happy Days!
Travel gently…
Lotsa love, Grace xo
Clarity – The Home of Art, Craft and Well-being.
Thank you Grace. That is lovely. Will have a try at that.
Luckily I have everything needed for this tutorial, thanks Josie, will spend the afternoon working on this,
Wow how fabulous thank you Josie and Grace for this what a wonderful idea xx
Hi Grace, another great blog. Like how Josie has turned a PTC plate into a 6 x 6 card. For those that don’t know a PTC is 3.5 x 2.5 inches in size that you add a design to depending on the theme for the month or to try out different techniques similar to ATC’s which are Artist trading Cards.
I have been doing the PTC swap each month for almost a year now – wasn’t sure what it was to begin with so sat on the side lines to see how it panned out. Now I have a lovely selection that I had on my bookcase until Christmas when I replaced them with cards so have put them into an A5 folder so I can keep the cards & PTC together.
Great news that the Groovi SHAC projects are going to continue, the week is slipping by again though so need to get a wriggle on with last weeks !!
Stay safe everybody – plenty to keep us occupied with everything the Clarity team are cooking up for us.
This is beautiful , I’ll try and have a go
Thank you for sharing Josie’s card. I’ve been swapping PTC’S for a while now and this month I’m lucky enough to be paired with Josie herself.
Well that is AMAZING; far too difficult for me though. Maybe in a few months…….
Oh my goodness, what an awesome piece of art & tutorial! Thank you Grace. I need to wait a while to purchase some new goodies so I can try these techniques out, will check out the other tutorials xx
Hi Grace, fabulous ! Even better as i have all the elements, been in the PTCs since they started and thoroughly enjoy them. I’m usually trying to get mine out before the end of the month, will try to be better this year and start earlier ! No excuse is there as I don’t have to think about work and what with the situation we’re in ! Thanks for the tutorial Josie.
That’s so lovely. I don’t do Groovi, but do love seeing what everyone produces
Hi Grace, Thank you for sharing Josie’s beautiful card, and thank you Josie for the tutorial, it is gorgeous.
Lots of love from Patricia xx
That is lovely..I’ve now got a little project to look forward to on Saturday. xx
Beautiful card Josie, thank you fot the tutorial for it
Lovely piece to work on I am certainly going to give it a go. Thank you Josie very much.