Clarity’s Blog Tutorial: How To Use The 5 In A Circle Tool (Part 2)
Hello hello! Grace here.
Welcome back to another FABULOUS blog tutorial. This is Part 2 of the 5 in a Circle Tool. To circle back 😉 you can find Part 1 HERE.
The lovely Glynis Whitehead is our teacher, and what a brilliant teacher she is! Let’s get to it…

5 in a Circle Tool (Part 2)
Ingredients
Pergamano Handbook for Multi-Needle Tools Vol. 1 by Linda Williams (PER-BO-70291-XX)
Nested Arch Tags Groovi Plate A5 (GRO-PA-41465-04)
Linda’s Cosmos and Lace Groovi Plate A5 square (GRO-FL-40923-03)
5 in a Circle Perforating tool (PER-TO-70025-XX)
1.5mm Embossing Ball tool (PER-TO-70004-XX)
3mm Embossing Ball tool (PER-TO-70005-XX)
4.5mm Embossing Ball tool (PER-TO 70015-XX)
6mm Embossing Ball tool (PER-TO-70016-XX)
Tools from the starter kit (1&2) and (3&4)
Faber-Castell Polychromos Pencils (ACC-PE-30797-XX)
OR Perga-Liner Pencil (B) (PER-CO-70063-XX)
Blending nibs (PER-AC-XXXXX-XX)
A4 Translucent Perforating mat (GRO-AC-40307-A4)
A4 Translucent White Super Foam (GRO-AC-40603-A4)
Pergamano Sticky Ink (PER-AC-70134-XX)
Pergamano Mapping Pen (PER-TO-70039-XX)
Perga-glitters (PER-AC-70252-XX)
Instructions
**The patterns and samplers used for this project are illustrated by Linda in her handbook. The 5 in a Circle tool is featured on pages 26-29. You need to photocopy the black and white sampler from page 29.**
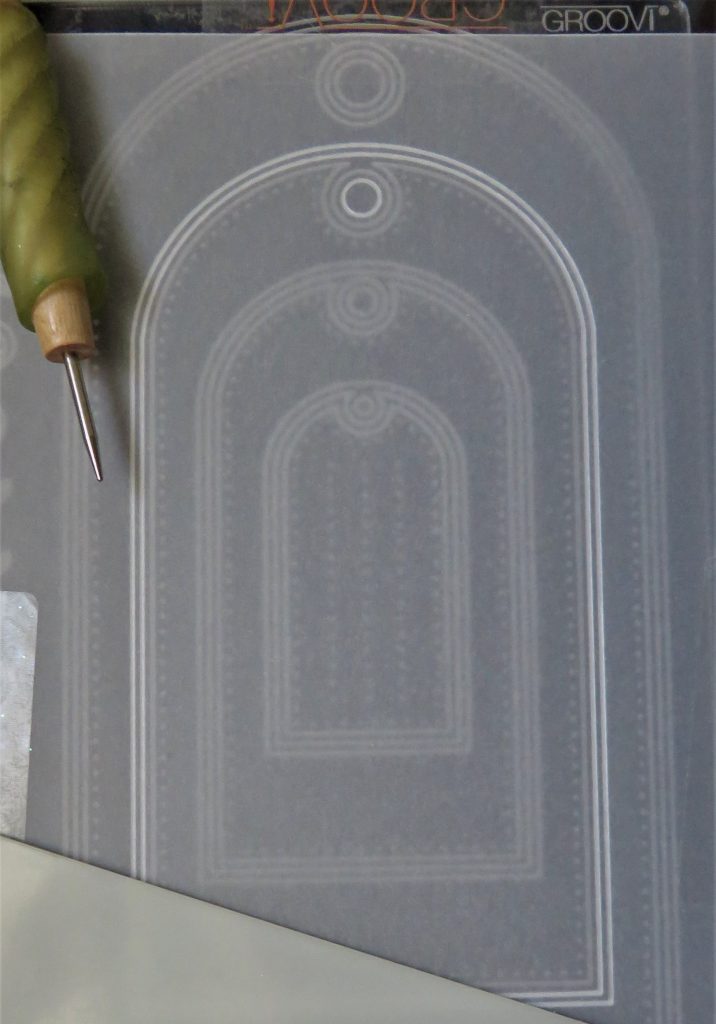
Step 1. Trace the 2nd largest tag from the nested arch tag plate.
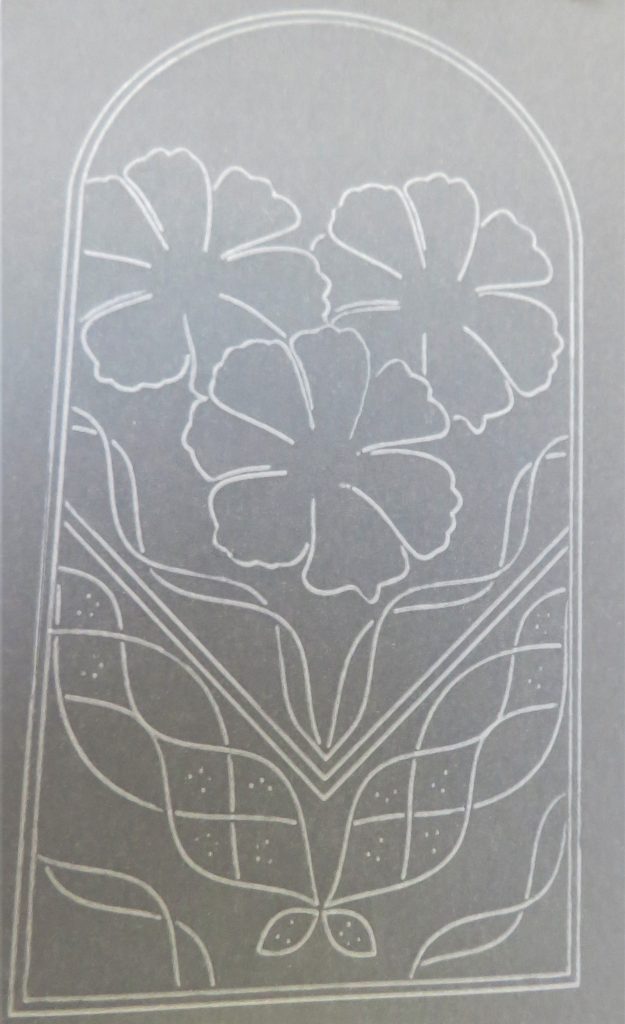
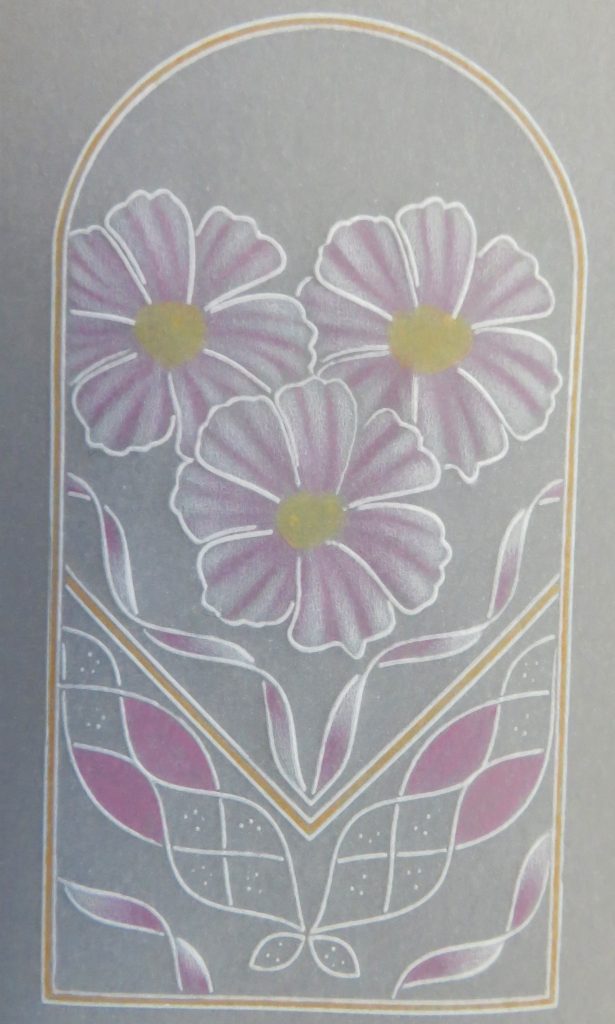
Step 2. Line up the tag onto the Cosmos and Lace plate so that the point of the border is in the centre of the tag at the bottom. Just make a few reference dots for the 5 in a circle tool. Then turn the work round and emboss the large cosmos in the centre. Add two more of the same flower, taking care not to cross over the lines of the flower in front. Do not add the flower centres.
Step 3. Add some embossing before the colour. Just enough to add some highlights once the colour goes on. Use a 6mm embossing ball tool to start with. If you want it whiter, give the parchment time to rest and then come back with the 4.5mm ball tool.
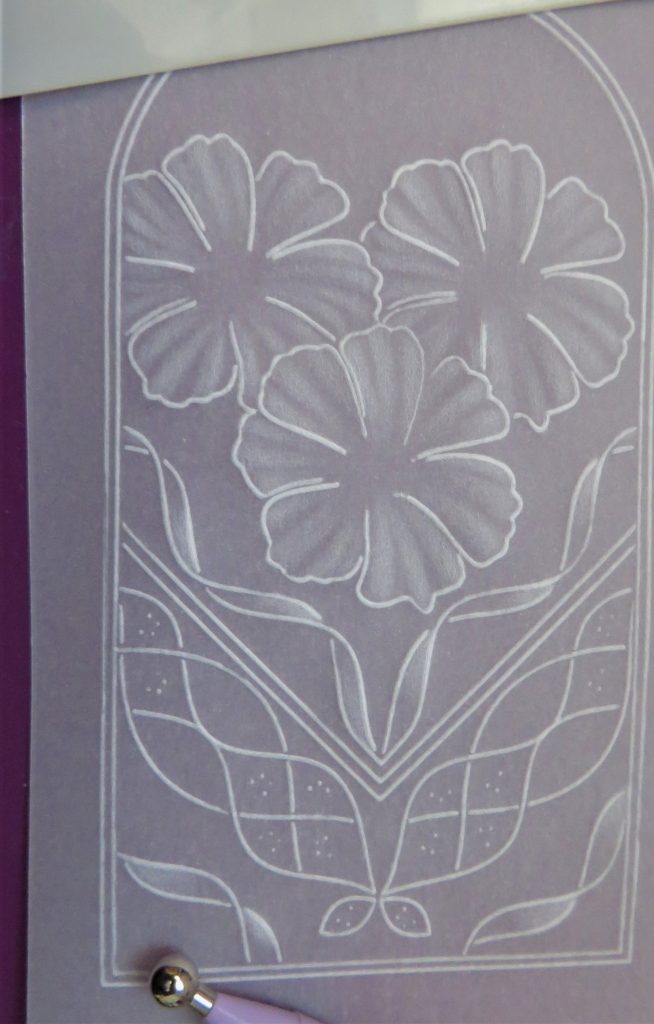
Step 4. Once you are happy with the embossing, add some colour using blending pencils. Avoid the embossing as much as possible when doing this, so as not to obliterate all the highlights. Blend each petal and strand of ribbon with a dry blending nib. Treat the ribbon in the same way.
Step 5. Add some yellow into the centre of the flowers and blend them out with a tiny bit of Dorso oil. Use oil to blend your choice of colour in the border design, and add yellow to the margins.
Step 6. Now to add some 5 in a circle tool interest to the piece! Work on the front and lay the work onto the shallow perforating mat. Use the reference dots in the border to line up the needles and perforate. Add some random 5 in a circle perforations to the centres of the flowers.
Step 7. Working on the back, add some embossed dots into the middle of all the 5 in a circle perforations with the 1.5mm ball tool/number 2 starter kit tool. *When embossing a dot like this, don’t start off going round and round. Start with an up, down and side to side motion to avoid a black dot in the centre. Add extra embossed dots if you wish to fill out the flower centres more.
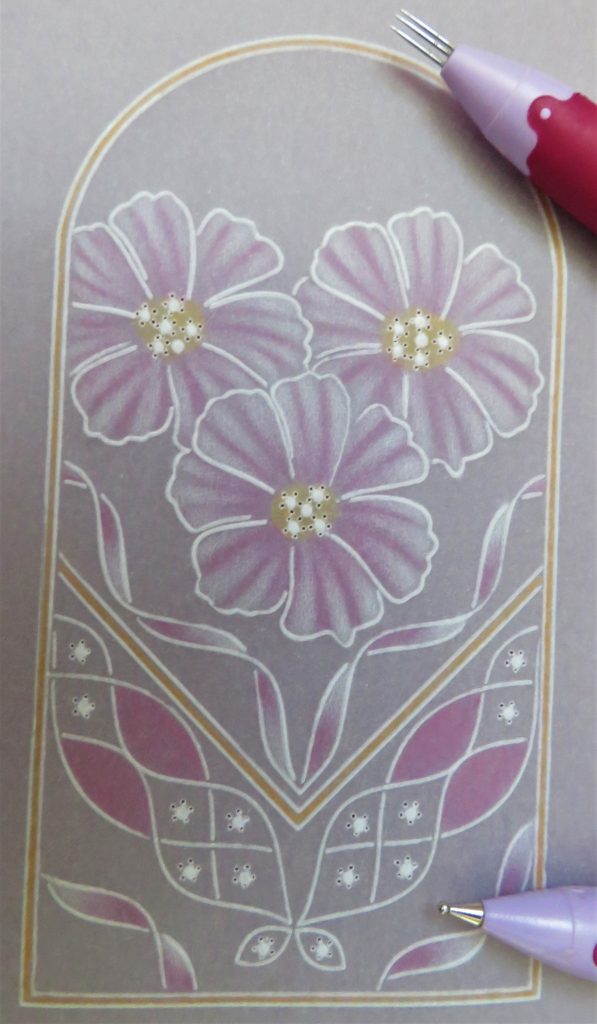
Step 8. Re-perforate all the 5 in a circle motifs, with the work on a deeper mat. If you have problems relocation the needles into the holes, then use a fine single needle tool.
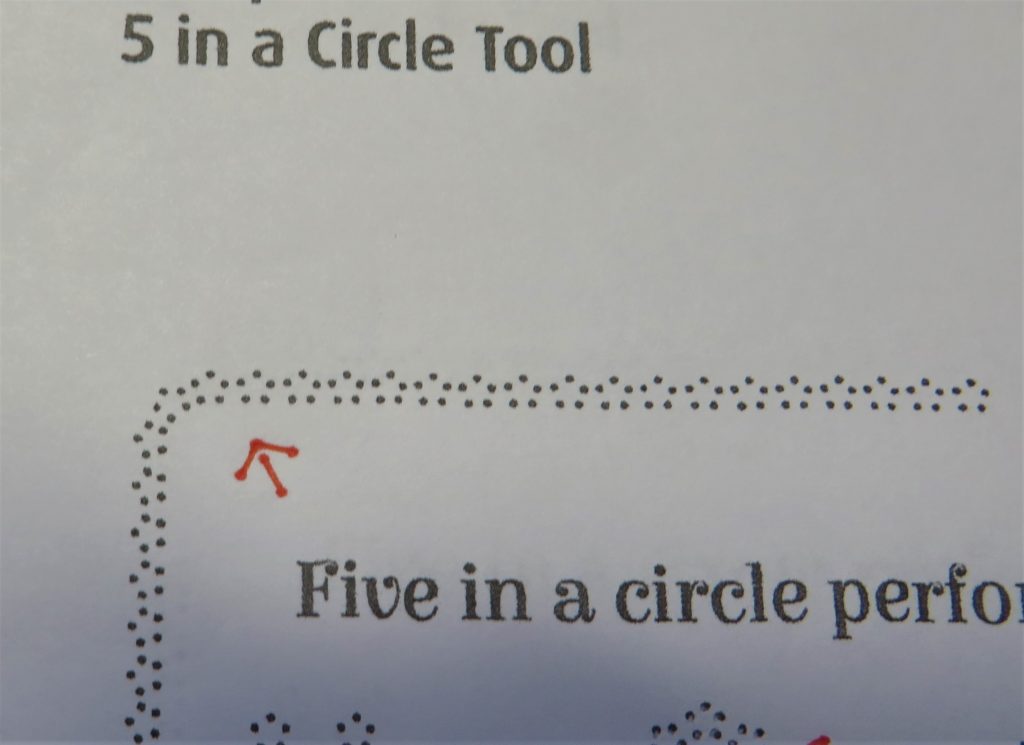
Step 9. Following the pattern I have indicated with a red arrow on the photocopy from Linda’s book, go around the edge of the tag, again, on a shallow mat. You can put your parchment on top of the pattern and pierce through, lining up the needles with each dot as you go. Turn the work so that you can see it well and keep your hand comfortable.
Step 10. Working on the back, emboss a dot into the centre of all the 5-in a Circle perforations.
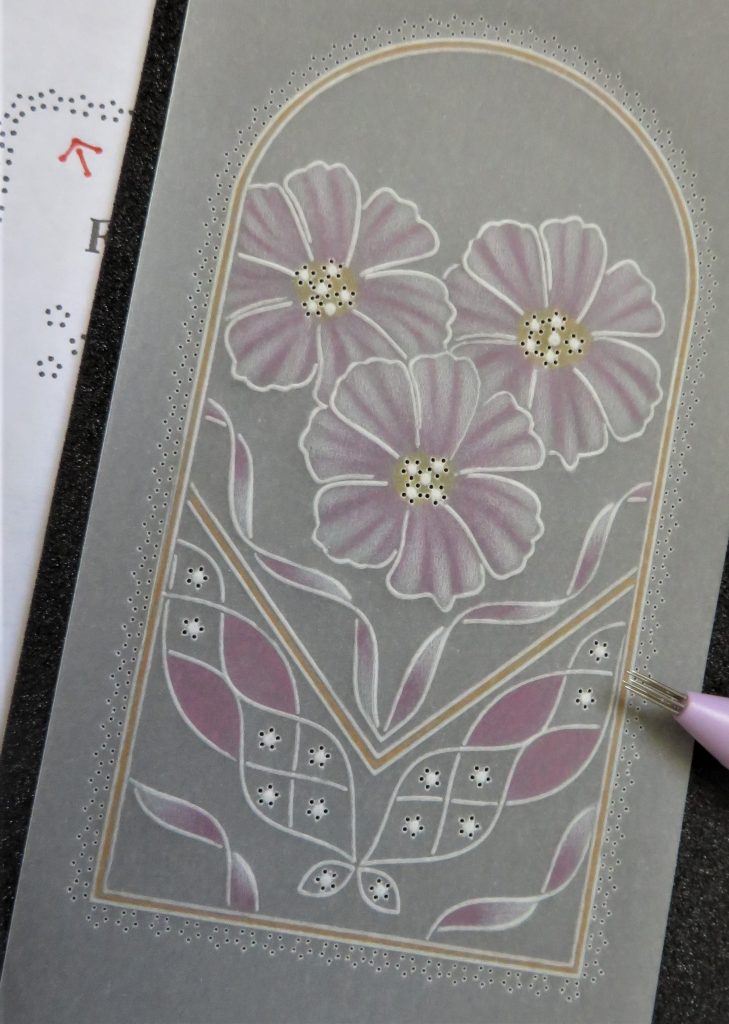
Step 11. Follow Linda’s guide on page 27 to snip out the work. This is indicated in the handbook by the red lines within the sampler.
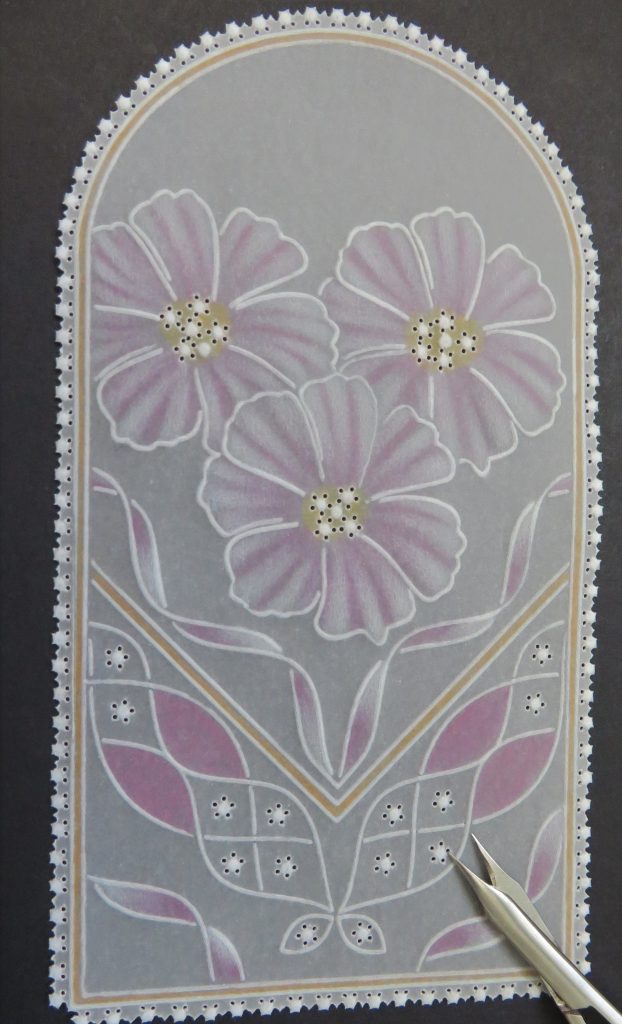
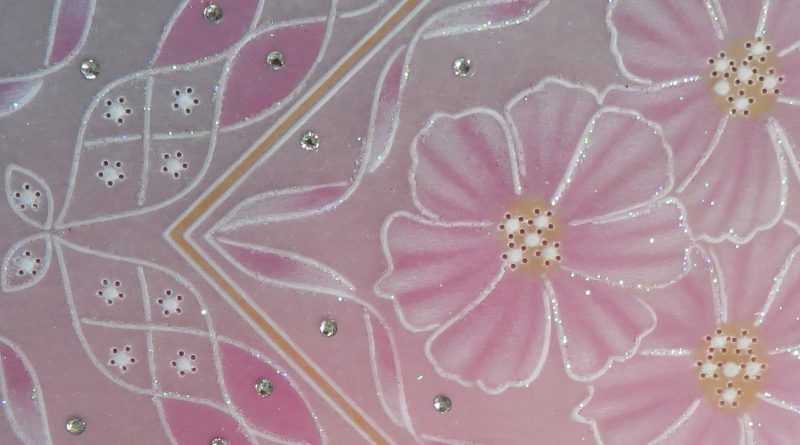
Step 11. Once the work has been snipped out, mat and layer it onto backing cards of your choice. Add a bow, glitter and gems.
Voila!! What a stunning piece of artwork. Thank you, Glynis!
As usual, everything that Glynis has used is in one place over on the Clarity website HERE
If you have missed any of the previous Pergamano Summer School Lessons, they are also in one place over on the Clarity website HERE so that it is nice and easy for your to find them!
Don’t forget, Mum is on the Craftstore.com today from 2pm-4pm with stamps, Groovi, dies and masks. I hope you can tune in and keep her company!
Lotsa love, Grace & Glynis xo
Clarity – The Home of Art, Craft and Well-Being.
Hi Grace, I like this weeks project & as I have all the necessary stash I will give it ago as I have missed a few over the last few weeks. Just catching up on some H….work before getting ready to watch your mom on tv at 2pm. Surprising what you can get done when you have a time limit !! I used to find this when I worked part time – the day I worked 11.30 to 2.30 I got more done before 11 than a day when I was at home all day. Take care & hope you have a good week xx
Hi Grace, Hi Glynis, Wow !! you are amazing, this creation is fabulous, thank you for the inspiration.
Lots of love from Patricia xx